
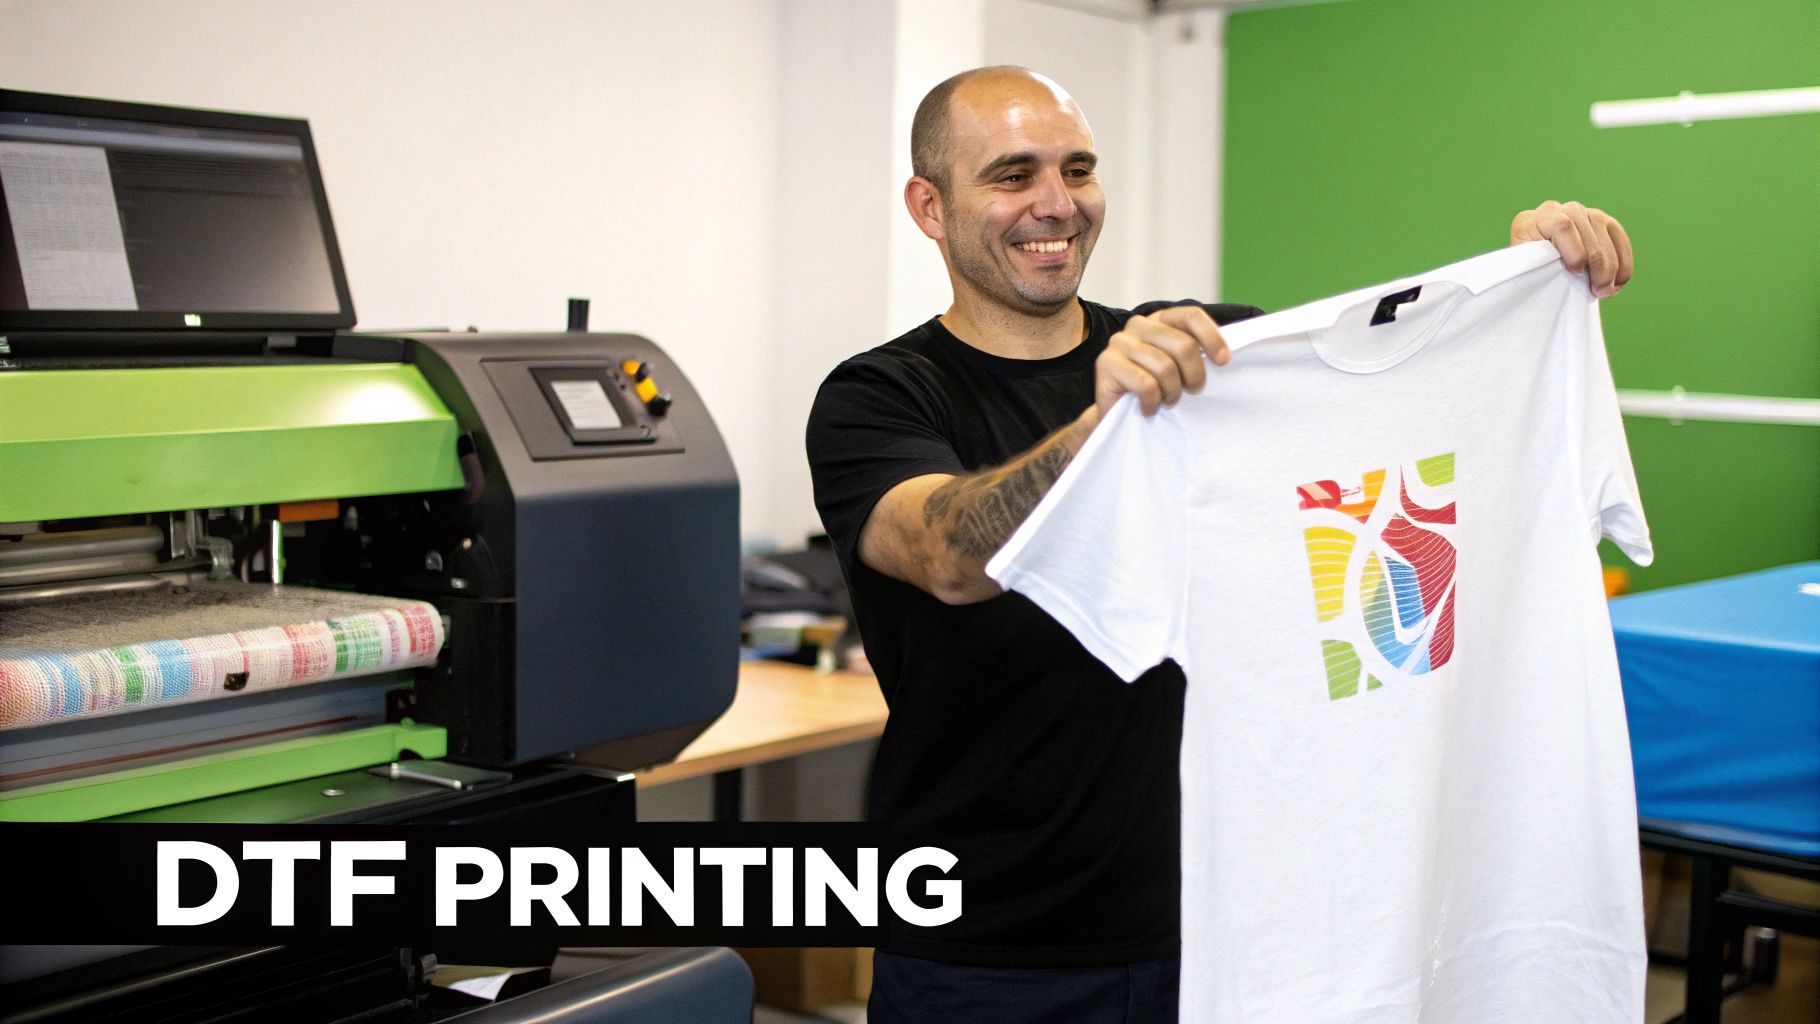
A Practical Guide to DTF Shirt Printing
So, what exactly is DTF shirt printing? Think of it as a modern, super-versatile way to get designs onto clothing. Instead of printing directly on the fabric, you print your artwork onto a special film. Then, a powdered adhesive is applied, and the whole thing is heat-pressed onto the shirt.
The result? You get stunning, full-color prints that work on just about any fabric you can throw at it—cotton, polyester, blends, you name it—all without the fuss of pre-treating the garment.
What Is DTF Printing and Why Does It Matter?
If you've ever run into the limitations of traditional t-shirt printing, you'll immediately see why Direct-to-Film (DTF) is such a big deal. It's a game-changer that borrows the best aspects of other methods and rolls them into one flexible, powerful process. The key difference from Direct-to-Garment (DTG) printing is that simple first step: printing onto a transfer film instead of directly onto the shirt. It sounds like a small change, but it makes all the difference.
This film-first approach means you’re no longer stuck with just 100% cotton. DTF transfers work beautifully on a huge range of materials, including:
- Polyester and synthetic activewear
- Common 50/50 cotton/poly blends
- Canvas tote bags and hats
- Even tougher materials like denim and leather
For a small business or even a hobbyist, this is huge. It means you can use the exact same transfer for a classic cotton tee and a high-performance polyester jersey, which really simplifies your workflow. If you want to get into the nitty-gritty, you can explore the basics in our comprehensive guide to understanding DTF printing.
The DTF Advantage Over Traditional Methods
When you put DTF up against old-school methods like screen printing, the advantages—especially for small-batch jobs—are crystal clear. With screen printing, every single color in a design needs its own screen. This makes complex, multi-color designs incredibly time-consuming and expensive unless you're printing hundreds of shirts.
DTF completely sidesteps that problem. It prints all colors at once, including a crisp white base, with zero extra setup. This means you can confidently offer customers detailed, photorealistic designs with unlimited colors, and you don't have to enforce a high minimum order to make it profitable. It truly brings professional-quality results to everyone.
The numbers speak for themselves. The global Direct to Film printing market was valued at $2.72 billion in 2024 and is expected to climb to nearly $3.99 billion by 2030. This boom is happening because creators and businesses are demanding faster, more flexible printing solutions.
To put it simply, here’s a quick breakdown of what makes DTF so appealing.
Key Advantages of DTF Printing at a Glance
| Advantage | Description |
|---|---|
| Material Versatility | Works on cotton, polyester, blends, canvas, and even leather without pre-treatment. |
| No Color Limits | Print photorealistic images and complex, multi-color designs with no extra setup costs. |
| Excellent Vibrancy | A white ink underbase ensures colors pop, even on the darkest colored fabrics. |
| Soft & Durable Finish | The final print feels soft, stretches with the fabric, and holds up well to washing. |
| Low Barrier to Entry | Perfect for small orders and one-offs, making custom apparel accessible to everyone. |
This table really highlights why so many people are turning to DTF for their custom apparel needs.
Color Vibrancy and a Soft Feel
Beyond its versatility, another reason DTF has become so popular is the look and feel of the final product. The process lays down a layer of white ink behind the colors, which acts as a primer. This ensures your design is completely opaque and the colors are incredibly bright and vivid, even on black or navy blue shirts. You avoid the muted look that can sometimes happen when printing directly onto dark fabrics.
But all that vibrant color doesn't mean you get a thick, plastic-feeling print. When applied correctly, a DTF transfer is surprisingly soft and flexible. It actually stretches right along with the fabric, so you don't have to worry about the cracking and peeling that often ruins lower-quality heat transfers. This durability means the shirts you create won't just look amazing right off the press—they'll stay looking great wash after wash.
Your Essential DTF Printing Toolkit
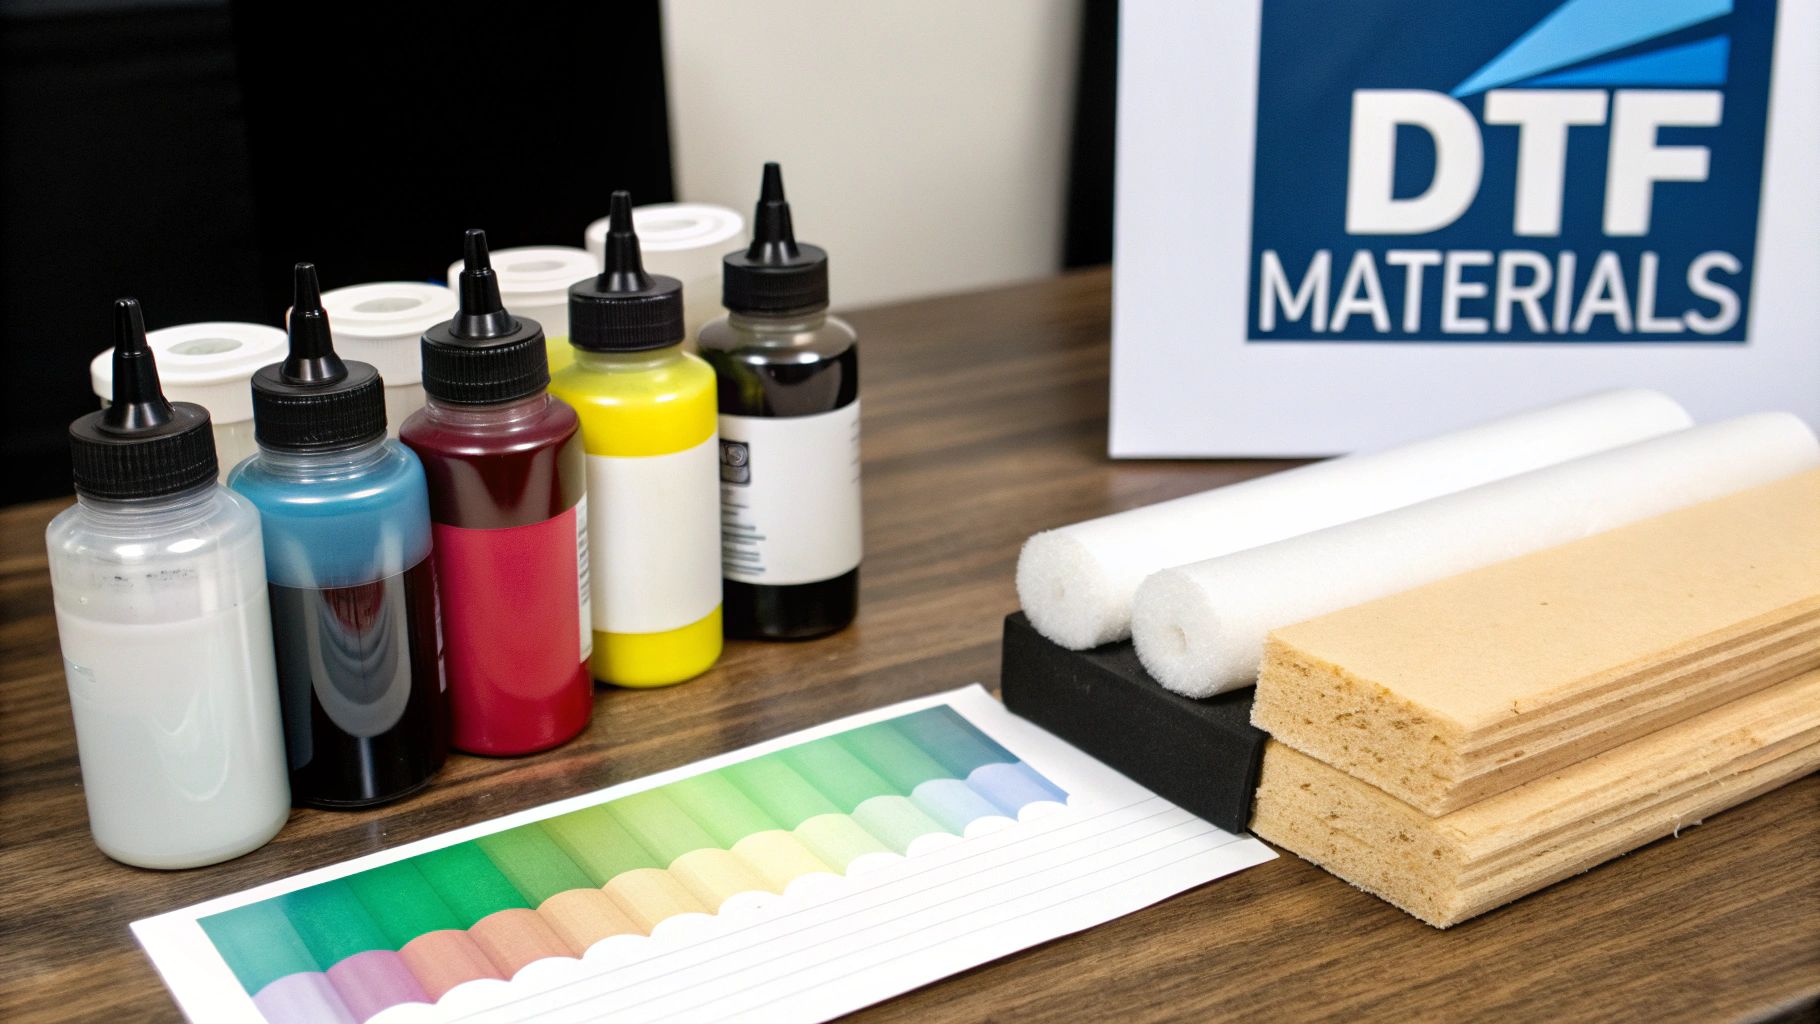
Jumping into DTF shirt printing means getting the right gear, but it's not just about the printer. Every single piece of your setup has a job to do, and getting it right from the start is the key to creating those bold, long-lasting prints and avoiding expensive headaches.
The DTF printer is obviously the star of the show. These aren't the printers you find in a typical office; they're specialized inkjet machines built to handle textile inks. They cleverly print the CMYK color layer first and then lay down a white ink overprint right on top of it, all in one pass. It’s this technique that makes the whole process so efficient.
Core Equipment and Supplies
The printer gets you started, but a few other items are non-negotiable for turning that print into a press-ready transfer.
- DTF Inks: You'll need specific water-based textile inks in Cyan, Magenta, Yellow, Black, and White. The real magic here is their elasticity—they're designed to stretch with the fabric, so your designs won't crack after a few wears.
- PET Transfer Film: This isn't just any film. It's a specially coated sheet that holds onto the ink perfectly and then lets it go cleanly when you press it. You'll see "hot peel" and "cold peel" options, which just tells you whether to remove the film right away or wait for it to cool down.
- Adhesive Powder: This fine, grainy powder is what makes everything stick. Once your design is printed, you sprinkle this over the wet ink. It melts in the curing stage, becoming the glue that bonds the print to the shirt.
Key Insight: Never skimp on the adhesive powder or your application technique. I’ve seen more transfers fail from a poor-quality powder or an uneven coating than almost anything else. Make sure you tap off all the excess powder thoroughly to get those clean, sharp edges.
The Brains and Brawn of the Operation
Beyond the basic supplies, two more pieces of equipment are absolutely essential for getting consistent, professional results. One handles the digital side, and the other does the heavy lifting.
First up is your RIP (Raster Image Processing) software. Honestly, you can think of this as the brain of your entire DTF setup. A standard printer driver just can't handle the ink layering needed for DTF. Good RIP software takes your artwork, automatically generates the white underbase, and manages the ink flow to give you accurate, punchy colors. You simply can't get pro-level quality without it.
And finally, you have the heat press—the brawn of the whole toolkit. A cheap press with uneven heating is a recipe for disaster, capable of ruining both your transfer and the shirt itself. Investing in a reliable press that delivers consistent temperature and even pressure will pay for itself in no time by preventing costly mistakes.
Staying on top of the latest hardware and software is part of the game. To see what's coming next, it’s worth checking out the top DTF printing trends for 2025.
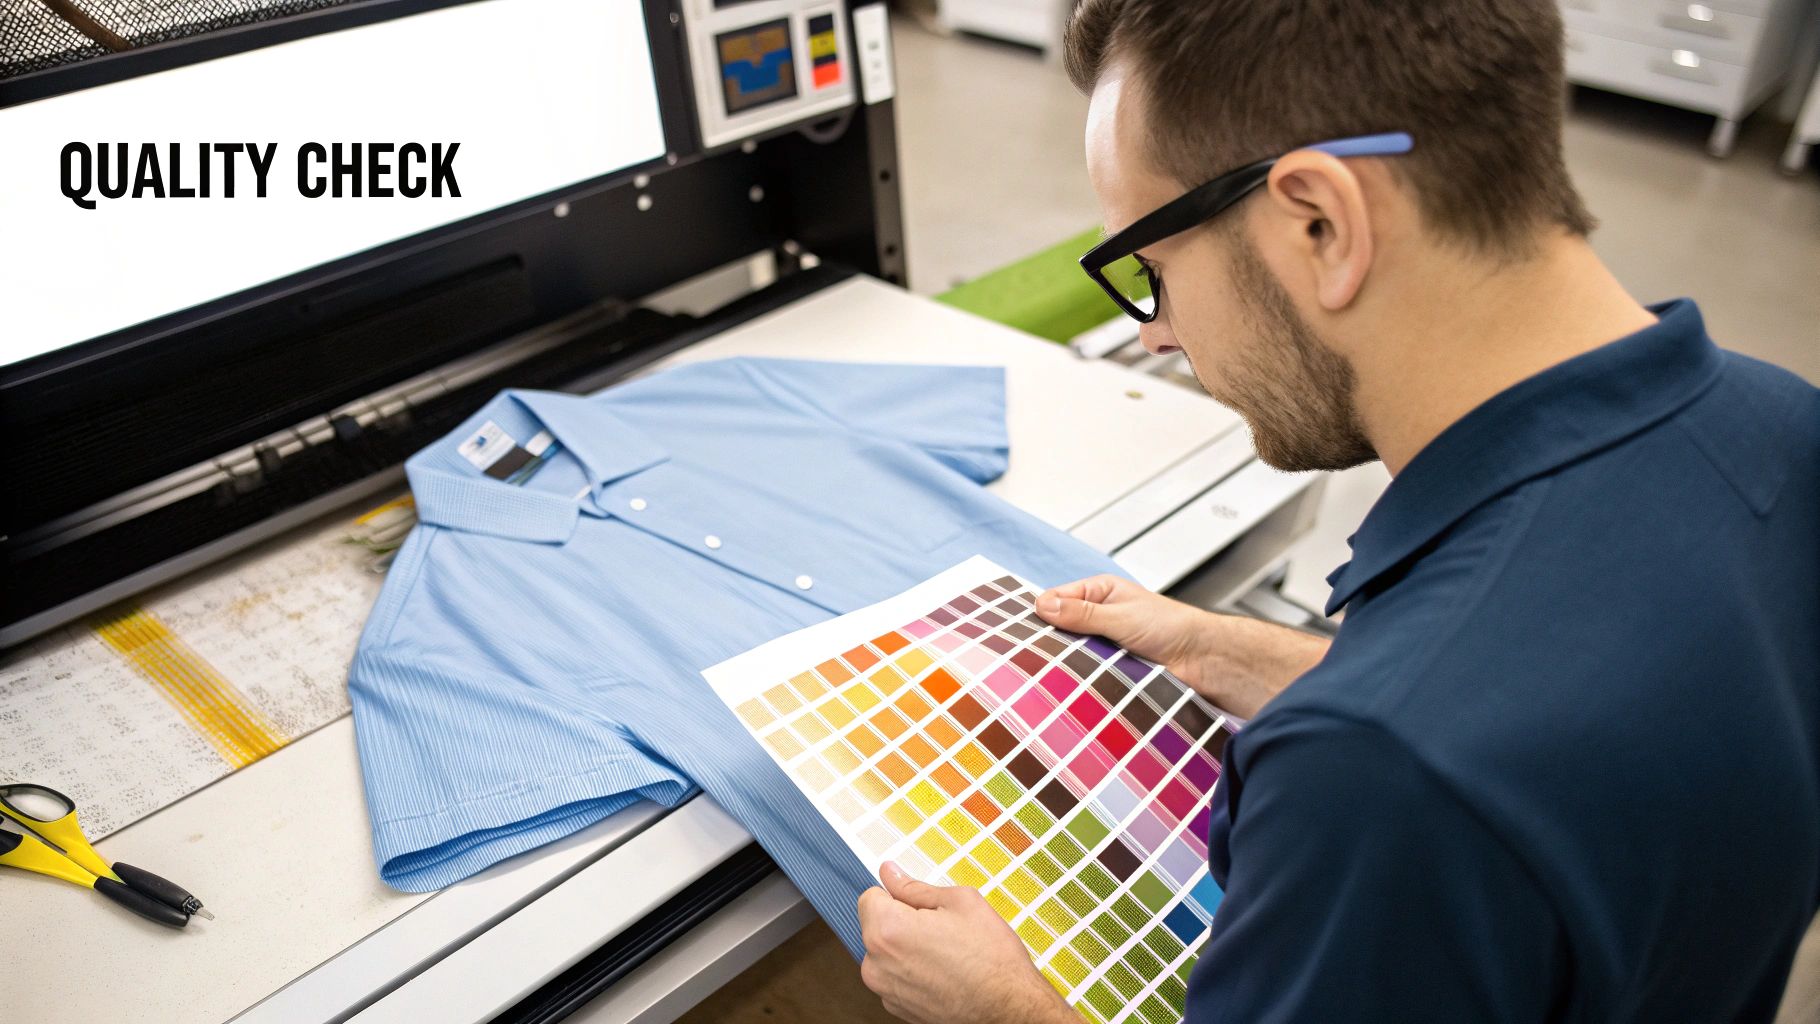
The quality of your finished shirt is pretty much decided before you even fire up the heat press. It all starts with the digital file. If you begin with a pixelated, low-resolution image, you're going to get a blurry, unprofessional-looking print. It’s that simple. Your gear can't fix a bad file.
Think of it as the foundation of a house. A shaky foundation means the whole structure will be weak. In DTF printing, that foundation is a high-resolution file. You should be aiming for 300 DPI (dots per inch) at the final, intended print size. This is the industry standard for a reason—it gives the printer enough data to create sharp lines and smooth details on the final garment.
Nailing the File Setup
Besides resolution, the single most important thing is a transparent background. With DTF, what you see in the file is exactly what you get on the shirt. If your design has a white box around it, that white box will get printed right along with it. To avoid this, always save your artwork in a format that supports transparency, like a PNG, PSD, or TIFF.
Let's say you're printing a detailed company logo on a black polo. If you use a JPG with a white background, you'll end up with a clunky, amateurish white patch on the shirt. A PNG with a transparent background, on the other hand, ensures that only the logo itself gets printed. The result is a clean, professional finish that looks like it belongs on the garment.
My Go-To Trick: Before I send anything to print, I always drop the final artwork onto a dark-colored layer in my design software. This quick check instantly shows any stray white pixels or leftover background bits I might have missed. It’s a five-second step that has saved me countless headaches.
Let the Software Do the Heavy Lifting
Here's one of the best things about the DTF process: you don't have to manually create the white underbase. Back in the day, this was a tedious step, but modern RIP (Raster Image Processing) software handles it automatically.
The software is smart enough to look at your design and generate the perfect white layer to go underneath the color. For a simple text design on a navy blue shirt, it'll lay down a solid white foundation to make the colors pop. For a more complex graphic with fine lines or semi-transparent areas, it creates a "choked" underbase. This means the white ink layer is pulled in just slightly from the edges of the color, which is crucial for preventing any little white halo from peeking out. It’s how you get those super clean, crisp edges every time.
The Core Process: From Print to Powder
With your artwork dialed in, it's time to get your hands dirty—well, almost. This is where the magic really happens, turning those pixels on your screen into a durable, press-ready transfer. The whole thing is a three-part dance: printing the film, applying the adhesive powder, and then curing it all together. Nail each step, and you’ll get a perfect print every time.
First up is the printer. Your DTF machine works in a brilliantly counterintuitive way, printing the ink layers in reverse. It starts by putting down all the colors—the CMYK (Cyan, Magenta, Yellow, Black)—directly onto the special PET film. Then, right on top of that, it lays down a perfectly aligned layer of white ink. This reverse layering is the secret sauce. When you press the design onto a shirt, that white ink acts as a solid base, making your colors pop on any garment, light or dark.
This graphic breaks down the journey from a digital file to a fully cured transfer, ready for the heat press.
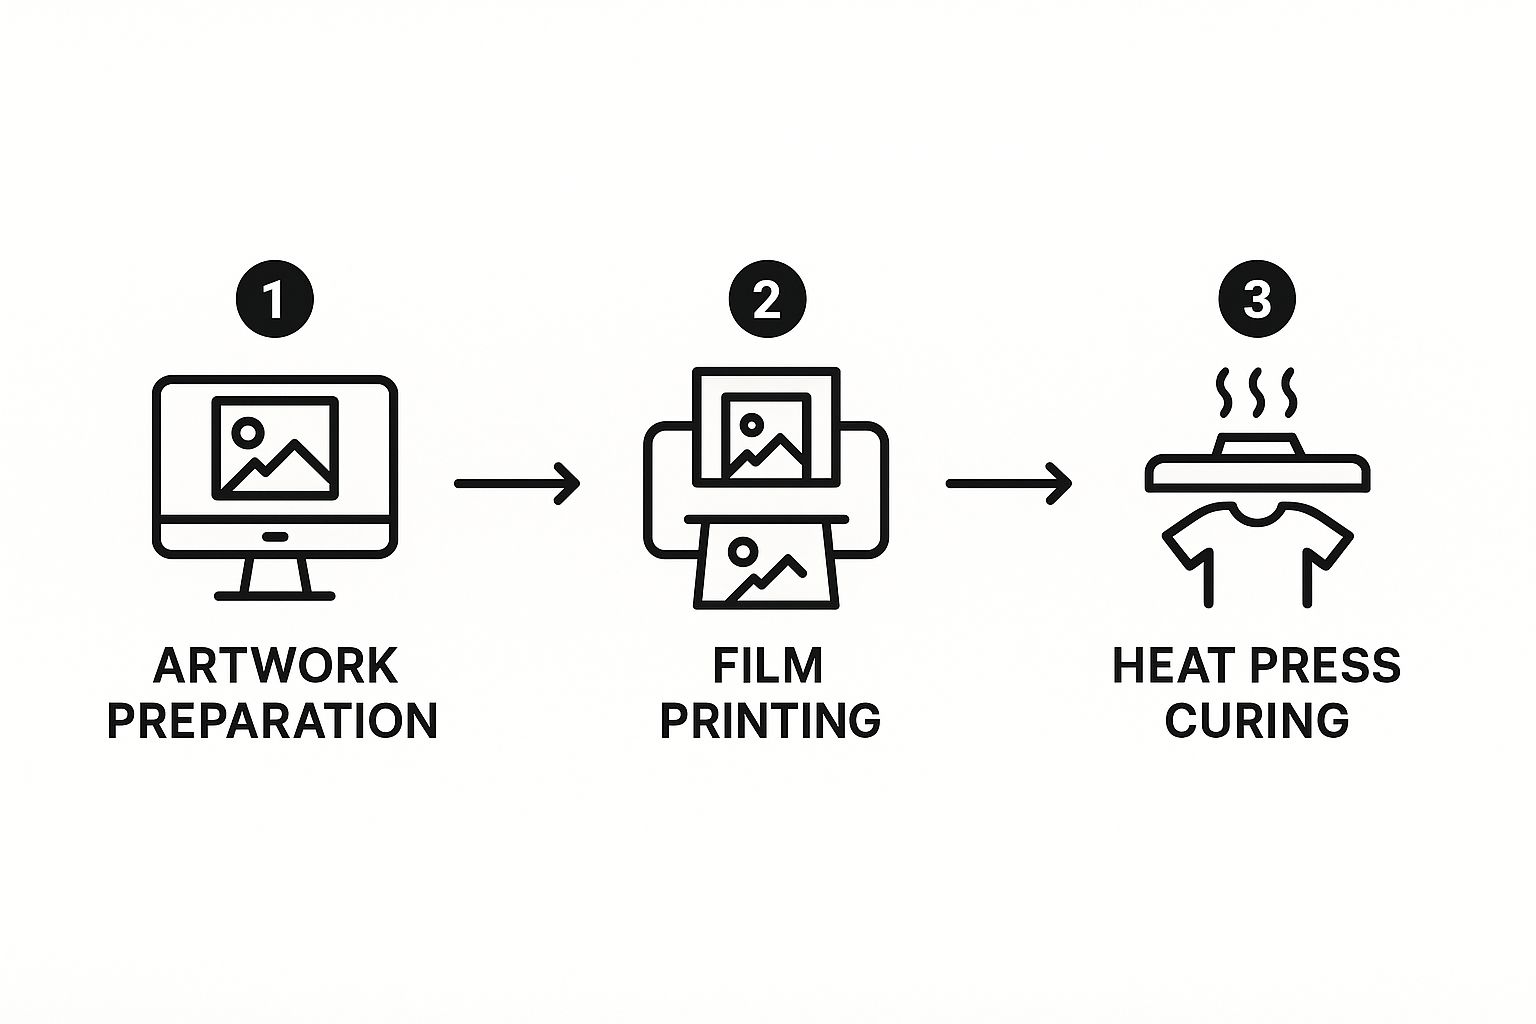
As you can see, each stage is distinct but builds directly on the one before it, all leading to a professional-grade transfer.
Applying the Adhesive Powder
While the ink is still wet on the film, you move on to powdering. This part is less about fancy equipment and more about good old-fashioned technique. Your goal is simple: get a nice, even coat of fine adhesive powder over every bit of the wet ink. This powder is literally the glue that will fuse your design to the fabric.
The low-tech method works great. Just hold the film by the edges and dip it into a shallow tray filled with the powder. Gently rock it back and forth to cover the whole design. The trick is making sure the powder sticks only to the ink and nowhere else.
Next, you have to get rid of all the excess powder. Give the back of the film a few firm taps to knock most of it loose. If you see any stubborn bits clinging to the clear, unprinted areas, a quick flick of your finger or a short blast from an air compressor will do the job. A clean powder job here is what gives you those crisp, sharp edges on the final shirt.
My Two Cents: Don't be timid when you're tapping off the extra powder. I've learned from experience that a few sharp, confident thwacks work much better than a bunch of gentle shakes. If you leave any stray powder on the film, it can melt during the curing phase and leave a faint, glossy stain on the shirt.
Curing the Transfer for a Perfect Finish
The last step before you head to the heat press is curing the transfer. This process melts the adhesive powder and bonds it to the ink, creating a single, stable sheet. You can use a dedicated curing oven for this, but honestly, your heat press works just as well.
To cure with a heat press, you just need to "hover" the top platen about half an inch over the powdered transfer. The key here is no contact. You're just using the radiant heat, not pressing it.
Set your press to a temperature between 350-375°F (176-190°C) and let it hover for about two minutes. You'll know it's perfectly cured when the grainy powder melts into a glossy, slightly bumpy surface that looks a lot like an orange peel. Just be careful not to hold it too close or for too long, or you risk scorching the film.
This demand for high-quality, on-demand printing is what’s driving the industry forward. Customers want personalized gear without the long waits or high setup costs of traditional screen printing. This is pushing shops to invest in more advanced DTF printers that can handle higher volumes with lower running costs. For a deeper dive, you can check out some detailed market trends and revenue forecasts on the subject.
From Pressing to Perfection: The Final Step
 This is where all the prep work comes together. You've got your cured transfer, you've got your garment—now it's time to bring that design to life on the heat press. Getting this right is all about the "big three": temperature, pressure, and time. Nailing this combination is what separates a professional-looking shirt from a dud.
But hold on. Before that transfer even gets near the shirt, you have to prep the garment itself. Fabrics, especially cotton, hold a lot of invisible moisture. If you don't get rid of it, that moisture turns to steam during pressing and can ruin the transfer's adhesion.
Always start with a quick pre-press for 5-7 seconds. This wicks away moisture and flattens out any wrinkles, giving you a perfectly smooth, dry canvas for your artwork.
Dialing in Your Pressing Settings
There’s no magic number that works for every single shirt. The right settings depend entirely on the fabric you’re working with. A heavy cotton hoodie can take a lot more heat than a thin polyester performance tee.
I've learned through a lot of trial and error that starting with a solid baseline is key. From there, you can tweak as needed. Here are the settings I rely on for the most common materials:
- 100% Cotton: These are pretty tough. I go with 300-325°F (149-163°C) for 10-12 seconds using medium to firm pressure.
- Polyester & Synthetics: You have to be careful here or you’ll scorch the fabric. I drop the temperature way down to 260-280°F (127-138°C) for just 8-10 seconds with medium pressure.
- 50/50 Blends: As you'd expect, these fall right in the middle. A good starting point is 280-300°F (138-149°C) for 10 seconds at medium pressure.
My Personal Tip: If you're ever unsure, especially with a new brand of shirt or a different film supplier, do a test press. Cut a tiny piece of the transfer and press it on the inside hem or another spot no one will see. It’s a small step that can save you a whole garment.
The Great Debate: Hot Peel vs. Cold Peel
Once that press pops open, what's next? You either peel the film off immediately or you wait. This is the difference between a hot peel and a cold peel, and it's not a matter of preference—your transfer film is specifically made for one or the other. Check your film's instructions to be sure.
A hot peel means you rip that film off the second the press opens. This technique usually leaves a softer, more matte finish that feels like it’s part of the fabric. The trick is to peel smoothly and confidently. Hold the shirt down with one hand and peel the film back in one fluid motion.
A cold peel, on the other hand, requires some patience. You have to let the shirt and transfer cool down completely before you even think about touching the film. Seriously, let it get to room temperature. The reward is often a glossier, slightly more vibrant finish. If you rush a cold peel, you’ll pull the ink right off and ruin the shirt.
Fixing Common Pressing Problems
Every now and then, even when you do everything right, you might see a faint, shiny box around your design. Don't panic—this is usually just a bit of leftover adhesive residue.
It's an easy fix. Just cover the design with a sheet of parchment paper or a Teflon sheet and give it a quick second press for about 5-7 seconds. This melts the residue back into the ink and makes that annoying outline disappear, leaving you with a perfectly clean print.
A Few Common Questions About DTF Printing
Even with the best guide in hand, you’re bound to have questions, especially when you’re new to DTF shirt printing. We get it. Let’s tackle some of the most common ones we hear from people just starting out. Getting these answers right from the beginning will help you avoid a lot of frustration and start printing like a pro.
How Durable Are DTF Prints, Really?
This is always the first question, and for good reason—you need your designs to last. The short answer is that DTF prints are incredibly durable. When you get the curing and pressing right, the ink and adhesive form a powerful bond that becomes one with the fabric.
This results in a print that’s soft, flexible, and built to withstand 50+ wash cycles without cracking, peeling, or fading. In terms of longevity, it’s right up there with traditional screen printing, making it a solid choice for any professional apparel line. If you really want to dive into the details, you can learn more about how long DTF transfers last and what impacts their durability.
Can I Just Use My Home Printer for DTF?
It's a tempting thought, but unfortunately, the answer is a hard no. A standard desktop or office inkjet printer just wasn't built for the unique demands of DTF shirt printing. It’s not just about what it prints on, but what it prints with.
A dedicated DTF printer is designed for several critical tasks your home printer can't handle:
- Specialized Inks: It uses specific textile-based inks, including a crucial white ink layer that regular printers lack.
- Film Handling: The mechanism is built to feed and print on PET film, not standard paper.
- RIP Software: You need specialized RIP software to control the ink layers, especially putting down the white base. A standard printer driver has no idea how to do this.
The Bottom Line: Trying to MacGyver a regular printer for DTF is a recipe for failure. Investing in the proper equipment is non-negotiable if you want the quality and durability that makes DTF so popular.
What's the Main Difference Between DTF and DTG?
At first glance, Direct-to-Film (DTF) and Direct-to-Garment (DTG) might seem like two sides of the same coin, but their processes are worlds apart. The key difference is how the ink actually makes it onto the shirt.
With DTG, the printer applies ink directly onto the fabric itself. This almost always requires pre-treating the garment, especially dark-colored ones, with a special liquid to help the ink stick and look vibrant.
DTF takes a different route. The design is printed onto a transfer film, coated with an adhesive powder, and then heat-pressed onto the garment. This indirect method is what makes DTF so incredibly versatile—it works on cotton, polyester, blends, leather, and more, all without any messy pre-treatment.
Why Won’t My DTF Transfer Stick Properly?
There's nothing more maddening than peeling back the film to see a failed transfer. The good news is that these issues almost always come down to a problem with your heat press settings. The usual suspects are incorrect temperature, not enough pressure, or too little time.
Another sneaky culprit is moisture. Even if a shirt feels dry, it can hold enough ambient moisture to ruin adhesion. That’s why you should always pre-press the garment for a few seconds to zap it out. Finally, look at your powder application—if it’s patchy or uneven on the film, the transfer won’t stick consistently. Always start with the recommended settings from your equipment and transfer provider.
Ready to skip the learning curve and get straight to pressing? At Raccoon Transfers, we deliver premium, press-ready DTF transfers with next-day shipping. Upload your artwork and build your custom gang sheet today!