
A Crafter's Guide to Vinyl Transfer Paper
If you’ve ever worked with adhesive vinyl, you know the frustration. You’ve just cut a beautiful, intricate design, but now you have to move all those tiny, perfectly spaced pieces from the vinyl’s backing paper onto your project—a mug, a sign, a car window—without turning it into a jumbled mess.
That’s where vinyl transfer paper comes in. It’s the essential middleman, the bridge that gets your design from point A to point B in one flawless piece.
Your Crafting Project's Best Friend
Think of vinyl transfer paper as the unsung hero of the crafting world. It’s essentially a sheet with a light adhesive on one side that’s just sticky enough to pick up your cut vinyl design without leaving any gunk behind.
Imagine trying to individually peel and place every letter of a quote or each delicate swirl of a pattern. It would be a nightmare. Transfer paper solves this by lifting the entire design at once, keeping everything perfectly aligned, just as you laid it out in your design software.
The Basic Process and Your Go-To Tools
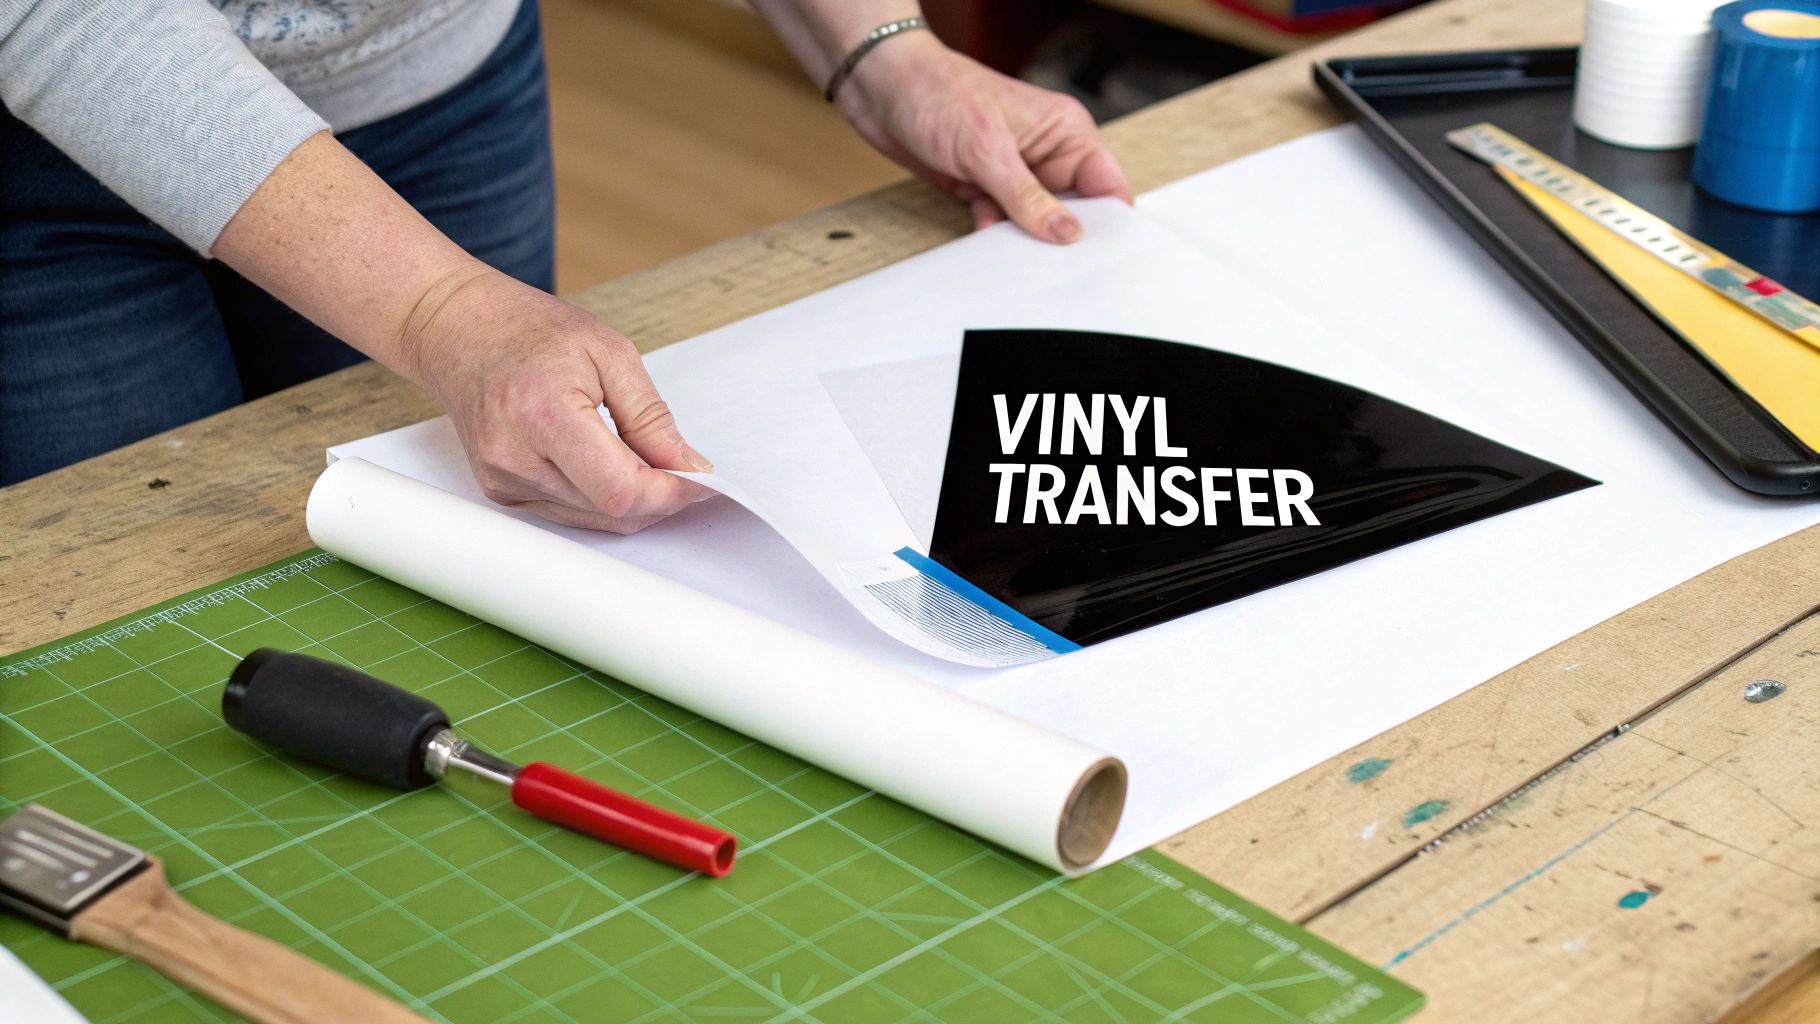
The whole process is refreshingly straightforward. Once your cutting machine has done its job, you’ll weed the design—that’s the oddly satisfying process of removing all the excess vinyl you don't want, using a sharp little tool called a weeder.
With your design weeded and sitting on its original backing, you’ll lay a piece of transfer paper over the top. Then, you grab a scraper or squeegee and firmly rub over the paper. This is called burnishing, and it ensures the transfer paper gets a good grip on every bit of your vinyl.
Finally, you peel back the transfer paper, and like magic, your entire vinyl design lifts with it, ready to be applied to its final destination.
At its heart, vinyl transfer paper is a simple but brilliant solution. It ensures that the precise spacing and arrangement you created in your design software are perfectly preserved during application.
Understanding "Tack" Levels
Not all transfer papers are created equal. Their stickiness, known in the industry as tack, is the single most important thing to pay attention to. Tack levels usually come in low, medium, or high.
Getting this right is crucial. If you use a high-tack paper on a delicate, thin vinyl, you risk stretching or tearing your design. On the other hand, if you try to use a low-tack paper on something heavy and textured like glitter vinyl, it probably won’t have enough muscle to lift the design off its backing.
To get started, you really only need a few things:
- A Weeder: For picking out all the negative space in your cut vinyl.
- A Scraper or Squeegee: To burnish the transfer paper and ensure a clean lift.
- The Right Transfer Paper: The star of the show! Make sure its tack level matches your vinyl type.
Nailing these basics is the foundation of any successful vinyl project. If you want to go a bit deeper, you can learn more about what is transfer paper and its different forms. Choosing the right tack and using these simple tools will make every application look smooth, clean, and professional.
Choosing the Right Type of Vinyl Transfer Paper
Once you've got the basics down, the next big step is picking the right tool for your specific project. It’s a common misconception that all vinyl transfer paper is the same. The truth is, your choice here can make or break your entire project, and it all boils down to the material and its stickiness, or tack.
Getting this right is the secret to avoiding those classic crafting frustrations—like when your vinyl stubbornly refuses to lift off its backing or, worse, sticks so aggressively to your project that you can’t get the transfer paper off. It’s really the difference between a clean, professional finish and a wrinkled, crooked disaster.
Clear Film vs. Paper Tape
The first choice you'll likely face is whether to go with a clear film or a more traditional paper tape. They both get the job done, but each one shines in different situations.
-
Clear Film Transfer Tape: This is exactly what it sounds like—a transparent, plastic-like film. The huge advantage here is visibility. You can see straight through it, which is a lifesaver for lining up designs perfectly, especially when you're layering multiple colors of vinyl. Most clear tapes are also reusable a few times, which can save you a bit of money in the long run.
-
Paper-Backed Transfer Tape: Think of this as extra-wide masking tape. It's often cheaper than clear film, making it a solid workhorse for simple, single-color decals where pinpoint precision isn't the top priority. The catch? It’s opaque, so you’re essentially placing your design blind.
If you’re just starting out, I’d recommend a medium-tack clear film. It’s the most versatile option and gives you the most room to learn and see what you're doing.
Choosing the right transfer paper isn't just about what’s easiest; it's about matching the tool to the vinyl. You need a high-tack paper to wrestle with heavy glitter vinyl, but a low-tack option is a must for delicate wall decals to avoid peeling up paint.
Tack Levels and Specialty Tapes
Beyond just clear or paper, the most critical factor to consider is the "tack"—the adhesive strength of the paper itself. It’s not one-size-fits-all.
Low-Tack: This is your gentle giant. It's perfect for applying decals to indoor walls or other delicate surfaces where you can't risk damaging the paint or finish when you peel the tape away.
Medium-Tack: This is the jack-of-all-trades and the most common type you'll find. It has enough grip to work with the vast majority of standard glossy and matte adhesive vinyl, like the ever-popular Oracal 651.
High-Tack: When you need serious muscle, this is what you grab. High-tack tape is essential for lifting stubborn, heavy, or textured vinyls. Think glitter, holographic, or shimmer finishes—these types of vinyl are notorious for not wanting to leave their backing paper without a strong pull.
You might also come across gridded transfer paper, which has printed lines on it to help with alignment. It’s a fantastic little feature that takes the guesswork out of lining up text and complex shapes.
This entire process, of course, is for adhesive vinyl that uses a cold application. When you're working with fabrics, you're in a completely different ballpark. For t-shirts and totes, you'll want to explore the best vinyl for heat press applications, which rely on heat and pressure, not transfer tape. By matching your vinyl transfer paper to your specific vinyl and project, you’re setting yourself up for a flawless finish every time.
Vinyl Transfer Paper Quick Comparison
Here's a simple chart to help you select the best transfer paper for your next crafting project.
| Transfer Paper Type | Key Feature | Best For | Tack Level |
|---|---|---|---|
| Clear Film | Transparent for easy alignment | Layered designs, precise placement | Low, Medium, High |
| Paper Tape | Opaque and budget-friendly | Simple, single-color decals | Medium, High |
| Gridded Film/Tape | Printed grid lines for accuracy | Signs, text, anything needing perfect alignment | Medium, High |
| Low-Tack | Gentle adhesive | Indoor wall decals, delicate surfaces | Low |
| High-Tack | Strong adhesive grip | Glitter, holographic, textured, and heavy vinyl | High |
Ultimately, having a roll of medium-tack clear film and a roll of high-tack paper on hand will cover about 95% of the projects you'll ever tackle.
Your Step-By-Step Vinyl Application Guide
Alright, you've weeded your design and picked out the perfect vinyl transfer paper. Now for the fun part—bringing your creation to life. This is the moment your digital file becomes a real-world object, and a little bit of care here goes a long way toward getting that flawless, professional finish everyone wants.
First things first: prep your surface. I can't stress this enough. Your target area needs to be squeaky clean and completely dry. Any lingering dust, grease, or grime will stop the vinyl's adhesive from getting a solid grip. For smooth surfaces like glass or metal, a quick wipe with isopropyl alcohol does wonders. If you're working on a painted wall, a damp cloth is all you need—just make sure it’s totally dry before you start.
This flowchart is a great cheat sheet for picking the right transfer paper every time.
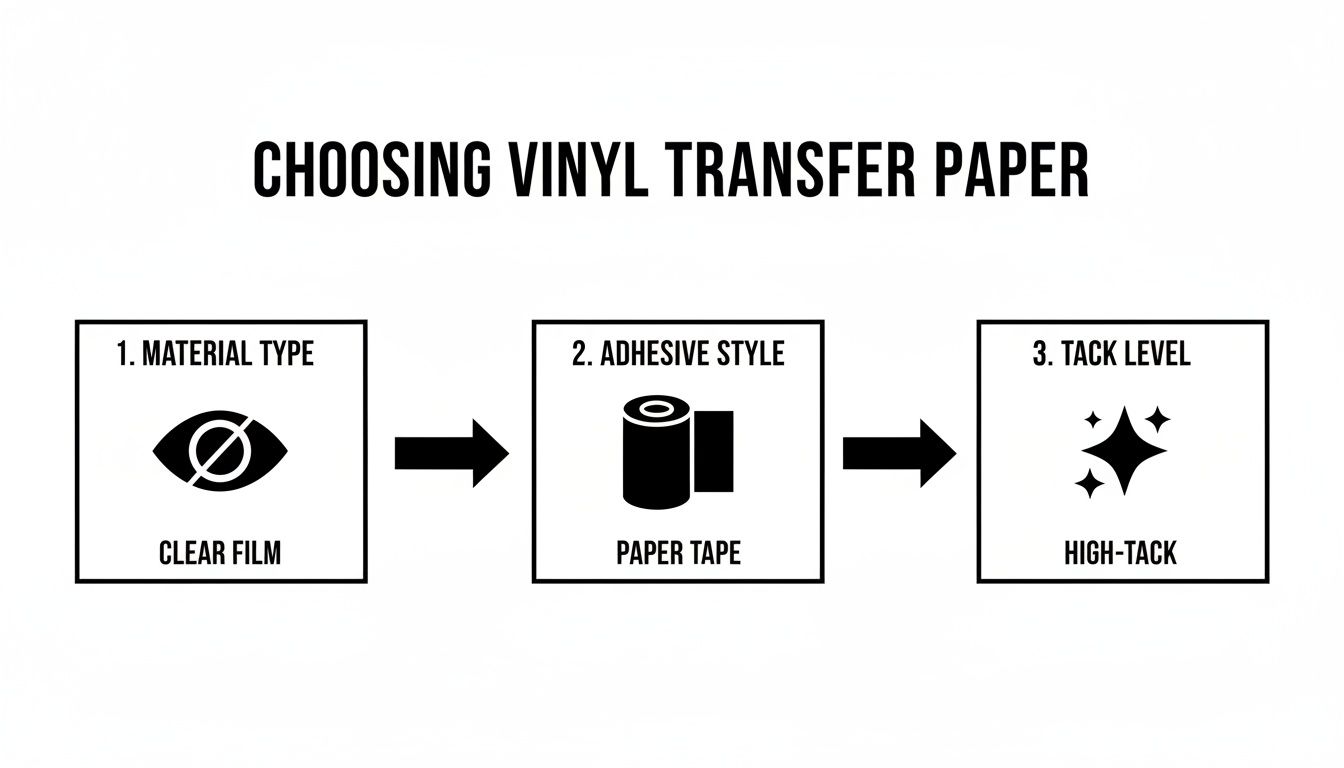
As you can see, clear film is your go-to for precise placement, while paper tape is a solid all-rounder. For those trickier materials like glitter vinyl, you’ll definitely need a high-tack option to get the job done.
Applying the Transfer Paper to Your Vinyl
Go ahead and cut a piece of transfer paper that’s just a little bigger than your weeded design. Peel back a corner of the liner and carefully place the sticky side over your vinyl. It’s best to start from the middle and smooth your way out to the edges to push any air bubbles out.
Now for the most important part of this whole process: burnishing. Grab a scraper or squeegee and rub it firmly across the transfer paper, making sure to cover every inch of your design. You need to apply some real, even pressure here. This is what forces the vinyl to stick to the transfer paper. Trust me, a weak burnish is the number one reason applications fail.
Once you’ve given it a good rubdown, start peeling the transfer paper away from the vinyl’s original backing. Do it slowly and at a sharp 45-degree angle. The whole design should lift right off with the tape. If a stubborn piece of vinyl decides to stay behind, just lay the tape back down, give that specific spot another good burnish, and try again.
The Final Application and Peel
With your design now sitting pretty on the transfer paper, it's time for the main event. For anything bigger than your hand, the hinge method is an absolute lifesaver. It prevents skewed placements and annoying wrinkles.
Here's how it works:
- Position the Decal: Place the entire decal, transfer paper and all, exactly where you want it on your project.
- Create a Hinge: Take a strip of masking tape and run it across the top or middle of the transfer paper, sticking it to the surface. This creates a simple hinge.
- Apply in Sections: Flip the decal up using your tape hinge. Peel the vinyl's paper backing off, but only down to the hinge. Snip off the exposed backing paper.
- Squeegee Down: Slowly lower the top half of the decal onto the surface. Use your squeegee to smooth it down, working from the hinge outwards.
- Finish the Job: Now you can remove the masking tape. Lift the bottom half of the decal, peel off the remaining backing, and squeegee the rest of it into place.
Once the entire design is on the surface, give it one final, thorough burnish. This really locks the vinyl in place.
The final peel is the moment of truth. Always pull the transfer paper off slowly, keeping it low and tight against the surface at a sharp 45-degree angle. This simple trick dramatically reduces the chance of accidentally pulling your vinyl back up.
If a piece of vinyl does try to lift, don't panic. Just press the transfer paper back down and give that spot another firm rub. After the tape is off, your project is officially done! Just remember to let the adhesive cure for a good 24-48 hours before you wash it or put it through any heavy use.
Transfer Paper vs. Heat Transfer Vinyl vs. DTF
Stepping into the world of custom crafts can feel like learning a new language. You've got vinyl transfer paper, Heat Transfer Vinyl (HTV), Direct-to-Film (DTF), and a whole alphabet soup of other terms. It's easy to get them mixed up, but picking the right one is the difference between a project that wows and one that bombs.
Let's cut through the noise. The easiest way to tell these apart is to think about them in one simple way: cold vs. hot.
Vinyl transfer paper is a tool used strictly for adhesive vinyl, which is basically a fancy, durable sticker. This is a "cold" process—no heat needed. You're simply moving a vinyl decal from its backing paper to a new home. This is your go-to for hard, smooth surfaces like windows, mugs, walls, or laptops. If you’ve ever seen a custom car decal or a personalized tumbler, that’s adhesive vinyl and transfer paper in action.
When Things Heat Up
Now, let's talk about fabric. Both HTV and DTF are designed for textiles and need heat to make the magic happen. These are "hot" applications where you use a heat press (or sometimes an iron) to permanently fuse a design into the fibers of a garment.
-
Heat Transfer Vinyl (HTV): Imagine cutting shapes out of a colored sheet of vinyl. That's HTV. You cut your design, peel away all the extra bits (a process called "weeding"), and what's left is your graphic on a clear carrier sheet. Heat and pressure activate the glue on the back, bonding it to the fabric. HTV is a champ for simple, bold designs like names and numbers on jerseys or clean, single-color logos.
-
Direct-to-Film (DTF): DTF is a whole different ballgame. Instead of cutting from a colored sheet, your design is printed with special inks onto a film. A fine adhesive powder is then applied and melted, creating a transfer that's ready to press. This is how you get those super-detailed, full-color, photorealistic graphics that feel soft and stretchy on a t-shirt. If you want to dive deeper, we have a detailed guide on heat transfer sheets for apparel.
Here’s the bottom line: If you’re not working with fabric, you need adhesive vinyl and transfer paper. If you’re putting a design on a t-shirt, hoodie, or tote bag, you’ll be choosing between HTV and DTF.
Comparing the Core Differences
To get a feel for the bigger picture, you can explore various custom printing options used across the apparel and merch industry. But when it comes to these three, the lines are pretty clear.
The demand for heat-applied graphics is exploding. The heat transfer vinyl market alone was valued at a massive USD 1,250 million and is expected to nearly double by 2032. This just goes to show how many people want tough, vibrant, wash-resistant designs on their clothes—a need that both HTV and DTF are perfectly suited to meet.
Ultimately, picking the right method boils down to what you're making. Think about the surface, the complexity of your art, and the feel you're going for. That will always point you in the right direction.
How to Fix Common Vinyl Transfer Problems
Even the most experienced crafters run into projects that just don't want to cooperate. It's a real momentum-killer when a perfectly cut vinyl decal refuses to transfer correctly. The good news is that most of these headaches stem from just a few common issues, and they're usually pretty simple to fix once you know what's going on.
Before we get into the nitty-gritty, let's cover the golden rule of vinyl application: always start with a clean, dry, and smooth surface. Seriously. Dust, oils from your fingertips, or a bit of moisture can completely ruin the adhesive's ability to bond. This one simple step can prevent nearly every problem we're about to discuss. A quick wipe-down with isopropyl alcohol is a lifesaver for most non-porous surfaces.
Problem One: The Vinyl Won’t Stick to the Transfer Paper
This one is probably the most common frustration out there. You’ve weeded your design, it looks amazing, but when you go to lift it with your vinyl transfer paper, little bits—or the entire thing—stay put on the backing paper.
Here’s what’s likely happening and how to fix it:
- You Haven't Burnished Enough: This is the culprit 9 times out of 10. You need to apply firm, even pressure across the entire design with a squeegee. Don't be shy here! The whole point is to press the vinyl's adhesive firmly onto the transfer paper. For stubborn designs, try flipping it over and burnishing from the back, too.
- Wrong Tack Level for the Job: Your transfer paper might simply not be sticky enough for the vinyl you're using. Most standard vinyl does great with a medium-tack paper, but heavily textured vinyls like glitter or shimmer need a high-tack transfer paper to properly grab onto their bumpy surfaces.
- The Vinyl Itself Is the Problem: It happens. If the adhesive on your vinyl is old, dried out, or just low-quality, it’s not going to stick well to anything, including your transfer paper.
Problem Two: The Vinyl Won’t Release From the Transfer Paper
So you've gotten past the first hurdle, but now you're facing the opposite problem. You've positioned the decal perfectly on your project, but as you peel back the transfer paper, the vinyl lifts right back up with it. Infuriating!
Pro Tip: Always peel the transfer paper back at a very sharp angle, almost folding it back on itself (45 to 180 degrees). If you pull straight up (90 degrees), you’re practically asking the vinyl to come along for the ride. Go slow and steady.
If your vinyl is still putting up a fight, one of these is probably to blame:
- Incompatible Surface: Vinyl loves smooth, non-porous surfaces—think glass, metal, or sealed wood. It has a tough time sticking to anything rough, porous, or overly flexible, like raw wood, some types of plastic, or silicone.
- Your Transfer Paper Is Too Tacky: If you used a high-tack tape for a simple design on standard vinyl, its grip might be stronger than the vinyl's new bond with the project surface. It's a tug-of-war, and the transfer paper is winning. Try a medium-tack paper next time.
- You Skipped the Final Burnish: Just like you burnished to lift the design, you need to burnish it again once it's on its final home. This final press activates the pressure-sensitive adhesive and locks the vinyl into place.
By figuring out exactly when the failure is happening—lifting off the backing or releasing onto the surface—you can quickly diagnose the root cause. A small tweak to your technique or materials can be all it takes to save your project from the bin.
When DTF Transfers Are the Smarter Choice
Adhesive vinyl and its trusty sidekick, vinyl transfer paper, are absolute workhorses for hard-surface projects. But there comes a time when your creative ambitions might bump up against their limits, especially when you start eyeing the world of custom apparel.
For anyone serious about producing professional-grade fabric goods, knowing when to level up your technology is crucial. This is where Direct-to-Film (DTF) transfers come in, offering a powerful alternative right where adhesive vinyl and even Heat Transfer Vinyl (HTV) can fall short. It’s not about ditching your vinyl cutter, but about adding a more specialized tool to your kit for those high-impact jobs.
Think of it as moving beyond simple shapes and solid colors into the realm of vibrant, complex graphics that are built to last.
For Complex Multicolor Graphics
Let's say your design is a detailed piece of art—full of color gradients, fine lines, and tiny text. With HTV, you'd be facing the monumental task of cutting, weeding, and layering every single color. It's a slow, painstaking process where one tiny slip can throw the whole design off. The result? A graphic that often feels thick, stiff, and heavy on the shirt.
DTF completely sidesteps that entire mess.
With a DTF transfer, your entire full-color design gets printed onto a single film in one shot. There's zero weeding and zero layering. You can press photorealistic images, intricate logos, and complex artwork with unlimited colors in one simple step.
This is a massive efficiency boost. It unlocks a level of creative freedom that’s just not practical with traditional vinyl, letting you take on apparel projects you might have previously thought were impossible.
When You Need Scalability and Speed
Weeding vinyl can be almost meditative when you're making a single, special item. But when an order for 20, 50, or 100+ shirts comes in, that "meditative" process quickly becomes a major production bottleneck. The hours spent picking out tiny vinyl pieces add up fast, grinding your workflow to a halt.
If that sounds familiar, it’s a clear sign you should be looking at DTF transfers. Here’s why it’s the go-to for volume:
- No Weeding, Period: This is the big one. Skipping the weeding process entirely lets you blow through large orders in a fraction of the time.
- Ready to Press: DTF transfers show up at your door ready for action. Just position the transfer on the garment and press. That's it.
- Flawless Consistency: Every single transfer is an exact replica of the last. This guarantees professional, brand-level consistency from the first shirt to the hundredth.
Using a service like Raccoon Transfers means you get to skip the most tedious parts of the job. You upload your design, and we deliver ready-to-apply transfers. This lets you focus on what actually makes you money—pressing shirts and growing your business—instead of getting lost in the weeds (literally). It’s how a crafting side-hustle becomes a scalable, efficient operation.
Got Questions About Vinyl Transfer Paper? We've Got Answers.
Even with a perfect plan, you're bound to run into a few questions when you're in the middle of a project. It happens to everyone. Let's tackle some of the most common ones that pop up when working with vinyl transfer paper. Getting these little details right can save you a ton of frustration (and wasted vinyl).
Think of this as a quick-reference guide for those moments when you're stuck. We'll cover the common hang-ups, from reusability to troubleshooting, so you can build your confidence and make every project a success.
Can You Reuse Vinyl Transfer Paper?
Yes, you often can! A good quality, clear vinyl transfer paper can usually handle two or three transfers before it gives up the ghost. It all comes down to the tackiness and how clean you keep it. If it picks up a lot of dust or fuzz, its life will be much shorter.
You'll know it's time to grab a new piece when it struggles to lift your weeded design off its backing. If you're fighting with it, the adhesive is shot.
My Two Cents: Don't try to stretch it too far. Reusing transfer paper is a great way to save a few bucks, but ruining a perfectly good vinyl decal because your tape is worn out will cost you more in the long run.
Is It "Transfer Paper" Or "Transfer Tape"?
Honestly, it's both. In the crafting world, you'll hear "transfer paper" and "transfer tape" used for the exact same thing. They both do the same job: moving your sticky vinyl from its paper liner to its new home.
If you want to get super technical, some people make a tiny distinction:
- Transfer Paper might refer to the classic, opaque stuff that feels like masking tape.
- Transfer Tape often describes the clear, plastic-y film that lets you see what you're doing.
But at the end of the day, call it what you want. We'll all know what you mean.
Ugh, Why Won't My Vinyl Stick to the Transfer Paper?
This is the number one problem people run into, and it's almost always one of two things. First, the tack level of your transfer paper might be too low for the type of vinyl you're using. This happens a lot with specialty vinyls that have a textured surface, like glitter vinyl.
The second, and more common, culprit? Not burnishing hard enough. You really have to give it some muscle. Grab a scraper or a squeegee and rub firmly over the entire design, front and back. This pressure is what forces the vinyl to let go of its liner and stick to the transfer tape.
When your projects get more ambitious than simple hard-surface decals—especially if you're looking at detailed, multi-color designs for t-shirts and hoodies—Raccoon Transfers offers a much simpler path. Check out our custom DTF transfers to get vibrant, pro-quality results on fabric without the headache of layering vinyl.