

DTF Transfer Printing Services Guide
You've got a strong design ready for a product launch, but the production choices are already creating friction. Vinyl takes too long to weed, screen printing makes a short run difficult to justify, and a direct-to-garment order may leave you worrying about dark garments, pretreatment, or machine maintenance. You need a way to test designs, produce detailed graphics, and keep quality consistent without turning your brand into a full-time print operation.
DTF transfer printing services solve much of that workload by separating image production from garment decoration. A specialist prints the design onto film, applies the adhesive, cures the transfer, and sends it ready for pressing. Your team can then focus on selecting garments, building product pages, and selling, while the provider manages the parts of production where small process errors can damage wash durability and increase waste.
The Shift to Professional DTF Transfer Printing Services
A small apparel brand often reaches the same uncomfortable point. The designs are ready, but every production method introduces a different bottleneck. Screen printing can be efficient for repeatable bulk work, yet setup work and color separation make small, highly detailed orders less convenient. Vinyl works for simple graphics, but fine lettering and multiple colors turn weeding into a labor problem. DTG can produce detailed apparel graphics, though dark garments and ongoing equipment care add their own complications.
DTF changes the handoff. Instead of sending a finished garment through a printer, you send artwork to a provider that prints a transferable image on PET film. You press that image onto the blank garment when you need it. That model gives an independent brand more control over inventory because the same transfer can support samples, individual orders, or a later production batch.
Practical rule: Treat the transfer provider as part of your production line, not just as a place to upload artwork.
The commercial market supports that shift. The Direct to Film Printing Market was estimated at USD 2.85 billion in 2025 and is projected to reach USD 4.46 billion by 2032, with a 6.57% CAGR, according to 360iResearch's DTF printer market analysis. Those figures describe a growing commercial segment, but they don't guarantee that every provider delivers the same result. The useful lesson for a buyer is that professional capacity is expanding, while quality still depends on film, ink, powder, curing, and pressing discipline.
For a designer who has spent an evening pulling vinyl scraps from small counters in a logo, outsourcing can feel less like a luxury and more like removing an unnecessary job. A provider can also help you choose a transfer size, consolidate several graphics, and identify artwork problems before they become wasted garments. The best arrangement leaves you with a repeatable system: upload clean files, order the right layout, press to a tested profile, and record the result.
For a broader look at what a specialized facility does differently from a home setup, the guide to choosing a DTF print house is a useful starting point.
How the Direct to Film Process Works
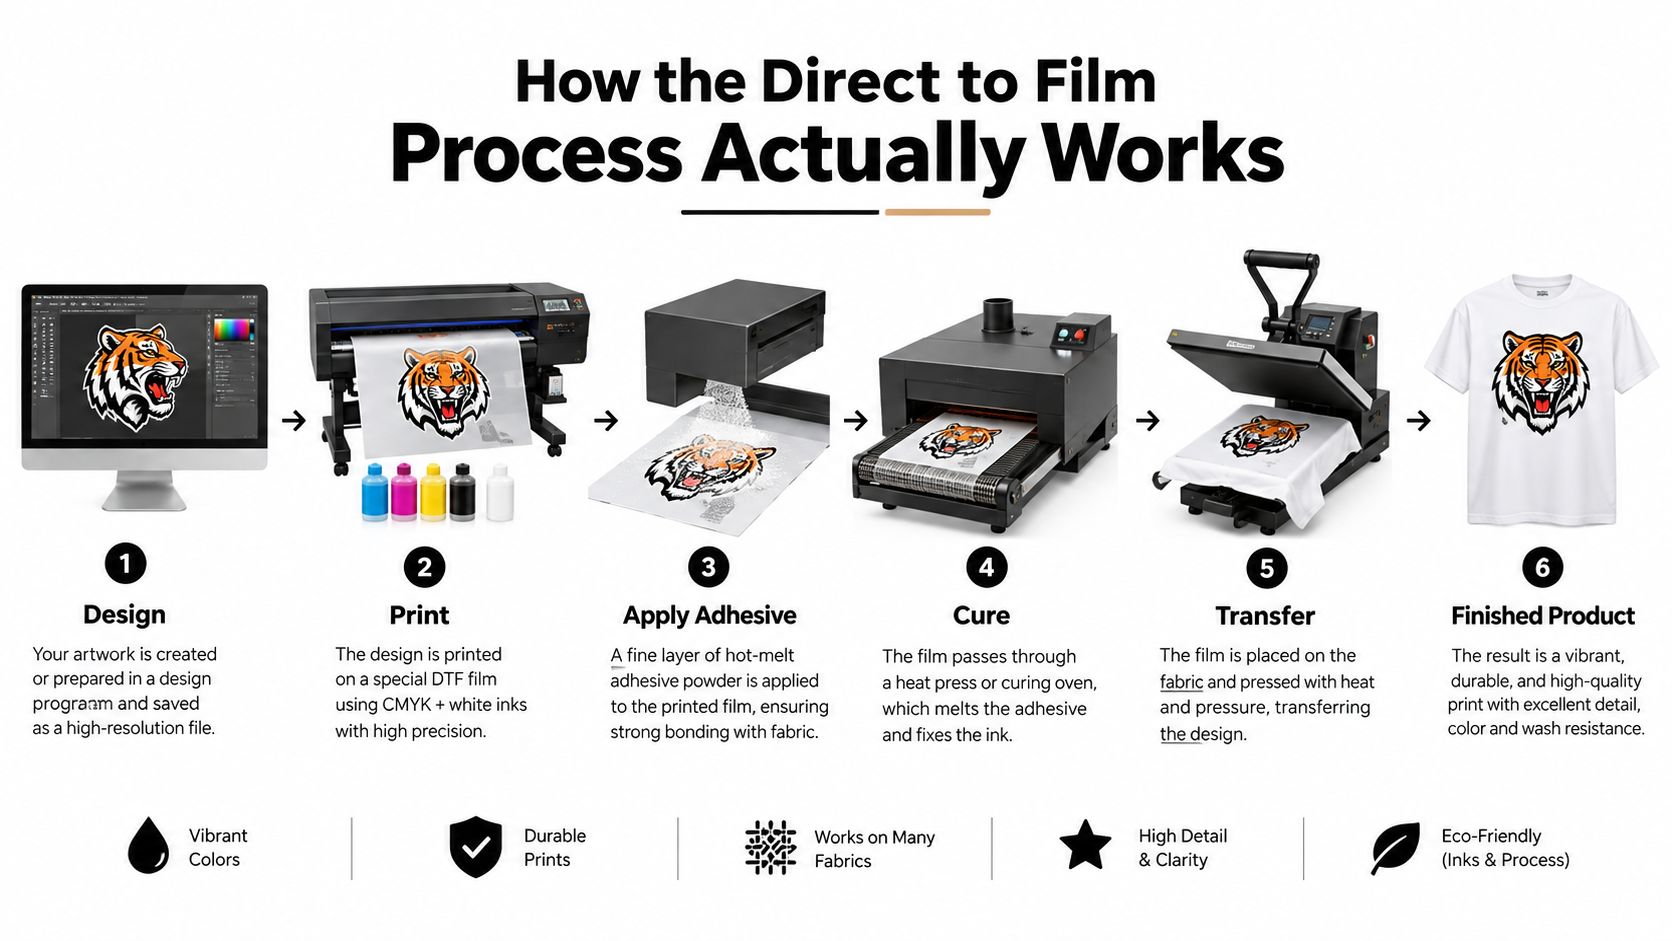
Wash durability starts before the transfer reaches the heat press. A professional DTF order depends on the white underbase, adhesive coverage, curing temperature, film handling, and the final press profile. DTF systems commonly print CMYK color and white ink onto PET film. The white layer sits beneath the color image, creating opacity on dark shirts and saturated fabrics. If its density is inconsistent, colors lose brightness and fine details become less defined than they appeared on screen.
The production sequence is simple to describe, but each stage affects the next:
- Artwork enters the RIP workflow. The software interprets transparency, color channels, scale, and the white layer. Clean artwork lets the operator adjust underbase density and edge treatment instead of compensating for avoidable file problems.
- Pigment ink prints onto PET film. Color is laid down with the required white layer arrangement. Industrial specifications commonly use a 600 mm print width and 720 x 1,080 dpi resolution, as described in DTF.ie's technical specification. That resolution can preserve fine detail, but it cannot repair poor artwork, weak ink laydown, or uneven curing.
- TPU adhesive powder covers the printed area. The powder bonds to wet ink and must cover the image consistently. Loose excess powder needs removal because it can create unwanted texture, weak edges, and contamination in the curing equipment.
- Heat cures the adhesive. The powder fuses into the bonding layer that connects the image to the textile. A transfer can look clean before curing and still fail after washing if the adhesive has not fused evenly.
- The film is prepared for pressing. Depending on the material and production method, it may be cooled, rolled, cut, or arranged into a gang sheet. That organization affects handling time and the risk of mixing up placements.
Why the production room matters
The operating environment affects ink behavior, static, powder distribution, and film handling. DTF.ie's technical specification lists an operating range of about 18–28°C and 50–80% relative humidity for stable production. A provider that ignores those conditions may produce transfers with inconsistent surfaces or bonding, even when the artwork is correct.
Press settings also need to match the garment and transfer construction. Thin polyester and heat-sensitive blends usually take the lower profile, around 140°C for 15 seconds at medium pressure. Heavy cotton hoodies and dense transfers can tolerate 160–180°C for 10–15 seconds at 25–35 psi. Confirm the profile supplied with the specific transfer, because insufficient pressure or heat can limit adhesive activation, while excessive heat can distort film or stress the fabric. This DTF process reference explains these application risks.
If you order finished transfers, ask for the exact application instructions rather than relying on a generic setting. Custom DTF Transfer by Size: Perfect Prints for Every Project is intended for ready-to-press use across listed garments and materials, but the profile still needs to suit the item being decorated.
For a closer technical explanation, compare this direct-to-film printing process guide with the instructions supplied for your transfer. Record the result after washing so future orders use a tested profile rather than guesswork.
Maximizing Efficiency with Gang Sheets and Turnaround
The most overlooked cost variable in DTF ordering is often the empty space around the artwork. A gang sheet places multiple graphics on one sheet or roll section, allowing a provider to print a left-chest logo, a large front graphic, sleeve art, neck labels, and design variations together. The goal isn't to fit as much as possible. The goal is to use the printable area without creating pieces that are too close to trim, too difficult to handle, or awkward to press.
A good layout starts with the products you plan to sell. Group designs by application size and garment type. Keep graphics that require different press settings separate, and leave enough spacing for clean cutting or easy manual separation. If a small logo and a large hoodie graphic share a sheet, label them clearly in the file so the pressing team doesn't confuse the intended placements.
Where the savings come from
Outsourcing changes the economics because the provider absorbs the specialized equipment, maintenance, powder handling, curing, and production labor. You still need a heat press and blanks if you're applying transfers yourself, but you aren't forced to operate the entire print system before validating demand.
A gang sheet helps in three practical ways:
- It consolidates artwork. Several designs can travel through one production order instead of being treated as unrelated jobs.
- It supports controlled testing. You can place multiple colorways or logo sizes together and press samples before committing to a larger garment order.
- It reduces handling decisions. A clearly labeled layout gives your team a physical production map, especially when an order contains several garment styles.
Don't confuse material efficiency with automatic profitability. A badly nested sheet can create more waste than a carefully planned set of individual transfers. Oversized graphics may be inexpensive per area but unsuitable for the blank, while tiny details can become difficult to weed from the film or position accurately on the garment. Ask the provider whether its gang sheet builder shows dimensions, spacing, and the final layout before checkout.
Turnaround is a workflow question
Fast fulfillment only helps when your file, blank garments, and pressing capacity are ready at the same time. A provider may print quickly, but an unclear file can trigger revisions, and a late shipment of blanks can still stop the launch. Build an order checklist that confirms artwork approval, transfer dimensions, garment count, delivery method, and the date you need to begin pressing.
Avoid paying for urgency created by poor planning. For a product drop, prepare the artwork and blank inventory before you order the final transfers. For an event, press a representative sample early enough to check placement, hand feel, and wash behavior. Professional DTF transfer printing services can shorten the production path, but they can't remove every dependency in your operation.
Expanding Beyond Apparel with UV DTF Technology
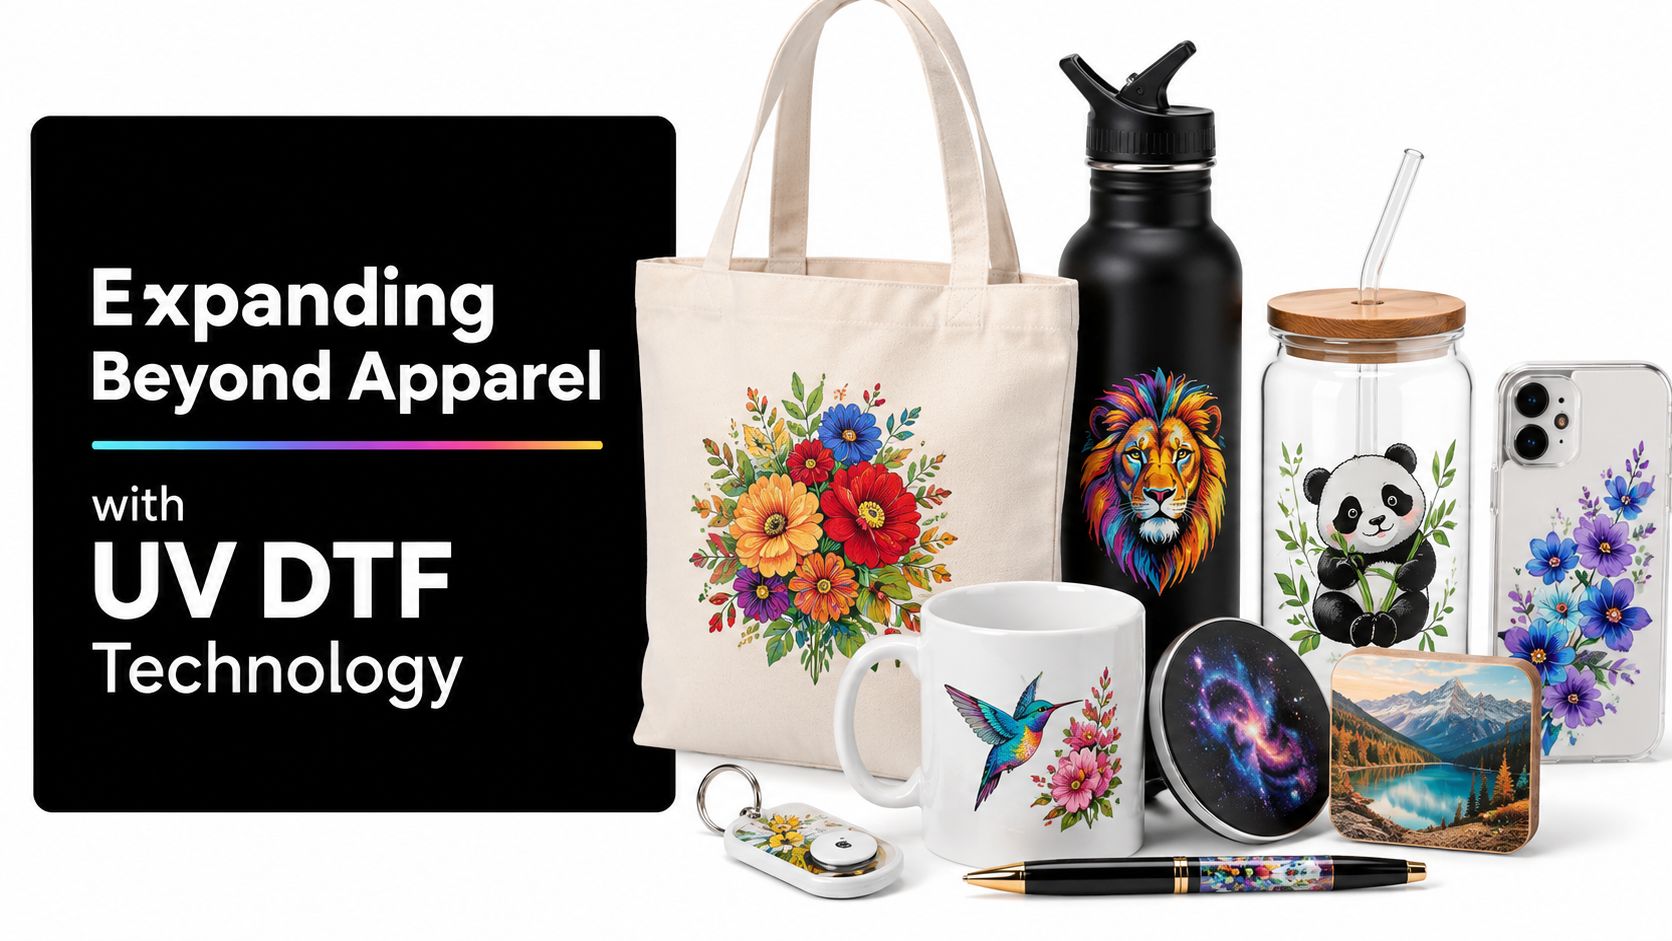
Standard DTF and UV DTF share the idea of printing a graphic for later application, but they serve different surfaces and use different finishing methods. Textile DTF uses a heat-activated TPU adhesive and is pressed into fabric. UV DTF uses UV-curable inks and an adhesive-backed construction designed for smooth, rigid objects. It isn't a replacement for textile transfers, and trying to use one system as though it were the other creates avoidable failures.
For apparel, the fabric flexes, stretches, and moves through laundering. A heat press activates the transfer so the ink and adhesive bond with the textile surface. UV DTF is applied without a heat press. The design is transferred from its carrier onto a clean, smooth object, then burnished and peeled according to the supplier's instructions.
Choosing the right surface
UV DTF makes sense for products such as glass bottles, metal tumblers, plastic giveaways, ceramic items, and laptop covers, provided the surface is smooth, clean, and compatible with the adhesive. Dust, grease, silicone residue, and heavy texture interfere with contact. Curved objects require extra care because large rigid graphics may wrinkle or lift if the transfer cannot conform evenly.
The finish is useful for brands that want to sell coordinated merchandise. A textile collection can carry the main apparel graphics, while UV DTF can add branding to packaging accessories, drinkware, desk products, or event items. That expands the catalog without requiring the same heat-press workflow for every product.
Durability still depends on use
UV DTF products are marketed for strong adhesion, water resistance, and weather exposure, but those qualities don't make every object indestructible. Abrasion, sharp edges, repeated bending, and dishwashing can shorten the useful life of a decal. Hand washing is the safer care instruction for items that need to retain their finish, especially drinkware and objects handled frequently.
The UV DTF printing guide can help clarify the distinction before you add hard-surface products to an apparel offer. Keep the product promise precise. Describe the surface, application method, and care expectations instead of treating UV DTF as a universal sticker for every object.
Evaluating Real-World Wash Durability and Quality
A transfer can look perfect immediately after pressing and still fail later. That's why “lifetime durability” is a weak buying criterion unless the provider explains the fabric, wash method, adhesive system, and press profile behind the claim. Real garments face abrasion, detergent, heat, stretching, and repeated folding. A professional service should discuss those variables instead of presenting wash resistance as a single unconditional outcome.
Independent testing found that the most durable samples in one study included screen-printed and DTF prints that survived 20 wash cycles, as reported in the published textile durability study. A separate durability discussion reported that DTF can show edge cracking around 35 washes and corner peeling by wash 50 under some conditions, using the same supporting source. Those observations don't define the life of every DTF transfer. They show why a buyer should distinguish between a tested sample and a broad marketing promise.
The variables behind failure
Adhesive quality affects whether the printed layer stays anchored after laundering. Poor powder coverage, contamination, or incomplete curing can leave weak zones that later lift.
Press calibration matters just as much. Heat, dwell time, and pressure must work together. If the operator applies the same profile to a thin polyester performance shirt, a heavy cotton hoodie, and a textured blend, one of those items may receive the wrong amount of energy or compression.
Fabric composition and surface texture change the contact area available to the adhesive. A smooth, stable textile usually behaves differently from a stretchy or heavily textured one. Even a strong transfer can fail when the garment moves more than the adhesive layer can tolerate.
How a shop should test
Before releasing a new design, press it on the actual blank rather than a convenient substitute. Inspect the edges after cooling, perform a stretch check appropriate to the fabric, and wash the sample according to the care instructions you intend to give customers. Record the press setting and garment style so a successful result can be repeated.
Tell customers to follow the garment and transfer care guidance. Turning garments inside out, avoiding excessive heat, and limiting abrasive washing practices can help protect the print, but don't use care instructions to excuse an under-cured or poorly pressed transfer. Quality control starts with the production profile.
File Preparation and Choosing the Right Provider
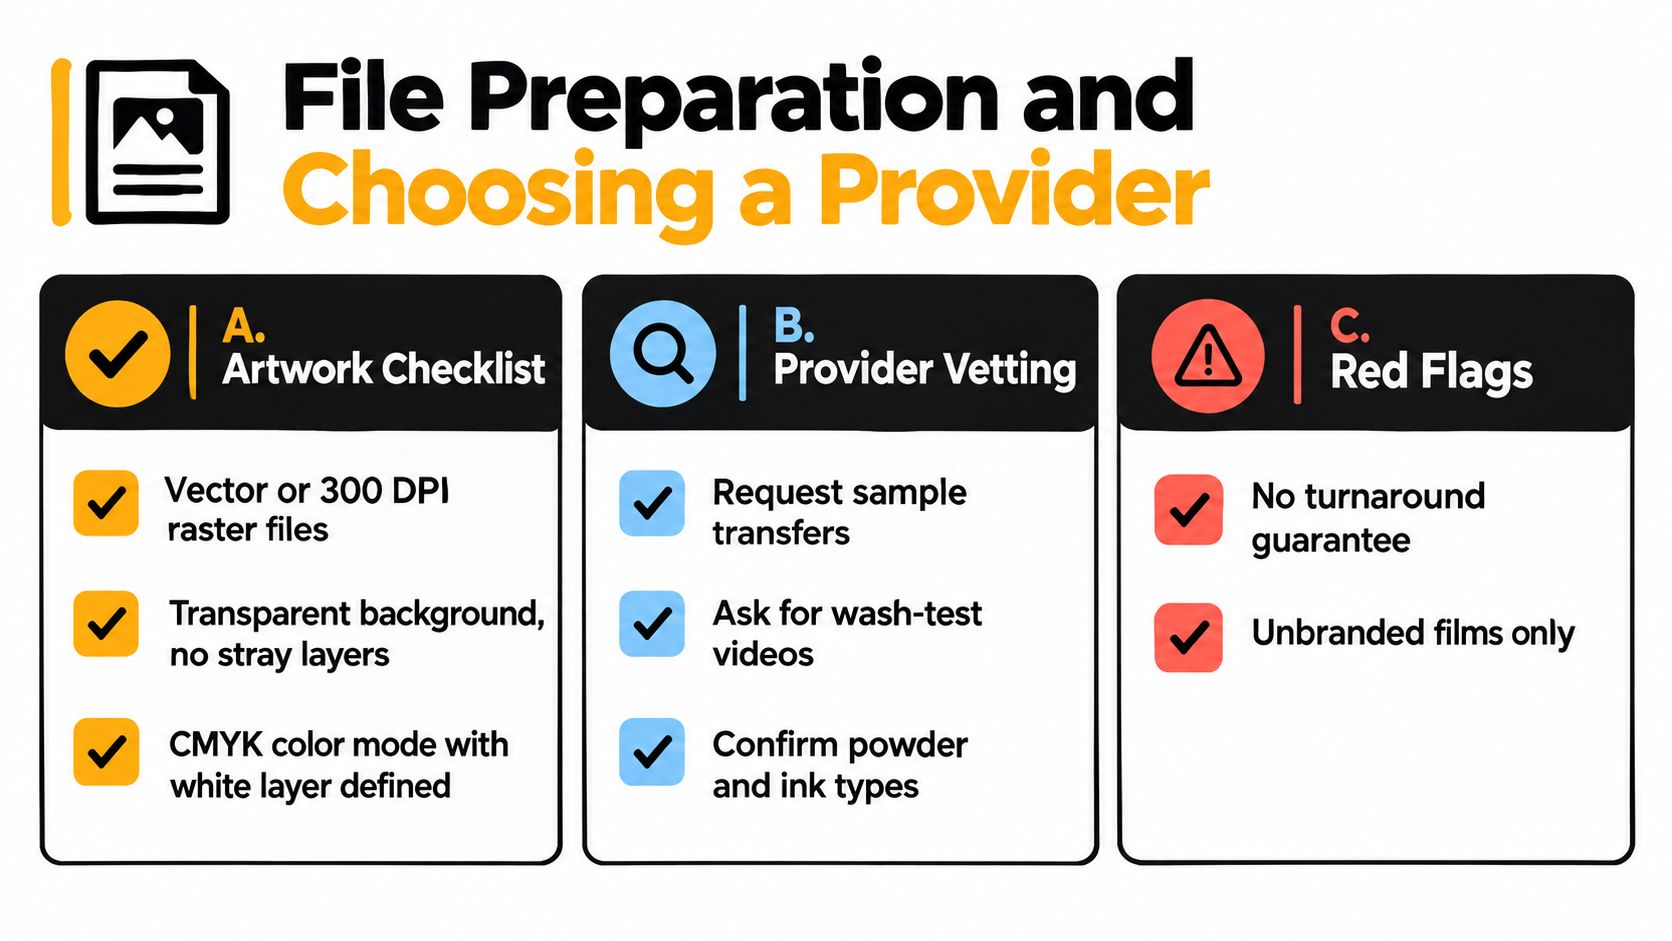
The cleanest production line can't rescue a damaged file. Start with the artwork, not the checkout page. Your design should have a transparent background, no hidden stray elements, and enough resolution to preserve small type, smooth curves, and gradients at the final print size. Vector artwork is useful for logos and lettering, while a high-resolution raster file can work well for illustrated or photographic designs.
Prepare the artwork deliberately
Use a file format your provider confirms it can process. Common options include PNG, PDF, and AI, but acceptance rules differ between shops and upload systems. Don't mirror the image before uploading unless the provider specifically instructs you to do so. Professional workflows may handle orientation automatically, and a file mirrored twice will press backward.
Check these details before submission:
- Transparency: Remove the background rather than hiding it under a white rectangle.
- Edges: Inspect fine outlines and small counters in letters at actual print size.
- Color: Confirm how the provider interprets RGB artwork and whether it creates the white layer automatically.
- Scale: Specify the finished width or height, not just the canvas dimensions.
- Layout: Keep separate designs clearly spaced and label variations when a gang sheet contains multiple graphics.
A mockup can confirm placement, but it isn't a substitute for a physical press test. Metallic effects, simulated transparency, and very thin lines may print differently from how they appear on a backlit monitor.
Vet the service, not just the website
Ask a provider how it controls white ink, powder coverage, curing, and press instructions. Request a sample transfer or order a small test before committing to a launch. You want to evaluate edge definition, color density, stretch behavior, and release from the film, not just the image shown online.
A reliable supplier should explain the recommended temperature, time, and pressure for each relevant material. It should also tell you how to store transfers before pressing, how to separate a gang sheet, and what to do if a transfer arrives damaged. Clear answers are more valuable than a long list of printer specifications.
Look for:
- A proofing process that catches sizing and transparency errors.
- Clear application instructions tied to substrates.
- Responsive support when a garment behaves differently from the sample.
- Consistent packaging and labeling for multi-design orders.
- Straightforward shipping and pickup terms that let you plan production.
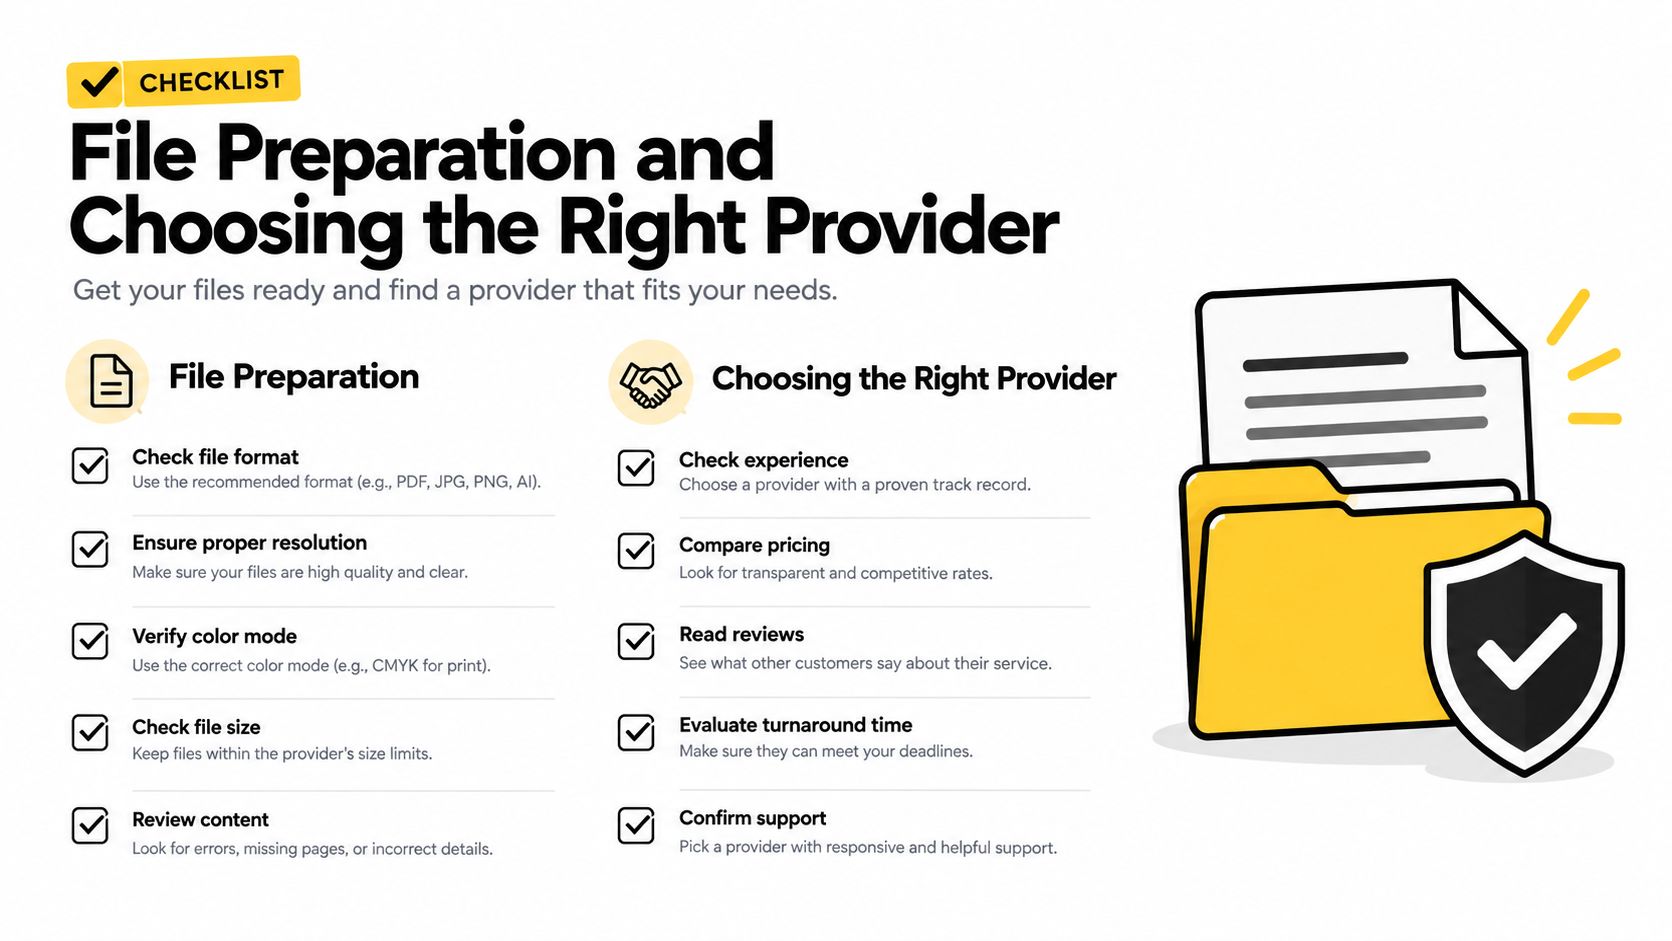
The file preparation and provider checklist gives you a compact reference for the final upload and vetting pass. Use it before every new design family, especially when several people share responsibility for artwork.
Scaling Your Custom Merchandise and Apparel Lines
A dependable transfer workflow does more than solve a printing problem. It lets a small brand separate design testing, inventory planning, and final decoration into manageable decisions. You can validate a graphic on a few garments, keep the transfer artwork organized, and press units as orders arrive instead of filling a storeroom with every size and color combination.
Gang sheets support that flexibility when the layout is planned around real products. Standard textile DTF handles detailed, full-color artwork on suitable garments, while UV DTF can add coordinated branding to smooth hard goods. The result is a broader merchandise system without forcing every item through the same machine or application method.
Before your first production order, choose a small group of designs and define the finished dimensions for each one. Press samples on the exact blanks, record the successful settings, and wash-test the garments before publishing durability language. If you're still deciding what products belong in the collection, this explanation of how to define merch can help separate a coherent merchandise line from a random group of decorated items.
Your provider should make the process repeatable rather than mysterious. Keep approved files, transfer dimensions, garment references, press profiles, and care guidance in one place. That documentation becomes especially valuable when you add a helper, repeat a seasonal design, or move from one-off orders to a consistent apparel line.
Raccoon Transfers offers custom DTF and UV DTF transfers for apparel and smooth hard surfaces, with gang sheet and size-based ordering, ready-to-press application, and support for artwork and heat-press instructions. Visit Raccoon Transfers to prepare a test order, compare textile and hard-surface options, and build a more consistent production workflow.