
How to Heat Press a Shirt for Perfect Results
Learning how to heat press a shirt really comes down to nailing four key stages: getting your design ready, dialing in the right machine settings, aligning the transfer perfectly, and the final press itself. It’s a lot like following a recipe—if you skip a step or get an ingredient wrong, the final result just won't be the same. Mastering each part is what makes a custom shirt look truly professional and hold up wash after wash.
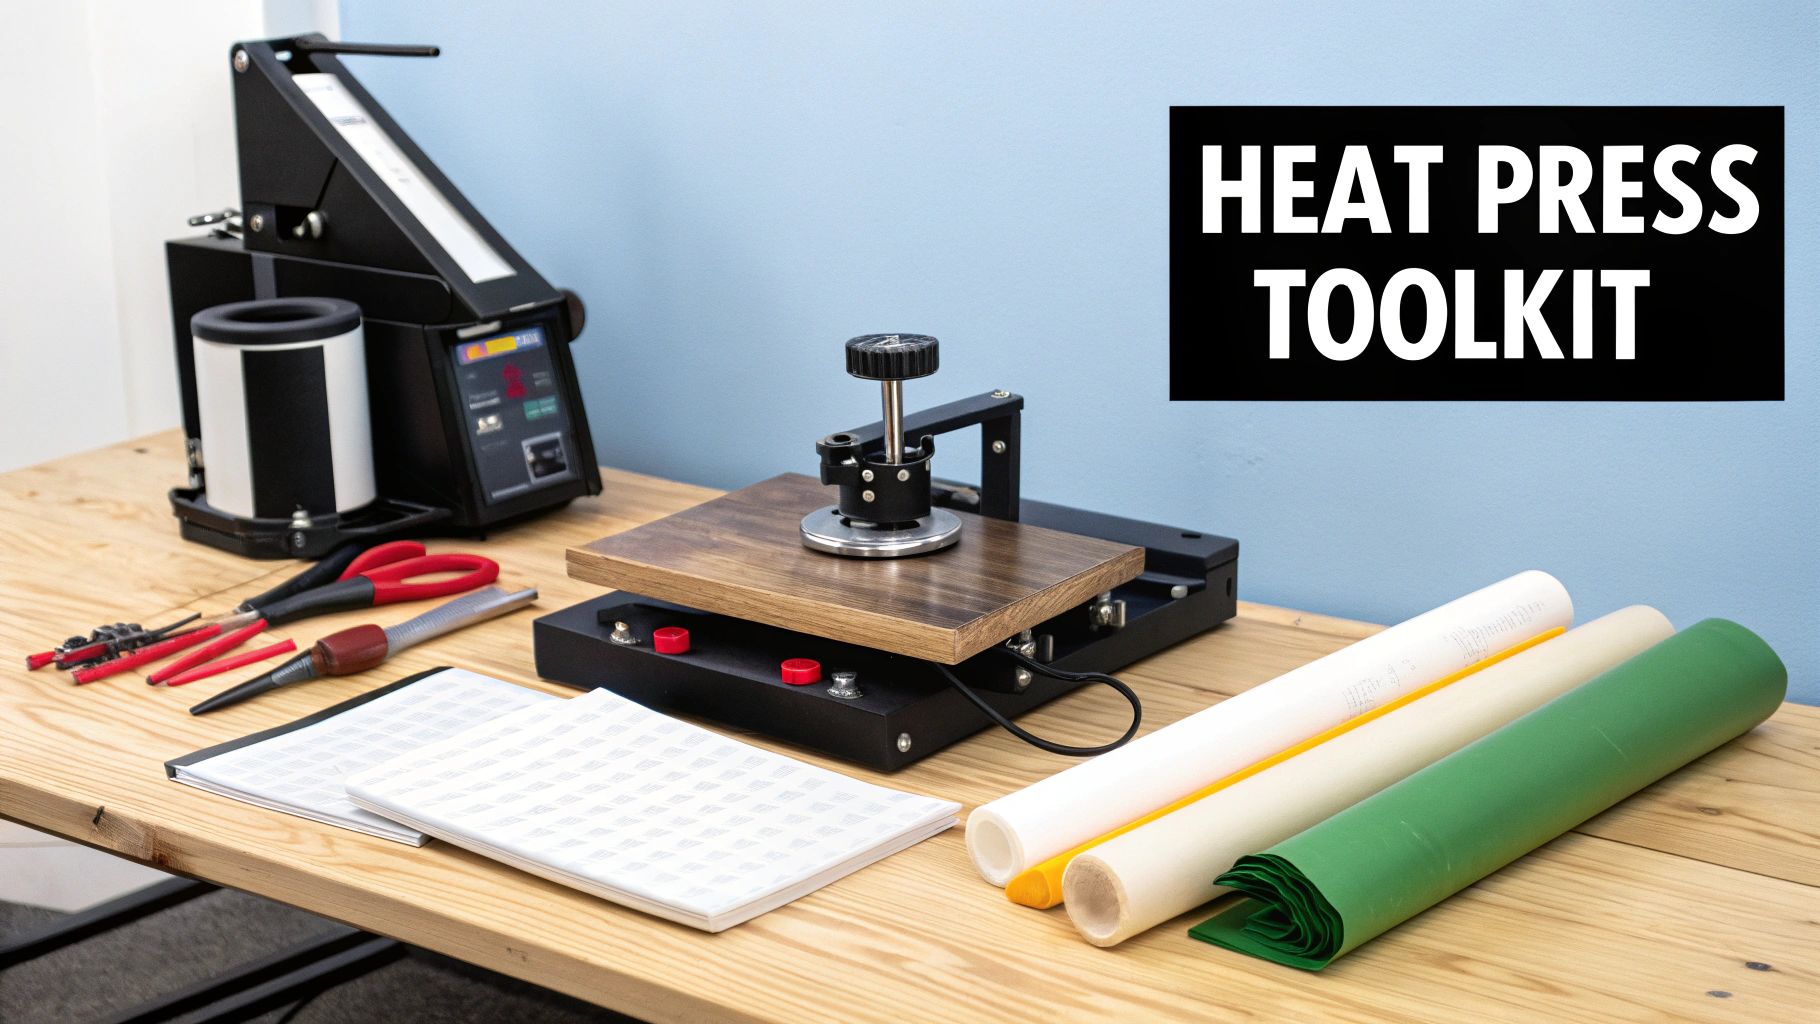
Setting Up Your Heat Press Toolkit
Before you even think about pressing your first shirt, let's talk gear. Having the right tools on hand is what separates frustrating mistakes from flawless, sellable products. This isn't just a list of things to buy; it's about understanding why each piece is so important for getting that clean, professional finish.
The Heart Of The Operation: Your Heat Press
The heat press is your workhorse. If you're just starting out, a clamshell press is a great choice—they don't take up much space and are perfect for standard t-shirts. For more flexibility, a swing-away model gives you better access and clearance, which is a lifesaver when you're working with thicker items like hoodies.
No matter which style you choose, there are two non-negotiables: the heat plates must distribute heat evenly, and the digital timer and temperature controls need to be accurate. If you need help deciding, check out our guide on the best heat press machine for shirts to find a model that fits your goals and budget.
To give you a quick reference, here's a checklist that covers the entire process from start to finish.
Quick Start Heat Pressing Checklist
This table breaks down the essential stages for a successful application. Think of it as your cheat sheet for every single press.
| Stage | Key Action | Why It's Important |
|---|---|---|
| Preparation | Gather all tools, pre-press the garment, and prepare the transfer. | Sets the foundation for a smooth, error-free process. |
| Settings | Set the correct temperature, time, and pressure for your specific material. | Prevents scorching, under-curing, or poor adhesion. |
| Alignment | Use rulers and landmarks to center the design on the shirt. | Ensures a professional, well-placed final product. |
| Pressing | Apply heat and pressure for the specified duration. | Bonds the transfer to the fabric fibers permanently. |
| Finishing | Peel the carrier sheet (hot or cold peel) and perform a post-press. | Cures the ink or vinyl and enhances durability. |
Having this workflow down is what allows you to work efficiently and consistently every time.
The Unsung Heroes: Must-Have Accessories
Beyond the machine, a few small tools make a huge difference in your final quality. Don't overlook these—they’re the secret to a truly professional job.
- Weeding Tools: For anyone working with vinyl, a sharp, pointed tool is your best friend. It’s absolutely essential for cleaning out the negative space in your design, especially with tiny letters or intricate graphics.
- Heat-Resistant Tape: This stuff is magic. It holds your transfer exactly where you want it, preventing any slipping or shifting when you close the press. This is how you avoid "ghosting" and crooked designs.
- Teflon Sheets or Parchment Paper: Always place one of these protective sheets over your transfer. It acts as a barrier, shielding your shirt from scorch marks and protecting your heat platen from any ink or adhesive residue.
Success in heat pressing is built on having the right tools ready before you even plug the machine in. Preparation prevents panic and ensures a clean, professional outcome every single time.
Getting your setup right from the start is more important than ever. The demand for personalized apparel is exploding, with the global custom t-shirt printing market expected to hit USD 18.32 billion by 2034. Having a reliable and complete toolkit means you're ready to meet that demand head-on.
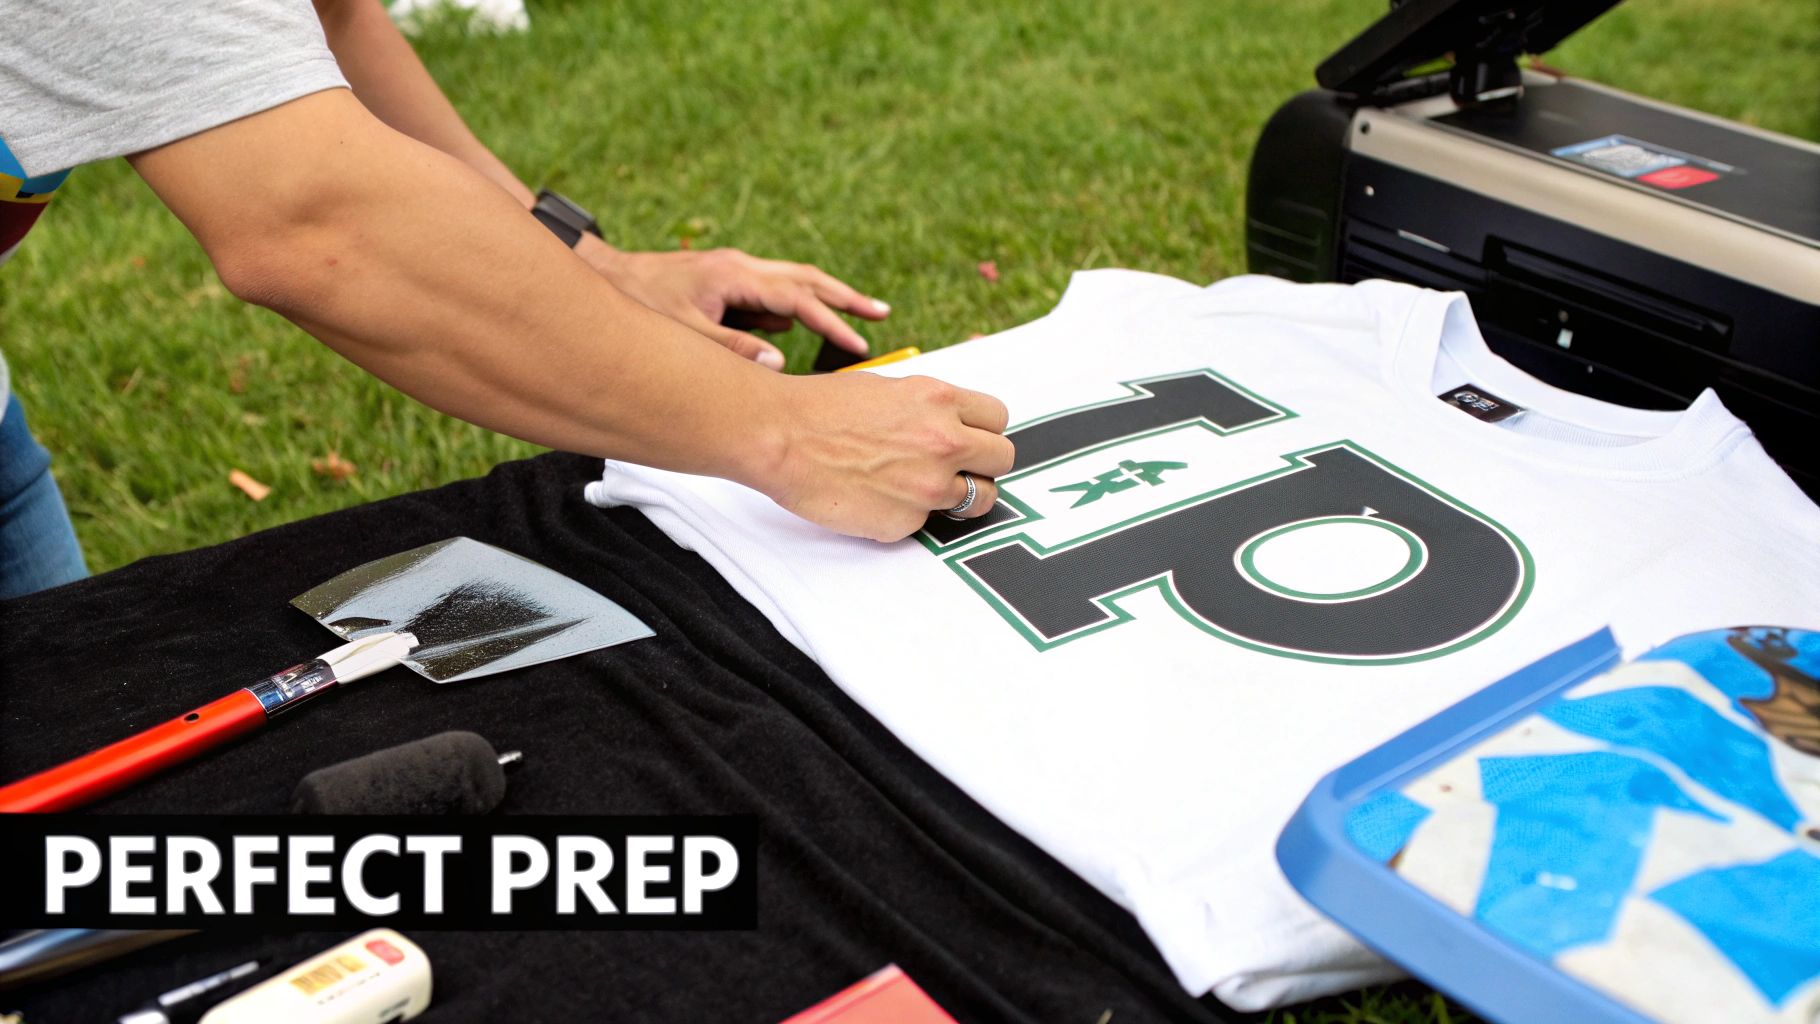
Getting Your Shirt and Design Ready for a Flawless Press
Honestly, a professional-looking heat-pressed shirt is made—or ruined—long before you even turn the press on. This whole prep stage is where you build the foundation for a sharp, long-lasting, and perfectly centered design. I've seen it time and time again: rushing this part is the fastest way to waste a perfectly good shirt and some pricey vinyl.
The classic rookie mistake? Forgetting to mirror the design before cutting. It happens to everyone at least once. With heat transfer vinyl (HTV), you're cutting into the back of the material, so your design has to be flipped horizontally. If you don't, any words or logos will come out completely backward on the shirt. Always double-check that "mirror" box in your software!
Weeding Your Design Like a Pro
After your vinyl is cut, it's time for weeding—the often tedious process of removing all the extra vinyl that isn't part of your final graphic. If you're working with a design full of tiny letters or super detailed lines, this can easily be the most time-consuming part of the job.
You absolutely need a sharp weeding tool; it's non-negotiable. I also highly recommend getting a light pad to place under the vinyl. It illuminates the cut lines and makes a world of difference. The key is to work slowly and carefully, pulling the excess vinyl away at about a 45-degree angle.
Here are a few tips I've picked up over the years:
- Start at an outside corner to peel off the biggest piece of negative space first. It's so satisfying.
- Use the tip of your tool to hold down small pieces, like the insides of letters ("o," "a," "e"), while you pull the main sheet away.
- Keep a sticky scrap of vinyl on your wrist or desk. You can just tap the tiny weeded bits onto it to keep your workspace from getting messy.
Once you get really good at creating your own graphics, you might even look into how to sell digital art and turn your skills into another income stream.
The Make-or-Break Pre-Press
Whatever you do, don't skip the pre-press. I can't stress this enough. Shirts, even brand new ones right out of the package, are full of hidden moisture and wrinkles that will absolutely sabotage your transfer. That moisture turns into steam under the heat, which is the enemy of a good bond between the vinyl's adhesive and the fabric.
The fix is simple. Just lay the shirt flat on your press and press it for 5-10 seconds at the same temperature you'll be using for the vinyl. This quick step zaps the moisture, smooths out the fibers, and gives you a perfect canvas to work with.
Taking ten seconds to do this can be the difference between a design that peels after one wash and one that looks great for years. The fabric itself plays a huge role, too. For a deep dive, check out our guide on the best fabric for t-shirts.
This attention to detail is what defines modern apparel decoration. The global market for heat transfer film is actually expected to hit USD 4.1 billion by 2035, largely because it's so much more flexible and faster than older methods. You can read more about these market trends and insights on futuremarketinsights.com.
Nailing Your Heat Press Time and Temperature
This is where the magic really happens. Getting your time, temperature, and pressure settings just right is the single most important part of creating a lasting design. These three settings are a team—if one is off, the whole project can fail. Don't think of it as a rigid formula; it’s more like a recipe that you tweak based on what you're cooking with, which in this case, is your shirt and your transfer.
One of the biggest mistakes I see beginners make is using the same settings for every single material. A classic cotton tee needs a totally different approach than a heat-sensitive polyester performance shirt. Get this wrong, and you’re looking at scorched fabric, melted vinyl, or a design that starts peeling after the first wash.
The Big Three: Temperature, Time, and Pressure
Each of these settings plays a unique and critical role in how your design sticks to the fabric.
- Temperature: This is what activates the adhesive on the back of your heat transfer material. If it’s too low, the glue won't melt enough to grab onto the fabric fibers. Too high, and you can scorch the shirt or even melt the transfer itself into a gooey mess.
- Time: This is simply how long the heat is applied. You need just enough time for the heat to soak through the transfer and fully activate the adhesive. Press for too short a time, and you get a weak bond. Too long, and you risk damaging both the garment and the design.
- Pressure: This is the force that pushes the melted adhesive deep into the fabric's weave. The right pressure ensures a strong, even bond that can handle stretching and washing without a problem.
Getting these right is a straightforward, three-part process. This flow chart breaks down the fundamental steps for every single project.
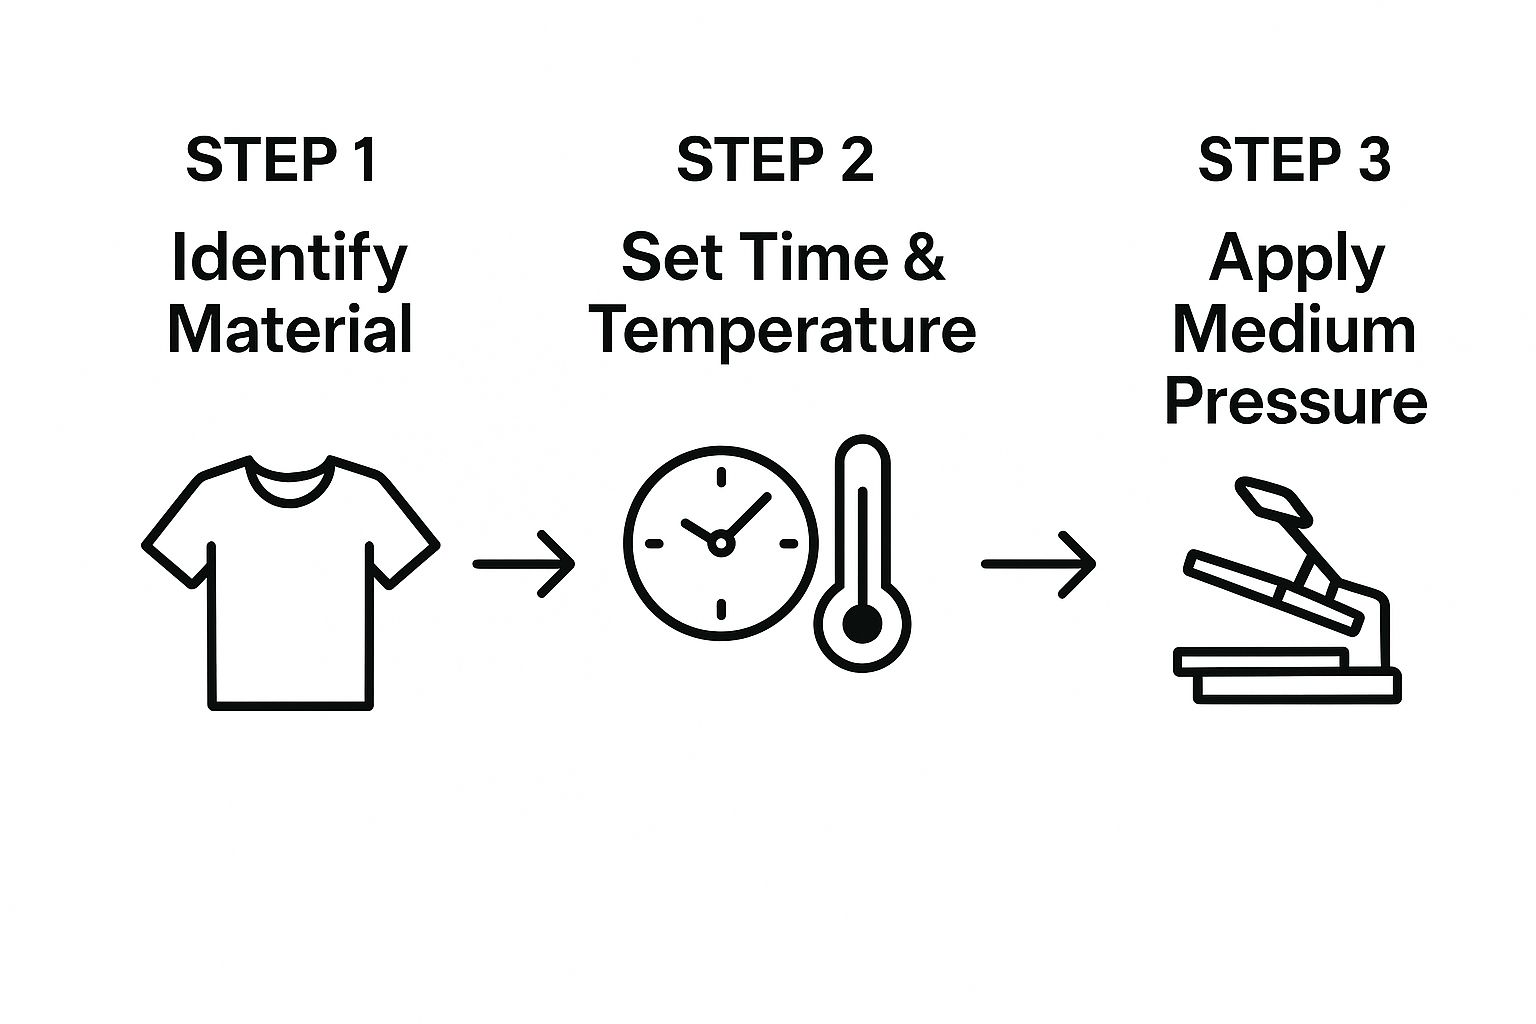
As the visual shows, it all starts with identifying your material. That simple first step dictates your machine's settings and the pressure you'll need for a perfect press.
Adapting Settings to Different Materials
So, how do you find the right numbers? Your best friend here is the manufacturer of your transfer material. They’ve done the testing and provide the best starting points for their products. For a great all-in-one resource, check out our comprehensive heat press temperature chart for specific settings across tons of fabrics and vinyls.
Let's walk through a real-world example. Say you're pressing a standard HTV design onto a 100% cotton shirt. For this, you’ll typically set your press to around 305–315°F (152–157°C) and press for 10–15 seconds using medium pressure.
Now, let's switch to a 100% polyester athletic shirt. Polyester scorches easily, leaving a permanent shiny outline of your press platen if you're not careful. To avoid that, you'd dial the temperature way down to 270–280°F (132–138°C) and shorten the press time to just 8–10 seconds.
Pro Tip: Pressure is often the most confusing setting. For "medium pressure," you should need a firm, two-handed push to close the press, but you shouldn't have to throw your whole body into it. It should clamp down with a solid feel, not a struggle.
To make things easier, here's a quick reference table for some of the most common materials you'll encounter.
Heat Press Settings for Common Materials
This table provides a great starting point for dialing in your settings. Always remember to check the specific recommendations from your vinyl or transfer manufacturer, as they can vary slightly.
| Material Type | Temperature Range (°F/°C) | Press Time (Seconds) | Pressure Level | Peel Type (Hot/Cold) |
|---|---|---|---|---|
| 100% Cotton | 305-320°F / 152-160°C | 10-15 | Medium to Firm | Hot or Cold |
| 100% Polyester | 270-290°F / 132-143°C | 8-12 | Light to Medium | Warm |
| 50/50 Cotton/Poly Blend | 290-305°F / 143-152°C | 10-15 | Medium | Warm or Cold |
| Tri-Blends | 275-290°F / 135-143°C | 10-12 | Medium | Warm |
| Glitter HTV | 320-330°F / 160-165°C | 15-20 | Firm | Warm |
| Stretch HTV | 290-300°F / 143-149°C | 12-15 | Medium | Hot or Cold |
| Flock HTV | 310-320°F / 154-160°C | 15 | Medium | Cold |
Think of these as reliable baselines. Your specific heat press, environment, and materials might require small adjustments for that perfect result.
The Nuances of Different Vinyl Types
The type of vinyl you're using adds another layer to the equation. It's not just about the shirt!
- Glitter HTV: This stuff is thick. It needs a higher temperature (around 320°F / 160°C) and a longer press time (15–20 seconds) to make sure the heat fully penetrates all those sparkly layers.
- Flock HTV: Known for its soft, fuzzy texture, this vinyl often needs less time but requires firm pressure to properly embed its suede-like fibers into the garment.
- Stretch HTV: This is your go-to for athletic wear. It’s designed to be applied at a lower temperature to avoid melting or damaging sensitive spandex-blend fabrics.
When in doubt, always do a test press. Grab a scrap piece of the same fabric or use an inconspicuous area like an inside hem. A few seconds of testing can save you from ruining a perfectly good shirt and wasting expensive materials. Mastering these settings is what separates the novices from the pros.
Getting Your Design Aligned and Pressed Perfectly
A great design with the right settings won't mean a thing if it ends up crooked. Honestly, getting your placement right is what really separates a project that looks homemade from a shirt that looks like it came from a pro shop. This is where we move from prep work to the real action.
Trust me, just eyeballing the placement is a recipe for frustration and wasted materials. A couple of simple techniques will get you straight, centered results every single time. Mastering how to heat press a shirt really comes down to these small but critical alignment steps.
Finding the Center and Placing Your Transfer
The most reliable way to find the center of your shirt is what I call the "fold-and-press" method. It’s simple.
Lay your pre-pressed shirt flat on your heat press, fold it in half lengthwise (just match up the shoulder seams), and give it a quick 2-3 second press. This leaves a faint but perfectly straight centerline down the middle of the shirt.
Next, you can do the same thing with your transfer. Gently fold it in half, making a tiny crease in the carrier sheet at the top and bottom. Now you just have to line up the creases on your transfer with the centerline on the shirt. Boom—perfect vertical placement.
A solid rule of thumb for standard chest designs is to place the top of the graphic about three inches down from the collar. For most adult shirts, this puts the design right in that sweet spot on the chest.
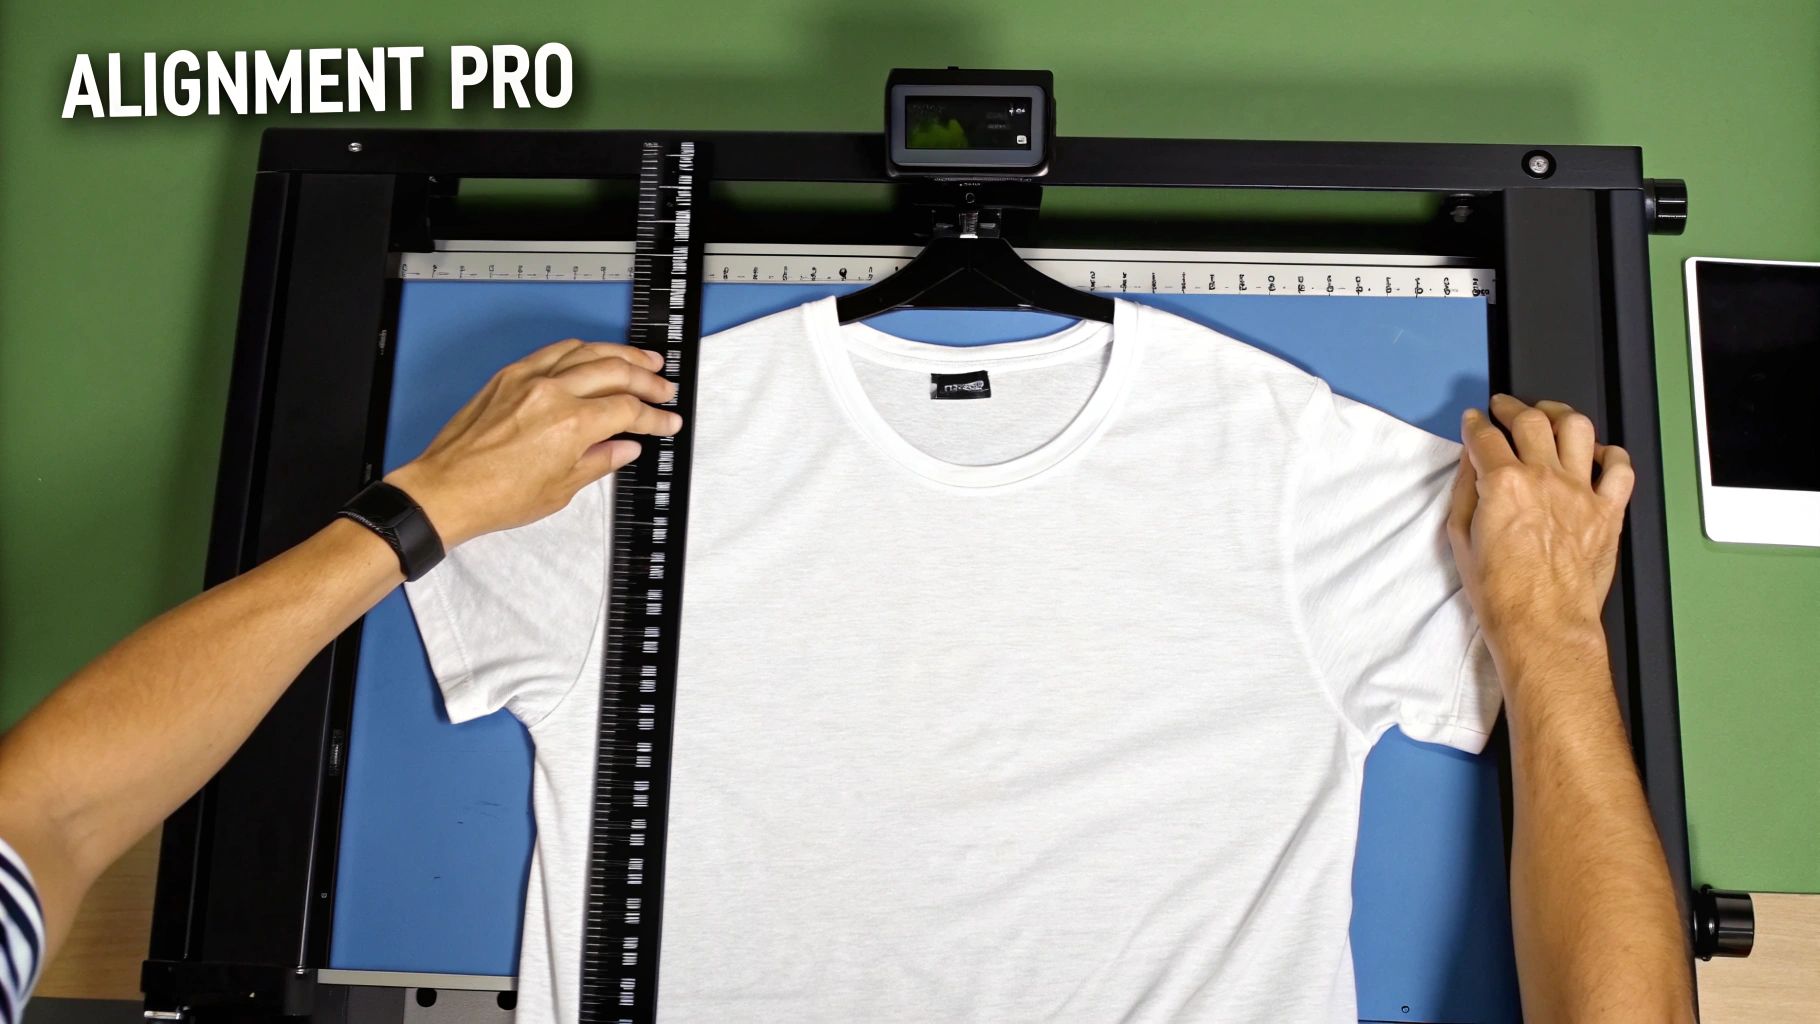
My Favorite Alignment Tools and Tricks
For even better precision, especially when you're working with left-chest logos or tricky layouts, a few tools and old-school tricks can be a lifesaver.
- T-Shirt Rulers: These are a game-changer. They're basically clear, L-shaped, or grid-style guides made specifically for shirt alignment. They take all the guesswork out of finding the center and making sure your design is level.
- The Four-Finger Rule: Here's a classic trick for placing left-chest logos. Just lay four of your fingers (no thumb!) across your chest right below the collar. The spot where your pinky lands is usually the perfect height for the top of the logo.
- Heat-Resistant Tape: Once you've got your design exactly where you want it, use a couple of small pieces of heat-resistant tape to hold it in place. This is a must-do step because it stops the transfer from shifting when you close the press.
The Final Press and That All-Important Peel
With your design perfectly aligned and taped down, it’s go-time. Cover the design with your Teflon sheet or a piece of parchment paper and close the press. Let it run for the time and temperature you figured out earlier.
When that timer beeps, open the press and get ready for the most critical moment: the peel. This is where you pull off the clear carrier sheet, and the timing is everything. Transfers are either hot peel or cold peel, and if you get it wrong, you can easily ruin the shirt.
- Hot Peel: This means you peel the carrier sheet off immediately after the press opens, while it's all still hot. This usually leaves a softer, more matte finish that feels integrated into the fabric.
- Cold Peel: You have to let the shirt and the transfer cool down completely before you even think about touching that carrier sheet. Peeling it while it's still warm will just pull the design right off. This method often gives you a slightly glossier finish.
Always, always check the instructions from your vinyl manufacturer to know which type you have. If you're ever in doubt, just wait for it to cool. It's much safer to peel late than to peel too early.
After the peel, a lot of pros (myself included) will do a quick 2-3 second post-press. Just lay the Teflon sheet directly over the exposed design and press it one last time. This really helps seal the graphic into the fabric fibers for maximum durability.
What to Do When Things Go Wrong
Even with the most careful prep work, you're going to have a press that doesn't turn out right. It happens to everyone. Think of this as your go-to guide for those frustrating moments. When a design fails, the problem almost always comes down to one of the big three: temperature, time, or pressure.
The most common complaint I hear is vinyl peeling up after a single wash. This is the classic sign that something was off with your pressure or temperature. It means the adhesive on the back of the vinyl never got hot enough—or wasn't pushed deep enough into the fabric's weave—to form that permanent bond you're looking for. The first thing you should do is grab the instructions for your specific vinyl and double-check the recommended settings.
Peeling Vinyl and Sticking Issues
Let's say your settings are spot-on, but the vinyl still isn't sticking. The culprit is almost certainly pressure. The term "medium pressure" can be maddeningly vague because it feels different on every single machine.
You're looking for a solid thump when you lock the press down. It should take a firm, two-handed push to close it, but you shouldn't have to throw your whole body into it. If it's too easy, crank up the pressure.
Another headache is uneven sticking, where maybe the corners are lifting but the center of the design is stuck down tight. This is a dead giveaway that you're pressing over something uneven, like a collar, a seam, or a thick hem.
The solution here is a pressing pillow. These are heat-resistant foam pads that you slide inside the shirt. They elevate the print area, ensuring the platen makes clean, even contact only with the flat surface where your design is. Honestly, this simple tool is a total game-changer.
Dealing with Scorch Marks and "Ghosting"
Ever pull a shirt off the press and see a faint, shiny outline of the heat platen? That’s scorching, and it's especially common on polyester or poly-blend garments. It happens when your temperature is just too high for those delicate synthetic fibers.
The fix is simple: lower your temperature. For most polyester, you'll want to be in the 270-290°F (132-143°C) range. You might also need to shorten your press time slightly.
"Ghosting" is another common problem. This is when your design comes out with a blurry, shadowed edge. It's caused by the transfer paper shifting just a tiny bit as you open or close the press.
The easiest way to stop ghosting in its tracks is to use heat-resistant tape. Just use two small pieces to tack your transfer down to the shirt before you press. It guarantees nothing moves.
With the custom apparel market exploding—the heat press machine industry is on track to hit $2.8 billion in 2025 after sales jumped 53% recently—knowing how to fix these common issues is what separates the pros from the hobbyists. If you're interested, you can read more about the growth of the heat press machine market on Accio.com.
Got Questions About Heat Pressing Shirts? We've Got Answers.
When you're getting the hang of heat pressing, a few questions always pop up. It happens to everyone, from total beginners to people who've been at this for years. Let's tackle some of the most common ones so you can press with confidence.
Can I Just Use My Regular Iron Instead of a Heat Press?
I get this question all the time, and it's a tempting shortcut. But honestly, a household iron is just not the right tool for the job. You'll be setting yourself up for frustration.
An iron can't provide the two things that are absolutely essential for a design that lasts: consistent, even heat and uniform, measurable pressure.
Irons have notorious hot and cold spots. This means one part of your design might stick perfectly, while another corner starts peeling up after the first wash. And when it comes to pressure, you're just guessing.
My take: If you want a professional-looking shirt that actually holds up in the laundry, a heat press isn't a luxury—it's a must-have. It creates the perfect, controlled environment to lock that transfer into the fabric fibers for good.
How Do I Wash a Heat-Pressed Shirt So It Doesn't Peel?
You've done all the work to create a great-looking shirt; now you want it to last! Proper aftercare is just as critical as the pressing process itself. A few simple laundry habits will keep your creations looking brand new.
The most important thing you can do is turn the shirt inside out before washing. This is non-negotiable. It protects the design from getting scratched up and worn down by other clothes.
For maximum durability, just follow these simple guidelines:
- Stick to cold water on a gentle cycle.
- Use a mild detergent. Avoid bleach and fabric softeners like the plague, as they eat away at the transfer's adhesive.
- Hanging the shirt to dry is your best bet. If you must use a dryer, use the lowest heat setting possible.
- And whatever you do, never iron directly on the design itself.
Help! Why Is My Vinyl Wrinkling or Bubbling?
That sinking feeling when you lift the press and see bubbles or wrinkles in your design is the worst. Don't panic! It's almost always caused by one of three very common (and fixable) issues.
The number one culprit? Moisture. Even if a shirt feels dry, its fibers hold humidity. If you skip the pre-press, that moisture turns into steam, gets trapped under the vinyl, and creates bubbles. A quick 5-10 second pre-press solves this every single time.
Incorrect settings are a close second. Too much heat or too much time can literally scorch the adhesive, making it bubble up and look awful. Always double-check the recommended settings for the specific vinyl you're using.
Finally, watch out for uneven pressure. If you're pressing over a collar, seam, or zipper, the platen won't make even contact. This creates pockets where the vinyl wrinkles or doesn't stick at all. The easy fix here is a heat-resistant pressing pillow placed inside the shirt to raise the printing area and guarantee flat, even contact.
Ready to skip the tedious weeding and layering? Raccoon Transfers delivers top-quality Direct-to-Film (DTF) transfers that are ready to go right out of the box. Just upload your design, and we’ll send you vibrant, durable transfers that are a breeze to apply. Get started today at https://raccoontransfers.com.