
How to Use a Heat Press Machine for Perfect Prints
Using a heat press machine boils down to a simple formula: the right temperature, time, and pressure for your specific material. You'll start by pre-pressing your garment to get rid of any sneaky moisture, place your design, and then apply heat using a protective sheet. When the timer dings, you'll peel back the transfer paper based on its instructions—hot, warm, or cold peel.
Your First Press: From Unboxing to Confidence
So, you've got a brand new heat press machine sitting in your workshop. It's packed with potential, but let's be honest, it can look a little intimidating. The great news is that going from unboxing to your first perfect press is a lot simpler than it seems. Once you get the hang of the basic setup and controls, you'll be on your way.
Let’s walk through those first few steps together to get you pressing like a pro from day one.
Setting Up a Safe and Efficient Workspace
First things first, let's find the right spot for your new machine. A heat press needs a really sturdy, heat-resistant surface that won’t buckle under its weight or the pressure you’ll be applying. A solid workbench is perfect, but a heavy-duty table in a well-ventilated room also works great. Just avoid flimsy furniture or cramped corners where you can't move around easily.
You'll also want to make sure the power outlet can handle the machine's electrical demands. Nobody wants to be constantly resetting a tripped breaker. Most presses use a standard outlet, but it's always smart to double-check the manual. Keeping your supplies—blanks, transfers, and tools—organized and within arm's reach will make your workflow so much smoother (and safer).
Understanding Your Machine's Anatomy
Getting to know the main parts of your heat press is the fastest way to demystify the process. While every model has its quirks, they all share a few core components that you’ll be using every single time.
- Upper Platen: This is the hot part—the heated top plate that comes down to press your design.
- Lower Platen: The bottom plate, usually decked out with a silicone pad, is where your shirt or item rests.
- Pressure Adjustment Knob: Almost always found on top, this big knob is how you dial in the clamping force. Nailing the pressure is absolutely critical for a transfer that lasts.
- Control Panel: Your command center. This digital screen is where you'll set the two most important variables for any job: temperature and time.
Pro Tip: I like to think of these parts working together like a high-tech sandwich press. The platens are the hot surfaces, the control panel gives you the cooking instructions, and the pressure knob makes sure everything melts together perfectly.
The boom in custom apparel is no joke. It's why the heat transfer printing machine market was valued at a whopping $1.82 billion back in 2022. The demand for one-of-a-kind gear in fashion, sports, and small businesses is what keeps this industry growing.
Making the right choice from the start really sets you up for success. If you're still weighing your options, take a look at our guide on the best heat press machine for shirts to help you find the perfect fit.
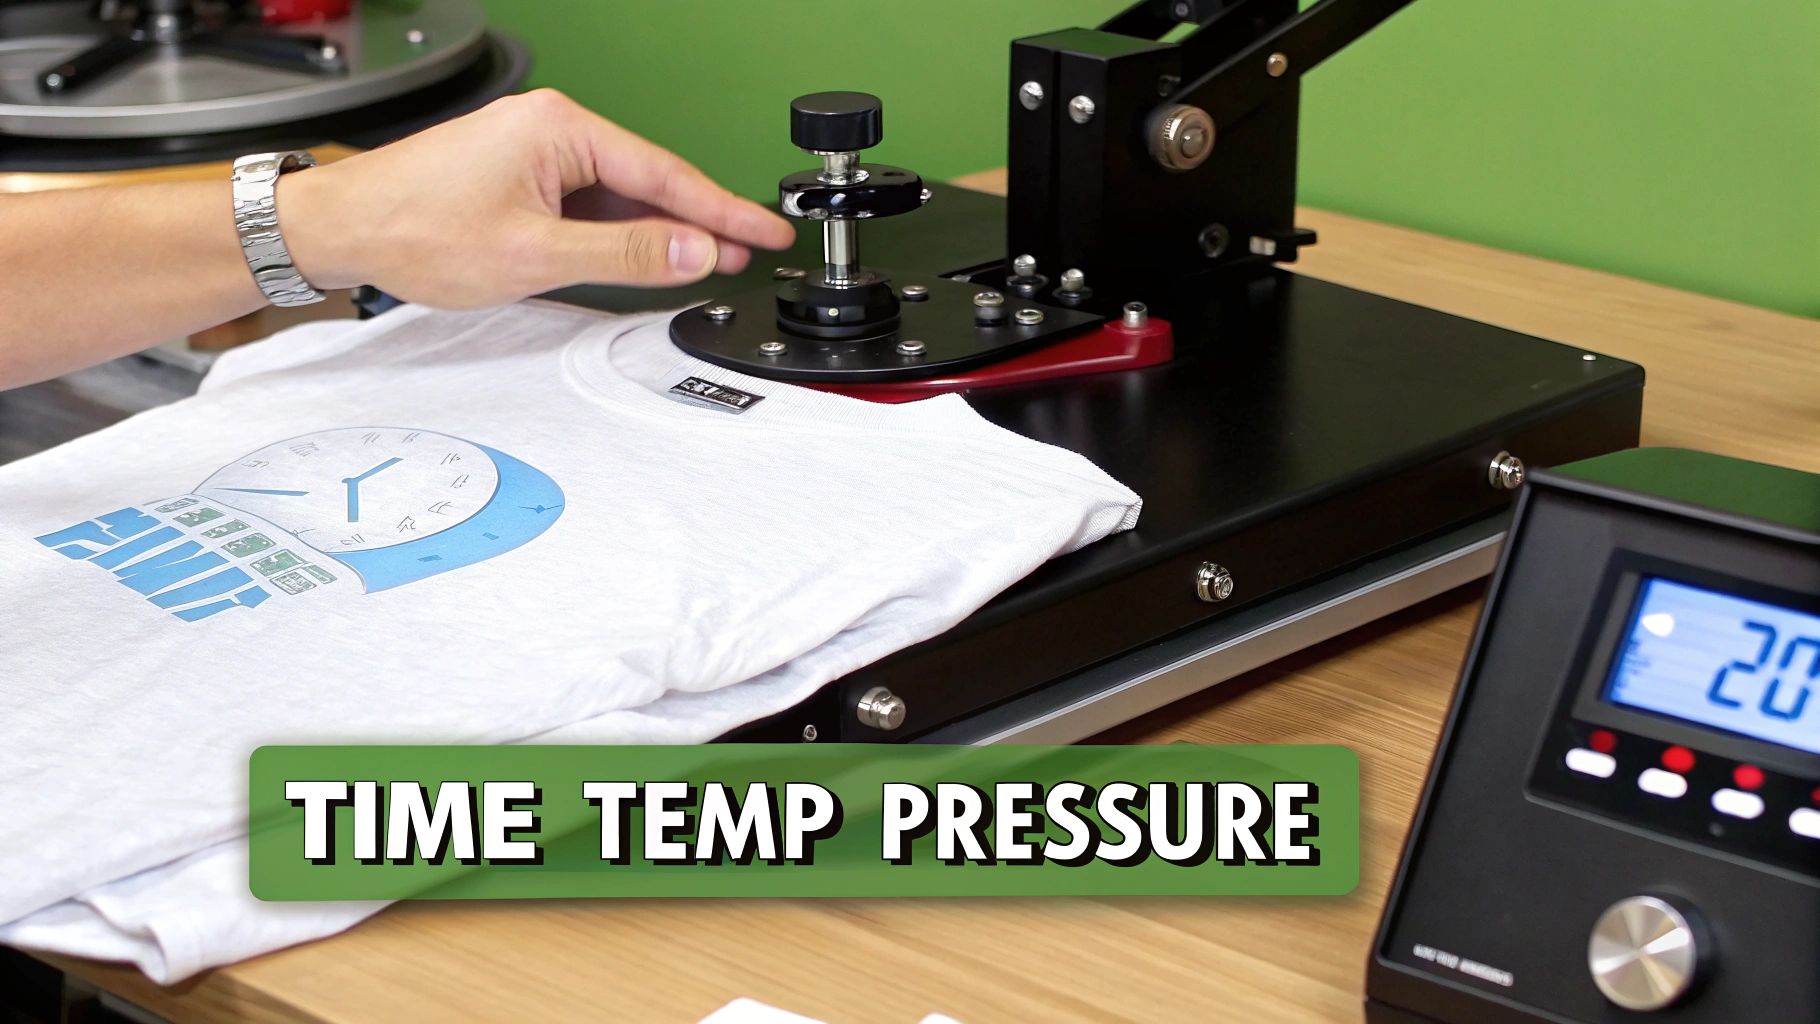
Dialing In Your Time, Temperature, and Pressure Settings
The real secret to prints that last isn’t just about the quality of your transfers or your machine—it’s about mastering the three pillars of heat pressing: time, temperature, and pressure. I like to think of these settings as a recipe. Too much heat will scorch the fabric, not enough time will cause peeling, and the wrong pressure creates uneven, disappointing results.
Getting a feel for the "why" behind these numbers is what separates the beginners from the pros. It's the difference between a shirt that looks amazing after 20 washes and one that cracks and peels on the first wear.
Cracking the Code on Temperature
Of the three, temperature is probably the most critical variable. It's what activates the adhesive on your transfer, allowing it to permanently bond with the fabric fibers. Different materials and different transfer types all have their own sweet spot.
For example, a standard heat transfer vinyl (HTV) on a cotton t-shirt usually calls for a temperature around 305-320°F (150-160°C). But if you're working with a polyester performance shirt for a sublimation project, you'll need to crank that heat way up to 385-400°F (195-205°C). That's what it takes to turn the solid ink into a gas that actually dyes the fabric.
Pro Tip: Don’t blindly trust the digital readout on a brand-new machine. I highly recommend investing in an infrared temperature gun to check the actual surface temperature of your platen. You might be surprised to find a discrepancy of 10-15 degrees, which can absolutely make or break a project.
Timing Is Everything
Once you’ve got the heat dialed in, the timer takes over. How long you press the garment determines if the adhesive has enough time to properly cure and create a solid bond. This setting is just as sensitive as the temperature.
Press for a few seconds too long, and you risk burning the garment or overheating the vinyl, which can leave a weird, glossy sheen. A few seconds too short, and the transfer won’t fully stick, leading to corners peeling up after the first wash. A typical HTV press might only need 10-15 seconds, while something like glitter or a specialty puff vinyl could require up to 20 seconds.
This delicate balance is a big reason why the custom apparel industry is thriving. With the global plate heat press market projected to hit $500 million in 2025, the demand for precise, reliable machines is only growing. The on-demand printing boom is fueled by creators who have mastered these exact settings. You can dive deeper into the research on the plate heat press market trends to see just how big this is getting.
Mastering the Feel of Pressure
Pressure is the most hands-on of the three settings, but it's just as vital. It’s what ensures the heat is applied evenly across the entire design, literally forcing the transfer material into the fabric’s weave for a bond that will last. Most machines have a manual adjustment knob, and terms like "light," "medium," and "firm" can be a little confusing at first.
Here’s a more practical way I think about it:
- Light Pressure: The upper platen just "kisses" the garment. This is often what you want for delicate fabrics or sublimation.
- Medium Pressure: This takes a little effort to close and lock the handle. It's the go-to setting for most of your standard HTV jobs.
- Firm Pressure: You’ll need to use some real muscle to lock this one down. This is for thicker materials like sweatshirts or specialty transfers like puff vinyl.
While these tips provide a great foundation, I've found that having a quick-reference guide on the wall is invaluable. Below is a simple table to get you started, but remember to always test your settings on a scrap piece of fabric first.
Quick Reference for Heat Press Settings
Use this table as a starting point. Always test on a scrap piece of fabric first, as materials and vinyl can vary.
| Material Type | Transfer Type | Temperature Range (°F/°C) | Time (Seconds) | Pressure Level |
|---|---|---|---|---|
| 100% Cotton | Standard HTV | 305-320°F / 150-160°C | 10-15 | Medium |
| 50/50 Blends | Standard HTV | 305-320°F / 150-160°C | 10-15 | Medium |
| 100% Polyester | Sublimation | 385-400°F / 195-205°C | 45-60 | Light-Medium |
| Spandex/Lycra | Stretch HTV | 290-310°F / 143-154°C | 8-12 | Medium |
| Nylon | Special HTV for Nylon | 275-300°F / 135-149°C | 10-15 | Medium |
| Sweatshirts | Puff/3D Vinyl | 320-330°F / 160-165°C | 8-10 | Firm |
To take the guesswork out of new projects, we’ve put together a far more detailed list. For a comprehensive breakdown of settings for dozens of materials, be sure to check out our complete heat press temperature chart. It’s a real lifesaver.
Prepping Your Design and Garment Like a Pro

A great press starts long before you ever lower the handle. I can't stress this enough: the way you prep your materials is just as crucial as the settings on your machine. So many beginners get frustrated with peeling transfers or weird discoloration, and nine times out of ten, it’s because they rushed the prep work.
Think of it like cooking. You can have the best recipe in the world, but if your ingredients are off, the whole dish suffers. The same exact principle applies here.
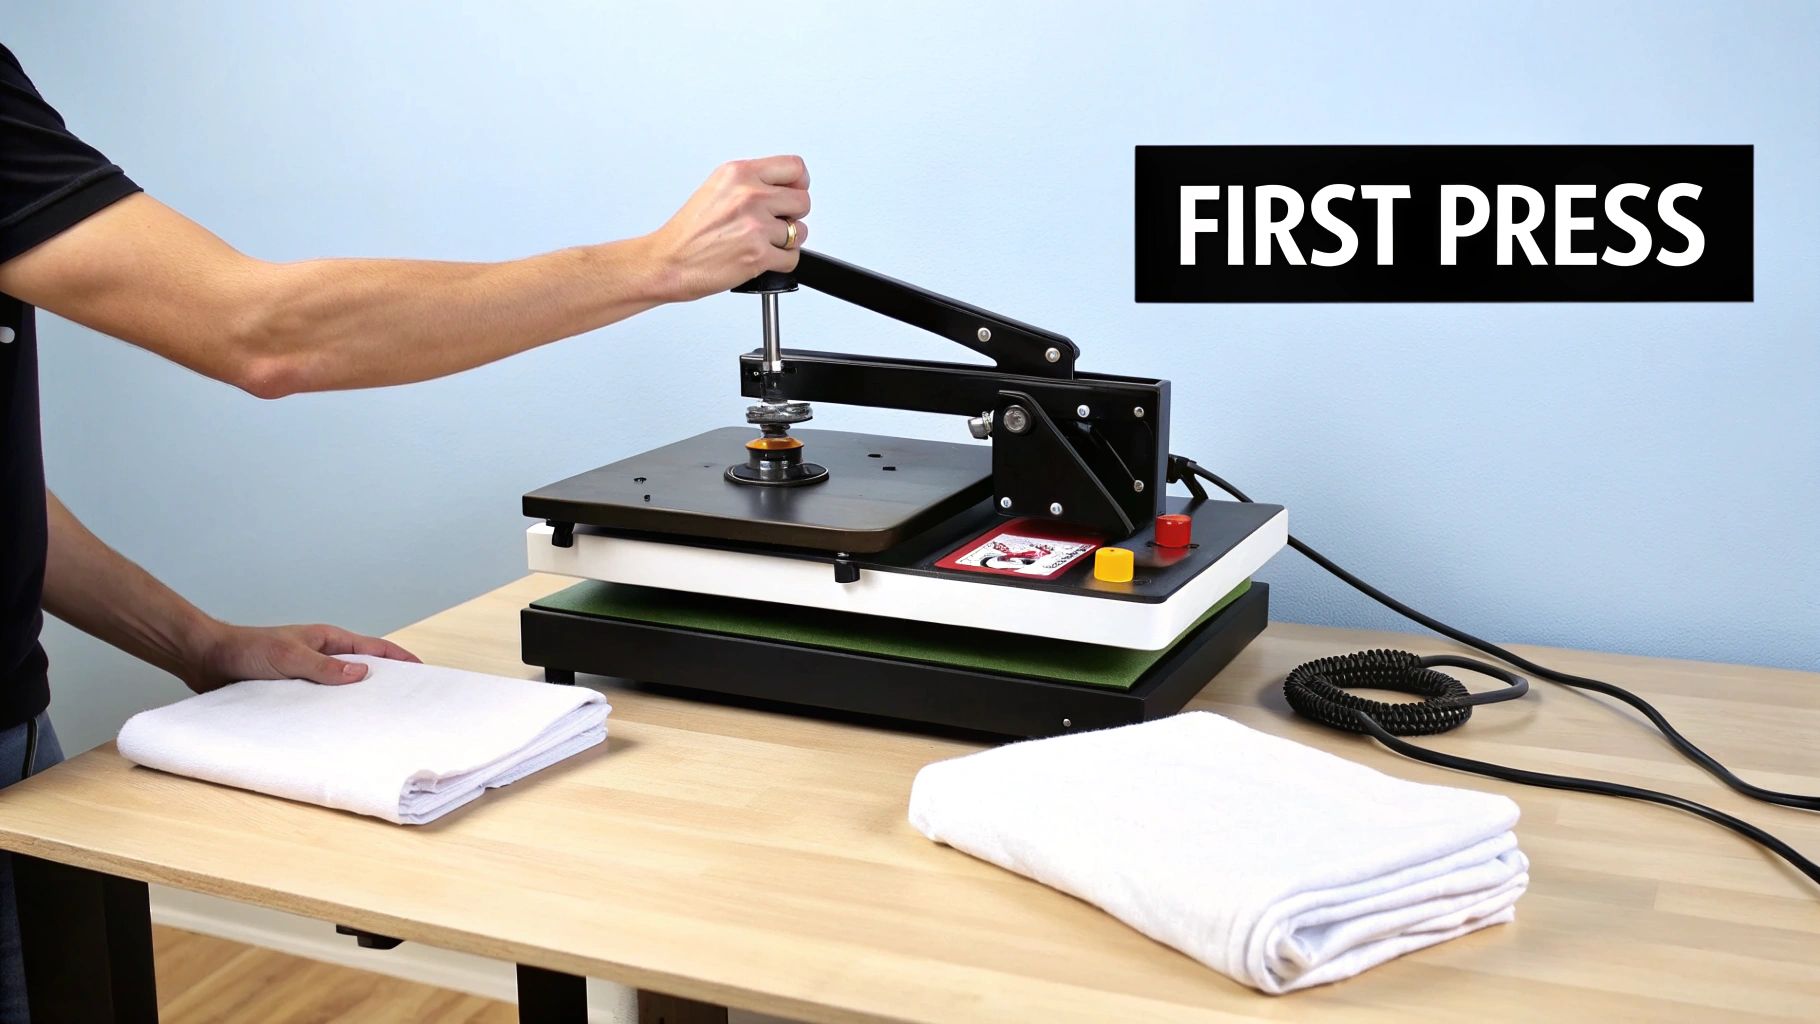
The Non-Negotiable Pre-Press Step
Every piece of fabric, even one that feels bone-dry right out of the plastic, has moisture and tiny wrinkles hiding in its fibers. If you try to press a design onto a damp or creased shirt, you’re setting yourself up for failure. That trapped moisture turns into steam, which gets in the way of the adhesive and stops it from bonding correctly.
This is why pre-pressing your garment is a must-do, every single time.
Just lay your blank item on the bottom platen and press it for a quick 5-10 seconds at whatever temperature you're about to use. This simple action is a game-changer. It zaps any lingering moisture and gives you a perfectly flat, smooth surface to work with—an ideal canvas for your transfer.
I’ve seen countless projects saved by this simple 10-second step. It’s the single best piece of advice for avoiding that dreaded "my vinyl is lifting" moment after the first wash. This is how you ensure professional, long-lasting adhesion.
Achieving Perfect Placement and Protection
Alright, your garment is prepped and ready. Now comes the fun part: positioning your design. Just eyeballing it is a risky move that often ends with a crooked logo. If you want to make products that look polished and professional, a couple of simple tools will be your best friends.
Here’s what I and other pros always have on hand for perfect alignment:
- T-Shirt Rulers/Alignment Tools: These guides are lifesavers. They take the guesswork out of finding the center of a shirt and help you place the design at the right distance from the collar.
- Heat-Resistant Tape: Once you’ve got the transfer exactly where you want it, lock it in place with a few small pieces of this tape. It’s a cheap and easy way to guarantee your design doesn’t shift an inch when you close the press.
- Teflon Sheets or Parchment Paper: Always, always, always place a protective sheet over your design before pressing. This is your shield. It stops ink from getting on your upper platen and protects the fabric from scorching.
Nailing the size and placement can feel a little tricky when you're starting out. For a deeper dive, check out our guide on choosing the right graphic size for t-shirts. And while a heat press is a fantastic tool, it's always helpful to understand the broader context of transferring designs onto fabric to expand your skills.
Get these prep steps down, and you'll be creating the perfect conditions for a flawless press every single time.
Bringing It All Together: The Perfect Press
Alright, your machine is hot, your settings are locked in, and your garment is prepped and ready to go. This is the moment where all that careful setup pays off. The actual press takes just a few seconds, but it's the little details right now that separate an amateur job from a professional-looking product.
Let's get this done. Your pre-pressed shirt should still be sitting on the lower platen. Carefully position your transfer exactly where you want it. I can't stress this next part enough: use a couple of small pieces of heat-resistant tape to hold it in place. It’s a tiny step that prevents the nightmare of a design shifting as you close the press.
Once the transfer is secure, lay your protective sheet over everything. A Teflon sheet is the industry standard, but a simple piece of parchment paper will do the trick just fine. This little barrier protects your garment from scorching and keeps your heat platen clean from any stray ink.
Locking It Down and Counting It Down
With your layered masterpiece ready, it's time to apply the heat. Grab the handle and pull the upper platen down firmly until it locks. You should feel that pressure you set earlier. If it snaps shut too easily or you have to wrestle it, revisit your pressure setting. The second it locks, the timer should kick on and start its countdown.
It’s amazing to think that this simple action is part of a massive global industry. Heat sealing machines—the bigger category your press falls into—were valued at a staggering $2.3 billion back in 2025. The precision you're using right now is what drives that market. You can actually get a deeper look into the future of heat sealing technology on Future Market Insights.
When that timer finally beeps, don't rush. Open the press with a smooth, controlled motion—remember, that platen is dangerously hot. Your work isn't over just yet, though. Now comes the make-or-break moment: the peel.
The Art of the Peel: Hot, Warm, or Cold?
How you remove the transfer's backing paper (the carrier sheet) is just as critical as the press itself. Your transfer material will specify whether it needs a "hot peel," "warm peel," or "cold peel." Getting this wrong is the fastest way to stretch, crack, or completely ruin your design. Trust me, I've seen it happen countless times.
- Hot Peel: This means right now. Peel the carrier sheet off immediately while the garment is still on the press and practically steaming. Be decisive and pull it back in one fluid motion.
- Warm Peel: For this, you'll take the shirt off the press and give it a moment to breathe. Let it cool for just 5-10 seconds before peeling. The design will still be quite warm.
- Cold Peel: This one requires patience. You have to let the garment cool completely to room temperature before even thinking about touching that carrier sheet. Peeling it even slightly warm will likely pull the design right off with it.
My Go-To Peeling Technique: Instead of pulling the carrier sheet straight up, fold it back on itself and peel it away at a low, sharp angle. This technique puts way less stress on the fresh transfer, helping every little edge stay perfectly adhered to the fabric.
Mastering these final movements—from the confident clamp-down to the carefully timed peel—is what truly defines the quality of your work. It's the difference between something that looks homemade and a product you can proudly wear or sell.
Troubleshooting Common Heat Press Problems
Even seasoned pros run into issues. You do everything by the book, but the vinyl won't stick, or worse, you find faint scorch marks on a fresh shirt. Don't panic—these problems are almost always fixable. Think of this as your field guide for turning a heat press hiccup into a learning moment.
Most frustrations boil down to the big three: time, temperature, or pressure. Let's walk through the most common headaches and get you back to making things you're proud of.
Why Your Vinyl Is Lifting or Peeling
This is, without a doubt, the most frequent problem you'll face. You go to pull back the carrier sheet, and the edges of your design come right up with it. Or, it looks great at first, only to peel after one wash.
Nine times out of ten, the cause is one of these:
- Not Enough Pressure: The adhesive on the vinyl needs to be physically pushed into the fibers of the fabric. If your pressure is too light, you're only getting a temporary bond on the surface, which will never hold up.
- Wrong Temperature: Too low, and the adhesive doesn't activate properly. Too high, and you can actually scorch the adhesive itself, rendering it useless.
- Skipping the Pre-Press: This is a big one. Moisture trapped in the garment is the arch-nemesis of a good transfer. A quick pre-press for just 5-10 seconds gets rid of that steam and gives you a perfectly dry canvas for the vinyl to grip onto.
Getting the process right from the start is the best way to avoid these issues. The infographic below lays out that simple workflow perfectly.
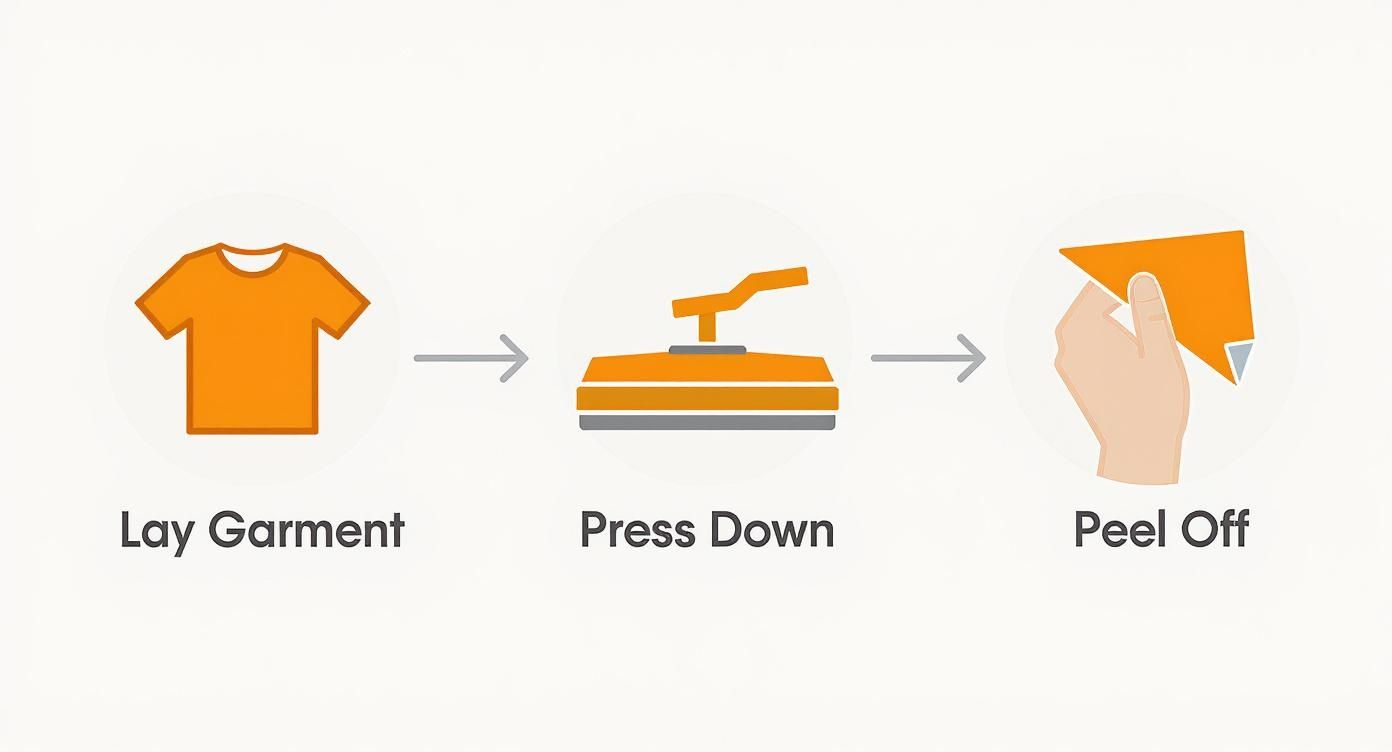
As you can see, a smooth flow—from prepping the garment to the final peel—is what leads to success. When a press goes wrong, mentally walk back through these steps. That's usually where you'll find the culprit.
Dealing with Scorched Fabric or Discoloration
There's nothing more frustrating than seeing that tell-tale yellowish box around your design where the heat platen sat. This kind of scorching is especially common on light-colored polyesters and poly-blends when the heat is just a little too much for the fabric's dye.
First thing's first: try lowering your temperature. Dropping it by just 5-10 degrees is often all it takes to solve the problem. Another option is to add more protection. A thicker Teflon sheet or even a clean cotton scrap on top can help diffuse the heat more gently.
Here's a pro tip I swear by: try using a heat press finishing sheet. Sometimes, pressing with one of these for a few seconds after you've peeled the design can help minimize the look of the press box and gives the transfer a softer, more integrated feel.
Finally, watch your timer. If the instructions call for 15 seconds, don't wander off and leave it for 20. Those extra seconds dramatically increase the risk of scorching, especially with delicate fabrics. By being methodical and checking your settings, you can troubleshoot just about any problem that comes your way.
Common Questions & Quick Fixes for Heat Pressing
Going through the steps is one thing, but running into a real-world snag is another. It's totally normal to have questions pop up as you start working with different fabrics and designs. This is where experience comes in handy.
Here are some of the most common questions I hear from people just getting started, along with the straightforward answers you need to press with confidence.
Can I Just Use a Regular Iron Instead of a Heat Press?
I get this question a lot. And while you technically can use a home iron for certain types of heat transfer vinyl (HTV), you're setting yourself up for a headache. The results just aren't in the same league.
A standard iron has major hot and cold spots across its surface, which means part of your design might get scorched while another part barely sticks. The biggest issue, though, is pressure. You can lean on an iron with all your might and still not get the consistent, even pressure needed for a transfer that will actually last through the wash. For a one-off personal craft, maybe. For anything you want to look professional or sell? A heat press is a must-have.
How Do I Get Rid of That Faint Box Outline on My Shirts?
Ah, the dreaded "press box." It's that faint rectangle you see around your design after pressing, and it's especially common on polyester fabrics. This happens when the heat and pressure mash down the fabric fibers. It's annoying, but fixable.
Here are a few tricks I use to make it disappear:
- Ease Up on the Pressure: You might be cranking it down too hard. Try using the lightest pressure setting that still gives you a good, solid application.
- Get a Heat Press Pillow: This is a game-changer. Sliding a foam-core pillow inside the shirt lifts the application area, so the edges of the heat platen never even touch the surrounding fabric.
- Turn Down the Heat: Sometimes the fabric is just too sensitive for the heat you're using. Try dropping the temperature by 5-10°F and see if that solves it.
My go-to solution for delicate garments is always a heat press pillow. It's the best tool for isolating the design and protecting the rest of the shirt from the heat platen.
Can I Press Over Zippers, Buttons, or Thick Seams?
Pressing directly onto a zipper, a thick collar seam, or a button is a classic rookie mistake, and it will ruin your transfer every time. The hard, raised surface prevents the heat platen from making full, even contact with the rest of your design.
You'll end up with a ton of pressure on the zipper or seam and almost no pressure on the fabric right next to it, leaving you with a design that's peeling up right out of the gate.
The fix is simple: use a heat press pillow or a flexible pressing pad. Just like with the press box issue, you slide the pillow inside the garment. This raises the flat, printable area above the troublesome zipper or seam, allowing it to drop out of the way. This ensures you get that perfect, even pressure across your entire transfer.
Ready to stop troubleshooting and start creating with flawless results? Raccoon Transfers provides premium, easy-to-apply DTF transfers that take the guesswork out of the equation. Get vibrant, durable prints with next-day shipping. Start your custom order today!