
how to use the heat press machine for perfect prints
When you're ready to start using your heat press, the process really boils down to three key things: getting your machine and workspace ready, nailing the perfect combination of time, temperature, and pressure, and finally, making the transfer. It sounds simple, and once you get the hang of how these elements play off each other, it really is.
Getting to Know Your Heat Press Machine
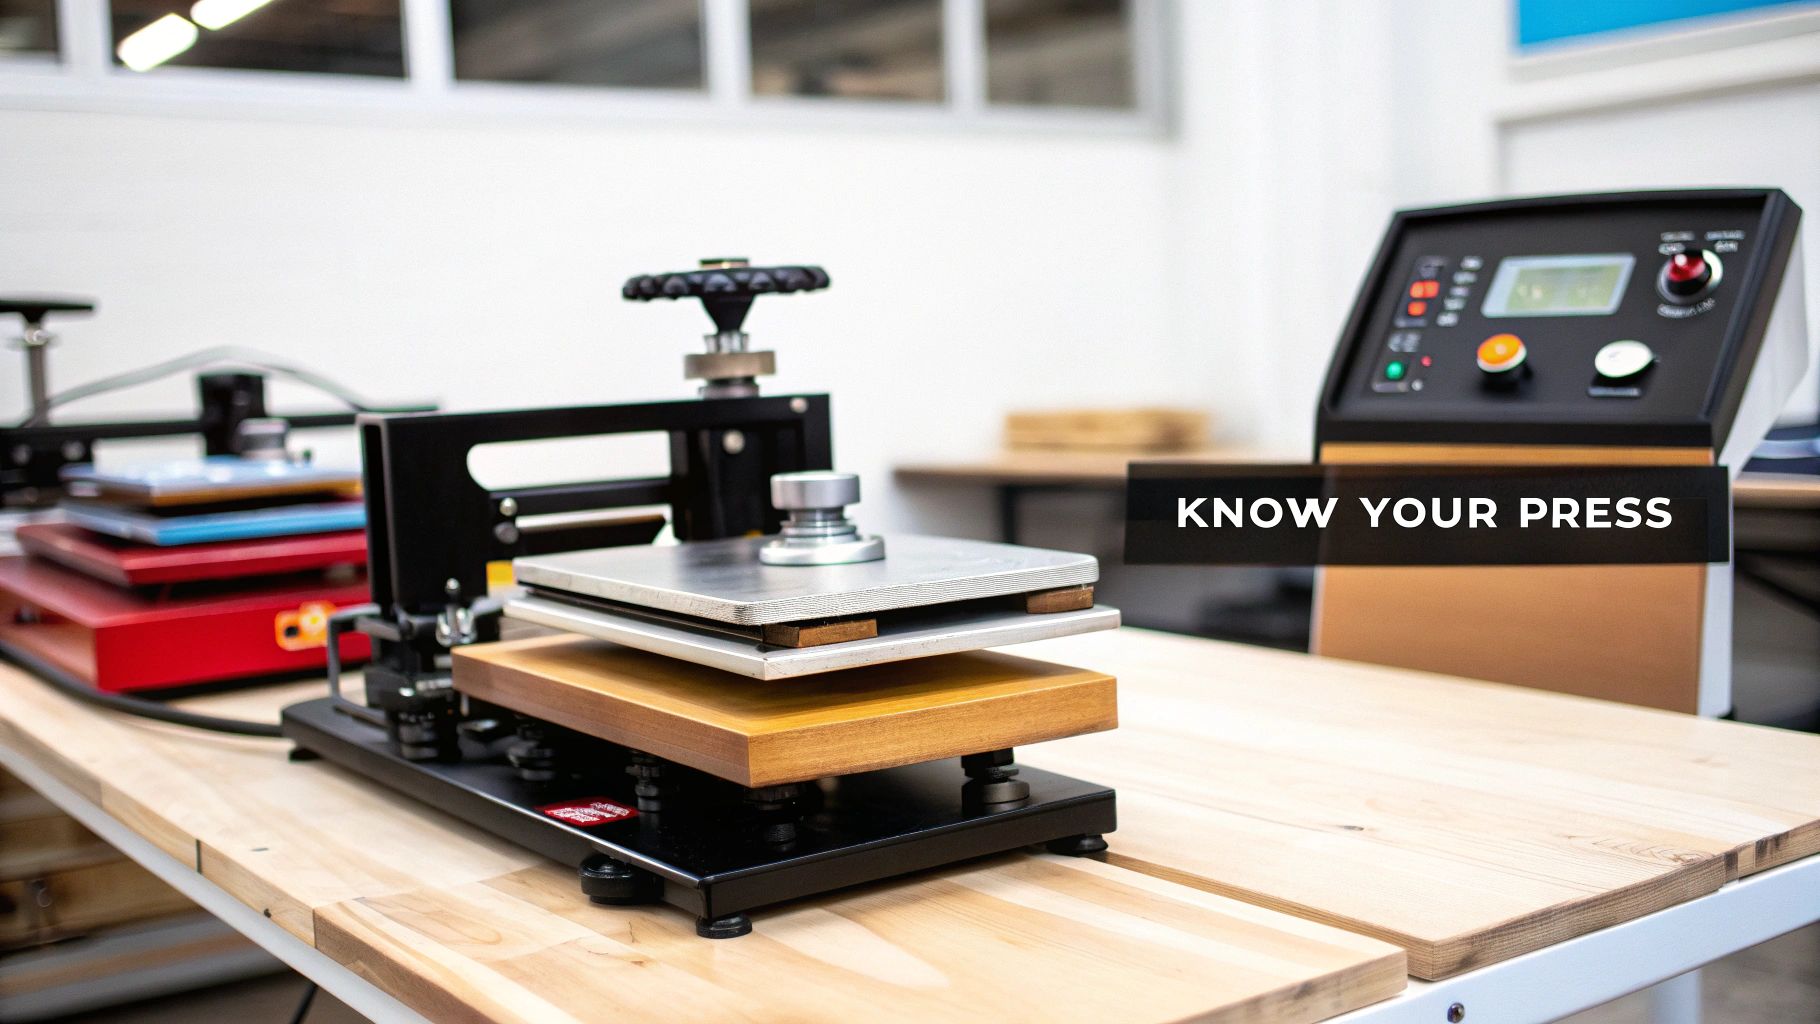
Before you even think about pressing that first t-shirt, let's get familiar with the tool itself. A heat press can look a bit intimidating, but at its core, it's just a machine designed to deliver heat, time, and pressure with precision. Truly learning how to use it starts with understanding its basic anatomy.
This goes beyond just skimming the manual. It's about seeing how each component directly impacts the quality of your finished product. Taking the time to understand this foundation will save you from common beginner headaches like scorched shirts and transfers that peel off after one wash.
And this knowledge is more valuable than ever. The custom apparel world is booming, and the heat press is at the center of it. The market for these machines was valued at around USD 1.5 billion and is expected to grow by about 7.5% each year through 2033. For more on this trend, you can explore insights into the expanding heat press machine market and see just how big the creator economy has become.
The Core Components of Your Machine
Whether you've got a small clamshell for hobby projects or a big swing-away for a professional shop, every heat press is built around the same essential parts. Let's break down what they do.
To help you get acquainted, here's a quick look at the essential parts of your press and why each one is so important for getting that perfect application.
Key Heat Press Components and Their Roles
| Component | Primary Function | Why It Matters for Your Press |
|---|---|---|
| The Heat Platen | Heats up and applies the design to the garment. | Even heat distribution is everything. A quality platen ensures there are no cold spots, which prevents parts of your transfer from failing to stick. |
| The Digital Controller | Sets and monitors the temperature and timer. | This is your command center. Accuracy here means you can confidently press different materials without guessing or ruining items. |
| Pressure Adjustment Knob | Controls the amount of force applied during the press. | This is the "Goldilocks" setting—too little pressure and the transfer won't adhere, too much and you can damage the fabric or design. |
These three components work together to create the perfect environment for your transfer. Getting them right is the secret to professional, long-lasting results every single time.
Pro Tip: Before you start a real project, try the "paper test." Stick a piece of regular printer paper in each of the four corners of the lower platen and clamp it down. If you can pull any of the pieces out easily, your pressure isn't even. You'll need to adjust it until you feel consistent resistance on all four corners.
Setting Up Your Workspace for Success
Where you put your heat press is just as important as how you use it. A little bit of planning here will pay off in both safety and the quality of your work.
First off, make sure the area is well-ventilated. While most modern transfers are safe, some materials can release fumes you don't want to be breathing in. An open window or a small fan can make a big difference.
Next, think about power. A heat press is a power-hungry machine. You absolutely need to plug it directly into a dedicated 20-amp outlet. Never, ever use a standard extension cord—it can't handle the load, which is a serious fire risk and can cause your machine to underperform.
Finally, give yourself some elbow room. You'll need a sturdy, stable workbench that won't wobble under pressure. Keep the area around it clear so you have space to lay out your garments, line up your transfers, and place finished items to cool. A cluttered space is where mistakes happen, like pressing a stray piece of lint permanently into a brand-new hoodie.
Getting Your Design and Garment Ready to Press
The secret to a great-looking custom garment isn't just in the press itself—it's all in the prep work. Honestly, what you do before the heat platen even comes down makes the biggest difference between a project you're proud of and one that ends in frustration. This is where the pros separate themselves from the beginners.
It really kicks off with knowing your materials inside and out. Different transfers behave in completely different ways, and getting a feel for their quirks is essential.
Choosing the Right Transfer for the Job
The world of heat transfers has exploded with options, but most of them fall into a few key buckets. Each one has its own vibe and plays best with certain fabrics.
- Heat Transfer Vinyl (HTV): This is the go-to for many, especially when starting out. You cut your design from a sheet of vinyl, "weed" away the parts you don't need, and press it on. It’s fantastic for bold, solid-color graphics and text on cotton or poly blends.
- Sublimation Transfers: This is pure magic. Special ink turns into a gas under heat and literally becomes one with the fabric fibers. You get stunning, full-color designs with zero feel. The only catch? It's strictly for 100% polyester or high-poly-count items in light colors.
- Screen Printed Transfers: Think of these as pre-made screen prints on release paper. You get that classic, soft-hand feel of a screen-printed shirt without all the messy setup. They're super versatile and work on a ton of different fabrics.
- Direct-to-Film (DTF) Transfers: This is the new powerhouse on the block. A design is printed onto a special film and then transferred. DTF is a game-changer because it works on just about anything—cotton, polyester, leather, you name it—and delivers vibrant, durable, full-color graphics.
Picking the right material is half the battle. If you're going the HTV route, for example, the options can be overwhelming. To make sure you're getting the perfect match for your fabric, you can learn more about the best vinyl for heat press projects in our detailed guide.
The Pre-Press: Your Non-Negotiable First Step
Once you've got your garment, there's one step you absolutely cannot skip: the pre-press. It’s as simple as pressing the blank item for 5-10 seconds before you even think about adding the transfer. It sounds minor, but it's probably the most critical part of the whole process.
Why? Moisture. Fabrics, especially natural ones like cotton, are like sponges, soaking up humidity from the air. When you apply heat, that hidden moisture turns to steam. That steam creates a barrier between your transfer's adhesive and the fabric fibers, preventing a solid bond.
Ever had a transfer that looked perfect right off the press, only to peel or crack after the first wash? Skipping the pre-press was likely the culprit. A quick pre-press gets rid of that moisture and smooths out wrinkles, giving you a perfect, dry canvas for your design.
Nailing Your Design Placement
Alright, last prep step: getting your design straight. Nothing screams "amateur" faster than a crooked or off-center graphic. Taking the time to line things up perfectly is what makes your work look polished and professional.
There's no single magic number for every shirt, but I've developed some reliable rules of thumb for standard tees:
- Vertical Placement: For a typical crew neck, I usually place the top of the design about 3 to 3.5 inches down from the collar's edge. This hits that sweet spot on the chest.
- Horizontal Placement: The easiest way to find the center is to fold the shirt in half vertically. You can make a light crease with your fingers or give it a quick tap with the press on low heat. Use that line to center your transfer.
If you want to get really precise, tools are your best friend. A simple T-square ruler or one of those specialty t-shirt alignment guides can eliminate all the guesswork. These tools make it easy to get consistent placement on every single shirt in a batch. Trust me, spending an extra 30 seconds here will pay off big time in the final product.
Dialing in the Perfect Time, Temperature, and Pressure
This is where the real magic happens. Getting your settings just right isn't just a step in the process; it's the most critical part of making a transfer that looks amazing and actually lasts. It's less about a one-size-fits-all chart and more about understanding why certain settings work for certain materials. Once you get a feel for it, you can confidently tackle any project.
Every fabric and transfer has its own personality. Think about it: a sturdy cotton tee can take a lot more heat than a delicate polyester performance shirt, which can scorch in a heartbeat. That’s why a single "go-to" setting is a recipe for frustration. Learning how different materials behave is your first step toward mastering the machine.
The Temperature and Time Equation
Temperature and time are a team. If you have too much heat or press for too long, you’ll end up with a burnt garment or melted vinyl. But if you don't use enough heat or time, the transfer's adhesive won't bond properly, and you'll see it peeling after the first wash. The sweet spot is finding that perfect balance where the adhesive fully cures without damaging the fabric.
For example, a standard cotton t-shirt with a DTF transfer usually does great around 300-325°F for about 10-15 seconds. But switch over to a 100% polyester athletic shirt, and you'll need to drop that temperature quite a bit to avoid leaving that dreaded shiny press mark.
Getting these settings right is everything. For a deeper dive, this essential heat press temperature guide is a fantastic starting point for all sorts of different materials.
Understanding Pressure Dynamics
Pressure is the "muscle" that physically pushes the transfer’s adhesive deep into the fabric fibers, locking it in for good. You'd be surprised how much the right pressure matters. It isn't about cranking it down as hard as you can; it's about applying the correct amount of force for the job.
Here's a simple way to think about it:
- Light Pressure: Perfect for delicate fabrics or specialty transfers that are meant to sit on top of the garment, like some foil vinyls.
- Medium Pressure: This is your everyday workhorse. It’s ideal for most DTF transfers and standard heat transfer vinyl on cotton and poly-blends.
- Heavy Pressure: You'll need this for things like sublimation, where you need to force the ink to turn into a gas and permanently dye the polyester fibers for those super vibrant, can't-feel-it results.
A great old-school trick to test your pressure is to lock the press and try to slide a piece of paper between the platens. If you have firm pressure dialed in, that paper isn't going anywhere. This simple check ensures you're getting consistent force across the entire design.
Of course, before you even think about pressing, you need to prep your garment. This quick visual gives you the rundown.
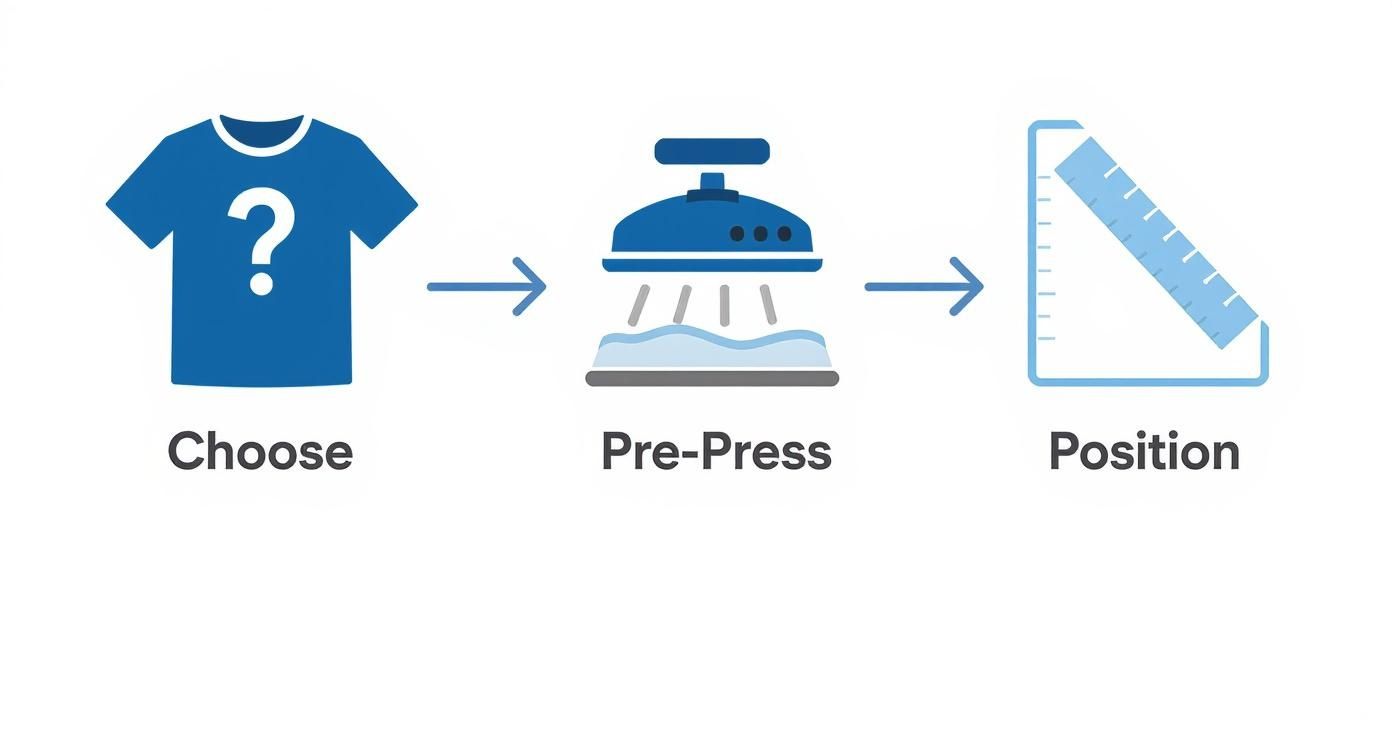
This simple routine—choosing your item, pre-pressing it to get rid of moisture and wrinkles, and then carefully placing the design—is your foundation for a flawless transfer.
Starting Point Settings for Common Materials
Use this table as your go-to reference for popular fabrics and transfers. Always do a test press, but these settings will get you in the right ballpark.
| Material Type | Recommended Temperature Range (°F/°C) | Recommended Time (Seconds) | Pressure Level | Common Transfer Type |
|---|---|---|---|---|
| 100% Cotton | 300-325°F / 149-163°C | 10-15 | Medium to Firm | DTF, HTV, Screen Prints |
| 100% Polyester | 270-300°F / 132-149°C | 8-12 | Medium | HTV, DTF (Low Temp) |
| 50/50 Cotton-Poly Blend | 280-305°F / 138-152°C | 10-15 | Medium | DTF, HTV |
| Tri-Blends | 260-280°F / 127-138°C | 8-12 | Light to Medium | Specialty Low-Temp Vinyl |
| Sublimation (Polyester) | 385-400°F / 196-204°C | 45-60 | Firm | Sublimation Transfers |
Keep in mind, these are just starting points. Your machine, the specific brand of transfer, and even the humidity in your room can affect the outcome. A quick test press saves a lot of headaches (and wasted shirts!).
Real-World Scenarios and Adjustments
Let's put this into practice. Say you're pressing a thick, heavy-blend hoodie with a glitter HTV design. The fabric is dense, so you'll probably need a bit more heat and a longer press time to push through all that material and properly activate the adhesive on the textured vinyl.
Now, flip the script. You're sublimating a logo onto a thin, white performance tee. Here, you'll need very firm pressure and high heat—around 400°F—but for a longer time, like 45-60 seconds. This gives the ink enough time to vaporize and permanently dye the polyester fibers.
My Best Advice: Always start with the manufacturer's recommended settings for your specific transfer. They've done the testing for a reason. From there, press a small test on a scrap piece of the same fabric to dial it in before you risk your final garment.
For a complete reference, our detailed heat press temperature chart is an invaluable resource that covers a huge range of materials. Having a good chart handy, combined with your own hands-on testing, will help you build the intuition needed to nail your settings every single time.
Executing a Flawless Heat Press Application
Alright, you’ve got your settings dialed in and the garment is prepped and ready. This is where the magic happens and all that prep work pays off. The actual press is pretty straightforward, but a sharp eye for detail is what really separates an amateur job from a professional one. It's all about creating a smooth, repeatable process.
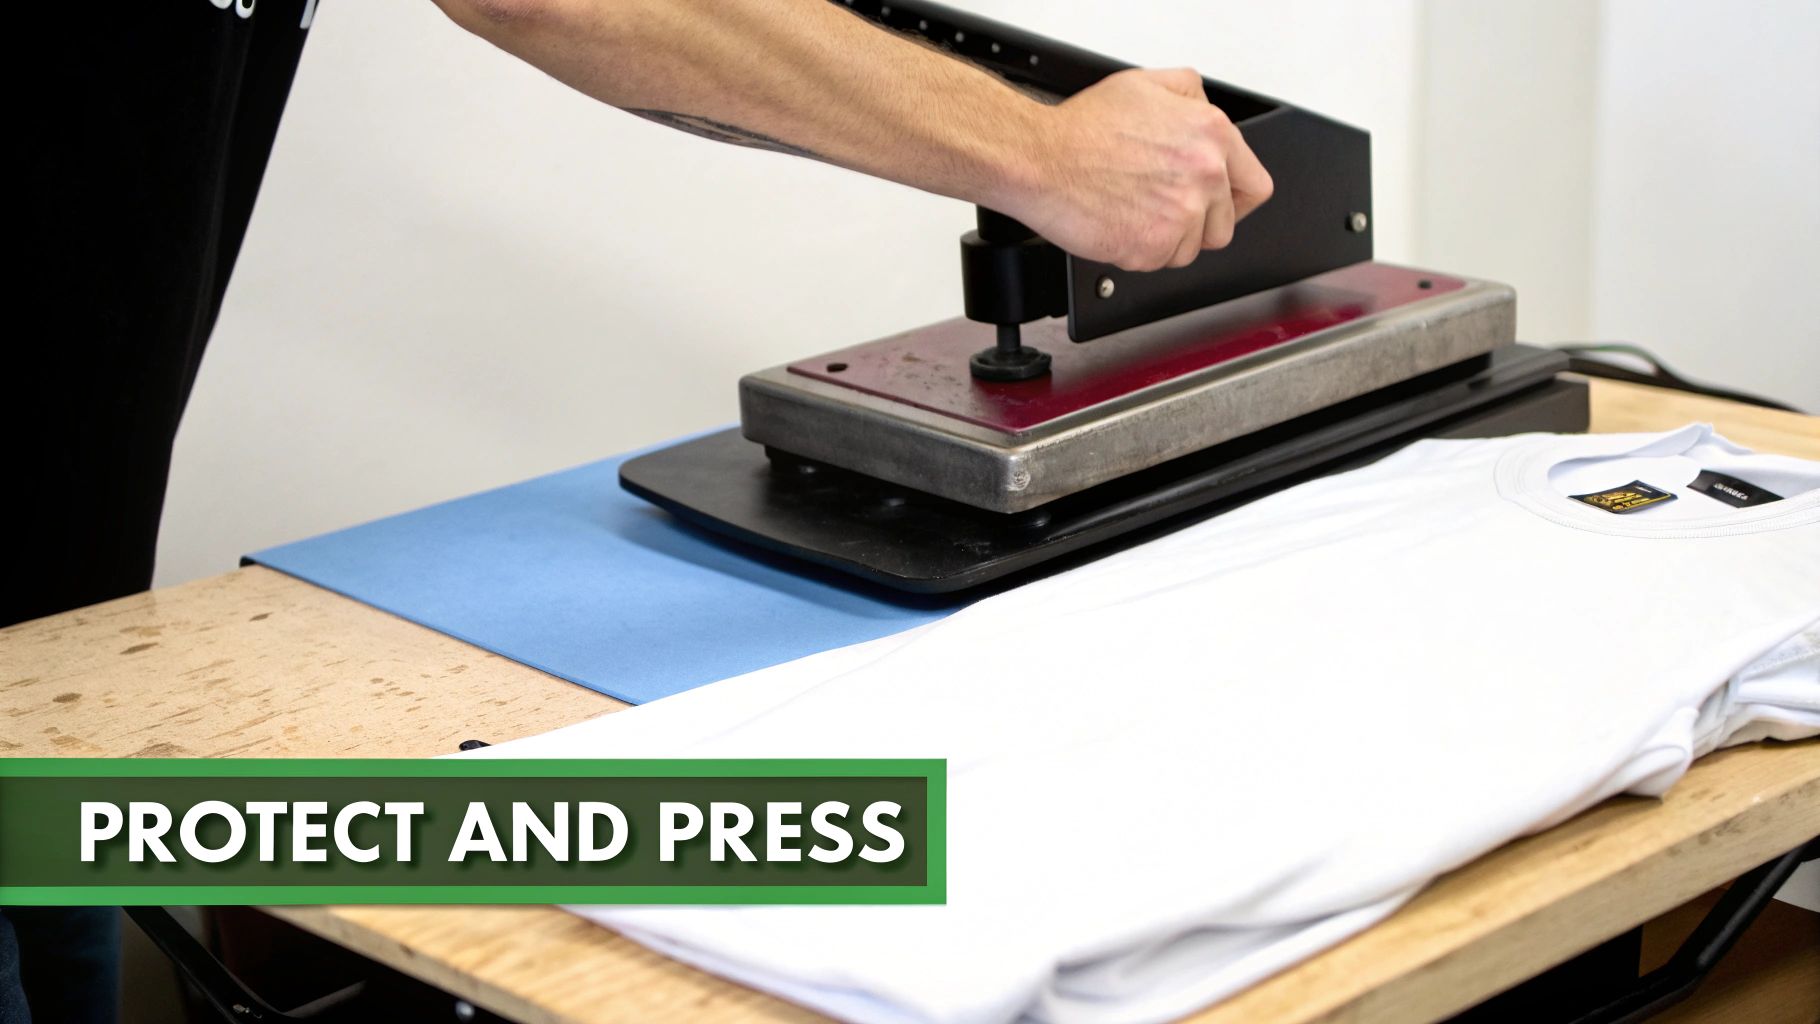
A huge part of that process is protecting your gear—both the garment and the machine itself. This is absolutely non-negotiable. Always, always place a protective layer over your transfer before you press.
The Importance of a Protective Layer
Think of a Teflon sheet or even a simple piece of parchment paper as an insurance policy for your project. This little barrier sits between your design and the hot upper platen, and its job is critical.
- It prevents scorching. Direct contact from a hot platen can leave a permanent shiny mark or even burn heat-sensitive fabrics like polyester. A cover sheet distributes the heat more gently.
- It stops ghosting and residue. If any ink or adhesive bleeds from the edge of your transfer, it gets on the cover sheet, not your expensive platen. This keeps you from accidentally pressing that leftover ink onto your next shirt.
I once ruined a whole stack of white tees because a tiny speck of red ink got on my platen and I didn't catch it. It’s a simple habit that will save you from making the same costly mistake.
Lowering the Platen and Applying Pressure
How you close the press actually matters. Don't just slam it shut. You want to lower the platen smoothly but firmly, making sure it makes even contact across the entire design at once. This ensures pressure is distributed uniformly from the second the timer begins.
For designs with fine lines or intricate details, even pressure is everything. If the press is lopsided, some parts of the design will get less force, leading to weak spots where the transfer won't stick properly. Once it's locked down, the machine does the rest. Just wait for the beep.
To get those perfect results every single time, it's a great idea to create standard operating procedures for your heat press workflow. This ensures every print meets the same high standard.
The Critical Moment: Demystifying the Peel
When that timer goes off, you've reached the final, crucial step: peeling away the carrier sheet. This is where a lot of beginners trip up because the right technique depends entirely on the type of transfer you're using. Get this part wrong, and you can pull a perfectly pressed design right off the shirt.
There are three main peel types, each dictated by the transfer's specific adhesive.
Key Takeaway: Always check the instructions that came with your transfers. The manufacturer will tell you if it's a hot, warm, or cold peel. Guessing is one of the fastest ways to ruin a good garment.
Hot Peel vs. Warm Peel vs. Cold Peel
Knowing the difference is absolutely essential to getting a clean, durable transfer.
1. Hot Peel
- What it is: You peel the carrier sheet immediately after the press opens, while the shirt is still on the platen and piping hot. No hesitation.
- Why it's used: The adhesive is engineered to release cleanly only at its peak temperature. If you let it cool, it re-bonds to the carrier sheet and can rip the design right off.
2. Warm Peel
- What it is: You wait just a few seconds—usually 5-15 seconds—after the press opens. The transfer should be warm to the touch, not scorching.
- Why it's used: This is a happy medium. The adhesive needs a moment to set into the fabric but won't release correctly if it gets completely cold. Many DTF (Direct to Film) transfers fall into this category.
3. Cold Peel
- What it is: You must let the garment and transfer cool down completely before peeling. This can take 30-60 seconds or even longer. Be patient.
- Why it's used: The adhesive on these transfers needs to fully cool and solidify its bond with the fabric fibers. Peeling while warm will cause a stretched, distorted, or incomplete transfer. Glitter and other specialty effect vinyls often require a cold peel.
I learned this the hard way on a glitter vinyl job. I got impatient and tried a warm peel—half the glitter stuck to the shirt, and the other half came off with the plastic sheet. Following the correct peel method is the final touch that ensures your work looks professional and lasts.
Troubleshooting Common Heat Press Problems
Even the most seasoned pros run into issues. It’s just the nature of the beast when you're working with heat, pressure, and a dozen different types of fabric. Don't get discouraged when things go sideways; think of it as part of your training. Every mistake is a lesson learned.
This section is your field guide for fixing those "uh-oh" moments. We’ll walk through the most common headaches, like seeing scorch marks on a brand-new tee or having a beautiful design peel right after the first wash. Trust me, the fix is usually simpler than you think.
Why Is My Transfer Peeling or Lifting?
This is, without a doubt, the number one problem beginners face. A design that looks perfect right off the press but starts lifting at the edges a day later is almost always caused by an issue with pressure, temperature, or a missed pre-press.
For a transfer's adhesive to permanently fuse with the fabric fibers, it needs a precise recipe of heat and force. If that bond doesn't form correctly, failure is inevitable.
- Not Enough Pressure: This is the usual suspect. If your pressure is too weak, the adhesive just skims the surface of the fabric instead of being pushed deep into the weave. It has no real grip, so it’s bound to peel.
- Wrong Temperature: Too cool, and the adhesive never fully melts to do its job. Go too hot, and you can scorch the adhesive, making it brittle and useless.
- Sneaky Moisture: Did you skip the pre-press? Even fabric that feels dry can hold moisture. When heated, that moisture turns into a layer of steam, creating a barrier between the adhesive and the fabric. A quick 5-10 second pre-press is non-negotiable.
A Lesson I Learned the Hard Way: I once rushed a big order of hoodies and completely forgot I had just adjusted my pressure for thinner t-shirts. Every single transfer started peeling at the corners by the next day. It was a painful reminder that taking 10 seconds to double-check your settings can save you hours of work and a lot of money.
Before starting any project, do a quick pressure check. A simple trick is the "dollar bill test"—clamp a bill under each corner of the platen and try to pull them out. If they slide out with no resistance, you need to crank up the pressure.
How to Deal with Scorch Marks and Discoloration
There's nothing more gut-wrenching than pulling a garment off the press and seeing a faint yellow box or a shiny outline around your design. This is scorching, and it typically happens to heat-sensitive fabrics like polyester when the temperature is just too high. The heat is literally damaging the fibers.
Here’s how you can prevent it from happening again:
1. Dial Down the Temperature: First things first, lower your heat. Every fabric and transfer type has a sweet spot. Polyester, for example, can't handle the same high heat that 100% cotton can. Always check the recommended settings for what you're working with.
2. Use a Protective Cover: This is a must. Always place a Teflon sheet or a piece of parchment paper between your garment and the hot upper platen. This sheet acts as a buffer, helping to distribute the heat more evenly and shielding the fabric from direct, harsh contact. You can get a deeper dive into why this is so important in our guide on heat transfer sheets.
3. Shorten the Press Time: Sometimes the problem isn't just how hot the press is, but how long the fabric is exposed to that heat. Shaving a few seconds off your press time can make all the difference.
Why Does My Transfer Look Faded or Patchy?
If your design comes out looking dull, splotchy, or like it has missing spots, you're almost certainly dealing with uneven heat or pressure. Your heat platen might have "cold spots," or the pressure isn't consistent across the entire surface.
To figure this out, start with a pressure test. Take four small strips of paper and place one in each corner of your press. Clamp it down as you normally would, then try to pull each strip out. If one comes out much easier than the others, your pressure is lopsided and needs adjustment.
If the pressure seems fine, the heating element in your platen could be the culprit. A great tool for diagnosing this is a non-contact infrared thermometer. Heat your press to your target temperature, then scan the surface of the upper platen. If you see significant temperature drops in certain areas, you've found your cold spots. At that point, it's probably time to get in touch with the manufacturer for support.
Heat Press Troubleshooting: Your Top Questions Answered
When you're first getting the hang of a heat press, a few common questions always seem to pop up. Let's walk through the most frequent head-scratchers I hear from people and get you some clear, practical answers so you can press with confidence.
"Why Is My Vinyl Peeling After I Wash It?"
Ah, the classic beginner's nightmare. You pull a shirt off the press, it looks flawless, but after one trip through the laundry, the design is lifting and peeling. This is almost always a sign of a weak bond, and it usually boils down to one of three culprits: pressure, temperature, or how you peeled the carrier sheet.
You need enough firm, even pressure to actually push the vinyl’s adhesive deep into the fabric's fibers. Without it, the design is just sitting on top. Also, double-check the recommended temperature for your specific material. Finally, pay close attention to the instructions—is it a hot, warm, or cold peel vinyl? Peeling at the wrong temperature can completely ruin the bond before it has a chance to cure.
My Two Cents: If a transfer looks perfect right after pressing but fails in the wash, the first thing I always check is my pressure setting. It's the most common mistake and the easiest to fix.
"Can't I Just Use a Regular Iron Instead?"
I get this question a lot, and while a home iron is okay for a one-off craft project for yourself, it’s just not going to cut it for anything you plan to sell or want to last. A heat press is designed to do two things an iron can't: deliver consistent, accurate temperature and apply even pressure across the entire design.
An iron is full of hot spots and relies on you guessing the pressure, which leads to patchy application. The result? Transfers that crack, peel, and look unprofessional. If you're serious about quality, a heat press is a non-negotiable investment.
"What's a Pre-Press? Is It Really That Important?"
A pre-press is when you press the blank shirt for about 5-10 seconds before you even think about putting your transfer on it. And yes, it is absolutely crucial. Don't ever skip this step.
Here’s why: fabrics, especially cotton, are like sponges for humidity in the air. You can't see it, but that moisture is there. When you apply heat, that moisture turns into steam, and that steam gets trapped under your transfer, preventing the adhesive from properly grabbing onto the fabric. Pre-pressing gets rid of that moisture and irons out any wrinkles, giving you a perfectly flat, dry surface to work with.
"Help! How Do I Stop Getting Scorch Marks on My Shirts?"
Scorch marks—those faint, brownish outlines—are a bummer. They're typically caused by either too much heat or pressing for too long. The first thing to check is your temperature setting. Different fabrics have different heat tolerances, and materials like polyester are notoriously sensitive.
Always, always use a protective sheet. A Teflon sheet or even a clean piece of parchment paper placed between the hot platen and your garment will do the trick. It acts as a buffer and helps soften the heat distribution. If you're still seeing scorching, try this: lower your temperature a bit and add a few extra seconds to the press time. This gentler, slower approach often solves the problem.
"I Messed Up and Pressed a Transfer Upside Down... What Now?"
Don't sweat it—this happens to the best of us, usually when we're in a hurry. The trick is to deal with it right away while the machine is still warm.
- Kill the heat. Turn the machine off and let the platen cool down a little, but not all the way. A bit of residual warmth will help.
- Scrub gently. Use a soft, clean cloth to carefully wipe away the melted gunk. For stubborn residue, a non-abrasive cleaner can help loosen it up.
- Do a test press. Before you move on to your next good shirt, press a scrap piece of fabric to make sure you got all the residue off.
Taking a minute to clean the platen properly will save you the headache of ruining more apparel later.
Ready to create stunning, durable custom apparel with transfers that are vibrant and easy to apply? Raccoon Transfers specializes in premium Direct-to-Film transfers that work on cotton, polyester, leather, and more. Upload your art, build a gang sheet, and enjoy next-day shipping on us for orders over $79.90. Start your custom transfer order today!