
Remove Wrinkles From Clothes: Simple Ways to remove wrinkles from clothes Fast
We've all been there: staring at a hopelessly wrinkled shirt with only minutes to spare before we need to be out the door. Whether you're a designer putting the final touches on custom apparel or just trying to look presentable for a meeting, a crumpled garment is a frustrating obstacle.
This guide will walk you through the best ways to get those wrinkles out, from classic ironing to quick fixes for when you're in a pinch.
The secret to de-wrinkling any piece of clothing comes down to a simple combination: heat and moisture. This duo works together to relax the tiny polymer chains inside fabric fibers. Once those fibers loosen up, they can be smoothed flat, either by the direct pressure of an iron or the gentle pull of gravity while steaming. Knowing this little bit of science makes it much easier to pick the right tool for the job.
Choosing Your Wrinkle Removal Method
Not all wrinkles—or fabrics—are the same. The best way to tackle them depends on what the garment is made of and how much time you've got. A sturdy cotton button-down, for example, can handle the high, direct heat of an iron to get a perfectly crisp finish. But that same heat would spell disaster for a delicate silk blouse, where a gentle steamer is the only way to go.
To make the right call, think about these three things:
- What's the fabric? Tougher materials like cotton and linen need more heat. Synthetics, silk, and other delicates require a much softer touch. Always check the care label first.
- How much time do you have? If you're rushing, a quick blast with a steamer or a few spritzes of a wrinkle-releaser spray is your best friend. Save the full ironing session for when you're not against the clock.
- What look are you going for? For sharp, professional creases in trousers or a crisp collar, nothing beats an iron. For a soft, flowy look on a dress or blazer, steaming is the clear winner.
This quick decision tree can help you choose the best method at a glance.
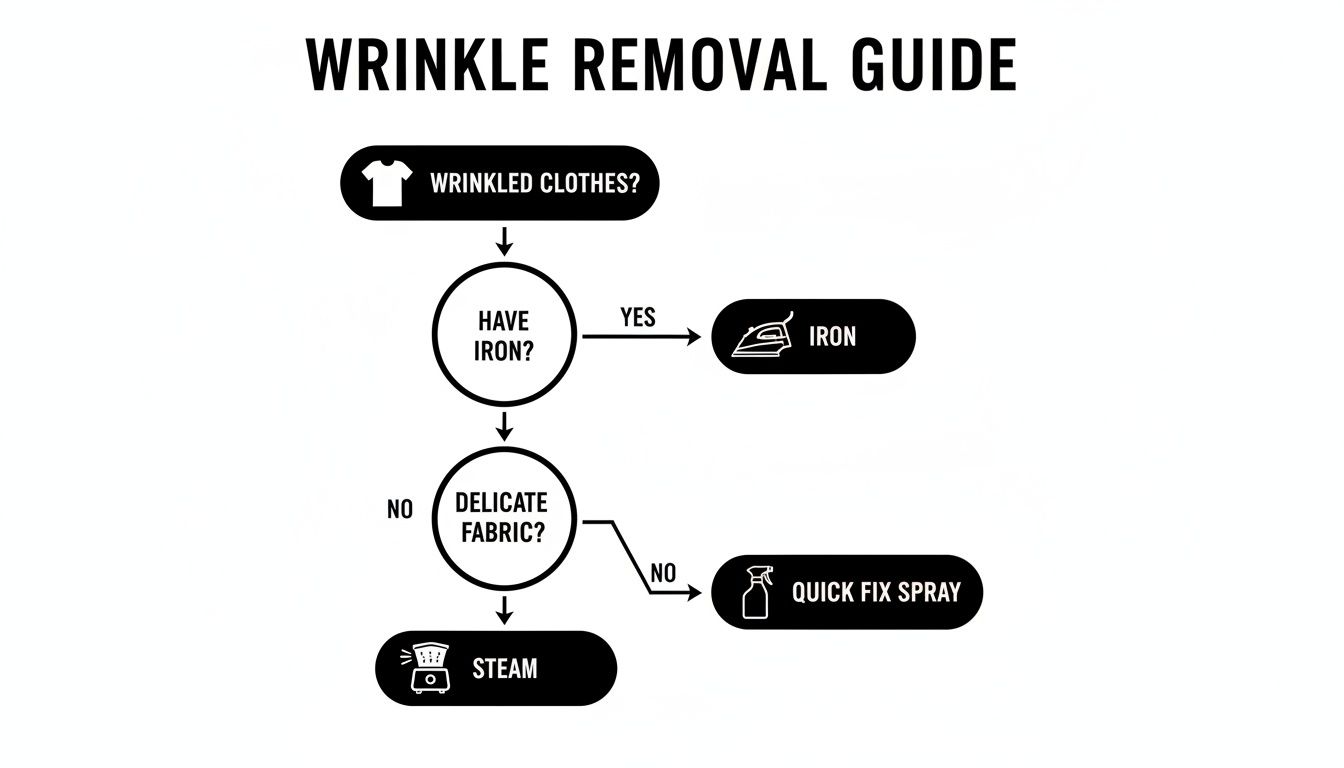
As you can see, your options split between traditional methods and quick, convenient fixes for when you’re on the go.
Sometimes you need to make a quick decision. This table breaks down the most common methods to help you choose the right one for your situation.
Wrinkle Removal Methods at a Glance
| Method | Best For | Speed | Fabric Safety |
|---|---|---|---|
| Ironing | Crisp finishes, sharp creases (e.g., collars, cuffs) | Slow to moderate | Best for cotton, linen, and durable fabrics. Risky for delicates. |
| Steaming | Delicate fabrics, soft finishes, refreshing clothes | Fast | Excellent for silk, chiffon, polyester, and most synthetics. |
| Dryer with Ice/Towel | Lightly wrinkled items, quick touch-ups | Very Fast (5-10 min) | Safe for most dryer-safe fabrics. Not for wool or delicates. |
| Wrinkle-Release Spray | On-the-go fixes, packing wrinkles | Very Fast | Works on many fabrics, but test an inconspicuous spot first. |
Each method has its place, and knowing the pros and cons of each will make your life a lot easier.
Here's a fascinating shift I've noticed: a garment care study found that while 75% of people own an iron, the popularity of handheld steamers has shot up by over 40% in the last five years. It's clear people are looking for faster, gentler solutions for everyday wrinkles.
Ultimately, the best way to keep your wardrobe looking great is to have a few of these techniques in your back pocket. This guide will give you the step-by-step instructions for each one, so you can tackle any wrinkle with confidence.
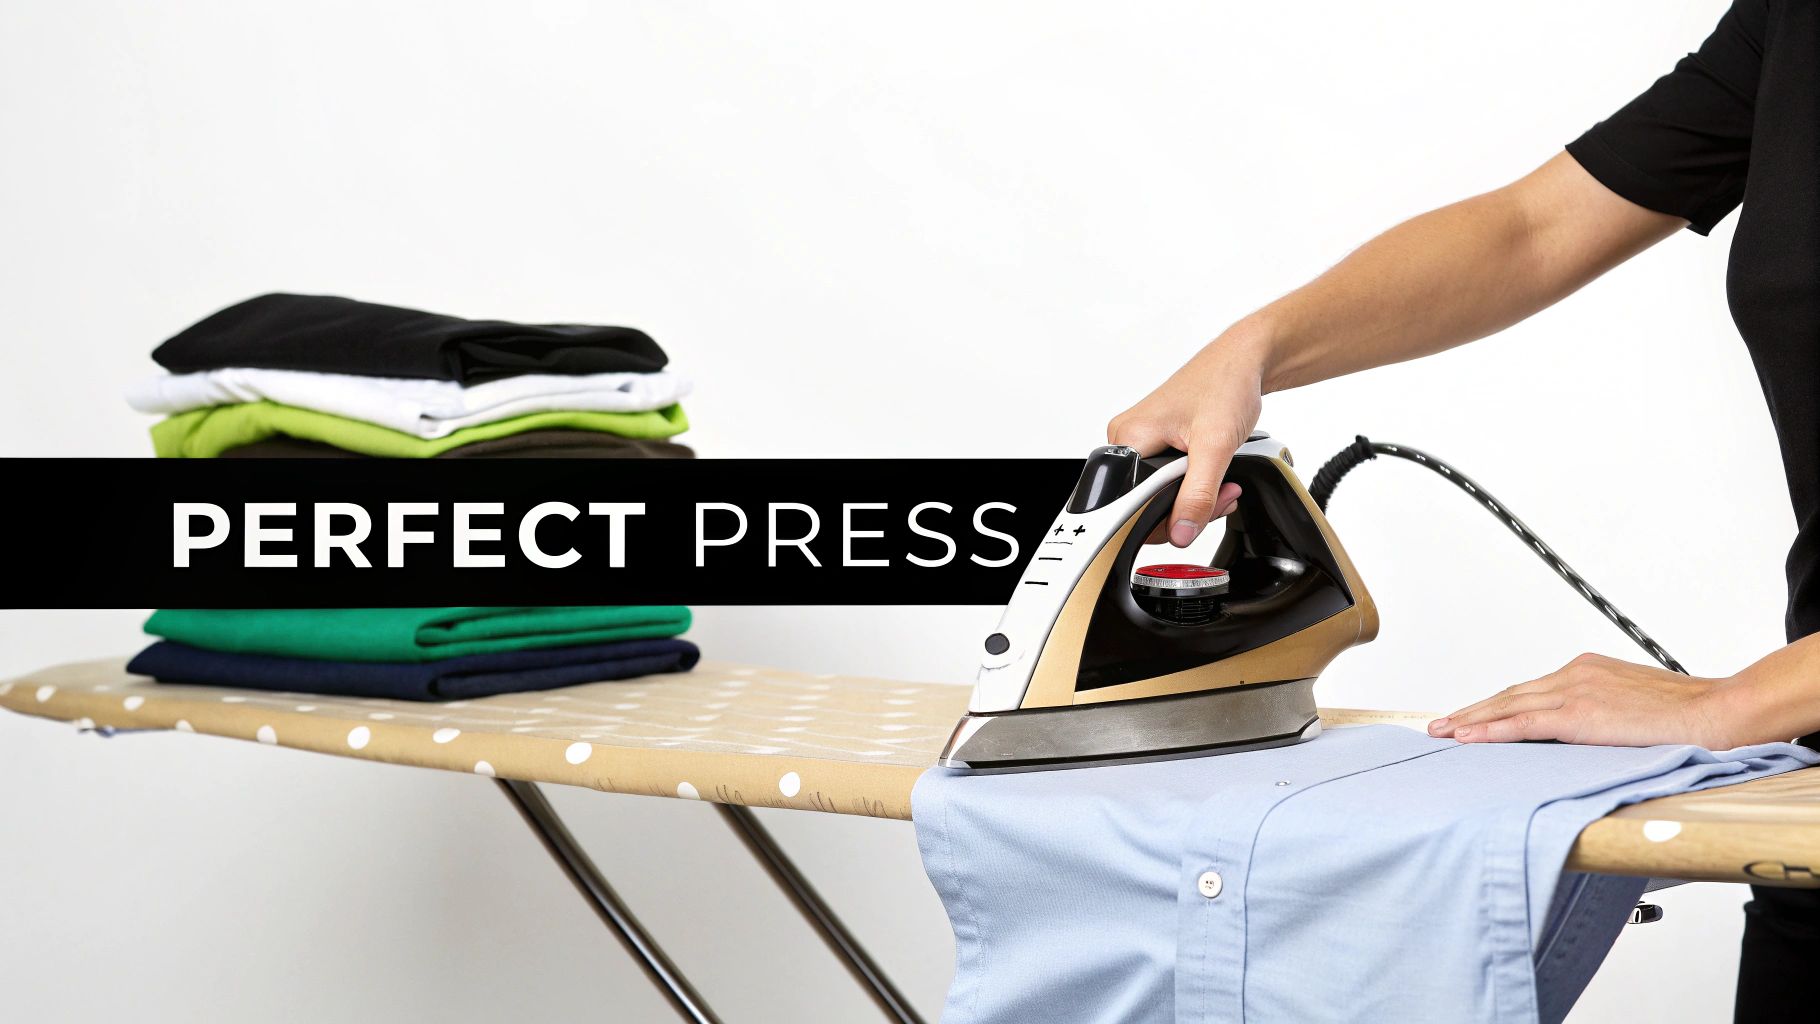
Nothing Beats a Classic Iron for a Crisp Finish
While steamers and other quick fixes are great in a pinch, sometimes you just need that sharp, professional finish that only a traditional iron can deliver. When you need a perfect crease or a flawless press, mastering this timeless tool is the way to go. The whole idea is to use a combination of controlled heat and pressure to smooth out fabric fibers, giving you a polished look that holds up all day.
But getting it right is about more than just sliding a hot plate over a shirt. The real art of ironing comes down to understanding the dance between heat, fabric, and technique. Every material, from tough cotton to delicate silk, needs a different approach, making temperature control your most important skill.
Matching the Heat to the Fabric
The single biggest mistake you can make when ironing is using the wrong temperature. If it's too low, you’ll be there forever, going over the same spot with zero results. If it’s too high, you’re risking a scorch mark, melted fabric, or a permanent shiny patch on your favorite piece of clothing.
Your first stop should always be the care label—it’s your best friend here. If the tag is missing, you can use this general guide to set your iron:
- Low Heat: This setting is for your synthetics like nylon, acrylic, and acetate. They’re sensitive and can melt in a heartbeat.
- Medium Heat: Perfect for polyester, silk, and wool. These fabrics need a gentler touch to avoid damage.
- High Heat: Save the high temps for sturdy, natural fibers. Think cotton and linen, which can handle (and often need) serious heat to get those stubborn wrinkles out.
Pro Tip: When in doubt, always start low and go slow. You can always increase the temperature, but you can’t undo a burn mark.
A Smart Approach for Tricky Garments
Ironing a t-shirt is one thing. A collared dress shirt or a pair of pleated trousers? That requires a bit more strategy. By tackling these items in a specific order, you can work much more efficiently and stop yourself from ironing new wrinkles right back into the fabric.
For a dress shirt, I’ve found this sequence works wonders:
- Start with the collar. Always iron from the tips inward toward the center to keep the fabric from bunching up.
- Next, the cuffs. Unbutton them and lay them flat. Iron the inside first, then flip and do the outside.
- Then, the sleeves. Lay one sleeve flat on the board, press it smooth, then repeat on the other side.
- Move to the front panels. Go carefully around the buttons, using the pointed tip of your iron to get into those tight spots.
- Finish with the back. It's the largest and easiest part, so it makes sense to save it for last.
When you're working on trousers, the goal is usually that sharp, defined crease. The trick is to fold the leg along its natural seam and press firmly along that fold. A little shot of steam here is your best tool for setting a crisp, lasting line.
A Few More Tricks for Flawless Ironing
Beyond the basics, a few simple habits can really elevate your ironing game and protect your clothes, especially items with custom designs. For instance, correctly applying and caring for heat transfers requires precision. For a deep dive into that specific process, you can find a great guide on how to use iron-on transfer paper that walks you through the application.
Always Use a Pressing Cloth This is a non-negotiable step for dark fabrics, delicates like silk, and anything with a screen print or transfer. A pressing cloth—even a clean piece of a cotton t-shirt will do—creates a protective barrier between the hot iron and your garment. It’s the secret to preventing scorch marks and that dreaded shiny finish you sometimes see on dark suits.
Use Distilled Water in Your Iron It might seem like a small thing, but tap water is full of minerals that build up inside your iron. Over time, this limescale clogs the steam vents and can spit out rusty-colored deposits right onto your clean clothes. Using distilled water stops this from happening, keeps your steam clean and consistent, and will make your iron last so much longer. It's a tiny investment that really pays off.
Using Steam for Gentle Wrinkle Removal
Sometimes, an iron is just too aggressive. For delicate fabrics, intricately designed garments, or moments when you simply can't risk a scorch mark, the garment steamer is your best friend. It’s the secret weapon both pros and savvy home users rely on for a gentle, yet surprisingly effective, way to get wrinkles out.
Unlike an iron that flattens fibers with direct, high-pressure heat, a steamer works on a totally different principle. The hot vapor gently penetrates the fabric, causing the fibers to relax and swell. As they loosen up, wrinkles simply fall away, often with just the help of gravity. This method is incredibly kind to materials like silk, chiffon, and rayon, which a hot iron plate could easily ruin. It's also my go-to for preserving the life of custom-printed apparel, as there’s no direct contact to cause fading or peeling.
Choosing the Right Steamer for You
When you start looking around, you'll quickly see there are two main types of garment steamers, and which one you pick really comes down to your lifestyle and needs.
A handheld steamer is your quick-fix champion. It’s compact, lightweight, and typically heats up in less than a minute, making it perfect for last-minute touch-ups or travel. If you’re constantly de-wrinkling a single shirt before work or trying to smooth a dress you just pulled from a suitcase, this is a fantastic choice.
On the other hand, a standing steamer is a more serious piece of equipment. These are more robust units with a large water tank and a built-in hanger. They deliver a more powerful and continuous flow of steam, which is ideal if you steam clothes regularly or tackle big batches of laundry. It’s a worthwhile investment for anyone who needs to refresh suits, curtains, or other bulky items without stopping to refill the tank.
The shift toward steaming is undeniable. The global garment steamer market hit a staggering USD 2.65 billion in 2023 and shows no signs of slowing down. People love them because, unlike sprays, steamers penetrate fabrics deeply, with many users reporting they can eliminate 99% of wrinkles in under five minutes. In fact, 65% of users now prefer them over irons for the sheer time savings, and one survey noted a 72% satisfaction rate among businesses for maintaining the vibrancy of custom prints. You can dig into more of these trends and stats in this garment steamer market report from Maximize Market Research.
Mastering the Art of Steaming
Getting flawless results with a steamer is easy once you nail the technique. It’s far more forgiving than an iron and doesn't require a special board or a lot of space.
First things first, hang your garment on a sturdy hanger with plenty of room around it. Let the steamer preheat completely—this usually only takes a minute or two. A fully heated unit produces dry, effective steam instead of sputtering hot water, which can leave spots on your clothes.
Hold the steamer nozzle a few inches away from the fabric and move it in a slow, deliberate top-to-bottom motion. There’s no need to press it against the clothing; just let the steam do its job. For really stubborn creases, you can use your other hand to gently pull the bottom of the garment taut, which helps the fabric smooth out as the fibers relax.
Here's a pro tip from my own experience: whenever possible, steam from the inside of the garment. This is especially true for fabrics with a texture, like velvet or corduroy. Steaming from the outside can sometimes crush the pile, but working from behind relaxes the fibers without messing with the finish.
Make sure to give a little extra attention to those tricky areas where wrinkles love to hide:
- Collars and Cuffs: Hit these thoroughly from both sides.
- Plackets: The fabric around the buttons always gets crumpled, so give it an extra pass.
- Hems and Seams: These spots are often thicker and may need a bit more steam to fully release.
Once you’re done, let the garment hang for about five to ten minutes. This allows it to dry completely before you wear it or put it away. It’s a crucial final step that locks in the smooth finish and ensures the wrinkles don’t creep back in as the fabric cools.
Quick Fixes for Wrinkles on the Go

We’ve all been there. You pull a shirt from your suitcase just before a meeting, only to find it’s a wrinkled mess. With no iron or steamer in sight, that moment of panic sets in. But don't worry—you can still look sharp. A few clever hacks using everyday items are all you need to remove wrinkles from clothes in a pinch.
These tricks are lifesavers for travelers, busy professionals, or anyone who needs a quick touch-up without a full laundry room at their disposal. From using a dryer as a makeshift steamer to harnessing the power of a hot shower, these methods are your secret weapons against unexpected creases.
The Dryer as a De-Wrinkling Machine
Believe it or not, your clothes dryer is one of the best tools for a quick fix, especially for forgiving fabrics like cotton and many synthetic blends. The trick is to introduce a little moisture, which creates steam and helps the fabric fibers relax and smooth out.
One of my go-to methods is tossing the wrinkled garment in the dryer with a slightly damp towel—you want it damp, not soaking wet. Run the machine on medium to high heat for about 10 to 15 minutes. The moisture from the towel turns to steam, gently easing out the creases.
No towel handy? A couple of ice cubes work just as well. Throw two or three in with your wrinkled clothes and run the dryer for the same amount of time. As the ice melts and evaporates, it creates that same powerful steam effect.
Important Takeaway: For both dryer methods, you have to grab your clothes the second the cycle ends. If you let them sit in a crumpled heap while they're still warm, you'll just be trading old wrinkles for new ones.
The Power of Wrinkle Release Sprays
For an even faster solution, a good wrinkle-release spray is an absolute game-changer. I always keep a travel-sized bottle in my bag. These sprays are formulated to relax fabric fibers almost instantly, letting you smooth out wrinkles with just your hands.
You can find them everywhere, from brands like Downy to more boutique options like The Laundress. They work on a huge range of fabrics and often leave a nice, fresh scent behind. The market for these sprays is exploding, which tells you just how much people value convenience.
In fact, the global wrinkle release spray market was valued at USD 1.9 billion in 2025 and is projected to hit USD 2.8 billion by 2035. This huge growth is driven by busy people looking for shortcuts. For some, these sprays are helping reduce laundry frequency by up to 30%. You can learn more about this shift toward convenience from Future Market Insights.
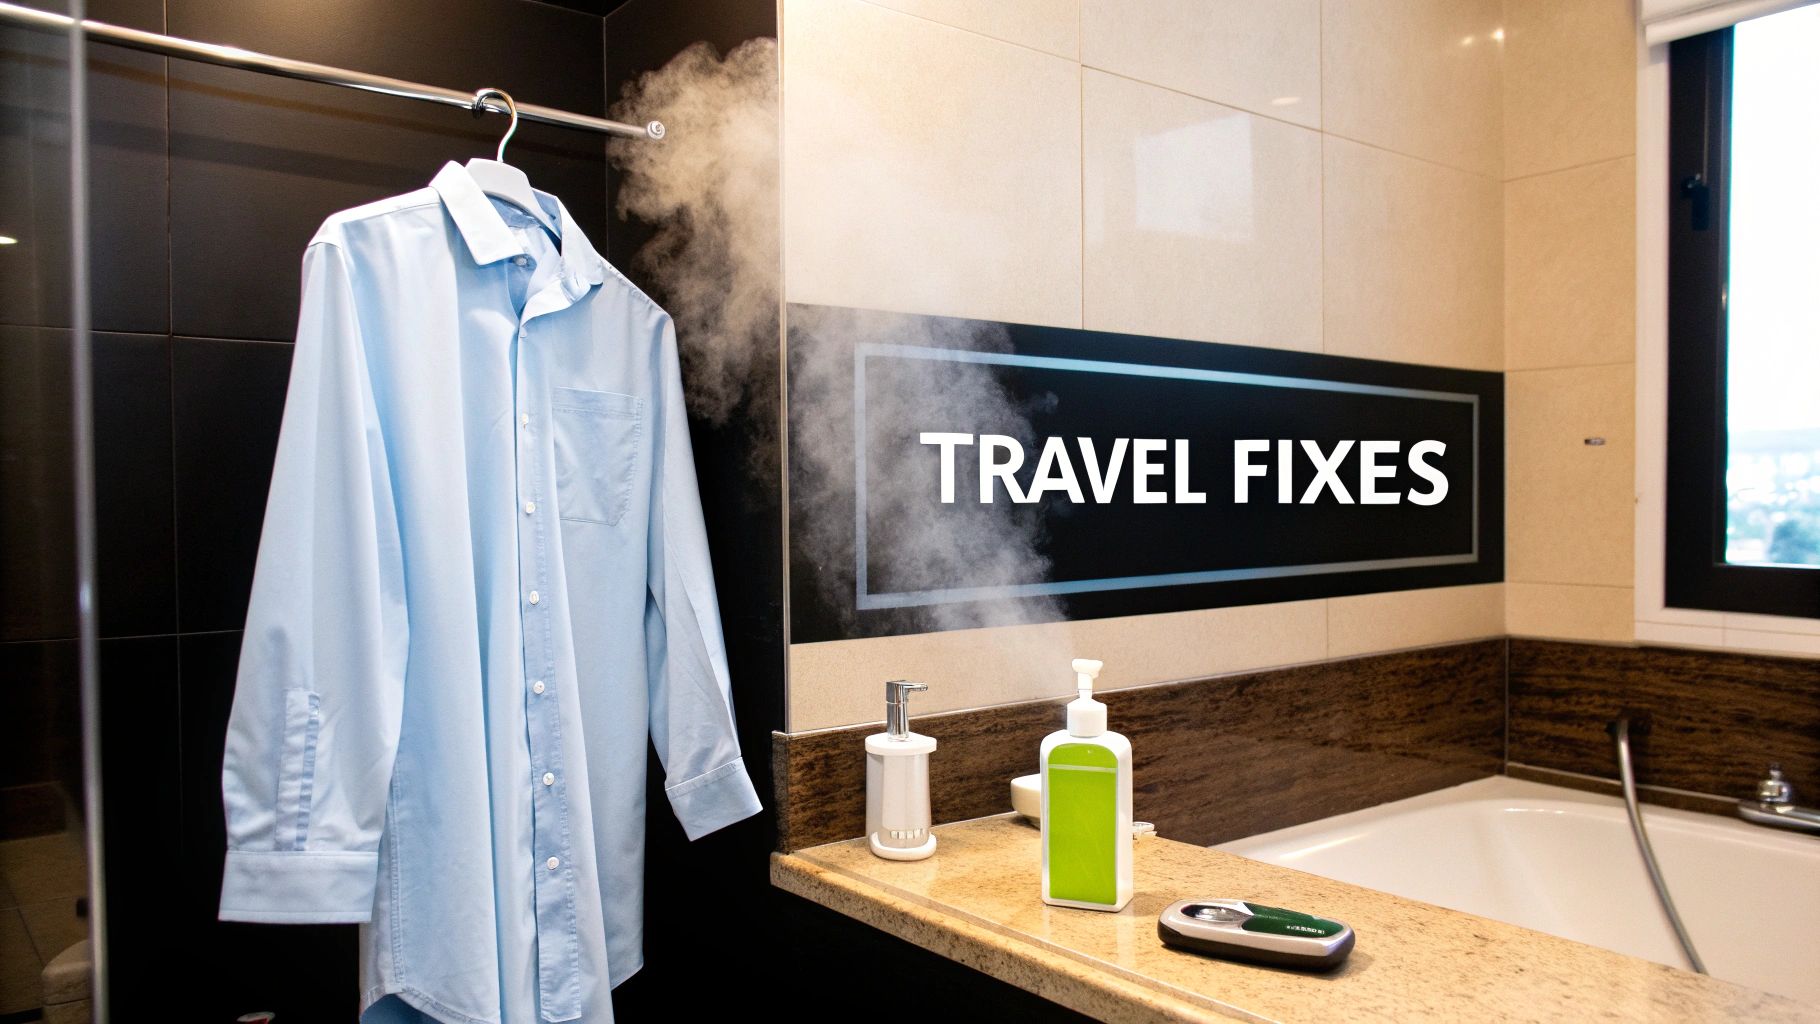
Creative Travel and Last-Minute Hacks
When you’re truly in a jam without any appliances or sprays, it's time to get creative. These tried-and-true methods have saved me from looking disheveled more times than I can count.
The Shower Steam Method This one is a classic for a reason. Before you hop in a hot shower, hang your wrinkled item on a hanger. Place it somewhere it can get plenty of steam without getting wet—the back of the bathroom door or on the shower rod are perfect spots. Close the door and any windows to trap the steam. After 15-20 minutes, the humid air will have gently loosened most of the wrinkles.
The Hair Straightener Trick In a real pinch, a hair flat iron can double as a mini-iron. It’s fantastic for tackling small, stubborn wrinkles on shirt collars, cuffs, and the placket between the buttons.
- Clean the Plates: First, make sure the straightener’s plates are spotless. Any hair product residue could stain your clothes.
- Use Low Heat: Start on a low or medium temperature setting to avoid scorching the fabric.
- Keep It Moving: Clamp the wrinkled section between the plates and glide the iron over it quickly. Never let it sit in one spot for more than a second or two.
This trick works best on sturdier cottons. Be extra careful with delicates like silk or synthetics. If you’re unsure, always test it on a hidden area, like an inner seam, first. These fixes just go to show you don't always need traditional tools to get a smooth, polished look.
How to Prevent Wrinkles Before They Start
Honestly, the best way to deal with wrinkles is to make sure they never show up in the first place. If you build a few smart habits into your laundry routine, you can save yourself a ton of time with the iron or steamer. A wrinkle-free wardrobe really starts in the laundry room, not when you're rushing to get dressed.
It all comes down to how you wash, dry, and put away your clothes. Small tweaks at each of these stages can make a huge difference, leaving your garments smooth and ready to go. This is especially true for custom-printed apparel, where keeping creases at bay also protects the design.
Start with a Smarter Wash Cycle
Your fight against wrinkles kicks off the second you load the washing machine. The settings you pick and how full you pack it can either create a wrinkled mess or set you up for success.
One of the biggest culprits for deep-set wrinkles is simply cramming too much into the machine. When clothes don't have room to move, they get twisted and tangled, pressing creases right into the fabric. Make sure your load has plenty of space to tumble.
The spin cycle is another thing to watch. A super-fast spin cycle is great at wringing out water, but it also smashes your clothes against the drum, embedding wrinkles that are a nightmare to get out. Try using a slower spin speed, especially for fabrics that wrinkle easily, like cotton and linen.
- Go with Cold Water: Hot water can actually lock in wrinkles on some synthetic fabrics. Washing with cool or cold water is much gentler on the fibers and helps avoid this.
- Pick the Right Cycle: If your machine has a "permanent press" or "wrinkle control" option, use it. These cycles are designed with a cool-down period and a slower spin to minimize creasing from the start.
Optimize Your Drying Strategy
How you dry your clothes is probably the single most important step in keeping them wrinkle-free. The trick is to catch them when they're still just a little damp and warm, which is when the fibers are softest and easiest to smooth out.
Over-drying is your worst enemy here. It essentially bakes wrinkles right into the material, making them incredibly difficult to remove later. Get your clothes out of the dryer the moment the cycle ends—letting them sit in a crumpled heap is just asking for trouble.
A Simple but Effective Habit: As you pull each item from the dryer, give it a good, sharp snap. This quick shake works wonders to release minor tangles and smooth the fabric before you hang or fold it. It’s a tiny step that makes a big impact.
It’s no surprise that the market for wrinkle-care products like sprays and dry washes was valued at USD 6.97 billion in 2024. With households making up 70% of the demand, people are clearly looking for convenient ways to extend wear, cut ironing by 50%, and make their clothes last longer.
Master the Art of Hanging and Folding
Once your clothes are dry, proper storage is your final defense. Whether you hang or fold really depends on the fabric and the type of garment. Knowing how different materials behave is key. For a deeper dive, our guide on the best fabric for t-shirts is a great resource for understanding how textiles work.
What to Hang:
Anything prone to wrinkling should go on a hanger right away. This usually includes:
- Blouses and dress shirts (fasten the top button to help the collar hold its shape)
- Dresses and skirts made from flowy fabrics like rayon or silk
- Trousers and slacks (hang them by the cuff or the waistband)
- Linen garments, which seem to wrinkle just by looking at them
Always use sturdy, shaped hangers that actually support the shoulders of the garment. This prevents those annoying stretched-out bumps. For more great tips on long-term wardrobe care, you can learn more about how to prevent wrinkled clothes.
What to Fold:
Heavy knits, like sweaters, should always be folded. If you hang them, their own weight will cause them to stretch out of shape over time. T-shirts and other casual knit tops are also fine to fold. Just be sure to smooth each piece out on a flat surface before you fold it to get a clean, crisp finish.
Got Wrinkles? We've Got Answers
Even when you know the basics, getting wrinkles out can still feel like a bit of an art form. Some fabrics just don't want to cooperate, and sometimes you're just plain out of time. Let's tackle some of the most common questions that pop up when you're trying to get your clothes looking sharp.
Think of this as your go-to guide for those tricky situations, from dealing with an over-dried shirt to carefully handling your most delicate garments.
Can I Get Wrinkles Out of Clothes That Have Already Been Dried?
Absolutely. A wrinkled shirt that's already gone through the dryer isn't a lost cause—it just needs a bit of moisture to relax the fabric fibers.
The easiest fix? Just toss it back in the dryer for about 10-15 minutes on a medium heat setting. Throw in a damp washcloth or a few ice cubes to create a steamy environment that will gently coax those creases out.
If you’re in a bigger hurry, a light mist from a spray bottle will do the trick. Dampen the wrinkled spots, then a quick once-over with an iron or steamer will smooth them right out. Wrinkle-release sprays are also made for exactly this kind of situation, so it's always handy to have a bottle around.
What Is the Fastest Way to Remove Wrinkles Without an Iron?
When you need smooth clothes now and an iron is nowhere in sight, a garment steamer is your best friend. A good handheld steamer can de-wrinkle a shirt in just a couple of minutes flat. It's fast, gentle, and there's virtually no setup.
Your next best bet for speed is a wrinkle-release spray. A few spritzes, a little tug, and some hand-smoothing can make a huge difference in seconds. The dryer trick with a damp cloth also works great, but you'll need to wait for that 10-minute cycle to finish.
Pro Tip: In a real pinch, a hair flat iron can be a surprisingly effective tool for small wrinkles. Use it on a low setting to quickly press collars, cuffs, and the placket between buttons. Just make sure the plates are clean and you don’t let it sit in one spot!
How Do I Remove Wrinkles from Delicate Fabrics Like Silk or Rayon?
For delicate materials like silk, chiffon, or rayon, steaming is the undisputed champion. It’s the safest and most effective method, period. The gentle vapor relaxes the fibers without the harsh, direct heat of an iron, which can easily leave behind scorch marks, shiny patches, or permanent damage.
If you absolutely have to use an iron, you need to be extremely careful. Here’s how to do it safely:
- Turn the garment inside out. This protects the visible surface from direct heat.
- Use the lowest possible heat setting. You can always go up, but you can't undo a burn.
- Use a pressing cloth. Place a clean cotton cloth (like a pillowcase or tea towel) between the iron and your garment to act as a buffer.
- Keep it moving. Never let the iron rest on one spot for more than a second or two.
This cautious approach is critical for keeping delicate clothes looking their best. The same goes for specialty items like printed tees. For more on that, check out our guide on how to wash printed t-shirts to keep them looking brand new.
Does Rolling Clothes Instead of Folding Really Prevent Wrinkles?
Yes, it really does! For many fabrics, rolling is a much better way to avoid wrinkles than folding, especially when you're packing a suitcase. Folding creates sharp, defined creases, while rolling keeps the fabric gently curved. This trick works best for soft, casual clothes—think t-shirts, knits, and most synthetic blends.
But it’s not a universal rule. For more structured pieces like a tailored blazer, crisp dress shirts, or pleated trousers, careful folding is still the way to go to maintain their shape. The best packing strategy is often a hybrid: roll your casual stuff and neatly fold the more formal items.
At Raccoon Transfers, we know how important it is to keep custom apparel looking crisp and professional. Our high-quality DTF transfers are made to last, ensuring your designs look incredible, wash after wash. Ready for your next project? Explore our custom transfer options at https://raccoontransfers.com.