

UV DTF Decals for Tumblers How to Apply Flawlessly
You've finished a tumbler, lined up a beautiful decal, and started peeling the carrier film. Then the edge lifts, a bubble appears across the curve, or the design refuses to sit flat over the powder-coated texture. The problem usually isn't the artwork. It's the geometry, the surface, or the pressure applied before and during transfer.
UV DTF decals for tumblers can produce sharp, raised-looking decoration without a heat press, but they aren't ordinary stickers. A cylindrical drinkware surface changes how the film wants to settle, especially around tight curves, seams, textured coatings, and high-contact areas. The clean result comes from choosing a decal that suits the tumbler, preparing the surface properly, and treating placement as a one-shot operation.
What UV DTF Decals Are and Why They Work on Tumblers
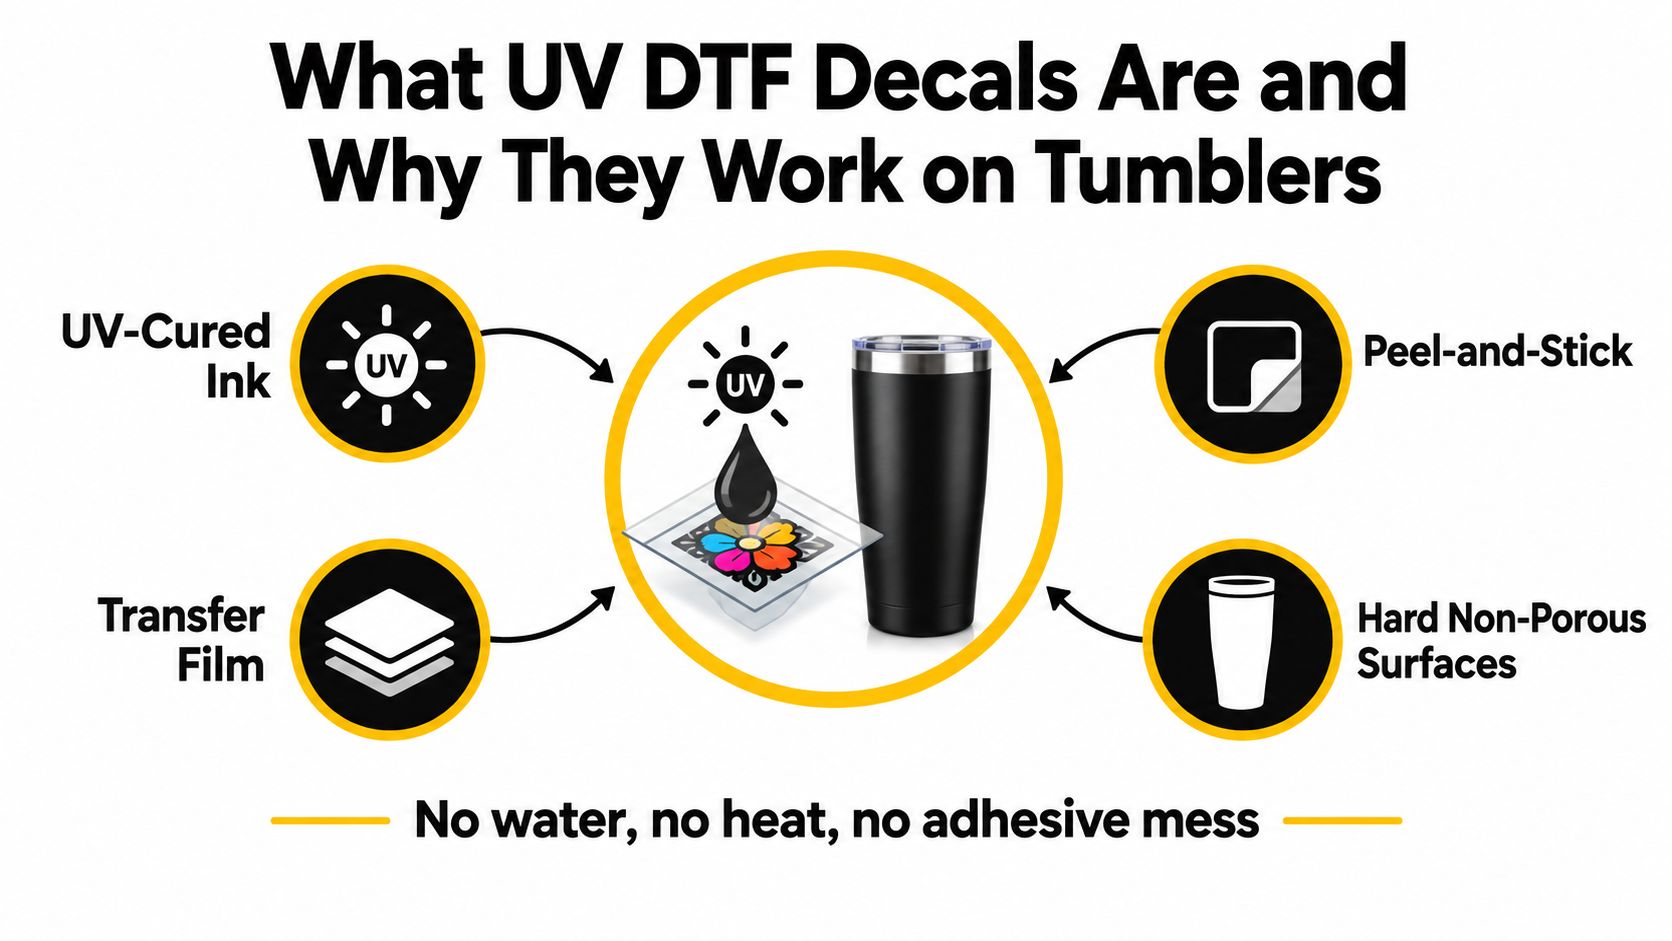
UV DTF uses ultraviolet-curable ink printed onto transfer film. The finished design behaves like a peel-and-stick decal with a pressure-sensitive adhesive, so you can apply it by hand to hard, non-porous drinkware without a heat press. Independent application guidance describes the process for tumblers, glass, metal, and plastic, while standard DTF is primarily designed for fabric and requires heat to bond the transfer. This guide to UV DTF cup wraps explains the distinction and why curved hard goods are a central use case.
That difference matters when you're decorating insulated stainless steel. A fabric transfer needs heat and pressure to move adhesive into a textile surface. UV DTF relies on contact pressure against a hard surface, which makes it practical for coated metal, glass, acrylic, plastic, ceramic, and similar blanks. It also avoids the need to place a tumbler inside a heat press or oven.
UV DTF versus vinyl and sublimation
Vinyl can work well for simple lettering and uncomplicated shapes, but it often demands more weeding and transfer-tape handling. UV DTF is better suited to full-color artwork, small details, layered visual effects, and designs that would be tedious to assemble from separate vinyl pieces.
Sublimation is a different process entirely. It needs compatible sublimation-coated drinkware and specialized heat equipment, while UV DTF is chosen for its ability to decorate smooth hard surfaces without heat. That flexibility is why tumblers remain one of the core applications as the method has moved beyond niche experimentation. Market coverage projects the global UV DTF market at about USD 1.5 billion by 2033, with a 10.5% compound annual growth rate from 2025, although that is a projection rather than a guarantee for any individual tumbler seller. The cited industry coverage also connects the format's appeal to its compatibility with curved drinkware.
UV DTF still has limits. Smooth, sealed surfaces provide the most predictable bond. Slight curves are manageable, but extreme curves and heavy texture can reduce contact area and make edge lift more likely. For detailed handling advice and format examples, see these UV DTF transfer sheet guidelines.
Prepping Your Tumbler and Decal for a Clean Bond
A decal can look perfect on the carrier and still fail within days. Dust, oil, polishing residue, and fingerprints form a thin barrier between the adhesive and the coating. The usual results are lifting edges, weak corners, or small sections that never settle against the tumbler.
Choose a smooth, non-porous blank whenever possible. Stainless steel, glass, plastic, acrylic, ceramic, and powder-coated metal may work, but the finish controls the bond. Smooth powder coat gives the adhesive continuous contact. Texture creates tiny channels beneath the decal, while a double-wall tumbler can add taper or compound curvature that a flat rectangular wrap cannot follow cleanly.
Build a clean application station
Use a lint-free cloth and isopropyl alcohol. Wipe the entire placement area, then let it dry completely. Keep fingers off the cleaned zone afterward, and move the tumbler away from loose fibers, sanding dust, pet hair, and open packaging. A clean surface matters more than extra burnishing later.
Before exposing adhesive, hold the decal against the tumbler and check its actual fit. Look for tapers, seams, sharply narrowing bases, textured coating, and areas that your hand will rub repeatedly. A wide, rigid rectangle may look correct on a flat proof but buckle or overlap on a tapered or compound curve. Choose a compact spot design when the surface changes diameter quickly.
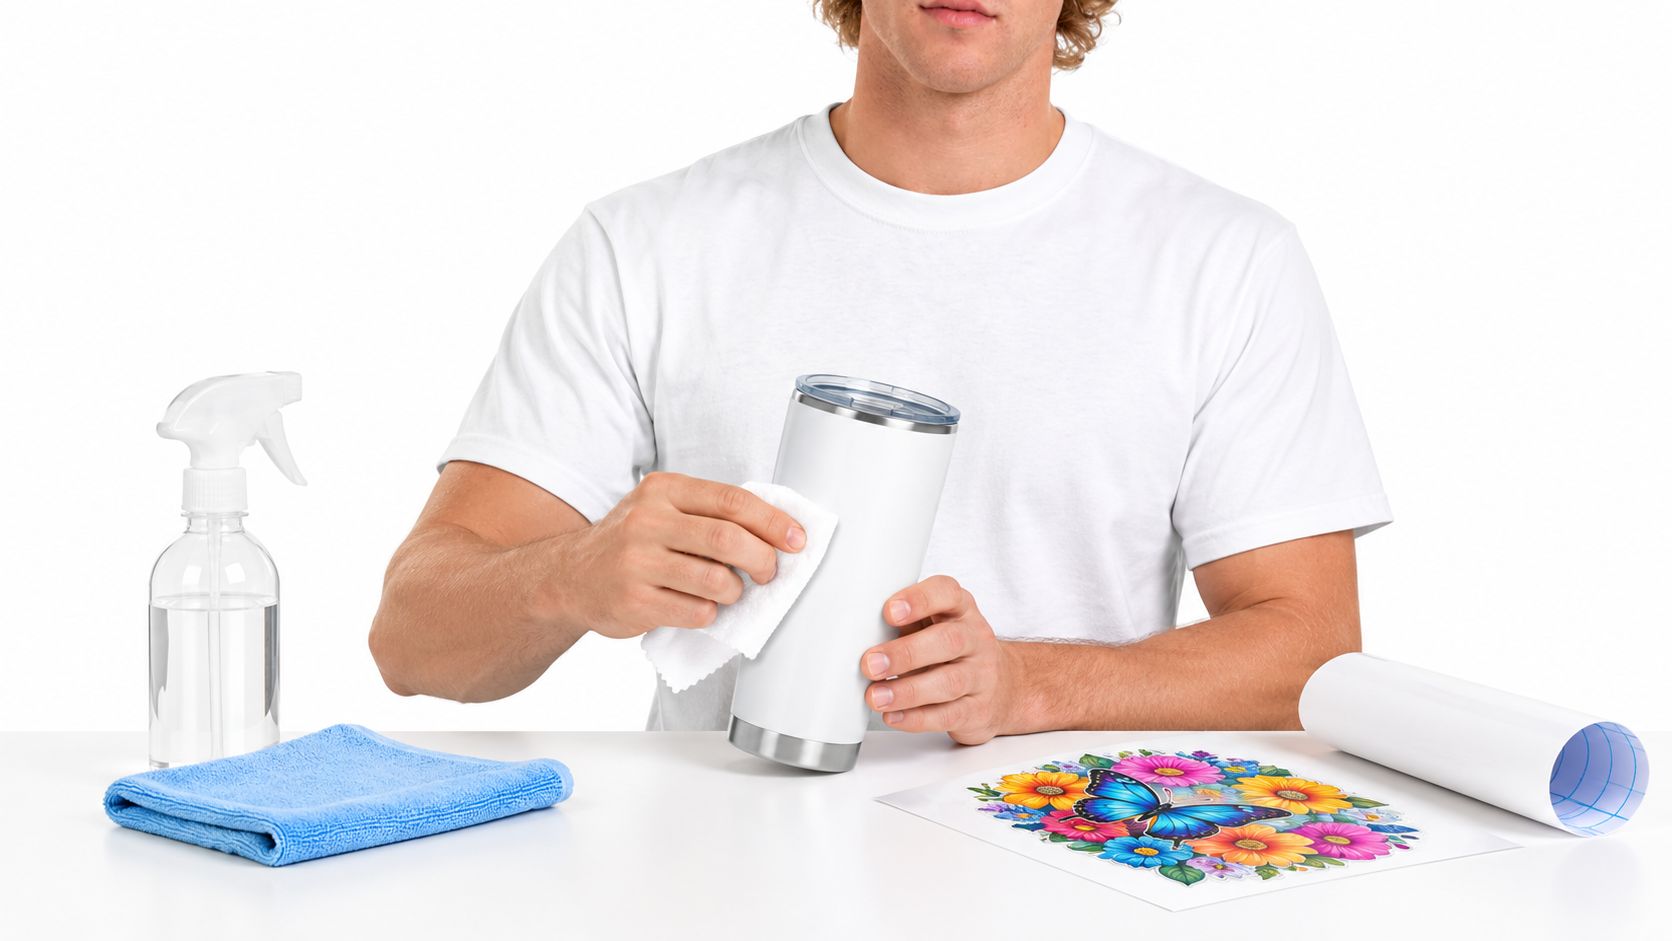
A garment blank such as the Gildan Heavy Cotton T-shirt (Small to XLarge) belongs to the heat-transfer workflow, not the hard-surface UV DTF process. Keep fabric-transfer assumptions out of tumbler preparation.
Check the design before committing
- Measure the usable panel: Keep artwork away from rims, bases, handles, and abrupt diameter changes.
- Match the shape to the surface: Use a compact decal for tighter curves. Reserve broad wraps for surfaces that remain consistently cylindrical.
- Inspect the carrier: Confirm the transfer is flat and free from dust before exposing adhesive.
- Plan your grip: Set the tumbler on a stable surface and leave enough room to rotate it without dragging the decal.
- Mark alignment points: Use the seam, handle position, or another fixed feature as a reference before placement.
If the design bridges a sharp transition, reduce its width, split the artwork, or select a decal shaped for that geometry. Repositioning repeatedly usually means the size, shape, or placement plan needs to change before adhesive touches the tumbler.
Practical rule: Test the fit dry, clean once, and commit only after the decal follows the tumbler's real curve.
Applying UV DTF Decals to Curved Tumblers Without Bubbles
A decal can look aligned at the top and still wrinkle near the base once the tumbler changes diameter. Curved application depends on controlling tension, not pressing harder. Double-wall tumblers often taper, while textured finishes interrupt contact and trap air beneath broad artwork. Choose a compact design for tighter curves, and avoid forcing a flat-style wrap across a surface that changes shape quickly.
Start at the center and work outward
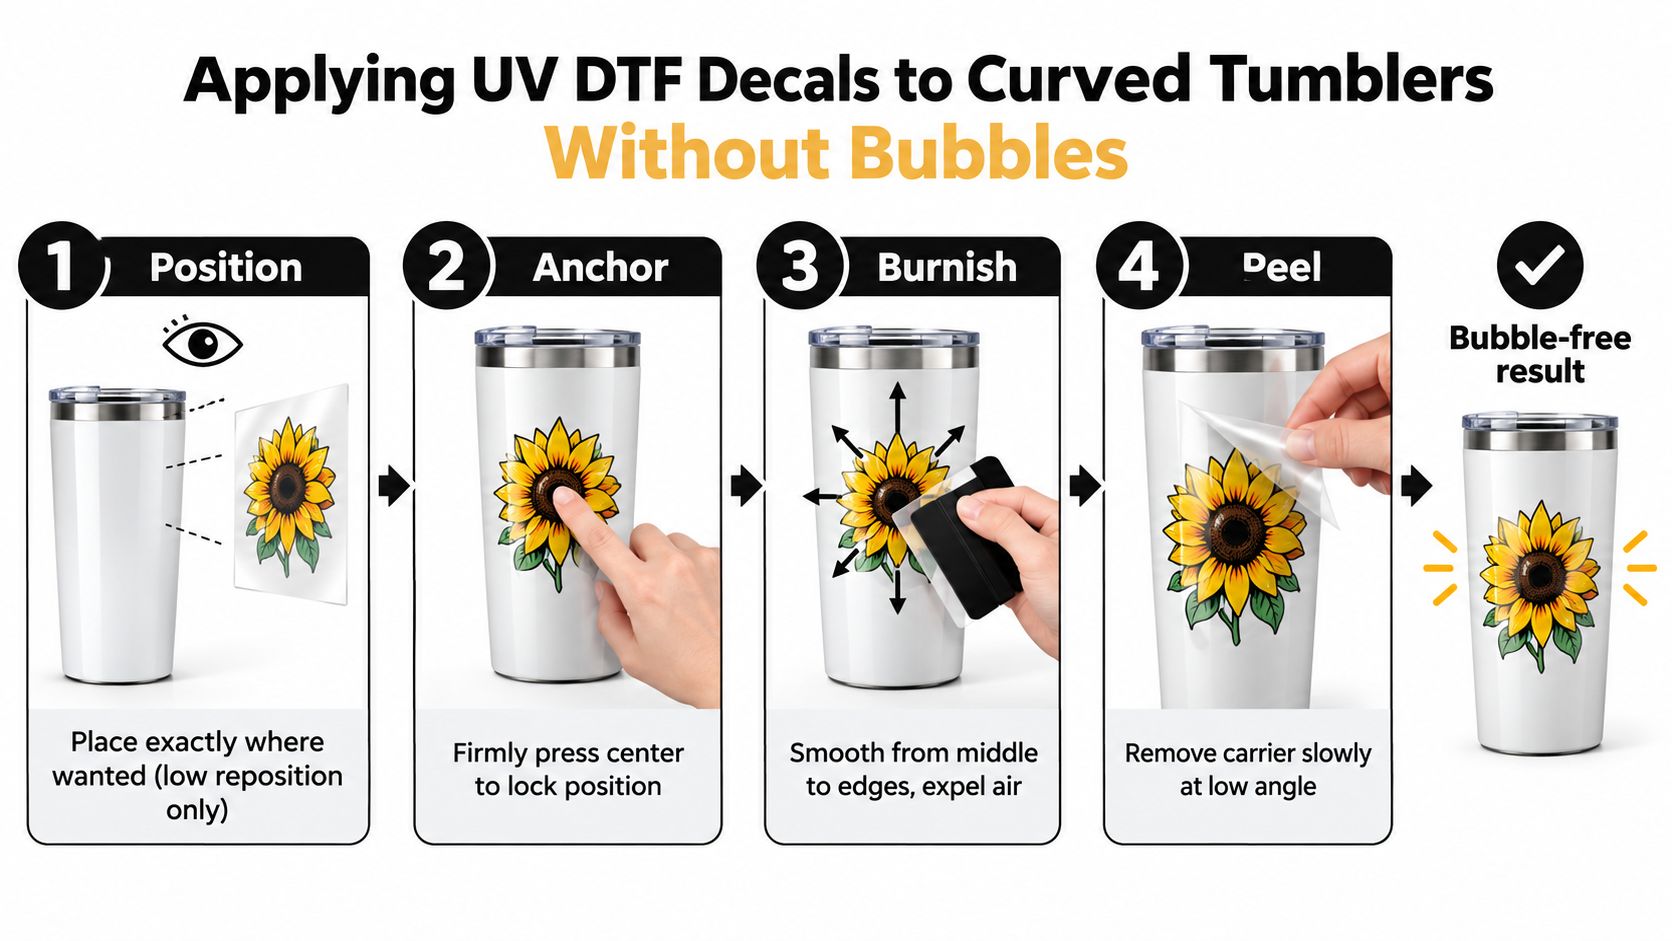
Hold the decal over the prepared tumbler and align it before lowering the adhesive. For a spot design, use the artwork's visual center. For a wrap, align one reference edge and check the opposite edge before committing.
Expose only the adhesive you can control. Place the center or a small central section first, then press it firmly with a fingertip. This anchor keeps the design from drifting as you work toward the sides.
Use a squeegee, plastic card, or firm credit card in short, overlapping passes. Work from the middle outward, keeping the tool in close contact with the surface. Maintain firm, even pressure for about 20 to 30 seconds, concentrating on the perimeter and any curved seam. Uneven pressure leaves channels where bubbles can form.
Follow the tumbler's geometry
Rotate the tumbler gradually instead of trying to flatten a wide decal in one stroke. On a cylinder, short sections keep the film supported. On a tapered tumbler, press in the direction the surface accepts naturally. Pulling sideways to force a lower edge into alignment creates tension and can lift the opposite side.
A smaller decal, separated artwork, or open space around the design usually performs better on a compound curve than a solid panel. Textured tumblers need extra attention because raised grain or powder coat texture can prevent full contact. Press those areas repeatedly rather than dragging the tool across them.
Peel the carrier slowly at a low angle. Watch the artwork as it releases. If a letter, outline, or edge remains on the carrier, stop, lay the film back down, and reburnish the area before continuing.
A clean peel is earned by pressure. If the carrier resists, put it back down, press the problem area, and adjust the peel angle instead of yanking.
Inspect the perimeter after removal, especially around seams, corners, and the lower edge of a taper. Press down any area that looks hazy or lifted. For another hard-surface example, see this UV DTF bottle sticker application guide.
Curing and Caring for Long Lasting Durability
A decal can look finished as soon as the carrier comes off, but the adhesive still needs time to establish its bond. The first day is when careless handling does the most damage. Rubbing the design, soaking the tumbler, or scrubbing an edge too soon can compromise an application that otherwise looked perfect.
Give the adhesive a dwell window
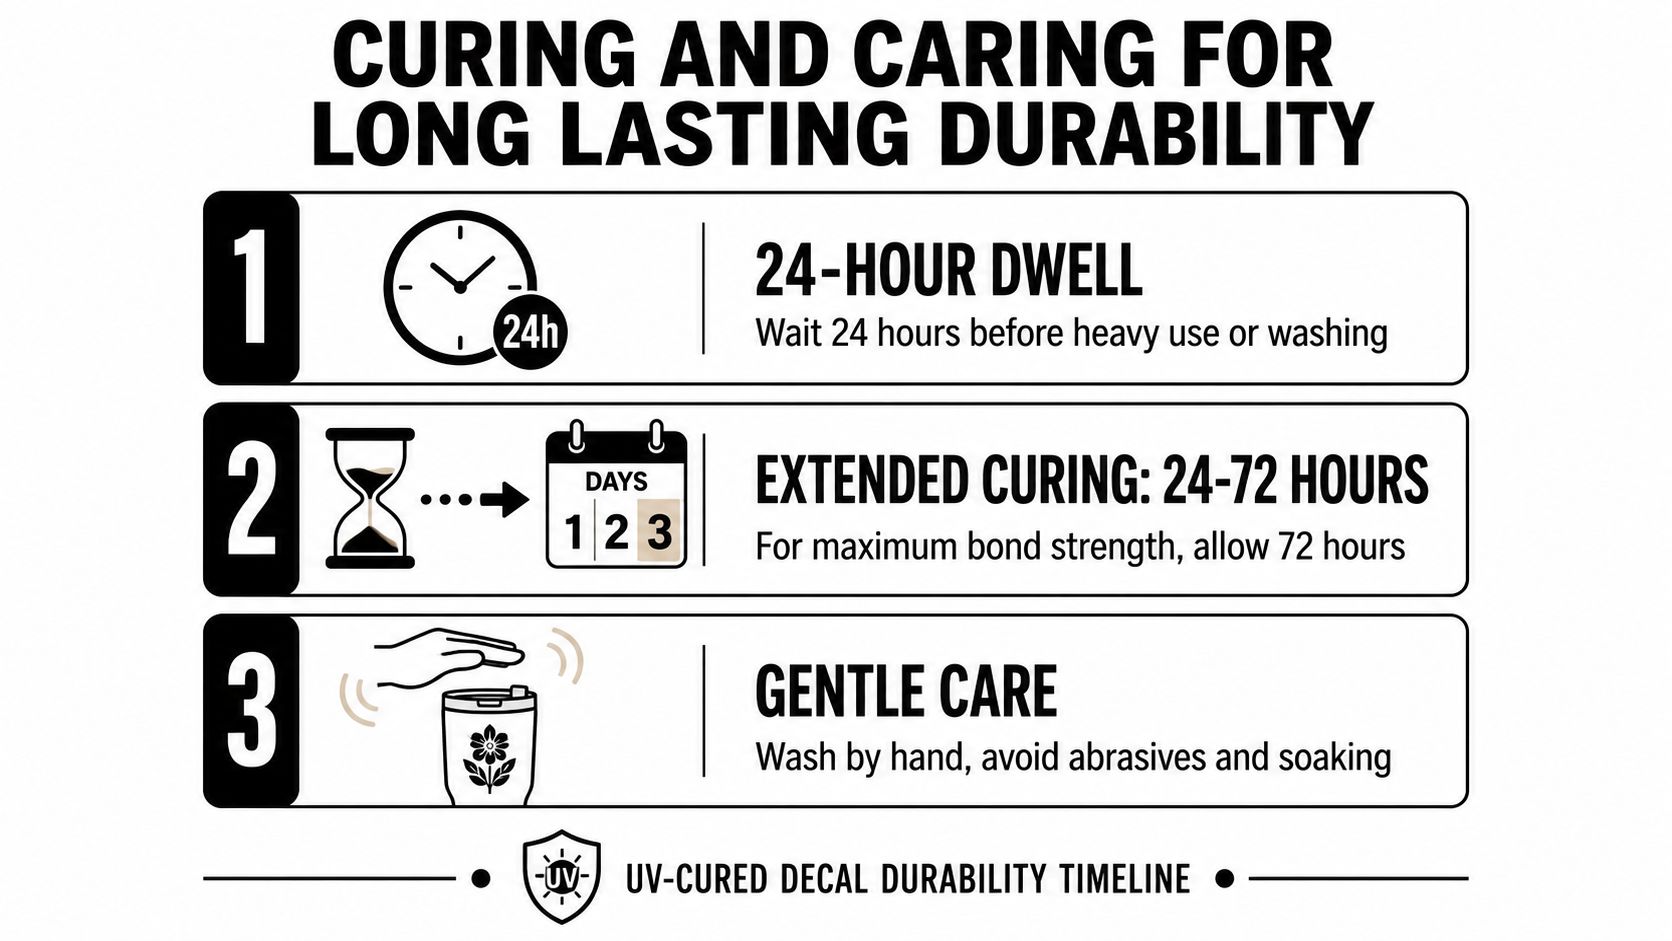
Plan for about 24 hours before heavy use. Some application guidance extends the waiting period to 24 to 72 hours for maximum adhesive strength, particularly when the tumbler will face frequent handling or washing. Durability guidance for UV DTF transfers identifies the same practical window and points to contamination, incomplete edge pressure, and aggressive carrier removal as common causes of premature failure.
During that period, leave the tumbler in a clean, dry place. Don't stack other items against the decal, put it in a bag where the design can rub, or test the edge with a fingernail. The adhesive needs undisturbed contact, not repeated checking.
Treat waterproofing as limited protection
UV-cured ink and a well-bonded adhesive can handle normal contact with moisture, but that doesn't make every application suitable for a dishwasher, abrasive sponge, or prolonged soaking. Hand washing is the safer care routine. Use mild soap, a soft cloth, and gentle pressure around the decorated area.
Avoid scrubbing directly across raised details or sharp decal edges. Those are the points most likely to catch on a rough pad or fingernail. Harsh chemicals and repeated abrasion can shorten the useful life of the finish even when the initial application was sound.
For broader guidance on handling transfer-decorated products, refer to these DTF care instructions. Store finished tumblers upright with space between them, and keep decorated areas from contacting hard surfaces during transport.
Fixing Common Issues on Textured and Tightly Curved Tumblers
A flat sample can make every decal appear universally compatible. Real drinkware is less cooperative. Textured powder coat creates peaks and valleys, double-wall construction often produces tapered profiles or transitions near the base, and heavily handled zones expose weak edges quickly.
The key question isn't whether UV DTF works on tumblers. It's whether the decal can maintain enough continuous contact across that tumbler's actual geometry. Slight curves are generally manageable, while very textured surfaces and extreme curves can weaken adhesion, as noted in the UV DTF surface FAQ.
Diagnose the failure by location
A bubble in the center usually points to trapped air or incomplete center-outward burnishing. A bubble that follows a texture line suggests the surface itself is preventing full contact. Edge lift along a tight curve often means the decal is too wide, the film is under tension, or the edge didn't receive enough pressure.
A double-wall tumbler isn't automatically a problem because of the insulation. The issue is the external shape and coating. A decal can look smooth across the broad body but fail where the diameter changes, where a seam interrupts the panel, or where the design reaches a high-contact rim or base area.
| Tumbler Geometry | Recommended Decal Approach | Risk If Ignored |
|---|---|---|
| Smooth straight cylinder | Spot decal or full wrap with careful alignment | Misalignment and trapped air |
| Smooth tapered body | Smaller artwork, flexible layout, or segmented design | Wrinkles, overlap, and edge tension |
| Lightly textured coating | Compact decal with firm perimeter burnishing | Weak contact along texture peaks |
| Deep texture or pronounced ridges | Test a small design first, consider a tactile or segmented format | Persistent lifting and incomplete bonding |
| Tight curve near base or lid | Keep artwork away from the transition | Edge peel and visible distortion |
| High-contact grip area | Use a smaller design with rounded edges | Abrasion and handling wear |
Choose the format before wasting the transfer
A wide flat wrap isn't always the premium option. On a difficult tumbler, several smaller decals may produce a cleaner, more intentional result than one large panel forced across incompatible curves. Recent market coverage also points toward differentiated formats, including 3D tactile UV DTF transfers and mini-tumbler accessories, reflecting demand for designs that offer more than a basic name decal.
If the surface is heavily textured, test the exact finish before committing to a larger order. If the curve is extreme, redesign around the geometry instead of asking the decal to behave like a flexible sheet. Open artwork, rounded corners, segmented lettering, and compact motifs usually give the adhesive more opportunities to sit flat.
For silvering or hazy areas, press the film again from the center toward the affected edge. For a lifted section, return it to position and reburnish before removing the carrier. If the surface itself prevents contact, more pressure won't fully solve the underlying mismatch. Change the decal shape or placement.
Your Next Flawless Tumbler Project Starts Here
A reliable tumbler workflow is less about speed than sequence. Choose the blank by its finish and geometry, not just its color. Match the decal format to the curve, clean with isopropyl alcohol, let the surface dry, position once, anchor the center, burnish outward, and remove the carrier slowly.
Start with a compact spot decal before attempting a large full wrap. That smaller project lets you judge the coating, pressure response, carrier release, and edge behavior without sacrificing a complex design. Once you know how the blank handles, you can test wider layouts or use a gang sheet to compare multiple sizes and shapes in one production run.
Use this decision checklist before your next application:
- Smooth and straight: A standard spot decal or wrap is a reasonable choice.
- Tapered: Reduce width, avoid abrupt transitions, and keep the artwork away from the base.
- Textured: Test first and expect weaker contact in deeper texture.
- Tightly curved: Use a compact or segmented design rather than forcing a rigid panel.
- High handling: Keep critical details away from grip zones, rims, and bases.
- New artwork: Apply one sample and allow the adhesive to dwell before judging the result.
If you're planning personalized drinkware, the HYDAWAY personalization guide offers another useful reference for thinking about placement, product shape, and how a design sits on a travel tumbler.
Raccoon Transfers provides UV DTF stickers for hard surfaces such as tumblers, cups, and phone cases, along with custom artwork and gang sheet options for testing different decal formats. Visit Raccoon Transfers to choose a transfer for your tumbler geometry, order a sample, and apply it with the pressure and cure time the surface requires.