

UV DTF Transfer Sheets Explained for Hard Surfaces
You've got a stack of plain tumblers, a set of colorful designs, and a familiar question: should you use apparel DTF, sublimation, vinyl, or something else entirely? Then you discover that UV DTF transfer sheets can decorate glass, metal, acrylic, plastic, and ceramic without a heat press. The appeal is obvious, but the first application can still go wrong if the surface is dusty, textured, curved, or slightly oily.
UV DTF works best when you treat it as a pressure-activated hard-surface system, not as apparel DTF with a different name. This guide starts with the basic film structure, compares UV DTF with standard DTF, then moves into surface selection, application technique, curing time, care, and ordering decisions.
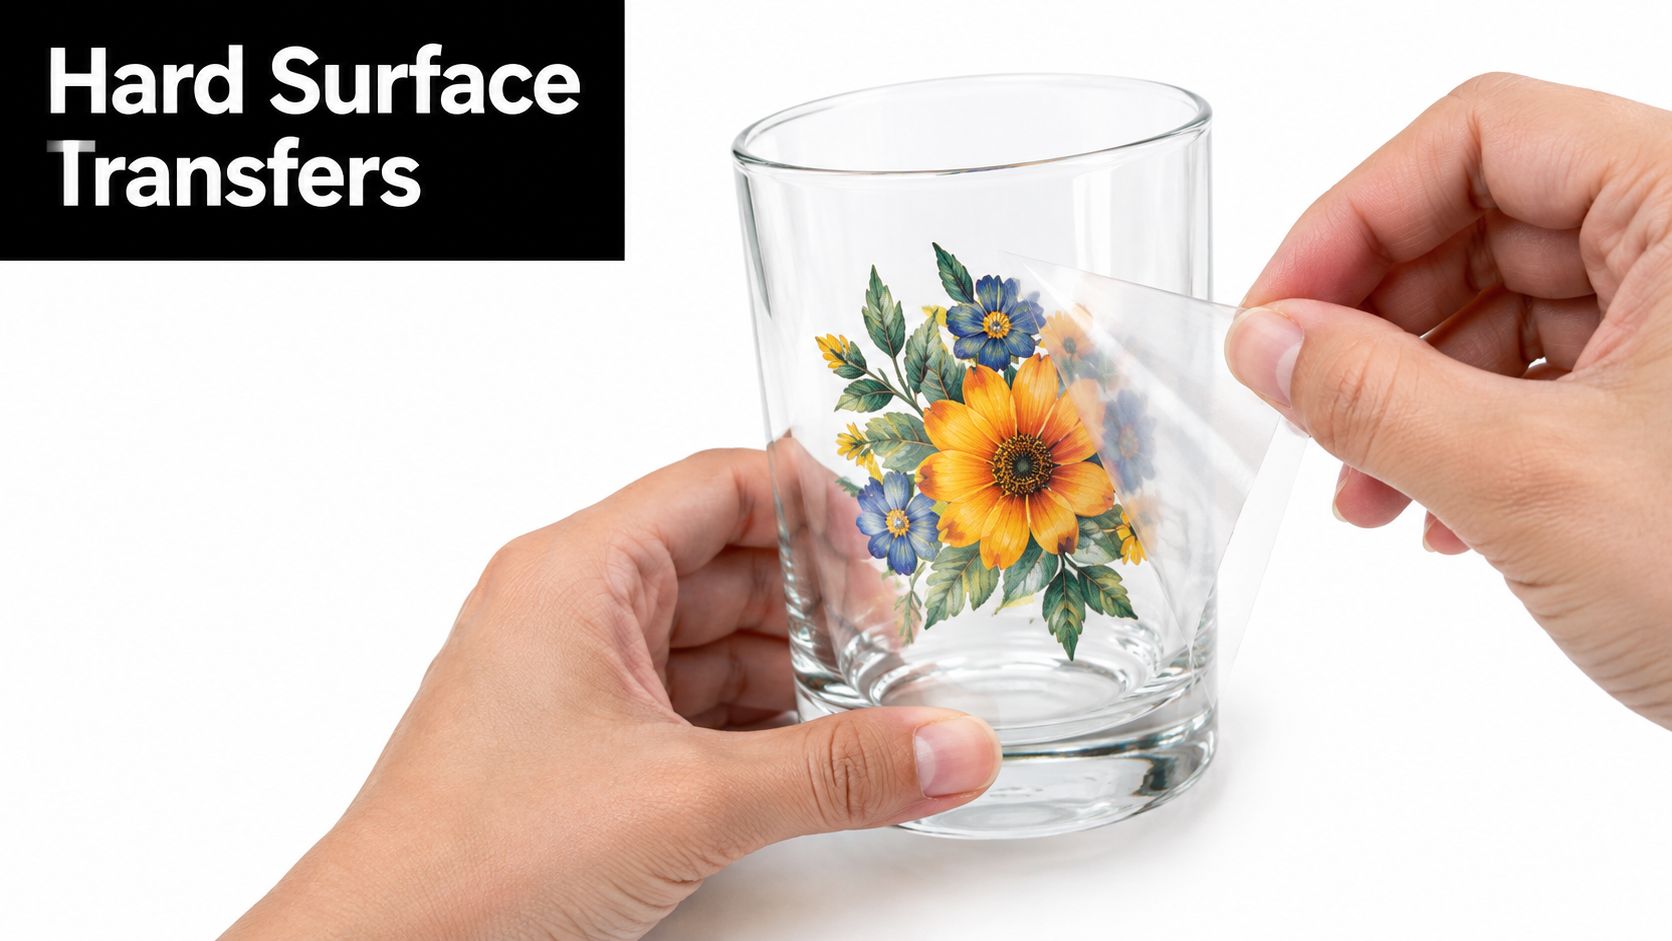
The category is also attracting wider commercial attention. One market projection places the UV DTF market at USD 1,470 million in 2025 and USD 5 billion by 2035, representing more than 3.4 times expansion over the decade, according to the Wise Guy Reports market forecast. That growth doesn't mean every object is automatically compatible. It means makers and small brands need a more precise understanding of where the process performs well.
Introduction to UV DTF Transfer Sheets
A small brand owner may start with a simple product idea, such as a logo on a stainless-steel bottle or a floral wrap on a glass tumbler. If the design is going on a shirt, standard DTF makes sense because the transfer is built for fabric and heat pressing. If the design is going on a rigid object, UV DTF usually belongs on the shortlist because it applies with pressure rather than a heat press.
That distinction changes the entire workflow. You're not loading a garment, sprinkling adhesive powder, and pressing the artwork into fibers. You're preparing a hard surface, positioning a transfer, pressing it down evenly, and removing the carrier film carefully.
The practical decision is simple:
- For clothing, look at standard DTF or another fabric-focused decoration method.
- For glass and drinkware, consider UV DTF when you want full-color graphics without heat.
- For acrylic, plastic, metal, or ceramic, inspect the finish first, then test adhesion before committing to a production run.
- For porous or heavily textured objects, assume the surface needs extra testing or sealing rather than assuming the transfer will behave like a sticker.
The most common beginner mistake is judging a transfer by the print alone. A design can look sharp and colorful while still lifting at the edges because the object had residue, a powder-coated texture, or a low-surface-energy plastic finish. UV DTF rewards careful preparation more than rushed application.
You'll also want to separate short-term visual success from long-term performance. A decal may look perfect immediately but need settling time before you evaluate its final bond. Cleaning habits, abrasive contact, and heat exposure can also affect the result.
This is why UV DTF transfer sheets suit independent designers, crafters, promotional-product teams, and small merchandise brands that need flexible hard-surface decoration. They can make a polished object without investing in a fabric heat-press workflow, but they still need to match the film to the substrate and use controlled pressure.
What UV DTF Transfer Sheets Are and How They Work
Think of UV DTF as a premium peel-and-stick graphic that arrives in layers. The image isn't printed onto an ordinary sticker. It's built through a two-film PET system, with each film performing a different job.
The UV DTF substrate compatibility guide describes the usual structure:
- A film: This film has the adhesive coating and receives the UV-curable print.
- B film: This film is laminated over the printed A film and acts as the transfer carrier.
- Pressure bond: The adhesive activates through firm contact and pressure, not through heat.
That last point explains why a heat press isn't the centerpiece of this process. The transfer needs clean contact with a suitable surface. Heat may be part of some supplier-specific recommendations, but the basic bond described for UV DTF is pressure-activated.
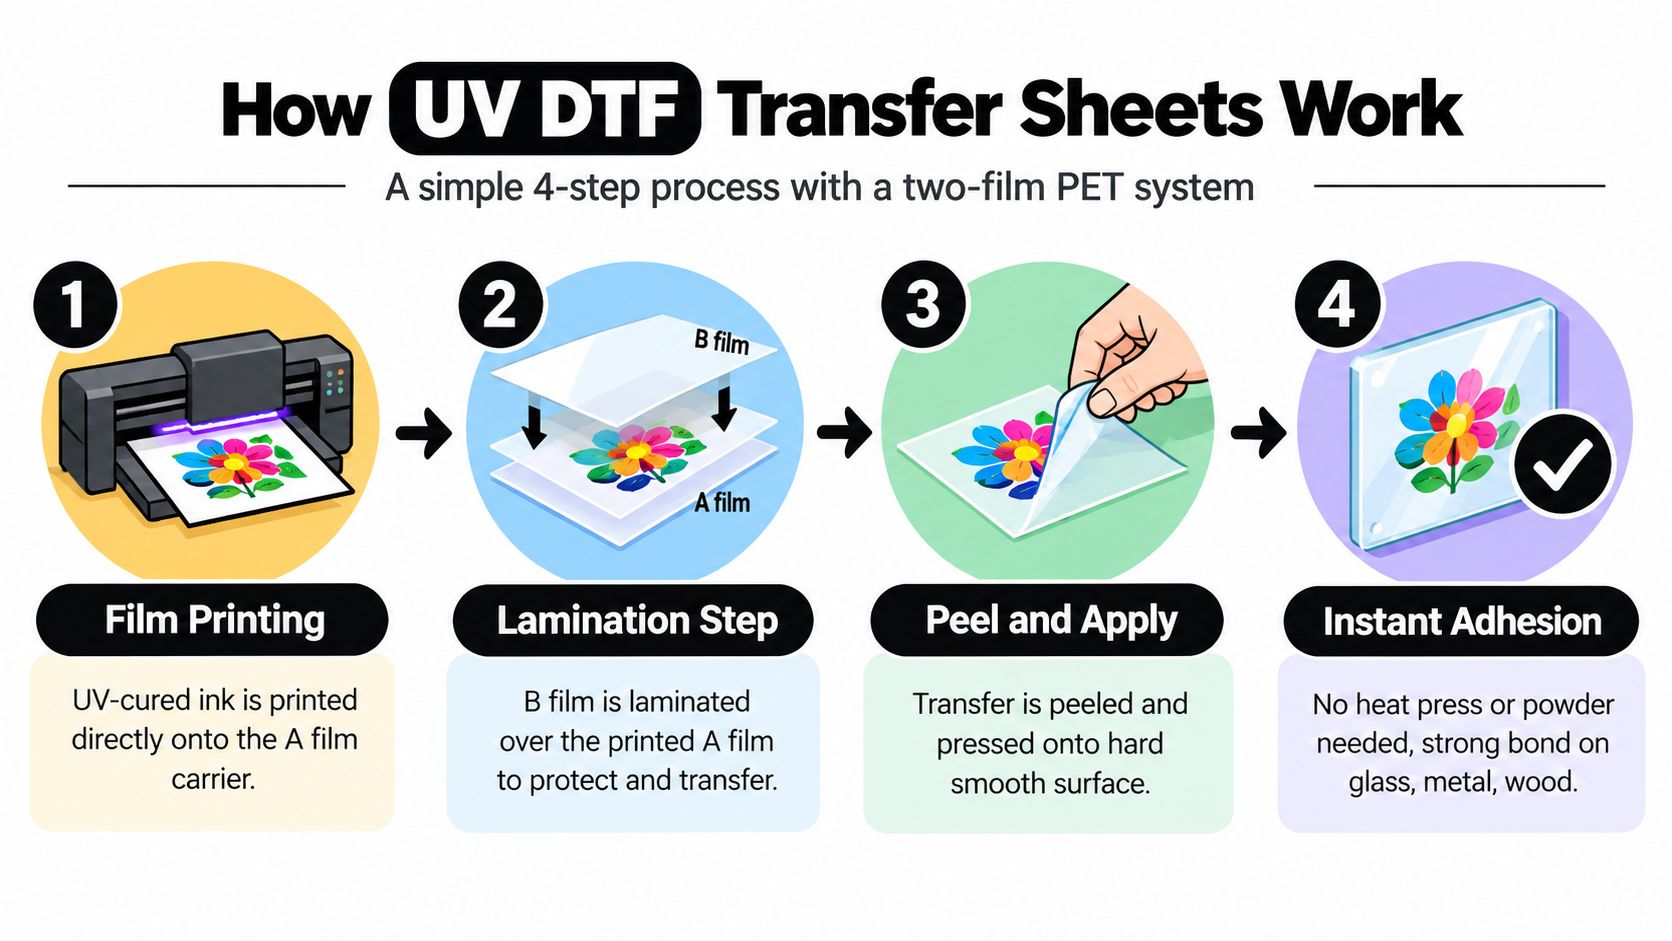
The four stages in plain language
First, the printer creates the graphic. UV-curable ink is printed onto the A film. UV exposure cures the ink, forming the colorful, raised graphic associated with many UV DTF products.
Next, the films are laminated. The B film covers the printed design and gives you a carrier that can hold the artwork while you position it. You can think of it as a temporary handle for the graphic.
Then, you transfer the design. The prepared sheet is placed against a clean, rigid surface. Firm, even pressure brings the adhesive into contact with the object.
Finally, you peel away the carrier. If the design has bonded correctly, the B film lifts away while the printed graphic stays on the substrate.
The cured ink layer helps explain why UV DTF is used for hard goods rather than flexible apparel. Technical guidance describes the cured layer as hard and plastic-like, which gives the finished graphic a more decal-like feel than a soft fabric transfer. If you're still learning the broader difference between apparel DTF and other transfer types, Skup's DTF transfer guide provides useful context for standard ready-to-press DTF.
For custom artwork, a gang-sheet workflow can place multiple designs into one efficient layout. Upload Your Own UV DTF Gang Sheets is one example of a service built around submitting artwork for hard-surface transfers. The important question isn't just whether the graphic looks vibrant. It's whether the film, adhesive, substrate, and application method work together.
UV DTF Versus Standard DTF and When to Use Each
UV DTF and standard DTF share part of a name, but they solve different decoration problems. Confusing them can leave you with a transfer that looks right on the screen but has the wrong bonding method for the object in your hand.
UV DTF is designed around rigid surfaces. Standard DTF is designed around textiles. UV DTF uses UV-curable ink and a pressure-sensitive adhesive system. Standard DTF generally uses printed film, adhesive powder, and heat pressing to bond the design to fabric.
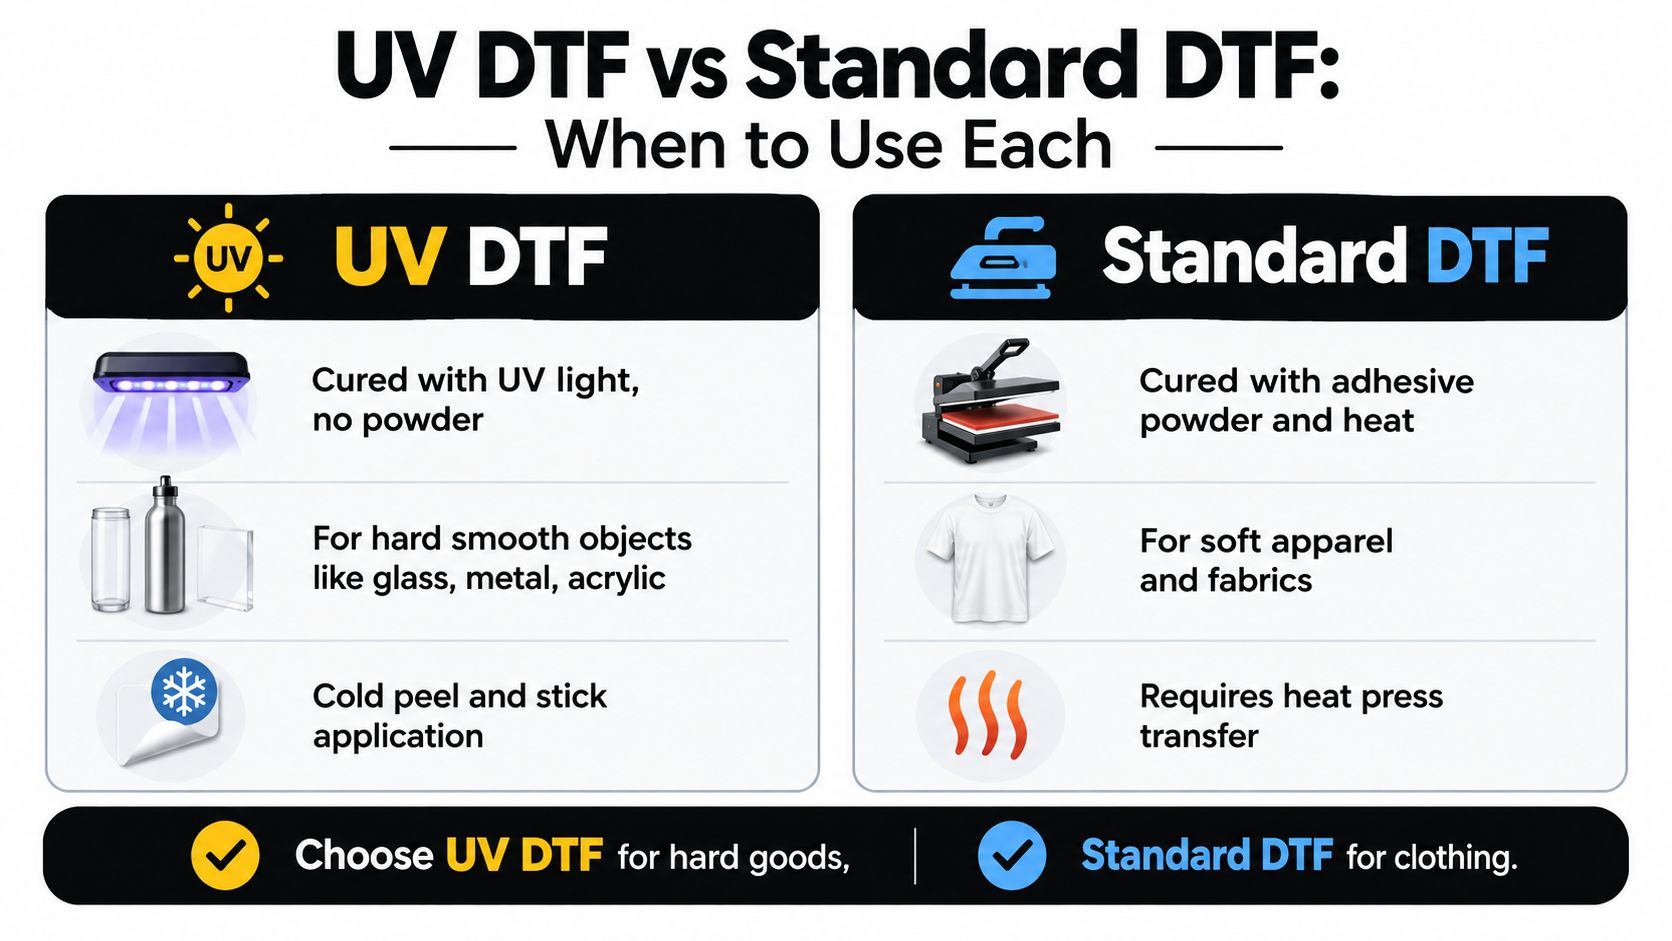
UV DTF vs Standard DTF at a Glance
| Feature | UV DTF Transfer Sheets | Standard DTF Transfers |
|---|---|---|
| Primary surface | Hard, smooth objects | Fabric and apparel |
| Ink and bonding approach | UV-cured print with pressure-activated adhesive | Printed transfer with adhesive powder and heat |
| Main application method | Position, press, and peel the carrier | Heat press the transfer into the textile |
| Typical examples | Glass, metal, acrylic, plastic, ceramic | Cotton and synthetic garments |
| Finished feel | More rigid, raised, and plastic-like | Flexible and designed to move with fabric |
| Main performance concern | Surface contact, peeling, cleaning, and abrasion | Fabric compatibility, wash care, and press conditions |
Choose UV DTF when the blank is a tumbler, glass jar, acrylic sign, metal bottle, plastic container, or ceramic item with a suitable finish. The method is especially useful when the object can't be placed conveniently in a garment heat-press workflow.
Choose standard DTF when you're decorating shirts, hoodies, tote bags, or other fabric products. Textile transfers need to flex as the garment bends, stretches, and moves. A rigid, raised UV DTF graphic isn't a substitute for that behavior.
Some projects can include both methods. A small merchandise business might use standard DTF for a logo on a sweatshirt and UV DTF for the same logo on a branded water bottle. The artwork can be related, but the production process and substrate requirements are not interchangeable.
A second market estimate valued the global UV DTF market at US$215 million in 2024 and projected it to reach US$442 million by 2031, with an implied 10.2% CAGR, as reported in the Valuates market estimate. Regardless of the forecast, your immediate decision still comes down to the object. Hard goods point toward UV DTF. Clothing points toward standard DTF.
Technical Specs That Affect Print Quality and Adhesion
A vivid print can't compensate for poor contact. UV DTF performance depends on the conditions in the workspace, the condition of the film, and the pressure used during application.
A technical datasheet for UV DTF film recommends a printing and lamination environment of roughly 20 to 28°C with 40 to 60% relative humidity, and it identifies clean, dry, smooth, rigid surfaces as the preferred adhesion conditions. The same source reports commercial pencil hardness commonly around 3H to 6H, as detailed in the UV DTF film technical datasheet.
Control the room before blaming the print
Temperature affects how materials handle during printing, lamination, and application. Humidity can also change the way films behave. You don't need to turn a craft room into a laboratory, but you should avoid applying transfers in a space with noticeably unstable conditions.
Keep the work area clean and let the object reach the room's normal working temperature. A cold tumbler taken directly from storage may not behave like a dry tumbler that has been sitting indoors.
Check the film and cured layer
The A film carries the printed image and adhesive system, while the B film protects and supports the transfer during handling. Creases, damaged edges, trapped dust, or weak lamination can create visible defects before the transfer reaches the product.
The cured surface is one reason UV DTF suits rigid graphics. A hard, plastic-like layer can resist everyday scratching better than a soft decorative film, but hardness doesn't eliminate edge lifting. A sharp corner, rough coating, or repeated abrasion can still challenge the bond.
Apply pressure evenly
Pressure must reach the entire design, including small lettering and outer edges. Pressing only the center can leave weak contact around the perimeter, where peeling usually begins.
Before applying, compare the object with a practical material compatibility chart. It can help you identify whether you're working with a straightforward rigid surface or a finish that deserves a test piece first.
Workshop rule: Treat surface preparation and pressure as part of the print process, not as optional finishing steps.
Compatible Substrates and Surfaces to Avoid
The safest starting point is a clean, dry, smooth, rigid, non-porous surface. Glass, metal, acrylic, plastic, and ceramic are common candidates for UV DTF, but the material name alone doesn't guarantee success. The coating, texture, curvature, and surface energy matter just as much.
A smooth glass tumbler gives the adhesive broad, consistent contact. A textured powder-coated bottle may look solid but present tiny high and low points that reduce the actual contact area. A plastic container can also be difficult if its surface energy is low, because the adhesive may not spread and hold as reliably.
Strong candidates
- Glass: Usually offers a smooth, non-porous face, especially after removing fingerprints and residue.
- Metal: Works well when the finish is clean and even. Inspect painted or coated metal rather than judging bare metal alone.
- Acrylic: Smooth acrylic can accept detailed graphics, but protective coatings and scratches deserve attention.
- Plastic: Test unfamiliar plastics first. Different formulations and finishes can behave differently.
- Ceramic: Glazed ceramic is more predictable than rough or porous ceramic.
The UV DTF application guide is useful when you want a practical reference for cleaning, positioning, pressing, and carrier removal. Start by wiping away oil, dust, and fingerprints with a suitable cleaner and a lint-free cloth. Let the surface dry fully before positioning the transfer.
Edge cases that need a test
Textured coatings can prevent full adhesive contact. If the transfer crosses a raised pattern, expect a greater chance of gaps or edge lift.
Curved bottles require careful positioning because the transfer may wrinkle or bridge as the surface changes direction. Smaller graphics or designs planned for the curve are easier to control than oversized artwork forced around a tight radius.
Powder-coated items can work, but the coating's texture and finish control the result. Test the exact blank, not a visually similar one.
Porous wood should not be treated as a default substrate. Guidance identifies porous wood as unsuitable without a sealant, and fabric is generally outside the rigid-surface use case. Rough, unfinished materials can absorb contamination or prevent a continuous adhesive bond.
A simple test saves material. Apply a small, representative design to the same finish, press it carefully, and inspect the edges after the transfer has had time to settle. If the test lifts, flakes, or shows incomplete contact, change the substrate or prepare it differently before committing to a larger order.
Application Curing and Durability in Real World Use
The application itself is where many failures begin. A transfer can be technically compatible with an object and still perform poorly if you rush the peel, trap dust underneath, or press unevenly.
Start with a clean, dry surface and place the transfer carefully. Work from one side toward the other, using your fingers, a squeegee, or another smooth pressing tool to push the graphic into contact. Keep the sheet aligned before applying firm pressure, because repositioning becomes difficult once the adhesive starts contacting the object.
Peel slowly and watch the design
Remove the carrier film at a controlled pace and a low angle. If part of the graphic starts lifting with the carrier, stop, lower it again, and press that area before continuing. Pulling quickly can contribute to flaking or cracking, particularly around fine details and sharp corners.
Peeling rule: If the artwork follows the carrier, don't force it. Put the film back down, burnish the area, and continue more slowly.
After the carrier is removed, inspect the edges and small lettering. Press down any area that looks raised. Avoid judging final adhesion immediately. Many guides recommend waiting about 24 hours before final adhesion testing because the bond strengthens as the adhesive settles, as noted in application and care guidance.
Durability depends on use
UV DTF graphics are often described as waterproof and scratch-resistant, but those terms don't mean indestructible. Repeated abrasion, harsh cleaning, soaking, dishwasher cycles, and heat exposure can shorten the useful life of a transfer. Hand washing is the safer care choice for decorated drinkware and similar items.
A tumbler used gently at home faces different conditions from one carried daily, scrubbed aggressively, or placed in a dishwasher. Check your finished item with an abrasion resistance testing guide if you're evaluating a product for resale or repeated handling.
The contrarian lesson is important: durability comes from the whole system. Film quality matters, but surface preparation, controlled peeling, complete pressure, settling time, and maintenance may matter just as much.
Ordering Tips File Prep and Getting the Best Value
Good ordering starts before you visit a transfer supplier. Decide what objects you're decorating, measure the usable area, and identify whether the artwork will be applied to a flat face, a gentle curve, or a complex shape.
For multiple designs, gang sheets can make better use of the printed layout because several graphics share one sheet. Arrange logos, names, icons, and small labels with enough separation to cut them cleanly. If you're ordering a single large graphic, a transfer selected by size may be simpler than building a crowded layout.
Prepare the artwork correctly
Raccoon Transfers' catalog information lists PNG, PDF, and AI as accepted file types for its UV DTF gang-sheet workflow. The same information says artwork shouldn't be mirrored before upload because the system prepares the file for printing.
Before submitting a file, check these points:
- Inspect edges: Zoom in on small text, thin outlines, and transparent areas.
- Confirm orientation: Keep the artwork in its normal reading direction unless the supplier gives different instructions.
- Match the object: Size the design for the actual flat or curved application area.
- Plan the layout: Group repeat designs efficiently without placing them so close that cutting becomes awkward.
- Ask about format options: Fixed-width roll systems with variable lengths and pre-cut cup wraps are becoming more relevant for different production needs, especially when standard tumbler formats are involved.
The best value isn't always the largest sheet. It's the format that reduces unused space, cutting time, and application mistakes. A small brand making several product types may prefer a gang sheet, while a maker testing one design may want a transfer ordered by its finished dimensions.
Order only after checking the substrate, care expectations, and final size. That simple sequence prevents the most expensive mistake, printing attractive artwork for an object that can't provide a reliable adhesive surface.
Raccoon Transfers offers custom UV DTF gang sheets and transfers by size for hard surfaces such as glass, acrylic, plastic, and metal, with artwork upload options for creators and small businesses. Visit Raccoon Transfers to choose a format, prepare your design, and start your next hard-surface customization project with the right transfer for the job.