
A Crafter's Guide to Heat Press Tape
Heat press tape is one of those simple, unsung heroes in a print shop. It's a special kind of heat-resistant tape made specifically to hold your designs in place while you're pressing them. The magic is in its unique adhesive—it grips tight when things get hot but peels off cleanly afterward, leaving you with a sharp, perfectly placed graphic every single time.
Why Heat Press Tape Is Your Secret Weapon
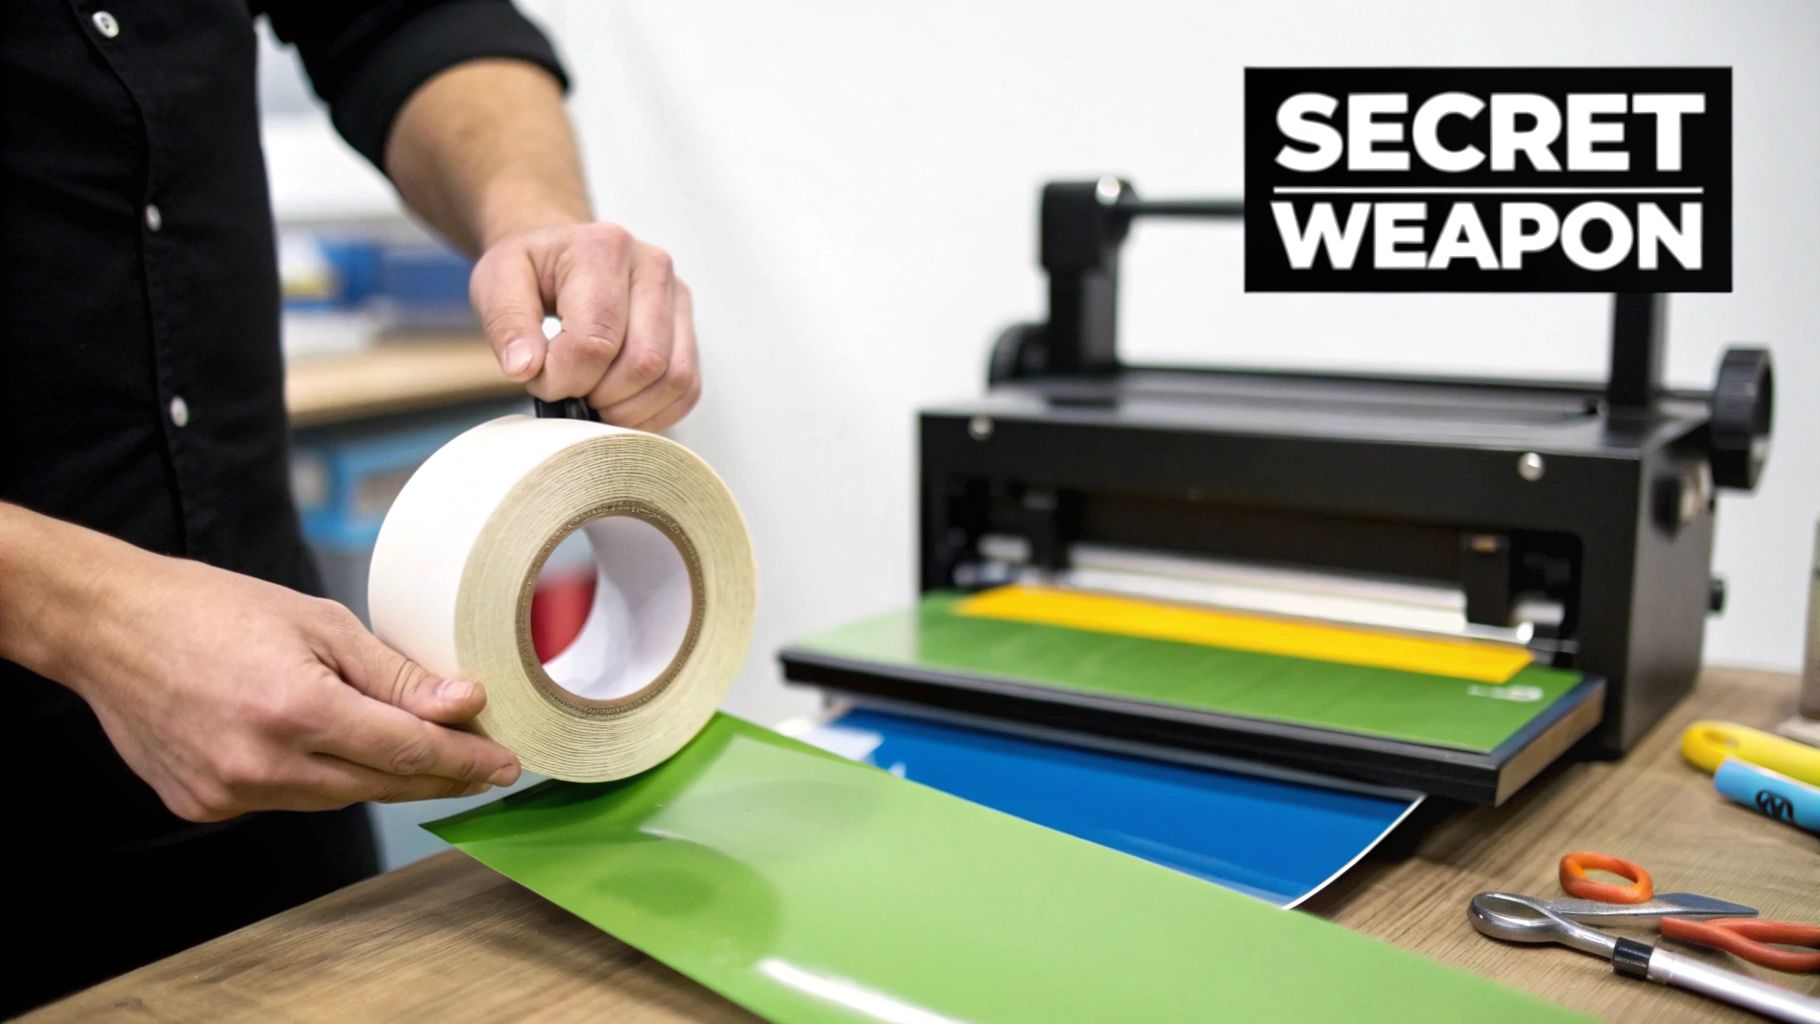
We've all been there. You spend time and money getting a custom design just right, you line it up perfectly, and then you open the press to find a blurry, misaligned mess. That frustrating result is called "ghosting," and it's the number one problem heat press tape solves.
Think of it as a cheap insurance policy for your project. A small, simple tool that protects your valuable time and materials from being wasted.
The Science of a Secure Transfer
When you clamp down a heat press, the combination of intense pressure and heat can easily make your transfer paper or vinyl shift around. Even a tiny slide—less than a millimeter—is enough to ruin an intricate design. This tape acts as a temporary anchor, locking your transfer exactly where you want it, whether you're working on a soft t-shirt or a hard ceramic mug.
So, how does it work? The tape uses a silicone-based adhesive that doesn't melt under pressure. It's specifically engineered to hold strong in the heat and then release without leaving any sticky gunk behind. Try that with regular office tape, and you'll get a melted, gooey disaster. Heat press tape, on the other hand, can easily withstand temperatures up to 500°F (260°C) and sometimes even higher.
At its core, heat press tape provides stability in an unstable environment. It holds everything perfectly still while the intense heat and pressure work their magic, transforming ink into a permanent design.
More Than Just an Anchor
Beyond stopping ghosting, this little tool brings a few other key benefits to the table that really boost the quality and consistency of your work. Its job might seem simple, but the impact is huge, especially as you start taking on more complex projects.
Here’s why you should always have a roll handy:
- Waste Reduction: By preventing slips and misalignments, you'll dramatically cut down on ruined items. That means saving real money on blank shirts, hats, tumblers, and whatever else you're printing on.
- Professional Precision: It lets you achieve perfect alignment every time. This is absolutely critical when you're working with multi-layer vinyl designs or trying to position a graphic on an awkward, non-flat item.
- Equipment Protection: The clean-release adhesive means no sticky residue is left on your final product or, just as importantly, on the expensive upper platen of your heat press. A clean platen is a happy platen.
Choosing the Right Type of Heat Press Tape
Picking the right heat press tape is a lot like choosing the right tool for a job—you wouldn't use a sledgehammer to hang a picture frame. Not all tapes are created equal, and the right choice can make or break your project, whether you're working with delicate fabrics or hard, unforgiving ceramics. The key differences usually boil down to material, width, and even color.
If you've ever walked down a craft supplier's aisle, you've probably seen rolls of tape in shades of brown, amber, blue, and green. Those colors aren't just for show. They often signal different materials and heat tolerances.
The classic brown or amber tape, for instance, is typically made from polyamide, a super durable, heat-resistant polymer. Think of it as the workhorse for high-temperature jobs like sublimation on mugs and tiles, where you absolutely cannot have anything move.
Understanding Materials and Widths
The material your tape is made of is the single most important factor. While polyamide is king for sublimation, other tapes are designed for lower-temperature work, like applying heat transfer vinyl (HTV). The goal is to match the tape's temperature rating to your project's needs to avoid a sticky, melted mess.
Width also plays a huge role. A skinny 1/4-inch or 1/2-inch tape gives you precision and flexibility. It’s perfect for securing tiny, detailed designs or taping around the curves of a tumbler without causing wrinkles. On the other hand, wider 1-inch or 2-inch tapes are your go-to for big, flat items like t-shirts or metal signs, letting you secure a large transfer with just a few pieces.
A Practical Comparison
So, when do you use which tape? Let's break it down.
- Polyamide Tape (Brown/Amber): This is your champion for sublimation. Because sublimation demands high heat (often around 400°F), you need a tape that won’t warp, shrink, or leave gunk behind. It's the standard for hard goods.
- Silicone-Based Tape (Blue/Green): These are usually more flexible and are great all-rounders, especially for applying heat transfer vinyl to apparel. HTV uses lower temperatures, so you don't always need the extreme heat resistance of polyamide. Our detailed guide on the best vinyl for heat press projects can help you pair your materials perfectly.
- Fiberglass Tapes: While less common for hobbyists, these tapes offer incredible strength and are typically reserved for more demanding industrial settings.
To make it even clearer, here’s a quick comparison of the most common materials you'll encounter.
Comparing Common Heat Press Tape Materials
| Tape Material | Key Features | Best For | Typical Temp. Resistance |
|---|---|---|---|
| Polyamide | High heat resistance, no residue, firm adhesive | Sublimation on ceramics, metal, and hard surfaces | Up to 500°F (260°C) |
| Silicone-Based | Flexible, easy to remove, good for varied surfaces | Heat transfer vinyl (HTV) on apparel, fabrics, and general use | Up to 400°F (204°C) |
| Fiberglass | Extreme durability and strength, abrasion-resistant | Heavy-duty industrial applications, long-lasting machine parts | Over 500°F (260°C)+ |
Ultimately, the right tape really comes down to what you're making.
The global market for hot melt adhesive tapes, which includes products similar to heat press tape, was valued at over USD 17.79 billion in 2023. This massive number is driven by materials like polypropylene, which is prized for its high tensile strength and excellent heat resistance, showing just how much the industry relies on strong, high-performance adhesives. You can learn more about the growth of the adhesive tapes market.
For a detailed photo sublimated onto a ceramic mug, a narrow, high-temp polyamide tape is your best friend. But for a big HTV logo on the back of a hoodie, a wider, general-use silicone tape will get the job done quickly and securely.
Mastering Your Heat Press Tape Application
Getting your heat press tape application right is more than just a quick stick-and-press. It’s the difference between a project that looks sharp and professional and one that’s just… off. Sure, the tape holds the transfer down, but how you apply it is the secret to avoiding common frustrations like pressure marks, faded colors, and crooked designs.
Think of it like a chef plating a dish. They don't just dump the food on the plate; they arrange it with care for the best result. In the same way, placing your tape strategically is what elevates your work, especially when you're dealing with tricky items like mugs or delicate fabrics where every little detail counts.
The Foundation of a Flawless Press
Before a single piece of tape touches your project, a little prep work goes a long way. Always start by giving your blank a quick wipe-down with an alcohol wipe. This gets rid of any dust, oils, or lint that could get trapped under your transfer and cause those frustrating little blue spots during sublimation.
Next, it's all about positioning your transfer paper. For things like tumblers or mugs, you want to wrap that design as tightly as you can, leaving zero air gaps. Any space between the paper and the surface can lead to "ghosting"—that blurry, faded look that screams amateur—because the sublimated gas doesn't have a direct path to the blank.
This decision tree gives a great visual for how to approach different projects.
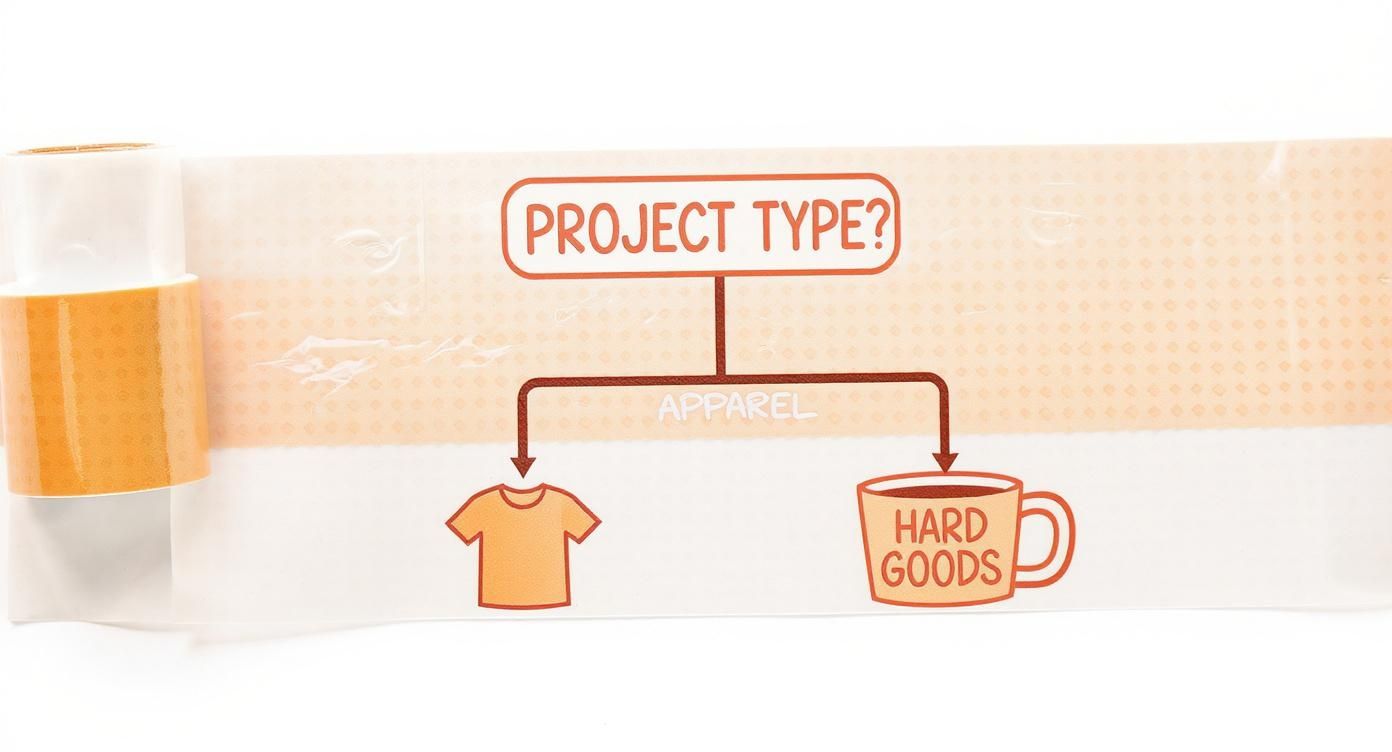
You can see how the taping strategy changes completely, from simply anchoring a design on a flat t-shirt to creating a tight, seamless wrap around a curved mug.
Pro Techniques for Perfect Placement
Once your transfer is perfectly positioned, it’s taping time. The real key here is to use just enough tape to hold everything securely without going overboard. Slapping on too much tape can leave permanent indentations on soft fabrics, while putting it in the wrong spot can straight up ruin your print.
Here are a few professional tricks to get it right every time:
- Create a Hinge: This is a game-changer for apparel. Place one strip of tape along a single edge of the transfer paper. This creates a little "hinge" that lets you lift the paper, check your alignment one last time, and lay it back down perfectly centered.
- Edge Taping Only: This one is non-negotiable. NEVER put heat press tape over the inked parts of your design. The adhesive can literally pull the sublimation ink right off the paper, leaving you with faded or completely blank spots on your final product. Stick to the blank edges of the paper only.
- Minimal Strips for Fabric: For t-shirts and hoodies, two or three small pieces of tape at the corners are usually all you need. It's just enough to stop the design from shifting without adding extra pressure that could mark up the fabric. Of course, taping skills are only half the battle; check out our comprehensive heat press temperature guide to nail your settings.
The goal is to make the tape a silent partner in your process. It should hold the design flawlessly during the press and then disappear without a trace, leaving only a perfect, vibrant image behind.
Why Quality Tape is Your Secret Weapon
You might think heat press tape is just a minor accessory, but it’s one of the most important tools in your arsenal. Investing in good tape isn't just about holding a design in place—it's about getting consistent, professional results and protecting your gear for the long haul.
Think of it as cheap insurance against some of the most frustrating printing mishaps.
A high-quality tape is your first line of defense against ghosting and blurring. When a transfer shifts even slightly during pressing, you're left with a faint, shadowy outline or a fuzzy edge. This almost always means throwing the item away, which is a complete waste of your time and supplies. A tape that holds firm practically eliminates this risk.
Protect Your Products, Protect Your Press
Ever peeled off cheap tape only to find a sticky, gunky mess left behind? That residue is a nightmare to clean off your finished product and instantly makes it look amateurish.
But the problem gets worse. That same adhesive can transfer onto the hot upper platen of your press. Over time, it cooks on, creating a permanent layer of gunk that can stain future projects or even start to chip away at the platen’s non-stick coating.
Quality tape acts like a shield. It protects the project you're working on right now from misprints, but it also guards your expensive heat press from the slow, cumulative damage that cheap adhesives can cause.
The right tape is also non-negotiable for intricate projects. If you're working with multi-layered vinyl designs, precision is everything. Each color has to line up perfectly, and even a millimeter of movement can throw off the entire look. A tape with a strong, reliable hold is what makes those ambitious, detailed designs possible.
The science behind this isn't trivial. The global market for thermal release tapes—a specialized cousin to what we use—was valued at over US$ 2.43 billion in 2024. These tapes are designed for high-tech manufacturing, but the principle is the same: adhesion that holds strong under heat and then releases cleanly when the job is done. You can read more about the growing thermal release tape market to see how important this technology is.
Ultimately, it’s a mindset shift. Stop seeing tape as a disposable supply and start seeing it as a crucial tool. It pays for itself over and over again.
- Saves You Money: Fewer botched jobs mean you aren't throwing expensive blank shirts, mugs, or hats in the trash.
- Ensures Precision: Gives you the confidence to tackle complex, multi-part designs that sell for a premium.
- Protects Your Gear: Keeps your heat press platen pristine and performing like new for years.
Common Heat Tape Mistakes and How to Avoid Them
Even when you've got all the right gear, it’s often the small slip-ups that lead to the most frustrating results. Learning to use heat press tape is one thing, but knowing the common pitfalls is what really levels up your game from amateur to pro. Let's walk through the mistakes I see all the time so you can save yourself the headache, materials, and money.
By far, the biggest and messiest mistake is grabbing the wrong kind of tape. In a pinch, it's tempting to reach for whatever's on your desk—like regular office tape or masking tape—but this is a guaranteed disaster. Their adhesives are designed for paper, not for a 300-400°F press. They will melt instantly, leaving a gummy, permanent residue all over your project and, even worse, your heat press platen.
Let me make this crystal clear: if it wasn't specifically made for a heat press, it doesn't belong anywhere near it. Using the wrong tape can also release some nasty fumes and cause damage that’s a nightmare to clean up, if you can at all.
Over-Taping and Pressure Problems
Another classic blunder is going overboard with the tape. It feels logical, right? More tape means it's more secure. But in reality, it often backfires. Piling on the tape can create tiny bumps that cause uneven pressure across your transfer, leaving you with patchy colors or faded spots in your design.
This is especially true for soft items like t-shirts. All that extra tape can press noticeable indentations into the fabric. Sometimes these marks relax and fade, but other times they're there for good, leaving a perfect outline of where your tape was.
To get it right, just remember a few things:
- Less is More: All you need are a few small pieces placed strategically on the corners or edges of your transfer paper.
- Keep Off the Ink: Never stick tape directly over the printed part of your sublimation design. The adhesive can literally pull the ink right off the paper, leaving a blank spot on your finished product.
- Protect Your Work: For delicate fabrics that mark easily, using a protective layer is a game-changer. You can learn about your options in our guide to using heat transfer sheets to shield your garments.
Placement and Preparation Errors
Finally, let’s talk about placement. Taping down a design that isn't perfectly flush with the item is a recipe for a blurry mess. This is a huge issue with curved surfaces like mugs and tumblers. If the paper isn’t pulled completely taut, you create tiny air gaps.
When you press it, the sublimation gas pools in these gaps instead of infusing into the blank, causing fuzzy edges and dreaded "ghosting."
Before you even think about taping, make sure your transfer paper is wrapped as tightly and smoothly as possible against the substrate. Taking an extra 10 seconds to smooth out every wrinkle and eliminate those air pockets is the single best thing you can do to get a sharp, professional transfer every single time. Nail these basics, and you'll see your success rate skyrocket.
Expanding Your Craft with Heat Press Tape
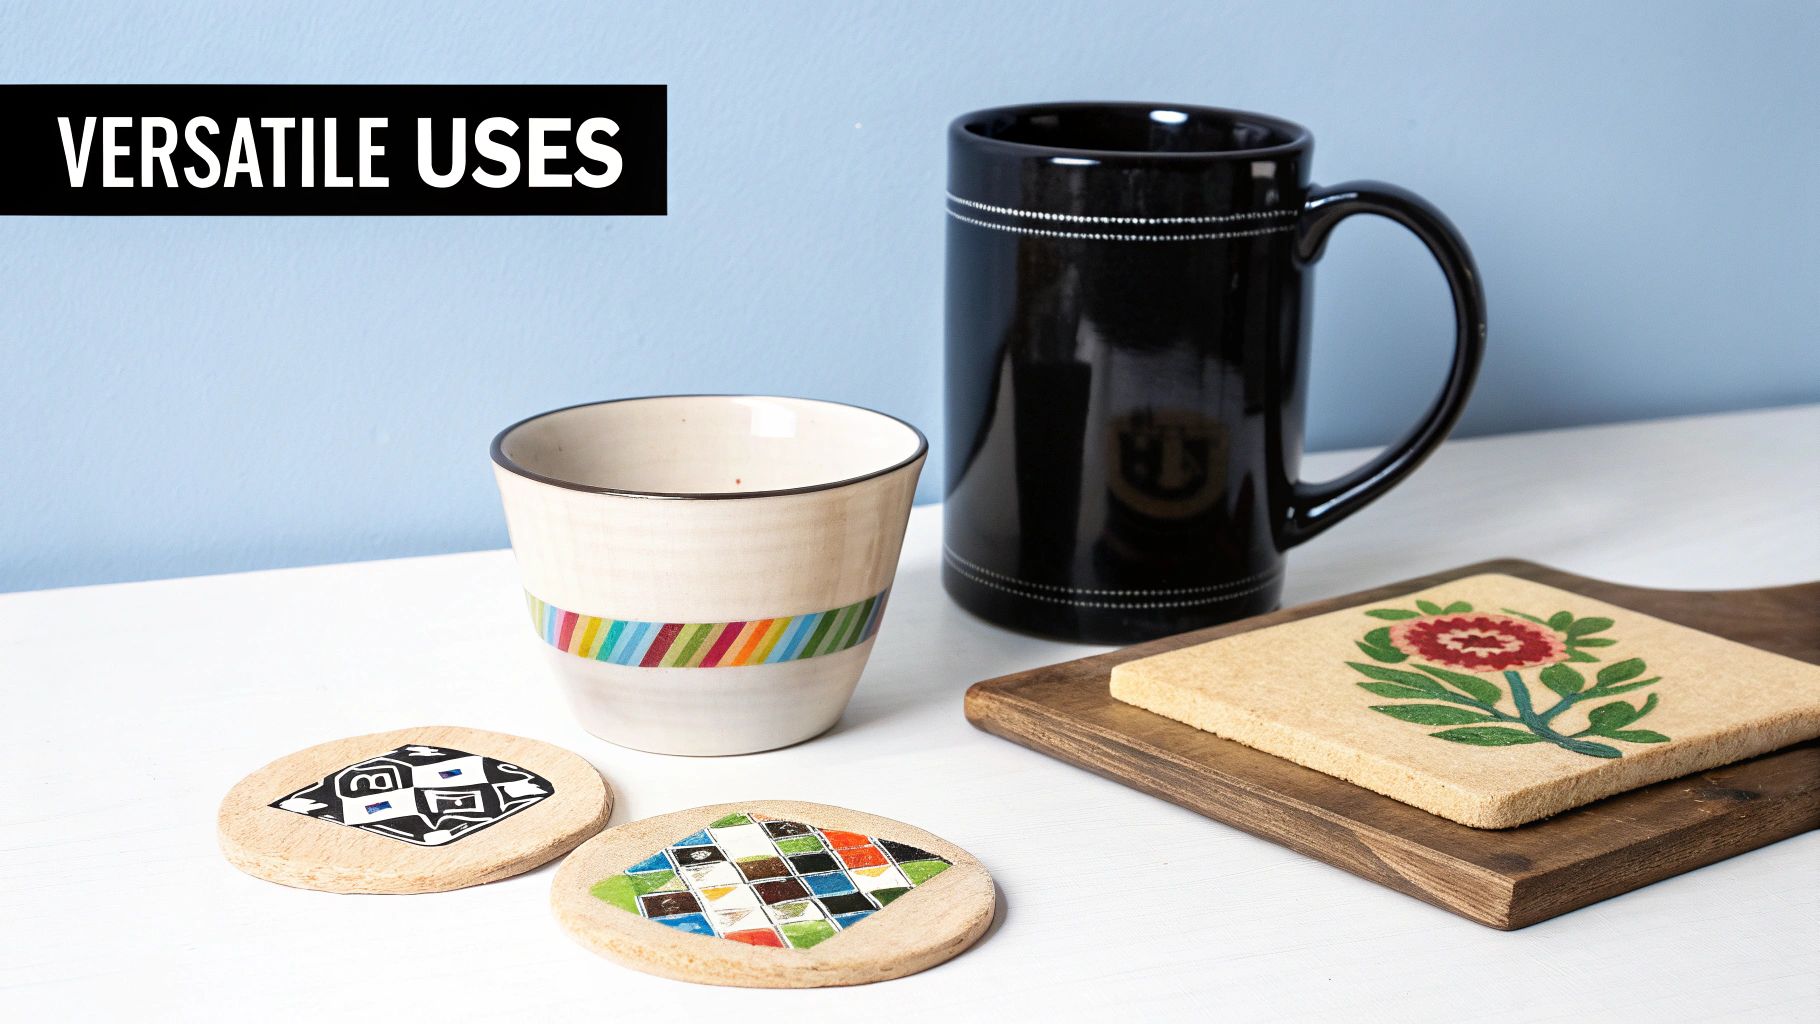
While heat press tape is a lifesaver for preventing ghosting on t-shirts, its real magic becomes clear once you move past flat fabrics. It's the key that unlocks a whole new level of custom products, especially those tricky items with unforgiving shapes and slippery surfaces where every millimeter counts.
Think about sublimating a photo onto a ceramic mug. You're dealing with a hard, slick, curved surface. Trying to hold the transfer paper perfectly flush by hand is a recipe for disaster—the tiniest slip or air gap results in a blurry, faded mess. This is where the tape becomes your best friend. It acts like a third hand, letting you wrap the design tightly, squeeze out any air pockets, and guarantee the ink transfers perfectly for a crisp, professional finish.
The same idea holds true for a long list of popular items that would otherwise be a nightmare to customize.
- Curved Tumblers: The tape is perfect for securing a full-wrap design, making it hug the tumbler’s shape without any wrinkles.
- Metal Plates & Signs: It keeps transfers locked down on rigid, slippery metal that has zero give.
- Custom Ceramic Tiles: It ensures perfect edge-to-edge alignment when you're creating photo tiles or decorative backsplashes.
More Than Just Sublimation
The usefulness of heat press tape doesn't stop with sublimation. It’s a versatile tool that can solve headaches across all sorts of crafting projects, making complicated designs feel much more doable.
Take a detailed heat transfer vinyl (HTV) project, for example. When you're working with lots of tiny, separate letters or design pieces, keeping them perfectly aligned after weeding is a constant battle. A small piece of heat press tape can hold those little vinyl bits in place on the carrier sheet, making sure nothing moves an inch before you press. It’s also brilliant for holding an embroidered patch steady on a jacket or hat, so you can get that final stitch just right.
Think of heat press tape as a universal positioning tool, not just a sublimation accessory. Once you do, you’ll find it smooths out your workflow, cuts down on mistakes, and gives you the confidence to tackle more ambitious projects.
It's no surprise that reliable thermal adhesives are a big deal. The global market for thermal tapes is expected to hit USD 2,132.5 million by 2035, a demand powered by industries like electronics and automotive that need precise heat management. You can find more details about the thermal tapes market on futuremarketinsights.com. This industrial need is what led to the high-performance tapes we crafters now rely on.
From mugs to patches, this simple roll of tape truly expands what’s possible with your heat press.
Got Questions About Heat Press Tape? We've Got Answers.
Even when you feel like you've got the process down, a few questions always seem to pop up. Let's tackle some of the most common ones so you can press with total confidence.
Can I Reuse Heat Press Tape?
I get this question a lot, and my answer is always a firm no. Do not reuse heat press tape. It’s tempting to try and save a few cents, but it's just not worth the risk.
That special silicone adhesive is designed to work perfectly one time under intense heat. The moment you peel it off, its gripping power plummets. Try to use it again, and you're inviting your design to shift, slide, and create that dreaded "ghosting" effect. The adhesive can also start to break down and leave a sticky mess on your garment or press.
My Two Cents: Think of heat press tape like a one-time-use tool. Its reliability is what you're paying for. Sacrificing a perfect print to save a few pennies on tape is a gamble that can cost you a perfectly good t-shirt or hoodie.
Will It Leave Marks on My Shirts?
A good quality tape shouldn't leave any residue or permanent marks. However, sometimes you might see a faint indentation on softer fabrics, especially if you get a little heavy-handed with the tape or the pressure.
Here's how to make sure that doesn't happen:
- Less is more. Use only what you need—small pieces are usually enough to tack things down.
- Keep it on the paper. Try to place the tape so it's only touching the edges of your transfer paper, not the fabric itself.
- Check your pressure. Make sure your heat press isn't set to a pressure level that's too high for the material you're working with.
If you do see a light mark, don't panic! It almost always vanishes after the first wash.
What's the Deal with the Different Colors?
The color of the tape is more than just for looks; it's usually a quick visual cue for its material and heat rating. While there isn't a strict universal code, you'll generally find these common types:
- Brown/Amber Tape: This is the heavy-hitter. It’s typically made from polyamide and boasts the highest heat resistance, often handling up to 500°F. This is my go-to for high-heat sublimation on things like ceramic mugs, tiles, and other hard surfaces.
- Blue/Green Tape: This is usually a more flexible, silicone-based tape. It's perfect for lower-temperature jobs, like applying heat transfer vinyl (HTV) to t-shirts and other apparel.
Ready to create flawless, professional-grade transfers every single time? Raccoon Transfers offers premium Direct-to-Film prints that are a perfect match for solid heat press techniques. Check out our vibrant, durable transfers and get started today.