
Heat Press Temperature for Polyester: Essential Guide
When you're heat pressing polyester, a good starting point is usually somewhere between 270°F and 300°F (132°C - 149°C). But honestly, that’s just a baseline. The perfect temperature really boils down to your transfer type and the specific fabric blend you're working with.
Why Polyester Demands Such Careful Heat Control
Before you even think about pressing that first shirt, it’s crucial to understand why polyester is so finicky. This isn't like pressing cotton. Polyester is a synthetic, plastic-based material, and that simple fact changes everything. It means the fabric has a very narrow window between a successful press and a melted mess.
Crank up the heat too high, or leave it on for just a few seconds too long, and you’ll see irreversible damage. The fabric can scorch, the fibers might melt together, or you could be left with that dreaded permanent shiny square from the heat platen. It doesn't just look bad; it completely ruins the garment's feel and structure.
The Challenge with Modern Performance Fabrics
It's gotten even trickier over the years. The polyester used in today’s performance wear isn't the same stuff from a decade ago. Manufacturers now treat these fabrics with all sorts of chemical additives for things like moisture-wicking and odor control. They're also often blended with other materials for stretch and comfort.
All these changes mean that the thermal properties are completely different. That go-to temperature you used on older polyester might scorch a modern moisture-wicking shirt. If you want to dive deeper into this, it's worth reading up on how to avoid heat press marks on today's polyester.
Understanding Dye Migration: The Print Killer
The biggest headache you'll face with colored polyester is dye migration. This is what happens when the heat from your press essentially turns the dye in the fabric into a gas. That gas then seeps into your transfer material—whether it's vinyl, DTF, or something else—and stains your design from the inside out.
Key Takeaway: Dye migration is notorious on dark and vibrant colors. Think reds, navy blues, and deep blacks. You can press a beautiful, crisp white design, peel away the carrier sheet, and watch it slowly turn a murky pink or dull gray right before your eyes. It’s incredibly frustrating.
This is exactly why nailing your heat press settings is non-negotiable. Your goal is to find that sweet spot: just enough heat to properly cure the transfer's adhesive, but not so much that you scorch the fibers or trigger dye migration. Getting this delicate balance right is what separates a professional, lasting print from a ruined garment. Once you master it, you'll be able to tackle any polyester job with confidence.
Finding Your Sweet Spot: Polyester Press Settings
Getting your heat press settings right for polyester isn't just a suggestion—it's the key to avoiding wasted garments and frustrated clients. Instead of guessing, it’s best to start with a reliable baseline. Think of these numbers as your starting recipe; you can always tweak them a bit, but they give you a solid foundation for consistent, professional results.
For the most common job you'll encounter—decorating 100% polyester apparel—lower temperatures are a must. This is your first line of defense against scorching the fabric or causing that dreaded dye migration we talked about earlier.
As a go-to starting point for standard heat transfers on 100% polyester, I always recommend a range of 270°F to 285°F (132°C to 141°C). This temperature window is hot enough to cure the adhesive but gentle enough to protect those sensitive synthetic fibers.
What About Polyester Blends?
Things get a little more nuanced when other fibers enter the mix. The moment you introduce cotton or rayon, you have to adjust your approach. Each blend has its own personality under the platen.
Here’s a quick rundown of how I handle the most common ones:
- 50/50 Cotton/Polyester: These are pretty common and quite forgiving. The cotton fibers can take a bit more heat, but you still have to respect the polyester. I usually bump the temperature up slightly, starting around 280°F to 300°F (138°C to 149°C). It’s a happy medium that ensures a solid bond without putting the poly at risk.
- Triblends (Polyester/Cotton/Rayon): Everyone loves how soft these are, but that rayon content makes them notoriously sensitive to heat. You absolutely have to be gentle here. Stick to the low end of the spectrum, around 270°F to 280°F (132°C to 138°C), and maybe even shorten your press time by a second or two.
- Performance Polyester (with Spandex/Lycra): Think activewear. These fabrics are built to stretch, but they are also incredibly prone to showing press marks. For these, I always use the lowest temperature the transfer manufacturer allows, which is often in the 260°F to 275°F (127°C to 135°C) range.
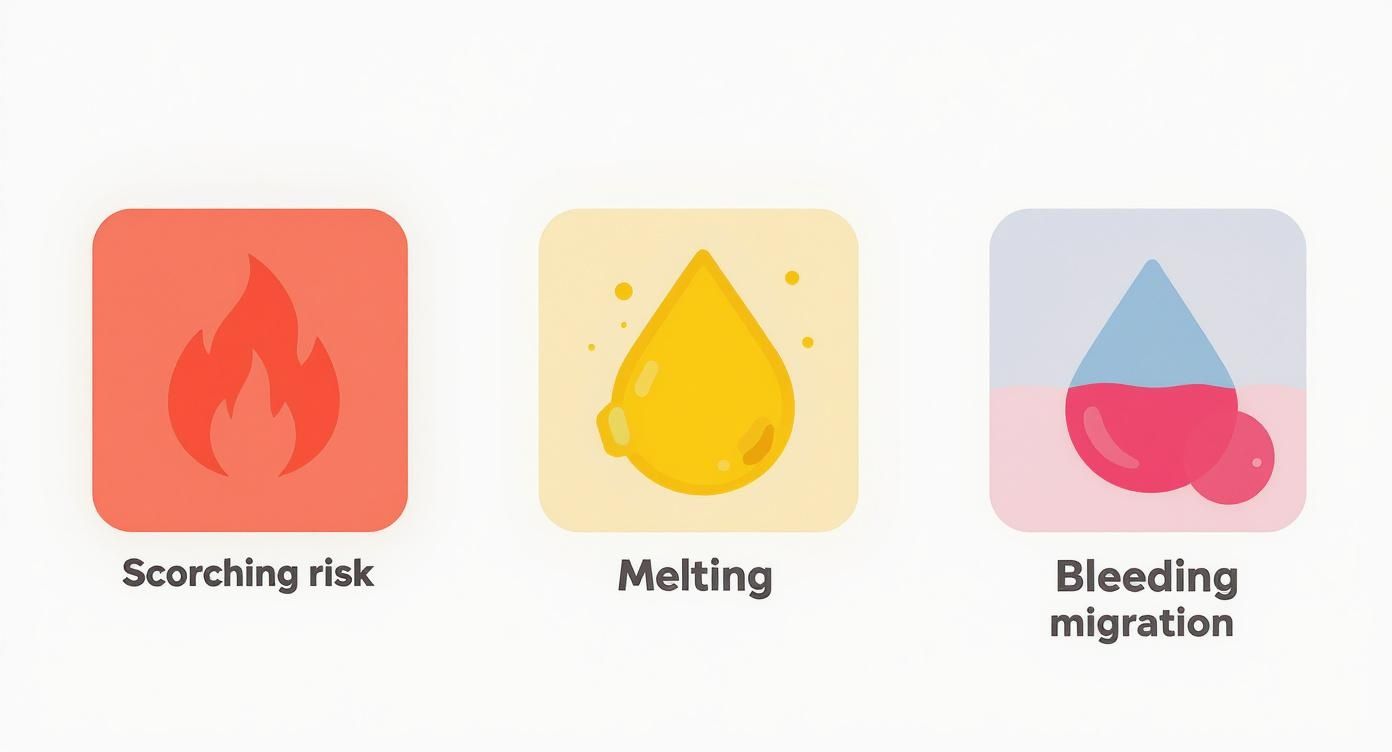
These three issues—scorching, melting, and dye migration—are almost always a direct result of having the wrong settings. This is why dialing in the correct heat press temperature for polyester is so critical.
Your Go-To Reference Chart
To make life easier, here’s a quick-reference table with my recommended starting points for various polyester fabrics. But remember, a test press on a hidden spot is always a good idea if you're working with a new garment.
My Two Cents: Don't ever skip the pre-press. Just 3-5 seconds before you place your design is all it takes. This quick step zaps out any lingering moisture and smooths wrinkles, giving your transfer a perfectly flat, dry surface to bond to. It makes a huge difference.
Recommended Heat Press Settings for Polyester Fabrics
Here's a handy chart to get you started. Use it as your baseline and adjust as needed based on your specific heat press and materials.
| Fabric Type | Transfer Method | Temperature Range (°F/°C) | Time (Seconds) | Pressure Level |
|---|---|---|---|---|
| 100% Polyester | DTF Transfers | 270-285°F / 132-141°C | 8-12 | Medium |
| 100% Polyester | Standard HTV | 280-300°F / 138-149°C | 10-15 | Medium |
| 50/50 Poly-Cotton | DTF Transfers | 275-290°F / 135-143°C | 10-12 | Medium |
| 50/50 Poly-Cotton | Standard HTV | 300-320°F / 149-160°C | 12-15 | Medium-Firm |
| Triblend | DTF Transfers | 270-280°F / 132-138°C | 8-10 | Light-Medium |
| Performance Poly | Specialty Stretch HTV | 260-275°F / 127-135°C | 8-12 | Light-Medium |
These settings are your launchpad. For a deeper dive covering just about any material you can think of, our complete heat press temperature chart is an essential resource to bookmark.
Ultimately, the logic is simple: the more delicate the fiber (like rayon or spandex), the lower and quicker your press should be. Start with these trusted settings, and you'll be producing durable, professional-quality work in no time.
Working with DTF Transfers on Polyester
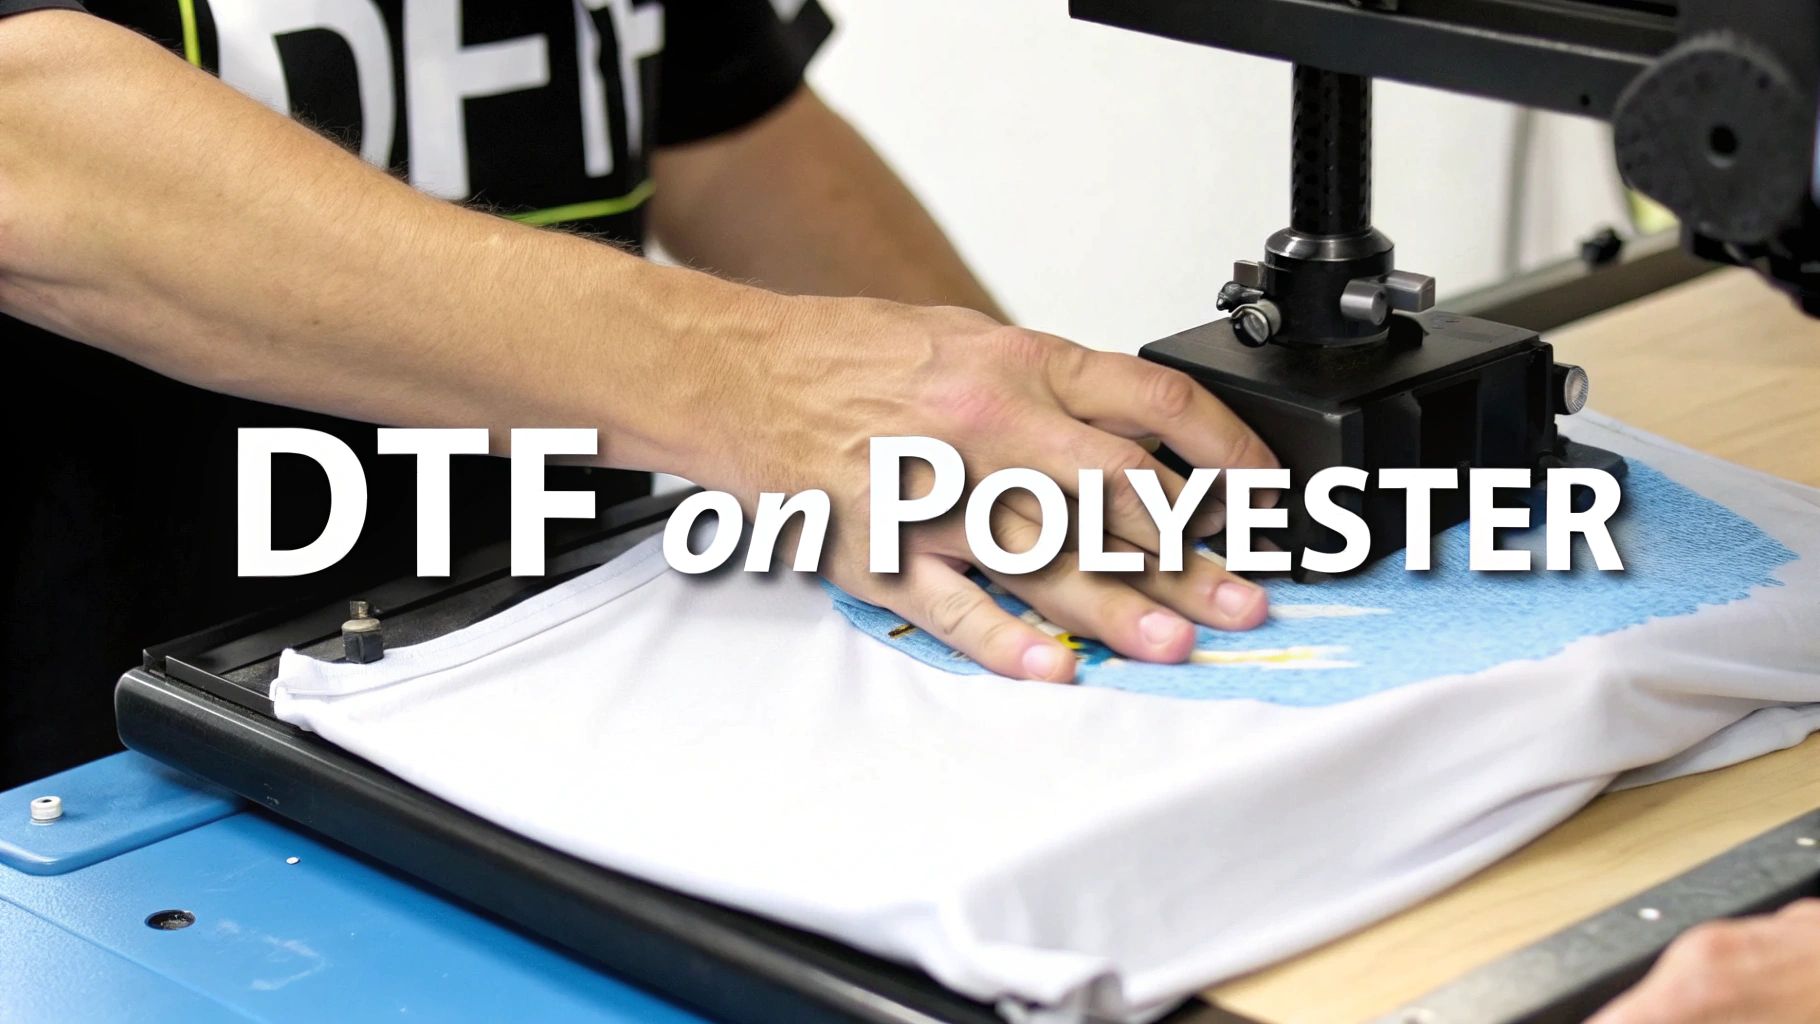
Direct-to-Film (DTF) has been a real game-changer for decorating polyester. It lets you create incredibly vibrant, detailed designs without the prep work that other printing methods demand. But to get it right, you have to understand that DTF plays by a different set of rules, especially when it comes to heat.
The secret to a perfect DTF transfer on polyester is a much gentler approach. Unlike traditional vinyl that often needs temperatures pushing past 300°F, DTF actually prefers a cooler press. This is a huge benefit when you're working with a heat-sensitive fabric like polyester. If you go too hot, you don't just risk scorching the material; you can also over-cure the DTF adhesive, leaving you with a design that feels stiff and plastic-like.
Finding the Sweet Spot for DTF Temperature
Getting the temperature right is a balancing act. You need just enough heat to activate the adhesive powder and create a permanent bond, but not so much that you ruin the garment. Precision is everything here.
For most DTF jobs on polyester, you'll want to be in the 270-280°F (132-138°C) range. I've found that 100% polyester garments do best right around 270°F (132°C). For common polyester blends, you might need to nudge it up slightly to 275-280°F (135-138°C) to make sure you get a solid, lasting press.
My Pro Tip: Always, and I mean always, check the instructions from your DTF transfer supplier. The numbers I've given are a fantastic starting point, but different manufacturers use their own unique inks and adhesives that might require a slightly different temperature.
Don't Skip the Prep and Peel
A great DTF application is about more than just setting the right temperature; your process is just as important. Before you even lay down the transfer, give the garment a quick pre-press. A short 3-5 second press is all it takes to zap any hidden moisture and smooth out wrinkles, giving you a perfect surface to work with.
After pressing the transfer, the next make-or-break moment is the peel. The vast majority of DTF transfers are cold peel, and this is one step you absolutely cannot rush if you want good results on polyester.
Here’s why you need to let it cool down:
- The Adhesive Needs to Set: The hot-melt adhesive needs time to fully cool and lock itself into the polyester fibers. If you peel it while it’s still hot, you’re almost guaranteed to pull up parts of your design.
- You Get a Cleaner Release: A cold peel gives you that clean, satisfying release of the film, leaving behind nothing but the crisp, vibrant ink. Rushing it will only lead to a patchy, unfinished look.
Press your design for about 10-15 seconds using medium pressure. Then, take the garment off the press and set it on a flat, cool surface. Once it's completely cool to the touch, you can peel the film away to reveal a flawless finish. To see how these techniques vary across different materials, check out our comprehensive guide on heat press settings for DTF.
Troubleshooting and Pro-Level Tips
So, what do you do when a transfer just won't stick? Your first instinct might be to crank up the heat, but with DTF on polyester, that's almost always the wrong move. More often than not, the problem is pressure. If an edge or corner of your design isn't sticking, it’s probably due to uneven pressure, not a lack of heat.
A quick second press can also work wonders. After you’ve done the cold peel, cover the design with a Teflon sheet or parchment paper and press it again for another 3-5 seconds. This final touch helps embed the ink into the fabric's weave, making it more durable and giving it a much softer, professional-looking matte finish.
It’s worth noting that the newer UV-DTF technology (for hard surfaces) is a completely different animal, usually requiring no heat at all—just firm pressure. But for apparel, mastering that lower heat press temperature for polyester is what makes DTF such a powerful and reliable tool for this otherwise tricky fabric. Stick to this gentler process, and you’ll be creating durable, scorch-free gear every single time.
While DTF transfers are an incredible tool for decorating polyester, they're not the only game in town. Two other mainstays in the apparel world, sublimation and Heat Transfer Vinyl (HTV), have completely different personalities—and their own unique heat press requirements. Getting these settings right is the key to unlocking their full potential and picking the perfect method for every project.
Diving Into Sublimation on Polyester
Sublimation is a bit of a magical process. It's not about laying a design on top of the fabric; it's about infusing it into the fabric. At high temperatures, the solid sublimation ink turns directly into a gas, which then bonds permanently with the polyester fibers.
The result? A print you can't feel at all. It's incredibly vibrant, won't crack or peel, and is as durable as the garment itself. But this magic requires serious heat. You'll need a much higher heat press temperature for polyester, typically somewhere between 380°F and 400°F (193°C to 204°C). That’s far hotter than you'd ever want to press a DTF transfer.
Because of this extreme heat, sublimation is best friends with light-colored, high-polyester-count fabrics. Think 100% polyester shirts in white or light grey. The ink simply won't show up on dark materials, and the high temperature can easily scorch polyester blends.
For a flawless sublimation transfer, here's what you're looking at:
- High Temperature: A great starting point is 390°F (199°C).
- Long Dwell Time: This isn't a quick press. The ink needs time to convert to gas and infuse into the fibers, so plan for 35 to 45 seconds.
- Light to Medium Pressure: Don't crank it down. You're looking for consistent, even contact, not a death grip on the garment.
My Biggest Sublimation Tip: Always, and I mean always, use protective paper. Place a sheet of butcher paper inside the shirt and another one on top of your sublimation paper. This is your insurance against "ghosting" or "blowout," where the gaseous ink bleeds through the fabric and permanently stains your heat press platen or the back of the shirt.
Working with Heat Transfer Vinyl (HTV)
On the other end of the spectrum is Heat Transfer Vinyl. HTV is all about versatility and works with much lower heat. It’s essentially a sheet of material with a heat-activated adhesive on the back, and it comes in a mind-boggling array of colors and finishes—glitter, holographic, flock, metallic, you name it.
With HTV, the goal is to activate that adhesive just enough for a permanent bond without scorching the polyester or melting the vinyl itself. The ideal heat press temperature for polyester using HTV is much friendlier, usually falling between 280°F and 320°F (138°C to 160°C).
The exact settings really depend on the specific brand and type of vinyl you're using, so always check the manufacturer's recommendations. For example, a standard iron-on might only need 15 seconds at 300°F, while a specialty holographic vinyl could require 30 seconds at 330°F. This is a world away from sublimation's 35-45 seconds at 390°F.
For a deeper look into how these different processes stack up, our guide on heat transfer and sublimation printing breaks it all down.
Heat Press Method Comparison for Polyester
Switching between these methods means you have to completely reset your brain (and your heat press). Trying to press HTV at sublimation temperatures is a recipe for a melted, gooey mess. On the flip side, attempting to sublimate at HTV temps will leave you with a faint, faded image that will wash out in a heartbeat.
To help keep it all straight, here’s a quick comparison of the most common methods for polyester.
| Method | Typical Temperature | Typical Time | Pressure Needed | Best For |
|---|---|---|---|---|
| DTF Transfers | 270-285°F / 132-141°C | 8-12 seconds | Medium | Full-color, detailed graphics on any color polyester. |
| Sublimation | 380-400°F / 193-204°C | 35-45 seconds | Light-Medium | Vibrant, permanent designs on light-colored 100% polyester. |
| Standard HTV | 280-320°F / 138-160°C | 10-15 seconds | Medium | Solid colors, logos, and text on any color polyester. |
| Specialty HTV | Varies by type | 15-30 seconds | Varies | Unique finishes like glitter, holographic, or flock effects. |
At the end of the day, success comes from understanding the "why" behind the settings. Sublimation needs intense heat and more time to create a chemical bond inside the fabric. HTV and DTF use lower temperatures just to activate an adhesive layer that sits on top. Respect these fundamental differences, and you'll be able to produce amazing, durable results on polyester, no matter which technique you choose.
How to Fix Common Polyester Pressing Issues
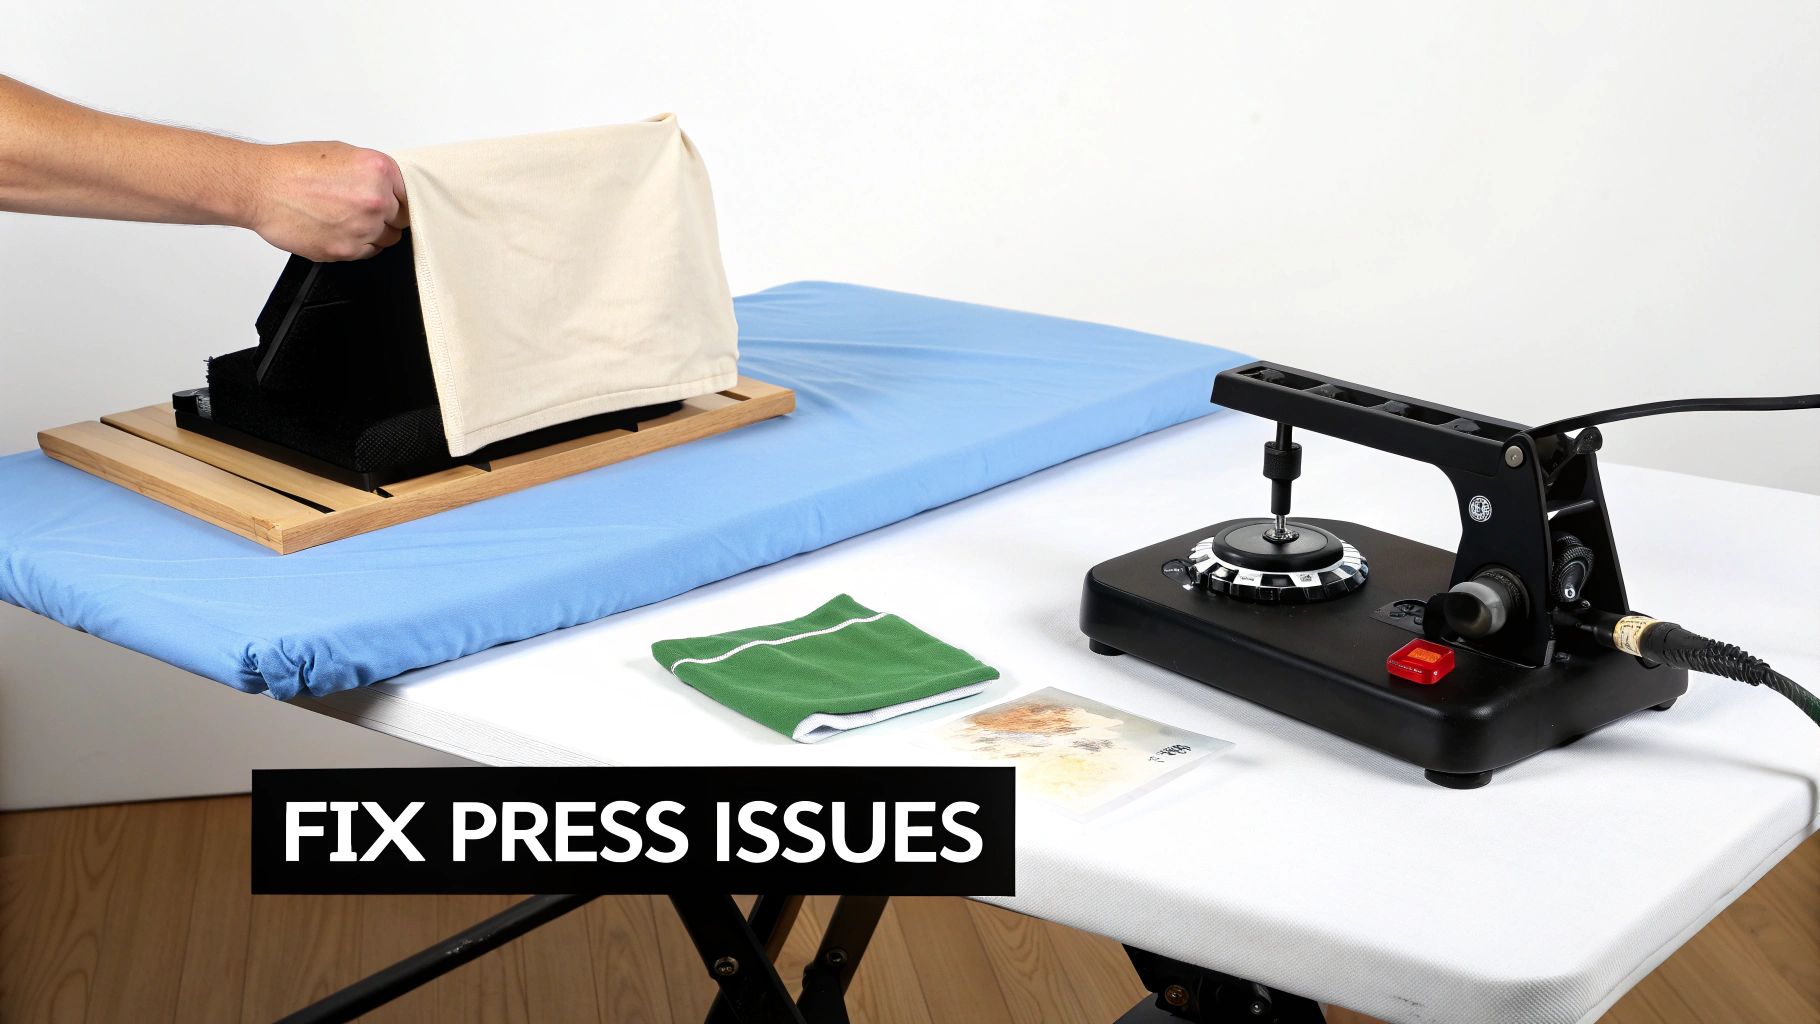
Even with the perfect settings, things can go sideways. It happens to everyone. Don't sweat it—every misprint is a lesson learned. This is your field guide for troubleshooting the most common headaches when heat pressing polyester.
The number one issue I see is the dreaded shiny box or press mark left on the garment. This happens when the heat and pressure start to melt the polyester's surface fibers, leaving a permanent sheen. It’s a dead giveaway that your temperature is too high or you’re coming down with way too much pressure.
Right behind that is dye migration. This is when the color from the polyester bleeds into your nice, clean transfer. Heat is the trigger, and it’s notoriously bad on reds, deep blues, and other saturated polyester colors.
Preventing Press Marks and Scorching
Honestly, the best fix is to avoid the problem in the first place. Your first and most important line of defense should always be a protective cover sheet.
A Teflon sheet or even a simple piece of parchment paper acts as a critical buffer between your hot platen and the fabric. It helps diffuse the heat, softening the impact on those sensitive fibers and dramatically cutting down the risk of getting those shiny marks.
Another tool that should be in every shop is a good heat press pillow. When you slide one inside the garment, it raises the print area. This little trick focuses the pressure right where you need it—on the transfer—and keeps the hard edges of your platen from smashing down on the rest of the fabric.
Here's what to do to dodge those press marks:
- Drop the Heat: The first thing to try is lowering your heat press temperature for polyester. Start by knocking it down by 5-10 degrees.
- Ease Up on Pressure: Switch to a lighter pressure setting. You just need enough contact for a solid transfer, not a death grip.
- Always Use a Cover Sheet: I'll say it again: never press polyester without a protective layer like a Teflon sheet.
- Grab a Pillow: If your design is smaller than your platen, using a heat press pillow isn't optional—it's essential.
Defeating Pesky Dye Migration
Dye migration can ruin a whole batch of shirts, turning a sharp white design into a faded pink mess in seconds. Lowering your temperature is the main fix, but sometimes, especially with stubborn fabrics, that’s not enough.
When you know you’re working with a high-risk garment, it’s time to bring out the secret weapon: dye-blocking (or sub-block) heat transfer vinyl. This stuff is specifically engineered with a charcoal or metallic silver layer that creates a physical barrier, stopping the fabric dyes cold. It’s an extra step, for sure, but it guarantees a vibrant, clean result every single time.
Expert Tip: In a pinch and don't have dye-block vinyl? Try shortening your press time. Instead of one 10-second press, try two separate 5-second presses. This can sometimes set the adhesive before the fabric's dyes have enough time to fully activate and bleed through.
Diagnosing Peeling or Cracking Transfers
So what happens if the transfer won't stick, or it looks great until it peels after the first wash? This almost always comes back to one of the big three: temperature, time, or pressure.
Your first instinct might be to crank up the heat, but fight that urge. With polyester, too much heat can actually "over-cure" the adhesive, making it brittle and useless. The real culprit is usually pressure. I’ve found that uneven or weak pressure is the top reason for transfers failing, especially when only certain parts of the design are lifting.
Run through this quick diagnostic check:
- Check Your Pressure: Is it firm and totally even? Things like seams, collars, and zippers can get in the way, preventing the platen from making solid contact. A heat press pillow is the solution here.
- Verify Your Temperature: Don't just trust the digital display on your press. Use an infrared temperature gun to check for cold spots across your platen. A bad heating element could be sabotaging your work.
- Review Dwell Time: Are you pressing for the full time recommended by your transfer manufacturer? Cutting it short, even by a couple of seconds, can be the difference between a temporary sticker and a permanent bond.
By systematically working through these common issues, you’ll turn frustrating mistakes into know-how, ensuring every polyester job you do looks professional and is built to last.
Your Top Questions About Pressing Polyester, Answered
Even when you follow the steps, real-world projects can throw you a curveball. This is the part where we tackle the most common questions that pop up when the heat press is on and you’re working with polyester.
Think of it as your personal troubleshooting guide. Let's get into the nitty-gritty of blends, colors, and those annoying little issues that can make or break a project.
Can I Use the Same Temperature for 50/50 Blends and 100% Polyester?
Not quite, but you’re in the same ballpark. A 50/50 cotton-poly blend has a bit of cotton’s resilience, so it can often handle a little more heat than its pure polyester cousin. This gives you a slightly wider margin for error.
For instance, with a standard heat transfer vinyl (HTV), you might press a 50/50 blend somewhere around 300-320°F. But when you switch to a DTF transfer, it's always smarter to stick to the lower end, around 275-280°F, to keep the polyester fibers happy and scorch-free. The goal is always the same: find that sweet spot where the transfer bonds perfectly without damaging the fabric. When in doubt, always test on a hidden spot first.
What Is Dye Migration and How Do I Stop It?
Ah, dye migration. It’s the bane of anyone who's ever tried to put a brilliant white design on a red polyester shirt. It’s what happens when the heat from your press essentially wakes up the dye in the fabric, turning it into a gas that seeps into your transfer. The result? Your crisp white logo slowly turns a disappointing shade of pink or muddy gray.
Your first line of defense is always using the lowest possible temperature that will still get the job done. Shorter press times help, too, by giving the dye less time to activate.
But for high-risk colors—think reds, maroons, or dark blues—the only guaranteed fix is to use a specialty dye-blocking or sub-block vinyl. These materials are lifesavers. They’re built with a special barrier layer that physically stops the fabric dye in its tracks, ensuring your design stays the color you intended.
Why Does My Polyester Shirt Have a Shiny Square Mark After Pressing?
You’ve finished pressing, and there it is: a faint, shiny outline of your heat platen. That dreaded press mark is a tell-tale sign that the heat and pressure have ever-so-slightly melted the surface fibers of the polyester. It's incredibly common, but luckily, it's also preventable.
The two main culprits behind press marks are too much heat and uneven pressure. You really only want to apply heat and pressure directly to the transfer area, not the whole garment.
Here are a few tricks I’ve learned to avoid them:
- Use a Protective Cover: Never press without a Teflon sheet or a piece of parchment paper over your transfer. It’s a simple buffer that helps distribute the heat more gently.
- Get a Heat Press Pillow: These foam pillows are a game-changer. You slide one inside the shirt, which elevates the print area. This means the pressure is focused only on the design, keeping the hard edges of the platen away from the surrounding fabric.
- Tweak Your Settings: Try backing off the temperature by 5-10°F and easing up on the pressure. You’d be surprised how often you need less of both than you think for a perfect press on polyester.
Does the Polyester Color Affect My Temperature Setting?
The color of the fabric won't change the actual temperature your transfer needs to adhere, but it absolutely changes your risk level. The ideal heat press temperature for polyester is determined by your transfer type, not the garment’s dye.
What color does change is your margin for error. Dark and vibrant garments are prime candidates for dye migration, so you have to be disciplined about using the absolute lowest recommended temperature and time. On the flip side, with white or light-colored polyester, dye migration isn't an issue, but you still have to watch out for scorching. For some great additional reading on materials and techniques, you can explore the Branditok Blog for additional insights.
At Raccoon Transfers, we specialize in high-quality DTF transfers that are perfectly suited for the delicate nature of polyester. Our transfers are designed for low-temperature application, ensuring you get vibrant, durable results without risking your garments. Create your custom gang sheet today at https://raccoontransfers.com.