
Heat Transfer Tape Your Guide to Perfect DTF Prints
Think of heat transfer tape as your project's insurance policy. It's a simple, heat-resistant adhesive tape designed to lock your designs firmly in place during the heat pressing process. This little tool is the secret to preventing costly mistakes like ghosting or shifting, ensuring your final product comes out perfectly aligned and looking professional every single time.
The Secret to Flawless Custom Apparel Projects
Have you ever spent ages perfectly placing a Direct-to-Film (DTF) transfer on a shirt, only to open the heat press and discover a blurry, misaligned mess? It’s a gut-wrenching moment that can ruin a great garment and waste expensive materials. The culprit is almost always a tiny, barely noticeable shift that happens as the press closes or opens.
This is exactly where the unsung hero of the custom apparel world comes in.
Heat transfer tape is your heat-resistant anchor, specially engineered to hold your transfers steady from the moment you place them to the final peel. It’s not just sticky tape; it’s a crucial piece of gear for getting professional-grade results. Think of it as a temporary, super-strong set of hands holding your design steady under intense heat and pressure.
What Makes Heat Transfer Tape Essential
For anyone looking to move beyond hobby-level work, the right tape is just as important as your printer or heat press. Its real value comes from doing three key jobs perfectly:
- Securing the Design: Its primary function is to stop any movement, period. This ensures the ink transfers exactly where you want it, which means no more ghosting or blurry double images.
- Ensuring Crisp Alignment: When you're working with designs that have multiple pieces or need precise placement—like on a shirt pocket or the brim of a hat—tape guarantees every element stays perfectly registered.
- Enabling a Clean Release: Good tape is designed to peel away cleanly after pressing. You won't be left with any sticky residue that can stain the fabric or mess up the look of your finished product.
By learning to use this simple tool, you gain total control over the pressing process. You can confidently place transfers on anything—from standard cotton tees to tricky hard surfaces—and know the result will be sharp, clean, and exactly how you pictured it.
Beyond Standard Fabric Applications
While it’s a must-have for t-shirts and hoodies, the tape's usefulness doesn't stop there. It's absolutely indispensable when you’re working with slick or unconventional materials where transfers love to slide around, like ceramic mugs, metal tumblers, or polyester sports jerseys. If you’re exploring other decorating methods, you might find this DIY guide to iron-on clothing decals, also known as heat transfer vinyl (HTV) helpful for comparison.
Knowing how to use heat transfer tape the right way is a fundamental skill. It turns the often-unpredictable art of heat pressing into a reliable science, giving you the consistency you need to create amazing custom products, every single time. This guide will show you everything you need to know to make it your most trusted tool.
Picking the Right Heat Transfer Tape for the Job
Figuring out which heat transfer tape to use can feel like a guessing game at first, but it's really about matching the tape to the task. There isn't one single "best" tape out there. It’s all about picking the right tool for the specific material and design you’re working with.
Think of it like a mechanic's toolbox—you wouldn't use a sledgehammer to fix a watch. The first thing to understand is what the tape is made of. Most of the time, you'll be choosing between two main players: silicone and acrylic adhesives. Each one has its own personality.
Silicone Tapes: The Strong Grip
Silicone-based tapes are the heavy lifters. They have what I'd call a "strong grip"—a high-tack adhesive that really locks things down. This aggressive hold is exactly what you need when there's a serious risk of your transfer sliding around during pressing.
It's the perfect choice for slick, non-porous surfaces where other tapes would just give up.
- Metal Tumblers: The smooth, curved surface of a tumbler is prime territory for a transfer to shift. Silicone tape grabs on and doesn't let go.
- Ceramic Mugs: Just like metal, ceramic is slippery. A high-tack silicone tape makes sure your design stays put.
- Glazed Tiles: When you're working with decorative tiles, you need that design to be perfectly placed. Silicone provides the secure hold you need on that glossy finish.
A quick word of caution: that powerful grip can be too much for delicate fabrics. On some materials, the strong adhesive can leave a faint impression behind after pressing, so you'll want to use it carefully on sensitive garments.
Acrylic Tapes: The Gentle Hold
If silicone is the strong grip, then acrylic tape is the "gentle hold." This type generally has a lower tack, giving you just enough stickiness to secure your design without being overbearing. It’s my go-to when I'm working with anything delicate where protecting the fabric's surface is the top priority.
You'll want to reach for an acrylic tape whenever you're trying to avoid press marks or any potential damage to the substrate itself.
- Delicate Fabrics: We're talking about silks, thin polyester, and some of those modern performance fabrics. A low-tack tape won't pull at the fibers.
- Soft Cotton T-Shirts: For most standard apparel jobs, a gentle hold is all you need. It also minimizes the chances of leaving any residue or marks.
- Heat-Sensitive Materials: Some substrates can get marred by a strong adhesive when heat is applied. Acrylic is almost always the safer bet in these situations.
The need for tapes like these isn't just a niche crafter thing; it's a huge global business. As of 2025, the market for heat-resistant adhesive tape is valued at an estimated $1.2 billion. That number is only going up, thanks to demand from industries like automotive and electronics that need things to stick together under intense heat. You can dive into the market analysis to get a better sense of the technology driving this growth.
To make the choice a little easier, here’s a quick-reference guide that breaks down the most common tape types.
Heat Transfer Tape Comparison Guide
| Tape Material | Tack Level | Max Temperature | Ideal Substrates | Best For |
|---|---|---|---|---|
| Silicone | High | Up to 400°F (204°C) | Metal, Ceramic, Glass | Securing transfers on hard, slick surfaces like tumblers and mugs. |
| Acrylic | Low to Medium | Up to 350°F (177°C) | Cotton, Polyester, Blends | General apparel and delicate fabrics where press marks are a concern. |
| Polyimide | Medium | Up to 500°F (260°C) | Electronics, Heat-Sensitive Items | High-heat applications like sublimation on hard goods. |
This table should help you quickly pinpoint the right starting point for your next project, but always remember to test on a scrap piece if you're unsure!
Clarity and Alignment: Clear vs. Translucent Tape
Finally, let's talk about how the tape looks. You'll find tapes that are crystal clear and others that are translucent but colored (usually blue, green, or red). This might seem like a minor detail, but it can actually make a big difference in your workflow.
Clear Tape: This one’s all about visibility. It lets you see your design perfectly, which is a lifesaver for precise placement. If you're trying to line up a transfer next to a collar, a seam, or another graphic, clear tape is your best friend.
Translucent Tape: You can't see through it as well, but the color makes it incredibly easy to spot against your transfer and the garment. When you're pressing a huge batch of shirts, being able to find and peel off the tape pieces quickly can save a ton of time.
So, which one is better? It really comes down to what you need for that specific job. Do you need perfect, down-to-the-millimeter alignment, or do you need to work fast? Most pros I know keep both on hand and choose the right one for the moment. It’s all about being prepared.
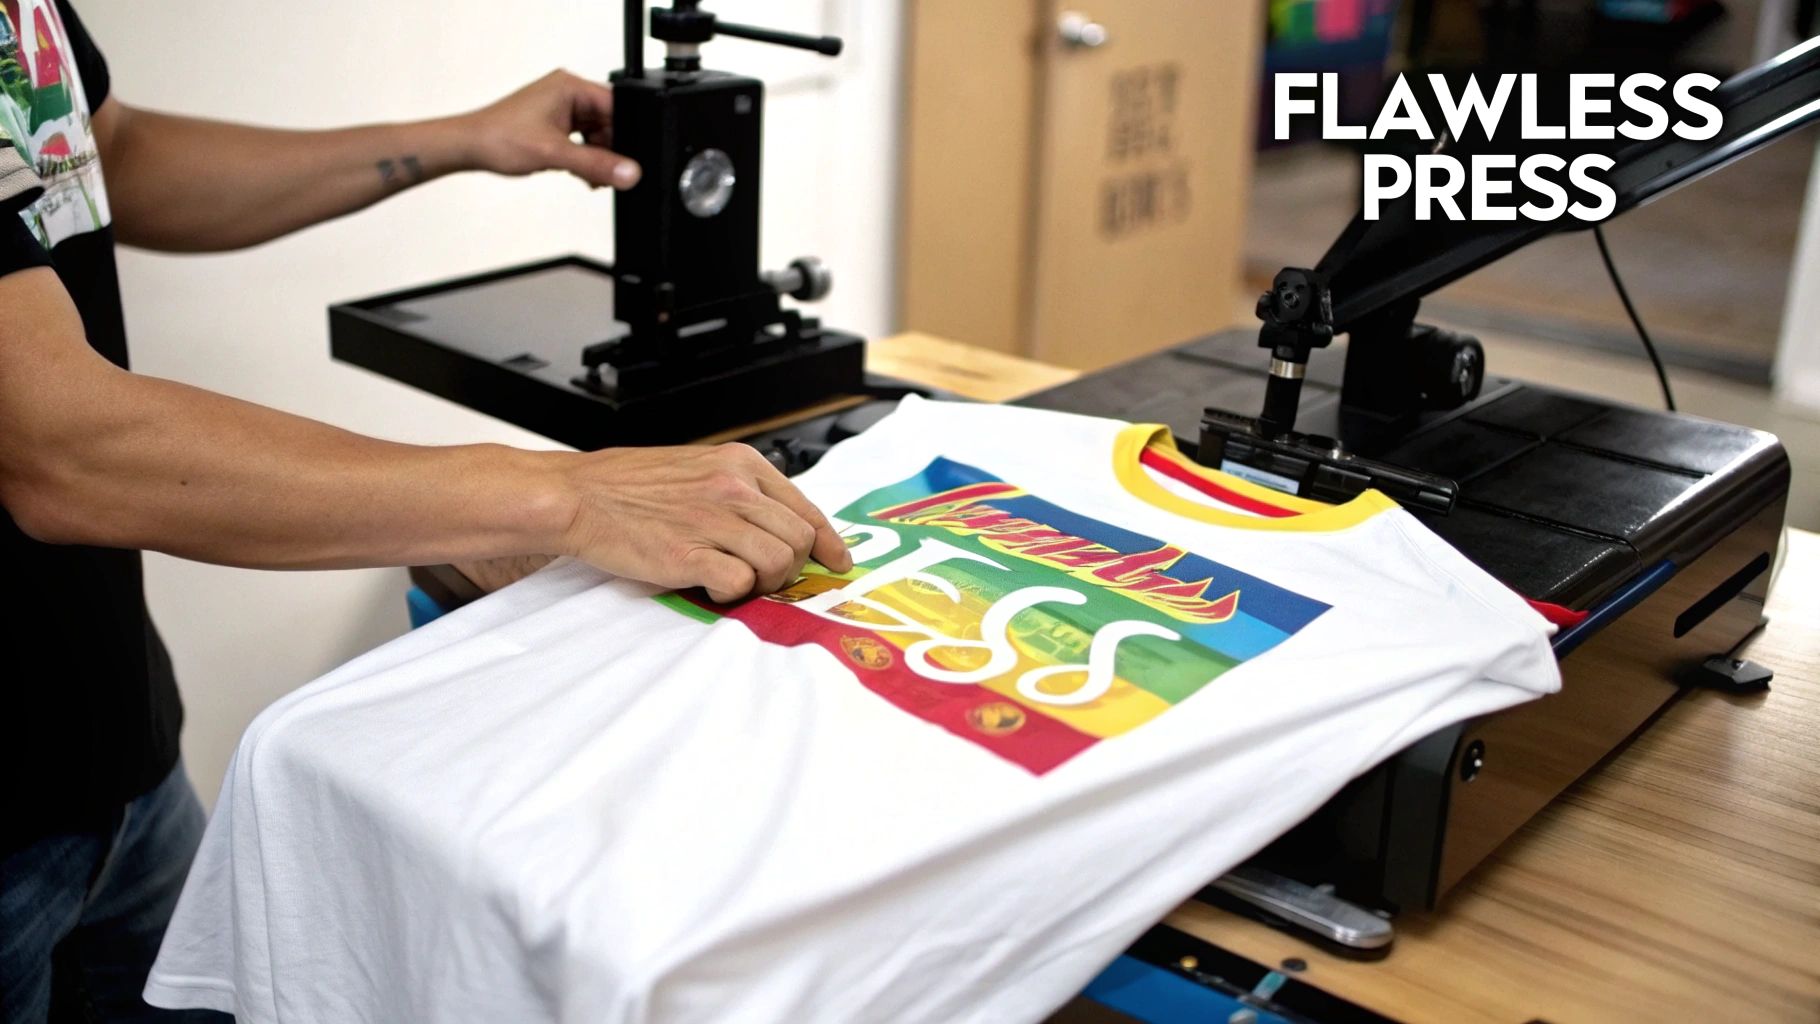
How to Apply Heat Transfer Tape Like a Pro
If you want to master heat transfer tape, you need to stop guessing. It's really a science, but a simple one built on what we in the industry call the "heat press triangle." This whole concept boils down to three things that have to work together perfectly: time, temperature, and pressure. Getting that balance right is the secret sauce for clean, professional-looking results on every single project.
Think of it like a three-legged stool. If one leg is off, the whole thing wobbles. Not enough pressure? Your transfer won't stick properly, and you'll see corners peeling after the first wash. On the other hand, too much pressure can crush the fabric fibers and leave a permanent, ugly outline of your heat press on the shirt.
The infographic below breaks down how to think about your project before you even get to the heat press.
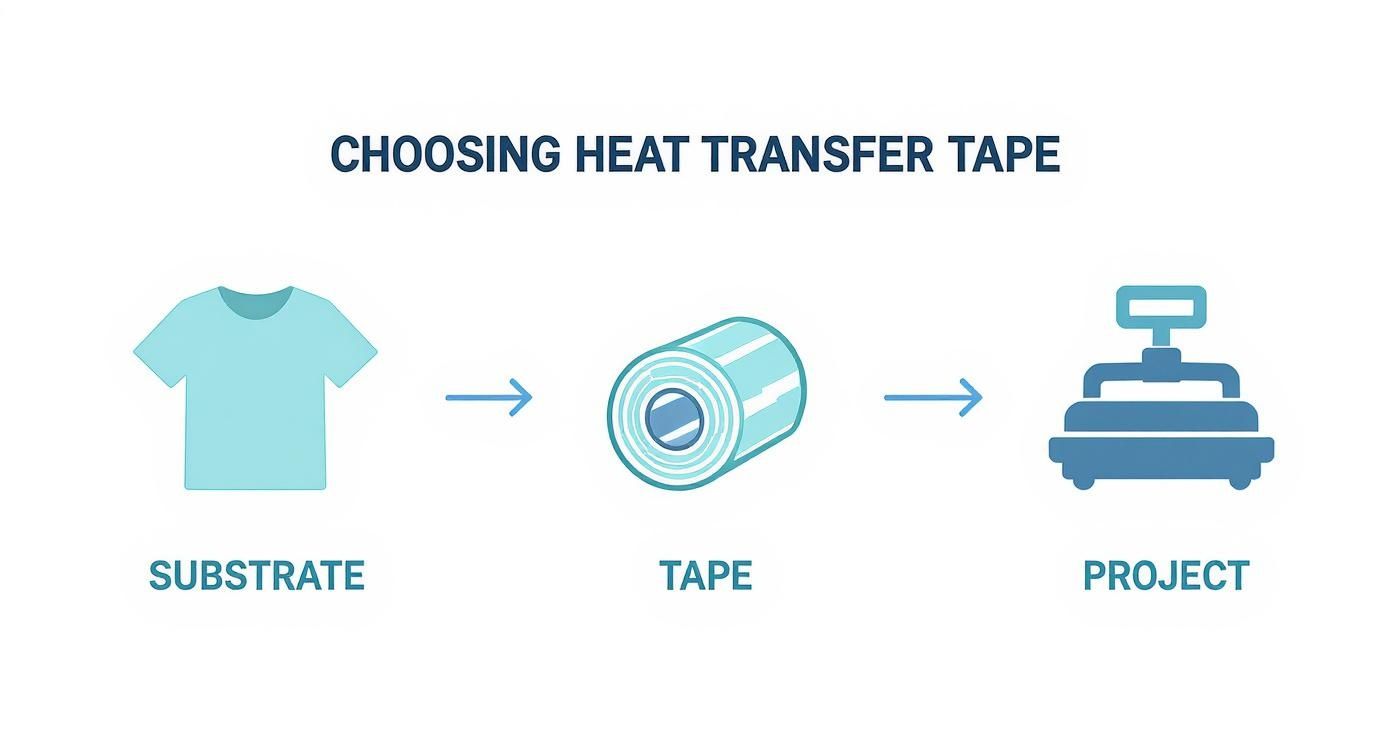
As you can see, it all starts with your blank—the substrate. Your choice of garment dictates everything that comes after, from the tape you use to the settings on your press. Nail these first few decisions, and you're setting yourself up for a flawless application.
The Essential Pre-Press Step
Okay, listen up. Before you even think about laying that transfer down, there's a step that pros never skip: the pre-press. Garments, especially anything with cotton, are like sponges for humidity. If you try to press a transfer onto a shirt that’s holding hidden moisture, that water turns into steam and can completely sabotage the bond.
It's an easy fix. Just press the empty garment for 5-10 seconds. This quick hit of heat zaps any moisture and gives you a perfectly smooth, dry surface for the adhesive to grab onto. Seriously, this one simple action is the easiest way to sidestep failed applications and will dramatically boost your success rate.
And it’s no surprise this level of precision matters. The global market for thermal transfer tapes was valued at around $2.2 billion in 2023 and is expected to climb to $3 billion by 2028. That growth is fueled by industries that can't afford mistakes, and as custom apparel creators, neither can we.
Your Step-by-Step Application Workflow
With your garment prepped and ready, it's time for the main event. Following a consistent process here is what separates the hobbyists from the pros.
- Position Your Transfer: Carefully lay your DTF transfer on the garment. Bust out a ruler or an alignment tool to make sure it's perfectly centered and straight.
- Secure with Tape Strategically: This is where technique really comes into play. Don't just slap a long piece of tape across the design. Instead, use smaller pieces at the corners. This keeps the tape from acting like a heat shield, which can cause uneven adhesion right underneath it.
- Press with Precision: Close that press and apply heat based on the recommended settings for your specific transfer and fabric. Time, temp, and pressure have to be exact. If you want to dig deeper into dialing this in, check out our complete guide on heat press settings for DTF.
- Peel with Confidence: Once the timer beeps, open the press. That final peel is just as critical as the press itself, and how you do it depends entirely on your transfer type.
Hot Peel vs. Cold Peel Demystified
You'll hear "hot peel" and "cold peel" thrown around a lot. This isn't a suggestion—it's a critical instruction baked into the chemistry of the transfer itself. It tells you when to remove the clear carrier film.
Hot Peel: This means you peel the film away the second the press opens while the design is still piping hot. If you wait even a few seconds, the transfer can cool and bond to the film instead of the shirt.
Cold Peel: This one requires a bit of patience. You have to let the garment and transfer cool down completely to the touch, which might take 30-60 seconds. Peeling too early will pull the design right off or leave you with a patchy, ruined transfer.
Always, always follow the instructions that come with your transfers. For instance, Raccoon Transfers are a cold peel, which ensures a clean, complete release every time. Stick to this structured workflow, and you'll take the guesswork out of the equation and start turning every press into a win.
Matching Your Tape to Different Materials
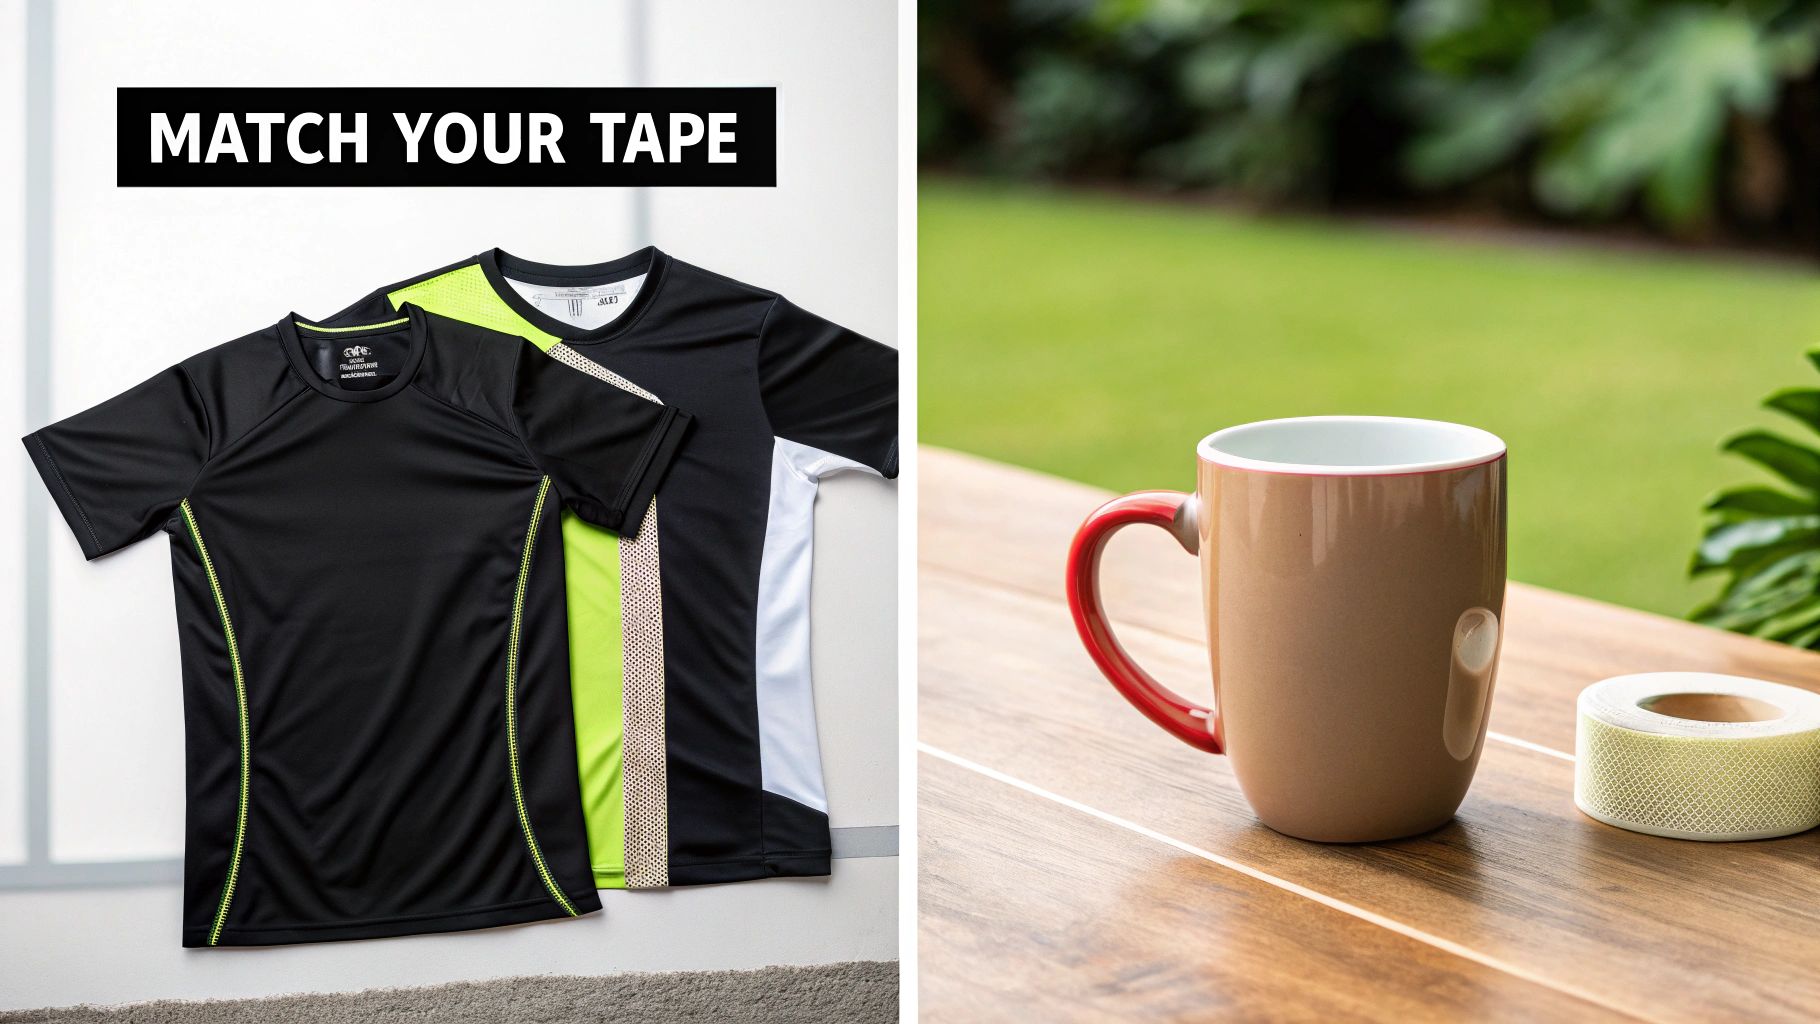
Choosing the right heat transfer tape isn't just a box to check—it’s a crucial decision that can make or break your entire project. The trick is to stop thinking about tape in a vacuum. Instead, see it as part of a three-way relationship between the substrate, the transfer, and the tape's adhesive. Every material you work with is telling you exactly what it needs; you just have to know how to listen.
Think about hanging a poster. You wouldn't use a thumbtack on a concrete wall or super glue on delicate wallpaper, right? The same logic applies here. The texture, stretch, and heat sensitivity of your blank all dictate the kind of grip you need from your tape.
Taping Stretchy and Synthetic Fabrics
Let's dive into a common scenario: applying a DTF transfer to a stretchy, 100% polyester athletic shirt. These performance fabrics are built to move, and your tape has to play along. A rigid, high-tack tape is the wrong tool for the job. It’ll fight the fabric's natural stretch under the heat press, which can easily distort your design once the garment cools off and relaxes.
For these kinds of jobs, a flexible, medium-tack tape is your best friend. It has just enough stickiness to stop the transfer from sliding around on the slick polyester surface, but it's forgiving enough to move with the fabric. This ensures your design stays perfectly aligned without putting stress on the garment's fibers. If you want to go deeper into fabric quirks, check out our guide on cotton vs polyester for printing.
This need for specialized adhesives is a huge deal. The global market for adhesive tapes was valued at around $94.9 billion in 2025 and is expected to climb to $141.8 billion by 2032. Hot melt adhesives, like those found in some thermal transfer products, are a major driver of this growth thanks to their impressive strength and heat resistance.
Securing Designs on Hard and Curved Surfaces
Now, let's switch gears to a totally different challenge: a hard, curved ceramic mug. On a surface like this, flexibility becomes your enemy. The slick, non-porous ceramic doesn't give a weak adhesive much to grab onto, and the curve practically begs the transfer's edges to lift up before you can even close the press.
This is where you bring in the heavy-hitter: a high-tack tape, often one with a silicone base. You need an aggressive adhesive that will clamp the transfer film down and hold it completely flush against the mug's surface. Even the slightest lift can cause blurry edges or prevent parts of the design from adhering properly during the press. Your best bet is to use several small pieces of tape to anchor the design securely around the entire perimeter.
Pro Tip: When taping curved items, apply a bit of gentle tension to the tape as you press it down. This helps the transfer film conform to the object's shape, which eliminates air pockets and ensures a tight, secure hold under pressure.
Protecting Delicate and Textured Materials
Finally, let's look at something like a soft cotton-poly blend tee or a canvas tote bag with a distinct weave. With these materials, your main goal shifts from preventing slippage to preventing damage. A tape that’s too aggressive can leave a sticky residue or, worse, pull at the fabric's fibers, leaving a permanent mark or a dreaded "press box" outline.
Here, a low-tack tape is the smartest and safest option. It provides just enough grip to keep the transfer steady on a relatively stable surface, but it’s not strong enough to mar the garment. It's the gentle touch you need for a flawless result.
No matter what material you're working with, the single most important professional habit you can build is this: always test your tape first. Before you commit, stick a small piece on a hidden spot of the item (like the inside hem) and give it a quick press. This simple test tells you everything you need to know about how the tape and fabric will interact, saving you from ever ruining a valuable blank again.
Tips for Raccoon Transfers and Gang Sheets
When you're working with professional-grade transfers, the devil is in the details. To get those jaw-dropping results from your Raccoon Transfers, you really need to stick to their recommended settings. Think of their guidelines as the specific recipe for their unique adhesive—they've dialed everything in to guarantee a perfect bond, vibrant color, and incredible durability with every press.
You can always experiment, but following the "chef's" instructions is what separates a good result from a great one. Their settings are designed to fully activate the adhesive for maximum grip without damaging the garment itself.
The Official Raccoon Transfers Heat Press Settings
Raccoon Transfers has put in the time to find that perfect sweet spot between heat, pressure, and time. One thing to burn into your memory: their DTF transfers are cold peel only. This isn't just a suggestion; it's the key to a flawless finish.
Here are the official pressing instructions you'll want to follow:
- Temperature: Press between 280-300°F (138-149°C). This range is the magic number—hot enough to melt the adhesive powder completely but not so hot that it scorches common fabrics like cotton or poly blends.
- Time: Give it 10-12 seconds. That's just enough time for the adhesive to work its way into the fabric fibers for a solid bond.
- Pressure: Use firm, even pressure. You'll know you nailed it when you can see the faint texture of the fabric's weave in the transfer after pressing. That’s a sign of a strong, integrated bond.
- Peel: This is the hard part—wait! Let the transfer and garment cool down completely to the touch before you even think about peeling the film. Patience here is non-negotiable for a clean release.
Once you’ve peeled the film, it's a great idea to do a quick second press. Just cover the design with a protective sheet (Teflon or parchment paper works great) and press again for 3-5 seconds. This little step locks the design into the fabric, making it feel softer and hold up even better in the wash.
Mastering Your Gang Sheet Workflow
Gang sheets are an absolute game-changer for saving money and material, but they can look a little intimidating at first. The trick is to have a simple, repeatable process.
Start by carefully cutting each design out from the main sheet. A sharp pair of scissors or a craft knife will do the trick. I like to leave a small border around the edge of the transfer—it makes it much easier to handle and gives you a perfect spot to place a piece of heat transfer tape.
Next, lay your first design onto the pre-pressed garment. Get it perfectly aligned, then use small strips of heat transfer tape on the corners to lock it in place. This tiny step prevents the design from shifting under the press, ensuring every detail, from tiny text to intricate lines, stays exactly where you want it. This strategy is a core skill, and learning more about how to transfer designs onto fabric for various crafts can give you a broader perspective on your projects.
Treat each design on your gang sheet like its own mini-project. This mindset helps you maintain control and precision, preventing costly mistakes and making sure every single item you create looks professional. If you want to dive deeper, our guide on DTF gang sheets is packed with advanced tips to help you maximize your layouts.
Post-Press Care for Lasting Vibrancy
Your job isn't quite done when the heat press opens. What you do next determines whether your creations look amazing for a few weeks or for years. Raccoon Transfers suggests a few simple care instructions to protect the print and keep the colors popping.
- Wait Before Washing: Give the garment at least 24 hours to fully cure before its first wash.
- Turn Inside Out: This is the golden rule. Always wash the item inside out to shield the transfer from rubbing against other clothes.
- Use Cold Water: Stick to a cold, gentle cycle in the machine.
- Mild Detergent: Stay away from bleach and harsh fabric softeners, as they can degrade the adhesive over time.
- Drying: Hanging it to dry is your best bet. If you have to use a dryer, choose the tumble dry setting on its lowest heat.
Follow these steps, and your custom gear will stay as bright and durable as the day you made it.
Of course. Here is the rewritten section with a more natural, human-expert tone.
What to Do When Heat Transfer Tape Goes Wrong
Even the most seasoned pros run into a snag every now and then. If your heat transfer tape isn't cooperating, don't sweat it. The fix is usually surprisingly simple and often comes down to a small tweak in your setup. Think of it less as a failure and more as a chance to fine-tune your process.
Let's walk through the most common headaches, figure out what's causing them, and get you back on track to producing perfect transfers.
Problem One: The Tape Leaves a Sticky Residue
This is a classic. You peel back the tape and find a tacky, sticky film left behind on the garment. It's a frustrating mess that can ruin the feel of the fabric and act like a magnet for dust and lint.
-
What's Happening: Nine times out of ten, this is caused by one of two things: cheap tape adhesive or way too much heat. When your press is running hotter than the tape can handle, the adhesive literally melts and bakes itself into the fabric's fibers.
-
The Fix: First, take a look at your heat press. Is the temperature set correctly for both your transfer and your tape? If your settings are spot on, then the tape itself is the problem. It's time to switch to a higher-quality tape made with a more robust, heat-resistant adhesive that’s designed to come off clean.
Problem Two: The Design Still Shifted During Pressing
You did everything right—you even used tape—but your design still has that dreaded ghosting or a slight misalignment. It's enough to make you wonder why you bothered with tape in the first place, but the cause is usually pretty clear.
When a taped design moves, it almost always comes down to one thing: the tape's tack level wasn't strong enough for the job. The grip just wasn't powerful enough to hold the transfer steady when the heat press clamped down.
-
What's Happening: You've got a mismatch between your tape's tack and your item's surface. A low-tack tape that’s perfect for a standard cotton t-shirt just doesn't have the muscle to secure a transfer on something slick like a polyester jersey or a smooth, curved tumbler.
-
The Fix: Think about the surface you're working with. For anything non-porous, slippery, or slick, you need to upgrade to a medium or high-tack heat transfer tape. That stronger grip will anchor the design firmly in place and stop any movement dead in its tracks.
Problem Three: The Tape Damaged a Delicate Garment
This one can be painful. After pressing, you see a faint outline—or a full-on "press box"—where the tape was. In a worst-case scenario, it might have even snagged or pulled the fibers, leaving permanent damage.
-
What's Happening: This is the exact opposite of the last problem—your tape is too aggressive for the fabric. A high-tack adhesive can be overkill for sensitive materials, digging into the weave under the heat and pressure.
-
The Fix: When you're working with delicate fabrics like thin polyester, silk, or certain blends, always reach for a low-tack acrylic tape. Its hold is gentle but still firm enough to prevent shifting without risking any damage. And here's the golden rule: if you're ever unsure, always test a small piece of tape on a hidden spot of the garment first.
Frequently Asked Questions
When you're working with heat transfer tape, a few questions always seem to pop up. Getting them answered upfront can save you a lot of headaches and prevent a simple project from going sideways. Let's break down some of the most common ones.
Can You Reuse Heat Transfer Tape?
I get why people ask this. You peel it off, it still feels a little sticky, and it seems like a waste to just toss it. But trust me on this one: don't do it.
The adhesive on this tape is engineered for one trip through the heat press. That heat cycle dramatically weakens its ability to stick. If you try to reuse it, you’re risking your design slipping and sliding during the press, which is the very thing you're trying to prevent. Think of it as cheap insurance—always use a fresh piece of tape to guarantee a perfect press every time.
How Is It Different From Regular Tape?
The short answer? Heat. Your standard desk tape would turn into a gooey, melted nightmare under a heat press. That mess could easily ruin your garment and even damage the platen on your press. It’s just not built for the job.
Heat transfer tape, on the other hand, is made with special silicone or acrylic adhesives. These are specifically designed to handle the high temperatures of heat pressing, often up to 400°F (204°C), without melting or leaving any gunk behind.
How Do I Know If My Pressure Is Too High?
Your fabric will tell you. After you press and peel, take a close look at the garment. If you see a distinct, shiny rectangle where the tape was, almost like it's been embossed into the material, your pressure is cranked up too high.
This "press box" is a dead giveaway. You want just enough pressure to hold everything in place and bond the transfer, not so much that you're permanently marking the fabric itself. If you see that box, just back off the pressure a bit for the next one.
Does Heat Transfer Tape Expire?
Yep, it sure does. Like any adhesive, it has a shelf life. Over time, especially if it’s not stored well, the adhesive can dry out and lose its tack. An old roll simply won't have the grip you need to hold your transfers securely in place.
The best way to keep it fresh is to store it in a cool, dry spot, away from direct sunlight. Tossing it in a sealed bag or its original container helps a lot. That way, you know it’ll be ready to go when you are.
Ready to stop worrying about shifting transfers and get perfect alignment on every single press? Raccoon Transfers delivers top-tier DTF transfers that make professional results easy to achieve.