

How to Make Custom Merch: The Complete Small Brand Guide
You've chosen a design, ordered blank shirts, and promised customers a delivery date. Then the first sample arrives with a weak edge, the color looks different from the mockup, and one buyer asks whether the shirt can go in a dryer. That's the point where custom merch stops being a design exercise and becomes an operating system.
The reliable answer to how to make custom merch isn't just "upload a file and press it." You need a repeatable path from demand research and artwork preparation to transfer selection, application, testing, sizing, care instructions, fulfillment, and reordering. This guide follows that path for small brands that need to protect cash, avoid dead stock, and deliver products customers will really use.
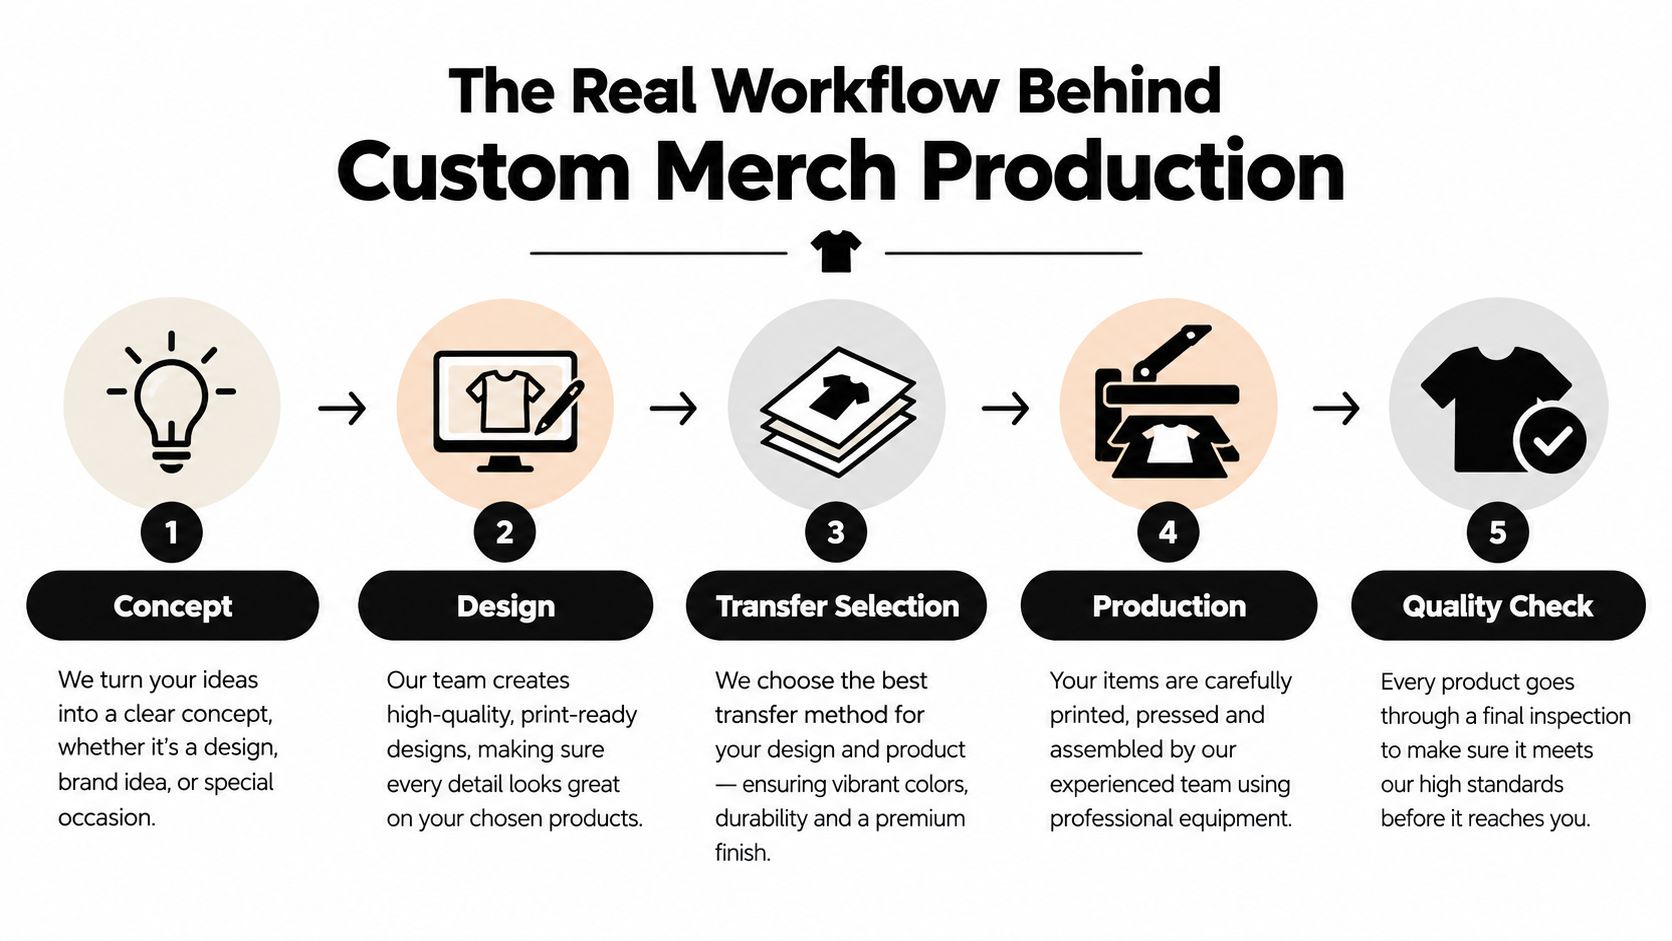
The Real Workflow Behind Custom Merch Production
A profitable merch workflow starts before anyone touches a heat press. First, choose a specific audience and product use case. A local event, independent clothing label, creator community, or school group may all want custom apparel, but they'll differ in quantity, deadline, design style, garment choice, and tolerance for customization.
Then move through the production chain in order:
- Concept: Define the customer, product, message, and expected order pattern.
- Design: Prepare artwork at its intended size, with clean transparency, suitable detail, and accurate placement.
- Transfer selection: Match the decoration method to the garment or hard surface.
- Production: Order a sample or small run, apply the transfer using controlled settings, and record what you do.
- Quality check: Inspect the finished product, test apparel through laundering, document the result, and only then accept a larger commitment.
The market context supports this flexible approach. One estimate values the global custom T-shirt market at $1.95 billion in 2023 and projects $3.72 billion by 2030, a 9.7% compound annual growth rate from 2024 to 2030. A broader estimate places global custom apparel at $14.7 billion in 2023 and forecasts $31.2 billion by 2032, equivalent to 9.1% annual growth. These estimates use different definitions, but both point to the same operational lesson: your workflow should handle one-off items and scalable production. Review the custom apparel market estimates for the underlying definitions.
Keep the process visible in your order system. A guide such as Raccoon Transfers' production process can help you compare file preparation, transfer ordering, application, and inspection as connected tasks rather than isolated steps.
Preparing Artwork That Prints Cleanly
A design can look perfect on a laptop and still fail on film. The usual causes are soft transparent edges, artwork supplied at the wrong size, very thin lines, or a background that wasn't properly removed.
Use a PNG with transparent background when you need a ready-to-print raster file. PDF and AI files are useful when the artwork remains vector-based or needs further production handling. Don't mirror the artwork before uploading if your transfer provider handles orientation during printing. Mirroring too early is an easy way to create an application error.
File rules that prevent rework
Build the artwork around its final placement. A chest graphic, sleeve mark, tote design, and large back print each need different dimensions, even when they use the same logo. Check transparent edges at high zoom, simplify fragile details, and confirm that small lettering remains readable after application.
Gradients and shadows need particular care. A transfer can reproduce complex color transitions, but a low-resolution source may produce visible stepping or a fuzzy outline. Keep an organized folder containing the editable master, the transparent production file, a preview mockup, and a version name. Never overwrite the approved production file with a later experiment.
| File Type | Recommended Use | Key Requirement |
|---|---|---|
| PNG | Ready-to-print artwork with transparency | Use a high-resolution file at the intended print size |
| Vector artwork or production review | Confirm fonts, transparency, and embedded elements | |
| AI | Editable vector master | Keep linked assets and fonts available for revision |
For a fuller file checklist, use Raccoon Transfers' artwork preparation guide. It's also useful to understand how visual alignment and repeatability affect printed work, especially if you're troubleshooting a pattern print settings resource for another production format.
For brands that need detailed, ready-to-press apparel artwork, Custom DTF Transfer by Size: Perfect Prints for Every Project is one available ordering format. Its catalog information describes support for PNG, PDF, and AI files, along with designs containing gradients and fine lines. Treat those capabilities as a starting point, not a substitute for testing the exact design on the exact substrate.
Production rule: Approve the file at the same size and placement you'll sell. A mockup can show intent, but only a production-scale sample can show the finished edge, texture, and visual weight.
Choosing the Right Transfer Type and Substrate
The substrate decides more than the look of the product. It determines whether you need heat, whether the adhesive can bond, how the surface should be cleaned, and what durability promise you can reasonably make.
Standard DTF is primarily an apparel solution. It suits many cotton, polyester, and blended garments, and it can also be used with certain leather applications when the supplier confirms compatibility. The transfer carries the printed design and adhesive powder, so the operator applies it with a heat press under the recommended settings.
UV-DTF serves a different job. It's intended for smooth, hard surfaces such as glass, metal, plastic, ceramic, laptops, and water bottles. It's applied as an adhesive-backed graphic rather than pressed into fabric with heat. The surface still needs to be clean, dry, smooth, and free of oils.
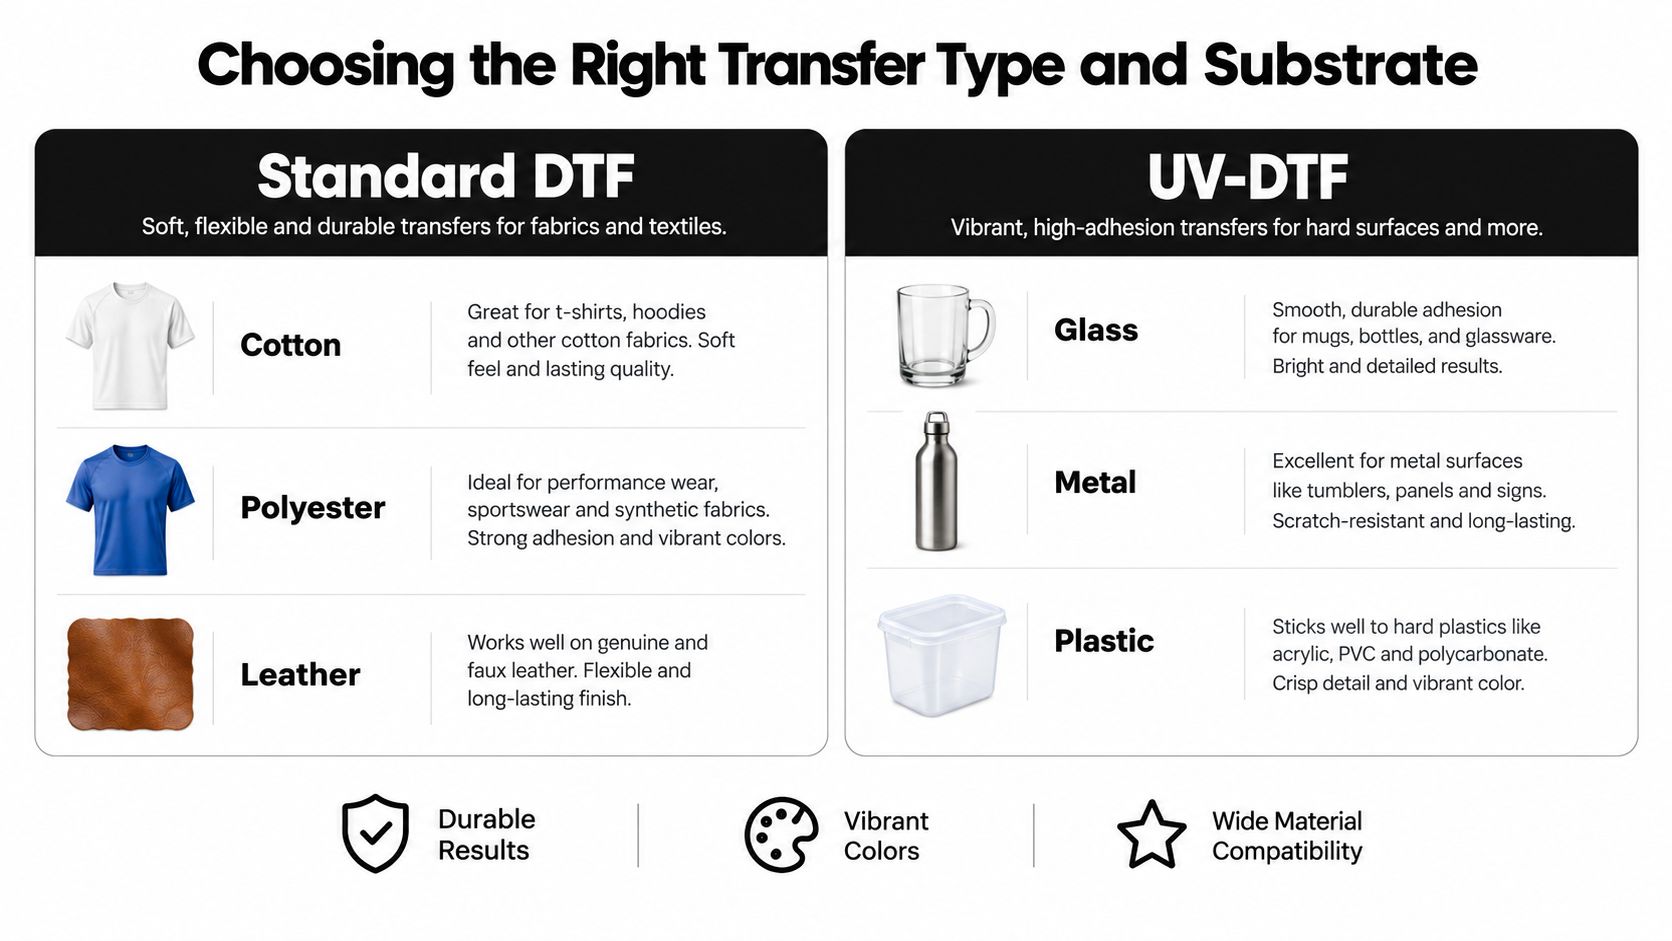
Use this decision filter:
- Choose standard DTF for garments: Select it when the product is a T-shirt, hoodie, performance shirt, or another compatible fabric item.
- Choose UV-DTF for smooth hard goods: Select it for decals on glass, plastic, metal, ceramic, or similar surfaces.
- Test unusual materials first: Leather coatings, textured plastics, painted metal, and heat-sensitive fabrics can change adhesion and appearance.
- Set care expectations by substrate: Apparel needs laundering guidance. Hard-surface decals may need gentler cleaning, and the product information for UV-DTF recommends hand washing for maximum longevity.
The most expensive mistake is selecting a transfer because it handles the artwork, then discovering that it doesn't suit the product. Compare the substrate, application method, finish, cleaning conditions, and customer use before you order. Raccoon Transfers' transfer-type guide provides a practical reference for making that match.
Ordering Strategy and Gang Sheet Efficiency
Small orders often lose money through poor layout rather than high production costs. If each design occupies its own sheet or you leave large unused spaces around graphics, you're paying for material that never becomes a sellable product.
A gang sheet places multiple separate designs on one sheet. That makes sense when you're testing several graphics, producing a small event assortment, or cutting repeat logos for different garment sizes. Arrange designs with enough separation for clean cutting and handling, and keep a record of which artwork version occupies each position.
Start with a test order when any of these conditions apply:
- New artwork: You haven't confirmed the design's size, edge quality, or color appearance on the chosen garment.
- New blank: The fabric, dye, stretch, or surface differs from what you've tested before.
- New application setup: You're using a different press, platen, cover sheet, or operator.
- Uncertain demand: Customers have shown interest, but nobody has paid or committed yet.
Move toward a larger run only after the sample confirms both product quality and demand. Consolidating proven designs on a gang sheet can reduce waste, but don't fill unused space with speculative graphics just because the sheet has room. Unwanted transfers still represent tied-up cash.
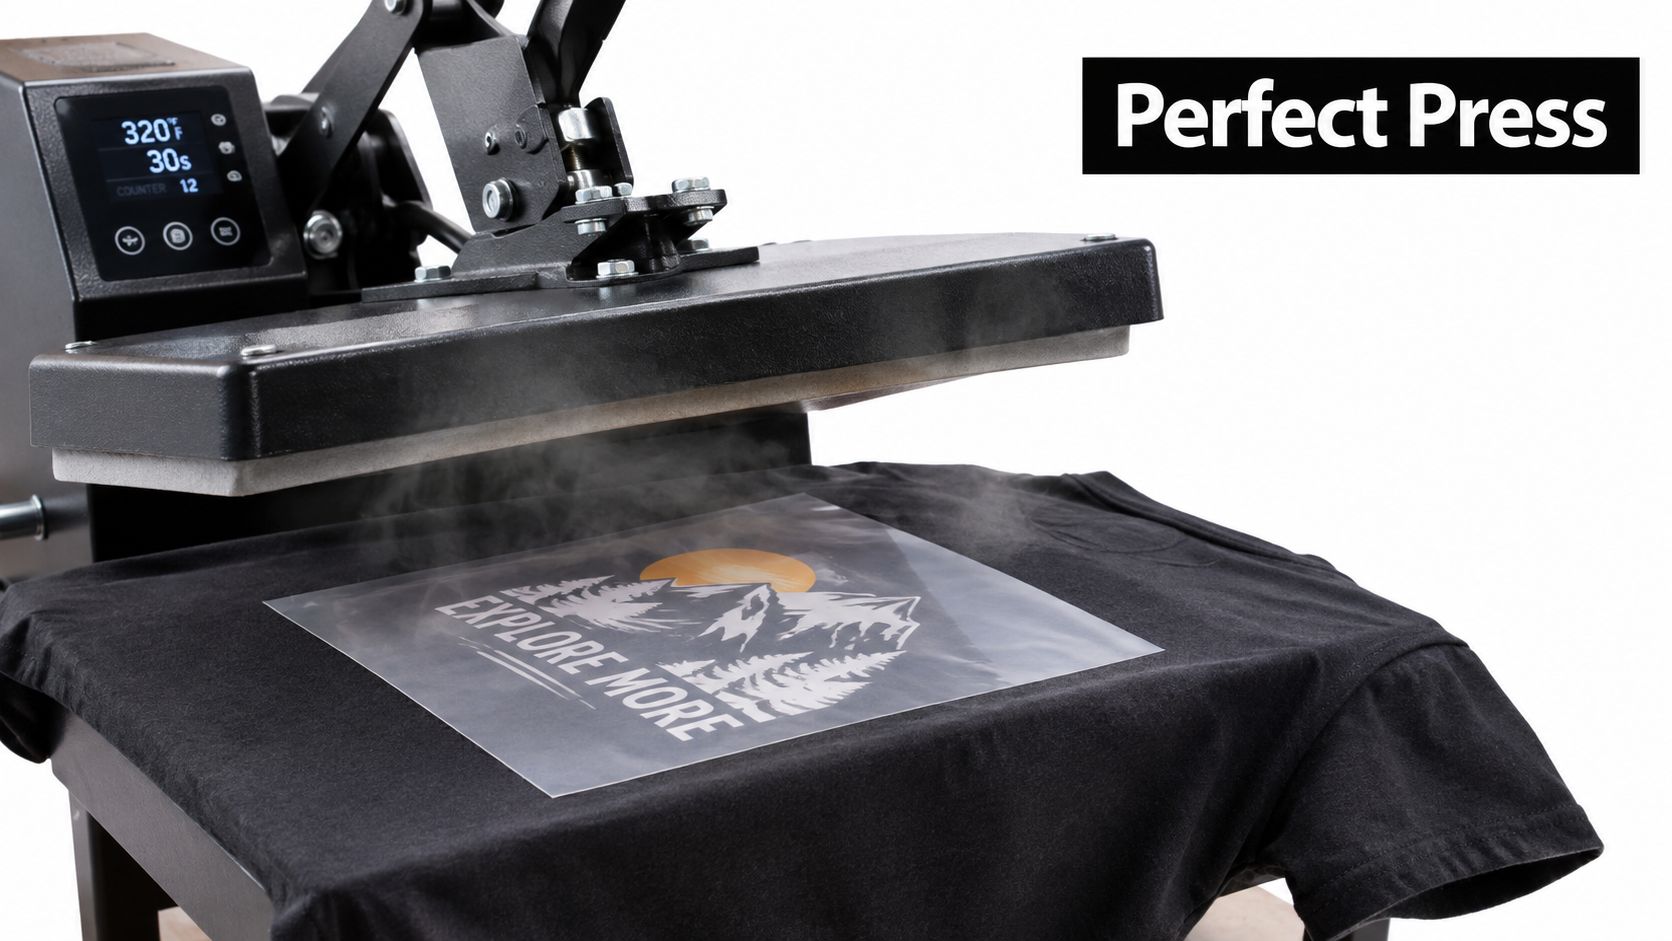
Build the order around actual sales units. Separate artwork by product and size, label the gang sheet layout, and count every planned application before checkout. If you offer local pickup or need a fixed event deadline, include processing and inspection time instead of planning only around the shipping estimate. Faster delivery helps cash flow only when the product arrives early enough to test.
Heat Press Application and Troubleshooting
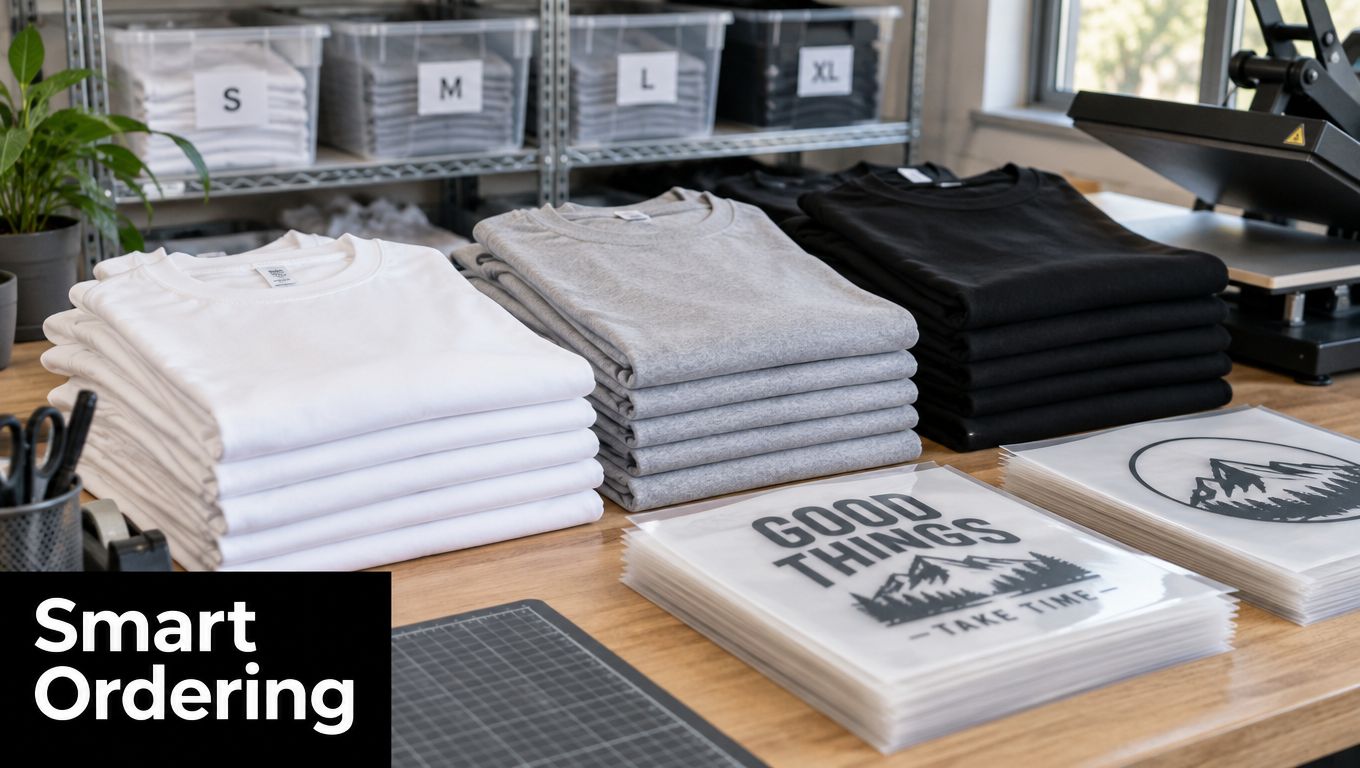
A heat press becomes reliable when the operator controls the variables instead of guessing. Start with the supplier's recommended temperature, time, pressure, and peel instructions for the specific transfer. Don't borrow settings from a different film or garment and assume they'll behave identically.
Pre-press the garment briefly when the instructions call for it. This can help remove moisture and flatten the application area. Place the transfer carefully, confirm the garment is aligned on the platen, and use a cover sheet if the transfer instructions require one. After pressing, peel at the specified temperature, then complete any second press or finishing step.
Keep a small press log with the garment, transfer type, setting, peel stage, and result. That record turns a successful application into a repeatable process.
Most common press error: A graphic looks bonded in the center but lifts around the edges. Recheck pressure, platen contact, garment seams, and the supplier's application instructions before increasing temperature or time.
If bonding is incomplete, inspect the surface first. Seams, zippers, thick collars, moisture, and uneven pressure can prevent full contact. If the print looks dull or the fabric shows heat damage, the setting may be too aggressive for that substrate. Cracking can result from an unsuitable material, inadequate bonding, excessive stretch, or care conditions that the decoration wasn't designed to withstand.
Never troubleshoot by changing several variables at once. Press a controlled sample, change one factor, and compare the result. That approach saves garments and gives you a usable process instead of a collection of lucky settings.
Quality Control, Care Labeling, and Demand Validation
The sample isn't just a preview. It's evidence that the artwork, substrate, transfer, press profile, and care instructions work together.
Before accepting a full order, finalize the artwork at production scale and apply one sample to the exact garment or substrate. Inspect adhesion, edge lift, registration, color appearance, surface feel, and placement. For apparel, wash-test the completed product rather than testing the transfer on film alone, because fiber, weave, dye migration, heat sensitivity, pressure, and laundering chemistry can change the result.
Use standardized methods where possible. ASTM references AATCC TM61 for accelerated laundering and AATCC TM8 or TM116 for dry and wet crocking. A commonly used benchmark is approximately Grade 4 for shade change and dry crocking and Grade 3 for wet crocking on a 1–5 scale, where 5 indicates negligible change or transfer. These methods and benchmarks are discussed in the ASTM colorfastness reference.
Labeling and post-sale clarity
For U.S. apparel, the FTC Care Labeling Rule requires a reasonable basis for care instructions, a regular cleaning method or warning when cleaning could harm the garment, and labels that remain permanently attached, legible, and accessible through the product's useful life. Test washing, drying, ironing, and abrasion conditions, then record shrinkage, cracking, peeling, staining, color change, and print distortion before writing the final instructions. The FTC apparel and household textile guide provides the relevant compliance context.
Fit creates a separate return risk. A durable print won't prevent complaints caused by inconsistent blank sizing, unclear measurements, poor photography, or a customer choosing the wrong fit. Show garment measurements, note any shrinkage observed during testing, approve a pre-production sample, and state how customized products are handled when the customer changes their mind.
Validate demand before buying depth
Dead stock is a demand problem disguised as a unit-cost problem. Industry estimates cited in the available research place excess fashion production at 2.5–5 billion items annually, with potential sales value of roughly $70–140 billion, while as much as 30% of garments remain unsold. These figures appear in the inventory-risk analysis, and they reinforce why small brands should treat each design as an experiment.
Use preorders, limited drops, small-batch testing, or made-to-order fulfillment. Calculate break-even using the blank, transfer, labor, packaging, payment fees, shipping, returns, and customer-acquisition costs. A lower decorated unit cost isn't automatically cheaper if the larger order creates storage, markdown, or cash-flow exposure.
McKinsey's 2025 State of Fashion report estimates that 20–30% of online fashion purchases are returned, and says approximately 60% of global apparel production is handled by small and medium-sized suppliers facing uncertain volume commitments. See the State of Fashion 2025 report for that context. Your policy should distinguish decoration defects from fit mistakes, customization errors, and change-of-mind requests.
Pricing, Fulfillment, and Scaling Smartly
Your price needs to cover the complete order, not just the blank and transfer. Add decoration labor, pressing time, packaging, payment processing, shipping support, reprints, returns, and the cost of samples. If you don't track those inputs separately, a busy launch can look successful while quietly losing money.
Use a simple unit-cost worksheet for every product:
- Materials: Blank garment or substrate, transfer, packaging, labels, and inserts.
- Labor: Artwork preparation, pressing, inspection, packing, customer support, and corrections.
- Selling costs: Payment fees, marketplace charges, advertising, shipping subsidies, and returns.
- Risk allowance: Samples, failed applications, damaged blanks, and replacement orders.
Fulfillment should match the promise you make. For event merchandise, group packing and local pickup may simplify handoff. For online orders, publish realistic processing times, confirm the size chart, protect folded garments from moisture, and inspect every item before sealing the package.
Scale only the parts that have earned expansion. Reorder a design when it has repeatable sell-through, acceptable support volume, stable quality, and a clear margin after all costs. Keep uncertain designs available through preorders or on-demand transfers rather than converting every promising idea into finished inventory.
A compact scaling checklist looks like this:
- Approve the artwork version and placement.
- Confirm the substrate and transfer compatibility.
- Test one finished product and document the press profile.
- Verify care instructions, sizing information, and return terms.
- Review real orders before buying deeper inventory.
- Reconcile actual costs against the planned unit margin.
The brands that last don't chase the lowest possible production cost. They build a process that produces the same result, gives customers accurate expectations, and makes the next order easier than the first.
Raccoon Transfers offers ready-to-press DTF transfers for apparel, UV-DTF transfers for smooth hard surfaces, custom gang-sheet ordering, artwork upload support, heat-press instructions, local pickup options, and shipping across the U.S. Visit Raccoon Transfers to order a small test, prepare a consolidated sheet, or build the transfer workflow behind your next merch drop.