
How to Make Shirts with Heat Press: Easy Step-by-Step Guide
Alright, let's dive into making some killer custom shirts. The whole process really boils down to three things: having the right gear, picking the perfect shirt and transfer material, and then bringing it all together with the right amount of heat and pressure. It sounds simple, and it is—once you get your toolkit squared away. Getting this part right from the start is the secret to making shirts that look like they came from a pro, not a craft room.
Your Essential Heat Press Toolkit
Before you even think about designs, let's talk about what you need on hand. Getting all your tools and materials gathered and organized first makes everything else a million times easier. It's the difference between a smooth, fun project and a frustrating one filled with scorched shirts and peeling vinyl. Think of this as your pre-flight check for creating awesome, durable custom apparel.

The Heart of Your Setup: The Heat Press
Obviously, the star of the show is the heat press itself. This is your biggest investment, and you'll generally run into two main styles: clamshell and swing-away.
- Clamshell Press: Just like the name suggests, it opens and closes like a clamshell. These are fantastic if you're tight on space and are mostly pressing standard t-shirts or other flat items. They're fast and efficient, which is a huge plus for bigger batches.
- Swing-Away Press: With this style, the top heated platen swings completely away from the bottom plate. This gives you a wide-open, burn-free workspace, which is a lifesaver for placing tricky designs or working with bulky items like hoodies.
So, which one is for you? It really comes down to your workspace and what you plan on making. If you're still on the fence, we've got a helpful guide on picking the best heat press machine for shirts that breaks it down even further.
Custom apparel is booming, and the numbers prove it. The global heat press market was valued at around USD 1.2 billion in 2024 and is expected to nearly double by 2033. It's clear that more and more people are jumping into this creative field.
Choosing Your Canvas: Shirts and Fabrics
Not all shirts are created equal when it comes to heat. The fabric you choose will totally change the look, feel, and lifespan of your design.
For most projects, you can't go wrong with 100% cotton or a solid cotton/polyester blend. These fabrics are workhorses—they handle heat well and are compatible with almost every type of transfer material out there.
If you're working with performance gear or want to get into sublimation, you'll be looking at 100% polyester. Just be warned, it needs lower heat to avoid that dreaded shiny, scorched look. Sublimation ink only bonds to polyester fibers, so it's a must for that type of printing.
Pro Tip: Always, and I mean always, pre-press your shirt for 3-5 seconds before you apply the design. This quick step zaps any hidden moisture and smooths out wrinkles, giving you a perfect surface for your transfer to stick to. It's a non-negotiable step for me.
The Design Medium: Heat Transfer Materials
Now for the fun part—the actual material that holds your design. There are a few main players, and knowing the difference is key to getting the result you're picturing in your head.
To help you decide, here's a quick look at the most common options and what they're best for.
Heat Transfer Material Comparison Guide
| Material Type | Best For | Feel on Shirt | Durability |
|---|---|---|---|
| Heat Transfer Vinyl (HTV) | Bold, simple graphics, lettering, and multi-color layered designs. Great for cotton and blends. | Sits on top of the fabric; can be thin or thick depending on the type (e.g., glitter vs. matte). | Very durable when applied correctly; can outlast the shirt itself. |
| Sublimation Prints | Full-color, photorealistic images on 100% polyester (or high-poly) white or light-colored shirts. | No feel at all. The ink becomes part of the fabric. | Extremely durable; permanent and will not crack, peel, or fade. |
| Screen Printed Transfers | Detailed, multi-color designs, distressed looks, and larger batches. Works on most fabrics. | Soft feel, similar to traditional screen printing but often thinner. | Excellent durability, holds up to many washes just like a store-bought shirt. |
Each of these materials has its own personality and requires different settings on your press. Your choice here will directly influence the final look and feel of the shirt, so it's worth taking a moment to match the right material to your specific project.
Preparing Your Design for a Flawless Transfer
A great custom shirt starts long before you ever plug in the heat press. Honestly, the prep work—getting your design right and your station set up—is just as important as the final press. I’ve seen countless projects go sideways because of simple mistakes made at this stage, leading to crooked graphics, peeling vinyl, and a pile of wasted shirts.
First things first, you need a solid design. If you're stuck for an idea, you can find some unique drawing ideas to spark creativity to get the ball rolling. Once you have your artwork, the most critical step for anyone using heat transfer vinyl (HTV) is to mirror the design. You have to flip it horizontally in your software before you send it to the cutter. It might look backward on your screen, but it ensures that when you lay the vinyl down on the shirt, everything reads correctly after you press it. Forgetting this step is a classic rookie mistake we've all made at least once.
Setting Up Your Workspace and Tools
Your workspace needs to be both safe and efficient. A heat press gets seriously hot, so you absolutely need to place it on a sturdy, heat-resistant surface. A solid workbench is perfect, but a purpose-built cart works great too. Just please, avoid flimsy folding tables that could wobble or even collapse while you're working.
This infographic lays out the whole prep workflow really clearly, breaking it down into three stages.
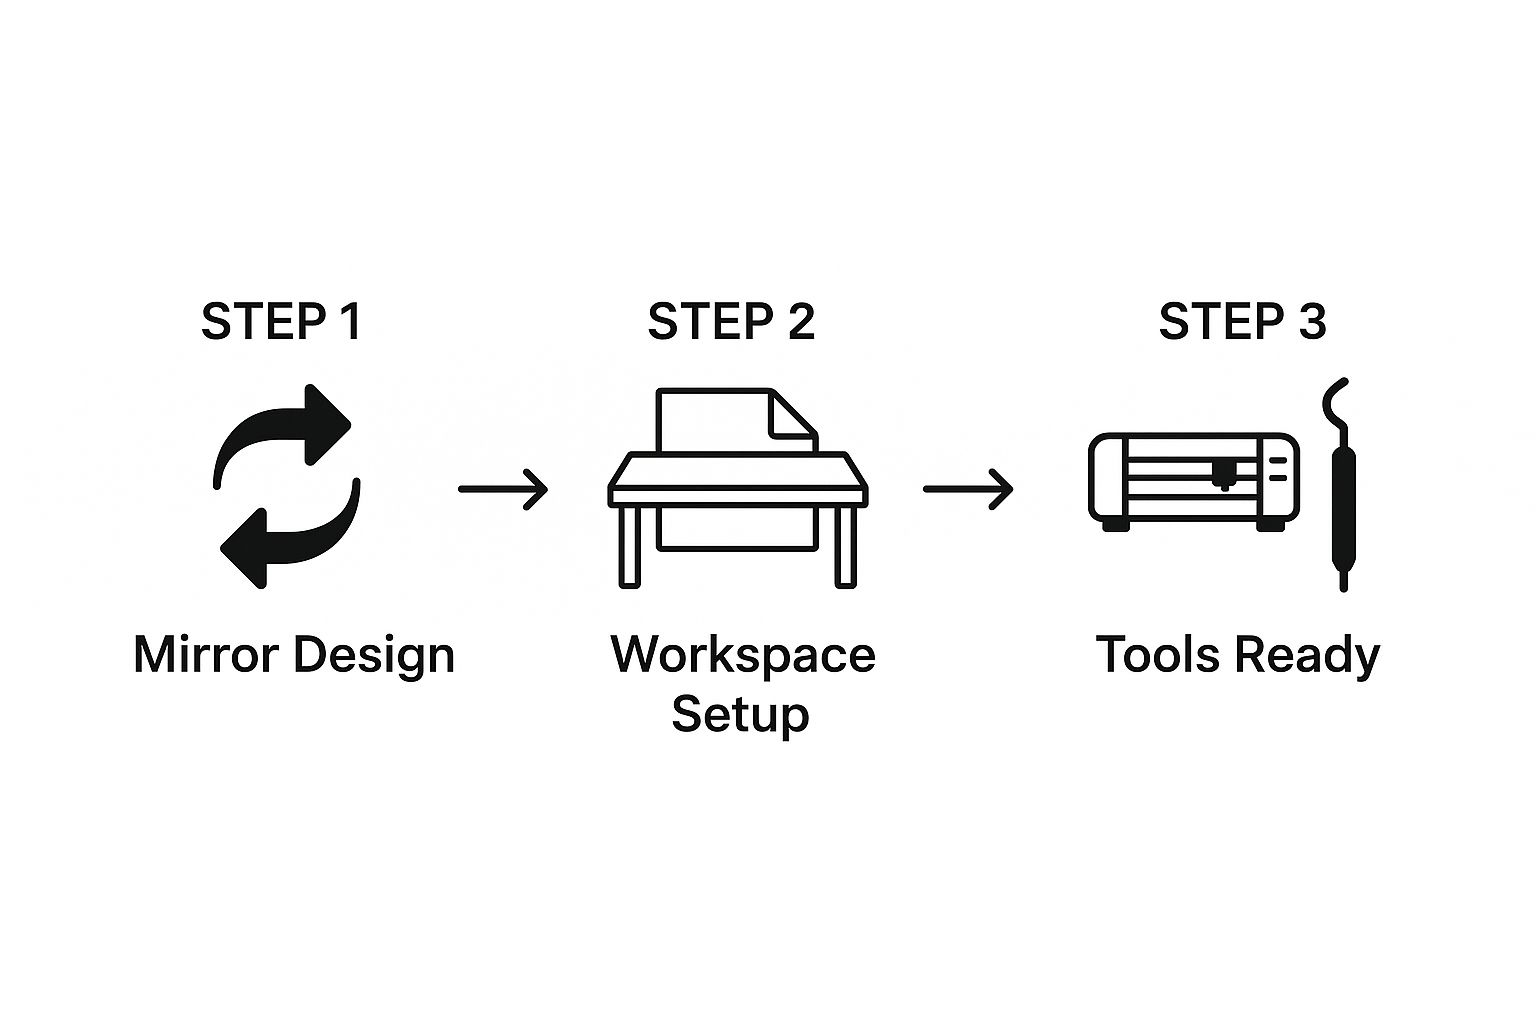
As you can see, it’s a logical flow from the digital file to the physical setup. Having all your tools laid out and ready to go stops you from scrambling mid-press, which is when things tend to go wrong.
Here’s a quick checklist of must-have tools you should have within arm's reach:
- A Weeding Tool: You'll need a sharp hook or pick to get all those tiny, negative-space pieces of vinyl out of your design.
- Teflon Sheet or Parchment Paper: This is your best friend. It acts as a protective barrier between the hot platen and your transfer, keeping vinyl from melting onto the press and preventing scorch marks on your shirt.
- Heat Resistant Tape: A few small pieces of this tape will hold your transfer perfectly in place, so it doesn't shift an inch when you lower the press.
A huge part of the design process is just getting the size right. A massive graphic on a small shirt looks awkward, while a tiny design on an XL tee just gets lost. To nail the proportions every time, take a look at our guide on choosing the perfect graphic size for a t-shirt.
The demand for personalized apparel is exploding, with the global custom t-shirt printing market expected to reach USD 13.3 billion by 2029. This boom is happening because the tools and techniques have become so accessible to creators like us. By mastering your prep work, you’re setting yourself up to produce the kind of high-quality, professional gear that people are looking for.
Mastering Your Heat Press Settings
The real secret to a vibrant, durable design isn’t just in the vinyl or the shirt—it’s in how you use your machine. Getting the hang of the temperature, time, and pressure trifecta is what separates amateur results from professional-grade shirts that look great wash after wash. Think of these three variables as a recipe; get the balance wrong, and the whole thing falls apart.
Too much heat can scorch a delicate polyester shirt in seconds, but too little will stop the adhesive from bonding correctly, leading to peeling designs. It’s a delicate dance. Likewise, the wrong pressure can cause an uneven transfer or leave that dreaded press mark on the fabric. It’s time to move from guesswork to a more calculated approach.
Dialing in Temperature and Time
Every type of heat transfer material has a sweet spot for temperature and time. A standard HTV on a cotton shirt, for example, is going to need a totally different setup than glitter vinyl on a poly-blend hoodie.
Always start with the manufacturer's recommendations for the specific vinyl or transfer paper you're using. These are your baseline numbers, the foundation you'll build on.
- Standard HTV on Cotton: A solid starting point is 305-320°F (150-160°C) for 10-15 seconds.
- Glitter HTV: This stuff is thicker and usually needs a bit more heat. I typically aim for around 320-330°F (160-165°C) for 15-20 seconds.
- Sublimation on Polyester: This is a whole different ballgame. Sublimation needs high heat to turn the ink into a gas, so you're looking at 385-400°F (195-205°C) for a longer press of 45-60 seconds.
Keep in mind, these aren't absolute rules but excellent starting points. Your specific machine might have hot spots or run a few degrees cooler than what the display says. To nail a perfect result, especially with sublimation, you have to understand the specific heat press settings for sublimation, as the science behind it is completely different from applying vinyl.
My Two Cents: Before I commit to pressing a brand-new garment, I always do a quick test on a hidden area, like the inside hem, or on a scrap piece of the same fabric. A five-second press tells me everything I need to know about whether the fabric will discolor or scorch at my chosen temp.
Finding the Right Pressure
Pressure is the unsung hero of heat pressing. It’s often overlooked, but it’s just as crucial as temperature and time. Your goal is to apply enough force to really embed the transfer's adhesive into the fabric's fibers without squishing the design or leaving a harsh outline from the platen.
Most machines have a big knob for pressure adjustment, and the settings are usually described as light, medium, or firm.
- Light Pressure: Best for delicate fabrics or specialty materials that could be damaged by too much force.
- Medium Pressure: This is my go-to for probably 90% of standard HTV jobs on t-shirts and sweatshirts.
- Firm Pressure: You'll need this for thicker materials like glitter HTV, plastisol transfers, and sublimation to ensure a complete, even bond.
Figuring out the "feel" for each pressure level can be tricky at first. A good old-fashioned trick is the "dollar bill test." When the press is cold, clamp it down with a dollar bill under one corner. If you can pull it out with no resistance, the pressure is too light. If it’s locked in tight, you’re in the medium-to-firm range.
To take the guesswork out of it, having a reliable chart is a lifesaver.
Recommended Heat Press Settings by Fabric and Transfer Type
This table gives you a solid starting point for some of the most common combinations you'll encounter. Always remember to test first!
| Fabric Type | Transfer Material | Temperature (°F/°C) | Time (Seconds) | Pressure |
|---|---|---|---|---|
| 100% Cotton | Standard HTV | 305-320°F / 150-160°C | 10-15 | Medium |
| 50/50 Cotton/Poly | Stretch HTV | 300-315°F / 149-157°C | 12-15 | Medium |
| 100% Polyester | Sublimation | 385-400°F / 195-205°C | 45-60 | Light-Medium |
| Tri-Blends | Standard HTV (Low Temp) | 270-280°F / 132-138°C | 10-12 | Medium |
| Any Blend | Glitter HTV | 320-330°F / 160-165°C | 15-20 | Firm |
| Any Fabric | Screen Printed Transfers | 325-350°F / 163-177°C | 7-10 | Firm |
These numbers are your guide, not gospel. For an even more comprehensive breakdown, our detailed https://raccoontransfers.com/blogs/guides/heat-press-temperature-chart is an invaluable resource to bookmark.
Applying Your Design with the Heat Press
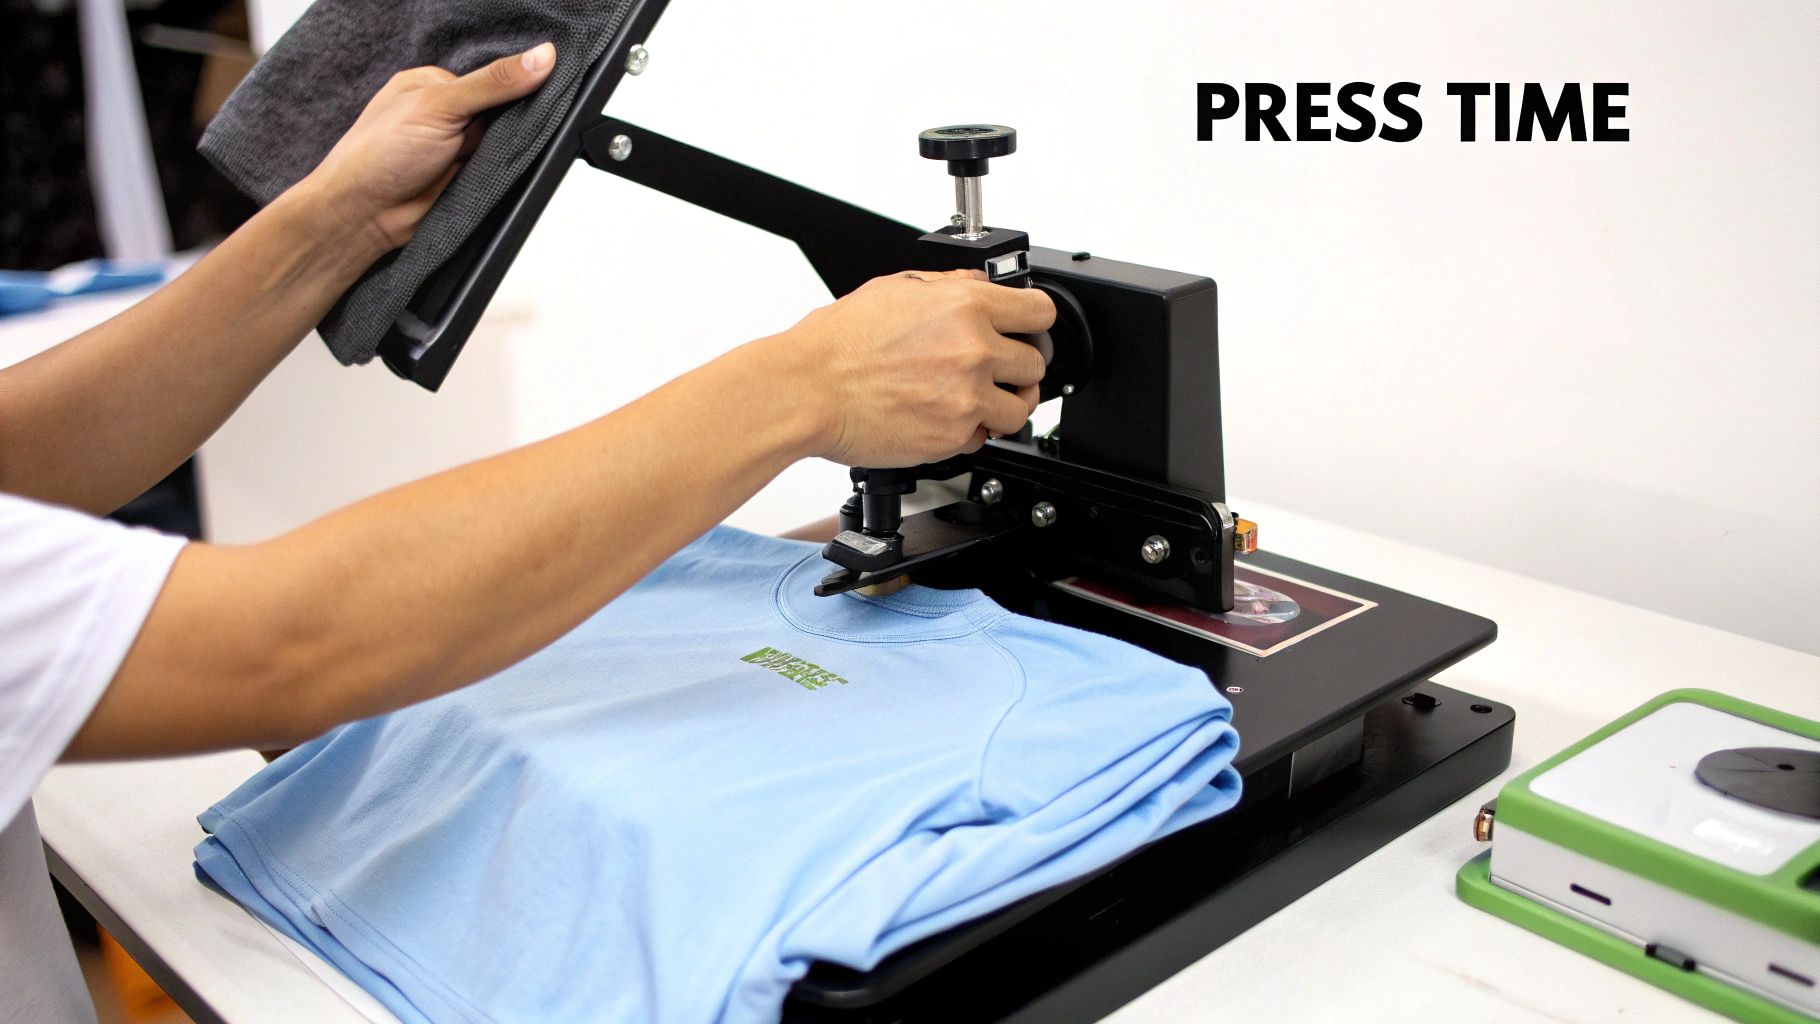
Alright, this is the moment of truth. You’ve got your settings locked in and your design is perfectly weeded—now it’s time to make the magic happen. The actual press takes just a few seconds, but what you do in those moments makes all the difference between a shirt that looks homemade and one that looks store-bought.
It’s no surprise that making shirts this way is catching on everywhere. The Asia-Pacific region alone makes up a massive 47.78% of the global heat press market, which just shows how effective and accessible this tech has become. If you're curious about the numbers, Verified Market Research has some fascinating data on this growing industry.
The All-Important Pre-Press
First things first: never skip the pre-press. Seriously, don't even think about it. This is probably the most common mistake beginners make. Fabric straight out of the package is full of moisture and wrinkles you can't even see, and both are enemies of a good transfer.
Just lay your shirt flat on the lower platen, close the press, and hit it with heat for a quick 3-5 seconds. This steams out the moisture and gives you a perfectly flat, dry canvas. Now the vinyl’s adhesive can get a death grip on the fabric fibers, which is exactly what you want.
Positioning Your Transfer Perfectly
With the shirt prepped, it's time for placement. Gently lay your weeded design onto the shirt, making sure the sticky side of the carrier sheet is down.
Getting a design perfectly centered can feel like a guessing game at first. Here’s a tried-and-true trick: fold the shirt in half vertically and give it a quick, light press to create a faint centerline. Do the same with your transfer (by folding the carrier sheet slightly), and then just line up the two creases. Easy.
For a classic chest graphic on an adult tee, a good starting point is placing the top of the design about 2-3 inches down from the bottom of the collar. I highly recommend using a t-shirt alignment tool or even just a simple ruler to keep things consistent, especially if you're running a batch of shirts. A few small pieces of heat-resistant tape at the corners will keep your design from shifting when you close the press.
Pro Tip: Always, always cover your design with a Teflon sheet or a piece of parchment paper before pressing. This little step saves you a world of headache. It protects your vinyl from melting onto the hot upper platen and keeps the shirt from getting any direct scorch marks.
Understanding the Peel: Hot, Warm, or Cold
Once that timer goes off, you’re almost done. The final move is peeling away the clear carrier sheet, but this is where you need to pay close attention to your material’s instructions. Not all vinyl is created equal.
The manufacturer will specify whether it's a hot, warm, or cold peel. This is critical.
- Hot Peel: This means you rip that carrier sheet off right away, while the shirt is still on the press and smoking hot. Most standard, matte-finish heat transfer vinyls (HTV) are hot peel.
- Warm Peel: Let it cool off just a bit, maybe for 5-10 seconds, before peeling. It should still be quite warm to the touch.
- Cold Peel: You have to exercise some patience here. Let the shirt cool down completely before you even think about touching the carrier sheet. Specialty vinyls—like glitter, holographic, and foils—almost always require a cold peel to make sure the material sets perfectly.
When you do peel, pull the sheet back low and slow at a sharp 45-degree angle. Don’t just yank it straight up. If you see any part of the design lifting with the sheet, stop immediately. Lay everything back down, cover it, and press it again for another 3-5 seconds. That extra bit of heat and pressure almost always solves the issue, leaving you with a flawless custom shirt.
Aftercare and Troubleshooting Common Issues
That moment when the timer beeps and you peel back the carrier sheet to reveal a perfect design is a great feeling. But the job isn't quite done. What you do in the next 24 hours is just as important as the press itself, determining whether that shirt looks fantastic for years or starts to peel after its first trip through the laundry.
The first rule of heat pressing is patience. You have to give the adhesive time to fully cure and bond with the fabric. I always tell people to wait at least 24-48 hours before that first wash. Resisting the urge to wear it or wash it right away lets that heat-activated glue create a permanent connection, one that can actually handle a washing machine.
Keeping Your Custom Shirts Looking New
When it is finally time for a wash, a few simple habits will dramatically extend the life of your design. The single most effective thing you can do is turn the garment inside out before tossing it in the machine. This protects the vinyl from getting scratched up by zippers, buttons, and other clothes.
For the best results, stick to these washing guidelines:
- Wash in cold water on a gentle cycle.
- Use a mild detergent. Steer clear of bleach and fabric softeners.
- Tumble dry on low heat, or better yet, hang it up to dry.
Remember, heat is what applied the vinyl, and heat can also mess it up. A hot dryer can reactivate the adhesive, making the design soft and easy to damage.
Solving Those Common Heat Press Headaches
Even when you think you’ve done everything right, things can still go sideways. Don't panic—most of these issues are common and have simple fixes once you know what to look for.
One of the most frustrating problems is vinyl that won't stick to the shirt. Nine times out of ten, this is a pressure problem. A good rule of thumb is to check if you can see the fabric's texture through the vinyl. If you can, your pressure is probably spot-on. If the vinyl looks like it's just sitting on top of the fabric, you need to crank up the pressure for a firmer press.
Another common sight is a scorched or shiny box around your design, especially on polyester. That’s a dead giveaway that your press is too hot. Drop the temperature by 10-15°F and press a test scrap. And if you're not already, start using a Teflon cover sheet—it's non-negotiable for protecting sensitive fabrics from direct heat.
My Pro Tip: If a customer comes back saying their design is peeling, I immediately ask about three things: pressure, when they first washed it, and the water temperature. It's almost always one of those three culprits. Dial in your pressure, enforce the 24-hour rule, and advise cold water washes, and you’ll eliminate the vast majority of durability complaints.
Your Top Heat Pressing Questions, Answered
Once you get started making custom shirts, you'll inevitably run into a few head-scratchers. It’s all part of the learning curve! Let's walk through some of the most common questions that pop up, so you can get back to creating with confidence.
Can I Just Use a Regular Iron Instead of a Heat Press?
I get this question all the time, especially from beginners. And while technically, yes, you can use an iron for a quick, one-off project, you're rolling the dice on quality and durability. For anything you want to sell or have last more than a couple of washes, a heat press is non-negotiable.
The problem with a household iron is simple: it can't deliver what a transfer needs. You get hotspots, uneven pressure, and no way to accurately control the temperature. A heat press, on the other hand, provides consistent, edge-to-edge heat and perfectly uniform pressure. This is what truly melts the adhesive and fuses it into the fabric, creating a bond that lasts. An iron just can't compete.
Help! Why Is My Vinyl Peeling After I Wash the Shirt?
This is the most frustrating thing, isn't it? You make a beautiful shirt, wash it, and the design is already lifting. Nine times out of ten, peeling comes down to one of the "big three": temperature, pressure, or time. Your first move should always be to go back and check the specific instructions for the brand and type of vinyl you're using.
Another sneaky culprit is the peel. Every type of heat transfer vinyl (HTV) has a specific instruction for when to remove the clear carrier sheet.
- Hot Peel: You rip it off immediately while it's still steaming.
- Warm Peel: Give it a few seconds to cool down a bit, maybe 5-10 seconds.
- Cold Peel: You have to let the shirt cool completely to room temperature before touching the carrier sheet.
If you peel a cold-peel vinyl while it's still hot, you're pulling the adhesive away before it has a chance to set. It’s an easy mistake to make, but it's a guaranteed way to get a failed transfer.
What's the Best Kind of Shirt to Use for Heat Pressing?
This depends entirely on what kind of transfer you're putting on it.
For most standard heat transfer vinyl, you've got a lot of flexibility. 100% cotton, 100% polyester, and cotton/poly blends are all fantastic choices. They handle the heat well and give the HTV adhesive a great surface to grab onto.
But if you're venturing into the world of sublimation, the rules change drastically. Sublimation is a chemical process where the ink turns into a gas and bonds only with polyester fibers. For that reason, you have to use a shirt with a very high polyester count—100% polyester is best—and it needs to be white or a very light pastel color for the design to show up properly.
The dreaded square press mark is a dead giveaway of a DIY shirt. It's caused by the heat and pressure from the edge of the platen squishing the fabric. The best way to avoid it is by using a heat press pillow, which elevates your design so only it gets the pressure, not the area around it.
How Do I Get Rid of That Annoying Square Mark on My Shirts?
Ah, the dreaded press box! We’ve all been there. This happens when the edges of your heat platen leave an indentation on the fabric. The best way to avoid it is to start by using the lightest pressure setting you can get away with while still getting a good press. Too much pressure is the number one cause.
The real game-changer, though, is a heat press pillow. You slide it inside the shirt, right under where you're placing the design. This raises the print area up, so the platen only makes firm contact with your transfer. The edges of the press barely touch the surrounding fabric, which means no more box! A gentle stretch of the shirt while it’s still warm can also help those fabric fibers relax and make the mark disappear.
Ready to create stunning, full-color designs without the hassle? Raccoon Transfers specializes in high-quality, easy-to-apply DTF transfers that work on almost any fabric. Upload your art and get professional results with next-day shipping. Start your next project with Raccoon Transfers.