
What Is DTF Transfers A Guide to Modern Apparel Printing
Direct-to-Film, or DTF, is a game-changing way to create custom apparel. At its core, the process involves printing your design onto a special transfer film and then using a heat press to apply it directly onto the fabric. The result is a stunningly vibrant, full-color graphic that's both durable and flexible.
Your Guide to DTF Transfers
The best way to think about DTF transfers is as a professional-grade, modern-day iron-on, but with way better results. Instead of printing directly onto a t-shirt, we first print your artwork onto a sheet of clear PET (polyethylene terephthalate) film. A special powdered adhesive is applied to the back of the wet ink, which is then cured with heat. This simple step creates a solid, ready-to-press transfer.
When you're ready, you just place the transfer onto your garment and press it with heat. The design permanently bonds with the fabric, creating a clean, sharp look that feels great. It’s a method that beautifully fills the gap between other decoration techniques like screen printing and Direct-to-Garment (DTG).
Why DTF Is Gaining Popularity
The buzz around DTF is all about its incredible flexibility and how easy it makes custom printing. It smashes through many of the old barriers that made high-quality custom apparel too expensive or complicated, especially for smaller brands or one-off projects.
The numbers don't lie. The global DTF printing market shot up from USD 2.56 billion in 2023 and is projected to reach USD 4.57 billion by 2033. This massive growth is fueled by how cost-effective it is, allowing companies like us at Raccoon Transfers to deliver high-resolution prints without massive minimum orders. You can explore more about the market's growth trends to see how it's shaking up the industry.
One of its biggest selling points is that DTF isn't picky about fabrics. You can press these transfers onto almost anything:
- 100% Cotton and polyester
- Cotton/poly blends
- Denim and canvas
- Fleece and leather
This opens the door to decorating way more than just t-shirts. Think hoodies, hats, tote bags, and even tricky materials like nylon jackets.
Key Takeaway: DTF technology gives you one reliable method to decorate almost any fabric with detailed, full-color graphics, all without needing messy pre-treatments.
DTF also makes printing complex designs simple and affordable. With screen printing, every single color requires its own screen, which adds time and cost. DTF prints all colors in one pass. This means you can have photorealistic images, smooth gradients, and an unlimited color palette without the price skyrocketing, making it perfect for small, highly custom orders.
How the DTF Printing Process Works Step by Step
So, what does it actually take to bring a DTF transfer to life? It's one thing to know what they are, but seeing the process from start to finish really shows you why this method is so cool. Let's walk through the entire journey, from a digital file on a screen to a finished design on a shirt.
Think of it like being a chef. You start with a recipe (your artwork), carefully mix your ingredients (the inks), prep it for the oven (add the adhesive powder), bake it (cure the transfer), and finally, serve it up by pressing it onto the garment. Every single step has to be just right.
Stage 1: Prepping the Digital Design
It all starts with your artwork. Before a single drop of ink is used, the digital file has to be perfect. The most important thing is making sure your design has a transparent background. This way, we only print the graphic itself—not a big, clunky box around it.
For a sharp, professional-looking print, you'll want to use a high-resolution format like a PNG, PSD, or AI file. The gold standard is 300 DPI (dots per inch). This ensures your design comes out crisp and clear, with no blurriness or pixelation. When you upload a file to us at Raccoon Transfers, we run all the technical checks to make sure it's ready to go.
Stage 2: Printing on the PET Film
With the design prepped, we send it over to a specialized DTF printer. This isn't your average desktop printer; it’s a pro-grade machine loaded with textile inks—Cyan, Magenta, Yellow, Black, and the all-important fifth color: White.
First, the printer lays down all the colors of your design directly onto a sheet of special PET (polyethylene terephthalate) film. Right after that, it prints a perfectly registered layer of white ink on top of the colors. This white layer is the game-changer. It acts as a solid base that makes your colors explode on any fabric, especially dark t-shirts.
Stage 3: Applying the Adhesive Powder
While the ink is still wet on the film, it’s time for a little magic. The printed sheet gets coated in a fine, granular adhesive powder made of thermoplastic polyurethane (TPU).
The powder is incredibly clever—it only sticks to the wet ink, leaving the blank areas of the film completely clear. Think of it like sprinkling glitter on wet glue; it only sticks where you want it to. This adhesive is what will physically bond your design to the fabric fibers in the final step.
The Role of the Adhesive: This powder is the bridge between the ink and the garment. Without it, the design would have nothing to grab onto, making this step absolutely essential for a print that lasts.
Stage 4: Curing the Transfer
The powdered transfer isn't quite ready yet. It needs to be cured. We run the film through a curing oven that heats it to a precise temperature, usually somewhere between 200-250°F (90-120°C).
This quick bake does two critical things:
- It melts the adhesive powder, turning it from a grainy texture into a smooth, even layer of glue.
- It gels the ink at the same time, locking the colors and adhesive together into one solid, stable transfer sheet.
What comes out is a dry, durable, and ready-to-press transfer. At this stage, it can be stored for months or shipped right to your door. This is when your order from Raccoon Transfers is finalized and sent on its way. If you want to get even deeper into the nuts and bolts, our guide on how to make transfers for t-shirts has more detail.
Stage 5: The Final Heat Press
This is where you take the wheel. The last step is pressing the transfer onto your apparel. Just place the DTF transfer where you want it on your t-shirt, tote bag, or hoodie, and put it in your heat press.
Using firm pressure and a temperature around 300-325°F (150-165°C) for about 10-15 seconds, the heat reactivates that cured adhesive. It melts again, this time sinking right into the fibers of the fabric. Once the time is up, you peel off the clear film, and what’s left is a vibrant, flawlessly bonded design. Your custom gear is officially done and ready to show off.
Choosing DTF Over Other Printing Methods
Navigating the world of custom apparel printing can feel like you're trying to pick the right tool for a job without knowing what each one does. You've got options like Direct-to-Garment (DTG), traditional screen printing, and Heat Transfer Vinyl (HTV), and they all have their strengths. So, when does Direct-to-Film emerge as the clear winner?
The real question isn't which method is "best," but which is best for your specific project. DTF really shines by offering a powerful mix of versatility, stunning color vibrancy, and cost-effectiveness—especially for small-to-medium-sized orders with complex, colorful designs. Think of it as the multi-tool in the printing world, ready to tackle a huge variety of fabrics and designs with professional-grade results.
DTF vs Direct-to-Garment (DTG)
At first glance, DTF and DTG seem like two sides of the same coin. Both are digital printing methods that can produce beautiful, full-color images with incredible detail. The core difference, however, is how the ink actually gets onto the shirt.
DTG printing applies ink directly onto the garment, much like your desktop paper printer. This works wonders on 100% cotton, where the ink soaks into the fibers for a super-soft, barely-there feel. But that's also its biggest weakness. DTG struggles with polyester and synthetic blends, and colors can look muted on dark fabrics without a pricey pre-treatment step.
DTF flips that process on its head by printing onto a film first. The design is then transferred to the fabric and bonded with a powerful adhesive.
This one simple change has massive implications:
- Fabric Freedom: DTF is your go-to for almost anything—cotton, polyester, nylon, leather, and blends—while DTG is really best for cotton.
- Vibrancy on Darks: That white ink underbase in a DTF transfer is a game-changer. It makes sure your colors pop just as brightly on a black hoodie as they do on a white tee.
- Feel and Durability: DTG might have a softer "no-feel" finish on cotton, but a DTF transfer offers a smooth, flexible feel that holds up better across a much wider range of materials.
If you're still weighing these two powerhouses, our complete guide on DTF vs. DTG printing breaks it all down to help you make the perfect choice.
The workflow for creating a custom garment with DTF is refreshingly simple, as this diagram shows.
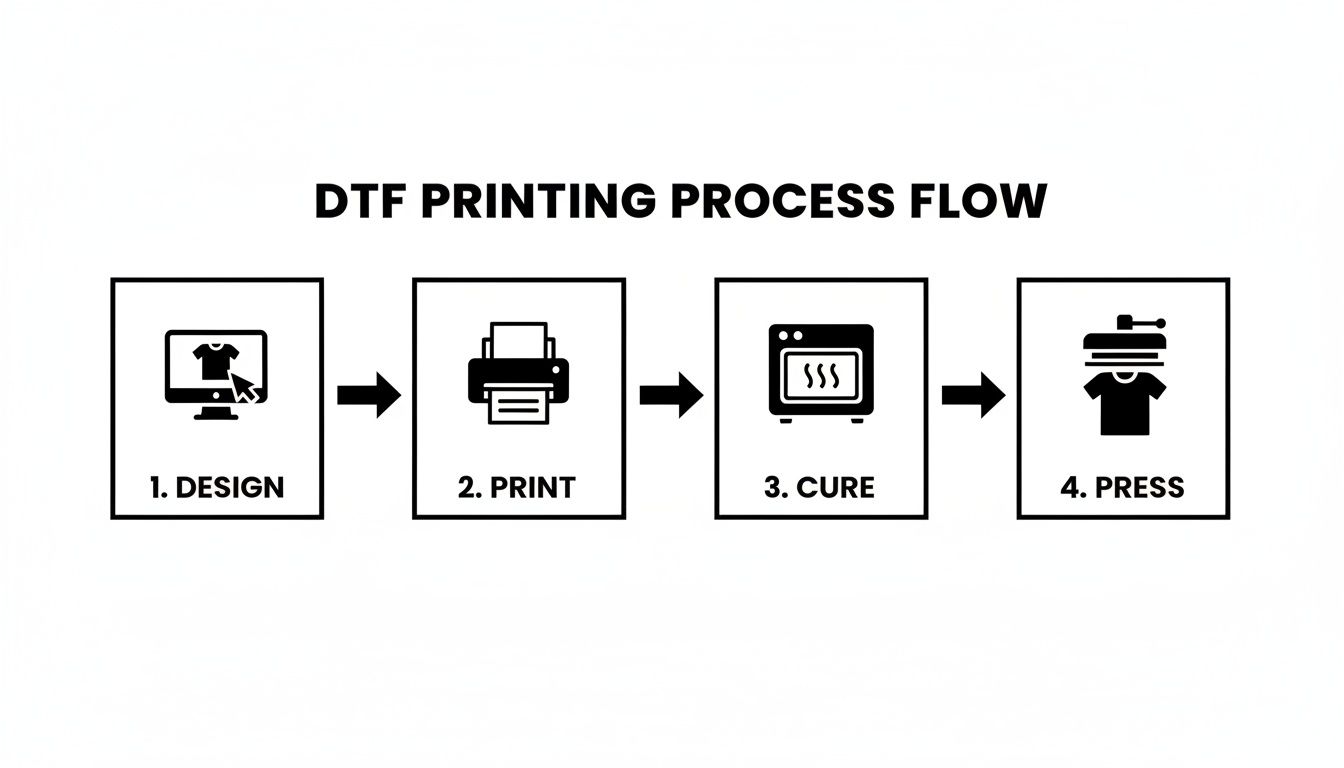
From a digital file to a finished product, the process highlights the efficiency that makes DTF so fantastic for getting projects done quickly.
DTF vs Screen Printing
For decades, screen printing has been the undisputed king of high-volume apparel production. It's known for its rock-solid durability and incredible cost-efficiency on massive runs. The process involves pushing ink through a mesh screen onto the fabric, but here’s the catch: you need a separate screen for every single color in your design.
This is where the trade-offs become crystal clear. Setting up all those screens is slow and expensive. Imagine you need 25 shirts with a five-color logo. The setup costs alone for screen printing would be sky-high, making each shirt ridiculously pricey.
This is exactly where DTF comes to the rescue. Since it’s a fully digital process, there are absolutely no setup costs tied to the number of colors. A simple one-color design costs the same to produce as a full-blown photograph.
Key Insight: DTF makes small-batch, multi-color orders financially possible. It gives small brands, bands, and creators the power to produce merch with complex, vibrant designs without being forced to order hundreds of units.
So, if you need thousands of one-color shirts for a marathon, screen printing is your best bet. But for 50 hoodies featuring a detailed, full-color album cover? DTF is the perfect solution.
DTF vs Heat Transfer Vinyl (HTV)
Heat Transfer Vinyl (HTV) is a favorite among crafters and is perfect for simple, one-color designs like names and numbers on jerseys. The process involves cutting a design from a sheet of colored vinyl and then using a heat press to apply it to the garment.
While it's great for basic personalization, HTV quickly shows its limits. The "weeding" process—painstakingly removing the excess vinyl from around your design—can be incredibly tedious and time-consuming for anything intricate. On top of that, creating a multi-color design means layering different colors of vinyl, which often leaves you with a final product that feels thick, heavy, and stiff.
DTF transfers offer a far better alternative here:
- Feel and Flexibility: A DTF print is significantly thinner and more flexible than layered vinyl. It moves naturally with the fabric instead of feeling like a plastic patch.
- Detail and Complexity: DTF can easily reproduce fine lines, tiny text, and photorealistic details that are simply impossible to achieve with a vinyl cutter.
- Efficiency: Forget weeding. With DTF, the transfer is printed and applied in one simple step, saving you a massive amount of time on complex jobs.
The rapid growth of DTF technology speaks for itself. Recent industry data shows that DTF devices now account for 44.5% of all digital transfer equipment installations worldwide. It's a clear sign that people are choosing it for its speed, versatility, and superior quality over older methods.
DTF vs DTG vs Screen Printing vs HTV At a Glance
Feeling a bit overwhelmed by the options? We get it. This table breaks down the key differences between the major printing methods to help you see exactly where each one shines.
| Feature | DTF Transfers | DTG (Direct-to-Garment) | Screen Printing | HTV (Heat Transfer Vinyl) |
|---|---|---|---|---|
| Best For | Small-to-medium runs, full-color designs, various fabrics | Small runs, 100% cotton, soft-feel designs | Large volume runs (100+), simple designs | One-offs, simple text/shapes, personalization |
| Color Capability | Unlimited colors, gradients, and photorealism | Unlimited colors, but can be less vibrant on darks | Limited by setup costs (1-6 colors is typical) | Limited to available vinyl colors; layering is bulky |
| Fabric Compatibility | Excellent (cotton, poly, blends, leather, nylon) | Best on 100% cotton; poor on polyester | Very good (cotton, blends, polyester) | Good (cotton, poly, blends) |
| Feel on Garment | Smooth, flexible, and soft | Very soft, "no-feel" on light cotton | Can be slightly thick depending on ink layers | Often thick and stiff, especially when layered |
| Durability | High, rated for 50+ washes with proper care | Good, but can fade faster than other methods | Excellent, often outlasts the garment | Good, but can peel or crack over time |
| Setup Cost | None | None | High (one screen per color) | Low |
Each method has its place, but as you can see, DTF transfers offer a unique combination of quality, versatility, and affordability that makes it the ideal choice for a huge range of modern apparel projects.
Unlocking Your Creative Potential with DTF
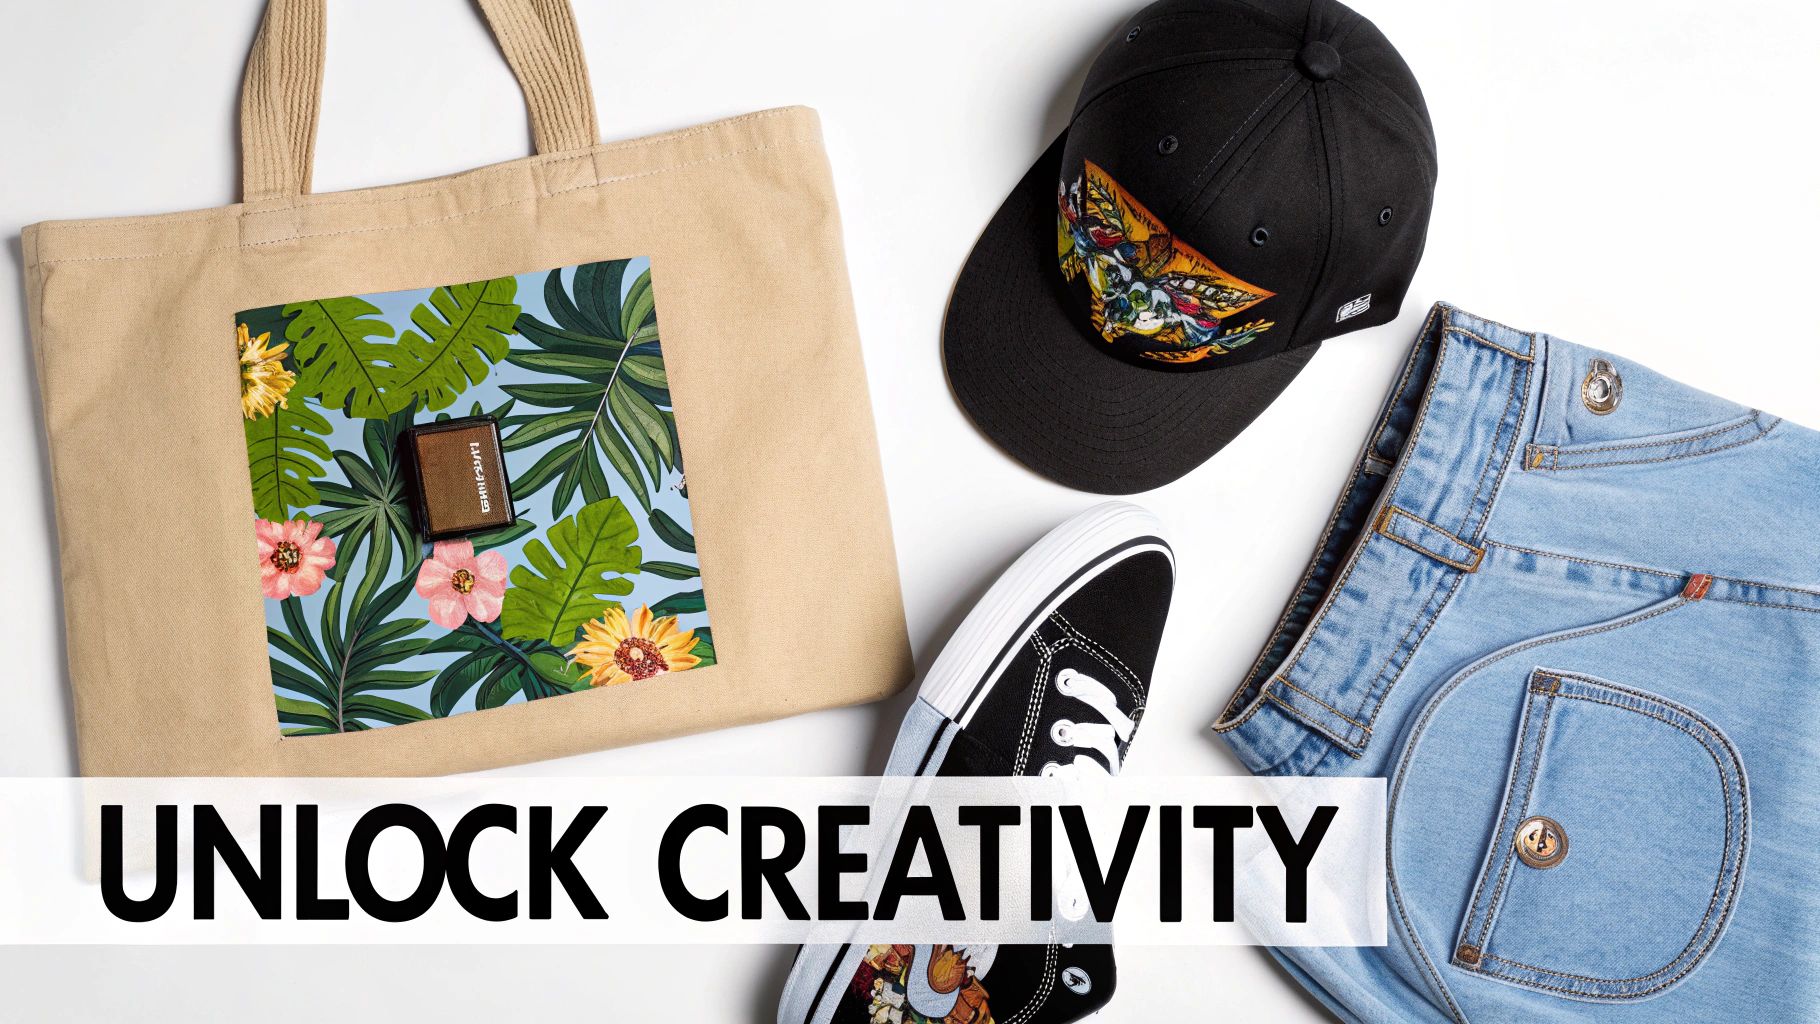
While t-shirts are a fantastic place to start, they're really just the tip of the iceberg. The true magic of DTF transfers is their incredible versatility. This isn't just a technology for one type of fabric; it’s a key that unlocks your ability to customize a whole world of different products and materials.
Think of it this way: other printing methods often box you in. DTG printing is pretty much married to cotton, and sublimation only really works its magic on polyester. DTF, on the other hand, is the all-terrain vehicle of the custom apparel world. It handles nearly any fabric you throw at it, making it the perfect single solution for all kinds of creative projects.
A World Beyond Cotton T-Shirts
So, what's the secret sauce? It’s the unique way DTF works. By printing the design onto a special film first and then using a heat-activated adhesive powder, we sidestep the limitations of printing directly onto the fabric itself. This simple but brilliant process is what blows the doors wide open for what you can create.
Suddenly, you can press a vibrant, full-color design onto almost anything. The list includes:
- Classic Apparel: Of course, you can still do your tees. But now you can easily decorate hoodies, sweatshirts, and polo shirts made from cotton, polyester, or those popular tri-blends.
- Rugged Fabrics: Got a tough material? No problem. Apply detailed logos to denim jackets, heavy canvas tote bags, and even durable workwear without worrying about the design cracking or fading.
- Performance and Outerwear: You can finally brand polyester jerseys for the local sports team, print on cozy fleece vests, or customize tricky nylon windbreakers.
- Unique Accessories: Get creative! Design custom hats, press intricate artwork onto canvas shoes, or even apply your graphics to non-traditional surfaces like leather patches.
This adaptability means you can build out an entire product line or brand with one consistent, high-quality look. Your logo will look just as sharp on a cotton cap as it does on a polyester performance shirt, giving you that professional edge across all your merch.
Practical Applications That Inspire
Let's get out of the weeds and talk about what this means in the real world. The possibilities are best understood when you see them in action.
A local coffee shop can brand not just their employee t-shirts but also their canvas aprons and the tote bags they sell to customers—all with the same transfer. An independent artist can take their digital paintings and put them on denim jackets, creating one-of-a-kind wearable art. A small sports league can finally afford to outfit their teams with full-color logos on modern moisture-wicking jerseys.
One Process, Many Products: Being able to use the exact same DTF transfer across wildly different fabric types simplifies your production and opens up entirely new ways to make money. You'll never have to turn down a customer again just because they want their logo on a "difficult" material.
This flexibility makes DTF an amazing partner for anyone looking to grow. You can easily test new product ideas, like custom-printed bandanas or branded cooler bags, without having to invest in a whole new printing setup. For any business that relies on customization, that's a game-changer. Here at Raccoon Transfers, we see our customers using our transfers for everything from pet accessories to custom upholstery swatches. It just goes to show how far you can push your creativity when the technology finally keeps up.
How to Get the Most from Your DTF Transfers
Knowing what DTF transfers can do is one thing, but learning how to order them smartly is how you really make them work for your business. The right ordering strategy can seriously cut your costs, speed up your workflow, and guarantee every single print comes out looking sharp. It's not just about what you order, but how you do it.
A little bit of planning goes a long way. By prepping your projects with a bit of strategy, you can make your budget stretch further without ever sacrificing the professional quality that makes DTF so great. From getting your artwork just right to using every last inch of film, a few simple tips can completely change the game.
Master the Gang Sheet for Maximum Savings
If you want the secret to cost-effective printing, it's the gang sheet. Let's say you have a bunch of different designs ready to go—a big graphic for the back of a hoodie, a small chest logo, a sleeve print, and maybe even a few designs for a totally different job. Instead of paying for each transfer individually, a gang sheet lets you group—or "gang"—all of them onto one single, large sheet of film.
Here’s the brilliant part: you pay for the sheet, not for how many designs you cram onto it. This simple shift in thinking can slash your cost per print. Think of it like buying in bulk at the grocery store; you're consolidating a bunch of smaller needs into one bigger, more efficient purchase.
This is a game-changer for anyone running a small brand or an Etsy shop. You can combine multiple customer orders or just stock up on your best-selling logos all at once, which makes even small-batch printing incredibly affordable.
Here’s a peek at how simple it is with Raccoon Transfers' online gang sheet builder.
Our builder gives you a visual canvas where you can upload, drag, drop, resize, and arrange your designs to fit perfectly. No wasted space, just maximum value.
Prepare Your Artwork for Flawless Results
The final quality of your print is a direct reflection of the quality of your digital file. A perfect transfer starts with a properly prepared design, and getting it right from the start saves you the headache and cost of reprinting. A few best practices are all it takes to make sure your vision translates perfectly from the screen to the shirt.
Before you upload anything, give your artwork a quick check to make sure it meets these standards:
- Transparent Background: This is non-negotiable. Your file must have a transparent background. If you upload a design with a white or colored box behind it, that box will get printed right along with your art. Stick to formats that support transparency, like PNG or PSD.
- High Resolution: For those crisp, clean lines and colors that pop, your artwork needs to be at 300 DPI (dots per inch). A low-res file will look blurry and pixelated, and no printer on earth can fix that.
- Correct Sizing: Size your artwork to the exact dimensions you want it to be when it's pressed. Trying to blow up a small image will only destroy its quality, so always start with a design that's big enough for the job.
Pro Tip: Always zoom in and double-check your design for any stray pixels or faint glows around the edges, especially if you removed the background yourself. Those tiny imperfections have a knack for showing up in the final print. A clean file is a happy file.
Taking a few extra minutes to prep your artwork is the single best investment you can make for a professional result. This focus on detail is what defines high-quality printing worldwide. Europe is currently setting the pace in the DTF market, holding a 36.0% global market share, and it's on track to become a USD 1.3 billion industry by 2032. That growth is fueled by a demand for top-tier digital printing, and Raccoon Transfers is committed to bringing that same world-class standard to you. Learn more about the global DTF market trends and see where this technology is headed.
Common Questions About DTF Transfers
Jumping into custom printing can feel like you're learning a new language, but you'll find that DTF transfers are refreshingly easy to get the hang of. To help you get started on the right foot, we’ve put together answers to the most common questions we hear from people just like you.
Think of this as your practical, no-fluff guide. We're skipping the jargon and getting right to what matters—durability, equipment, order sizes, and artwork. Getting these details sorted out first will give you the confidence to turn your ideas into amazing custom apparel.
How Long Do DTF Transfers Last?
This is usually the first thing people ask, and for good reason. You're not just creating a design; you're making something you want people to wear and love for a long time. The great news is that professional-grade DTF transfers are incredibly durable.
When you press a DTF transfer correctly, it doesn't just sit on top of the shirt—it chemically bonds with the fabric fibers. This creates a flexible, resilient finish that can easily handle dozens of washes without cracking, peeling, or losing its color. In fact, most high-quality DTF prints are rated to last for 50 to 100 washes, which often means they'll outlive the t-shirt itself.
Of course, proper care is key to getting that kind of lifespan. For best results, always wash the garment inside out with cold water and tumble dry on low (or hang it to dry). Steer clear of bleach and harsh detergents, which can slowly degrade the print. To really get into the nitty-gritty, check out our full guide on how long DTF transfers last.
Can I Use a Home Iron for Application?
It's a tempting shortcut, but using a home iron is one of the few things we strongly advise against. The success of a DTF transfer hinges on three things: precise temperature, even pressure, and accurate timing. A dedicated heat press nails all three, every single time. A home iron just can't compete.
Here’s why a home iron usually leads to disappointing results:
- Uneven Heat: An iron's surface has hot and cold spots. This means one part of your transfer might bond perfectly while another part fails to stick at all.
- Inconsistent Pressure: It's practically impossible to apply the firm, even pressure needed with your own hands. This results in a weak bond that will almost certainly start peeling after the first wash.
- Inaccurate Temperature: The dial on a home iron is more of a suggestion than a precise measurement. You might be too hot or too cold without even knowing it, leading to a failed press.
Using a heat press is the single biggest factor in getting a professional, durable print. Investing in even a simple, entry-level press will save you a ton of frustration, money, and wasted materials in the long run.
What Is the Minimum Order Quantity?
Here’s where DTF really shines, especially for small businesses and creators. Unlike screen printing, which involves a ton of setup for each color, DTF printing has no minimum order quantity (MOQ). This is a game-changer.
You can order a single transfer for a prototype, create a one-off custom gift, or handle a small order for a client without having to buy dozens of extras. At Raccoon Transfers, we're built for this kind of flexibility. You can order exactly what you need, whether it's a single print or a thousand. Even better, our gang sheet builder lets you fit multiple designs onto one sheet, making small-batch printing more affordable than ever.
What If My Artwork File Is Not Perfect?
Don't let a little uncertainty about your artwork stop you. We get it—not everyone is a Photoshop wizard. While a high-resolution file with a transparent background is the gold standard, it's not always what you have to work with.
The best first step? Just upload what you have. Our system is designed to catch common problems, like low-resolution images, and will often give you a heads-up if the print quality might look blurry.
If you have an image with a solid background that needs to be removed, there are plenty of free online tools that can do the job in seconds. The two most important things to aim for are a transparent background and a resolution of 300 DPI (dots per inch). Hitting that target ensures your final print will be sharp, vibrant, and professional.
Ready to bring your designs to life with unmatched color and durability? At Raccoon Transfers, we make it simple to get started. Build your custom gang sheet or order by size today and experience the difference of premium, easy-to-apply DTF transfers with next-day shipping.