

Custom Transfers for T Shirts: The Complete How-To Guide
Use 140°C for 15 seconds at medium pressure, around 2 bar, then adjust the settings for the fabric and press before washing a test garment. The reliable answer isn't a single universal setting, but a controlled application followed by wash testing.
The shirt looks perfect on the heat press. The colors are clean, the edges are sharp, and the carrier film lifts without taking half the design with it. Then the customer washes it, and you discover a lifted corner, a faded section, or a faint shadow where the print should have stayed solid.
That failure usually isn't caused by DTF technology alone. It comes from a broken link in the process, such as the wrong fabric setting, uneven pressure, incomplete adhesive curing, or a polyester dye that migrates into the print after pressing. Custom transfers for T shirts work best when you treat application as a chain of controlled decisions, not as a button press.
The Reality of Applying Custom Transfers for T Shirts
A new operator often presses the first shirt, lifts the film, and immediately reaches for the next blank. The design looks bonded, so production continues. The trouble appears later, when the first wash exposes a weak edge or a section that never received enough pressure.
That result is frustrating because the transfer may have been printed correctly. The failure happened at the garment. A seam under the platen, a collar sitting on the pressing area, or a slightly uneven lower platen can prevent the adhesive from making consistent contact. The shirt can look finished while the bond remains incomplete.
Why the process changed
Heat-transfer decoration has a long commercial history. Screen-printed plastisol transfers expanded in commercial use during the 1960s, became standard for sports-team names and numbers by the 1980s, and CAD-cut vinyl reduced setup costs for low-MOQ, on-demand apparel decoration in the early 1990s, as documented in this history of heat-transfer customization. Each development solved a practical production problem, especially personalization without the setup burden of traditional printing.
Modern DTF continues that progression. It handles detailed, full-color artwork and small batches without requiring the operator to weed individual vinyl shapes. That flexibility is valuable for a new clothing line, a club order, or a one-off sample, but it doesn't remove the need for process control.
Practical rule: If the shirt matters to the customer, press a test garment before pressing the complete order.
A useful example is a club order. Before ordering club shirts in the UK, confirm the garment composition, test the transfer on that exact blank, and record the successful settings. Don't assume that a cotton team shirt and a performance polyester shirt can share the same recipe.
The first week of operation should focus less on speed and more on repeatability. Check the fabric label, flatten the garment, keep seams away from the print area, and inspect the transfer after cooling. A professional result starts before the press closes.
Understanding Fabric Compatibility and Material Science
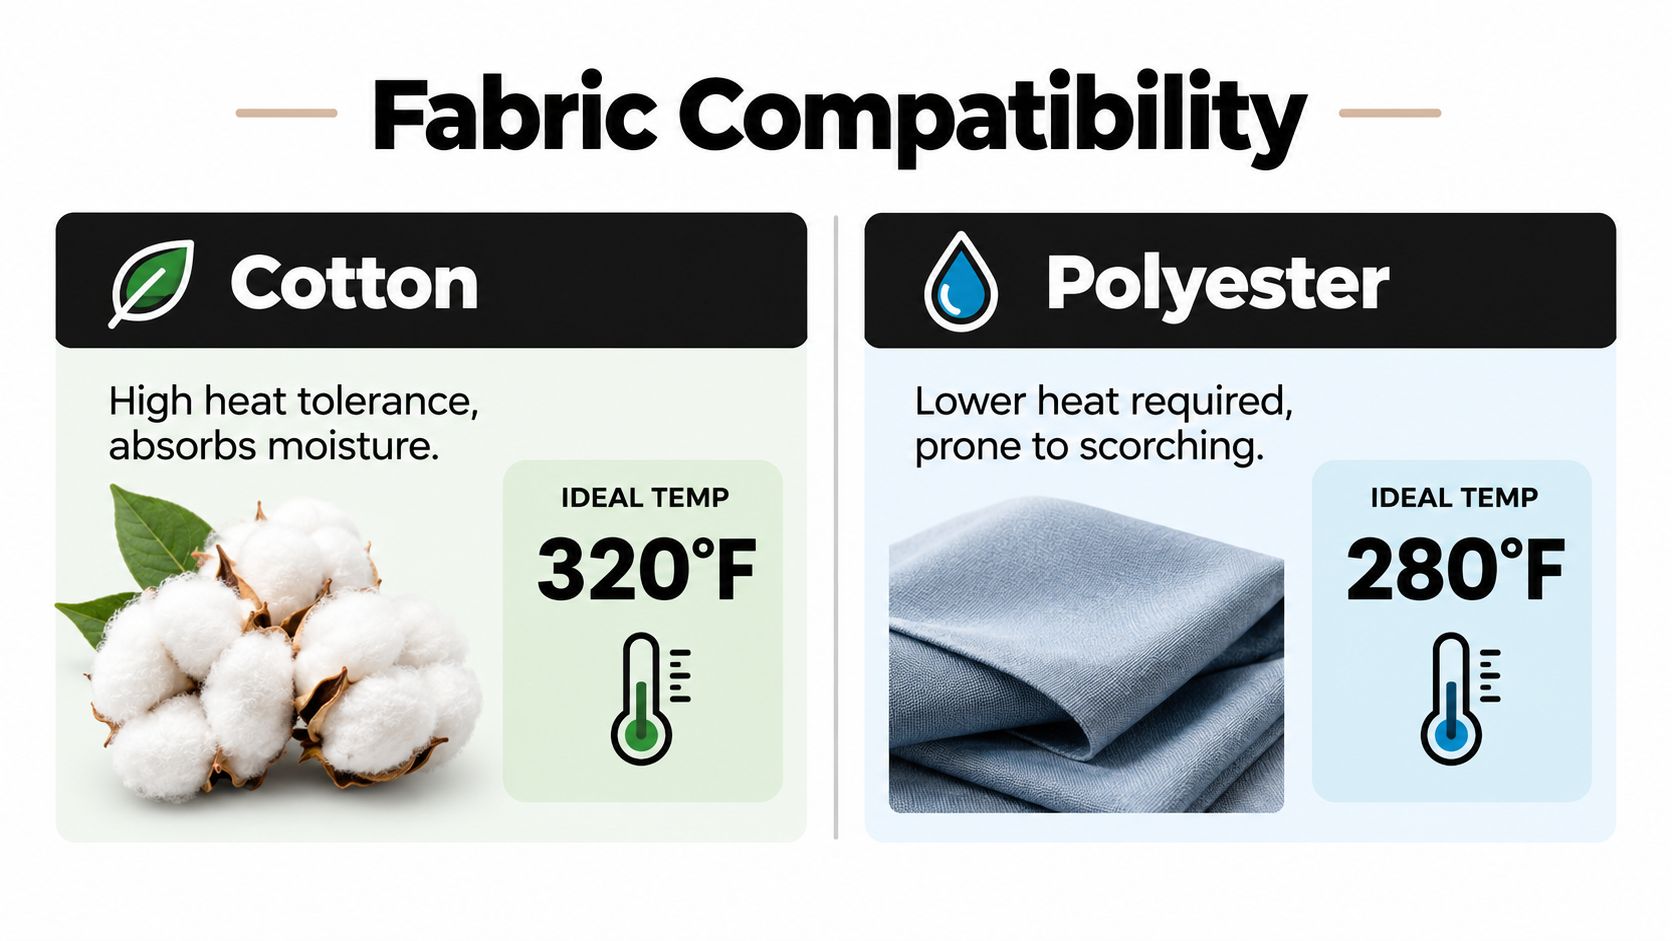
Fabric changes the way heat, pressure, moisture, dye, and adhesive interact. Cotton is generally forgiving, while polyester and blends demand more restraint because the garment's dyes and heat sensitivity can affect the finished print.
Cotton fibers absorb moisture and tolerate higher heat more readily than many synthetics. A dense cotton shirt may need firm pressure so the adhesive can contact the surface evenly, particularly where the knit has texture. Too little heat or dwell time can leave the transfer sitting on the surface rather than bonding into the fabric structure.
Polyester creates a different risk. Excessive heat can encourage dye migration, where the garment color moves into the transfer and changes its appearance. The design may leave the press looking correct, then develop a tinted cast as the fabric cools or after washing. Polyester typically needs a lower press temperature than cotton, and the correct setting depends on the specific garment and transfer system.
Read the blank before choosing the setting
Use the garment label as your first diagnostic tool. A cotton-polyester blend can behave differently from either fabric alone because the cotton side may accept heat while the polyester side introduces migration or scorching risk. Stretch fabrics add another problem. If the print film stays rigid while the shirt stretches, cracking can appear at the design edges.
| Fabric | Main risk | Operator response |
|---|---|---|
| Cotton | Incomplete contact on textured or thick knits | Use an even platen and verify pressure |
| Polyester | Dye migration and heat damage | Use a lower setting recommended for the transfer and test first |
| Blends | Mixed heat response and stretch | Test the exact blank and inspect after cooling |
| Stretch fabrics | Stress at edges and fine details | Avoid overlarge rigid designs and verify recovery after stretching |
A product such as Custom DTF Transfer by Size: Perfect Prints for Every Project can be considered when a shop needs ready-to-press designs for different garment types. The catalog describes applications across cotton, polyester, blends, leather, and other materials, but the operator still has to validate the transfer on the target substrate.
The important distinction is between transfer compatibility and application compatibility. A transfer may adhere to a fabric in principle, yet fail because the press setting causes migration, the fabric has a water-resistant finish, or the garment's stretch pulls the adhesive apart. Treat every unfamiliar blank as a test surface.
Preparing Your Artwork and Setting Up the Press
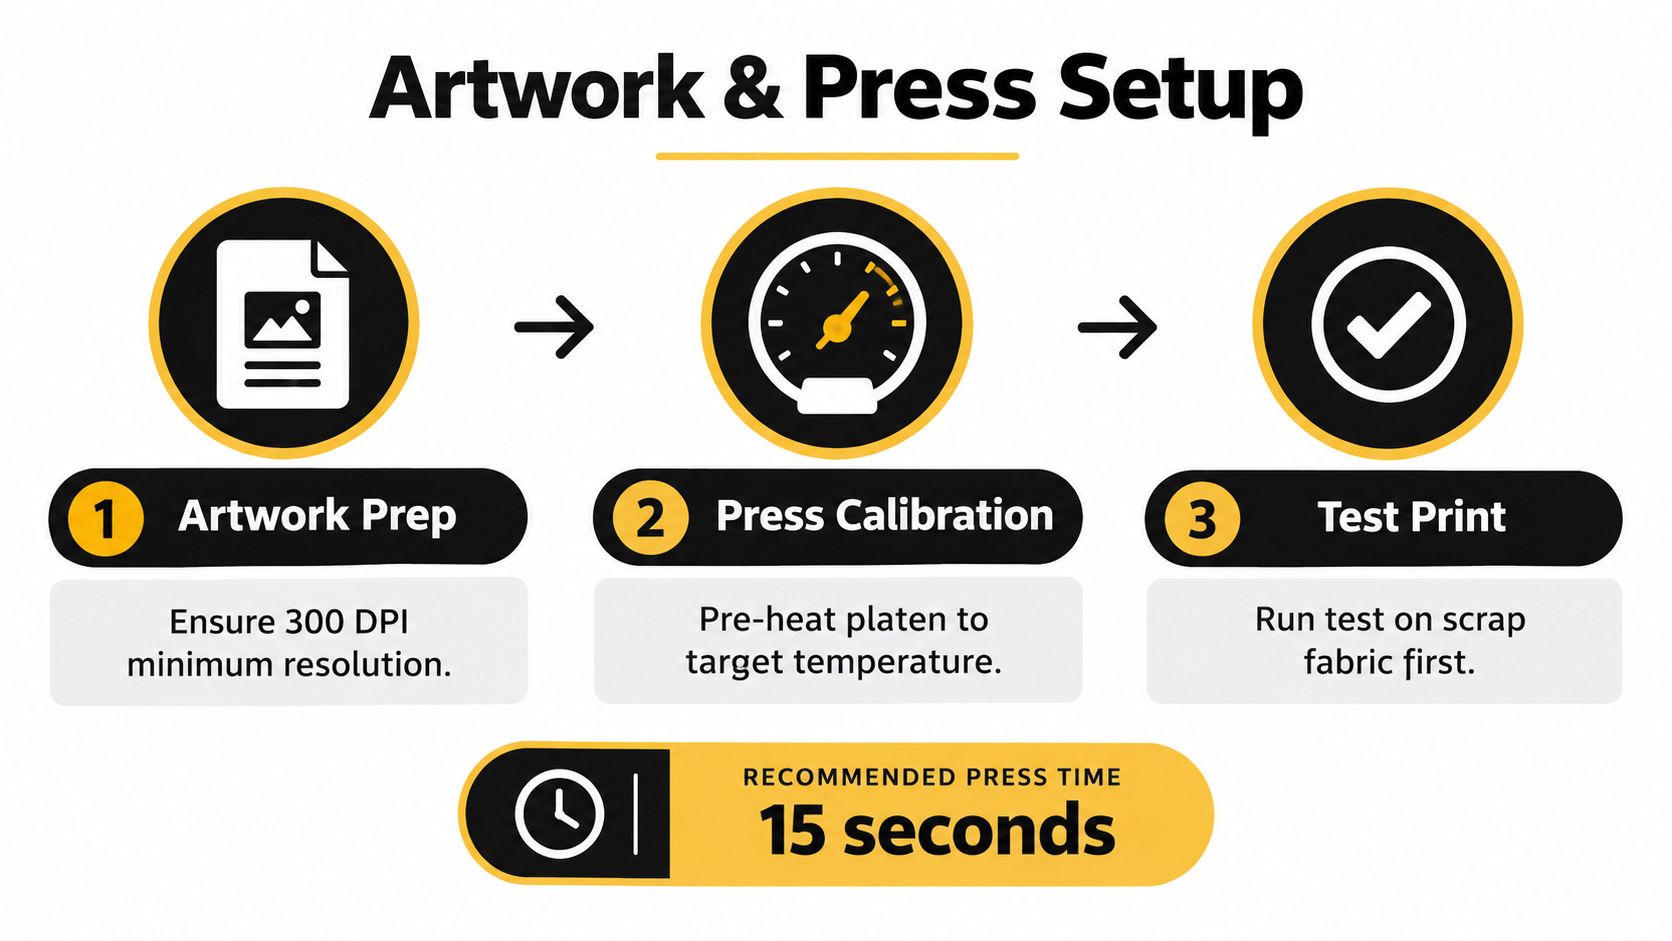
Good pressing starts before the artwork reaches the film. A low-resolution file produces soft edges, broken fine lines, and rough curves that no heat press can repair. Prepare raster artwork at 300 DPI, and use a clean vector file when the design contains logos, lettering, or shapes that need precise edges. The artwork preparation guide is useful as a preflight reference before sending files to production.
Build a repeatable preflight
Start with the artwork, then move through the press in a fixed order:
- Inspect the file. Check transparent areas, fine details, edges, and the intended print size. A design that looks sharp on a monitor may reveal pixelation when enlarged.
- Confirm film and ink compatibility. The film, ink, and adhesive powder must work as a system. Incompatible materials can produce poor coverage or a weak bond.
- Check the powder layer. Adhesive powder should cover the printed adhesive area evenly. Bare patches can become adhesion failures, while excess powder can create an unwanted texture.
- Cure the adhesive fully. Incomplete curing leaves the adhesive unstable before pressing. Follow the transfer supplier's curing process rather than guessing from appearance.
- Calibrate the press. Verify that the platen heats evenly, closes flat, and applies consistent pressure. A press display can show a target temperature while the actual pressing surface varies.
- Prepare the garment. Remove lint, flatten the print zone, and pre-press only when the garment and transfer instructions allow it.
A practical benchmark for DTF on cotton and blends is 140°C for 15 seconds at medium pressure, around 2 bar, but the appropriate setting must be adjusted for the fabric and machine. The same technical guidance stresses that temperature, time, and pressure should be tested on the target textile because under-curing and poor adhesion can result from assuming one setting works everywhere, as explained in this DTF application and wash-testing reference.
Press-room habit: Keep a small test piece of every new blank beside the machine. It gives you somewhere to verify adhesion before you risk a finished shirt.
Write the successful settings on the job ticket. Include the garment type, transfer supplier instructions, pressure feel, peel behavior, and wash-test result. That record turns a lucky first shirt into a repeatable production method.
Applying the Transfer with Precision and Care
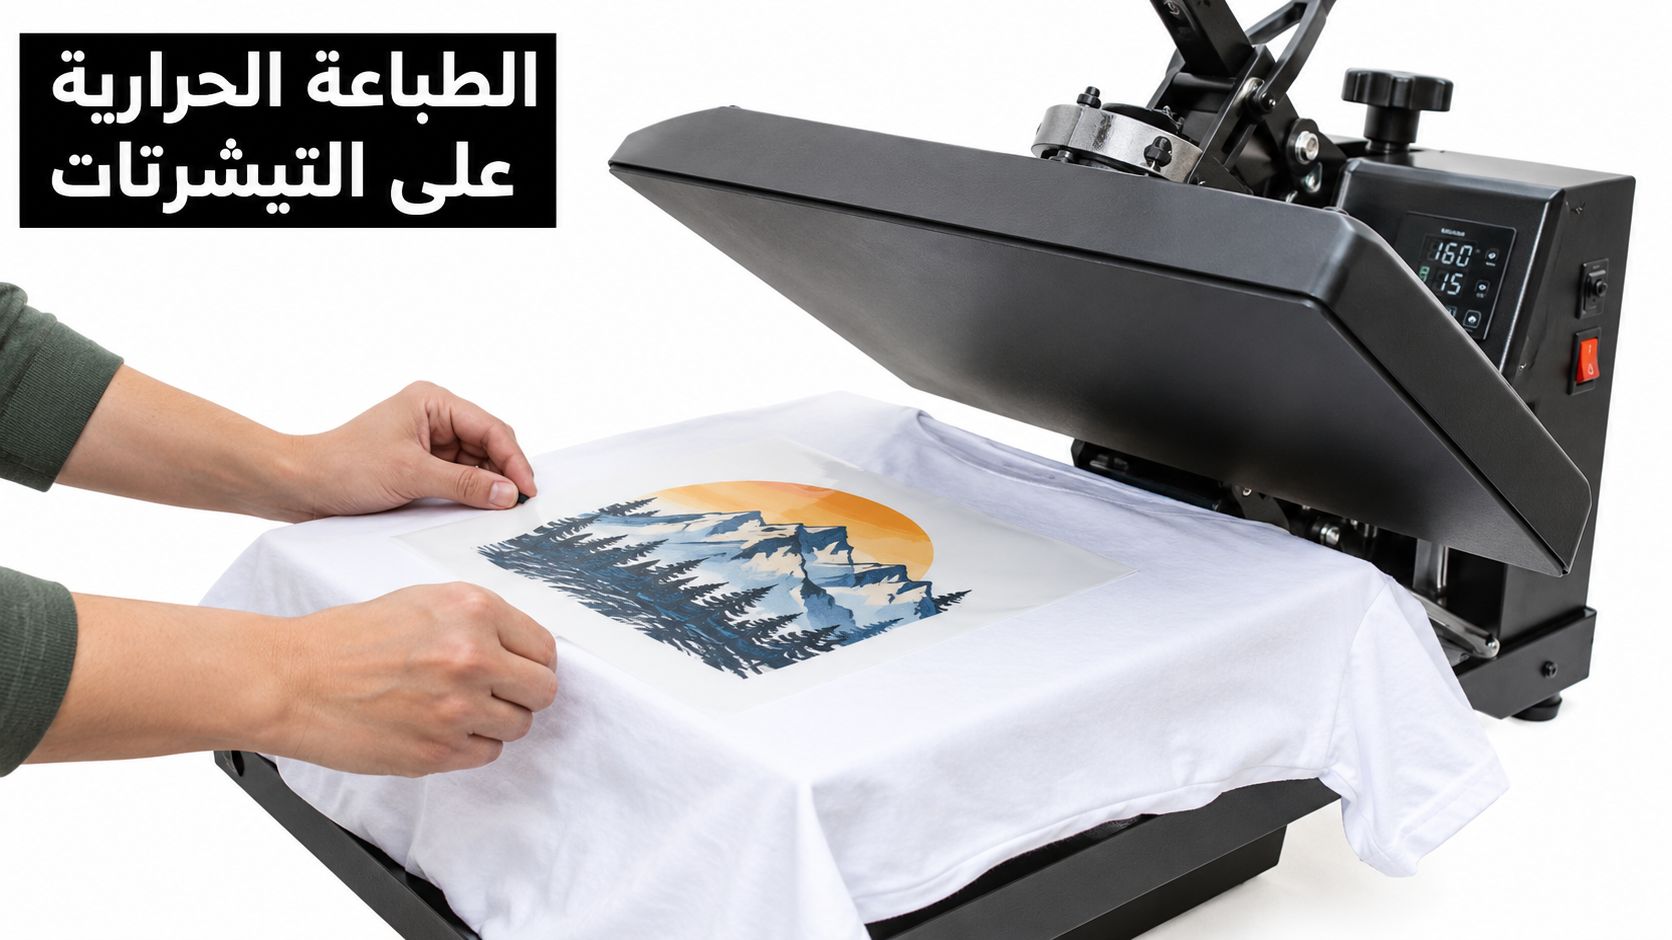
Place the garment on the platen so the print area is flat and seams aren't trapped beneath the transfer. A collar, pocket edge, or thick side seam can create a pressure gap. Smooth the shirt, position the design with a ruler or placement guide, and make sure the carrier film sits completely inside the printable area.
Close the press only after checking that the film hasn't shifted. Use the fabric-specific temperature and pressure you validated during testing. For a typical DTF job, the practical benchmark is 15 seconds, but the press must still deliver the intended heat and pressure evenly across the entire design.
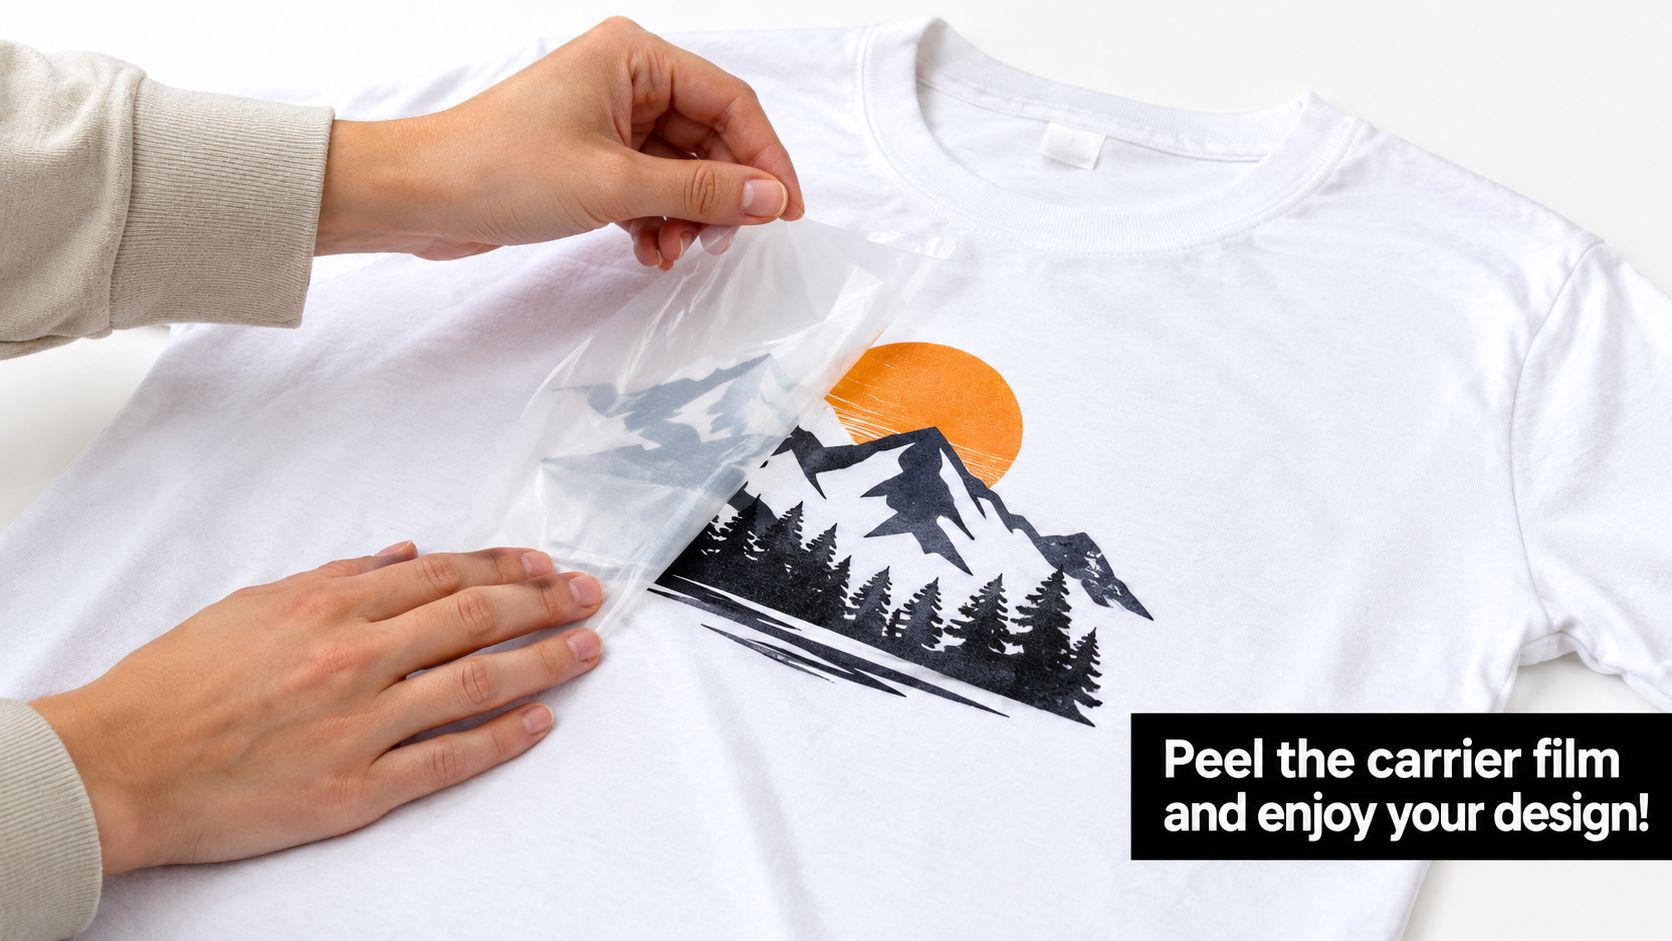
Peeling is part of the application
Don't peel by habit. Some films are designed for a hot peel, while others require cooling before removal. The transfer supplier's instructions take priority. If you peel too early, sections that haven't bonded can lift with the carrier. If you wait beyond the recommended process, the film may become harder to remove cleanly.
Lift the carrier at a low angle rather than pulling straight upward. Watch the design as it separates. If a corner or fine detail remains attached to the film, lower the carrier back down and repress according to the supplier's instructions instead of forcing the peel.
The finished surface should feel consistently bonded, with no loose edges, pinholes caused by poor powder coverage, or glossy patches created by uneven pressure. A second protective press may be appropriate for some systems, but it isn't a universal repair for a badly applied transfer. The heat-press settings guide for DTF can help you compare the supplier's directions with your machine setup.
The same discipline applies when a brand sells more than shirts. Standard DTF is designed for textiles, while UV-DTF uses a different adhesive and application approach for hard surfaces. Trying to use an apparel transfer on a bottle or a rigid sign is a material mismatch, not a pressing mistake.
Choosing Between DTF and UV DTF for Your Workflow
Standard DTF belongs on fabric. It uses heat and pressure to bond a printed transfer to garments such as cotton shirts, polyester workwear, and suitable blends. UV-DTF is intended for hard surfaces and is applied without the same heat-press process, making it useful for products such as packaging, signage, and other rigid merchandise.
That distinction matters for small brands building a product range. A shirt collection might use DTF for full-color garment graphics, while matching bottles, boxes, or laptop decorations use UV-DTF. The brand can keep its artwork consistent without pretending that one transfer type works across every substrate.
Choose by substrate first
Use this decision frame before ordering:
| Project requirement | More suitable direction | Why |
|---|---|---|
| Cotton or synthetic apparel | Standard DTF | Built for textile bonding through heat and pressure |
| Hard promotional goods | UV-DTF | Designed for heat-free application on rigid surfaces |
| Mixed merchandise | A two-system workflow | Keeps each product on the transfer type suited to its material |
| Simple one-color garment mark | HTV may be practical | Cutting and pressing can be economical when weeding is limited |
| Detailed multicolor garment artwork | DTF often fits better | It avoids manual weeding and handles gradients and fine detail |
The economics depend on the work mix, not on a universal winner. Independent comparisons describe DTF as useful for full-color designs, faster application, and avoiding weeding, while HTV can remain less expensive for very simple one-color jobs and very small startup operations, as discussed in this DTF versus HTV comparison.
Calculate labor carefully. HTV may have a low material cost, but cutting, weeding, layering, and correcting small mistakes consume operator time. DTF may cost more per transfer in some jobs, yet remove several manual steps. For a detailed design or a run with repeated artwork, that labor difference can change the better option.
UV-DTF also changes vendor planning. If a shop regularly sells shirts with matching hard goods, using one supplier strategy for both systems may simplify artwork management and ordering. It won't eliminate substrate testing, and it won't make a UV-DTF decal suitable for a stretchy shirt. The right question is which process minimizes rework for the complete product mix.
Evaluating Durability and Long-Term Value
A transfer can look perfect when it leaves the press and still fail after delivery. Incomplete curing, uneven pressure, an unsuitable polyester setting, or harsh washing can expose the weakness. Durability is a process result, not a permanent property of the word DTF on a product page.
Test the actual blank you plan to sell. A similar shirt is not enough, especially when polyester, blends, hard surfaces, or different coatings are involved. Use the recorded press settings, let the transfer cool as instructed, and inspect the edges before washing. Wash the test item under the care conditions your customer is likely to use. Check for lifting, cracking, color change, lost detail, and changes around stretch points. On polyester, judge the color after cooling, not only immediately after pressing.
Technical guidance reports that well-applied DTF transfers commonly benchmark at 50 to 80 or more wash cycles, while lower-quality systems may fail in the 30 to 50 wash range, as covered in our guide to how long DTF transfers last. These are comparison ranges, not promises for every garment. The same guidance identifies film compatibility, powder coverage, curing, pressing, and substrate preparation as parts of the durability chain in this DTF quality and wash-resistance guide.
Where the cost really sits
A cheap transfer becomes expensive when it causes a replacement shirt, refund, or second production run. A higher-priced method may also waste money when a basic one-color mark could be produced quickly with limited weeding.
Track the complete job:
- Material use: Count the transfer, blank garment, protective paper, and failed tests.
- Operator time: Include artwork preparation, weeding, pressing, peeling, inspection, and rework.
- Failure exposure: Assess whether a weak bond could cause returns or harm the customer relationship.
- Care communication: Provide practical washing guidance, such as turning the garment inside out and avoiding harsh treatment, when those instructions match the supplier's requirements.
The customer controls part of the garment's life after delivery, but the shop controls the initial bond. A documented test separates washing-related wear from failures caused by pressure, curing, or substrate choice, protecting both the operator and the buyer.
Troubleshooting Common Transfer Application Issues
Most failed prints leave clues. Diagnose the failure before changing several settings at once, or you won't know which adjustment solved the problem.
Edge lifting
Likely cause: The transfer missed pressure at the edge, the garment had a seam beneath it, or the adhesive powder wasn't evenly distributed.
Correction: Recheck platen contact, flatten the garment, and repress only according to the transfer supplier's approved process. If the edge still lifts, don't ship the shirt. Test a fresh transfer on the same blank.
Incomplete adhesion
Likely cause: The press was too cool, the dwell time was too short, pressure was uneven, or the adhesive wasn't fully cured before application.
Correction: Verify the press with a suitable temperature check, inspect the lower platen for unevenness, and review the curing stage. A longer press isn't a guaranteed fix if the substrate itself is heat-sensitive.
Color change on polyester
Likely cause: Dye migration caused by excessive heat or an unsuitable transfer system.
Correction: Stop the run. Test a lower polyester-appropriate setting on a fresh garment and allow the print to cool before judging the result. A design that looks correct immediately after pressing may still develop migration later.
Rough texture or powdery surface
Likely cause: Uneven adhesive coverage, excess powder, or incomplete curing.
Correction: Inspect the film before pressing. The print should have consistent adhesive coverage, and the cured layer shouldn't look patchy. If the transfer itself is inconsistent, changing the heat press won't repair the source problem.
Record the failure and the correction on the job ticket. That small habit prevents the same polyester, pressure, or powder mistake from becoming a repeated production cost.
Raccoon Transfers offers ready-to-press DTF transfers for apparel and UV-DTF options for hard-surface applications, with custom artwork and gang-sheet ordering available through its online service. Visit Raccoon Transfers to choose the transfer format that matches your garments, test the material correctly, and build a more consistent pressing workflow.