
do it yourself iron on transfers: complete crafting guide
There’s something incredibly satisfying about taking a digital design and turning it into a piece of custom clothing you can actually wear. That’s the magic of DIY iron-on transfers. The process is pretty straightforward: you print your design onto special paper, then use heat from a household iron or a heat press to transfer it onto your chosen fabric.
Your Ultimate Guide to DIY Iron On Transfers

If you've ever wanted to create your own custom apparel, you've come to the right place. This guide will walk you through everything you need to know about do it yourself iron on transfers, taking you from total beginner to a pro in no time. Forget about paying for expensive printing services; you've got this.
This craft has become a favorite for anyone looking to personalize their world. Think matching shirts for a family trip, branded totes for a local event, or just adding a unique flair to your own wardrobe. Iron-on transfers open up a ton of creative possibilities.
Why Is Everyone Doing This?
The simple answer? Accessibility. You don't need a professional workshop to get started—just a few key supplies. This easy entry point is part of a bigger trend toward personalized, handmade goods. The numbers back it up, too. The global market for iron-on transfer sheets is booming, rocketing from $1.2 billion to an expected $2.19 billion by 2033. It’s clear that people everywhere are catching on.
The Big Idea: The best thing about DIY iron-on transfers is the power they give you. You can create professional-looking custom pieces without a professional setup. It's a craft that can be a fun weekend hobby or even grow into a small business.
What Can You Actually Make?
Imagine turning your kid's latest masterpiece into a t-shirt they can wear with pride, or whipping up custom tote bags for your best friend's bachelorette party. The projects are endless and the results are incredibly rewarding.
This guide will give you the solid foundation you need to dive in. We’ll cover:
- The must-have tools and materials for the job.
- Getting your digital artwork print-ready for a perfect transfer.
- A step-by-step walkthrough of the application process.
And if you get really good at it, this hobby could become something more. Exploring options for selling your handcrafted items online can turn your creative passion into a real business venture. By the time you're done with this guide, you’ll have the skills to tackle your first project and proudly show it off.
Gathering the Right Tools and Materials
Before you can start bringing your designs to life, you’ll need to get your supplies in order. This isn't just a shopping list; knowing why you need each item is the secret to making do it yourself iron on transfers that look fantastic and actually last. The right gear is what separates a frustrating afternoon from a finished project you're proud to wear.
The DIY craft world is booming, and the numbers back it up. The global heat transfer market was valued at $1.6 billion and is expected to climb to $2.27 billion by 2034. That growth is great news for us because it means more innovative and higher-quality products are hitting the shelves all the time.
Choosing Your Transfer Material
Your first big decision comes down to the material you'll use for the transfer itself. The two main players are printable transfer paper and heat transfer vinyl (HTV), and they each have their strengths.
-
Printable Heat Transfer Paper: This is your best friend for complex, multi-colored designs. Think photographs, watercolor art, or anything with gradients. You just print your image directly onto the paper with a regular inkjet printer, making it incredibly accessible for detailed, full-color graphics.
-
Heat Transfer Vinyl (HTV): HTV is a solid-color vinyl that comes on a clear backing sheet. You cut your design out of it (usually with a machine), peel away the extra vinyl, and press it. It’s the go-to for bold text, logos, and layered, single-color shapes.
Real-World Example: If you’re making a one-off t-shirt with a family photo for a reunion, printable transfer paper is the clear winner. But for a set of basketball jerseys with crisp, durable numbers on the back, HTV is the only way to go for that pro-quality look and feel.
The Great Debate: Light vs. Dark Fabric Paper
One of the most common pitfalls for beginners is grabbing the wrong kind of printable paper for their shirt color. Trust me, it makes a huge difference in how your project turns out.
Choosing the right paper is non-negotiable for vibrant, professional-looking results. The main difference lies in how the transfer layer interacts with the fabric's color.
Transfer Material Comparison: Light vs. Dark Fabrics
| Feature | Transfers for Light Fabrics | Transfers for Dark Fabrics |
|---|---|---|
| Transfer Layer | Transparent | Opaque white |
| How it Works | Only the ink transfers; unprinted areas are clear. | The entire white layer transfers with your design. |
| Best For | White, pastel, and very light-colored garments. | Black, bright, and dark-colored garments. |
| Final Look | The design feels softer and more integrated. | The design has a solid base and appears bolder. |
Essentially, paper for light fabrics lets the shirt color show through, while paper for darks creates a solid white base so your colors don't get lost on a dark background.
If you want to dive deeper, our guide on the best paper for heat transfer breaks down all the options in detail.
Essential Tools of the Trade
With your material picked out, you just need a few other key tools to ensure the process goes smoothly.
A Way to Cut Your Design
For HTV, especially with intricate lettering or shapes, a digital cutting machine like a Cricut or Silhouette is a game-changer. For simpler HTV shapes or when using printable paper, you can get by just fine with a sharp craft knife or a good pair of scissors.
Weeding Tools
If you're using HTV, a weeding tool is an absolute must-have. This little hook-like instrument is essential for picking out all the tiny, unwanted bits of vinyl from your design before you press it. Don't skip this!
A Heat Source
This is where the magic happens. Your two options are a basic household iron or a dedicated heat press. A home iron can work in a pinch for small, simple projects, but getting even heat and consistent pressure is tough.
A heat press, on the other hand, is built for this. It delivers precise temperature and pressure across the entire design, which is the key to a transfer that won't peel, crack, or fade. For anyone serious about making do it yourself iron on transfers, investing in a heat press is the single best thing you can do to get professional, long-lasting results.
Getting Your Design Ready for Transfer
This is where the magic really begins—taking your idea from a digital file and getting it ready for its new life on fabric. The success of your do it yourself iron on transfers truly depends on how well you prep your design. A little bit of upfront work here is what separates a sharp, professional-looking shirt from a pixelated, homemade-looking one.
Your first move is to either find or create your artwork. You can find tons of great designs online, but honestly, making your own is what makes a project special. Whether it's a simple monogram for a tote bag or a complex, colorful graphic for a hoodie, the basics are the same: your design has to be high-quality.
Choosing the Right File Format and Resolution
Not all image files are built the same, and picking the right one is a game-changer for your project. When you're making iron-ons, you'll mainly work with two kinds of files: raster images (like PNGs) and vector images (like SVGs).
- PNG (Portable Network Graphics): This is my go-to for printable transfers. PNGs have a superpower: they support transparent backgrounds. That means you won't get that ugly white box printed around your design, which is essential for a clean look on any color fabric.
- SVG (Scalable Vector Graphics): If you're using a cutting machine like a Cricut or Silhouette to cut your design from heat transfer vinyl (HTV), you absolutely need an SVG. Vectors are made of math, not pixels, so you can make them as big or as small as you want without ever losing quality. The edges will always be perfectly crisp.
Resolution is another huge factor, especially for printable designs. An image can look perfect on your phone, but blow it up for a t-shirt and it suddenly looks like a blurry mess. As a personal rule I never break, I always make sure my design is 300 DPI (dots per inch) at the final size I plan to print it. This is the industry standard for a reason—it guarantees your image will be sharp and clear.
The Most Important Step: Mirror Your Image
Ever see a DIY shirt with the text printed backward? I have, and it’s a painful (and totally avoidable) mistake. This almost always happens when someone forgets to mirror their image before printing.
Think about how an iron-on works: you place the transfer paper face-down on the fabric. The heat then lifts the ink from the paper and bonds it to the shirt. For the design to face the right way on the shirt, it has to be a mirror image on the paper.
When to Mirror: For just about every printable iron-on paper out there, especially the kind for light-colored fabrics, you must mirror your design. This goes for any art that has text, a logo, or isn't perfectly symmetrical. You can usually find a "mirror image" or "flip horizontal" checkbox right in your design software or your printer's settings.
The one major exception is opaque transfer paper, the kind made for dark fabrics. These often work more like a sticker—you peel the design off the backing and place it face-up on the shirt, so no mirroring is needed. But please, always read the instructions that come with your specific paper. Getting this step wrong is probably the most common mistake I see people make.
Dialing in Your Printer Settings
Your printer is the final stop before your design becomes a real, physical thing. Just hitting "Print" with the default settings is a recipe for faded, disappointing colors. If you want the kind of vibrant, rich look you're hoping for, you need to dig into the settings.
I always do a quick test print on a regular piece of paper first. It’s a simple way to check my colors and double-check that I remembered to mirror the design, all without wasting a pricey sheet of transfer paper.
When you're ready for the real deal, open your printer's properties or advanced settings menu. You're looking for a few key options:
- Paper Type: Don't leave this on "Plain Paper." Look for a setting like "T-Shirt Transfer," "Photo Paper Glossy," or "Premium Matte."
- Print Quality: Crank it up. Always select the best quality available, usually labeled "High," "Best," or "Fine."
Changing these settings tells your printer to lay down more ink and do it with greater precision, which is the secret to a saturated design that will last. For a deep dive into every setting, our guide on how to print on transfer paper walks you through the whole process. Spending an extra minute here makes all the difference in creating impressive do it yourself iron on transfers.
Applying Your Iron-On Transfer Flawlessly
Alright, your design is printed and perfectly mirrored. Now for the fun part: turning that sheet of paper into a piece of wearable art. This is where all your prep work really pays off, transforming a plain garment into something uniquely yours. The whole process is a careful dance of preparation, precision, and heat.
Before you even think about plugging in the iron, you need to get your fabric ready. It’s so tempting to skip this step, but trust me, pre-washing your garment is non-negotiable. Wash it without any fabric softener to strip away manufacturing chemicals that can kill the bond. This also pre-shrinks the material, so your masterpiece doesn't get warped after its first real wash.
Once it's clean and dry, give the application area a quick press for about 5-10 seconds. This isn't just about smoothing wrinkles; it's about zapping any last bit of moisture out of the fabric. Steam is the absolute enemy of a good transfer, and this quick press ensures your surface is perfectly dry and ready.
From Printout to Precision Cut
Next, you've got to free your design from the rest of the transfer sheet. How you tackle this really depends on your artwork's complexity and the tools you have on hand.
-
Cutting by Hand: For simpler shapes, a sharp pair of scissors or a craft knife will do the trick. If your design has a solid background, just cut right along the edge. For designs that are just text or an image with no background, I find it's best to leave a tiny 1/8 inch border. It gives you a little wiggle room so you don't accidentally snip off part of your image.
-
Using a Machine: If you’re working with heat transfer vinyl (HTV) or a really intricate printable design, a digital cutting machine like a Cricut or Silhouette is a game-changer. These things follow your digital file with incredible precision, giving you clean, professional cuts every single time.
After cutting HTV, you'll move on to a process called weeding. This is where you use a small, hooked tool to meticulously pick away all the extra vinyl that isn't part of your design. My advice? Take your time, work under good light, and be patient—especially with those tiny pieces inside letters like 'a' or 'o'.
Pro Tip: A light box or even a bright tablet screen slid under your vinyl makes the cut lines pop. This little hack is a lifesaver that speeds up weeding and helps prevent you from accidentally peeling up a piece you wanted to keep.
This quick infographic breaks down the essential workflow, from creating your design to getting it ready for the heat.
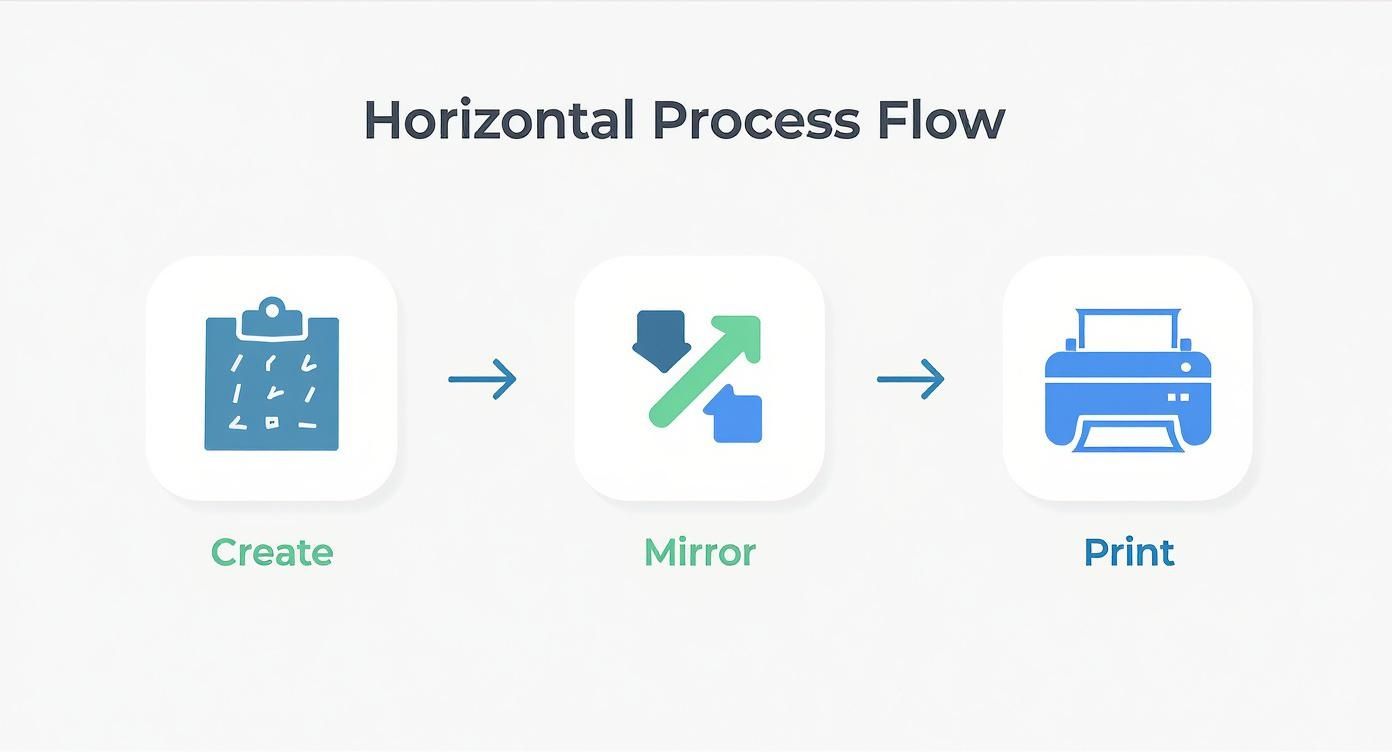
It’s a great visual reminder of those crucial prep steps you have to nail before you can even think about applying heat.
The Main Event: Applying Heat and Pressure
This is the moment of truth. A permanent, durable bond comes down to three things: the right temperature, the right amount of time, and the right pressure. Always, always check the instructions that came with your specific transfer paper or HTV, because the settings can vary quite a bit between brands.
A household iron can get the job done, but you have to be careful. You'll want to set it to the highest cotton setting and make absolutely sure the steam is turned OFF. Don't use a padded ironing board—they absorb too much pressure. Instead, press down on a hard, heat-safe surface like a wooden cutting board. You need to apply firm, even pressure and keep the iron moving for the recommended time to avoid scorching the fabric.
For truly consistent, professional-looking results, nothing beats a heat press. It gives you exact temperature control and perfectly even pressure across your entire design, every single time. If you get serious about making high-quality do it yourself iron on transfers, learning how to use a heat press machine is the single best thing you can do for your craft. It just takes all the guesswork out of it.
Hot Peel vs. Cold Peel: A Critical Distinction
Okay, one last thing. After you’ve applied the heat, you have to remove the backing paper. This is where you’ll run into the terms "hot peel" or "cold peel", and getting this right is crucial for a clean finish.
- Hot Peel: This means exactly what it sounds like—you have to peel the backing off immediately while the transfer is still scorching hot. If you wait even a few seconds, the design might stick to the paper instead of the shirt.
- Cold Peel: This is the opposite. You have to let the garment cool down completely. We're talking cool to the touch. Peeling it while it's still warm will lift the design right off.
Your transfer material’s instructions will tell you which type you have. Don’t ignore this final, simple direction. It can undo all your hard work in a split second. Follow these steps, and your transfer will not only look great but will stand the test of time.
Navigating Common Iron-On Transfer Hiccups
Even the most seasoned crafters run into trouble sometimes. When you're in the zone making your own DIY iron-on transfers, hitting a roadblock is frustrating, but don't toss that t-shirt just yet. Most common issues have surprisingly simple fixes. Think of this as your go-to guide for turning a potential craft-fail into a flawless win.
Nearly every problem I’ve ever seen comes down to one of three things: heat, pressure, or time. Once you know what to look for, you can not only fix mistakes as they happen but also prevent them from cropping up in the future. This kind of know-how is gold, especially during busy seasons like back-to-school or the holidays when custom projects are in high demand. If you're curious about how these trends play out, you can discover more insights about iron transfer patterns from Accio.
What to Do When Your Design Peels or Cracks
You've just finished the perfect shirt, but after one trip through the wash, the edges of your design are lifting. It’s probably the most common (and annoying) issue, but the good news is, it's almost always preventable.
The root cause is almost always an incomplete bond. The transfer’s adhesive just didn't get a good enough grip on the fabric fibers. A few things could be to blame:
- Not Enough Heat: Your iron or heat press simply wasn’t hot enough to properly melt and activate the adhesive. Always, always double-check the temperature settings recommended for your specific transfer paper.
- Uneven Pressure: When you're using a standard household iron, it's really easy to apply more force in some spots than others. Those areas with less pressure just won't stick as well.
- Pesky Fabric Softener: If you washed the garment with fabric softener before applying the transfer, you've left behind a chemical residue. This film acts as a barrier, preventing the adhesive from making a solid connection with the fabric.
The Quick Fix: If you spot the peeling before washing the item, you can usually save it. Just lay a piece of parchment paper over the design and press it again. Give those peeling areas some extra attention with firm, even pressure for another 10-15 seconds.
Tackling Faded or Discolored Designs
Another soul-crushing moment is when a design that looked bold and vibrant on your screen ends up looking dull and faded on the shirt. This usually points to a problem with either the printing process itself or how it was applied.
When working with printable transfer paper, your printer settings are everything. If you just used the default "Plain Paper" setting, your printer likely didn't use enough ink, leading to that washed-out appearance.
For any type of transfer, too much heat can be just as bad as too little. Excessive heat can literally scorch the material and the fabric, causing colors to look muddy or even change completely. I once left my heat press on a white shirt for just a bit too long and ended up with a faint yellow box around my design—a classic scorching mistake you only need to make once!
Why Won't My Transfer Stick at All?
Sometimes, the transfer just flat-out refuses to leave its backing sheet. You go to peel it back, and the whole design comes right up with it. This is a dead giveaway that the essential trio—heat, pressure, and time—wasn't right.
Before you try again, run through this quick mental checklist:
- Is your surface solid? An ironing board is your enemy here; it's too soft and absorbs all the pressure you're trying to apply. Use a countertop, a sturdy table, or even a wooden cutting board to get a firm pressing surface.
- Did you pre-press the garment? This is a step people love to skip, but it's crucial. A quick 5-second press before you place your design removes hidden moisture and wrinkles from the fabric. Trapped moisture turns to steam, which is the ultimate enemy of good adhesion.
- Are you following the peel instructions? This one gets people all the time. Some materials are "hot peel," meaning you pull the backing off immediately. Others are "cold peel," requiring you to wait until it's completely cool to the touch. Peeling at the wrong temperature will absolutely ruin your transfer.
Think of every mistake as a lesson. By working through these common issues, you'll become a more skilled and confident crafter, ready to take on any DIY iron on transfers project that sparks your creativity.
Got Questions About DIY Iron-On Transfers? I’ve Got Answers.
When you're just starting out with custom apparel, you're going to have questions. It's all part of the process. Hitting a snag is normal, but getting a quick, clear answer can be the difference between a frustrating afternoon and a finished project you’re proud of.
Think of this as your personal cheat sheet. I’ve rounded up the questions I hear most often from fellow crafters and laid out the simple, practical answers you need.
What’s the Best Fabric to Use for Iron-On Transfers?
For the most reliable results, stick with cotton, polyester, or a good cotton/poly blend. These fabrics are tough enough to handle the heat needed for a solid application, so you don't have to worry about scorching or melting them. The weave on these materials also gives the transfer's adhesive something substantial to grab onto.
That said, always read the instructions that come with your specific transfer paper. Some of the newer vinyls are made for more delicate materials. But unless the packaging explicitly says it’s safe, I’d avoid heat-sensitive fabrics like silk, rayon, or nylon—it’s just not worth the risk of ruining your garment.
How Do I Wash a Shirt with a DIY Transfer on It?
This is where you protect all your hard work. The number one rule? Wait at least 24 hours after pressing before the shirt sees the inside of a washing machine. That time is crucial for the adhesive to fully cure and lock into the fabric fibers.
Once it's time to wash, just follow these simple steps for a design that lasts:
- Always turn the shirt inside out. This protects the design from getting roughed up by other clothes.
- Use cold water and run it on a gentle cycle.
- Stick to a mild detergent. Stay away from bleach and fabric softeners, as they can weaken the adhesive.
- Hang drying is your best friend. If you must use a dryer, tumble dry on the absolute lowest heat setting.
And whatever you do, never iron directly over the design itself. The heat can reactivate the adhesive, causing it to peel right off.
Can I Really Use My Regular Home Printer?
Yes! And honestly, this is what makes this craft so accessible. The vast majority of printable heat transfer paper sold at craft stores is made to work perfectly with standard home inkjet printers. No fancy, expensive equipment is needed to get started.
The trick is to buy the right paper for your printer (inkjet paper for an inkjet printer) and pay close attention to the printer settings. The instructions will usually tell you to select a specific mode like "t-shirt transfer" or even "high-quality photo." This tells the printer to lay down more ink, which is what gives you those rich, saturated colors on the final transfer.
Once you get the hang of making your own custom shirts, you might start thinking bigger. It's a natural next step to wonder about how to sell your handmade creations online. Turning a fun hobby into a side business can be incredibly rewarding.
Ugh, Why Isn't My Design Sticking to the Shirt?
This is easily the most common headache, but the fix is almost always simple. When a transfer fails to stick, it boils down to one of three things: heat, pressure, or time. The adhesive simply didn't get what it needed to properly melt and bond with the fabric.
Let's troubleshoot. First, double-check that your iron or heat press is at the exact temperature recommended by the transfer paper instructions. If you're using a household iron, you need to press down with firm, even body weight. An ironing board is too squishy and will absorb all that crucial pressure; work on a sturdy table or countertop instead. Lastly, time it properly. Don’t guess—use a timer and press for the full recommended duration. Cutting corners on any of these three steps is a recipe for a peeling design.
At Raccoon Transfers, we make it easy to get professional-quality results every time. Explore our Direct-to-Film transfers for vibrant, durable designs that apply perfectly to any fabric. Start your custom apparel project today!