
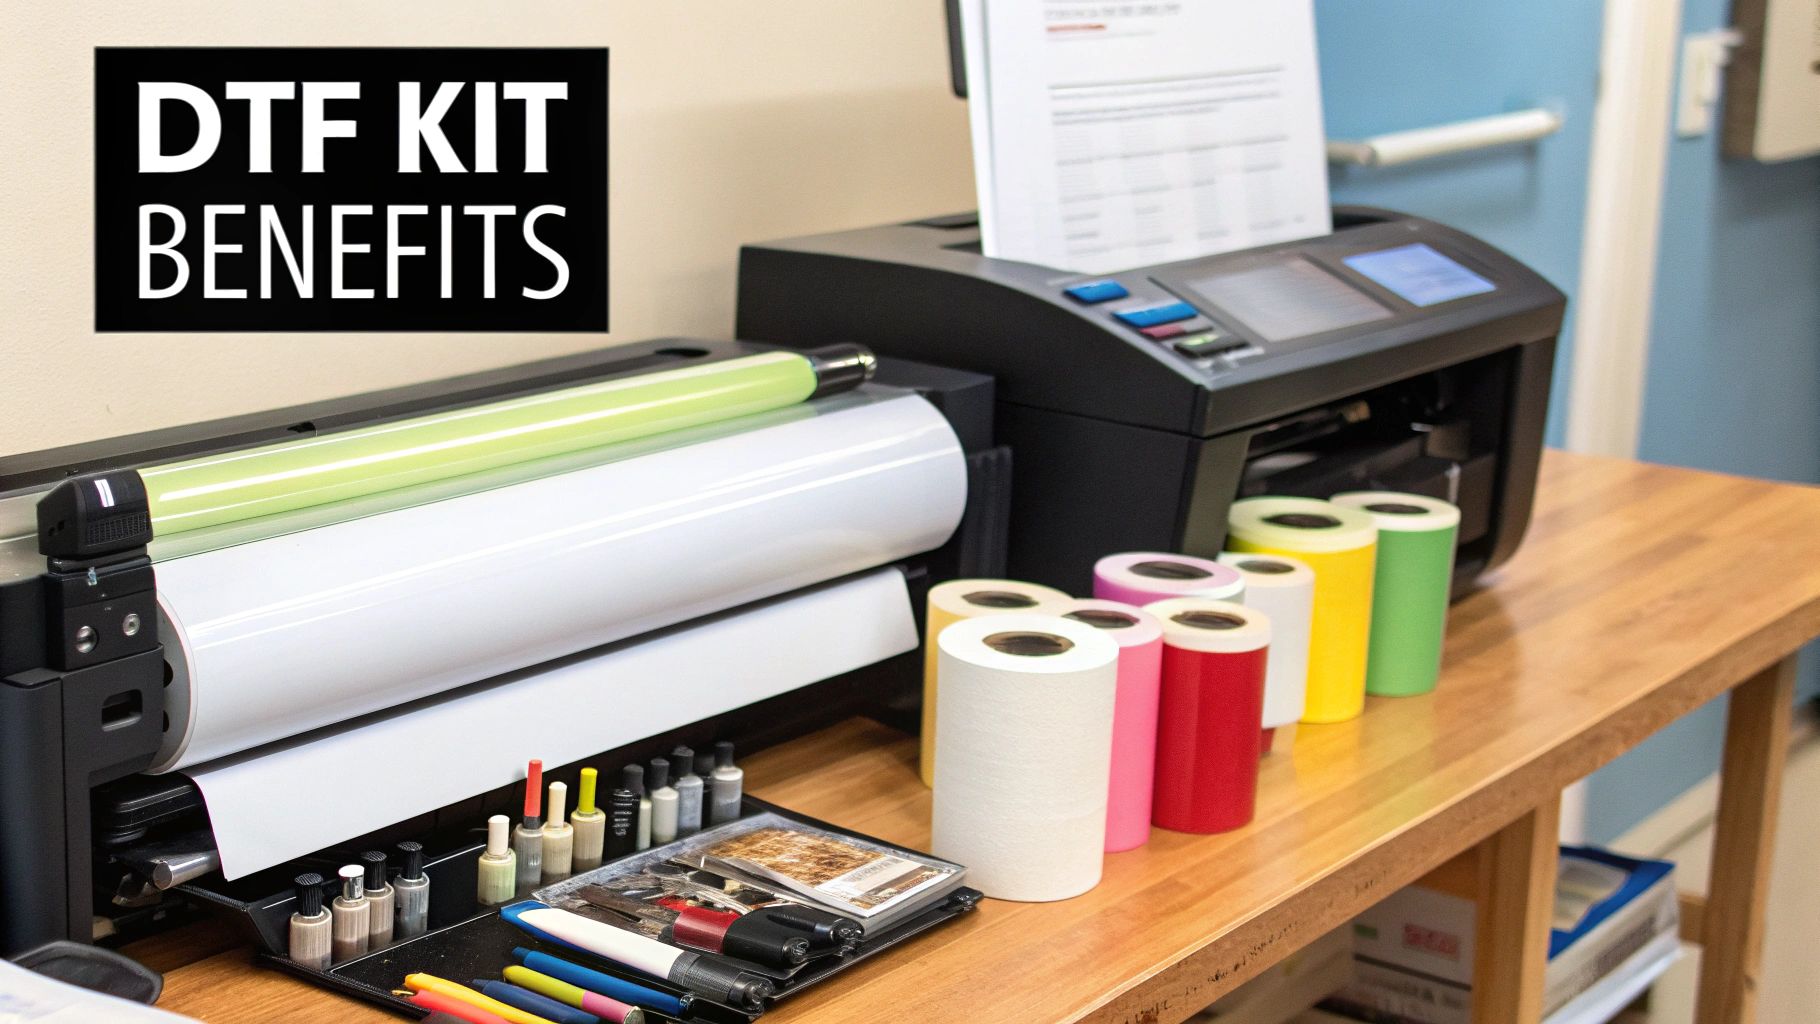
Your Guide to a DTF Conversion Kit
So, you're curious about diving into the world of Direct-to-Film printing without dropping a fortune on a brand-new machine. This is where a DTF conversion kit comes into play. In short, it’s a collection of specialized parts that lets you retrofit a standard inkjet printer—think certain Epson models—and turn it into a DTF powerhouse.
This DIY route is how countless creators and small businesses get their start, allowing them to print brilliant, full-color designs onto film. That film can then be heat-pressed onto just about any fabric you can imagine.
Is a DTF Conversion Kit Right for You?
The buzz around DTF is real, but is a conversion kit your golden ticket? For many, it absolutely is. A DTF conversion kit closes the gap between hobby-level crafting and producing professional custom apparel, all without the five-figure investment a dedicated commercial printer demands.
Think of it like this: you already have a solid car (your printer), and the kit is the turbo-charger and performance parts needed to unlock a whole new level of capability. If you're comfortable getting a little hands-on and enjoy tinkering, this path is incredibly rewarding.
Who Should Seriously Consider a Conversion?
Let's be clear, this DIY approach isn't for everyone. It takes a bit of technical know-how and patience. But for the right person, it's a game-changer.
You're a prime candidate if you are:
- A Crafter Outgrowing Vinyl: Tired of the endless weeding and layering? If your cutting machine is constantly running and you're hitting the limits of what vinyl can do, DTF is your next logical step. A conversion kit empowers you to create intricate, full-color graphics effortlessly.
- A Startup T-Shirt Business: When you're just starting out, every dollar counts. A dedicated DTF printer can be a massive upfront cost. Converting a printer offers a much more affordable entry point to test your designs, build a customer base, and start bringing in revenue.
- A Print Shop Testing the Waters: If you run an established shop, you can use a converted printer as a low-risk way to gauge local demand for DTF products before committing to a huge equipment purchase.
What's Actually in the Box?
A good DTF kit isn't just a random assortment of parts. It's a complete system where each component works together to make your printer do something it was never designed for. The core pieces are a specialized ink system to handle the thick, pigmented DTF inks, the inks themselves (CMYK plus that all-important white), a roll of PET film, and the adhesive powder.
But the real heart of any conversion kit is the RIP (Raster Image Processor) software. This is the brain of the entire operation. It's what tells the printer how to lay down the white ink underbase and then print the colors on top. The quality of the RIP software often makes or breaks the entire setup.
The popularity of this method is a big reason why the DTF printing market is exploding. It hit an estimated USD 2.72 billion in 2024 and is expected to climb to around USD 3.92 billion by 2030, according to a report from Grandview Research. This growth is all about the demand for one-off custom gear.
If you need a refresher on the basics, our guide on what is DTF printing is a great place to start. Understanding the process and its potential helps you decide if a DTF conversion kit is the right move for your goals.
DTF Conversion Kit vs. Dedicated DTF Printer
Making the right choice from the get-go can save you a lot of time and money. Here’s a quick breakdown to help you decide which path makes the most sense for your situation.
| Factor | DTF Conversion Kit | Dedicated DTF Printer |
|---|---|---|
| Initial Cost | Low. Often under $1,000, assuming you have a printer. | High. Ranges from $3,000 for entry-level to $20,000+. |
| Setup & Learning Curve | High. Requires manual assembly and software configuration. | Low. Usually plug-and-play with professional training. |
| Production Volume | Low to medium. Best for small batches and custom orders. | High. Built for continuous, high-volume commercial printing. |
| Reliability & Support | Variable. Relies on community forums and your own troubleshooting. | Excellent. Comes with manufacturer warranties and tech support. |
| Print Quality | Good to great, but highly dependent on your skill and setup. | Consistently excellent, with optimized components. |
Ultimately, a conversion kit is a fantastic, budget-friendly entry point for those willing to learn and tinker. A dedicated printer, on the other hand, is a serious investment for businesses ready to scale up production immediately.
How to Choose the Right DTF Conversion Kit
Jumping into the world of DTF conversion kits can feel a bit like the Wild West. There are tons of options out there, and if you pick the wrong one, you're setting yourself up for clogged printheads, wasted materials, and a whole lot of frustration. Trust me, a little homework upfront saves a mountain of headaches later.
The journey starts with the most important piece of the puzzle: your printer.
You can't just convert any old inkjet printer. DTF printing requires a specific printhead technology and a design that you can actually get into and modify. This is exactly why you constantly see models like the Epson L1800 and Epson P600 pop up in forums and tutorials. They’re workhorses with a proven track record for handling the thick, pigmented inks used in this process without constantly giving you grief.
Nail Down Printer Compatibility First
Before you even start shopping for a kit, you absolutely have to confirm your printer is a good candidate. A quick Google search for your printer model plus "DTF conversion" will usually tell you what you need to know. If you find nothing, that's a bad sign—it means you'll be on your own without a community to help troubleshoot.
Ideally, a printer ripe for conversion will have a few key things going for it:
- A Piezoelectric printhead (this is standard in most Epsons). These heads use pressure, not heat, to push ink out, which is crucial for DTF inks.
- An accessible interior. You'll need to get in there to remove things like the small, star-shaped "pizza wheels" that would otherwise smudge the wet ink on your film.
- A strong online community. You want to see lots of YouTube videos and forum posts about converting your specific model.
Getting the printer right is half the battle. If you're buying a printer just for this, our guide on the best DTF printers for t-shirt printing is a great place to start, with solid options for both dedicated and convertible machines.
Assess the Quality of Kit Components
Okay, so your printer is a go. Now it's time to dig into the DTF conversion kit itself. This is where many of the cheap, no-name kits fall flat. You need to pay close attention to the ink system and the RIP software.
A good ink system should have sturdy, well-sealed tanks and tubing that doesn’t easily kink. Cheaper kits often use flimsy plastic that cracks or leaks, letting air into the lines. Air is the enemy; it causes ink starvation and is a primary culprit behind clogged printheads.
Then there's the RIP (Raster Image Processor) software—this is the brain of your whole operation. A reputable kit will bundle something proven like AcroRIP, which gives you granular control over ink channels and color output. A generic, unsupported RIP is often a nightmare to configure and can be a deal-breaker.
This handy visual breaks down the decision-making process.
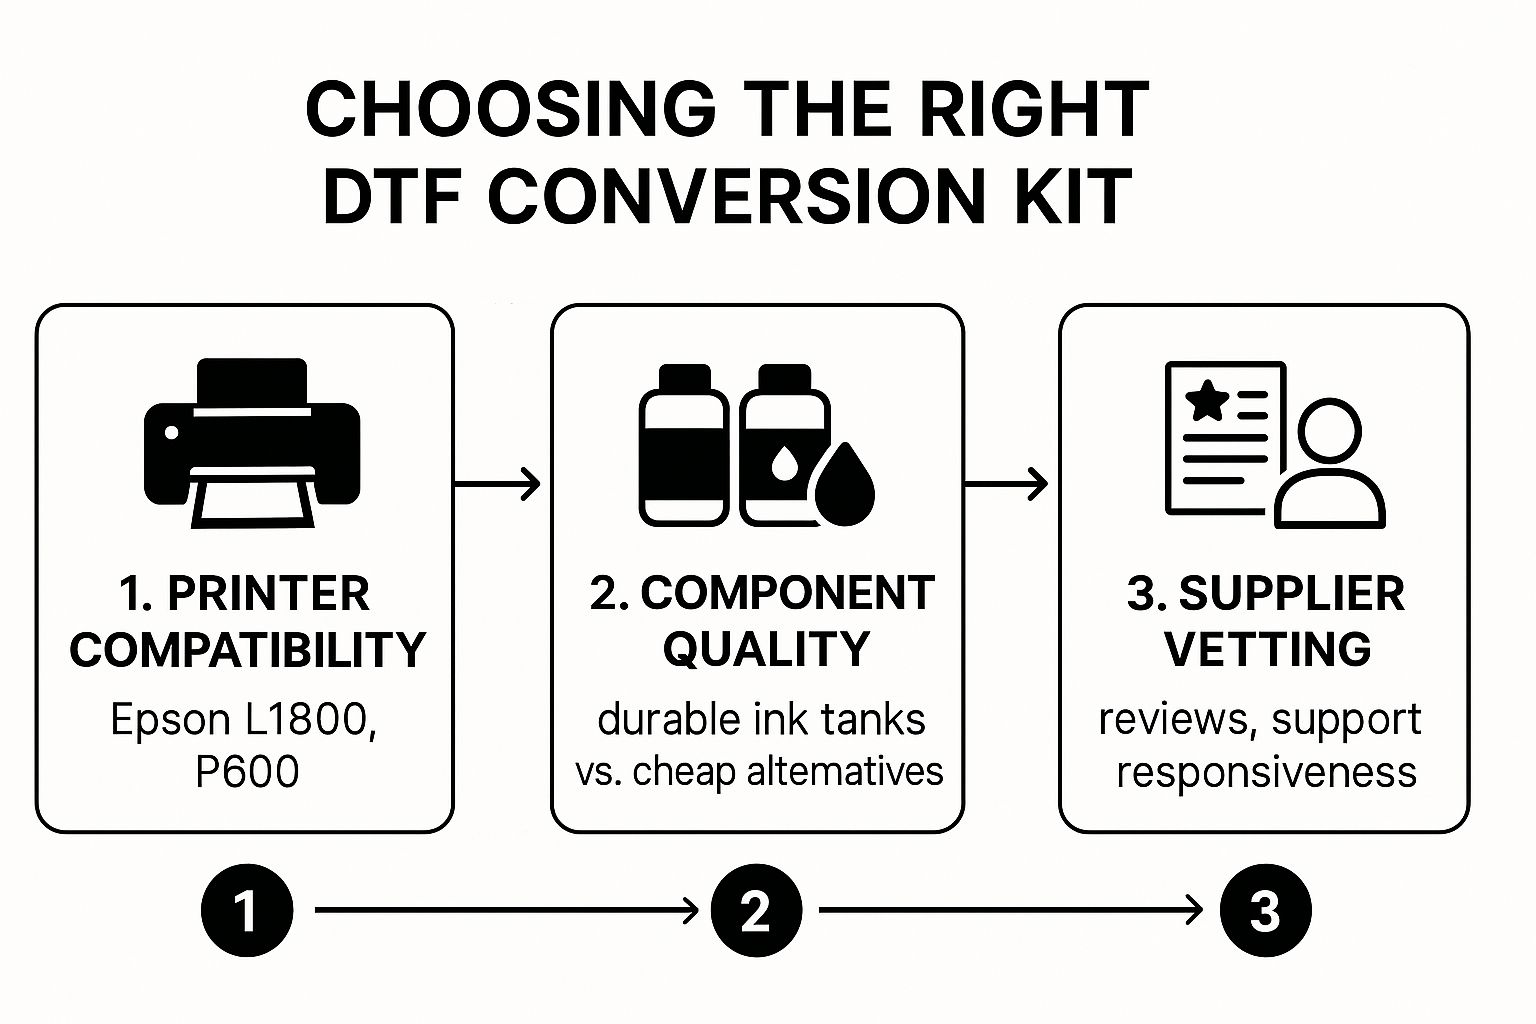
As you can see, following this logical path—from printer to components to supplier—is the best way to avoid a costly mistake.
Vet Your Supplier Thoroughly
Finally, who you buy from is just as important as what you buy. A great supplier can be a lifeline when you hit a snag. Before you click "add to cart," do a little digging on the seller.
Look for recent, authentic customer reviews. Are people actually having success with this specific kit? What do they mention about the installation? Go a step further and test their support. Send them a pre-sales question. If you get a fast, helpful response, that's a good sign. If they ignore you when you're trying to give them money, imagine how they'll treat you when you have a problem.
A common pitfall is choosing a kit based solely on the lowest price. A budget kit from an unknown seller might save you $50 upfront but cost you hundreds in wasted ink, film, and garments when it fails to perform. The bitterness of poor quality remains long after the sweetness of a low price is forgotten.
A good supplier will also provide clear instructions, and even better, video tutorials. Vague, poorly translated manuals are a huge red flag. By taking the time to properly vet the printer, the kit components, and the supplier, you're setting yourself up with a reliable foundation for your business—not a constant source of technical headaches.
Your Printer Conversion and Setup Guide
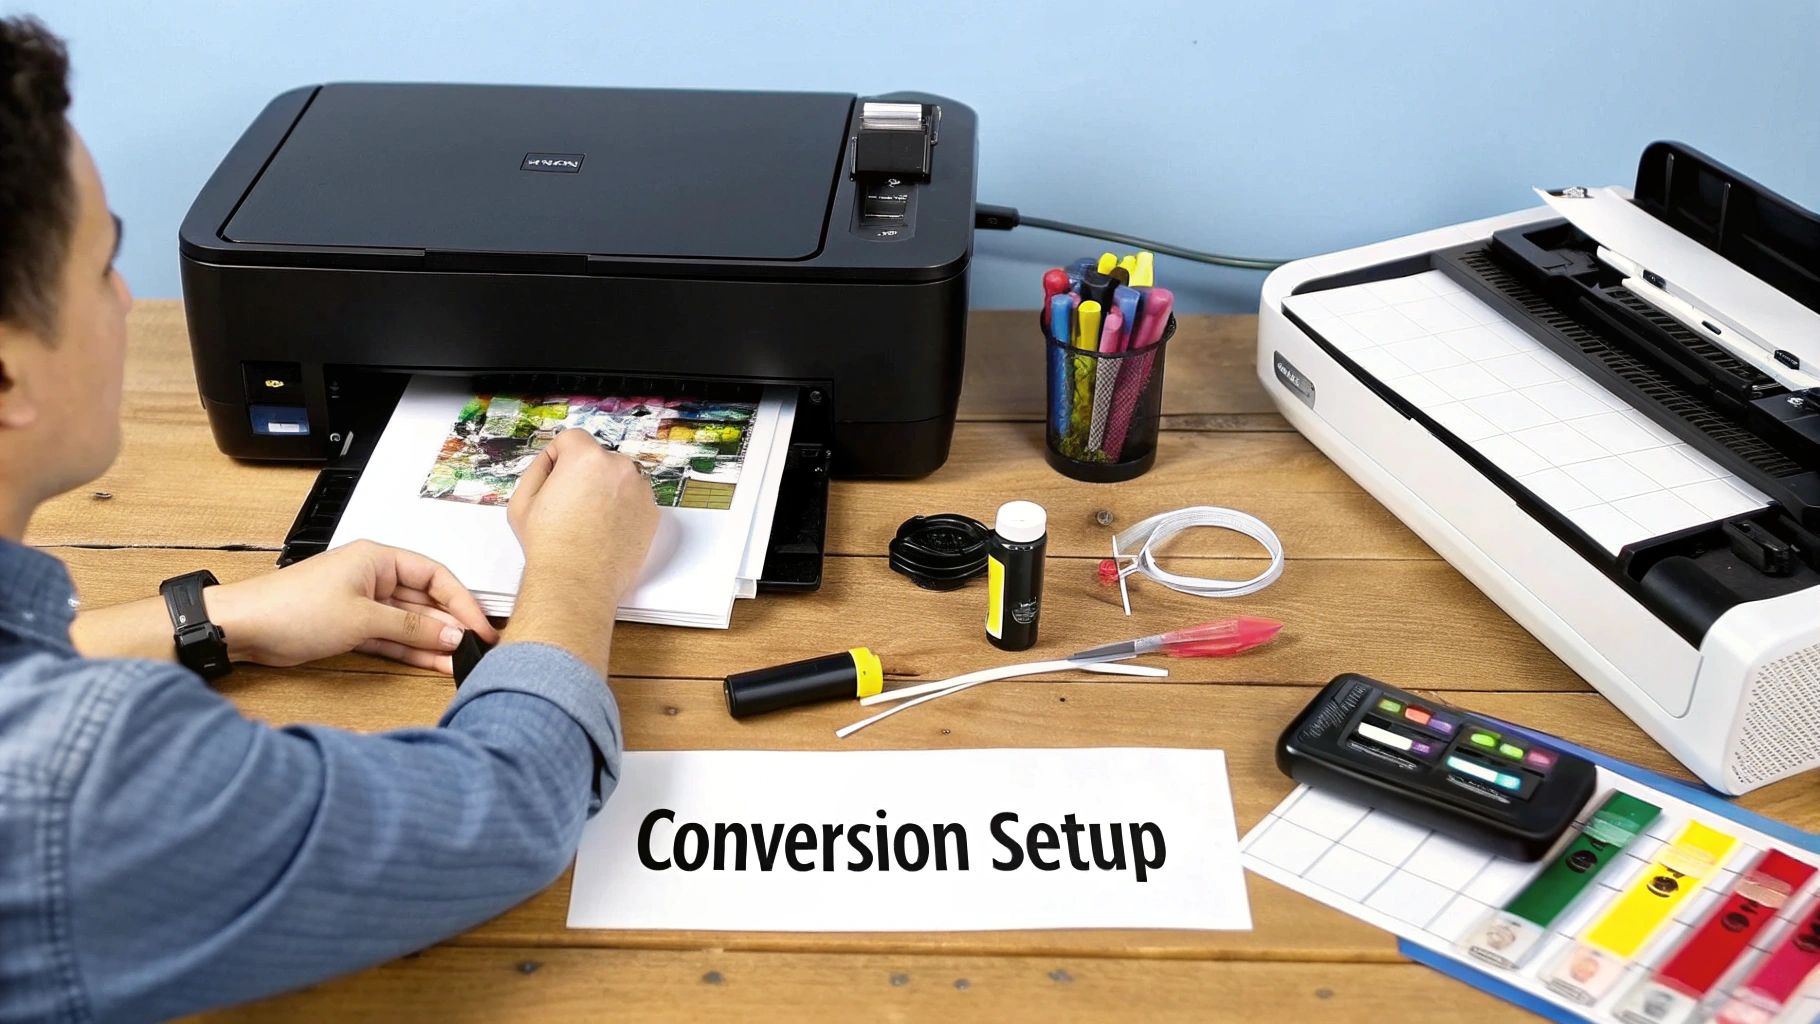
Alright, this is where the real work—and the real fun—begins. Turning a standard inkjet printer into a DTF powerhouse is a hands-on process, but don't let that intimidate you. When you tackle it step-by-step, it's completely achievable. We're going to walk through everything from clearing your workbench to getting the software dialed in.
Think of it like you're building a custom piece of equipment. Every part has its place, and a little attention to detail now pays off big time with reliable, professional-quality prints down the road. Let's start by getting your space ready for a smooth conversion.
Workspace and Printer Preparation
Before you even think about opening your dtf conversion kit, get your environment and the printer itself prepped. A clean, well-lit workspace isn't just for comfort; it's your first line of defense against dust and debris that can ruin a perfect print. I always recommend laying down a protective mat—it’s a lifesaver for catching those inevitable ink drips.
Your first hands-on task is to get inside the printer and remove a few specific parts that will get in the way of the DTF film. The most famous culprits are the tiny, star-shaped plastic gears everyone in the community calls the "pizza wheels." These are designed to grip paper, but they’ll leave ugly track marks all over the wet ink on your DTF film.
- Get Your Tools Ready: A small Phillips head screwdriver set, some tweezers for those fiddly bits, and isopropyl alcohol for cleanup are usually all you need.
- Take Pictures as You Go: Seriously, use your phone to snap a photo at each step of disassembly. It's a lifesaver if you ever need to put things back together.
- Go Slow: Gently unclip or unscrew the pizza wheel assembly. Be patient. Forcing a part is the fastest way to break something permanently. Bag and label everything you take out.
Once those rollers are gone, the film has a clear path from the printhead to the exit tray. Getting this right is probably the single most important physical modification you'll make. If you want more context on the entire process, our guide on how to make transfers for t-shirts is a great resource.
Hardware Installation and Ink System Setup
With the printer prepped, it's time to install the new hardware. This is mainly about hooking up the external ink system (often called a CISS, or Continuous Ink Supply System) and setting up your film output tray or roll feeder.
The name of the game here is creating a sealed, continuous flow of ink. Air bubbles in the lines are your worst enemy—they're the number one cause of print failures like missing colors or clogged nozzles. When you fill the external tanks, pour the ink in slowly and steadily to keep it from getting frothy.
Next, you need to "prime" the system. This just means drawing the ink through the tubes and into the dampers or cartridges that click into the printhead. Most kits give you syringes to do this. The goal is simple: get the lines completely full of ink, with zero air pockets.
Insider Tip: When you're routing the ink lines, leave just enough slack for the printhead to travel all the way across without pulling the tubes tight. Too much slack can cause the lines to snag on something inside the printer, but too little will restrict movement and ruin prints.
The ability to create such stunning prints with these kinds of modifications is what has made DTF a game-changer. The DTF market was valued at an estimated USD 2.72 billion in 2024, largely because it delivers high-definition results without the steep learning curve of screen printing. You can dive deeper into the market data over at 360iResearch.com.
Software and Final Configuration
The physical build is done, but now comes the brains of the operation: the software. Your printer’s factory-installed drivers have no idea how to handle DTF printing, especially the crucial white ink layer. This is where your RIP (Raster Image Processor) software from the dtf conversion kit steps in.
Installing and configuring the RIP is what brings it all together. This software hijacks your printer’s controls, giving you command over individual ink channels, letting you fine-tune ink density, and—most importantly—creating that opaque white underbase that makes your colors explode on dark garments.
Getting started involves a few key settings:
- Port Configuration: First, make sure the RIP software can actually "see" and talk to your printer.
- Ink Channel Setup: You'll need to tell the software which channel has which color. For a standard six-color conversion, you'll map two channels to White (W) and the rest to CMYK (Cyan, Magenta, Yellow, Black).
- Resolution and Ink Flow: Start with the settings your kit provider recommends (something like 1440x720 dpi is common). You can tweak these later, but the defaults are your best bet for a successful first print.
Once that's done, your first print should be a simple nozzle check from within the RIP software. This pattern shows you if every channel is firing ink correctly. Don't stress if it's not perfect right away. It often takes a couple of head cleanings and small tweaks to get everything dialed in. This last part is all about patience, but it’s what leads to those brilliant, repeatable results you're after.
Mastering Your New DTF Printing Workflow
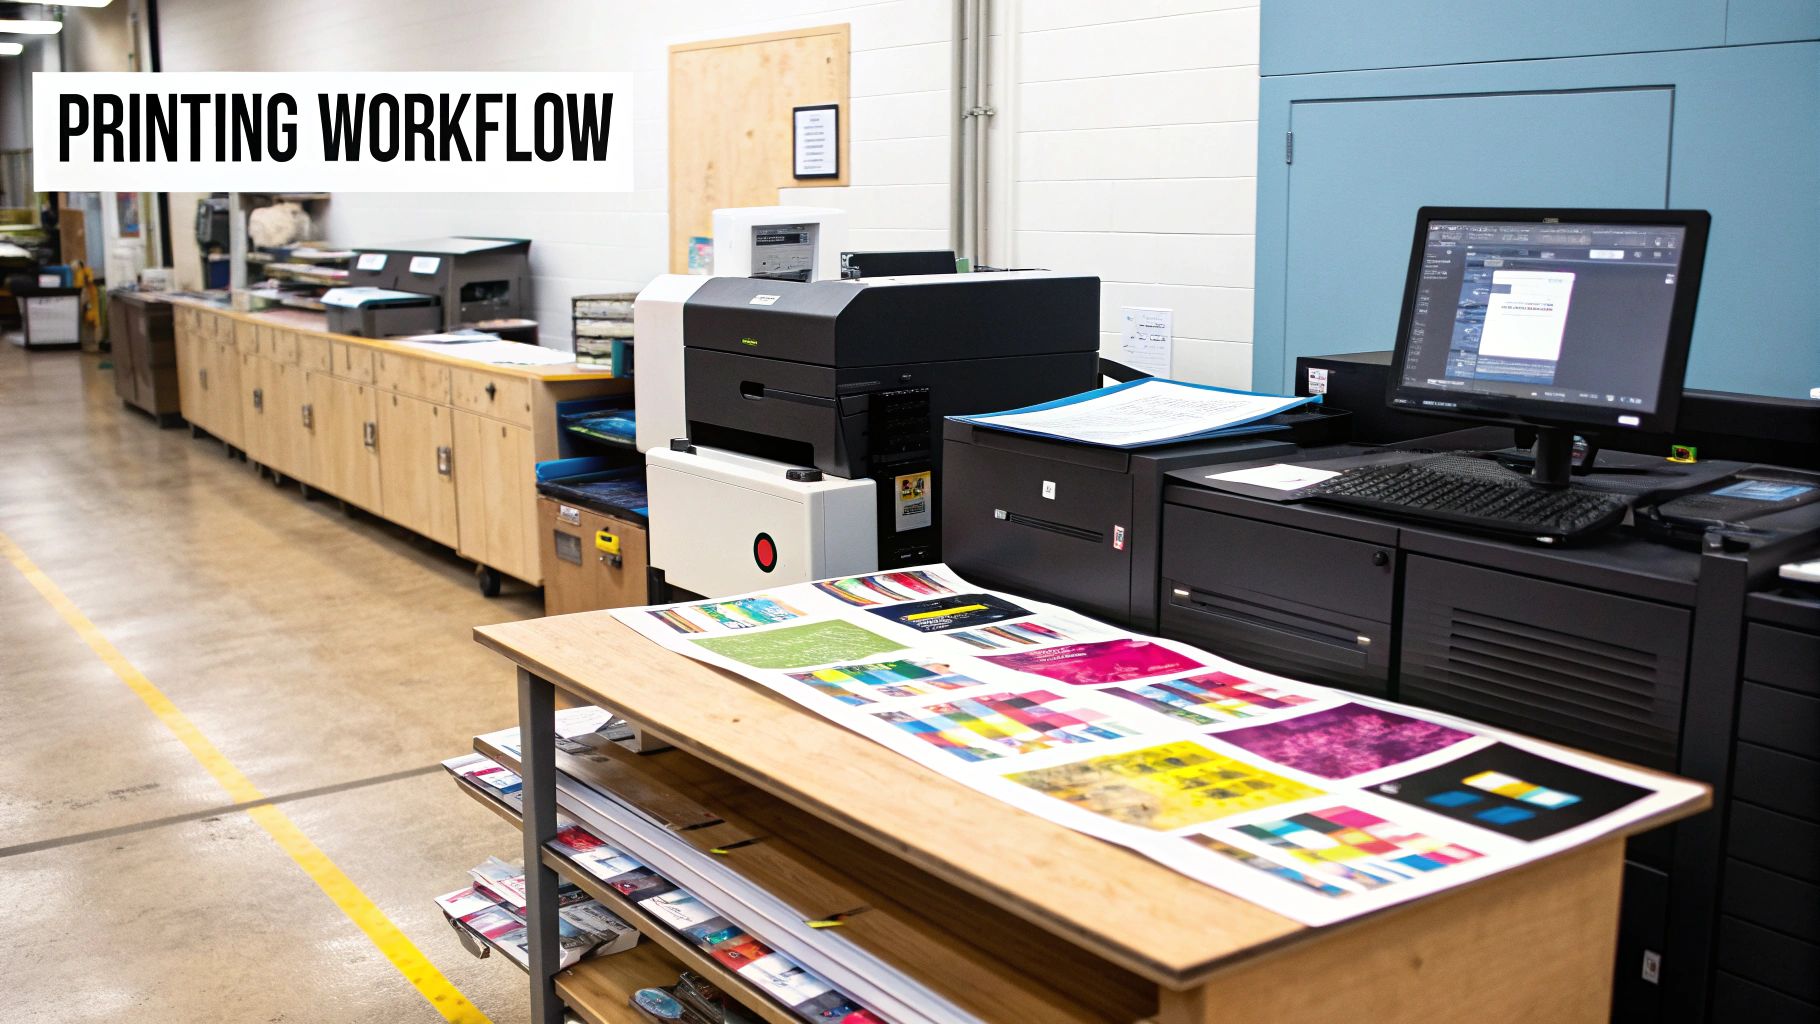
Alright, your printer conversion is done. Now the fun part begins—turning that piece of hardware into a money-making machine that produces professional-grade products. Getting your daily workflow dialed in is what separates inconsistent results from high-quality, sellable DTF transfers that keep customers coming back.
The whole process has a few key stages, and honestly, each one is just as important as the last. From prepping your artwork to curing the final transfer, a little attention to detail goes a very long way. Let's walk through the entire journey, from your computer screen to a finished, press-ready transfer.
Preparing and Printing Your Artwork
It all starts with the design file. Before you even think about hitting "print," you have to get your art ready in your RIP software. This is your command center for mirroring the image, setting the right resolution, and, most critically, configuring the white ink underbase.
That white layer is the secret sauce, especially for dark garments. It’s what makes your colors really pop instead of looking dull and muddy. Most RIP software lets you fine-tune the white ink percentage, and I've found that a setting around 80-90% is a great starting point for bold, vibrant prints on black shirts. You can definitely back that off for lighter-colored shirts to save a little ink.
Once your settings are locked in, it’s time to print. Load a sheet of PET film into your printer, making sure the matte, printable side is facing up. It's a classic beginner mistake to print on the glossy side—all you'll get is a smeared, wet mess that never dries.
The Art of Applying Adhesive Powder
As soon as the film comes out of the printer, the ink is going to be wet and incredibly easy to smudge. Always handle it by the edges. This is where you move on to what a lot of us call the "shake and bake" method: applying the DTF adhesive powder.
Your goal here is a perfectly even, thin layer of powder that sticks to every bit of wet ink. You don't need to cake it on; a light, consistent coating is all it takes. A good trick is to lay the print inside a shallow plastic bin, sprinkle the powder over the design, and then gently rock the film back and forth so the powder flows over the entire print.
After it's coated, pick it up and give it a good, firm flick on the back to shake off any loose powder. You only want the adhesive sticking to the ink, not the empty spaces on the film. Any stray bits of powder will just melt into ugly glue spots on your shirt later.
A common rookie mistake is getting the curing wrong. If you under-cure the powder, the transfer won't have a strong bond and will start peeling after a few washes. Over-cure it, and the design can feel stiff and plastic-like. Consistency is everything.
Curing for Durability and Finish
The last step before your transfer is ready for the heat press is curing. This melts the powder, fusing it to the ink to create that durable backing that sticks to the fabric. You’ve got a few options for this: a heat press, a convection oven, or a dedicated curing unit.
- Using a Heat Press: The trick is to let the top platen hover just over the transfer without actually touching it. Set your temperature to about 350-375°F (176-190°C) and let it cure for 2-4 minutes. You're looking for the powder to melt down into a smooth, slightly bumpy "orange peel" texture.
- Using a Convection Oven: A small, dedicated toaster oven works great for this and is what a lot of people use. Set it to a similar temperature, but keep a close eye on it—the process is often much faster, sometimes taking only 90-120 seconds.
The huge demand for custom apparel is what's really pushing the DTF market forward. In 2025, the DTF printer market segment was valued at USD 2.68 billion, and it's projected to grow by about 6.53% annually through 2030. This growth isn't just big manufacturers; it's driven by small businesses and startups adopting DTF for its incredible quality and efficiency. You can read more about this market trend on OpenPR.com.
Storing Your Completed Transfers
Once your transfers are cured, they're ready to press right away or be stored for later. This is one of the biggest perks of DTF—you can batch-produce your most popular designs and press them as orders come in.
Just store them flat in a cool, dry place. A portfolio folder or a shallow drawer is perfect. I recommend placing a sheet of parchment paper between each transfer to keep them from sticking, especially if you live in a humid climate. When stored properly, these transfers can last for months, giving you amazing flexibility for running your business.
Follow this workflow, and you'll quickly move past the trial-and-error phase and start producing consistent, professional transfers every single time.
Troubleshooting Common DTF Conversion Issues
Sooner or later, every converted DTF printer will throw you a curveball. It’s just part of the game. Don't sweat it—most issues are surprisingly common and, more importantly, fixable. The key is learning to recognize the signs so you can spend less time troubleshooting and more time printing.
The most common headache, by a long shot, is ink flow. One minute you're pulling a perfect nozzle check, and the next, you've got gaps or a whole color has just vanished. Nine times out of ten, the problem lies with the printhead.
Let's walk through the usual suspects and how to get your printer back on track.
Dealing with Ink Flow Problems and Clogs
Your biggest enemy in the DTF world is a clogged printhead. This is especially true for the white ink channel. The titanium dioxide pigment that makes white ink opaque is heavy, and it loves to settle and create blockages, particularly if the printer sits unused for even a day or two.
If you spot gaps in your nozzle check, the first thing to do is run a standard head cleaning cycle from your RIP software. Often, one or two quick cycles will do the trick for minor clogs. If the problem persists, you’ll have to investigate a bit more.
Stubborn clogs usually come down to one of these three things:
- Air in the Ink Lines: It only takes one tiny air bubble to completely halt the ink flow. Visually inspect the tubes running from your external tanks to the dampers. If you see a gap, you'll need to use a syringe to gently pull ink through the line until the air is purged.
- Old or Unshaken Ink: You absolutely have to gently agitate your white ink every single day. If left to sit, the heavy pigments settle into a thick sludge at the bottom that no head cleaning cycle can push through the microscopic nozzles.
- A Dry Printhead: Never, ever leave your printhead uncapped and exposed to the air for long. When you’re done for the day, always perform a “wet cap.” This just means putting a few drops of cleaning solution onto the capping station sponge before parking the printhead. It keeps the nozzles from drying out overnight.
A solid daily maintenance routine isn't just a suggestion—it's essential. Think of it like changing the oil in your car. Spending five minutes on these checks before you start printing will save you from hours of frustration and the potential $500+ cost of a replacement printhead.
Fixing Print Quality Imperfections
What if the ink is flowing fine, but the prints just look… wrong? Issues like banding (those ugly horizontal lines) or colors that just don't pop are typically rooted in software settings or alignment, not a hardware failure.
Banding is almost always a classic case of a misaligned printhead. Dive into your printer's utility software and find the printhead alignment function. Running this simple calibration makes sure the nozzles are firing exactly where they should as the printhead moves.
If your colors look dull or shifted, the culprit is probably your RIP software settings. Double-check that you're using the correct ICC profile designed for your specific brand of ink and film. Sometimes, a tiny adjustment—like bumping up the ink channel limits or color density—can make a world of difference.
Common DTF Conversion Issues and Quick Fixes
When something goes wrong, it's easy to get overwhelmed. I've put together this quick-reference table to help you instantly diagnose what's happening and figure out what to try first. Keep it handy!
| Problem | Likely Cause | Solution to Try First |
|---|---|---|
| Banding in Prints | The printhead is misaligned. | Run the "Print Head Alignment" utility in your printer software. |
| Missing Colors | Clogged nozzles or air bubbles in the ink lines. | Perform 1-2 head cleaning cycles. If that fails, check the lines for air. |
| Film Jams or Skewing | Something is obstructing the paper path. | Confirm all the plastic "pizza wheels" were completely removed during the conversion. |
| Colors Look Washed Out | Your RIP software settings are off. | Verify you're using the correct ICC profile and try increasing the color ink density by 5-10%. |
Most of the time, the fix is simpler than you think. By methodically working through these common issues, you'll build the confidence to handle anything your printer throws at you.
Common Questions About DTF Conversion
So, you've got the rundown on what a DTF conversion kit is and how to get one up and running. But there are always a few lingering questions that pop up right before you're ready to commit. Let's clear up some of the most common ones I hear.
Can I Switch Back to Regular Printing After Converting My Printer?
This is a big one, and the short answer is: you really shouldn't.
While it might seem possible in theory, trying to revert a converted printer is a messy, high-risk job. You'd have to completely flush every last drop of the thick DTF ink from the lines, dampers, and printhead. It's incredibly difficult to do perfectly, and any leftover DTF ink mixing with regular ink can spell disaster for your printhead.
It's far better to think of the conversion as a permanent move. The people who have the most success dedicate one printer exclusively to DTF. This keeps things reliable and avoids a world of frustration.
What's the Single Most Important Part of a DTF Conversion Kit?
Every piece has its purpose, but if I had to pick one, it's the RIP (Raster Image Processor) software. The RIP is the brain of the whole operation.
This isn't just about sending an image to the printer; it's about controlling exactly how much ink goes down, managing the crucial white ink underbase, and getting your colors to look right on the final shirt. A cheap or unsupported RIP will give you headaches and mediocre prints, even with the best hardware. Investing in a DTF conversion kit with a solid, well-known software like AcroRIP is a game-changer for getting professional-quality results.
How Much Maintenance Are We Talking About for a Converted DTF Printer?
Let's be honest: consistent maintenance is non-negotiable, especially because of that tricky white ink. If you let it sit, the heavy pigments will settle and cause clogs. But it's not as scary as it sounds if you build a simple routine.
A little bit of proactive care goes a long way. Here's what a good weekly rhythm looks like:
- Daily: Give the white ink tank a gentle shake to keep the pigment suspended.
- Before Each Print Session: Run a quick nozzle check from your RIP software. It takes seconds and can save you from a misprint.
- Weekly: Run a standard head cleaning cycle.
- If Idle for a Few Days: Use a technique called "wet capping." This involves putting a little cleaning solution on the capping station to prevent the printhead from drying out.
Following these simple steps will keep your printer happy and ready to go, protecting your investment and preventing most of the common issues people run into.
Ready to skip the DIY and get perfect prints every time? Raccoon Transfers offers premium, ready-to-press DTF transfers with next-day shipping. Let us handle the printing so you can focus on creating. Explore our custom gang sheets and start your order today.