
The Ultimate Guide to DTF Printer Ink for Vibrant Prints
At its core, DTF printer ink is a specially formulated, pigment-based ink designed to print vibrant, long-lasting designs onto transfer films. This isn't your standard desktop printer ink; it's the key ingredient that allows a digital image to become a permanent, wash-resistant piece of art on all sorts of fabrics, from cotton and polyester to complex blends.
What Exactly Is DTF Printer Ink and How Does It Work?
Think of DTF printer ink less as a liquid and more as the lifeblood of the entire Direct-to-Film process. It's what turns a design on your screen into something you can actually wear. This ink is specially engineered to do a job that regular paper or photo inks just can't handle.
A good way to think about it is like creating a high-tech, permanent sticker for your clothes. Instead of just sticking something on top of the fabric, you're bonding a custom design into the material, and it’s the DTF printer ink that carries the color and detail with incredible precision.
The Teamwork Behind a Perfect Transfer
The whole DTF method relies on a finely tuned partnership between three things: the ink, a special PET film, and an adhesive powder. Each one has a critical job to do. If one part fails, the whole transfer can be ruined.
Let's walk through how a design goes from a digital file to a finished shirt:
- Printing the Design: A DTF printer meticulously lays down your design onto a clear transfer film, but it prints it in reverse. For dark garments, it first prints the colors and then lays down a layer of brilliant white ink on top. This white base is crucial—it's what makes the colors pop instead of getting lost on a black or navy shirt.
- Applying the Adhesive: With the ink still wet, a fine, almost sand-like adhesive powder is sprinkled over the entire print. The powder only sticks to the wet ink, creating a perfect adhesive stencil of your design.
- Curing the Transfer: The powdered film then goes through a heat tunnel or under a heat press to melt the adhesive. This step fuses the powder directly to the ink, creating a single, solid, and ready-to-press transfer.
This print, powder, and cure workflow is the foundation of the DTF process.
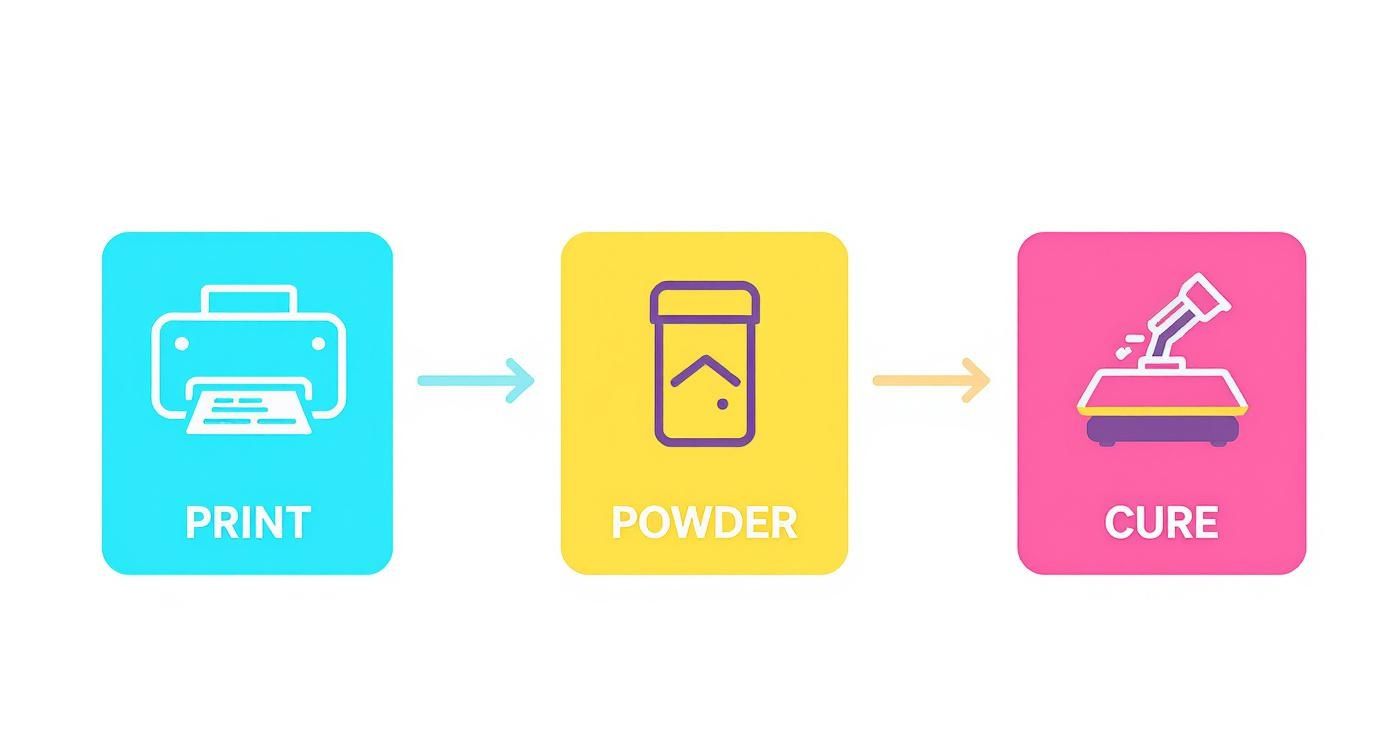
The image above perfectly illustrates how these three steps work in sequence to prepare the design. Getting a handle on this workflow is the first step in truly understanding what is Direct-to-Film printing. After curing, the transfer is ready to be heat-pressed onto a garment, where the ink permanently bonds with the fabric's fibers.
The demand for this technology is exploding. By 2025, the global digital printing industry is expected to consume roughly 304,000 tons of ink and toner, with a market value of $14.5 billion. This just goes to show how essential high-quality, reliable ink is to this booming corner of the print world.
Understanding the Science Behind DTF Inks

To really get why DTF printing works so well, you need to look inside the bottle. DTF printer ink isn't like the stuff you put in your office printer. It's a special kind of aqueous-based pigment ink.
Think of it this way: regular ink is like a dye, staining the fibers it touches. DTF ink is more like paint. Tiny, microscopic particles of color sit on top of the transfer film, waiting to be heat-pressed onto a garment. This pigment-first approach is exactly why DTF prints are so tough, holding up against fading from sunlight and countless wash cycles.
The magic happens when these ink particles grab onto the adhesive powder and then fuse directly with the fabric under heat. The result is a vibrant, flexible layer that can stretch with the material without cracking.
A Quick Look at DTF Ink Types
At its core, the DTF process relies on two very different types of ink working together. Here's a simple breakdown of what they are and what they do.
| Ink Type | Primary Role | Key Characteristic | Best For |
|---|---|---|---|
| CMYK | Color Reproduction | Semi-translucent, designed for layering | Creating the full-color spectrum of your design |
| White | Underbase & Highlights | Dense, opaque, high pigment load | Printing on dark fabrics and creating bright white areas |
This table gives you the basics, but the real star of the show, especially for anyone printing on colored shirts, is the white ink.
The Two Stars of the Show: Color and White Ink
In the DTF world, you've got two main players that have to work together perfectly: your standard colors and the all-important white ink.
- CMYK (Cyan, Magenta, Yellow, Black) Inks: These are your workhorses, responsible for bringing your design to life. They are formulated to be semi-transparent, which allows them to be layered in tiny dots to create millions of different shades and smooth gradients.
- White Ink: This is the unsung hero. White DTF ink is a completely different beast. It's thick, dense, and opaque because it’s packed with titanium dioxide—the same stuff that makes high-quality house paint so good at covering things up. Its main job is to lay down a solid white base on the film before any colors are printed.
This white underbase is absolutely essential for printing on dark or colored fabrics. Without it, the CMYK colors would just sink into the dark material and look dull and muddy. The white layer acts like a primer on a wall, making sure every color on top of it pops just as brightly as it does on your computer screen.
How Chemistry Creates Great Results
The specific formula of your DTF ink has a huge impact on the final product. The ink’s viscosity is carefully balanced to flow through the tiny nozzles of a printhead without causing clogs, while its chemical properties ensure it sticks perfectly to the coating on the PET film.
Getting colors right is also a big part of the equation. Taking a moment to learn what is an ICC file can save you a lot of headaches by helping you manage color profiles for accurate, consistent prints every time.
As technology gets better, inks are improving right along with it. Modern formulations offer even better vibrancy and durability. There’s also a growing focus on eco-friendly, water-based inks that are safer to handle and open up new possibilities. Of course, with any chemical process, safety is key. Professionals often rely on VOC product emission testing to ensure a safe work environment.
All this science is why choosing a high-quality, compatible DTF ink is one of the most critical decisions you'll make for your printing setup.
Creating a Perfect Match with Printers, Films, and Powders
Getting a great Direct-to-Film print is a bit like being the crew chief for a race car. It’s not just about one part; it’s about how every single component works together in perfect harmony. Your printer, film, adhesive powder, and especially your DTF printer ink aren't just separate items—they're a finely-tuned system.
You can't just grab any ink off the shelf and expect it to work with your setup. This is probably the most common pitfall for newcomers, and it almost always leads to frustration and wasted money. Each piece of the puzzle is designed to interact with the next in a very specific way.
It all starts with the ink's viscosity—basically, how thick or thin it is. The ink has to be fluid enough to zip through the tiny nozzles in your printhead without jamming things up, but also thick enough to sit neatly on the film without bleeding all over the place. Too thick, and you'll be dealing with constant clogs. Too thin, and your prints will come out looking blurry and oversaturated.
The Critical Bond Between Ink and Film
The relationship between the ink and the DTF film is just as crucial. DTF transfer films aren't just plain plastic sheets; they have a special coating that's engineered to grab and hold the ink. Think of this coating as a primer on a wall—it stops the ink droplets from spreading out and keeps your lines sharp and crisp.
When you have a good match, the ink bonds perfectly to this coating. But if you mix and match the wrong ink and film, you’ll run into all sorts of problems:
- Ink Beading: The ink just won't stick, forming little beads on the film instead of a smooth layer.
- Poor Ink Absorption: You'll see mottled or uneven color because the film’s coating can’t handle the amount of ink being laid down.
- Color Bleeding: The edges of your design look fuzzy because the ink is spreading where it shouldn't.
When the system works, the ink sits perfectly on the film's surface, creating a flawless foundation for the transfer. It’s a make-or-break step. To see how all these pieces fit together, check out our deep dive on what is a DTF transfer.
Fusing It All Together with Adhesive Powder
Finally, the adhesive powder has to play nice with the ink. The powder is designed to cling only to the wet ink, creating a perfect adhesive stencil of your design. When you cure it, this powder melts and fuses with the ink, creating one solid, durable layer.
If the powder and DTF printer ink aren't compatible, the powder won't bond correctly. The result? Your transfer will fail to stick properly to the shirt when you press it. You'll see parts of the design peeling or flaking off, sometimes after just one wash.
The absolute best way to sidestep these compatibility nightmares is to buy a complete, tested system from a supplier you trust. When you know your ink, film, and powder were made to work together, you create a reliable process that gives you consistent, professional-looking results right from the start.
4. Mastering DTF Ink Handling and Maintenance
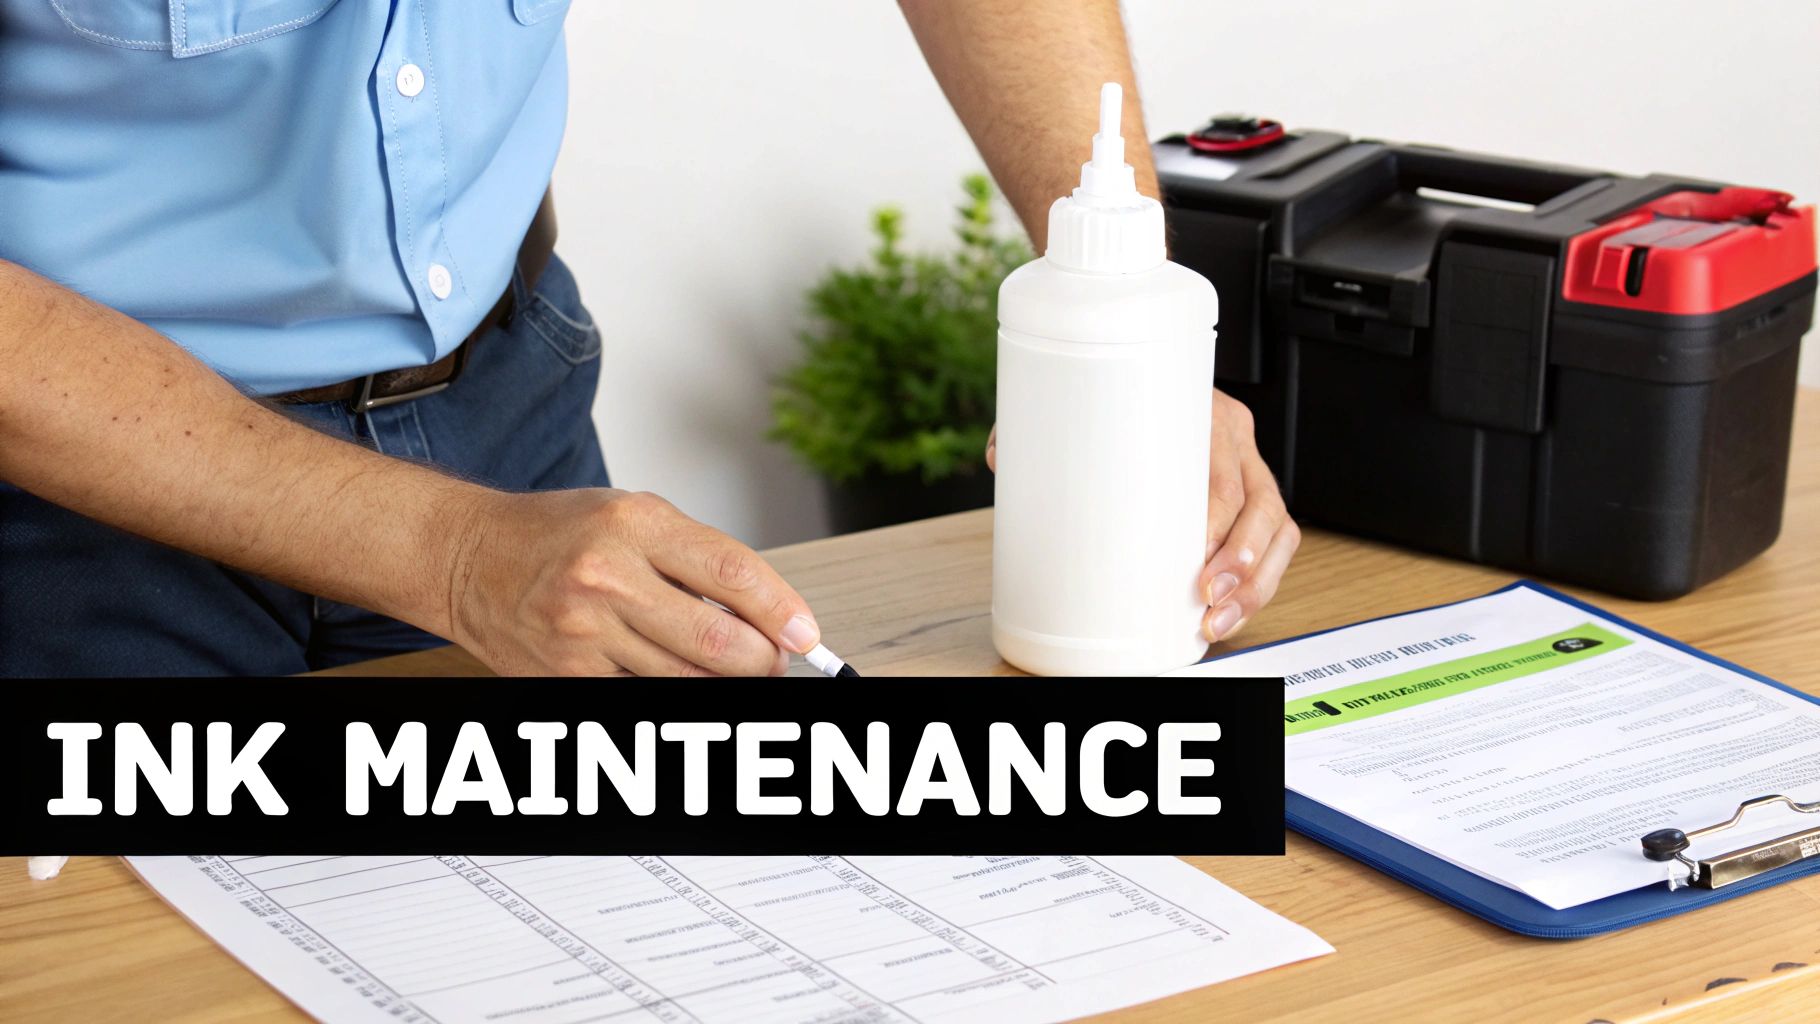
If you want to get consistently fantastic prints and keep your equipment running for the long haul, you have to get serious about ink care. This isn't just a boring chore; it's a core part of the DTF process. Skipping maintenance is the fastest way to run into expensive clogs, weird color shifts, and a whole lot of frustrating downtime.
Think of it like a high-performance car—you wouldn't skip the oil changes, right? Your DTF printer needs that same kind of routine attention to keep its ink system humming. The few minutes you spend on maintenance now will absolutely save you from costly repairs and wasted materials down the line.
The White Ink Agitation Rule
If you take away just one thing, let it be this: shake your white ink. All the time. White DTF ink is loaded with heavy titanium dioxide pigments, which is what gives it that awesome, bright opacity. But those heavy particles love to settle at the bottom of the tank when the ink sits still.
When that pigment settles, you’re basically setting yourself up for a printhead clog. It's the #1 cause of issues like banding, washed-out colors, and can even permanently wreck your printhead. Get in the habit of shaking your white ink bottle vigorously before every single refill, and give the cartridges in the printer a gentle agitation every day.
Many newer printers have a built-in white ink circulation system to help with this, which is great. But even with that feature, it’s not a complete substitute for a good old-fashioned manual shake.
Key Takeaway: Treat your white ink like a can of premium spray paint. You need to shake it thoroughly before you use it to mix everything up. This ensures the pigments are evenly suspended, giving you that solid, bright white base that makes your colors pop.
Daily and Weekly Maintenance Checklists
The easiest way to stay on top of maintenance is to stick to a schedule. A couple of minutes of preventative care each day will save you hours of headaches later. Use this checklist as a starting point to protect your investment.
Daily Maintenance (Before You Start Printing)
- Shake the White Ink: Seriously. Take the white ink bottle or cartridge out and give it a firm shake for a good 30-60 seconds. This is the most critical step you'll do all day.
- Run a Nozzle Check: Print a nozzle check pattern. It's a quick, simple test that immediately shows you if any printhead channels are clogged or not firing right.
- Perform a Head Cleaning (If Needed): If you see gaps in your nozzle check, run a light head cleaning cycle. Try to avoid doing this too often, as it uses up a fair bit of ink.
Weekly Maintenance
- Wiper Blade Cleaning: Grab a lint-free swab and some cleaning solution and carefully clean the rubber wiper blade. Any gunked-up ink on the blade can get smeared right back onto your printhead.
- Capping Station Cleaning: The capping station is what seals the printhead when it's parked, keeping it from drying out. Gently clean it to make sure it's making a good seal.
- External Wipe-Down: Give the outside of your printer a quick wipe-down to get rid of dust and ink splatters. It keeps your workspace looking professional and prevents dust from getting where it shouldn't.
Turning these simple tasks into daily and weekly habits is the secret. It ensures your DTF printer ink flows just right, which protects your gear and makes sure every single print looks exactly the way you want it to.
Dealing With Common DTF Ink Headaches
Sooner or later, every DTF printer owner runs into a snag. It's just part of the process. Think of this section as your go-to guide for figuring out what's wrong and getting your prints back on track. Learning to spot the early warning signs can save you a world of frustration (and wasted ink).
The massive growth in DTF printing is a testament to how many creators are jumping in. The market was valued at about USD 2.72 billion in 2024 and is on track to hit around USD 3.92 billion by 2030. With so many people embracing this technology, knowing how to fix common issues is a core skill for keeping your quality high and your orders flowing. You can dive deeper into the DTF market's rapid expansion with this report from Grand View Research.
Let's walk through some of the most frequent problems you're likely to encounter.
When Your Prints Don't Look Right
The final look of your design is all about how that ink lays down on the film. If you're seeing things like banding or colors that just seem off, it's almost always a sign that your ink system needs a little attention.
A perfectly printed transfer is a beautiful thing. But when issues pop up, it can be frustrating. Below is a quick-reference table to help you diagnose and solve the most common ink-related problems you'll encounter on your DTF journey.
| Problem | Potential Cause | Recommended Solution |
|---|---|---|
| Banding or White Lines | Clogged printhead nozzles, often from settled white ink or infrequent use. | Run a nozzle check. If there are gaps, perform a head cleaning cycle. Don't run more than 2-3 cycles back-to-back. |
| Washed-Out Colors | Settled white ink creating a weak underbase, or incorrect RIP software settings (ICC profile). | Vigorously shake your white ink. Then, double-check that you're using the correct ICC profile for your ink and film. |
| Ink Smearing on Film | The ink isn't drying fast enough before it hits the powder, or too much ink is being laid down. | Lower your ink limits in the RIP software slightly. Ensure your printer's platen heater is working correctly. |
| Cracking After Washing | Incomplete curing of the ink/powder, not enough adhesive powder, or incorrect heat press settings. | Check your curing oven's temperature. Apply a thicker, even coat of powder. Verify your heat press time, temp, and pressure. |
| Poor Adhesion to Fabric | The adhesive powder wasn't fully melted, or the fabric has a coating (like DWR) that repels the adhesive. | Ensure the cured transfer has a "gummy" or "orange peel" texture. Always pre-press garments to remove moisture and coatings. |
This table covers the usual suspects, but remember that every printer and setup has its own quirks. Consistent maintenance is always your best defense.
When Your Transfers Won't Stick
It's a gut-wrenching feeling when a design looks perfect coming off the printer but then peels or cracks after the first wash. This almost always points to a problem with how the ink, adhesive powder, and fabric are bonding together.
The culprit is usually one of three things: not enough adhesive powder, an incomplete cure, or the wrong settings on your heat press. Make sure you’re applying a solid, even coat of powder that covers every bit of wet ink. Then, double-check your curing temperature and time—you need to fully melt that powder so it fuses with the DTF printer ink.
Finally, always confirm your heat press settings. The right temperature, pressure, and time are absolutely critical for a permanent bond that can stand up to the washing machine.
A Pro Tip From The Trenches: Keep a simple logbook next to your printer. Jot down the settings for every successful job—ink levels, curing time, heat press temp, etc. When a problem pops up, you can look back at what worked before and instantly see what might have changed.
8. Smart Storage, Safety, and Cost Management
Your job doesn't end when the printer stops. How you handle your DTF ink after the printing is done is just as critical for protecting your investment, keeping your quality high, and ultimately, running a profitable business.
Think of your DTF ink like a premium ingredient in a recipe. If you leave milk on the counter or spices open to the air, they spoil. The same exact logic applies here—your ink needs a stable, controlled environment to keep its chemistry in perfect balance.
Maximizing Ink Shelf Life
Getting the most out of every bottle comes down to smart storage. Unopened, a bottle of DTF ink is generally good for about one year. But that clock starts ticking much faster if you don't store it right. Once you crack the seal, you'll want to use it up within six months.
Here are a few simple rules I live by:
- Keep it Cool and Dark: Your ink is happiest in a spot that stays between 60-80°F (15-27°C). Keep it out of direct sunlight and away from temperature swings. Heat can mess with the chemistry, and a freeze will absolutely ruin it.
- Airtight is Right: This one’s a biggie. Always, always make sure the caps are screwed on tight. Air is the enemy; it’ll cause the ink to dry out and thicken up, making it useless.
- First-In, First-Out (FIFO): It's a classic for a reason. Label your bottles with the date you bought them and always grab the oldest one first. This simple habit prevents you from finding an expired, unusable bottle hiding at the back of the shelf.
Safety First and Smart Purchasing
Let's be clear: working with DTF inks and adhesive powders means you have to be serious about safety. You absolutely need to work in a well-ventilated space. This is especially true when you're curing the film, as that's when fumes are most present. Gloves and safety glasses aren't optional—they're essential for protecting your skin and eyes.
When it comes to cost, it's all about finding that sweet spot. Buying ink by the gallon might seem cheaper per milliliter, but it's a terrible deal if half of it expires before you can ever use it.
Start by tracking your ink usage for a month or two. Once you know your average consumption, you can make much smarter buys. Don't get lured into overbuying just to hit a bulk discount.
For smaller shops and hobbyists, a good strategy is to buy your color inks in larger bottles, since they last longer. For white ink, which has that shorter shelf life, stick to smaller, more frequent orders. This ensures you’re always working with fresh ink and keeps waste to a minimum.
Common Questions (and Straight Answers) About DTF Ink
Getting into DTF printing is exciting, but it's natural to have a few questions, especially about the ink. Let's tackle some of the most common ones I hear from folks just starting out.
Can I Use My DTG Ink in a DTF Printer?
That’s a definite no. While both DTG and DTF inks are pigment-based, they are formulated very differently. Think of it like trying to put diesel in a gasoline engine—they're both fuel, but the engine won't run right.
DTF printer ink is specifically made to sit on top of a transfer film and grab onto the adhesive powder. DTG ink, on the other hand, is designed to soak into fabric. If you try to use DTG ink for DTF, you’ll run into a mess of problems:
- The print will look terrible on the film.
- The adhesive powder won't stick properly, leading to a failed transfer.
- Worst of all, you could clog and permanently damage your printhead.
Stick with the right ink for the job. It'll save you headaches and costly repairs down the road.
What’s the Shelf Life of DTF Ink?
Generally, an unopened bottle of DTF ink is good for about one year from the day it was made. Once you crack that seal, you’ll want to use it up within six months to get the best, most consistent results.
Be extra mindful of your white ink. It contains heavy titanium dioxide pigments that love to settle. This makes it more prone to clogging and separation, giving it a shorter practical lifespan than the colors. Always store your ink in a cool, dark place and keep an eye on those expiration dates.
Why Does My White Ink Look Faded or Transparent?
This is a classic problem, and it almost always comes down to one of two things. First, and most often, the ink wasn't mixed well enough. Those heavy white pigments sink to the bottom of the bottle or cartridge, so if you don't give it a vigorous shake before every print session, you're just pulling the thin, watery stuff from the top.
The second culprit is your software settings. You might just not be putting down enough ink. Dive into your RIP software and try bumping up the white ink percentage. This will create that thick, bright, and opaque underbase you need to make your colors pop.
Ready to create stunning, durable custom apparel without the hassle? Raccoon Transfers offers premium, ready-to-press DTF transfers with next-day shipping. Upload your designs and let us handle the printing, so you can focus on creating. Start your next project with us today!