
A Guide to Heat Transfer Paper Print
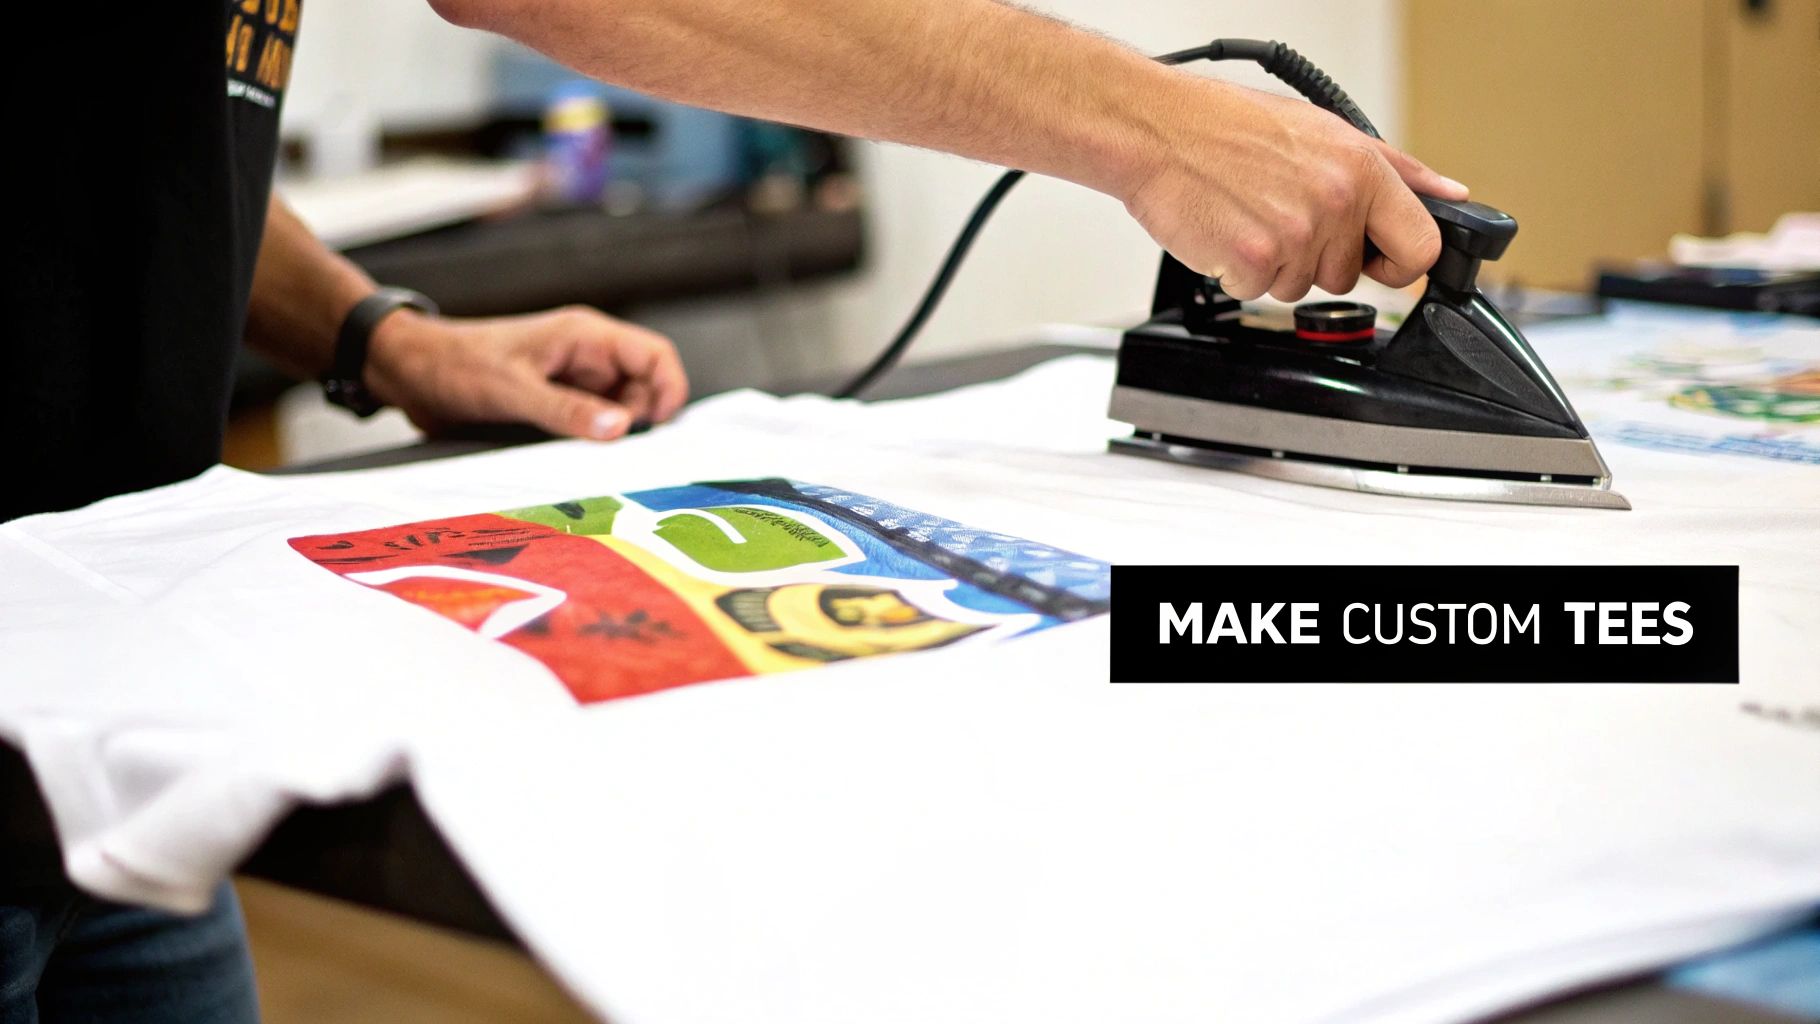
Ever wanted to put your own design on a t-shirt without a ton of expensive equipment? That’s exactly what heat transfer paper printing is for. It’s a super popular way to create custom gear by printing a graphic onto special paper and then pressing it onto fabric with heat.
This method is a go-to for hobbyists and small businesses alike, making it easy to create one-off pieces or small batches of personalized t-shirts, tote bags, and hoodies.
What Is Heat Transfer Paper Printing?
Think of it like a high-tech, permanent version of the temporary tattoos you used as a kid—but for your clothes. You're taking a digital image and making it part of the fabric itself. It’s a brilliantly simple concept that makes custom apparel accessible to almost anyone.
The process is pretty straightforward. You start with your artwork on a computer, print it onto a sheet of specially coated heat transfer paper, and then use a heat source to press it onto your garment. It’s that simple.
The Core Components of the Process
At its heart, the whole method boils down to a perfect trifecta: heat, pressure, and time. Nailing this combination is what separates an amateur-looking shirt from a professional, long-lasting one.
Here’s what you need to get started:
- The Specialized Paper: This isn't your everyday printer paper. One side has a unique polymer film coating that grabs onto the ink. When you apply heat, that film melts just enough to bond with the fabric, locking your design in place.
- A Standard Printer: This is one of the biggest perks of the process. You don’t need some fancy, industrial machine. A good-quality inkjet or laser printer from your home or office will do the job perfectly.
- A Heat Source: To make the magic happen, you need controlled heat and even pressure. For a quick DIY project, a household iron can work. But for consistent, durable results that look professional, a dedicated heat press is the way to go.
This accessibility is what makes the method so great. A DIY crafter can whip up custom shirts for a family trip, and a budding entrepreneur can start a merchandise line with very little upfront investment.
The real secret is in the transfer itself. The heat activates the polymer on the paper, and the pressure pushes it deep into the fabric's weave. This creates a solid bond that, if you take care of it, will last through dozens of washes.
Ultimately, heat transfer paper printing is the perfect entry point into the world of custom apparel. It offers a low-cost, low-complexity way for anyone to start creating unique items without jumping straight into more expensive and complicated techniques.
Choosing the Right Heat Transfer Paper
Getting into heat transfer printing is a bit like a painter picking out a canvas. The surface you choose completely changes the final piece. Not all papers are created equal, and your first, most critical decision is picking the right one for the job. The biggest fork in the road? Paper made for light fabrics versus paper made for dark fabrics.
This isn't just about branding—it's about the basic science of how your design shows up on the shirt. Nailing this choice is the difference between a faded, sad-looking print and a vibrant, professional one.
The Great Divide: Light vs. Dark Fabric Papers
The fundamental difference between these two paper types boils down to how they handle color and transparency.
A simple way to think about it is this: heat transfer paper for light fabrics is like a transparent sticker, while paper for dark fabrics is like an opaque one.
-
Paper for Light Fabrics: This paper has a clear polymer film. When you press it onto a white or light-colored shirt, that clear background melts right into the fabric, becoming pretty much invisible. All you see is the printed ink, which makes the design feel like it's part of the garment. This is also why you have to mirror your image before printing—you're applying it face-down.
-
Paper for Dark Fabrics: This type comes with an opaque, white base layer. If you tried using the transparent paper on a black shirt, your design's colors would just sink into the dark fabric and disappear. The white base on this paper acts like a primer, making sure every color in your design—especially the light ones—pops just like it should. With this paper, you print your image normally (no mirroring needed) and place it face-up on the shirt to press.
Grabbing the wrong paper is a classic rookie mistake, and it's a costly one. A design meant for light fabric will look muddy and faint on a dark shirt. On the flip side, using dark-fabric paper on a white shirt will leave an obvious white box around your design unless you trim it with absolute precision.
The rule is simple but non-negotiable: The garment's color dictates the paper type. Always match your paper to your fabric. It's a small step that saves you from wasting time, money, and materials while ensuring a top-notch result.
To make it even clearer, here’s a direct comparison to help you choose the right paper every time.
Heat Transfer Paper for Light vs Dark Fabrics
| Feature | Paper for Light Fabrics | Paper for Dark Fabrics |
|---|---|---|
| Background | Transparent/Clear | Opaque/White |
| Printing Method | Mirror image (print in reverse) | Do not mirror image (print as-is) |
| Application | Place design face-down | Place design face-up |
| Best For | White, pastels, and very light-colored fabrics | Black, navy, red, and all dark or bright fabrics |
| Trimming | Recommended but less critical | Essential to avoid a white background |
| Feel | Softer, blends into the fabric | Slightly thicker, more like a patch |
Ultimately, choosing the right paper is the first step toward a successful print. Keep this table handy, and you'll always have the right tool for the job.
Printer Compatibility and Paper Weight
Beyond just the light-vs-dark decision, you’ve got to make sure the paper works with your printer. Heat transfer papers are made specifically for either inkjet or laser printers. Don't mix them up. Using inkjet paper in a laser printer can actually melt the coating inside and wreck your machine, so always double-check the package.
Inkjet printing is definitely the most common choice for heat transfer paper, and for good reason—it produces great quality and is incredibly versatile. When it comes to paper thickness, market data shows a clear preference for medium-weight papers in the 51 to 150 GSM (grams per square meter) range, which are expected to hold 46.3% of the market share. This suggests people want paper that’s durable but still flexible. Interestingly, lighter papers (up to 50 GSM) are nearly as popular, capturing 46.5% of the market in 2023, which shows there’s a split demand based on what people are making.
The last thing to think about is the paper's "hand"—that's the industry term for how the finished design feels on the shirt. Some papers leave a soft, flexible finish you can barely feel, while others feel a bit thicker, more like a vinyl decal. For a complete look at the different options and what to expect, check out our guide on finding the best paper for heat transfer. A little research here will help you find a paper that not only looks great but feels perfect for your project.
Getting It Done: Your Step-by-Step Printing and Pressing Guide
Alright, you've picked out the right heat transfer paper for your project. Now for the fun part: turning that digital design into a real, wearable piece of art. Let's walk through the hands-on process, from your computer screen to the final press.
If you want a print that looks professional and actually lasts, you need to nail three things: heat, pressure, and time. Think of them as the three legs of a stool—get one wrong, and the whole thing falls apart. The goal is to get that perfect bond between the ink, the paper's coating, and the fabric itself.
This little graphic is a great starting point, showing the first big decisions you need to make.
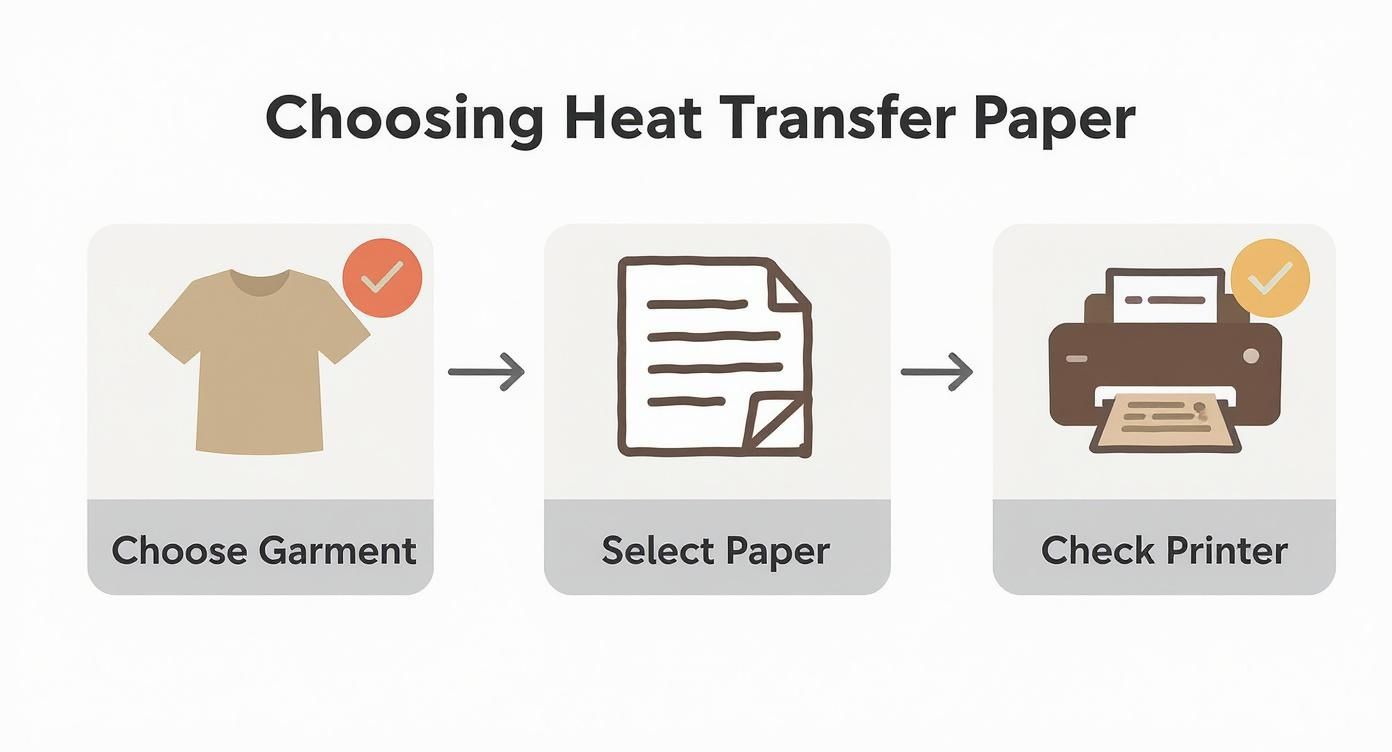
As you can see, success starts before you even hit "print." It’s all about matching your garment to the right paper and making sure your printer is up to the task.
Getting Your Design Ready for Print
A few key moves before you print can make all the difference. Seriously, don't skip these—they’re the difference between a crisp, professional-looking shirt and a disappointing mess.
First up is mirroring, and this is a big one. Forgetting this step is probably the most common mistake people make, especially when working with paper for light-colored fabrics.
- Mirror for Lights: When you're using paper for light shirts, you have to flip your design horizontally. Why? Because you'll be placing the paper face-down on the shirt. If you don't mirror it, any words or logos will be backward.
- Don't Mirror for Darks: On the flip side, paper for dark fabrics is applied face-up. You print it exactly as you see it on screen, no flipping needed. The paper has an opaque white base that makes sure the colors show up correctly.
Next, dive into your printer settings. The default "plain paper" setting just won't cut it. You need to tell your printer you mean business. Choose a high-quality option like "photo quality" or "premium matte." This pushes more ink onto the paper, giving you those rich, vibrant colors you’re after.
Trimming and Weeding Like a Pro
Once your design is printed, it's time to get rid of the extra, unprinted paper around the edges. This is absolutely essential for dark fabric paper, otherwise you'll end up with a big white box around your graphic.
For simple shapes, a good pair of scissors is all you need. But if you have a really intricate design with lots of little cutouts, a craft knife or a cutting machine (like a Cricut or Silhouette) will give you those super clean, precise edges that scream professional. A well-trimmed design looks like it's part of the shirt, not just a sticker slapped on top.
A clean cut is a professional cut. The less polymer border you leave around your design, the softer and more integrated the final print will feel on the fabric. This small detail dramatically elevates the quality of your finished product.
Applying Heat: The Final Step
This is where the real magic happens. Whether you're using a fancy heat press or a standard household iron, the goal is the same: controlled heat and even pressure. I'll be honest, a heat press is the way to go if you're serious. It gives you consistent temperature and pressure that a home iron just can't match.
Here’s how it works:
- Pre-Press the Garment: Before you even think about placing your transfer, press the shirt for about 5-10 seconds. This smooths out any wrinkles and gets rid of hidden moisture, giving you a perfect canvas.
- Position Your Design: Now, carefully lay the trimmed transfer on the garment. Remember: design-side down for light fabrics, and design-side up for darks. Grab a ruler to make sure it's centered and straight.
- Bring the Heat: Check the instructions that came with your paper. Most papers call for temperatures between 325°F and 375°F for 10-25 seconds. Apply firm, even pressure. If you're using an iron, put your body weight into it and keep it moving to prevent any scorching.
- The Peel Reveal: The moment of truth! Some papers are "hot peel," meaning you peel the backing off right away. Others are "cold peel," so you have to wait for it to cool down completely. Peeling at the wrong time will ruin your print, so always, always follow the manufacturer's directions.
For an even more detailed walkthrough, our guide on how to print on transfer paper has extra tips and visuals to help you perfect your technique.
Maximizing the Durability of Your Prints
You’ve just pressed the perfect custom shirt. Now for the big question: how long will it actually last? It’s a common concern, but the good news is you have a surprising amount of control over the lifespan of your design. With the right technique and proper care, a heat transfer print can look great for dozens of washes.
The life of your print begins long before it ever hits the laundry basket. It all comes down to two things: the quality of your materials and how precise you are with your heat press. A high-quality paper, combined with the correct heat, pressure, and time, creates a solid bond that can handle the rigors of daily wear.
Think of it like baking. If you use cheap ingredients or pull the cake out of the oven too soon, it’s going to crumble. In the same way, a solid heat transfer paper print needs that perfect "bake" to make sure the design fully cures and fuses into the fabric.
Extending the Life of Your Garment
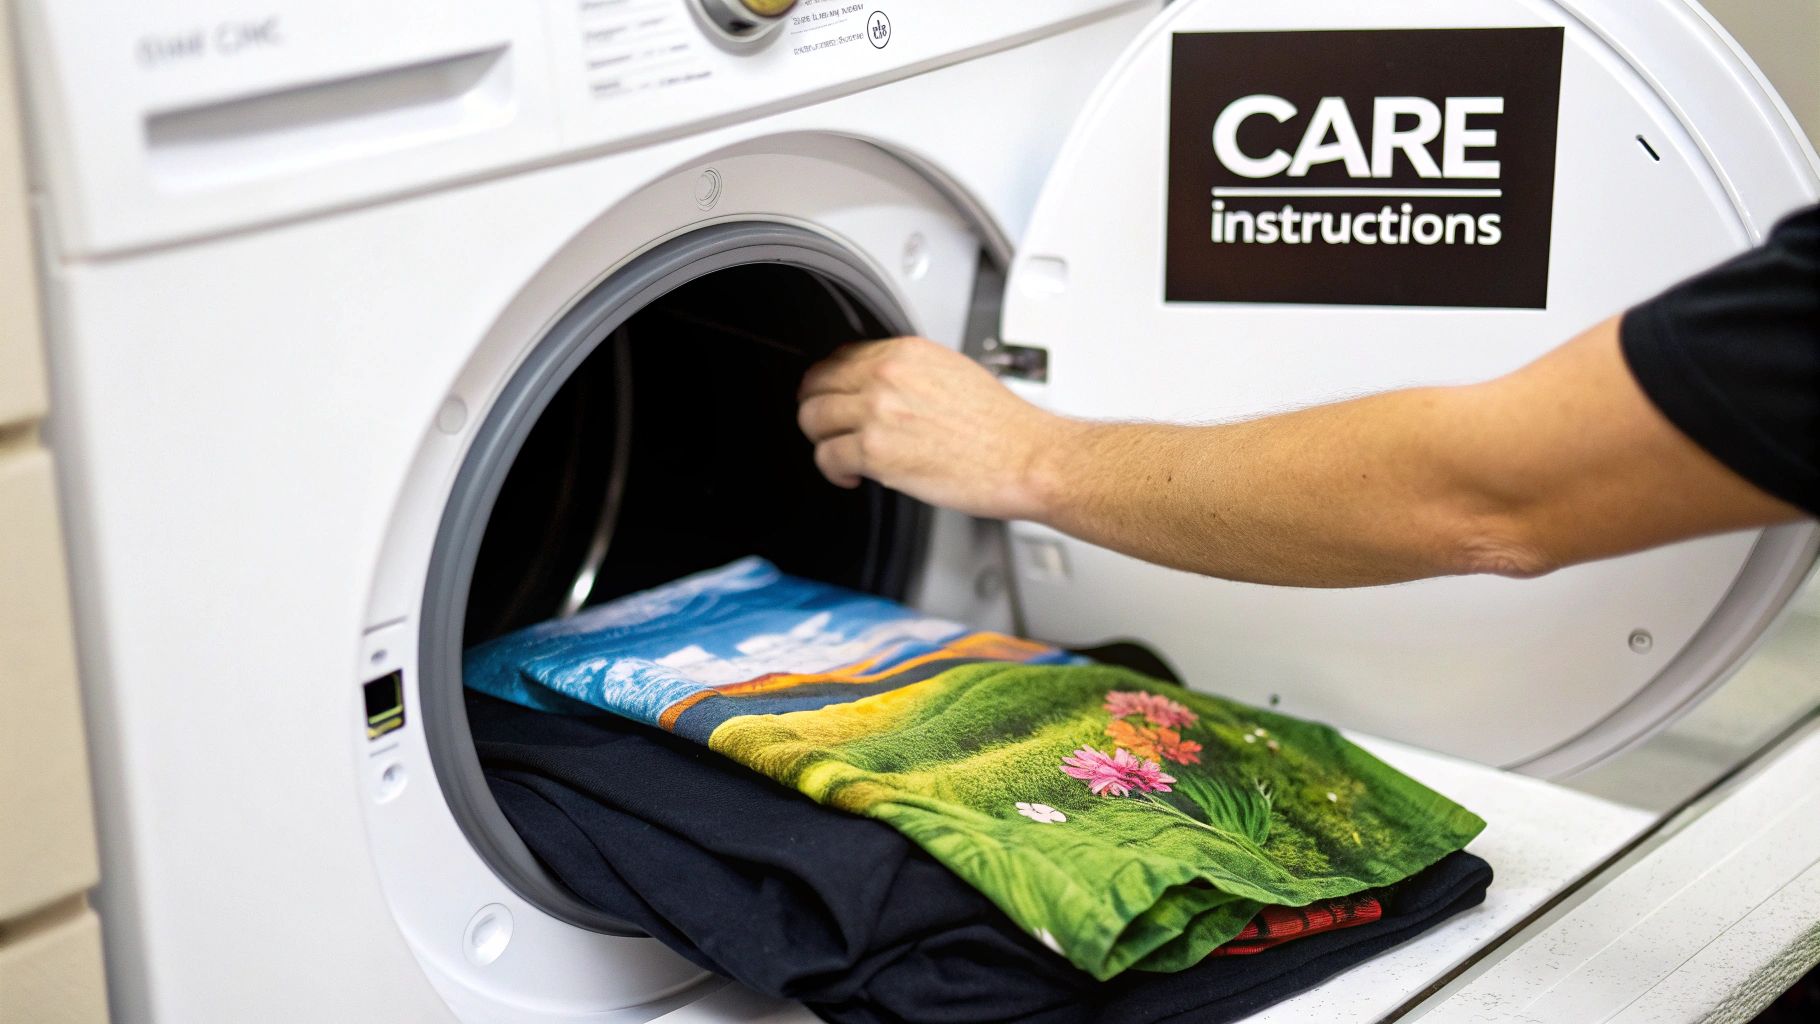
Once your design is on the shirt, it’s all about aftercare. How you wash and dry your custom apparel is the single biggest factor in preventing the dreaded fading, cracking, and peeling. A few simple tweaks to your laundry routine can make all the difference.
Follow these best practices to keep your prints looking sharp, wash after wash:
- Wait Before Washing: This is crucial. Give the ink and adhesive a full 24 to 48 hours to set before its first wash. This curing time lets the bond strengthen, making it far more durable.
- Turn It Inside Out: The golden rule for any custom garment. Turning it inside out protects the print from rubbing against other clothes and the inside of the washing machine.
- Wash Cold: Hot water is the arch-nemesis of custom prints. It can soften the adhesive and make colors bleed or fade. Always stick to a cold water cycle to keep the design intact.
Think of these steps as your first line of defense. They create a simple but effective barrier against the harsh environment of a typical wash cycle.
Properly caring for a heat transfer print isn't just about maintenance; it's about preserving the creativity and effort you put into the piece. A few extra seconds of care can add months or even years to the life of your custom creation.
Drying and Ironing Best Practices
The washing machine is only half the story—the dryer can be just as brutal if you’re not careful. High heat is what causes most prints to crack and peel over time.
Here’s how to safely dry and care for your printed apparel:
- Tumble Dry Low or Hang Dry: The absolute best method is to hang the garment up to air dry. If you’re in a rush and need to use a machine, always choose the tumble dry low or delicate setting to keep the heat to a minimum.
- Skip the Harsh Chemicals: Stay away from fabric softeners and bleach. Bleach will completely ruin a print, and fabric softeners contain chemicals that can break down the adhesive over time. A mild detergent is all you need.
- Iron with Care: If you need to iron the garment, make sure it’s still inside out. Never, ever let a hot iron touch the transfer directly. It will melt the design, ruining both the shirt and your iron.
By following these simple guidelines, you can set realistic expectations for your heat transfer paper print and enjoy your custom creations for a good, long while. It’s not about making them invincible, but about getting the most life and color out of every single piece you create.
Comparing Heat Transfer Paper to Other Methods
So, where does printing with heat transfer paper fit into the grand scheme of custom apparel? It's a fantastic starting point, but it’s just one tool in a much larger toolbox. To really know if it’s the right choice for you, you have to see how it stacks up against the other big players in the game.
Let's put it head-to-head with a couple of other popular methods: Direct-to-Film (DTF) and Heat Transfer Vinyl (HTV). We'll look at the things that really matter—how much it costs to start, what the final print feels like, how long it lasts, and how easy it is to actually use.
Heat Transfer Paper vs. Direct-to-Film (DTF)
Direct-to-Film, or DTF, has made a huge splash in the custom printing world recently. The process is pretty slick: you print your design onto a special film, coat it with an adhesive powder, and then press it onto the shirt. It sounds a bit like heat transfer paper, but the final product and the price of admission are worlds apart.
- Feel and Texture: This is where you'll notice the biggest difference. A DTF print feels incredibly soft and flexible, almost like it was screen-printed right into the fabric. A heat transfer paper print, especially on a dark shirt, tends to feel a bit heavier—more like a high-quality, flexible layer sitting on top of the material.
- Durability and Washability: DTF transfers are built to last. They can handle dozens and dozens of wash cycles without cracking or losing their color, making them a fantastic choice for professional, retail-quality gear. Heat transfer paper is less rugged and will show signs of wear and tear sooner.
- Startup Costs: This is where heat transfer paper really shines. All you need is a basic inkjet printer and a heat press (you can even get by with a home iron at first). DTF, on the other hand, demands a much bigger investment. You're looking at a specialized printer, a powdering and curing machine, and specific inks and powders.
Think of DTF as the natural upgrade for a business that's hitting the limits of what heat transfer paper can do. It gives you the same full-color freedom but with the professional feel and durability that customers expect from high-end brands.
Heat Transfer Paper vs. Heat Transfer Vinyl (HTV)
Heat Transfer Vinyl (HTV) is the go-to for many crafters and shops, especially for designs made of simple, solid colors. The process involves using a cutting machine, like a Cricut or Silhouette, to cut shapes and letters from a sheet of colored vinyl, which you then press onto your garment.
- Design Complexity: HTV is king for bold, single-color graphics, names, numbers, and logos. It's just not designed for full-color photos or images with smooth gradients. Heat transfer paper blows it out of the water here, since it can reproduce virtually any image you can print, making it perfect for photorealistic and complex art.
- The Weeding Process: Anyone who has worked with vinyl knows about "weeding." It's the often tedious job of manually picking out all the tiny, unwanted pieces of vinyl from your design before you can press it. With heat transfer paper, there's no weeding—you just print and trim around the outside.
- Material Versatility: HTV has a secret weapon: variety. It comes in an incredible range of finishes, from glitter and holographic to fuzzy "flock" and shiny metallics. This opens up a whole world of creative textures that you just can't get with standard heat transfer paper.
The demand for easy, personalized products is growing like crazy. The global market for heat transfer paper was valued at around USD 597.7 million in 2023 and is expected to skyrocket to a projected USD 1224.5 million by 2034. It's clear that accessible digital printing methods are here to stay.
Printing Method Comparison
Picking the right method is always a balancing act between your budget, quality goals, and what you’re actually trying to create. This table breaks it all down for a quick overview.
If you want to see how heat transfer paper stacks up against another popular ink-based method, check out our deep-dive guide on sublimation vs. heat transfer.
| Method | Best For | Durability | Initial Cost |
|---|---|---|---|
| Heat Transfer Paper | Hobbyists, prototypes, and low-volume orders needing full-color images. | Good (15-25 washes) | Very Low |
| Direct-to-Film (DTF) | Small to large businesses needing durable, full-color, retail-quality prints. | Excellent (50+ washes) | Moderate to High |
| Heat Transfer Vinyl (HTV) | Simple text, logos, and solid-color graphics with unique finishes. | Very Good (40+ washes) | Low to Moderate |
At the end of the day, there’s no single "best" method for everyone. Heat transfer paper remains the undisputed champion for getting started. It lets you bring vibrant, full-color ideas to life without breaking the bank. Once your business starts to grow or your quality needs change, moving on to DTF or HTV is a natural and smart next step.
When Does Heat Transfer Paper Make the Most Sense?
Picking the right way to customize a garment really boils down to your goals, your budget, and how many items you're making. Even with shiny new technologies popping up all the time, the classic heat transfer paper print is still the champion in a few key areas. It's all about matching the tool to the job.
Think of it as the perfect gateway into the world of custom apparel. The low startup cost and straightforward process make it a fantastic choice for anyone who wants to play around with designs without a major investment.
Who Is Heat Transfer Paper Perfect For?
This method really hits its stride on small-scale, personal, or test-run projects where being flexible and keeping costs down are the most important things. If any of these sound like you, heat transfer paper is probably your best friend:
- Hobbyists and DIY Crafters: Want to make a one-of-a-kind t-shirt for a birthday? Or maybe a few matching shirts for a family trip? This is exactly what heat transfer paper was built for. There are no minimum orders, and you waste next to nothing.
- Small Businesses Testing an Idea: Got a killer new design but not sure if people will buy it? Heat transfer paper lets you create a few prototypes to test the market with practically zero risk. You can press just one or two shirts to see how people react before committing to a big production run.
- One-Time Events: If you need custom gear for a charity 5k, a bachelor party, or a school club event, this is a fast and wallet-friendly way to make something memorable for the occasion.
Heat transfer paper is the ultimate low-barrier-to-entry method. It gives creators a way to pull their digital ideas into the real world quickly and cheaply, making it a foundational tool for personal projects and business experiments.
Knowing When It's Time to Upgrade
As great as it is for getting started, it’s just as important to know when you've outgrown it. There are some pretty clear signs that it’s time to look at more heavy-duty options like Direct-to-Film (DTF) or even screen printing.
You should probably start exploring other methods if you find yourself facing these scenarios:
- You're Handling Bulk Orders: If your brand is taking off and you suddenly need to make dozens or even hundreds of shirts, the time and effort for each individual heat transfer print just doesn't make sense anymore. It becomes a bottleneck.
- You Need Maximum Durability: For brands that promise retail-quality gear that can survive 50+ washes without fading or cracking, the superior lifespan of DTF is a much smarter long-term move.
- You're Thinking Bigger: The custom apparel market is massive. Asia-Pacific is the biggest consumer, and North America still holds a huge 26% of the global market share. As customers everywhere demand better quality, scaling up with a more durable method is crucial for staying competitive. You can read more about these global market trends and see how they might shape your business decisions.
At the end of the day, using heat transfer paper is a strategic move. It's the perfect way to start small, test big ideas, and create things you're passionate about. And when you're ready to grow, you'll be in a great position to jump to the next level.
Common Questions About Heat Transfer Paper
Even when you've got the basic steps down, a few questions always pop up when you're starting out with heat transfer paper. Let's run through some of the most common ones I hear, so you can sidestep those beginner mistakes and get great results from day one.
Getting the hang of the little details—like which fabrics play nice and what gear you really need—is what takes a project from "just okay" to truly impressive.
What Fabrics Work Best with Heat Transfer Paper?
While heat transfer paper is pretty flexible, it definitely has its preferred partners. If you want the most vivid colors and a design that lasts, stick with 100% cotton and cotton/polyester blends. These fabrics have a texture that allows the transfer's adhesive to really grab on and form a strong bond.
Can you use it on synthetics like polyester? Technically, yes, but you're entering a danger zone. The high heat needed to set the transfer can scorch, warp, or even melt some synthetic fabrics. If you're going to experiment, always do a test press on a hidden spot first.
Why Is My Heat Transfer Print Cracking or Peeling?
Ah, the most frustrating problem of them all. When a design starts to crack or peel after a wash, it almost always boils down to a problem with one of three things: heat, pressure, or time.
- Not Enough Pressure: This is the #1 reason for transfer failure. Without enough firm, even pressure, the adhesive simply can't melt and weave itself into the fabric fibers. The result is a weak bond that gives up as soon as it hits the washing machine.
- Incorrect Temperature or Time: Think of it like baking a cake. Too little heat or not enough time in the press, and the transfer adhesive never fully cures. On the flip side, too much heat can scorch the adhesive, making it brittle and easy to crack. Always, always follow the time and temp instructions for your specific brand of paper.
A good transfer creates a chemical bond; it's not just a fancy sticker. If your print is failing, take a hard look at your process. Consistent pressure and accurate temperature are the two things you absolutely can't compromise on.
Can I Use a Home Iron Instead of a Heat Press?
Yes, you can definitely use a home iron for a heat transfer paper print. It's how a lot of people get their start without dropping cash on new equipment. But—and this is a big but—you have to manage your expectations. A household iron is notoriously bad at providing consistent pressure and holding a steady temperature across its entire surface.
This lack of control makes it tough to get a durable, professional-looking print. An iron is perfectly fine for a one-off craft project or a fun shirt for your kid. But if you're thinking about selling your items or you want them to last for years, a heat press is a game-changing investment. The jump in quality and durability is massive.
Ready to move beyond the limitations of paper and achieve retail-quality results? At Raccoon Transfers, we specialize in professional-grade Direct-to-Film (DTF) transfers that offer superior durability, a softer feel, and vibrant colors on any fabric. Explore our easy-to-use services and see the difference for yourself at https://raccoontransfers.com.