
How to Iron Transfer Prints for Flawless Custom Gear
Alright, let's get you set up for a transfer that looks amazing and actually lasts. Before you even fire up your heat press, we need to talk about prep. Seriously, getting this part right is 90% of the battle.
Think of it this way: the time you spend on setup now saves you from the frustration of peeling, cracking, or faded designs later. We’re building the foundation for a perfect press, and it all starts with your workspace and having the right tools on hand.
Setting the Stage for a Perfect Press
First things first, where are you working? You need a solid, flat surface that won’t wobble when you clamp down your press. A sturdy workbench is perfect. Flimsy tables are a recipe for disaster—any movement during pressing can cause a blurry or shifted design.
Also, make sure your area is well-ventilated. Heat presses put out a lot of heat, and a little airflow makes the whole process safer and more comfortable. An open window or a simple fan does the trick.
Your Essential Toolkit
Having your gear ready and within arm's reach means no fumbling around when the clock is ticking. You don't need a lot, but what you do need is non-negotiable for getting those professional results.
Before we dive into the process, here's a quick checklist of everything you'll need for both DTF and UV-DTF applications. Having these items ready will make your workflow smooth and efficient.
Essential Tools and Materials Checklist
| Tool/Material | Purpose | Pro Tip |
|---|---|---|
| Heat Press | Provides the essential even heat and consistent pressure needed for DTF. | A home iron just won't cut it. The lack of consistent pressure is a primary cause of failed transfers. |
| Teflon Sheet or Parchment Paper | Protects your transfer from scorching and prevents ink from sticking to the heat platen. | Keep one sheet exclusively for pressing. You can reuse it many times until it starts to discolor or wrinkle. |
| Heat-Resistant Tape | Secures your transfer in place on the garment so it doesn't shift during pressing. | Use it to tape down the corners of your design, especially on slippery fabrics like polyester. |
| Lint Roller | Removes any stray fibers, dust, or pet hair from the garment before pressing. | This is a must-do step. Even a tiny piece of lint can create a noticeable bump under the final print. |
| UV-DTF Squeegee/Applicator | Ensures firm, even pressure when applying UV-DTF decals to hard surfaces. | The edge of a credit card can work in a pinch, but a proper squeegee gives you much better control. |
Getting these basics in order before you start is a simple habit that pays off big time in the quality of your finished products.
Prepping Your Garment: The Most Crucial Step
With your station set up, it's time to prep the actual garment. This is where you eliminate the two biggest enemies of a durable transfer: wrinkles and moisture.
Every fabric, especially cotton, holds moisture from the air. When you apply high heat, that moisture turns to steam and pushes against the transfer's adhesive, preventing it from bonding properly. This is the #1 reason transfers fail and peel off after a wash.
The fix is simple: pre-press your garment. Just place it on the press and close it for 5-10 seconds. You'll literally see the steam rise. This not only gets rid of the moisture but also smooths out any wrinkles, giving you a perfect, flat surface to work on.
This simple pre-press can be the one thing that separates a hobbyist-looking shirt from a professional-grade product that you can confidently sell. For a deeper look at how this applies to different materials, check out our comprehensive guide on using iron transfer paper.
Taking these prep steps seriously aligns with the professional standards driving the custom apparel industry. The demand for high-quality, personalized products has exploded, making Direct-to-Film (DTF) a go-to technology. In 2025, North America's share of the global DTF printing market hit 38%, part of an industry valued at a staggering USD 293 million. This boom really kicked off during the 2020 pandemic, when the desire for custom gear skyrocketed by over 200%, cementing DTF's place as a top choice for printers everywhere.
Mastering Your Heat Press Settings and Technique
Alright, you've got everything set up. Now comes the part where the magic really happens—the application. This is where precision makes all the difference between a print that looks amazing and one that just… doesn't. Forget any "one-size-fits-all" nonsense. The secret to a professional, long-lasting print lies in dialing in the perfect combination of temperature, pressure, and time for whatever you're pressing on.
These three elements are the holy trinity of heat pressing. They work in tandem to perfectly fuse the DTF transfer's adhesive with the fabric fibers. Nail this, and you avoid the classic blunders: peeling edges, colors that look dull, or a transfer that feels like a stiff piece of plastic. It's what separates a shirt that looks great after dozens of washes from one that cracks on the first go.
Calibrating Your Heat Press Settings
First things first, let's talk about your press. Not all heat presses are built the same, and what the display says isn't always what you get. Your machine might read 320°F, but the actual surface of the platen could be 10-20 degrees off in either direction. This is a huge deal. I highly recommend grabbing an infrared temperature gun. It’s a small investment that pays for itself by letting you verify the true surface temperature so you can adjust your settings for what’s actually happening.
Once you know your press is accurate, you can start dialing things in.
- Temperature: This is your most critical setting. If it's too low, the adhesive won't fully activate, and your transfer will fail. Too high, and you can scorch delicate fabrics like polyester or even melt the transfer itself.
- Pressure: You need firm, even pressure. No exceptions. This is what physically pushes the melted adhesive into the weave of the fabric, creating that strong bond. For most DTF work, you'll be shooting for medium to firm pressure.
- Time: This is simply how long the heat and pressure are applied. Too little time leads to a weak bond. Too much time can cook the transfer, ruining the colors, and can even damage the garment.
A common mistake I see is people using the same settings for everything. A thick, 100% cotton hoodie needs a different approach than a lightweight 50/50 blend tee. The fabric density and how it handles heat are completely different.
The Vital Role of the Pre-Press
I'm going to say this plainly: never skip the pre-press. Seriously. Just placing your garment on the press and hitting it with heat for 5-10 seconds before you even think about placing the transfer is an absolute game-changer. It does two critical things: it zaps any hidden moisture out of the fabric and flattens out every last wrinkle.
Moisture is the number one enemy of a good application. When it turns to steam under the press, it acts like a barrier, preventing the adhesive from making solid contact with the fibers. The result? You get a transfer that starts peeling at the edges right away. A quick pre-press ensures you have a perfectly dry, flat canvas to work with.
This little visual guide helps put the whole workflow into perspective, showing how each step builds on the last to get you ready for the main event.
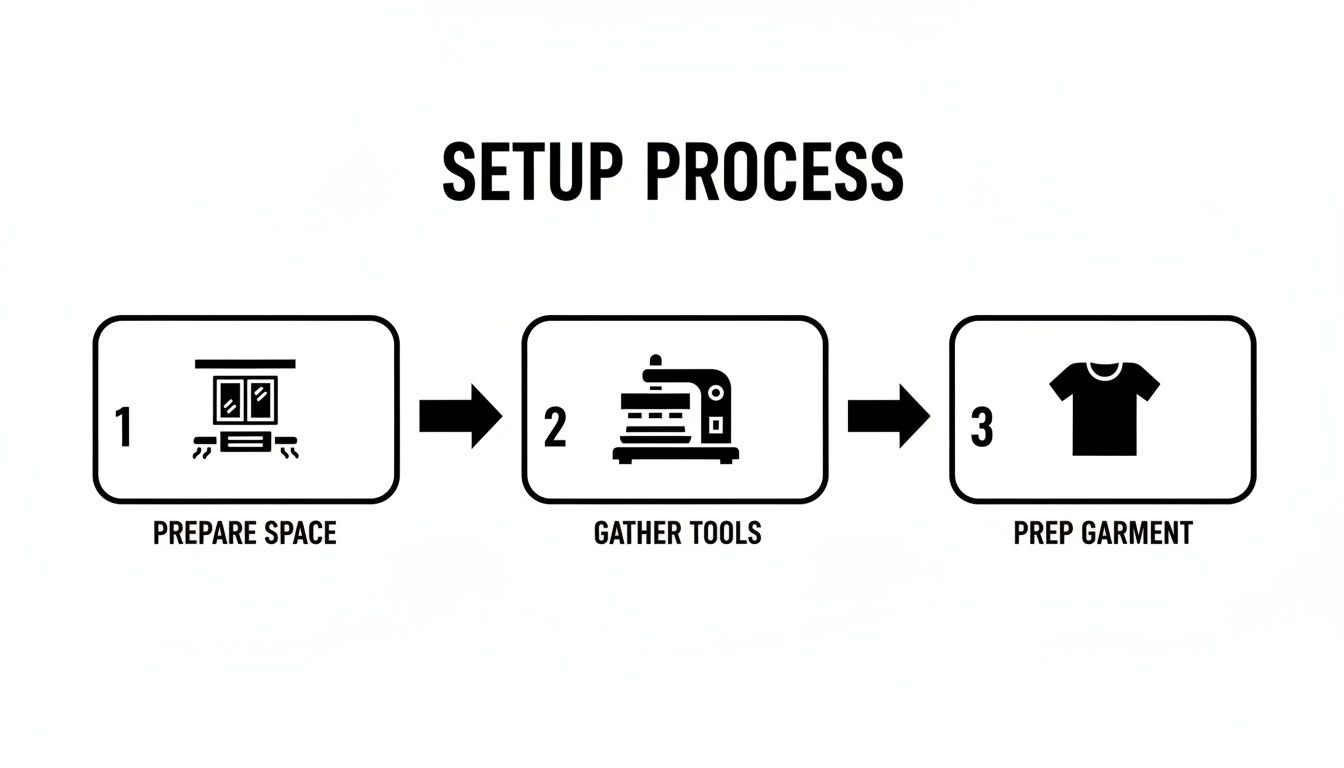
As you can see, a successful transfer isn't just one action; it's a methodical process, and prepping your garment is that final, crucial step before pressing.
Achieving Perfect Design Placement
A perfectly pressed transfer doesn't mean much if it's crooked. An off-center logo or chest design can make an otherwise great product look amateurish. A solid rule of thumb for t-shirts is to place the top of the design about three to four fingers down from the collar.
If you're doing a run of multiple items, consistency is key. Using a t-shirt alignment tool or even making a simple template out of cardboard will ensure every single piece is identical. Once you've got it positioned just right, use a couple of small pieces of heat-resistant tape to hold the transfer in place. This prevents it from sliding around when you close the press.
The Art of the Peel: Hot vs. Cold
And now, the moment of truth—peeling off the film. DTF transfers are typically either a hot peel or a cold peel, and you absolutely have to know which one you have. Doing the wrong one will ruin all your hard work. Always check the instructions that came with your transfers. For a deep dive into specific settings for different fabrics, check out our complete heat press temperature chart.
- Hot Peel: Just like it sounds. You peel the film away immediately after the press opens, while everything is still piping hot. It should be one smooth, confident pull. This is a common type and usually leaves a soft, matte-like finish integrated into the fabric.
- Cold Peel: With these, you have to wait. Let the garment cool down completely before you even think about peeling. You can speed the process up a bit by rubbing a clean, dry cloth over the transfer area to help dissipate the heat. If you try to peel a cold-peel transfer while it’s still warm, you'll pull the design right off with the film.
Here’s a pro tip for the peel itself: pull the film back at a low, sharp angle, almost parallel to the shirt. Don't pull it straight up. This technique puts less stress on the fresh transfer and gives you a much cleaner release every single time. Mastering this final touch is what guarantees a flawless, professional-looking product.
4. Adjusting Your Technique for Different Materials
Not every material is created equal, and that’s especially true when you're applying transfers. A vibrant DTF print on a thick, 100% cotton hoodie behaves completely differently than one on a slippery, heat-sensitive polyester jacket. And when you venture into hard goods like glass or metal? The rules change entirely.
Mastering these nuances is what elevates your work from good to great. You almost have to become a material scientist, understanding how heat, time, and pressure interact with each unique surface. A one-size-fits-all approach just won’t deliver professional, long-lasting results.
Fine-Tuning for Fabrics
The key to success with different fabrics lies in dialing in your three main variables: temperature, pressure, and time. Getting this trifecta right ensures the adhesive melts perfectly to bond with the fibers without scorching or damaging the garment.
For example, cotton can handle high heat, which lets the transfer's adhesive sink in for a permanent bond. But polyester can scorch or even melt if your temperature is too high for too long. For something like a 50/50 cotton-poly blend, you have to find that sweet spot—a lower temperature to protect the synthetic fibers, maybe with a slightly longer press time to get a solid application. It’s a delicate balance you learn with practice.
Pro Tip: Ever tried pressing a hoodie or a polo shirt and had the transfer come out uneven? Thick seams, zippers, and collars are the usual culprits. They prevent the heat platen from making full, firm contact across the entire transfer. An easy fix is to slide a heat press pillow or a folded Teflon sheet inside the garment. This raises the printing area, creating a flat, even surface for a perfect press every time.
Heat Press Settings by Substrate
To give you a reliable starting point, we've put together this chart of our recommended settings for common materials. Think of these as a baseline—your specific heat press and garment brand might require small tweaks.
| Substrate Material | Temperature Range (°F/°C) | Press Time (Seconds) | Pressure Level | Peel Type (Hot/Cold) |
|---|---|---|---|---|
| 100% Cotton | 300-320°F / 149-160°C | 10-15 | Medium-Firm | Hot or Cold (Check Transfer) |
| 50/50 Cotton/Poly Blend | 280-300°F / 138-149°C | 10-12 | Medium | Hot or Cold (Check Transfer) |
| 100% Polyester | 260-275°F / 127-135°C | 8-10 | Light-Medium | Hot or Cold (Check Transfer) |
| Tri-Blends & Delicates | 250-270°F / 121-132°C | 7-10 | Light | Cold Peel Recommended |
As you can see, the more synthetic and heat-sensitive the fabric, the lower the heat and time you'll need. To see these principles in action, check out guides on specialty applications like name printing on football shirts, which are almost always made of delicate polyester.
Beyond Fabric: Applying UV-DTF to Hard Goods
Let's pivot to the world of hard surfaces. This is where UV-DTF transfers really shine. Forget the heat press; these are essentially high-tech, permanent decals that open up a universe of possibilities for items that can't handle high temperatures.
Think about branding glass tumblers for a local café, creating custom metal water bottles for a corporate event, or adding logos to plastic phone cases. With UV-DTF, the process is a simple and satisfying "peel and stick."
Here’s how to get a flawless application:
- Clean the Surface. Start by wiping the item down with isopropyl alcohol to remove any oils, dust, or fingerprints. A perfectly clean surface is non-negotiable for a strong bond.
- Position and Press. Carefully peel the backing from the UV-DTF transfer and place it on your item. Once it’s where you want it, use a squeegee to apply firm, even pressure across the whole design. Work from the center outwards to push out any air bubbles.
- Remove the Carrier Film. With the decal firmly applied, slowly peel away the top carrier film at a sharp angle. Your vibrant, durable design will be left behind, perfectly bonded to the surface.
This method works beautifully on glass, metal, hard plastic, and even treated wood, allowing you to expand your product offerings far beyond apparel.
The growth of DTF technology has been explosive, and for good reason. In 2024, Europe led the market with a massive 36% share, valued at over USD 979 million. This popularity comes from its incredible durability. While older vinyl methods might crack after just 20 washes, quality DTF transfers can easily endure 50+ wash cycles. This longevity, combined with a quick application that saves about 35% in setup time over screen printing, makes it a game-changer for businesses of all sizes.
Troubleshooting Common Iron Transfer Problems
Even when you follow all the rules, things can go wrong. A transfer that peels, looks faded, or feels weird is more than just frustrating—it can ruin a great project. But don't worry, most of these issues are surprisingly easy to fix once you know what to look for.
Think of a bad transfer as a symptom. The real problem usually boils down to an issue with heat, pressure, time, or the garment itself. Let's dig into the most common headaches you’ll run into and how to solve them for good.

Why Is My Transfer Peeling or Lifting at the Edges?
This is the number one issue we see, and it almost always points to one thing: the adhesive didn't properly bond with the fabric. When you see those edges curling up—either right away or after the first wash—it's time to play detective.
- Uneven or Weak Pressure: If you're pressing near a thick seam, collar, or zipper, the press can't make flat, even contact. This creates weak spots where the adhesive barely touches the fabric.
- Hidden Moisture: Natural fibers like cotton are thirsty and pull moisture from the air. If you don't pre-press the garment for 5-10 seconds, that moisture turns to steam and gets trapped, preventing the adhesive from grabbing hold.
- Temperature Is Too Low: A press that's too cool won't fully melt the adhesive. Being off by even 10-15 degrees can be the difference between a transfer that lasts forever and one that peels by next week.
The Fix: Always pre-press your garment to get the moisture out. If you're dealing with uneven surfaces like seams, slip a heat press pillow inside the shirt. This raises the printing area and guarantees you get firm, even pressure across the entire design. It's also a great idea to double-check your press with an infrared temp gun to make sure the reading on the screen is accurate.
My Colors Look Dull or Scorched
Did your vibrant design come out looking muted? Or worse, slightly browned and crispy? That’s a classic sign of too much heat or too much time.
Every fabric is different. A temperature that works perfectly for a heavy cotton hoodie will scorch a polyester shirt. This can cause dye migration, where the dye from the fabric vaporizes and stains the ink of your transfer, leaving it looking dull and discolored.
Symptom, Cause, and Solution
- The Symptom: Your colors look faded or have a brownish tint. The fabric around the transfer might look a little shiny or melted.
- The Cause: Your temperature is too high for the material, or you pressed it for too long.
- The Solution: Drop the temperature by 10-15°F (5-8°C) and shorten the press time by a few seconds. When in doubt, check a reliable settings chart for your specific fabric. Using a Teflon sheet can also act as a buffer, protecting delicate materials from the direct heat of the platen.
What Is This Shiny Box or Outline Around My Design?
You nailed the press, the peel was perfect, but now you see a faint, shiny outline of the transfer film on the shirt. This happens when the heat and pressure flatten the fabric fibers around the design. It’s definitely more noticeable on dark polyester, but it’s fixable.
The best trick is a quick second press. After you peel the film, cover the design with parchment paper or a Teflon sheet and press it again for just 2-3 seconds. This quick hit of heat helps reset the fabric’s texture, making that boxy outline disappear. It’s a simple step that gives your final product a much cleaner, more professional finish.
Keeping Your Prints Looking Fresh: Aftercare Done Right
Your job isn't over once the heat press opens. The real test of a quality transfer—and your work—comes down to aftercare. How you wash and dry a garment is what makes the difference between a print that looks great for a week and one that stays vibrant and crack-free for years.
The first 24 hours are absolutely critical. Think of it like letting paint dry; the transfer's adhesive is still sinking in and permanently bonding with the fabric fibers. If you wash it too early, you're essentially pulling the plug on that process, which can lead to peeling down the road.
Give it time to set. Wait at least 24-48 hours before that first wash. This is the single most important step to ensure the transfer truly becomes one with the garment for maximum durability.
The Golden Rules for Washing DTF Prints
When it's finally time for a wash, the name of the game is being gentle. You want to protect the print from its two biggest enemies: friction and heat.
- Turn it inside out. This is a non-negotiable first step. It shields the print from getting scraped up by zippers, buttons, or just the friction of other clothes in the machine.
- Go with cold water. Hot water is a transfer killer. It can soften the adhesive over time and cause the vibrant colors to fade prematurely. Stick to the cold cycle.
- Choose a gentle cycle. Less aggressive tumbling means less stretching and stress on the printed area, keeping it from getting distorted.
You'll also want to be selective about your soap. Bleach is a definite no-go, and fabric softeners can leave behind a film that degrades the adhesive. A simple, mild detergent is all you need. For a deeper dive, we've put together a complete guide on how to properly wash printed t-shirts.
The Dryer Is Not Your Friend
If there's one mistake that will absolutely ruin a custom print, it's throwing it into a hot dryer. That intense, direct heat is the fastest way to crack, peel, and warp an otherwise perfect transfer.
The best method, hands down, is to hang dry the garment or lay it flat. It might take a little longer, but this gentle approach preserves both the print and the fabric. If you're in a pinch and must use a machine, use the absolute lowest heat setting—or even better, a no-heat "air fluff" option—and pull the item out while it's still just a little damp.
Getting these aftercare steps right is what separates the pros from the amateurs, and it’s a big reason why the custom apparel market is thriving. In fact, the Direct-to-Film (DTF) market alone skyrocketed to a USD 2.89 billion valuation in 2025, driven by creators who deliver quality that lasts. Proper aftercare is how you uphold that standard.
Keeping UV-DTF on Hard Goods Pristine
The same core principles apply to caring for UV-DTF transfers on hard surfaces like tumblers, glass, or metal: avoid harsh conditions.
While these decals are tough, they aren't invincible. The best way to preserve their scratch-resistant finish and bold colors is to hand-wash them. Stay away from abrasive scrubbers and definitely keep them out of the dishwasher—the high heat and aggressive detergents are too much for the decal to handle long-term. A quick wash with some warm, soapy water is all it takes to keep them looking perfect.
Your Top Questions About Iron-On Transfers Answered
Even with the best instructions, you're bound to have a few questions as you get going. That’s perfectly normal. Here are the answers to the most common queries we get from creators, designed to get you past those little hurdles and on your way to making amazing stuff.
Can I Get By with a Home Iron Instead of a Heat Press?
I get this question all the time, and I always give the same advice: for professional-grade results, a heat press is essential. A regular home iron just can't provide the two things that matter most for a durable DTF transfer: consistent, even pressure and accurate temperature.
Irons have hot spots and apply pressure unevenly, which is why you see transfers that peel at the edges or crack after a few washes. It’s a frustrating outcome for all your hard work. To get that clean, long-lasting finish that makes your designs pop, investing in a heat press is truly a game-changer.
Why Are the Edges of My Transfer Lifting or Peeling?
Peeling edges are a classic sign that something's off with your application, but it's almost always one of three things: not enough pressure, the wrong temperature, or hidden moisture in the garment. It’s a common hiccup, but thankfully, it's easy to fix.
First, check your pressure. You need firm pressure to physically embed the design into the fabric's fibers. Next, double-check your temperature with a heat gun if you have one; press readouts can sometimes be inaccurate. Most importantly, always pre-press your garment for 5-10 seconds. This zaps any humidity hiding in the fabric, giving the adhesive a perfect surface to grab onto. Also, watch out for thick seams, zippers, or collars—they can prevent your press from closing evenly and creating a solid bond.
Here's a pro tip: Cotton is a sponge for humidity in the air. A shirt can feel completely dry to the touch but still hold enough moisture to ruin a good press. That quick pre-press is non-negotiable because it forces that moisture out as steam, clearing the way for a flawless application.
What Exactly Is a Gang Sheet and Why Is It a Big Deal?
Think of a gang sheet as a giant canvas for all your designs. Instead of ordering dozens of individual transfers, you arrange multiple graphics—logos, sleeve hits, neck tags, you name it—onto one large sheet of transfer film to be printed all at once.
It's a huge money-saver. By fitting as many designs as possible onto the sheet, you maximize every square inch of the material and cut down on print runs. For anyone running a business or producing a variety of designs, it's hands-down the most cost-effective way to order, especially when you’re buying in bulk.
What's the Difference Between DTF and UV-DTF?
The easiest way to think about it is this: regular DTF is for fabric, and UV-DTF is for everything else.
-
Regular DTF uses a special heat-activated adhesive that’s made to bond with textiles like cotton, polyester, and blends. You use a heat press, and the design becomes a permanent, soft part of the garment.
-
UV-DTF, however, is basically a super durable, high-end sticker. It's printed with UV-cured ink onto a strong adhesive backing and is designed for hard, smooth surfaces like glass, metal, wood, and plastic. No heat is needed—you just peel and stick.
So, if you're making t-shirts, hoodies, or tote bags, you need DTF. If you want to customize mugs, phone cases, or tumblers, UV-DTF is your go-to.
Ready to create stunning, durable custom products? The team at Raccoon Transfers is here to help with premium DTF and UV-DTF prints, fast turnarounds, and expert support. Start your order today!