
How to Use Iron Transfer Paper for Custom Shirts
Before you even think about plugging in that iron, the success of your project hinges on getting your toolkit just right. This isn't just about grabbing any old paper and ink; it's about making deliberate choices that set you up for a fantastic, professional-looking result. Getting these fundamentals sorted out from the get-go is the real secret behind a flawless custom design.
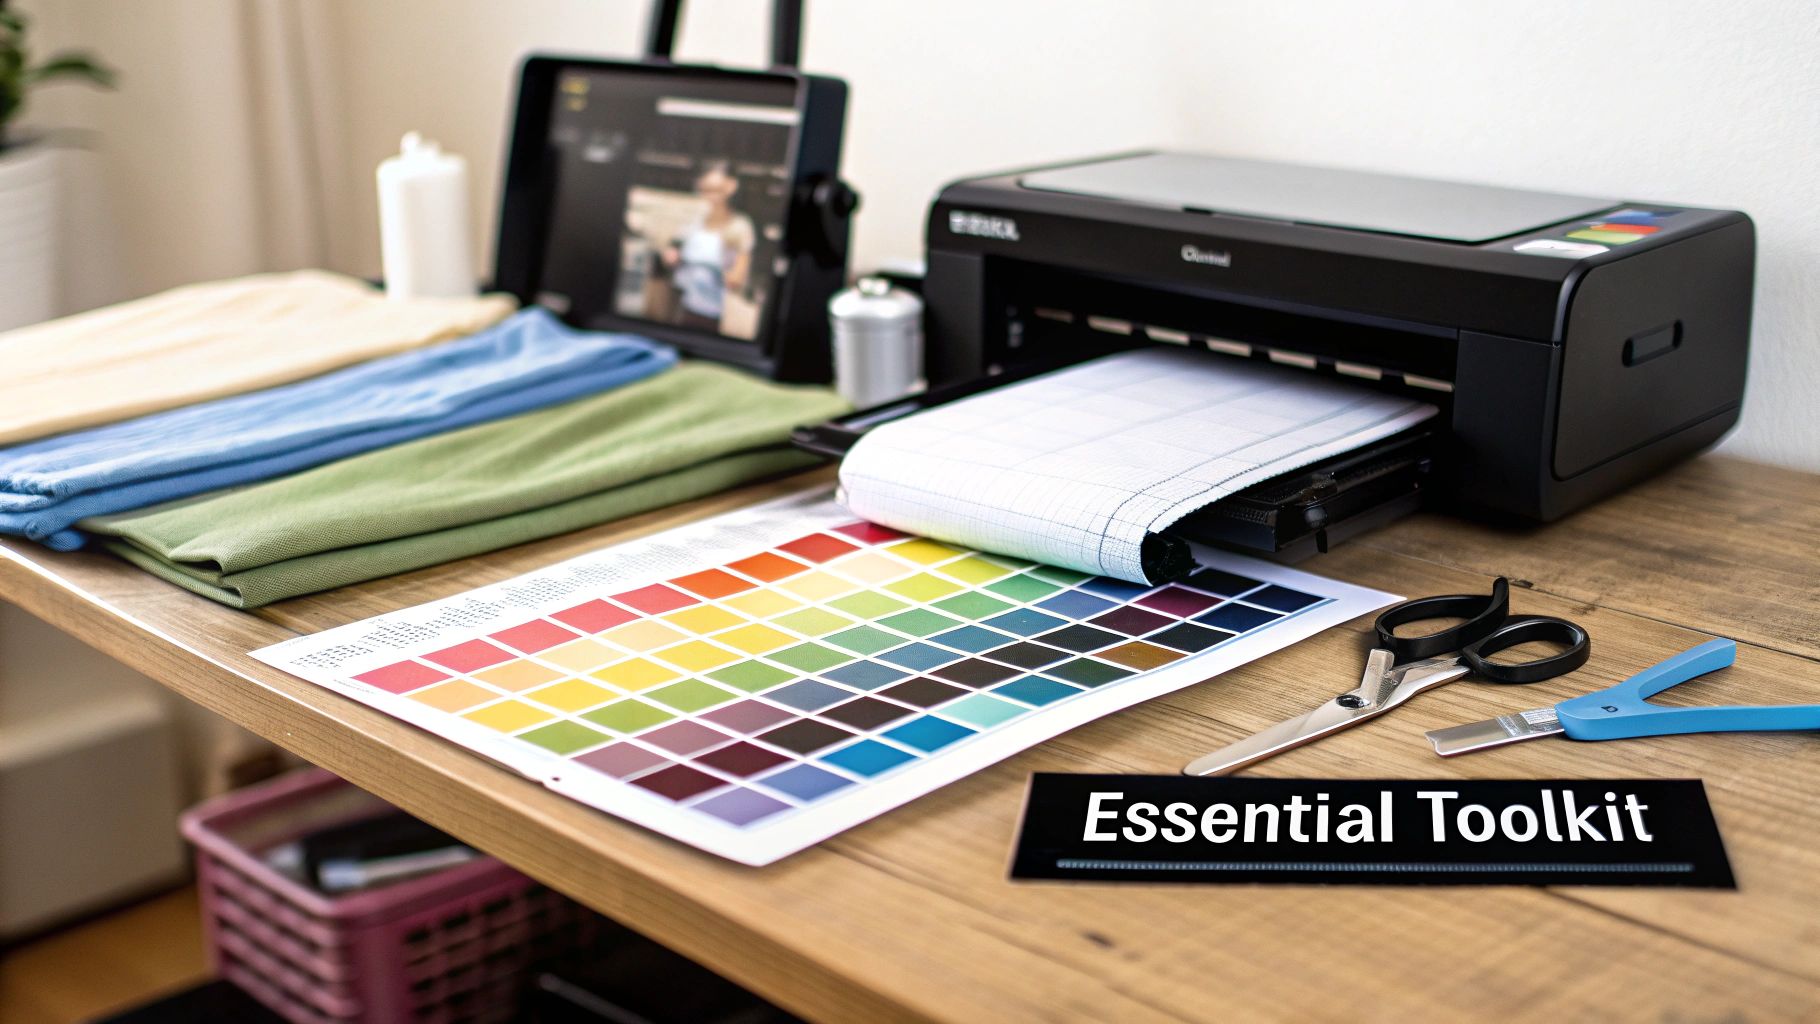
Gathering Your Essential Transfer Project Toolkit
Jumping into a custom apparel project is always exciting. It's no wonder this DIY method has become a massive hit, powering a huge part of the custom apparel world. In fact, the global heat transfer paper market is on track to hit a staggering USD 3,800 million by 2035, according to a recent report on heat transfer paper.
This boom isn't just driven by big companies; it's fueled by creative people like you who want a simple, affordable way to make unique items at home.
Choosing The Right Supplies
Let's be honest: your finished piece will only ever be as good as the materials you start with. The single most important decision you'll make is picking the right kind of iron transfer paper, and that choice comes down to one simple thing: the color of your fabric.
Light vs Dark Fabric Transfer Paper
Understanding the key differences between transfer papers for light and dark fabrics is crucial for a successful project. They work in completely different ways, and this table breaks down exactly what you need to know.
| Feature | Transfer Paper for Light Fabrics | Transfer Paper for Dark Fabrics |
|---|---|---|
| Background | Transparent film. | White and opaque background. |
| Printing | The design must be mirrored (printed in reverse). | Print the design normally (do not mirror). |
| Application | Ink transfers directly onto the fabric, allowing the light garment color to show through. | The entire film, including the white background, is ironed onto the fabric like a sticker. |
| Best For | White, pastels, and very light-colored fabrics. | Black, navy, red, and any dark or vibrant colored fabrics. |
| Trimming | Less critical, but trimming excess paper minimizes the feel of the clear film on the fabric. | Crucial. You must trim very close to your design to avoid a white box or outline around it. |
| Visual Effect | Colors can appear slightly muted as the fabric color influences them. | Colors remain bright and true to the original print, unaffected by the fabric color beneath. |
Picking the wrong paper is, without a doubt, the most common mistake I see beginners make. If you use light fabric paper on a dark shirt, your design will practically disappear. Trust me, it's a frustrating lesson to learn the hard way.
Essential Tools For The Job
Once you've got your paper, a few other items are absolutely non-negotiable for a smooth process.
First up is your printer. An inkjet printer is the standard for almost all consumer-grade transfer papers because the ink formulation is designed to work with the paper's special coating. For the most vibrant and durable colors, stick with genuine, high-quality ink from your printer's manufacturer.
Next, you'll need something to cut with. For designs with clean lines, a good pair of precision scissors will do the trick. But if you're working with something intricate, a digital cutting machine like a Cricut or Silhouette is a game-changer. It lets you trim perfectly around your design, which is especially important for dark fabric transfers where you want to eliminate any white background.
Finally, where you do your pressing matters more than you'd think. A standard ironing board is too soft—it just absorbs the heat and pressure you need. You'll get much better results using a firm, heat-resistant surface, like a wooden cutting board or a sturdy table protected with a pillowcase. This solid foundation lets you apply the consistent, even pressure that’s required for a perfect, long-lasting bond.
For a deeper dive into all your options, take a look at our comprehensive guide on the best paper for heat transfer to make sure you find the perfect match for your next creation.
Getting Your Design Ready for a Flawless Transfer

A vibrant, professional-looking transfer doesn't start with the heat press. It starts on your computer. Getting the digital file right is the key to avoiding common headaches like pixelated images, reversed text, or colors that just look off.
The absolute cornerstone of a great print is a high-resolution image. If you start with a low-res file, the printer has to guess at the missing information, which leads to those fuzzy, unprofessional edges. As a rule of thumb, always aim for 300 DPI (dots per inch) at your desired print size.
Don't Forget to Mirror Your Image (For Light Fabrics)
Here’s one of the most common mistakes I see people make: forgetting to mirror the design. When you're working with transfer paper for light-colored fabrics, you place the paper face-down on the shirt. To make sure it looks right after you iron it on, you have to print a reversed version.
Every design program has a "flip horizontal" or "mirror" command. If you skip this, all your text and any parts of the design that aren't symmetrical will end up backward. It's a real face-palm moment.
Crucial Tip: You only mirror for light fabrics. Transfer paper for dark fabrics is opaque, and you apply it face-up. For those, you print the design exactly as you want it to appear on the final product.
Dialing in Your Printer Settings
Whatever you do, don't just hit the "print" button using the default settings. You've got to dig into your printer's preferences to tell it you're not using plain old copy paper. This is how you get those deep, saturated colors you're after.
Look for a few specific settings:
- Paper Type: Choose something like "T-shirt Transfer," "Iron-On Transfer," or even a high-quality photo setting like "Photo Paper Glossy." This signals the printer to lay down more ink for richer color.
- Print Quality: Crank it up to the highest setting available. It might be called "High," "Best," or "Photo Quality."
- Color Management: Let the printer manage the colors for the most accurate results.
If you're looking to create something truly one-of-a-kind, you can even generate unique images with AI to use for your projects. Once you have a design you love, there's one more quick check I always recommend.
The Power of a Test Print
Trust me on this one: before you feed that pricey transfer sheet into your printer, do a test run on a regular piece of paper. This simple step takes just a minute but can save you from wasting a sheet. It lets you spot color issues, check if the size is right, and make sure everything is laid out perfectly. It’s a cheap insurance policy for a perfect final transfer.
For a deeper dive, check out our complete guide on how to print on transfer paper for more pro tips.
Mastering Your Ironing and Pressing Technique
This is it—the moment your digital design comes to life on fabric. Getting this part right boils down to three things: heat, pressure, and patience. I've seen countless projects ruined by rushing this stage, only to have the design peel or fade after one wash. Let's make sure that doesn't happen to you.
First thing's first: prep your iron. It's absolutely critical to empty all the water out of it and make sure the steam function is completely off. Any moisture, even a little puff of steam, can mess with the transfer's adhesive and prevent it from bonding properly. You need a totally dry heat source.
Nailing The Temperature and Pressure
Before you even think about placing the design, take a moment to preheat your garment. Just iron the spot where the transfer will go for about 10-15 seconds. This simple step gets rid of any hidden moisture and pesky wrinkles, giving you a perfectly smooth canvas for your design.
Now, let's talk temperature. This is where a lot of people go wrong. The beauty of this process is its simplicity: once your image is printed, you place the paper on the fabric and press it with a regular household iron. You’ll want it set somewhere between 180-200°C (350-390°F). Press for about 20-30 seconds, though this can vary a bit depending on your fabric. It works great for cotton and polyester blends, which, not surprisingly, make up over 70% of fabrics used for this kind of work. If you're curious, you can find more stats on the heat transfer paper market on Zion Market Research.
With your iron hot and ready, position your trimmed design onto the preheated fabric. Here's the most important part: apply firm, even pressure. Don't just glide the iron over the top. You need to use your body weight to press down consistently, moving the iron slowly across the entire transfer.
Pro Tip: Spend extra time on the edges and corners. From my experience, these are the first places a design will start to lift. I probably spend a good 30% of my total ironing time just making sure these areas get enough direct heat and pressure.
The Right Way to Move the Iron
Forget that quick back-and-forth motion you use to iron a shirt. For transfers, you need to be slow and deliberate.
- I like to start in the center and work my way out, using either slow circles or overlapping straight passes.
- The goal is to make sure every single part of the design gets the same amount of heat.
- Move slowly. Let the heat really sink into the paper and fully activate that adhesive.
This methodical approach is what creates a strong bond that will actually last in the wash. For a deeper dive into different application techniques, check out our guide on how to use iron-on transfers.
Hot Peel vs. Cold Peel: Know The Difference
Finally, you need to know when to pull off the backing paper. This depends entirely on the type of transfer paper you're using, and getting the timing wrong can ruin the whole thing.
- Hot Peel: This means you peel the backing off immediately after ironing, while the design is still piping hot. This usually gives you a softer, more matte finish that feels like it’s part of the fabric.
- Cold Peel: With this type, you have to wait for the transfer to cool down completely before peeling. If you try to peel it while it's still warm, the design can stretch, crack, or lift right off. This method often results in a slightly glossier, smoother surface.
Always, always check the instructions that came with your paper to see if it's hot peel or cold peel. If you've lost the instructions or just aren't sure, waiting for it to cool down completely is always the safest bet.
Post-Transfer Care for Lasting Results
You did it. The transfer is on, and your custom piece looks fantastic. But don't toss it in the hamper just yet. What you do in the next 24 hours is the difference between a design that lasts for years and one that cracks after the first wash. Think of this next step as curing—it’s what locks in your hard work.
The single most important rule is to wait at least 24 hours before washing. Seriously, don't rush this. This waiting period gives the transfer's adhesive the time it needs to fully bond with the fabric. It’s a chemical process, and it needs time to set properly for a durable, wash-resistant finish.
This infographic breaks down the initial application steps that create that crucial bond in the first place.
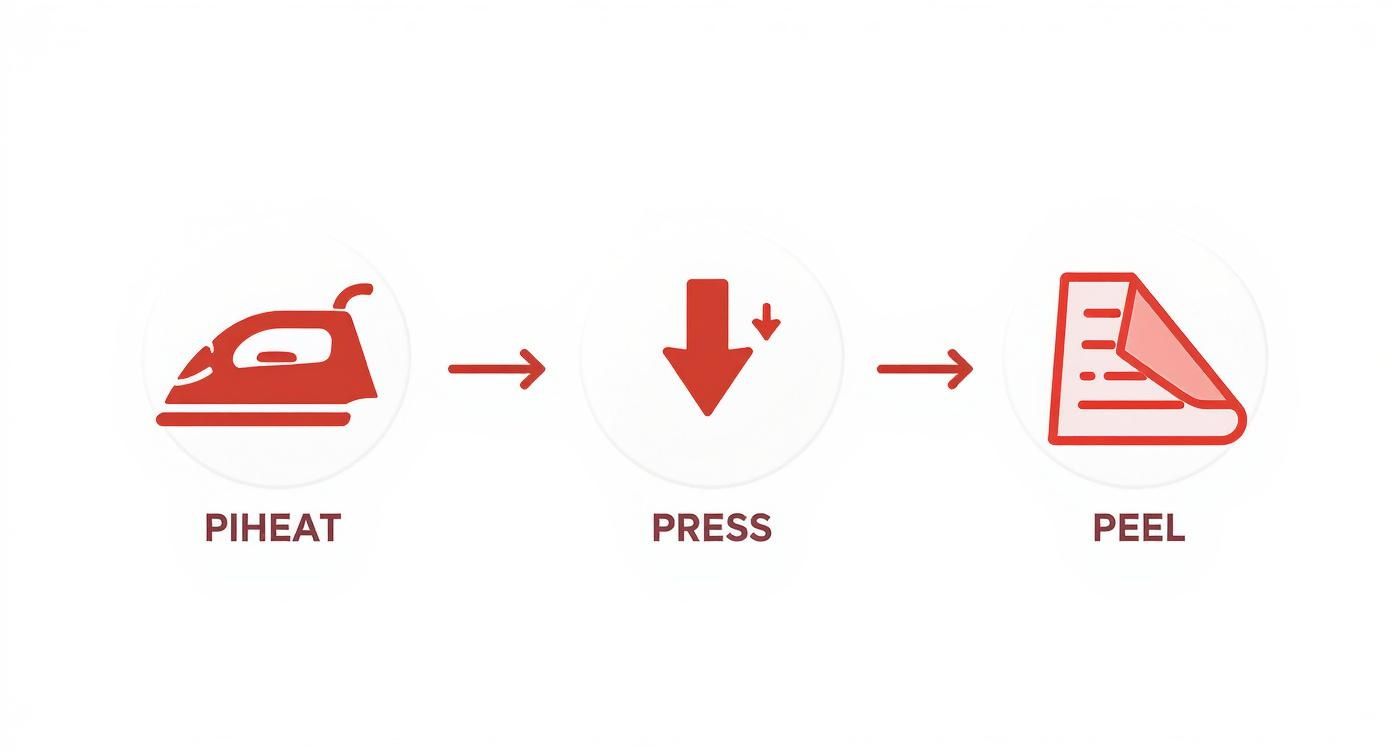
Nailing the preheating, pressing, and peeling is your foundation. Now, let's make sure it lasts.
First Wash and Beyond
Once the 24-hour cure time is up, it's time for the first wash. How you handle this sets the tone for the life of the garment.
Always, always, always turn the garment inside out. This is a non-negotiable step. It creates a protective barrier, preventing the design from rubbing against other clothes, zippers, or buttons in the wash.
Key Takeaway: Be gentle. That's the mantra here. Use a delicate cycle with cold water and a mild detergent. This combination is the sweet spot for keeping the colors bright and the transfer securely bonded to the fabric.
Steer clear of harsh detergents, bleach, and especially fabric softeners. These chemicals are notorious for breaking down the transfer's adhesive, which leads to fading, peeling, and a ruined design.
Drying Your Custom Garment
The laundry isn't done until the item is dry, and this step is just as critical as the wash. The number one enemy of any iron-on transfer is high heat. It can essentially "re-melt" the adhesive, causing it to become sticky, distorted, or peel right off.
For the absolute best results, stick to these guidelines:
- Air-Dry If Possible: Hanging your garment to air dry is the gold standard. It completely avoids heat and tumbling, giving your design the longest possible life.
- Tumble Dry on Low (If You Must): If you need to use a machine, choose the lowest heat setting you have. A no-heat or "air fluff" cycle is even better.
And a final pro-tip: never iron directly on the design after it's been applied and washed. If you need to get wrinkles out, turn the shirt inside out and use a low heat setting, carefully pressing the fabric around the transfer area. A few extra minutes of careful handling is all it takes to keep your custom creations looking incredible for a long, long time.
Working Out the Kinks: Troubleshooting Your Iron-On Transfers
Even with years of experience, a project can still go sideways. It happens. You follow all the instructions, but the finished product just isn't what you envisioned. The good news is that most iron-on transfer problems are surprisingly easy to fix, and each little hiccup teaches you something new.
Honestly, 90% of the time, a transfer that fails comes down to two simple things: heat and pressure. It’s incredibly common to underestimate just how much of both you really need to get that permanent, wash-proof bond. Let's break down the most common frustrations and get them sorted out.
Why Is My Design Cracking or Peeling?
There’s nothing worse than creating the perfect shirt, only to have the design crack or peel up after the very first wash. My heart sinks every time. This is almost always a sign that the transfer adhesive didn't fully melt and weave itself into the fabric's fibers.
Here’s what likely went wrong:
- Not Enough Heat: Your iron probably wasn't hot enough. You need to use the highest, driest setting it has—think cotton or linen. And don't rush it; let it heat up for a good five minutes before you even think about pressing.
- Pressure Wasn't Even: It's a natural tendency to press hard in the center of the design and ease up on the edges. You have to fight that urge. Use your body weight and lean into it, making sure every single millimeter of the transfer, especially the corners and edges, gets the same intense pressure.
- You Rushed the Job: Patience is key. A small design might take 60-90 seconds, but larger, more complex ones can require 3 minutes or more of sustained heat and movement.
If you notice peeling right after you press, don't panic! You can usually salvage it. Just lay a sheet of parchment paper over the design and go back in with your iron, focusing all your attention and pressure on that rebellious spot.
What Happened to My Bright Colors?
Did that brilliant, vibrant design on your screen turn into a dull, faded ghost on your fabric? This isn't your iron's fault—it's a classic printer setting issue. Thankfully, it's a super simple fix for your next go-around.
When colors look washed out, it’s because the printer simply didn't put down enough ink. This is a default outcome if you just hit "print" using the standard "plain paper" setting. You have to tell the printer you're using special material.
The Golden Rule of Printing: Before you print, always dive into your printer's properties or advanced settings. Look for the media type and choose an option like "T-Shirt Transfer," "Photo Paper Glossy," or "Premium Matte." Also, crank the print quality up to "High" or "Best." This combo forces the printer to use more ink, giving you those rich, saturated colors you want.
How Do I Get Rid of That Sticky Outline?
Sometimes, after you peel back the paper, you're left with a faint, clear film or a slightly sticky residue around the edges of your design. That's the unprinted polymer from the transfer sheet that didn't have any ink on it. It’s not a huge deal on white shirts, but it can stand out on darker colors.
You have a couple of options here:
- Trim, Trim, Trim: The best way to avoid the polymer box is to get rid of it before you ever start ironing. Cut as close to the edge of your printed design as you can. For really detailed shapes, I swear by a good craft knife or, if you have one, a digital cutter like a Cricut or Silhouette.
- Use a Protective Sheet: Placing a sheet of parchment paper or a thin Teflon sheet over the transfer before ironing does more than protect your fabric. It helps distribute the heat evenly and can lead to a much cleaner peel-away, minimizing that sticky residue.
When you hit a snag, try not to get discouraged. Just a small adjustment is usually all it takes to go from a frustrating failure to a flawless, professional-looking finished product. To help you diagnose issues on the fly, here's a quick cheat sheet for the most common problems.
Quick Fixes for Common Issues
This table is your go-to reference for quickly figuring out what went wrong and how to fix it on your next attempt.
| Problem | Likely Cause | Solution |
|---|---|---|
| Cracked/Peeling Design | Not enough heat or pressure during application. | Re-iron with parchment paper, using more body weight. Ensure your iron is on its highest setting and press for longer. |
| Faded or Dull Colors | Incorrect printer settings (e.g., "Plain Paper"). | Change printer settings to "T-Shirt Transfer" or "Glossy Photo Paper" and select "High Quality" print. |
| Sticky Outline/Residue | Excess unprinted polymer film melted onto the fabric. | Trim meticulously around the design before ironing. Using a digital cutter is ideal for complex shapes. |
| Image is Backwards | Forgot to mirror the image before printing (for light transfers). | Always select the "Mirror Image" or "Flip Horizontal" option in your printer settings for light fabric paper. |
| Uneven or splotchy transfer | Uneven surface or inconsistent iron movement. | Press on a hard, heat-resistant surface (not an ironing board). Keep the iron moving constantly to avoid hot spots. |
Think of your first few projects as practice runs. Once you get a feel for your specific iron, paper, and printer, you'll be turning out perfect custom creations every single time.
Got Questions? Let's Get Them Answered
Even the most detailed guide can't cover every single question that pops up, especially when you're just getting started. It's totally normal to have a few "what ifs" floating around. Let's tackle some of the most common questions I hear from fellow creators to help you get great results, faster.
Can I Use a Heat Press Instead of a Household Iron?
You absolutely can, and honestly, you should if you have one! A heat press is the gold standard for this kind of work. It delivers perfectly even heat and consistent pressure across your entire design, which is something a hand iron just can't replicate.
This consistency is the secret to getting a more professional, long-lasting transfer. It's a game-changer if you're making items to sell or just want that top-tier quality. Just remember to check the heat press manufacturer's guide, as their recommended time and temp settings might be a little different from what the transfer paper package says.
What Happens If I Use Light Transfer Paper on a Dark Shirt?
I've seen this happen, and unfortunately, it's a recipe for disappointment. Transfer paper for light fabrics is mostly transparent, meaning the dark color of the shirt will bleed right through your image.
The result? Your colors will look dull, muddy, and sometimes they'll barely even show up. Paper designed for dark fabrics has a crucial opaque white layer that makes your design pop. So, the rule of thumb is simple: always match the paper to the fabric color.
Why Did My Design Crack After the First Wash?
Ah, the classic (and most frustrating) problem. If your design cracked after its first trip through the laundry, it almost always comes down to one of three things.
- Not enough heat or pressure. The adhesive on the back of the paper never fully melted and bonded with the fabric. This is common with hand irons—you really have to lean into it.
- Washing it too soon. The transfer needs time to "cure" and fully set. You have to let it sit for at least 24 hours before washing.
- Harsh laundry settings. Hot water and high-heat dryers are the enemy of iron-on transfers. The heat can essentially re-melt the adhesive, causing it to soften, stretch, and crack.
The Fix: The solution is all in the details. Use very firm, even pressure when you press the design, paying extra attention to the edges. Wait that full 24-hour curing period. And when it's time to wash, turn the shirt inside out, use cold water on a gentle cycle, and let it air-dry or tumble dry on the lowest heat setting.
Nailing these small steps is what makes the difference between a project that looks homemade and one that looks truly professional.
Ready to create stunning, long-lasting custom apparel without the guesswork? Raccoon Transfers offers premium Direct-to-Film (DTF) transfers that provide vibrant colors, incredible detail, and unmatched durability on any fabric. Check out our custom DTF transfers