
Iron On Transfer How To A Pro Guide to Flawless Custom Apparel
Applying an iron-on transfer really comes down to three things: prepping your garment, nailing the placement, and applying heat and pressure the right way. If you can master these fundamentals, you’ll be creating custom pieces that look like they came from a pro and will survive wash after wash.
Your Foundation for Perfect Iron On Transfers
Before you even plug in your iron or fire up the heat press, what you do first makes all the difference. Think of this as your pre-flight checklist. Honestly, skipping these prep steps is the number one reason I see applications fail. It all starts with the fabric.
Choosing and Preparing Your Fabric
Let's be real: not all fabrics are created equal when you're applying heat. Natural fibers like 100% cotton are your best friend, especially if you're just starting out. They’re super forgiving and can handle the high heat needed to get a solid, permanent bond with the transfer.
Synthetics like polyester or delicate blends? They're a different story. Too much heat and you can scorch or even melt the fibers, ruining the garment for good. That’s why you absolutely have to know what your shirt is made of. If you want to get into the nitty-gritty of material selection, our guide on the best fabric for t-shirts is a great resource.
Once you have your garment, the most important thing you can do is pre-wash it. I can't stress this enough. New clothes often have a coating of chemicals or sizing that can block the transfer's adhesive. Plus, pre-washing shrinks the fabric. If you apply a design to an unwashed shirt, you’ll likely get a wrinkled, puckered mess after the first wash as the cotton shrinks up underneath the transfer. Just run it through a normal cycle, but skip the fabric softener—it leaves a residue that can mess with adhesion.
Setting Up Your Workspace and Tools
Where you work is almost as important as how you work. You need a hard, flat, heat-resistant surface. An ironing board is a no-go; its mesh surface is built to let heat escape, which means you won't get the firm, even pressure you need. A sturdy table or a kitchen counter with a Teflon sheet or a thin towel on top is a much better option.
Now, for your most important tool: the heat source.
- Household Iron: Everyone has one, and it’s fine for getting started. The tricky part is keeping the heat and pressure consistent. Make sure the steam is turned off and the water reservoir is completely empty.
- Heat Press: This is the professional standard for a reason. You get precise control over temperature, pressure, and time. It takes out all the guesswork and gives you a perfect, repeatable result every single time.
The boom in tools for custom apparel isn't just a coincidence. The global iron-on transfer sheet market was valued at $1.21 billion and is expected to hit $2.19 billion by 2033. This surge is driven by small brands and DIYers who want pro-level results without the industrial price tag. To see how this fits into the bigger picture, you can check out some other common methods for transferring designs onto fabric.
Key Takeaway: The success of your transfer depends entirely on your prep work. Picking the right fabric, always pre-washing your garment, and using a proper workspace are the three non-negotiables for avoiding peeling, cracking, and fading.
Modern Direct-to-Film (DTF) transfers, like the ones we make at Raccoon Transfers, have made this whole process even easier. When you use pre-made DTF transfers, you get to skip all the annoying steps like cutting, weeding, and layering vinyl. This lets you focus on what really matters—perfect placement and application—to get vibrant, detailed, and durable designs with way less effort.
Getting Your Heat Settings Just Right for Any Fabric
The real magic behind an iron-on transfer that lasts isn't just in the transfer itself—it's in the heat. Getting the perfect mix of temperature, time, and pressure is what takes a project from looking homemade to looking professionally printed and durable. This is where we need to get specific, because one size definitely does not fit all.
Think about it: the temperature that works for a thick cotton hoodie would absolutely ruin a delicate polyester shirt. Too much heat can melt the adhesive or scorch the fabric, while too little heat means the transfer won't stick properly and will start peeling after the first wash. Nailing this balance is probably the single most important part of the whole process.
The Big Three: Temperature, Time, and Pressure
Your success really comes down to three things working together: temperature, time, and pressure. If one is off, the whole application is compromised.
- Temperature: This is the heat level needed to activate the adhesive on the transfer. It changes from one fabric to another.
- Time: This is simply how long you apply the heat. Too short, and you get a weak bond. Too long, and you risk a burn.
- Pressure: This is the force you apply. It's what physically pushes the melted adhesive into the fabric's fibers for a permanent hold.
Understanding how these three play together is crucial. A tough, 100% cotton garment, for example, can handle more heat for longer. On the other hand, a heat-sensitive synthetic fabric needs a much lower temperature for a shorter time to avoid melting.
Proper prep is the foundation for everything that follows. This quick visual guide walks you through the non-negotiable first steps.
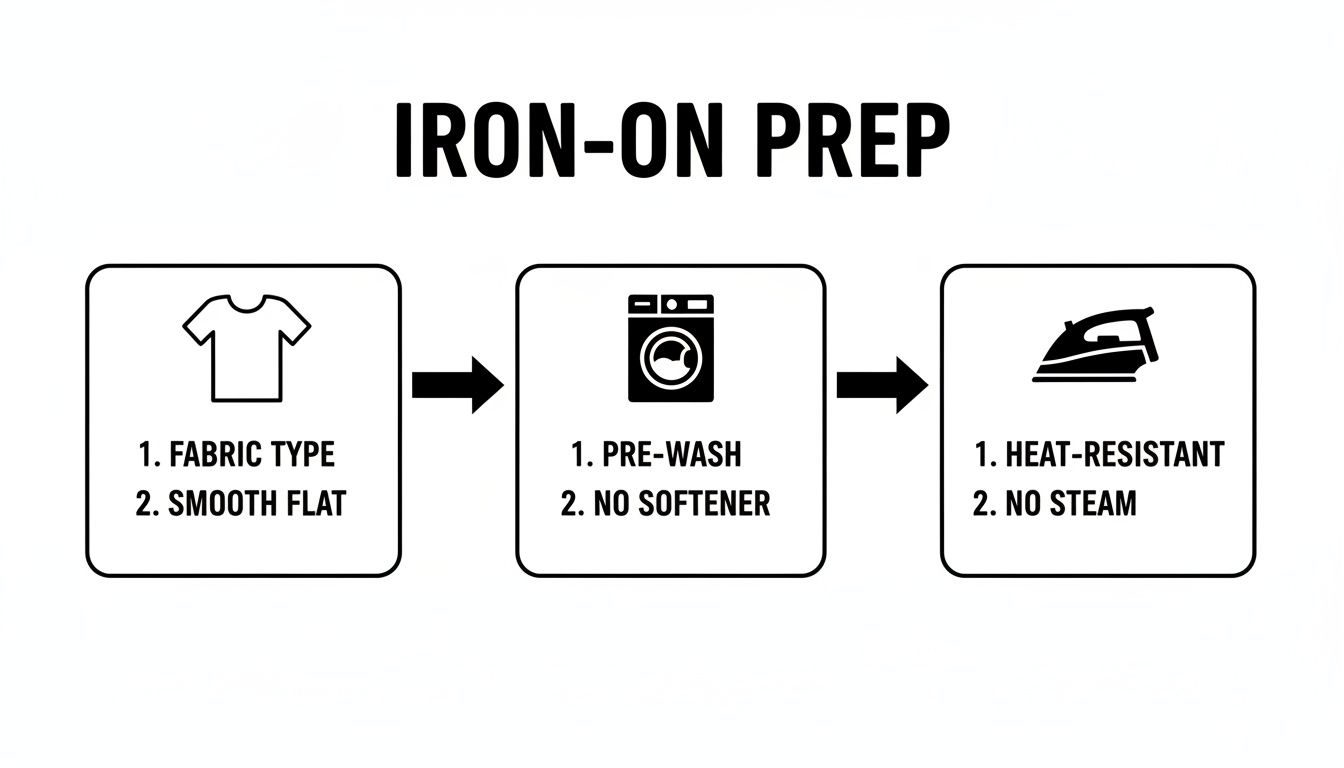
Starting with a clean, pre-shrunk garment on a hard, flat surface ensures your heat settings can do their job without anything getting in the way.
Dialing in the Pressure
Pressure is so often the forgotten element, especially when you're just starting out with a home iron. It’s not about just resting the iron on top; it's about applying firm, even pressure across the whole design.
If you're using a standard iron, you need to use your body weight to press down firmly in one spot. Hold it steady for the full recommended time before lifting it and moving to the next section, making sure to overlap slightly. Don't slide the iron around like you're getting wrinkles out of a shirt—that gliding motion just doesn't create the consistent pressure needed for the adhesive to bond.
This is where a heat press really shines. You can set the machine to a specific pressure (usually light, medium, or firm) and get the exact same result every single time. For most DTF transfers on fabrics like cotton or poly-blends, a medium to firm pressure is your best bet.
My Go-To Tip: Always, always put a Teflon sheet or a piece of parchment paper over the transfer before you press. It’s a simple step that protects your fabric from getting scorched and stops any stray adhesive from gunking up your iron or heat press.
Recommended Heat Press Settings by Fabric Type
While you should always check the instructions that came with your transfers, the settings below are a fantastic starting point for applying DTF transfers to some of the most common fabrics you'll work with.
| Fabric Type | Temperature (°F / °C) | Time (Seconds) | Pressure | Peel Type |
|---|---|---|---|---|
| 100% Cotton | 300-320°F / 150-160°C | 10-15 | Medium-Firm | Cold |
| Polyester Blends | 275-300°F / 135-150°C | 8-12 | Medium | Cold |
| 100% Polyester | 260-275°F / 125-135°C | 7-10 | Light-Medium | Cold |
| Triblends/Synthetics | 250-270°F / 120-132°C | 7-10 | Light | Cold |
This table covers the basics, but for a deeper dive into more specialized materials, our comprehensive guide is the way to go: https://raccoontransfers.com/blogs/guides/heat-press-temperature-chart
Beyond just the transfer, understanding how heat interacts with fabric is a skill in itself. Brushing up on essential fabric pressing techniques can seriously improve your results and give you that professional edge.
Ultimately, getting your heat settings right is a skill you build with practice. Start with good prep, pay close attention to the relationship between heat, time, and pressure, and use a reliable guide. Before you know it, you'll be applying any transfer with confidence.
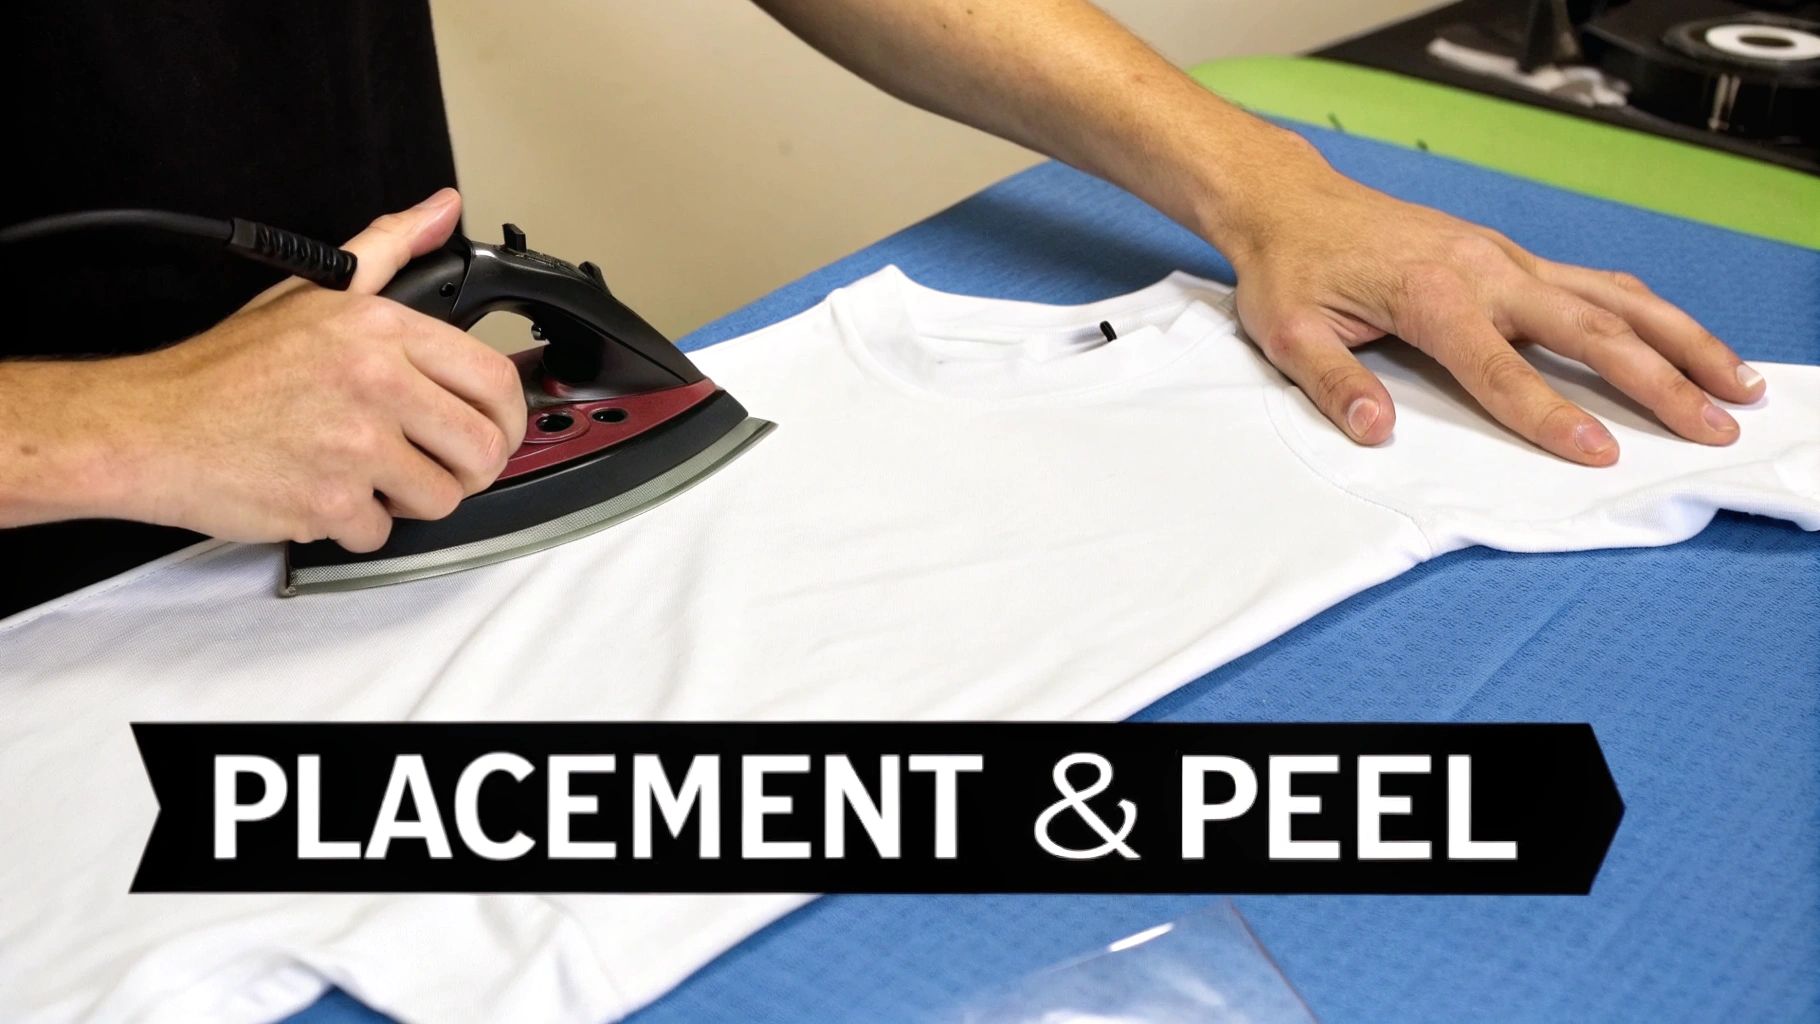
The Application Process From Placement to Peel
Now for the fun part. You’ve prepped your garment and have your heat settings dialed in—it's time to bring your design to life. It doesn't matter if you're using a standard household iron or a professional heat press; the fundamentals are the same. It all comes down to precise placement, even heat, firm pressure, and a clean peel.
We'll break down both methods, pointing out the specific techniques I've learned that lead to a flawless finish. The goal here isn't just to stick a design on top of the fabric—it's to make it a permanent part of it.
Applying Transfers with a Household Iron
Using a home iron is a great, low-cost way to get started. The trick is to compensate for its limitations by being methodical. An iron’s heat isn’t evenly distributed, so you can't just glide it around and expect good results.
First thing’s first: pre-press your garment for 5-10 seconds. This is a non-negotiable step that removes hidden moisture and any last-minute wrinkles, giving you a perfectly flat canvas to work on.
Next, position your transfer exactly where you want it. I always use a ruler to make sure everything is centered and straight. Once it's in place, cover the transfer with a sheet of parchment paper or a Teflon sheet. This protective barrier is essential for shielding both the transfer and your iron from direct heat.
Now, let's get to pressing. Set your iron to its highest setting (usually the cotton or linen setting) and make sure the steam function is completely off. Press down with firm, steady pressure—don't be afraid to use your body weight. Hold it in one spot for 15-20 seconds before lifting it straight up. Then, move to an adjacent section with a slight overlap and repeat until the entire design has been pressed.
Using a Heat Press for Professional Results
A heat press is a game-changer because it takes the guesswork out of the three most important variables: temperature, time, and pressure. This is how you get consistent, pro-level results every single time with much less effort.
Just like with an iron, start by pre-pressing the garment for about 5 seconds. This quick step gets rid of any moisture and smooths out the fabric, which is absolutely critical for a strong, lasting bond.
Carefully place your transfer onto the pre-heated garment and double-check its alignment. Cover it with a Teflon sheet, close the press, and lock it. The machine does the rest, ensuring every square inch of your design gets the exact same treatment. When the timer goes off, open the press, and you're ready for the final step.
The demand for custom apparel has sent related markets soaring. The Heat Transfer Vinyl (HTV) market, a close cousin to DTF, was valued at USD 1.36 billion back in 2026. This incredible growth is powered by DIY creators and small e-commerce brands who need durable and efficient ways to create graphics. You can find more insights on the HTV market's expansion on businessresearchinsights.com.
The Critical Moment: The Peel
The final step is removing that clear carrier film. How and when you do this is entirely dependent on the type of transfer you have, so always follow the instructions from your supplier. This is one detail you can't get wrong.
- Hot Peel: Just as it sounds, you peel the film off immediately after pressing while the design is still piping hot. Use a smooth, confident motion, typically starting at a corner and pulling diagonally.
- Cold Peel: This one requires patience. You must let the garment cool down completely to room temperature before you even think about touching the film. If you peel too soon, you'll lift the design right off the fabric.
Pro Tip: For cold peels, I like to gently wave the shirt in the air for a minute or lay it on a cool, flat surface (like a clean countertop) to speed up the process. Trust me, rushing a cold peel is a recipe for disaster. Let it cool.
Once the film is off, I always do one last thing: a final post-press. Lay your parchment paper back over the exposed design and press it again for another 5-10 seconds. This final touch helps meld the ink directly into the fabric's fibers, which dramatically improves durability and gives the design a much softer feel.
Post-Application Care to Maximize Durability
You've nailed the application, and your design looks absolutely perfect. So, what's next? The game now shifts from application to preservation. Proper aftercare is what makes the difference between a design that lasts a few washes and one that looks incredible for years.
Honestly, how you wash and dry your custom apparel is just as important as how you pressed it in the first place.
The number one rule here is simple: patience. You absolutely have to wait at least 24 hours before that first wash. I know it's tempting, but this waiting period is non-negotiable. It gives the adhesive the time it needs to fully cure and permanently bond to the fabric. Washing it too soon is the fastest way to see your hard work peel or crack.
The Right Way to Wash Your Custom Apparel
Once you’ve passed that crucial 24-hour mark, you're good to go. The secret to washing is to be gentle. Think of high heat and harsh chemicals as the enemies of your transfer.
First things first, always turn the garment inside out. It's a tiny step, but it makes a world of difference. This little trick minimizes friction and protects the design from getting scuffed up by other clothes or the inside of the washing machine.
From there, just stick to these simple rules:
- Go with Cold Water: Always use cold or, at most, cool water. Hot water is a big no-no; it can soften the adhesive and make the transfer vulnerable to peeling.
- Pick a Mild Detergent: Stay away from aggressive detergents, bleach, and heavy-duty stain removers. They can fade the vibrant colors and weaken the bond.
- Ditch the Fabric Softener: This one trips a lot of people up. Fabric softeners and dryer sheets leave behind a residue that can work its way under the edges of the transfer, causing it to lift over time.
Following these steps will keep your designs looking sharp. For a deeper dive, we've put together a complete guide with more pro tips in our proper DTF washing instructions.
Drying Your Garments for Longevity
Just like with washing, high heat is the villain when it comes to drying. The best method, hands down, is to hang dry the garment or lay it flat. It's the gentlest approach and guarantees you won't accidentally cook your transfer.
If you're in a pinch and must use a machine, be sure to use the tumble dry low setting or even the no-heat air-fluff option. High heat from a standard dryer cycle can reactivate the adhesive, which can lead to a wrinkled, peeling mess. And whatever you do, never iron directly on the design. If the garment needs ironing, turn it inside out, use a low heat setting, and carefully press around the transfer area.
A Quick Recap for Lasting Results: The formula for success is pretty straightforward. Wait 24 hours. Wash inside out in cold water with a mild detergent. Hang it up to dry. This simple routine protects the incredible scratch-resistant qualities of a good DTF transfer and keeps your custom gear looking professional for the long haul.
Troubleshooting Common Iron On Transfer Problems
Even when you follow every step to the letter, things can still go sideways.Don't get discouraged—most iron-on transfer issues are surprisingly easy to fix and offer a great chance to refine your technique. Think of this as your field guide for diagnosing and solving the most common hiccups you'll run into.
From those pesky peeling edges to a weird shiny outline, we'll break down what's actually happening and, more importantly, how to make it right. Mastering these quick fixes will give you the confidence to tackle any project that comes your way.
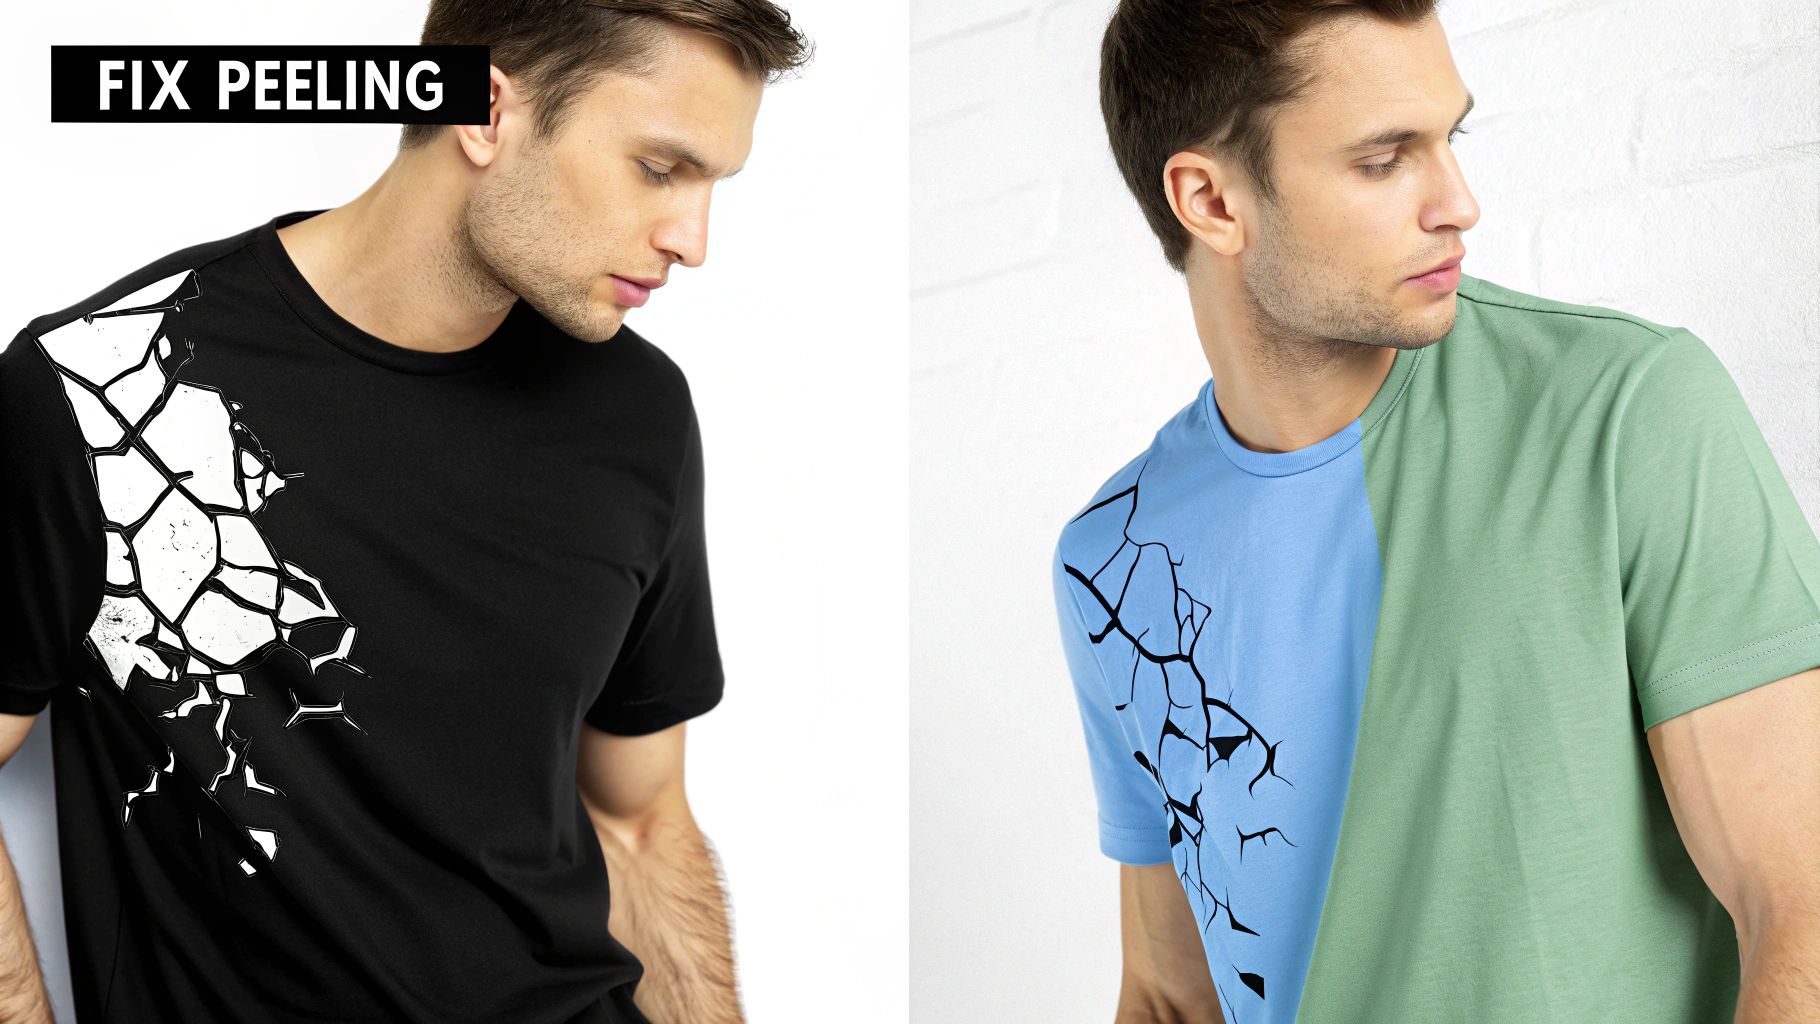
Why Are the Edges of My Transfer Peeling?
This is, without a doubt, the most common frustration I hear about. But the good news is, the cause is almost always simple. If your transfer's edges are lifting or peeling off, especially after that first wash, it’s a red flag for an issue with either heat or pressure.
When you're using a standard household iron, uneven pressure is the usual suspect. It’s nearly impossible to apply the same amount of force across the entire design, and the corners are always the first to let you know. The other major factor is insufficient heat. If your iron or press isn't hot enough, the adhesive never fully melts into the fabric fibers to create a strong bond.
Here’s how to fix it:
- Re-press the garment. Just grab a sheet of parchment paper, place it over the design, and focus your heat and firm pressure directly on the peeling spots for another 10-15 seconds.
- Check your pressing surface. You need a hard, flat, heat-resistant surface—not a wobbly ironing board. This is critical for getting enough downward force.
- Verify your temperature. Always double-check that your heat settings are correct for both your fabric type and the specific transfer you're using.
My Design Is Cracking or Fading
Seeing your design crack or fade is disheartening, but it points to a different set of problems, usually involving fabric prep, the quality of the transfer itself, or how it's being washed. A high-quality DTF transfer should stay flexible and vibrant for dozens and dozens of washes.
Did you skip the pre-wash? If so, the fabric might be shrinking underneath the design, stretching it to the breaking point. Another common cause is improper washing—using hot water, harsh detergents, or fabric softeners will absolutely degrade the transfer over time. And sometimes, it's just a matter of using low-quality transfers that don't have the durability for regular wear and tear.
Key Insight: The quality of your materials is everything. High-quality transfers can achieve 98% reliability after 40 washes. For comparison, other print methods often hit only 75%. That's a massive difference, especially for a small apparel brand.
What Is This Shiny Box Around My Design?
Ever peel back the carrier sheet and find a faint, shiny outline framing your transfer? This "shiny box" effect is a dead giveaway for one thing: too much heat.
When the temperature is set too high for the material, it can slightly scorch or singe the fabric fibers. This changes their texture and creates that tell-tale glossy look, which is especially noticeable on polyester and dark-colored cotton garments.
While you can't completely remove the sheen once it's there, washing the garment inside out a few times can help soften the effect. The best solution, of course, is prevention. Always start at the lower end of the recommended temperature range and do a small test press on a hidden area if you’re unsure.
Ultimately, transfer quality is the foundation of long-term success. The Heat Transfer Paper market is projected to hit USD 696.3 million by 2033, a growth driven by the demand for durable, professional-grade products. Choosing a supplier that provides clear, detailed instructions can dramatically reduce application errors and boost the longevity of your creations. You can dive deeper into the heat transfer market trends at market.us. By understanding these common pitfalls, you can perfect your process and ensure every project comes out looking fantastic.
Frequently Asked Questions
Even with the best guide, questions always come up when you're in the middle of a project. I've been there. Let's walk through some of the most common hurdles people face so you can get your application technique dialed in and avoid frustration.
Can I Use a Regular Iron Instead of a Heat Press?
Absolutely. A household iron is a great way to start, especially for one-off projects or if you're just testing the waters. It's totally doable, you just have to work around its limitations.
The trick is all about managing heat and pressure. First, make sure the steam function is completely off and the iron is bone-dry. Crank it up to the highest setting, usually cotton or linen.
Instead of gliding the iron around like you’re getting wrinkles out, you need to press. Plant the iron on one section of the transfer and apply firm, even body weight for about 15-20 seconds. Then, lift it straight up and move to the next spot, overlapping just a little bit. This mimics what a heat press does, ensuring every part of the design gets enough focused heat. A press is always better for consistency if you're doing a batch, but you can get fantastic, lasting results with an iron if you’re patient.
Why Are My Transfers Peeling Off After Washing?
This is, without a doubt, the most common frustration I hear about. When a transfer starts peeling, it’s almost always for one of three reasons: not enough heat, not enough pressure, or washing it too soon. If the edges are lifting, it's a dead giveaway the adhesive never fully melted into the fabric.
First, go back and double-check the recommended temperature for your specific transfer and fabric type. Were you in the right ballpark? Next, be honest with yourself about the pressure. Did you really lean into it, or was it a bit of a half-hearted push? And finally, the most critical step: you must wait at least 24-48 hours before that first wash. That curing time is non-negotiable; it’s when the adhesive truly bonds to the fibers.
Pro Tip: How to Save a Peeling Design
Don't toss that shirt! You can usually fix this. Just put it back on your press (or ironing board), cover the transfer with parchment paper, and press it again for another 10-15 seconds. Really focus on those peeling areas. This little re-bake is often enough to reactivate the adhesive and lock it down for good.
What Is the Difference Between Hot Peel and Cold Peel Transfers?
This is a big one, and getting it wrong is a surefire way to ruin a perfectly good print. "Hot peel" and "cold peel" are instructions that tell you when to remove the clear plastic film after you've pressed the design.
- Hot Peel: Just like it sounds. You peel the film off immediately, right after you open the press while everything is still piping hot. This is typically a quick, smooth motion. Hot peel transfers often leave behind a softer, more matte finish that feels really integrated into the shirt.
- Cold Peel: This means you have to wait. Let the garment and transfer cool down completely to room temperature before you even think about touching that film. Peeling it while it's still warm will likely pull up the design with it. Cold peel transfers tend to have a slightly glossier, smoother surface.
Always, always check the instructions from your transfer supplier. They know their product best. Mixing up the peel type is an easy mistake to make but also an easy one to avoid.
Ready to skip the weeding and layering and get straight to creating professional-grade custom apparel? At Raccoon Transfers, we specialize in vibrant, durable DTF transfers that make application a breeze. Upload your art, build a gang sheet, and get your prints shipped next-day. Create your custom DTF transfers today!