
A Crafter's Guide to Print on Iron On Transfer Paper
So, you've got a killer design on your computer and want to see it on a t-shirt. How do you make that happen? The good news is, it's probably easier than you think. You can actually print on iron on transfer paper with the same inkjet printer you use for documents. This method is a total game-changer for crafters and small brands dipping their toes into custom apparel without dropping a ton of cash.
Bringing Your Digital Designs to Life on Fabric
The idea of making custom clothes can feel a little intimidating, but iron-on transfer paper really lowers the barrier to entry. It's a straightforward way to pull your digital art off the screen and turn it into something you can actually wear. Because the startup costs are so low, it’s the perfect jumping-off point for anyone curious about customizing fabrics.
Think of this guide as your complete roadmap. We’ll walk through everything from picking the right paper and dialing in your printer settings to pressing the design for a bold, durable finish. This hands-on method is perfect for:
- Hobbyists who want to make one-of-a-kind gifts or personal projects.
- Small Brands looking to test out new merch ideas without a big financial commitment.
- DIY Enthusiasts ready to dive into a fun and rewarding new craft.
At its core, the process is pretty simple: you print your design onto a specially coated paper, and then use heat to bond the ink and an adhesive layer to your garment. It’s an incredibly effective technique for one-off designs, personalized gifts, or small-batch runs where other printing methods just aren't practical.
Consider this your gateway into the world of custom apparel. You can genuinely go from an idea to a finished shirt in a single afternoon with just your printer and a household iron.
As you get more comfortable, you’ll naturally start looking for what’s next. We'll also touch on a more professional alternative: Direct-to-Film (DTF) transfers. Knowing the whole landscape—from a basic iron-on to high-quality DTF prints from a service like Raccoon Transfers—gives you a clear path forward. Whether you’re just making one shirt for fun or laying the groundwork for a new clothing line, it all starts right here.
Gathering Your Supplies for a Flawless Print
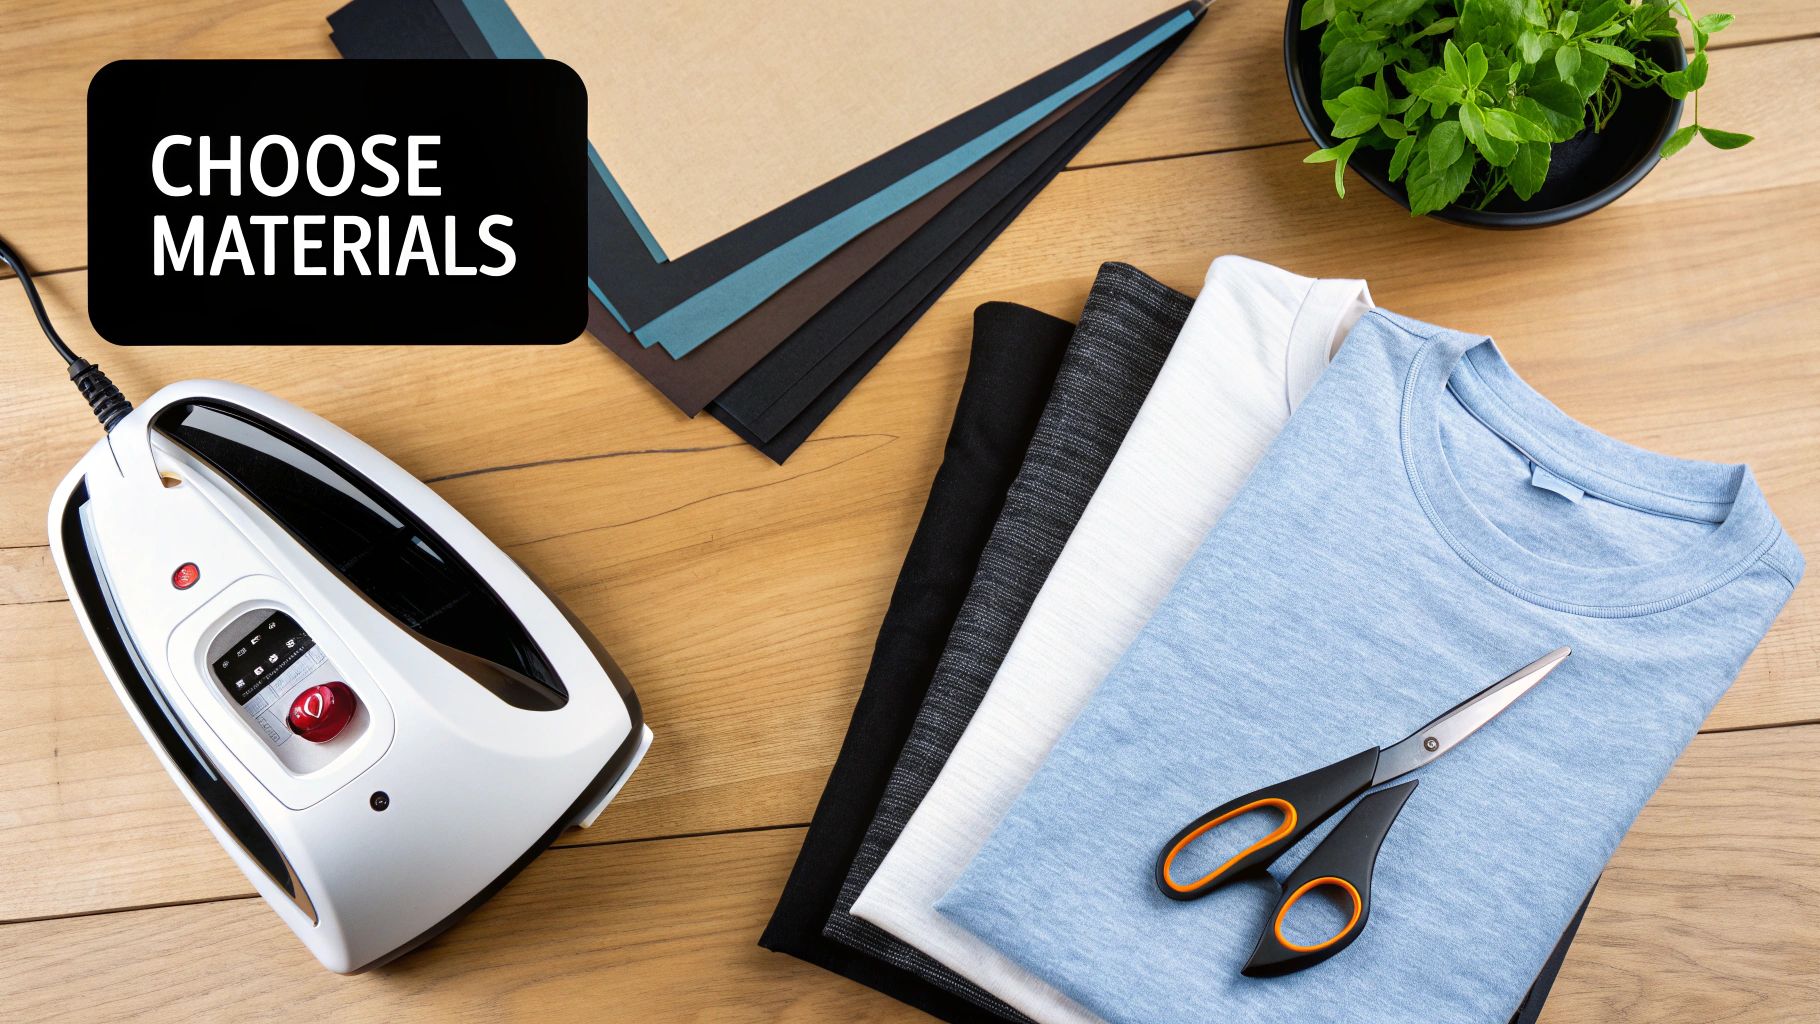
Before you even think about hitting "print," let's talk prep. The secret to a project you’ll be proud of isn't just in the final press—it starts with getting the right tools lined up. The quality of your materials directly impacts how vibrant and durable your creation will be.
The single most important choice you'll make is the iron-on transfer paper itself. This isn't a one-size-fits-all situation; the right paper is determined entirely by the color of the fabric you're using.
Light vs. Dark Fabric Paper
For white, cream, or pastel-colored shirts, you need paper specifically for light fabrics. This type has a transparent background. Any white areas in your design file won't print with ink; instead, the white of the shirt will show through. It’s a clean, seamless look.
On the other hand, if you're working with black, navy, or any deeply colored material, you must use paper for dark fabrics. This paper has a solid, opaque white background. This white layer acts as a primer, ensuring your colors show up bright and true instead of getting lost in the dark fabric.
To get into the nitty-gritty, you can explore our full guide on the best paper for heat transfer.
Here’s a quick breakdown to help you decide at a glance:
Choosing the Right Transfer Paper for Your Project
| Feature | Paper for Light Fabrics | Paper for Dark Fabrics |
|---|---|---|
| Background | Transparent polymer film | Opaque white film |
| Best For | White, pastels, light-colored fabrics | Black, navy, vibrant, and dark fabrics |
| "White" Areas | The shirt color shows through | A white background is printed |
| Feel | Softer, more blended into the fabric | Thicker, sits more on top of the fabric |
Ultimately, using the correct paper is non-negotiable for getting the result you want.
Your Printer and Inks
When you print on iron on transfer paper, your best friend is a standard inkjet printer. Most home models work just fine for this, but the ink inside can make a difference in how long your design lasts.
- Dye-based inks are super common and deliver great, punchy colors. The trade-off is that they can fade a bit faster with repeated washing.
- Pigment-based inks are the gold standard for durability. They’re naturally more resistant to water and UV light, which means your design will hold up much better over time.
A quick tip from experience: Before you waste a sheet of that pricey transfer paper, always run a nozzle check from your printer's maintenance menu. A single clogged nozzle can leave ugly streaks and ruin your entire print.
Your Heat Source: Iron vs. Heat Press
Now, how are you going to get that design onto the fabric? You’ve got two main choices.
A household iron is the most accessible option and it can definitely get the job done. The challenge here is consistency. It's tough to maintain even heat and pressure, which can lead to peeling corners or faded spots. You'll need to apply some serious elbow grease and keep the iron moving.
For anyone serious about this craft, a heat press is a game-changer. It delivers perfectly even temperature and pressure across the whole design, creating a bond that’s built to last. Even a small, budget-friendly press will give you more professional and reliable results than an iron ever could.
As you collect your gear, don't overlook organization. Using effective crafts storage solutions will keep your paper flat, dry, and clean, preventing frustration and wasted materials down the road.
Getting Your Artwork Ready to Print
A great-looking custom shirt doesn't start at the heat press. It starts on your computer with a well-prepared digital file. If you nail this part, you’re setting yourself up for vibrant colors and sharp details. The best transfer paper in the world can't save a design that wasn't printed correctly.
The Golden Rule: Mirror Your Image
For light-colored fabrics, there's one step you absolutely cannot forget: mirroring your image.
Think of it just like a temporary tattoo. The design is applied face-down onto the fabric, so the print needs to be a perfect horizontal flip of how you want it to look. If you skip this, all your text will be backward. It's a classic rookie mistake, and an easy one to avoid.
Most design programs have a simple "mirror image" or "flip horizontal" option. You’ll often find a "t-shirt transfer" setting in your printer's own software, which does the same thing. Just remember, you only do this for light fabric paper. Dark fabric paper is a different animal—it's applied face-up, so you print the design exactly as it should appear.
Fine-Tuning Your Printer Settings
Once your artwork is ready to go, don't just hit "Print" and hope for the best. Taking a moment to dive into your printer’s settings can make a huge difference in the final quality.
Look for these options in the print dialog box:
- Paper or Media Type: Don't leave this on "Plain Paper." Instead, choose a setting like "T-Shirt Transfer," "Photo Paper Glossy," or "Matte Photo Paper." This tells your printer to use more ink, which is key for getting those deep, saturated colors that pop.
- Print Quality: Crank it all the way up. Whether it's called "High," "Best," or "Photo," this setting slows down the printing process to lay down ink more precisely, ensuring you get every last bit of detail.
My Go-To Tip: I never print on my expensive transfer paper first. I always run a quick test on a regular sheet of copy paper to check colors and, most importantly, to double-check that I remembered to mirror the design. It's a simple step that has saved me a lot of frustration and wasted materials.
For a deeper dive, our guide on how to print on transfer paper covers even more detail.
A Quick Check to Prevent a Big Mess
Before you load that precious sheet of transfer paper, do a little bit of printer maintenance. It's worth it, I promise.
Run a nozzle check from your printer’s utility software. This prints a quick test pattern that shows you if any of your ink nozzles are clogged. A single clogged nozzle can leave ugly white lines, known as "banding," straight through your design, ruining the entire print.
If the test pattern has gaps, just run a head cleaning cycle and try again. Taking five minutes for this check is one of the smartest things you can do to guarantee a perfect print every time.
The demand for custom gear is exploding. People want unique items, and that’s fueling a huge market. The textile transfer paper market alone was valued at USD 1.2 billion and is projected to more than double to USD 2.5 billion by 2033. This growth just goes to show how popular accessible customization methods like iron-on transfers have become. You can learn more about the expanding textile transfer market to see where things are headed.
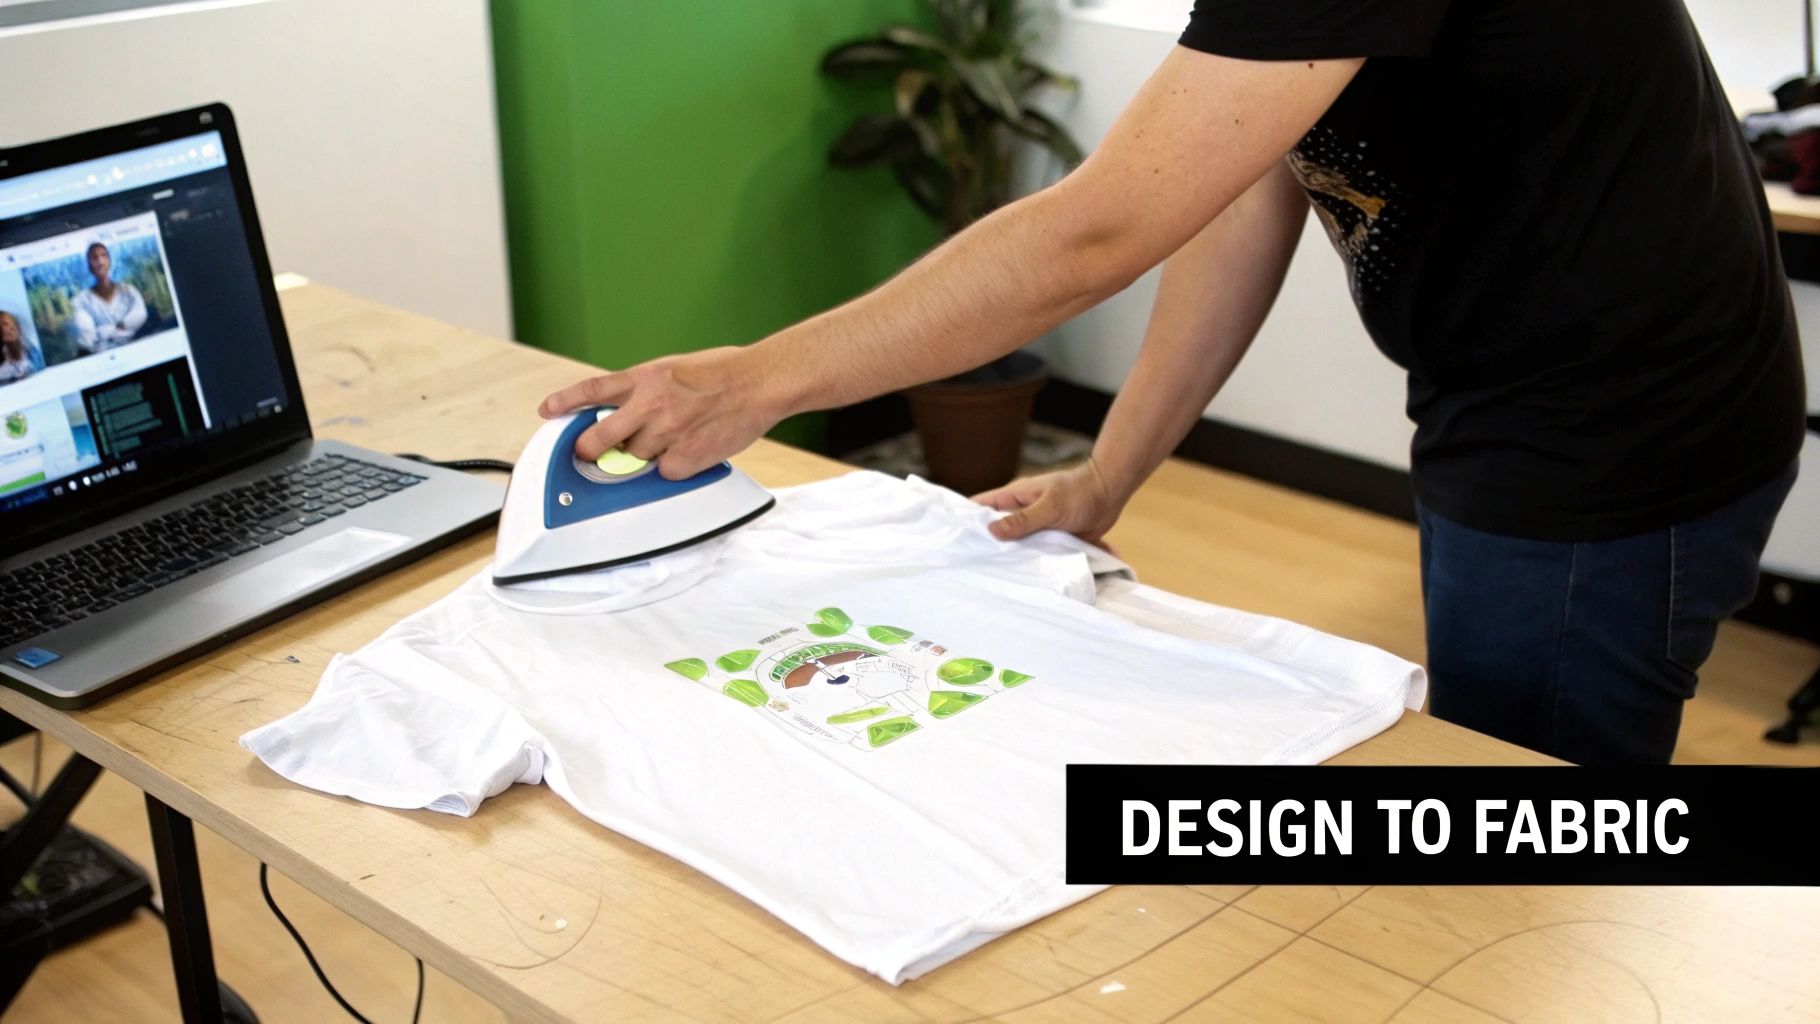
Bringing Your Design to Life with Heat
Alright, this is the moment of truth. All that prep work comes down to this final step: permanently bonding your design to the fabric. Success here boils down to a simple, yet critical, formula: the perfect balance of heat, pressure, and time. Nail this trifecta, and you’ll have a print that looks fantastic and holds up in the wash.
You can definitely get the job done with a standard household iron, but a heat press will give you more professional, consistent results. Let's break down both methods.
The Household Iron Method
Starting out with an iron is how most of us get our feet wet. It’s totally doable, but it requires a bit more effort and attention to detail. First things first: get rid of your ironing board. It’s soft and designed to dissipate heat, which is the last thing you want.
You need a solid, heat-resistant surface to work on. A sturdy wooden cutting board, a spare piece of countertop, or even a solid floor (protected with a Teflon sheet or parchment paper) will work great. This solid base ensures the pressure you apply goes directly into the transfer.
Here’s how to get a good press with an iron:
- Crank Up the Heat: Set your iron to its highest setting (usually "Cotton") and, most importantly, turn the steam off. Steam is just water, and it will absolutely ruin the adhesive.
- Use Your Body Weight: Don't be shy here. You need to apply firm, consistent pressure across the entire design. I mean really lean into it. The goal is to physically push the ink and adhesive into the fibers of the shirt.
- Stay in Motion: Don't let the iron rest in one spot. Use slow, overlapping motions—either back-and-forth or in circles—to cover the whole transfer. Pay special attention to the edges. Most paper manufacturers recommend doing this for 60-90 seconds.
From my experience, the biggest mistake people make is not applying enough pressure. That’s why you see corners peeling up after the first wash. It's a workout, but it’s worth it.
Getting Pro-Level Results with a Heat Press
If you find yourself making shirts regularly, investing in a heat press is a game-changer. It takes all the guesswork out of the equation. You get precise temperature control and perfectly even pressure every single time, which means more durable, longer-lasting prints.
For a standard cotton or cotton-poly blend shirt, a great starting point is 350-375°F (175-190°C) for about 15-20 seconds. But remember, this is just a guideline. Always, always follow the specific instructions that came with your transfer paper. Different brands have slightly different needs.
My Go-To Tip: Before you place your transfer, always pre-press the garment for 5-10 seconds. This zaps any hidden moisture and smooths out wrinkles, giving you a perfect canvas for the design.
The Big Reveal: The Peel
Once the heat has been applied, it's time to peel away the backing paper. This is a make-or-break moment, and it all depends on the type of paper you're using.
- Hot Peel: Just like it sounds, you peel the backing off immediately, while the shirt is still piping hot. This usually leaves the design with a softer, more flexible feel that's integrated into the fabric.
- Cold Peel: With this type, you have to exercise some patience. Let the garment cool down completely to room temperature before you even think about touching the backing. Peeling it warm will likely lift the design or leave you with a cracked, ugly mess.
You absolutely have to follow the manufacturer's instructions on this one. Getting the peel wrong can ruin an otherwise perfect print in a split second. As more people get into custom apparel, the demand for better materials is booming. In fact, the automatic transfer paper market is projected to jump from USD 167.12 million to USD 265.93 million by 2032. You can learn more by checking out these insights on the automatic transfer paper market. This growth just goes to show how important it is to use quality materials and follow the right process to get a great result.
Time to Go Pro? When to Upgrade From DIY to Professional DTF Transfers
While you can get some surprisingly great results with iron-on transfer paper, you might eventually hit a ceiling. It’s a great problem to have, honestly. It means your creative ambitions are growing, and you're ready to look at options that deliver professional-grade quality, durability, and efficiency—especially if you're scaling up from a hobby to a small business.
This is where Direct-to-Film (DTF) transfers come into play. Think of DTF as the natural next step up from your home setup. Instead of printing onto paper and ironing it on, the DTF process involves printing your design with specialized inks onto a clear film. That film is then heat-pressed onto the garment, and the difference this makes in the final product is night and day.
Durability and Feel: The Pro-Level Difference
One of the first things you’ll bump up against with standard iron-on paper is its lifespan. After a handful of trips through the washing machine, designs can start to crack, fade, or peel away at the edges. DTF transfers, on the other hand, are built for the long haul. The ink literally bonds with the fabric fibers, creating a print that can handle dozens of washes without breaking a sweat.
The feel of the design—what we call the "hand"—is another massive upgrade. Iron-on transfers, especially the opaque kind for dark fabrics, can feel like a thick, plasticky layer sitting on top of the shirt. DTF prints are incredibly soft and flexible. They stretch right along with the fabric, which makes them way more comfortable to wear and gives the whole garment a premium, retail-quality feel.
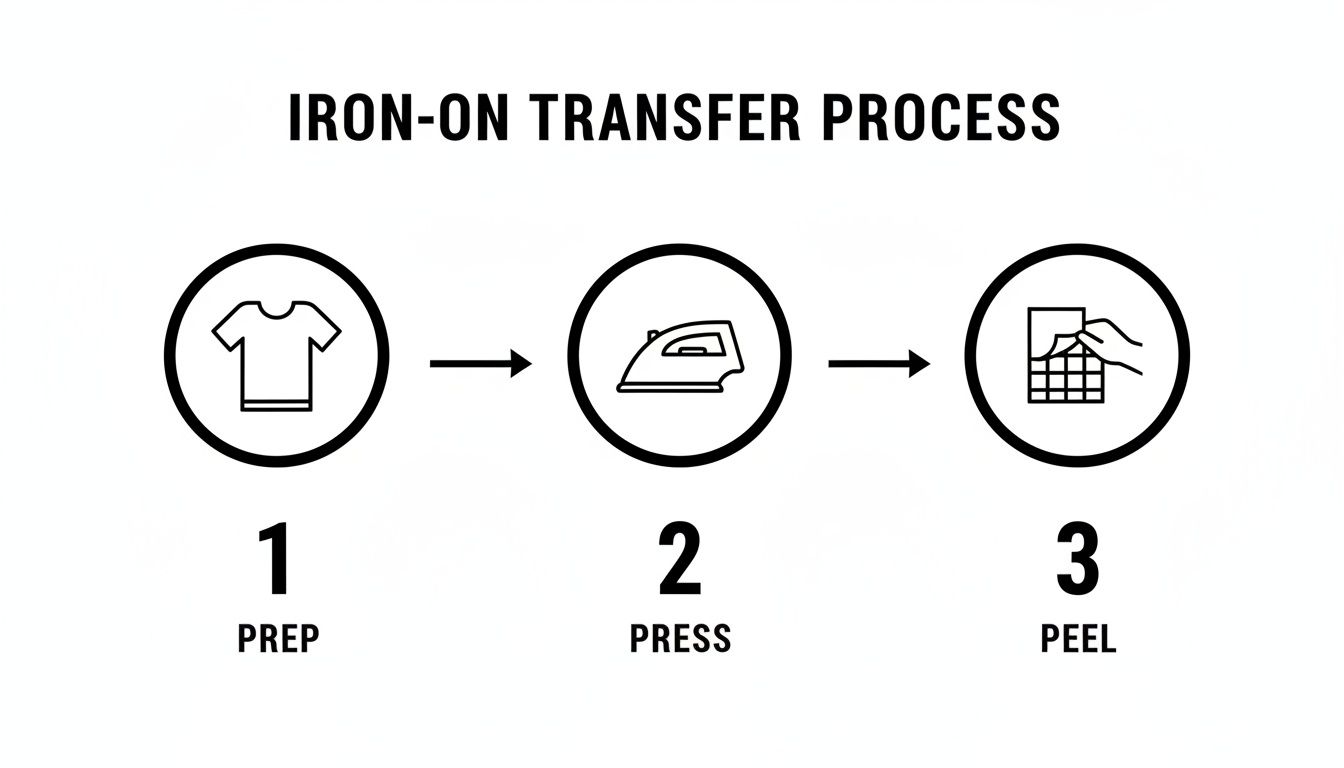
The classic iron-on method is simple: prep, press, and peel.
This process is perfect for one-off projects or gifts, but once you start thinking in terms of dozens of shirts, it quickly becomes a serious production bottleneck.
Color Vibrancy and "Any-Fabric" Freedom
Here’s where DTF really shines: its color capability. Iron-on paper for dark fabrics needs that white, opaque background to make colors show up. DTF technology takes a smarter approach by printing a layer of brilliant white ink behind your colors. What does that mean for you? You can get stunning, full-color designs with gradients and super-fine details on any color garment, from jet black to hot pink, without losing a bit of vibrancy.
Using a service like Raccoon Transfers lets you tap into this professional tech without dropping thousands on new equipment. You can just order your complex, multi-color designs as ready-to-press transfers and apply them with the heat press you already have. It's an instant quality boost for your products.
The demand for high-quality custom merch isn't slowing down. In fact, the global transfer paper market recently hit a USD 2.13 billion valuation, which is a huge signal of the opportunity out there. If you're curious, you can get more insights on the booming transfer paper market to see where things are headed.
And for a more technical deep-dive, check out our guide on DTF vs. DTG printing methods to really understand how the professional techniques compare.
Got Questions About Iron-On Transfer Paper? Let's Talk.
If you're just getting started with making your own custom shirts, you've probably got a few questions. That's a good thing! Getting these details sorted out upfront is the key to avoiding a project flop and actually creating something you're proud to wear. Let's walk through some of the things people ask me all the time.
Can I Use My Regular Home Printer?
This is easily the most common question, and the answer is yes, you absolutely can. But there's one huge catch: it must be an inkjet printer.
Do not, under any circumstances, try to run transfer paper through a laser printer. Laser printers work by using heat to bond toner to the page. That same heat will melt the special coating on the transfer sheet, leaving you with a gooey, melted plastic disaster inside your machine. Seriously, just stick with an inkjet.
How Long Will My Custom Shirt Actually Last?
Everyone wants to know if their hard work will survive the laundry. The lifespan of your iron-on design really boils down to three things: the quality of the transfer paper you bought, the type of ink your printer uses (pigment ink lasts longer than dye-based), and how well you pressed the design onto the fabric.
When you nail the application process and use good materials, you can expect the design to hold up for 20-30 washes before you start seeing any serious fading or cracking.
What Went Wrong? Fixing Common Transfer Problems
Even when you follow the steps, sometimes things just don't turn out right. Don't worry, it happens to everyone. Here are the two most frequent issues and how to fix them.
-
My design is cracking or peeling after just one wash! This is almost always a heat and pressure problem. If you used a home iron, it's very likely you didn't press down hard enough or evenly enough across the entire design. With a heat press, this usually means your temperature was too low or you didn't give it enough time.
-
The colors on the shirt look dull and faded. This one is usually an easy fix related to your printer settings. If you just hit "print" using the default "Plain Paper" setting, the printer didn't lay down enough ink. To get those rich, vibrant colors, you need to tell your printer you're using special paper. Look for settings like "Photo Quality," "Glossy Paper," or even a specific "T-Shirt Transfer" option.
If you remember only one thing, make it this: read the instructions that came with your specific brand of transfer paper. Every paper is a little different—they require unique temperatures, press times, and peeling instructions (hot peel vs. cold peel). Following their guide is the single best thing you can do to get a great result.
Tired of the DIY hustle and want results that look and feel professional from day one? At Raccoon Transfers, we make premium Direct-to-Film (DTF) transfers. They're way more durable, feel softer on the shirt, and the colors are incredibly vibrant on any type of fabric. Explore our ready-to-press transfers today!