
Screen Print Transfer A Complete Guide for Creators
Ever wondered how you can get that classic, professional screen-printed look on a t-shirt without all the messy ink and expensive equipment? The answer is a screen print transfer. It’s the perfect blend of old-school quality and modern-day convenience.
You get the durable, high-quality finish of real plastisol ink with the simple, quick application of an iron-on design. All you need is a heat press to create stunning, retail-ready apparel.
What Exactly Is a Screen Print Transfer
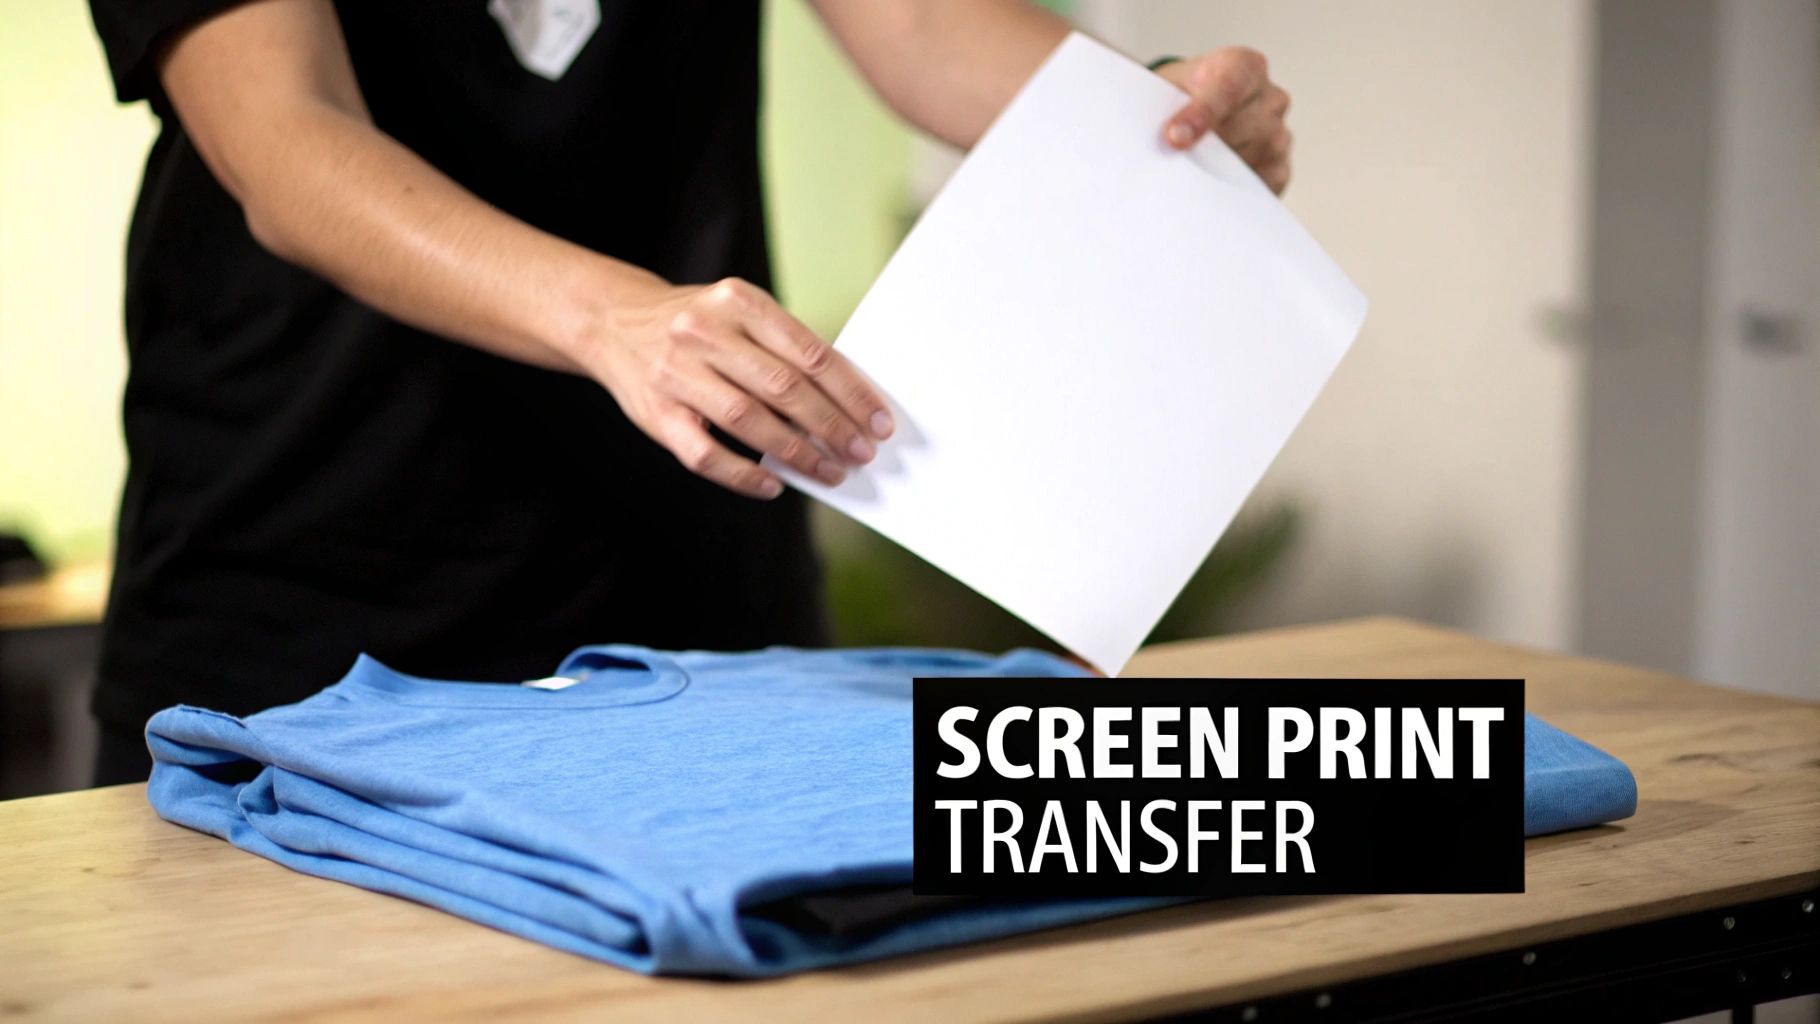
Picture this: you get that authentic, slightly-raised texture of a screen-printed shirt, but you never have to touch a squeegee, screen, or a single drop of ink. That's the magic of a screen print transfer.
Think of it as a professional-grade, ready-to-go design. A manufacturer like us screen prints your artwork with genuine plastisol ink onto a special release paper. All the technical, messy work is done for you.
What you get is a sheet with your design on it, ready to be heat-pressed onto a garment in just a few seconds. This clever approach has become a go-to for small businesses, Etsy shop owners, and up-and-coming apparel brands who want top-tier results without the hassle.
The Best of Both Worlds
This method really is a game-changer. You get the quality and durability that customers expect from traditional screen printing, but you get to skip the massive investment in equipment, space, and the steep learning curve that comes with it.
It opens the door to a "print-on-demand" style workflow. You can stock up on your most popular designs and press them onto different shirts, hoodies, or totes as the orders roll in. This kind of flexibility is huge for managing inventory and jumping on new trends fast.
It's clear that transfer-based printing is a big part of the future. The custom t-shirt printing market in the U.S. is expected to jump from $8.17 billion in 2024 to $13.55 billion by 2029. This boom is all about the shift toward more customized, small-batch production where speed and quality are everything.
A screen print transfer empowers you to produce authentic screen-printed apparel with just one tool: a heat press. It separates the messy ink work from the final application, giving you ultimate control over your inventory and production schedule.
Setting a Clear Foundation
To really get what makes screen print transfers special, it helps to know about the other players in the game. Most people have heard of iron-on clothing decals, also known as heat transfer vinyl (HTV), where you cut designs out of colored vinyl sheets.
While both use a heat press, that's where the similarities end. Screen print transfers use liquid ink, which results in a much softer design that feels like part of the fabric, not a plastic sticker sitting on top. For a deeper dive, check out our guide on https://raccoontransfers.com/blogs/guides/what-is-heat-transfer-printing.
This guide is designed to be your complete resource. We'll walk you through everything you need to know, including:
- How these transfers are actually made, from ink to paper.
- The real-world pros and cons for your business.
- Head-to-head comparisons with other methods like DTF, HTV, and DTG.
- A step-by-step guide to getting a perfect press every time.
The Two-Part Process of Making Transfers
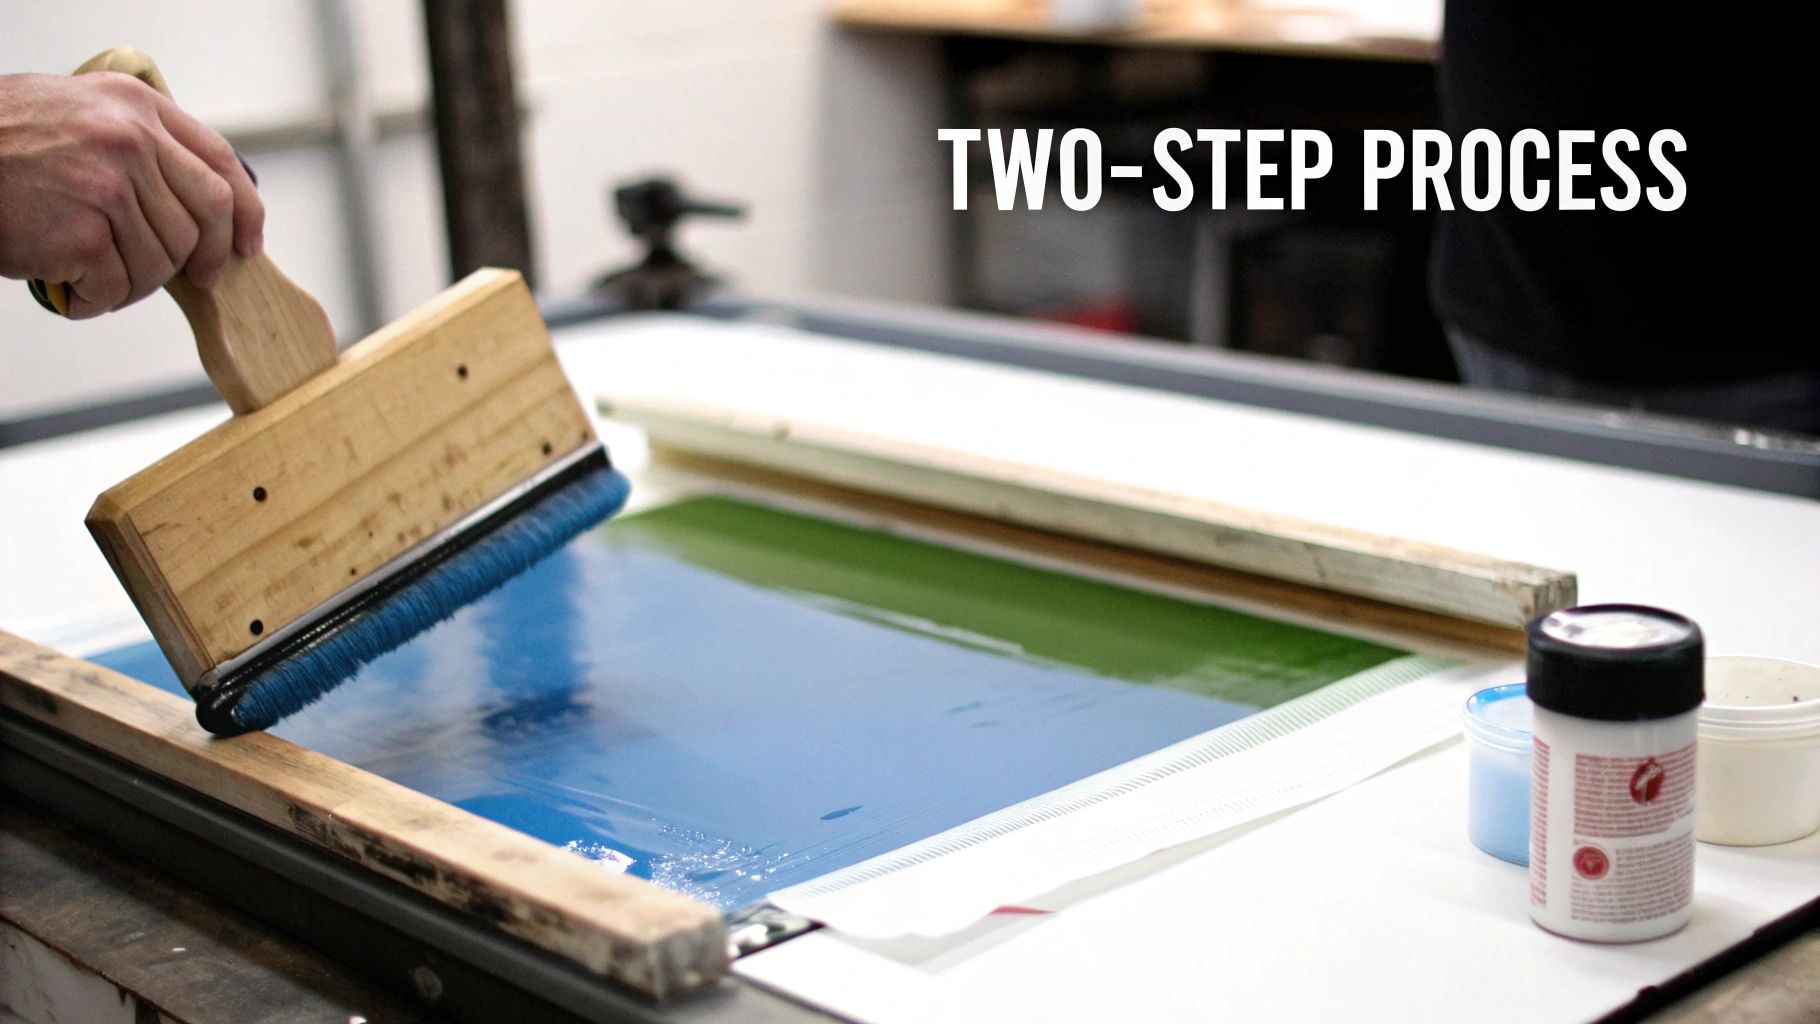
What makes a screen print transfer so clever is how it splits the traditional screen printing workflow into two manageable parts. This separation is the key to its power, taking the most difficult, messy steps out of your hands and leaving you with the quick and easy final application.
It's a bit like a relay race. The transfer manufacturer does the heavy lifting on the first leg, then passes the baton to you for the final sprint across the finish line. Let's break down that journey.
Phase One: Creating the Transfer
This is where the real screen printing happens, and it’s all handled by pros like us. The process starts exactly like it would in a traditional print shop: your design is burned onto a mesh screen, creating a perfect stencil.
Next, genuine plastisol ink—the very same durable, professional-grade ink—is pushed through that screen with a squeegee. But here's the twist: instead of going directly onto a garment, the ink is printed onto a sheet of special release paper. This paper is engineered to hold the ink just right, ready to let go when heat is applied.
The real magic happens next. While the ink is still wet, a fine, powdered adhesive is sprinkled over the entire design. This adhesive is the crucial link that will later permanently fuse the ink to the fabric fibers of your apparel.
After the adhesive is applied, the transfer sheets are sent through a conveyor dryer. This cures the ink just enough to stabilize it and lock the adhesive in place, resulting in a finished, shelf-stable transfer that’s ready to press whenever you are.
Phase Two: Applying the Transfer
This is your part, and honestly, it couldn't be simpler. All the expensive, complicated, and ink-stained work is already done. You don't need a darkroom, emulsions, washout booths, or any of the typical screen printing gear.
All you have to do is apply the finished transfer to your item. Here's what that looks like:
- Prep Your Press: Fire up your heat press and set it to the temperature and pressure recommended by the supplier.
- Position the Design: Lay your garment flat on the press, place the transfer exactly where you want it, and you're ready to go.
- Press It: Close the press. The heat and pressure activate that special adhesive from Phase One, creating a permanent bond. This step is incredibly fast, usually taking only 4 to 10 seconds.
- Peel and Reveal: Once the time is up, you simply peel away the release paper. The ink design is left behind, permanently fused to the shirt with a crisp, clean finish that feels just like a direct screen print.
By splitting the process this way, the screen print transfer gives you the best of both worlds. You get the unbeatable quality and durability of authentic screen printing, but with an application process that is fast, clean, and incredibly straightforward. You get to focus on your designs and your business, not the messy production work.
Understanding The Pros And Cons
Every decoration method has its trade-offs, and screen print transfers are no different. Getting a clear picture of where they shine and where they fall short is the key to deciding if they’re the right fit for your project. This honest look helps you avoid expensive missteps and ensures your finished products are exactly what you had in mind.
Let's break down the good, the bad, and where this method really makes sense for a growing apparel business.
The Advantages Of Screen Print Transfers
The number one reason people love screen print transfers is that you get the authentic quality of traditional screen printing without the mess and hassle. These transfers use real plastisol ink, giving your designs that classic, slightly raised feel and incredible durability customers expect. When you press them right, these prints will easily outlast the shirt itself.
This method is also a fantastic money-saver on larger runs. Most of the cost is tied up in creating the initial screens, so as your order quantity goes up, the price for each transfer plummets. This makes it a no-brainer for orders of 25 or more pieces with the same design—perfect for sports teams, company events, or a hot-selling design in your online store.
But perhaps the biggest win is the power to print on demand. You can order a big batch of your best designs and keep them on hand. When a customer orders a specific size or shirt color, you just grab a transfer, press it for a few seconds, and you’re done.
This workflow is a game-changer for inventory management. It eliminates the risk of being stuck with unsold, pre-printed apparel and gives you the agility to respond to customer demand instantly.
The Limitations To Consider
As great as they are, screen print transfers aren't the perfect tool for every single job. Their most significant limitation is the color count. Every color in your artwork needs its own screen, and each screen adds to the setup cost. For designs with four or more colors or photorealistic images, the price can climb quickly, making other methods more practical.
Because of this, screen print transfers are not ideal for one-off prints or tiny batches. That initial setup fee makes printing just one or two items far too expensive. This method is built for volume, where you can spread those upfront costs over dozens of transfers.
Finally, it's worth noting the power of the core technology. The global industrial screen printing market was valued at $1.6 billion in 2024 and is projected to hit $5.2 billion by 2033. Much of that growth comes from the electronics industry, where screen printing is used to make things like circuit boards. You can find more insights about industrial screen printing applications on custommarketinsights.com.
For apparel decorators, the message is clear: the technology is solid and proven, but it has its limits. It’s the champion for limited-color designs in bulk but isn't the right choice for full-color photos or individual custom orders. This is where newer options like DTF really start to show their flexibility.
Pros And Cons Of Screen Print Transfers
To make it even simpler, here's a quick side-by-side look at the key advantages and disadvantages of using screen print transfers.
| Advantages | Disadvantages |
|---|---|
| Authentic screen print quality & feel | Limited color counts can be costly |
| Highly durable and long-lasting prints | Not cost-effective for single or small orders |
| Very affordable for larger quantities | Setup fees for each color/design |
| Enables print-on-demand workflow | Less suitable for photorealistic images |
| Fast application with a heat press | Requires a heat press for application |
Ultimately, understanding this balance helps you choose the right tool for the job. Screen print transfers are a workhorse for many businesses, but knowing their sweet spot is crucial for success.
How Do Screen Print Transfers Stack Up Against Modern Methods?
Picking the right way to decorate a garment can feel like a minefield. You've got so many options, from the old-school classics to slick new digital techniques. It's tough to know which one is right for your project. Screen print transfers are a seriously powerful tool in any decorator's arsenal, but you only really see their value when you put them side-by-side with the competition.
Let's break down how screen print transfers compare to the other big players: Direct-to-Film (DTF), Heat Transfer Vinyl (HTV), and Direct-to-Garment (DTG). We’ll get into the nitty-gritty of what really matters—the feel, color options, durability, and cost—so you can confidently choose the perfect method for any job.
If you're just starting, this little decision tree can point you in the right direction based on how many shirts you're making and how many colors are in your design.
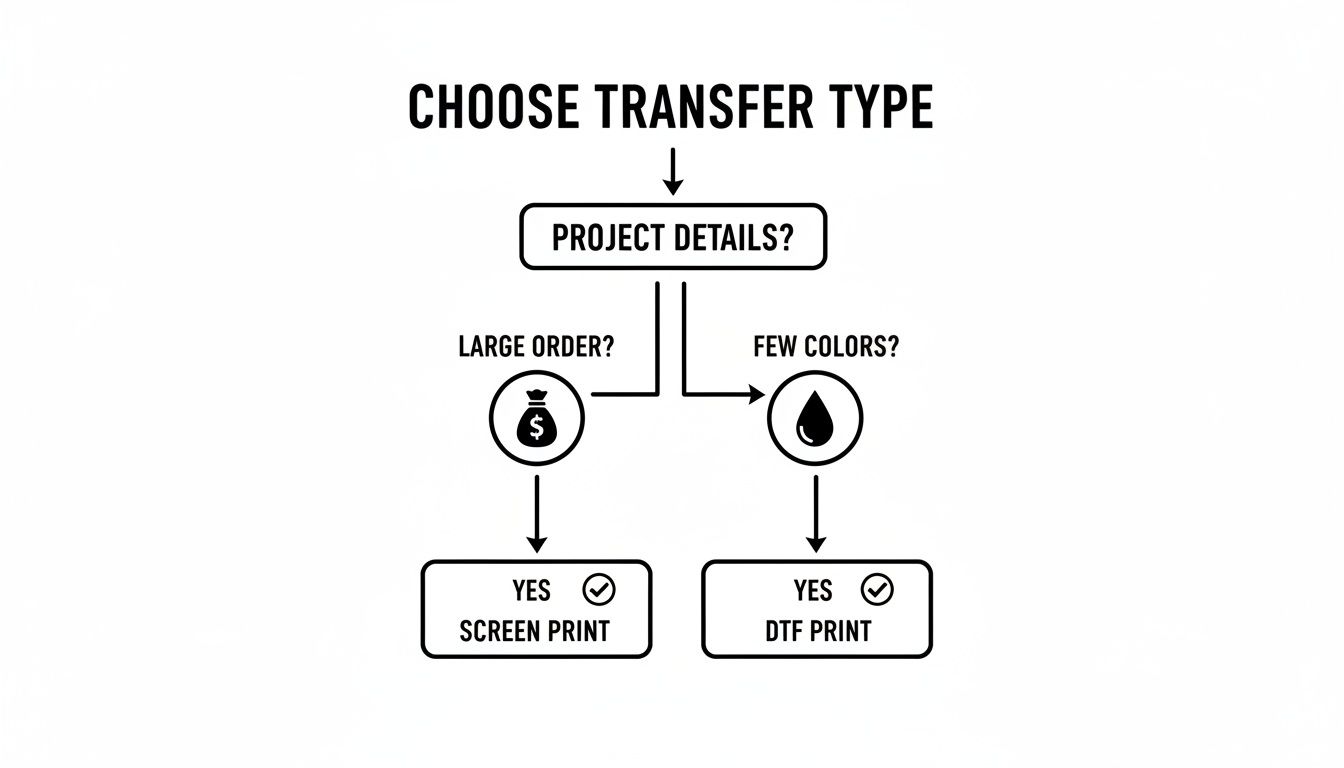
As you can see, for bigger jobs with just a handful of colors, screen print transfers are almost always the smartest and most affordable way to go.
Screen Print Transfer vs. Direct-to-Film (DTF)
Direct-to-Film (or DTF) has taken the apparel world by storm, and for good reason. It’s incredibly flexible and solves the biggest headache that comes with traditional screen printing: color limitations.
With DTF, a special printer lays down water-based inks onto a clear film. A powdered adhesive gets sprinkled on and melted, creating a ready-to-press transfer that can handle pretty much any fabric you throw at it. The killer feature here is unlimited color. DTF can handle photos, complex gradients, and designs with a million colors without any extra setup fees.
Screen print transfers, on the other hand, need a separate screen for every single color. That gets real expensive, real fast, when you're working with super colorful art.
The Bottom Line: Go with screen print transfers for high-volume orders with 1-3 solid colors to get the best price. Pick DTF when your design is full-color, has photographic details, or if you only need a few items.
The feel of the print is another huge difference. A screen print transfer uses plastisol ink that sinks into the fabric, giving you that classic, slightly raised, and super-durable finish everyone knows from traditional screen printing. DTF transfers are known for being soft, light, and stretchy, moving with the fabric, which makes them awesome for athletic apparel.
Screen Print Transfer vs. Heat Transfer Vinyl (HTV)
For a lot of people just starting out, Heat Transfer Vinyl is their first stop. The process is simple: you cut a design from a sheet of colored vinyl and press it onto a shirt. For years, HTV has been the champion of simple, one-off custom jobs.
HTV is fantastic for personalization. Need to put a name on a jersey or a number on a sleeve? HTV is your best friend. Plus, you can get all sorts of cool specialty vinyl—like glitter, flock, reflective, and even puff—that let you create unique looks that are hard to get any other way.
But where HTV stumbles is with complex or detailed designs. The process of weeding—peeling away all the tiny bits of unwanted vinyl—can be a nightmare for intricate artwork. A screen print transfer shows up at your door ready to press. No weeding, no fuss, just huge time savings.
Here’s when you’d pick one over the other:
- Team Uniforms: For simple player names and numbers, HTV is quick and easy.
- Brand Logos (1-2 colors): For a run of 50 company t-shirts, a screen print transfer is way cheaper and faster.
- Intricate Lettering: For designs with thin lines or small text, the sharp detail of a screen print transfer wins hands-down.
The feel is a big deal, too. HTV sits right on top of the fabric and can feel thick and plasticky, especially on bigger designs. A screen print transfer feels much softer and becomes part of the shirt. To get a really deep dive, check out our guide comparing heat transfer vs screen printing methods.
Screen Print Transfer vs. Direct-to-Garment (DTG)
Think of Direct-to-Garment printing as an inkjet printer, but for t-shirts. You load the shirt into the machine, and it sprays water-based inks right into the fabric. It's another fantastic choice for printing photos and full-color graphics, particularly on 100% cotton.
The biggest win for DTG is its incredibly soft feel. Since the ink soaks directly into the cotton fibers, there's almost no texture left on the print, especially on light-colored shirts. It's a favorite for high-end fashion brands where comfort is everything.
But DTG comes with some serious baggage. The equipment is a massive investment, often costing tens of thousands of dollars, and it needs constant babysitting and maintenance. DTG also works best on 100% cotton. While it can handle some blends, it really struggles with polyester and other synthetics, whereas screen print transfers are way more versatile.
From a pure speed perspective, DTG is slow. You have to pre-treat every shirt, print it, and then run it through a dryer. A screen print transfer, however, can be applied with a heat press in as little as four seconds. That speed makes it a much more practical choice for anyone looking to scale up their production and get orders out the door.
Comparison Of Apparel Decoration Methods
To make it even clearer, here’s a table that breaks down the key differences between all four methods at a glance.
| Feature | Screen Print Transfer | DTF Transfer | Heat Transfer Vinyl (HTV) | Direct-to-Garment (DTG) |
|---|---|---|---|---|
| Feel | Soft, slightly raised, classic screen print texture. | Very soft, lightweight, and flexible. Stretches well. | Can be stiff or "plasticky," sits on the fabric. | Extremely soft, almost no feel on light garments. |
| Color Capability | Best for 1-5 spot colors. Cost increases per color. | Unlimited colors, gradients, and photographic detail. | Limited to available vinyl colors. Layering is complex. | Unlimited colors, ideal for photorealistic prints. |
| Durability | Excellent. Lasts the life of the garment when applied correctly. | Very good. Flexible and resistant to cracking. | Good, but can peel or crack over time with washing. | Good, but can fade, especially on darks. |
| Best For | High-volume orders (25+), brand logos, simple graphics. | Small to medium runs, full-color designs, any fabric. | One-offs, names/numbers, specialty finishes (glitter). | Small runs, ultra-soft prints, 100% cotton apparel. |
| Cost | Very low cost at high volumes. High setup cost. | Moderate cost, consistent per print. No setup fees. | High material cost per item. Labor-intensive. | High cost per print. No setup fees. |
| Fabric Versatility | Excellent. Works on cotton, poly, and blends. | Excellent. Works on nearly any fabric type and color. | Good. Specific vinyl types for different fabrics. | Poor. Best on 100% cotton, struggles with synthetics. |
Choosing between these methods really comes down to what your specific project needs. There's no single "best" option—just the right tool for the job.
A Step-By-Step Guide to Perfect Application
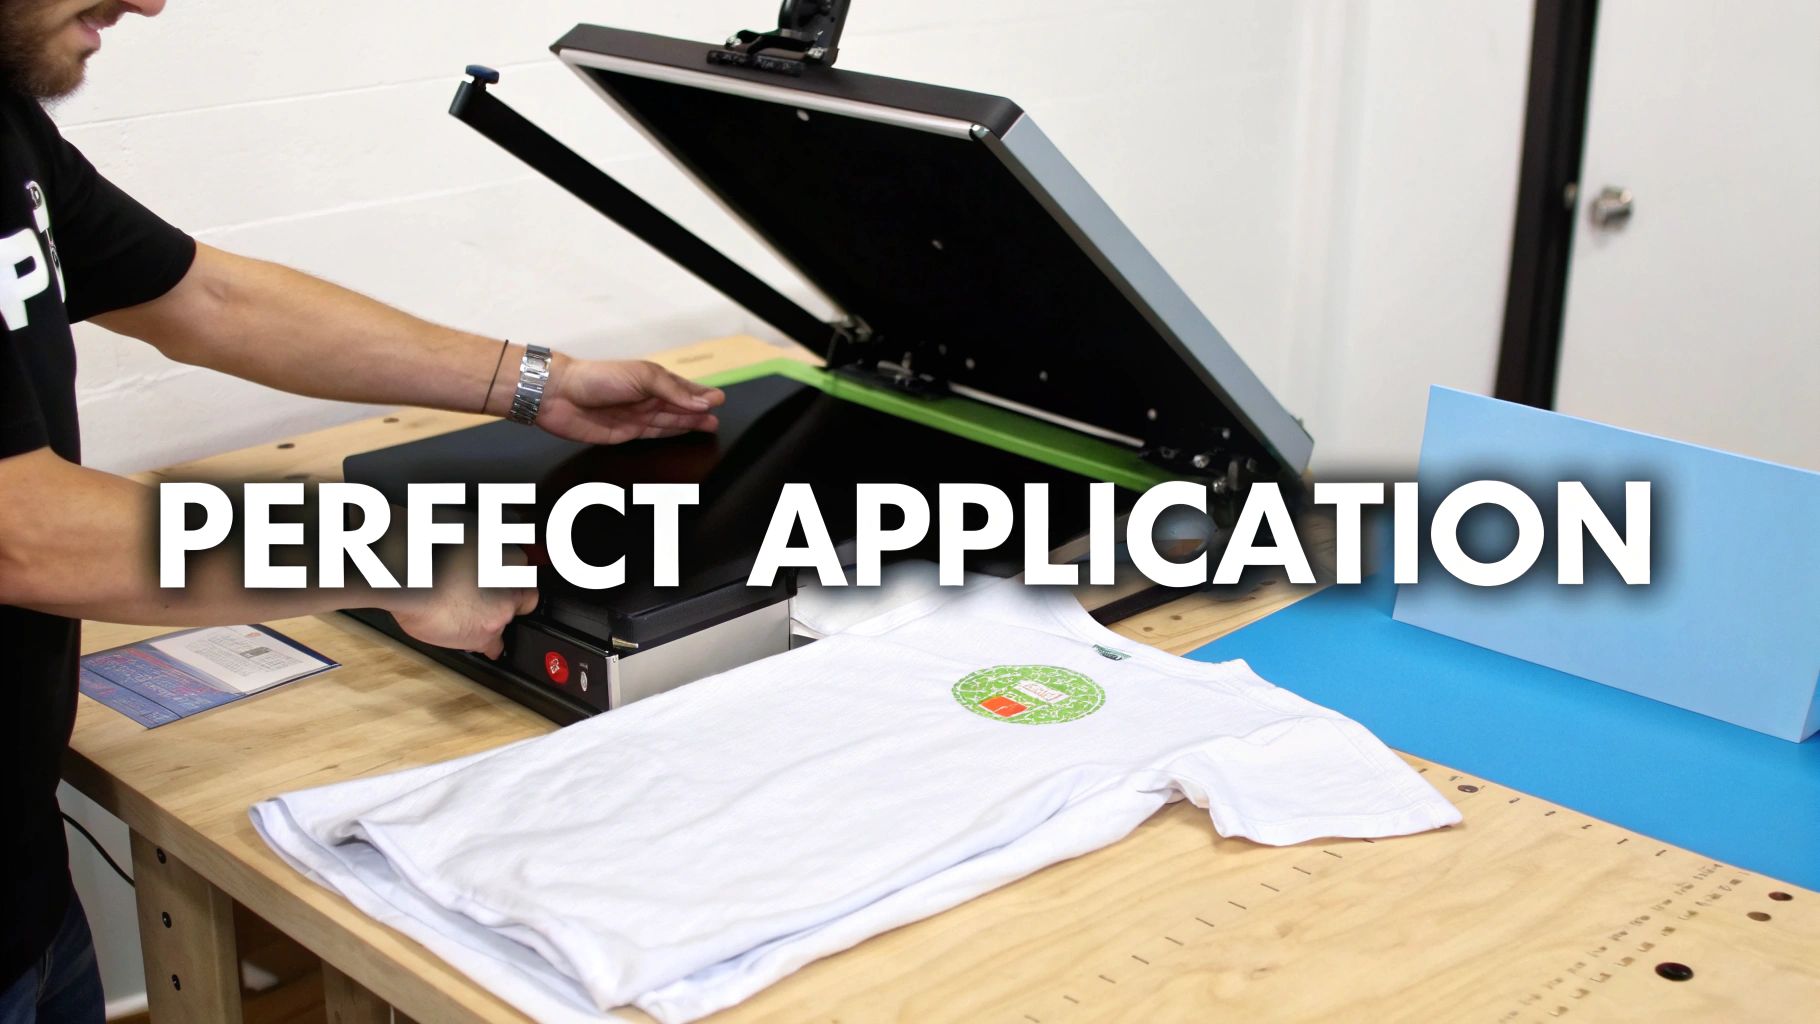
The real magic of screen print transfers is how simple they are to apply. All the messy, time-consuming work of screen prep and ink mixing is already done. You just get to handle the final, satisfying step: pressing the design onto the garment.
Getting this part right is what separates amateur-looking shirts from professional-grade apparel that’s built to last. Let's walk through the process to make sure every single press you do is a home run.
Before you even think about the heat press, though, your artwork needs to be spot-on. A solid grasp of essential graphic design principles is non-negotiable if you want transfers that look crisp and professional. Once your design is locked in, you're ready to bring it to life.
Dialing In Your Heat Press Settings
Your heat press is your only piece of equipment here, but getting the settings right is everything. While you should always follow the instructions from your transfer provider, it all boils down to three key variables.
- Temperature: Most plastisol transfers are happiest somewhere between 325°F and 375°F. If you go too low, the adhesive won't bond properly. Too high, and you risk scorching the shirt or melting the ink into a mess.
- Pressure: You're looking for firm, even pressure. It's like a good, solid handshake—not a limp touch, but not a bone-crushing grip either. This pressure is what forces the ink and adhesive deep into the fabric fibers for a permanent hold.
- Time: This is one of the biggest perks—the press times are incredibly short. We're talking just 4 to 10 seconds per shirt, which is a massive advantage when you're knocking out a big order.
A quick pro tip: Always use the manufacturer's specs as your starting point, but do a test press on a scrap piece of fabric first. It’s the best way to confirm your settings are perfect before you start on the real inventory.
The Four Steps to a Flawless Press
With your press heated up and ready to go, the actual application is a breeze. Follow these four simple steps, and you’ll sidestep the common pitfalls and get a perfect result every time.
- Pre-Press the Garment: Place your shirt or hoodie on the press and give it a quick 3-5 second press. This little step is a game-changer; it smooths out wrinkles and, more importantly, removes any hidden moisture, giving you a perfectly flat, dry canvas.
- Position Your Transfer: Lay the transfer paper on the garment, ink-side down. You can use a t-shirt ruler for precision or just eyeball it if you have a good eye for centering.
- Press the Design: Now for the main event. Close the press and let it work its magic for the recommended time. The heat and pressure release the ink from the paper and fuse it directly onto the shirt.
- Peel the Carrier Sheet: Pay close attention here, because this is where a great print can go wrong. Your transfer will be either a "hot peel" or a "cold peel," and you must follow the specific instructions.
Hot Peel vs. Cold Peel: This detail is everything. A hot peel means you rip that paper off immediately after the press opens, while it’s still steaming. A cold peel means you need to wait, letting the garment and transfer cool down completely before you touch the paper. Peeling at the wrong time will ruin the print, guaranteed.
Troubleshooting Common Application Issues
Even the pros run into hiccups now and then. The good news is that most common problems are incredibly easy to diagnose and fix on the fly.
- Transfer Is Not Sticking: Nine times out of ten, this is a pressure problem. Your press isn't clamping down hard enough. Crank up the pressure a bit. If that doesn't work, double-check that your temperature hasn't dropped.
- Ink Is Cracking After a Wash: This is a classic sign of an under-cured print. The ink didn't get enough heat or time to bond fully with the fabric. Verify your temperature is correct and maybe add a second or two to your press time.
- Edges of the Design Are Peeling: This screams uneven pressure. Make sure your press is closing completely flat. Watch out for thick seams, collars, or zippers getting in the way and preventing even contact across the whole design.
By sticking to these steps and understanding what each variable does, you can confidently press any screen print transfer and churn out beautiful, durable apparel that looks like it came from a high-end shop.
When DTF Becomes the Smarter Choice
Look, screen print transfers are a solid tool in the toolbox, and they're perfect for certain kinds of jobs. But let's be real—today's apparel world demands flexibility. That's where Direct-to-Film (DTF) technology steps in, picking up right where screen printing's limitations leave off. It's a powerful alternative for anyone who doesn't want to compromise on creativity or turnaround time.
DTF really comes alive in the areas where screen printing can get complicated, especially with complex, multi-color designs. With screen printing, every single color needs its own screen, which means more setup, more time, and higher costs. DTF, on the other hand, prints your entire design—gradients, photorealistic details, and all—in one go. You get unlimited colors for one straightforward price.
Total Freedom for Your Designs and Materials
The advantages of DTF go way beyond just color counts. It’s a complete game-changer when it comes to the fabrics you can use. Screen print transfers do great on cotton and poly-blends, but our DTF transfers at Raccoon Transfers can handle a much wider playbook of materials.
You can press incredible designs onto just about anything:
- Cotton and Polyester Blends
- Tri-Blends and Spandex
- Even tougher materials like leather and nylon
This opens up so many new avenues for your business, from performance athletic gear to high-end accessories, all without having to juggle different types of transfers.
And the market reflects this need for versatility. The traditional screen printing industry is still growing and is projected to hit $9.53 billion by 2030. That massive number tells us there's a huge opportunity for more flexible solutions like DTF to meet the demand that slower, more rigid methods can't. You can dig into more of this market data over at Research and Markets.
The Raccoon Transfers Edge
When you choose DTF from Raccoon Transfers, you're not just getting a better technology; you're getting a real strategic advantage for your business. We've completely ditched setup fees, so you can afford to print just one full-color design if that's all you need. It’s perfect for one-off custom orders, small test runs, or just trying out a new idea without a major investment.
Plus, our gang sheet builder is a cinch to use, letting you pack as many designs as you can onto a single sheet to get the most bang for your buck. Throw in our next-day shipping guarantee, and you’ve got top-notch transfers in your hands faster than you thought possible.
DTF isn't just another printing method; it's the go-to choice for modern creators who need speed, stunning color, and the freedom to bring any idea to life. It gives you the quality your customers demand and the efficiency your business needs to thrive.
By making the switch, you can break free from the old constraints and move to a much more dynamic way of working. If you're ready to dive deeper into how this all works, check out our complete guide on what is a DTF transfer and see what it can do for your brand.
Frequently Asked Questions
Even after you've got the basics down, a few questions always pop up. Let's tackle some of the most common ones we hear so you can press your designs with total confidence.
Can I Just Use a Home Iron for This?
I know it’s tempting, especially for a one-off project, but using a home iron is a really bad idea. We strongly discourage it.
The biggest problem is that an iron can't provide the two things that matter most: consistent, even heat and heavy, uniform pressure. Without those, the transfer won't bond properly to the fabric. You'll end up with peeling edges and a design that looks awful after the first wash. A good heat press is the only way to get that permanent, professional finish.
How Long Do These Transfers Actually Last?
When you apply them correctly with a heat press, they’re incredibly durable. Seriously. The plastisol ink actually fuses with the fibers of the shirt, creating a bond that will easily last the lifetime of the garment itself.
You can expect it to handle dozens and dozens of washes without cracking, peeling, or fading. It performs just as well as a traditional screen print you'd find in a retail store.
A properly applied screen print transfer doesn’t just sit on top of the fabric—it becomes part of it. This fusion is the key to its incredible longevity and retail-quality finish.
What's the Difference Between a Hot Peel and a Cold Peel?
This one is simple but super important. The term just tells you when to peel the backing paper off after you've pressed the design.
- Hot Peel: You peel the paper off immediately, while everything is still piping hot, right after the press opens.
- Cold Peel: You have to wait. Let the garment and the transfer cool down completely to room temperature before you even think about touching the paper.
The manufacturer's specific ink and adhesive formula determines which type you have. Always follow their instructions to the letter—peeling at the wrong time will absolutely ruin your print.
Are Screen Print Transfers Better Than DTF?
It's not really a question of "better," but more about which one is the right tool for the job. They both have their strengths.
A screen print transfer is the undisputed champ for designs with just one to three solid colors. It gives you that classic, slightly heavier plastisol feel and becomes incredibly cost-effective when you're ordering in bulk.
On the other hand, DTF transfers are the clear winner for full-color photos, gradients, or designs with tons of intricate detail. They feel softer and more flexible on the shirt and have zero color limitations, making them perfect for today’s vibrant, complex artwork.
Ready to unlock vibrant, full-color designs without limitations? Raccoon Transfers offers premium, next-day DTF transfers that make any project possible. Build your gang sheet and see the difference today!