
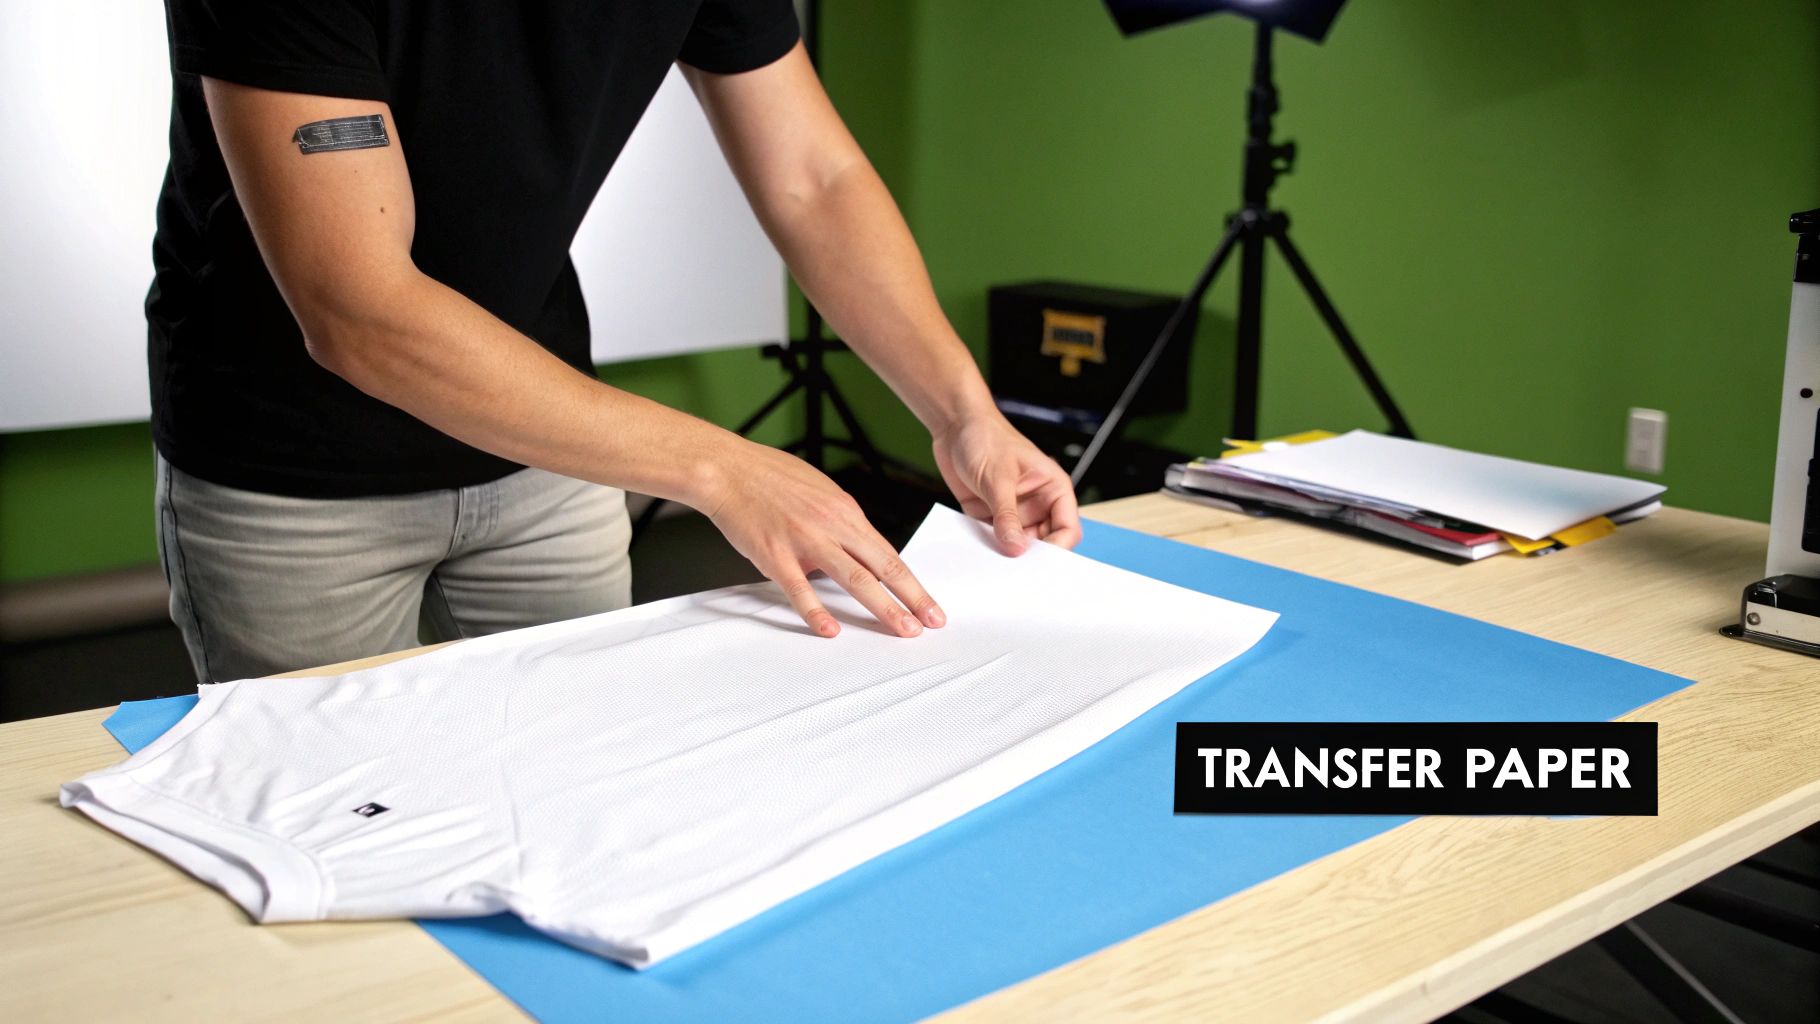
What Is Transfer Paper and How Does It Work?
Ever wanted to print your own custom t-shirt without a ton of fancy equipment? That’s where transfer paper comes in.
Think of it as a special kind of "sticker" for fabric. You print your design onto this coated paper, and then use heat and pressure to transfer that ink onto a t-shirt, bag, or another item. It’s like a temporary tattoo, but for your clothes—and it's permanent!
The Bridge Between Digital Art and Physical Products
At its heart, transfer paper is what lets you take a cool design from your computer screen and turn it into something you can actually wear or use. No need for complicated, industrial-sized machines. The magic is in the paper’s special heat-activated coating, which releases the ink from your printer when you apply heat with an iron or heat press.
This is why it's a game-changer for hobbyists, small businesses, and anyone wanting to add a personal touch to their gear. You don't have to be a screen-printing pro to get great results.
All you really need to get started is:
- Your Design: A digital file you’ve created or downloaded.
- A Printer: A regular inkjet or laser printer will do the trick.
- Transfer Paper: The key ingredient that carries your design.
- A Heat Source: An iron or, for better results, a heat press.
To make things even clearer, let's break down the core concepts.
Transfer Paper at a Glance
This table gives a quick overview of what transfer paper is and its core function.
| Concept | Simple Analogy | Primary Function | Key Ingredients |
|---|---|---|---|
| Transfer Paper | A temporary tattoo for fabric or hard goods. | To carry a printed ink design from a printer to a final product. | Paper or film base, heat-activated adhesive/coating, ink. |
Essentially, it's an accessible tool for creating custom products on demand.
The real beauty of transfer paper is its simplicity. It opens up the world of custom printing to everyone, allowing vibrant, full-color designs to be applied with tools you probably already have at home.
This simple process is a fantastic entry point into the wider world of custom apparel. To get a better handle on the science behind it, check out this guide on what heat transfer printing is and see how the whole process comes together.
How Does Transfer Paper Actually Work?
So, how do you get a design from a piece of paper onto a t-shirt? It might seem like magic, but it's actually a clever process that's surprisingly easy to get the hang of. The secret lies in a special, heat-activated coating on the transfer paper.
Think of that coating as a delivery service for your ink. When you apply heat and pressure, the polymer coating melts just enough to release the ink from the paper and permanently bond it to the fibers of your fabric. This isn't just sitting on top; it becomes a durable part of the material.
The whole journey, from your computer screen to the finished product, really just boils down to three simple stages.
The 3 Key Steps of the Transfer Process
-
Print Your Design: This is straightforward. You just print your digital artwork onto the transfer paper using a standard inkjet or laser printer. The one critical thing to remember? For most papers intended for light-colored fabrics, you have to mirror the image before printing. The paper goes face-down on the shirt, so if you don't flip the design, it will come out backward.
-
Apply Heat and Pressure: Here’s where the transfer happens. You'll use either a home iron or, for better results, a heat press to apply consistent heat and firm pressure over the entire design. The heat activates that special coating we talked about, and the pressure makes sure the ink gets a solid grip on the fabric, creating a strong, even bond. Always check the instructions, as every paper has its own ideal time and temperature.
-
Peel Away the Backing: The final reveal! After pressing, you carefully peel away the paper backing. Some types are "hot peel," where you remove the paper right away, while others are "cold peel," meaning you have to let everything cool down first. Once you peel it off, you're left with a vibrant design that's permanently fused to your item.
Getting a handle on these three steps—Print, Press, and Peel—is really all it takes. Once you understand this basic workflow, you'll have the confidence to get great-looking results, even on your very first try.
If you want a deeper dive into the nitty-gritty, our complete guide on how to print onto transfer paper walks you through every single detail. It’s the perfect resource to make sure your projects turn out perfectly every time.
Choosing the Right Tool for Your Project
Picking the right transfer paper feels a lot like choosing the perfect tool for a job—your decision will make or break the quality and durability of what you’re creating. Not all transfer papers are created equal, and the biggest fork in the road is the type of printer you have. The two main players are inkjet and laser transfer papers, and each is engineered for its own specific technology.
Getting this right is your first step toward professional-looking results. You can't just use inkjet paper in a laser printer and hope for the best; it simply won't work. Each paper has a special coating formulated to bond perfectly with a specific kind of ink—either the liquid dyes from an inkjet or the fine powder toner from a laser.
This simple infographic is a great starting point for figuring out what you need based on your fabric color.

As you can see, the fabric color is a huge factor. It dictates whether you'll need a transparent film for light-colored materials or a more robust, opaque paper for darks.
Inkjet Transfer Paper Explained
For most people diving into crafts at home, inkjet transfer paper is the default choice. It's easy to find, doesn't break the bank, and works with the standard inkjet printers many of us already own. This makes it a fantastic starting point for anyone just beginning their creative journey.
Inkjet papers are great at producing bright, full-color designs. The one trade-off is that the final print can sometimes feel like a thin film sitting on top of the fabric. While the quality has come a long way over the years, it might not give you that super-soft, commercial-grade feel or stand up to a lifetime of washing like other methods.
- Best For: Hobbyists, personal projects, and small-batch creations where budget is a top priority.
- Pros: It’s inexpensive, widely available, and produces vibrant colors on cotton fabrics.
- Cons: Can have a noticeable "hand" (the feel of the design) and may be less durable through dozens of washes.
Laser Transfer Paper for Durability
If you’re aiming for a more professional, long-lasting finish, laser transfer paper is the way to go. When used with a laser printer, this paper creates transfers that are incredibly resilient and often feel much softer on the garment. Even better, some laser papers are "self-weeding," which is a game-changer—it means only the printed toner transfers, so you don't have to painstakingly trim around the edges of your design.
The professional world leans heavily on this technology. In fact, laser printing accounts for a massive 35.8% of the tacky transfer paper market revenue, thanks to its crisp image quality and reliable performance. You can dig into these market trends on Future Market Insights.
Key Takeaway: Inkjet is perfect for getting your feet wet, but laser transfer paper is a clear step up in durability and finish. It’s the ideal choice for items that will get a lot of wear and washing, like team uniforms or merchandise.
Transfer Paper Comparison Guide
To make the choice even clearer, this side-by-side comparison breaks down the most common transfer paper types. Use it to find the best fit for your specific project.
| Feature | Inkjet Paper | Laser Paper | Sublimation Paper |
|---|---|---|---|
| Printer Type | Standard Inkjet Printer | Laser Printer | Sublimation Printer (with special inks) |
| Best For | Cotton & cotton blends | Cotton, polyester, and hard surfaces | 100% Polyester & poly-coated items |
| Feel on Fabric | Can feel like a thin film ("hand") | Softer feel, especially with self-weeding types | No feel at all; ink becomes part of fabric |
| Durability | Good; may crack or fade over time | Excellent; very resistant to washing and cracking | Permanent; will not crack, peel, or fade |
| Cost | Low (most affordable option) | Moderate | High (requires specialized equipment) |
Each type has its place, and the best one really depends on what you're making and what equipment you have on hand.
Ultimately, picking the right paper comes down to your printer, your budget, and what you want to achieve. For a much deeper dive, be sure to check out our complete guide to choosing the best paper for heat transfer to ensure you make the perfect choice every time.
Light vs. Dark Fabric Transfers: Getting It Right
One of the first hurdles everyone faces with transfer paper is picking the right kind for their fabric. It might seem like a small detail, but choosing between paper for light fabrics and paper for dark fabrics is a make-or-break decision for your project. They're built completely differently, and grabbing the wrong one can leave you with a faded, muddy-looking mess.
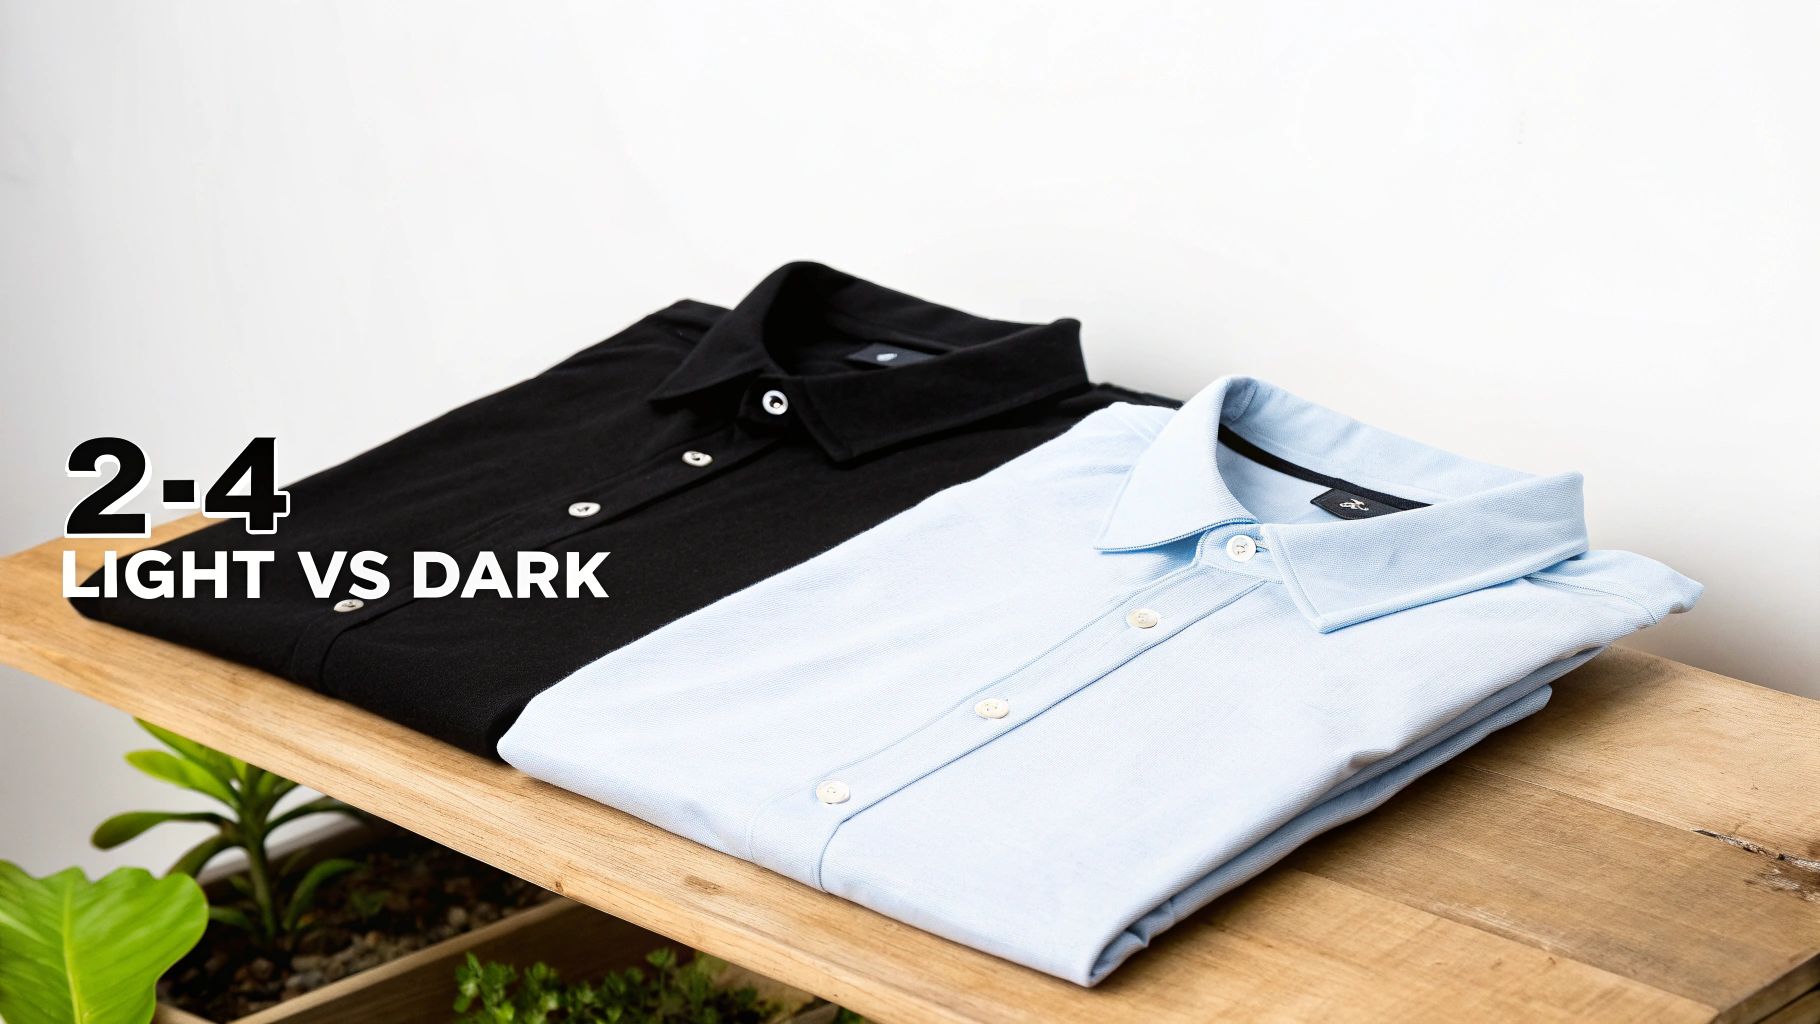
Think of transfer paper for light fabrics as a transparent sticker. It has a clear polymer film, so any part of the design you don't print on remains see-through. This allows the light color of the shirt—like white, beige, or a soft pastel—to become the background, making your design feel like it's part of the fabric itself.
The Secret is the Opaque Base
Now, paper for dark fabrics is a whole different beast. It works more like a painter’s canvas because it has a solid, opaque white base layer. This foundation is absolutely crucial. It acts as a barrier, stopping the dark fabric color from peeking through and messing with your design's colors.
Imagine trying to put a bright yellow design on a black t-shirt without that white base. The yellow would get swallowed up by the dark fabric, looking dull and greenish. That opaque layer ensures your colors stay true and vibrant, popping off the shirt exactly how you designed them.
The core difference is simple: Light fabric paper is transparent, letting the shirt's color through, while dark fabric paper is opaque, creating a blank canvas for your design to sit on.
Here's the catch with dark fabric paper: because of that white background, any area you don't trim away will show up as a white patch on your shirt. This is why you have to meticulously cut around the edges of your design before you press it. Taking that extra minute to trim makes all the difference between a homemade-looking craft and a sharp, professional-quality product.
From T-Shirts to Totes: Creative Project Ideas
When people think of transfer paper, custom t-shirts are usually the first thing that comes to mind. And for good reason—it’s a classic! But limiting yourself to just t-shirts is like buying a whole toolbox and only ever using the hammer.
Think bigger. That stack of plain tote bags? Perfect for custom grocery carriers. Those boring baseball caps? Ideal for a family reunion or a weekend team event. Got a friend who loves to cook? An apron with an inside joke printed on it makes a fantastic gift. The method is always the same—print, press, peel—but the canvas for your ideas is wide open.
Expanding into Home Decor and Beyond
Your creativity doesn't have to stop with what you wear. Transfer paper is an incredible tool for whipping up custom home decor that actually looks polished and professional.
- Decorative Pillows: Got a favorite quote or a cool abstract design? You can easily print it onto fabric and create throw pillows that tie a whole room together.
- Canvas Art: Skip the expensive art print. Transfer a high-resolution design onto a blank artist's canvas for some seriously cool, affordable wall art that perfectly matches your style.
- Custom Tea Towels: Create monogrammed or seasonal tea towels for your own kitchen. They also make thoughtful, handmade gifts that people genuinely love to receive.
This is why the market has exploded. The combined heat transfer paper and vinyl market has already hit a value of USD 2.21 billion. That number tells you just how many people—from hobbyists to small business owners—are turning their ideas into real products. If you want to dig into the numbers, this market research from Zion Market Research breaks it down.
Hard Surfaces: Wood and Ceramics
Now, let's venture beyond fabric. With specialized transfer papers, you can start decorating hard surfaces, too. Imagine creating a set of custom coasters with a family crest, personalizing a wooden plaque, or even putting a kid's drawing onto a ceramic mug for the perfect Mother's Day gift.
The real magic of knowing what is transfer paper is understanding its flexibility. It’s not just one tool for one job; it’s a versatile system for bringing digital designs to life on a huge variety of physical items.
So, whether you're making wearable art or unique home goods, transfer paper gives you the power to go way beyond the basics and explore a whole world of creative customization.
Got Questions About Transfer Paper? Let's Get Them Answered.
Even after you get the basics down, a few practical questions always pop up once you’re ready to roll up your sleeves and start a project. Think of this as your go-to troubleshooting guide—a place to get clear, straightforward answers to the most common hurdles people run into. We'll get you feeling confident enough to create professional-quality results right from the start.
This whole process has become a huge favorite for custom creators, and the numbers back it up. The global thermal paper market, which covers a lot of these transfer paper applications, was valued at a whopping USD 4.076 billion and is still climbing. You can dig into the thermal paper market trends on Grand View Research if you're curious. That kind of growth just goes to show how many people are jumping in and bringing their ideas to life.
Now, let's clear up any lingering confusion and dive into the specifics.
Can I Just Use My Regular Iron at Home?
Yes, you absolutely can! In fact, most inkjet transfer papers you'll find are designed specifically for a standard household iron.
The real secret is in your technique. You'll want to crank your iron up to a high heat setting—usually the "cotton" setting works best—and make sure the steam is switched completely off. When you press, use firm, even pressure and keep the iron moving so you don't burn the fabric. Here's a tip: skip the padded ironing board. They’re too soft and absorb all the pressure. Instead, work on a hard, heat-resistant surface like a wooden cutting board to get the best results.
Help! Why Is My Design Cracking or Peeling After One Wash?
This is easily the most common headache, but don't worry, it's almost always fixable. If your design is cracking or peeling, it usually boils down to one of three things:
- Not Enough Heat: Your iron simply wasn't hot enough to fully melt the adhesive coating and bond it to the shirt.
- Not Enough Pressure: You have to really press down hard. If you don't apply enough firm pressure, the ink won't properly fuse with the fabric's fibers.
- Peeling Too Soon: This is a big one. Many papers are "cold peel," which means you have to let the transfer cool down completely before you even think about touching the backing paper. Peeling it while it's still warm will wreck the bond.
Always, always double-check the instructions that came with your specific paper. They'll tell you the right temperature, time, and whether it's a hot or cold peel.
Pro Tip: To give your design the best shot at a long life, wait at least 24 hours before its first trip through the wash. When you do wash it, turn the garment inside out and stick to a gentle cycle with cold water.
Do I Really Have to Mirror the Image Before I Print?
This is a make-or-break step, and the answer completely depends on the type of paper you’re using.
For transfer paper made for light-colored fabrics, the answer is a definite yes, you must mirror the image. You'll be placing the design face-down on the shirt, so if you don't flip it, all your text will be backward.
But for most transfer papers designed for dark fabrics, you do not mirror the image. These work differently; you usually apply them face-up, so you print the design exactly how you want it to look on the final product.
Ready to bring your own custom designs to life? At Raccoon Transfers, we specialize in high-quality, easy-to-use Direct-to-Film (DTF) transfers that deliver vibrant, durable results on any fabric. Explore our options and start creating today at https://raccoontransfers.com.