
Direct to Film Printing Your Guide to Flawless Fabric Transfers
Direct to Film (DTF) printing is a relatively new way to customize apparel. In a nutshell, designs are printed onto a special film first, then transferred onto the fabric with a heat press. This technique lets you put super vibrant, full-color graphics on all sorts of materials—cotton, polyester, blends, you name it—making it an incredibly flexible option for creators and businesses.
What Is Direct to Film and Why Does It Matter for Your Brand?
Imagine being able to create a perfect, full-color, high-detail sticker that you can stick onto almost any piece of clothing, and it won't lose a bit of its color or sharpness. That's pretty much what Direct to Film (DTF) printing is all about. It's like a high-tech iron-on, but way better, giving anyone the power to make pro-level custom gear.
This method really fills a void that other printing techniques left open. It gives you the full-color freedom of DTG (Direct to Garment) printing but works on a much wider range of fabrics, kind of like screen printing. The best part? You don't have the high setup costs or big order requirements that come with screen printing. For small businesses, Etsy sellers, and brands just starting out, that's a huge deal.
The Rise of a Game-Changing Technology
DTF printing has exploded in popularity because it makes it possible to create intricate, long-lasting designs that used to be too expensive or complicated for small-scale production. The growth has been nothing short of amazing. In fact, industry analysts reported that more than 7.2 billion individual Direct to Film prints were made worldwide in 2024. That’s a jump of nearly 30% from the year before, which tells you just how fast the apparel world is adopting it. You can dig deeper into this trend in the DTF printing market review for 2025.
So, what's driving this massive shift? It comes down to a few key advantages that really help brands of all sizes:
- Unmatched Versatility: You can press these transfers onto cotton, polyester, leather, nylon, and blends with great results every time.
- Vibrant, Full-Color Prints: There are no limits on color. Gradients, tiny details, and even photorealistic images come out looking fantastic.
- Cost-Effective for Small Runs: Need just one shirt? Or a few dozen? No problem. You skip the expensive screen setups of traditional printing.
- Excellent Durability: When you apply them correctly, DTF transfers feel soft, stretch with the fabric, and stand up to wash after wash.
Direct to Film printing empowers brands to move faster, experiment more freely, and produce high-quality merchandise on demand, leveling the playing field between small creators and established companies.
Building Your Brand with Every Print
At the end of the day, DTF printing matters because it gives your brand a powerful tool for consistency. It helps reinforce your identity on every single fabric product you sell, which is a core part of maintaining strong brand consistency.
Whether you're kitting out a local sports team, creating merch for an event, or launching your own fashion line, DTF makes sure your logo and designs look crisp, professional, and exactly the same from one item to the next. That kind of reliability builds trust and makes your brand more recognizable, turning every piece of clothing into a walking advertisement for your quality.
How a DTF Transfer Is Made, Step by Step
Ever wonder what happens between uploading your design and getting a ready-to-press transfer? It’s not magic, but it’s a pretty slick process that turns a digital file into a durable, vibrant graphic. Think of it as a high-tech assembly line for your art, where each step perfectly builds on the last.
Let's pull back the curtain and walk through the five stages. This is the journey your design takes to become a professional-grade transfer, ready for just about any fabric you can throw at it.
This simple visual breaks down the DTF workflow from your screen to the final product.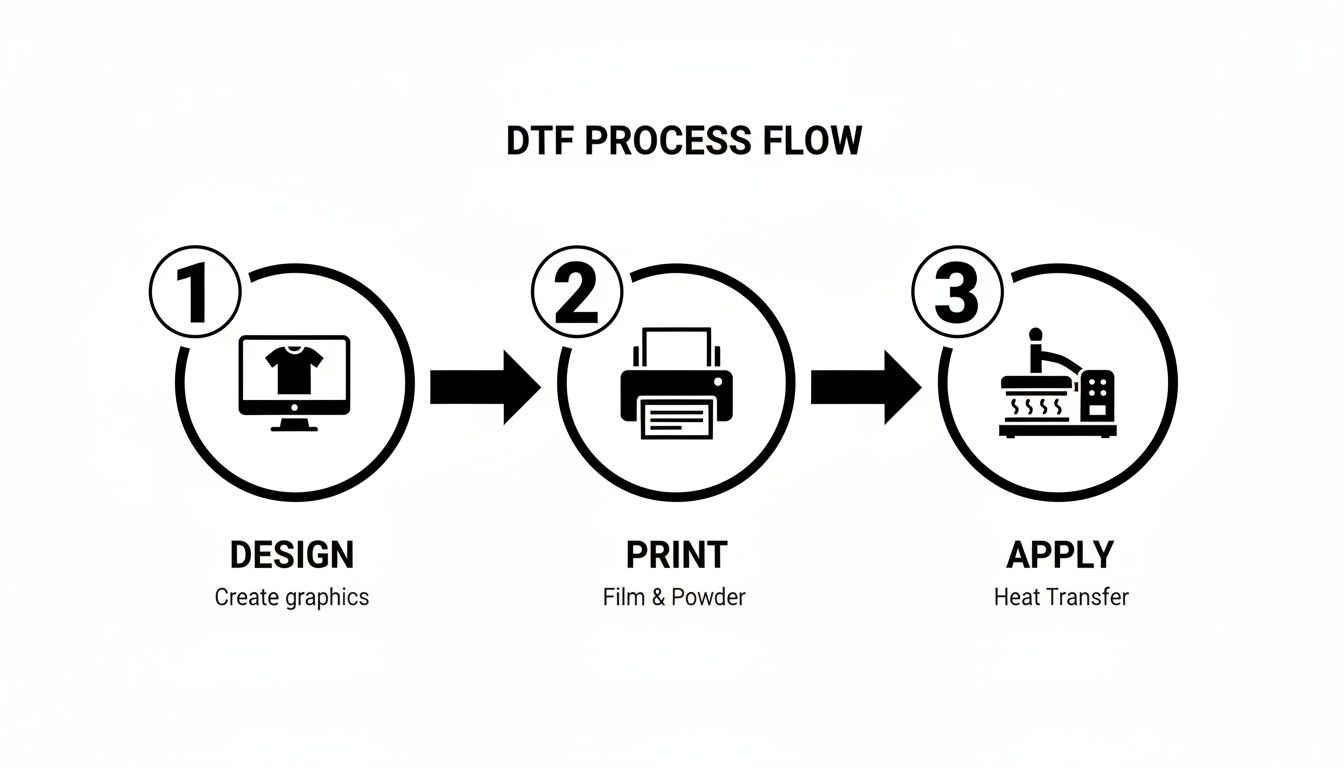
As you can see, the core idea is straightforward: print the design, prepare it for transfer, and then apply it with heat.
Stage 1: The Printing Process Begins
It all starts with printing your design onto a special PET (polyethylene terephthalate) film. This isn't your average sheet of plastic; it's engineered to hold the ink precisely and then release it cleanly when you press it. Our specialized DTF printers get to work, using multiple printheads to lay down the design with incredible accuracy.
First, the colors go down. The printer uses a standard CMYK (Cyan, Magenta, Yellow, and Black) ink set to perfectly recreate every hue from your original file.
Here’s a cool trick of the trade: the design is always printed as a mirror image. That way, when you flip it over to press onto the garment, your artwork shows up exactly the right way around.
Stage 2: The Crucial White Ink Layer
Right after the color layer is printed, the machine lays a layer of brilliant white ink directly on top of it. This white base is arguably the single most important part of the whole DTF process, and it does two critical jobs.
First, it acts like a primer, making sure your colors pop, even on black or dark-colored fabrics. Without it, colors would look dull or get lost in the shirt's color. Second, this is the layer the adhesive powder will grab onto in the next step, creating the foundation for a strong, lasting bond. The quality of this ink is everything, which is why a deep dive into DTF printer ink technology is so useful for anyone wanting top-tier results.
Stage 3: Applying the Adhesive Powder
While that white ink is still tacky, the printed film is sent for a powder bath. It passes through a station that coats it with a fine, granular hot-melt adhesive powder—specifically, thermoplastic polyurethane (TPU).
This clever powder only sticks to the wet ink, perfectly outlining your design. Any extra powder that falls on the blank parts of the film is immediately shaken off by an automated system, leaving a clean, crisp design coated in the essential bonding agent.
Stage 4: Curing and Melting the Adhesive
Now that it's powdered, the film takes a trip through a curing unit, which is basically a small conveyor oven. Inside, it's heated to a precise temperature, usually somewhere between 200-250°F (90-120°C). This step is a two-for-one deal:
- It dries the ink, curing the CMYK and white layers so they become permanent.
- It melts the powder, transforming the grainy adhesive into a smooth, even sheet of glue on the back of the ink.
When the film comes out the other side, it's no longer a delicate layer of ink and powder. It’s now a single, solid, and flexible transfer that’s dry to the touch and ready for action.
Stage 5: Quality Control and Finishing
The last stop is our quality control station. We inspect every finished transfer sheet for any flaws, like printing errors or uneven powder coating. Once they pass muster, the transfers are cut, rolled, and carefully packaged up to head your way. At this point, the DTF transfer is a complete, shelf-stable product, ready for you to heat-press whenever you need it.
Choosing the Right Print Method for Your Project
Direct to film is an incredibly powerful tool, but is it the right choice for every project? The honest answer is no, and it all comes down to what you’re making. To make the best call, you need to see how DTF stacks up against the other two titans of the industry: Direct to Garment (DTG) and old-school Screen Printing.
Let's cut through the technical jargon and focus on what really matters to creators and business owners. What's the best way to print a small batch of event t-shirts? How do you handle a full-color photograph? What about printing on those tricky polyester hoodies? By putting these methods head-to-head, you’ll be able to confidently pick the perfect one for your job, balancing quality, cost, and versatility.
DTF vs. DTG: A Tale of Two Technologies
On the surface, DTF and DTG look pretty similar. They're both digital printing methods that are fantastic for creating vibrant, full-color designs without the painful setup of screen printing. But underneath the hood, they work in completely different ways.
Think of DTG printing as an inkjet printer designed specifically for clothing. It sprays water-based ink directly onto the garment, allowing the ink to soak right into the cotton fibers. The result is a print with an incredibly soft feel because the ink literally becomes part of the shirt. This makes it a go-to for 100% cotton garments where a soft, breathable print is a must.
Direct to film, on the other hand, is more like creating a super high-quality, durable decal. We print your design onto a special transfer film first, then you apply it to the garment with a heat press. This simple but critical difference is what gives DTF its incredible versatility—it can adhere to almost any material, from cotton and polyester to leather and nylon.
For a much deeper dive into how these two compare, check out our full guide on DTF vs. DTG printing, where we break down every last detail.
Enter Screen Printing: The Time-Tested Classic
Screen printing is the OG of the apparel world, the method that started it all. The process involves pushing ink through a mesh stencil (a "screen") onto the fabric, one color at a time. This means every single color in your design needs its own dedicated screen, which makes the initial setup a bit time-consuming and expensive.
But where screen printing absolutely shines is with big-volume orders of simple designs. Once those screens are made, printing becomes fast and the cost per shirt plummets. It’s the undisputed champion for large runs of merchandise or company uniforms. The prints are famously durable and vibrant, but the process struggles with photographic details and gets expensive fast as you add more colors.
For bulk orders of one- to three-color designs, screen printing often remains the most cost-effective option. However, for full-color art or small batches, digital methods like DTF and DTG are far more efficient.
Making the Right Call: A Practical Comparison
So, how do you choose? It really boils down to five key factors: your order size, the complexity of your design, the fabric you're using, the feel you want, and how durable the print needs to be.
Let’s lay it all out in a simple table to see how these three methods compare side-by-side.
Printing Method Comparison: DTF vs. DTG vs. Screen Printing
This table breaks down the core strengths and weaknesses of each method, helping you match your project's needs with the right technology.
| Feature | Direct to Film (DTF) | Direct to Garment (DTG) | Screen Printing |
|---|---|---|---|
| Best For | Small-to-medium runs, full-color designs, and diverse fabric types. | Small runs, ultra-soft prints on 100% cotton, photorealistic detail. | High-volume orders (50+ items), simple designs with few colors. |
| Fabric Compatibility | Excellent. Works on cotton, polyester, blends, leather, nylon, and more. | Limited. Best on 100% cotton; struggles with polyester and blends. | Good. Works on most fabrics but may require different ink types. |
| Design Complexity | Unlimited colors and fine details. Excellent for photos and gradients. | Unlimited colors and photorealistic quality. The best for complex art on cotton. | Limited. Each color adds significant cost and setup time. |
| Feel of Print | Soft, flexible, and sits on top of the fabric. Has a smooth finish. | Very soft and breathable. The ink is absorbed directly into the fibers. | Thicker feel. The ink creates a noticeable layer on top of the fabric. |
| Durability | High. Very resistant to washing and stretching when applied correctly. | Good. Can fade over time with repeated washing, especially on darks. | Excellent. Extremely durable and long-lasting; the industry standard for workwear. |
| Cost Per Item | Low and consistent for single items or small batches. | Moderate for single items; not cost-effective for large runs. | Very high for one item, but becomes the cheapest for large volumes. |
Ultimately, the details of your project will point you toward the right choice. If you need 100 one-color shirts for a company fun run, screen printing is your winner. If you want a single, super-soft photo tee on a white cotton shirt, DTG is perfect.
But for that sweet spot—the ultimate balance of vibrant color, fabric freedom, and small-batch affordability—direct to film stands out as the most versatile and powerful solution for modern creators.
Getting Your Artwork Ready for Perfect DTF Prints
The magic of a great DTF transfer doesn't start at the printer—it begins with your digital file. Honestly, providing a properly formatted design is the single most important thing you can do to guarantee your prints are sharp, vibrant, and exactly what you envisioned.
Think of it this way: even a world-class chef can't make a masterpiece with bad ingredients. Your design file is the main ingredient here. Solid graphic design for branding sets the stage, ensuring what looks good on your screen translates beautifully to fabric. Let's walk through the must-knows for getting your files print-perfect.
Mastering the File Format Essentials
Before you even think about uploading, let’s get the technical stuff right. Nailing these details from the get-go prevents those all-too-common headaches like blurry images or a weird white box showing up around your graphic.
Here are the non-negotiables for great artwork:
-
File Format: While we accept a few different types, PNG is usually the king for most designs. Its biggest superpower is supporting a transparent background, which is an absolute must for DTF. We also take vector files like AI (Adobe Illustrator) and EPS. These are perfect for logos or anything you might need to scale up or down without losing a drop of quality.
-
Resolution: Your artwork has to be 300 DPI (dots per inch). No exceptions. This is the gold standard for high-quality printing. If you try to use a low-res file, like a 72 DPI image pulled from a website, it’s going to look pixelated and fuzzy when it's on a shirt.
-
Transparent Background: This is a big one. Unless you actually want a big colored box printed behind your design, your file needs a transparent background. This tells the printer to only print your graphic. In your design software, that classic checkerboard pattern behind your image is your best friend—it means you’ve got transparency.
Quick pro tip: Always double-check your resolution before you save your file. You can't just take a low-resolution image and bump up the DPI number later; that won't magically add the missing detail. You have to start your design at 300 DPI from the beginning.
Unlock Savings with Gang Sheets
One of the smartest ways to order DTF transfers is by using a gang sheet. A gang sheet is simply one large transfer film where you arrange multiple, different designs. Instead of paying for each little design one by one, you just pay for the total sheet.
This is a game-changer for maximizing your budget. You can mix and match different logos, various sizes of the same design, or totally unrelated graphics all onto one sheet. For instance, you could easily fit several left-chest logos, a couple of big back-of-shirt designs, and a handful of small sleeve graphics all on a single 22" x 60" sheet.
This trick dramatically cuts your cost per print. It's the perfect solution for small businesses, clothing brands, or crafters who need a variety of transfers without having to meet a huge minimum for every single design. Our online gang sheet builder at Raccoon Transfers makes this super easy—just upload your files, drag them around, and squeeze every bit of value out of the space.
The Final Artwork Checklist
Before you hit that "upload" button, do a quick run-through of this checklist. It takes just a minute and can save you from common mistakes, ensuring your transfers come out looking flawless.
- Check Your Resolution: Is the file 300 DPI at the exact size you want it printed?
- Confirm Transparency: Look closely. Is the background truly transparent, or is there a white background hiding there?
- Verify File Type: Are you uploading a PNG, AI, or EPS?
- Proofread Your Text: Have you checked for any spelling or grammar mistakes?
- Review the Edges: Zoom way in. Do you see any stray pixels or faint outlines around your design? Clean those up
Applying and Caring for Your DTF Transfers
So, your custom DTF transfers have landed, and they look fantastic. Now for the fun part: pressing them onto your garments and watching your designs come to life. Getting a perfect application really boils down to having the right tool for the job, and in this case, that’s a quality heat press. It’s the only way to get the consistent temperature and solid pressure needed for a transfer that truly lasts.
Think of the heat press as a high-tech laminator for fabric. It does more than just heat the transfer; it melts the adhesive backing just right, so it fuses deep into the garment's fibers. This is what gives DTF prints their signature stretch and durability, making them a true part of the fabric.
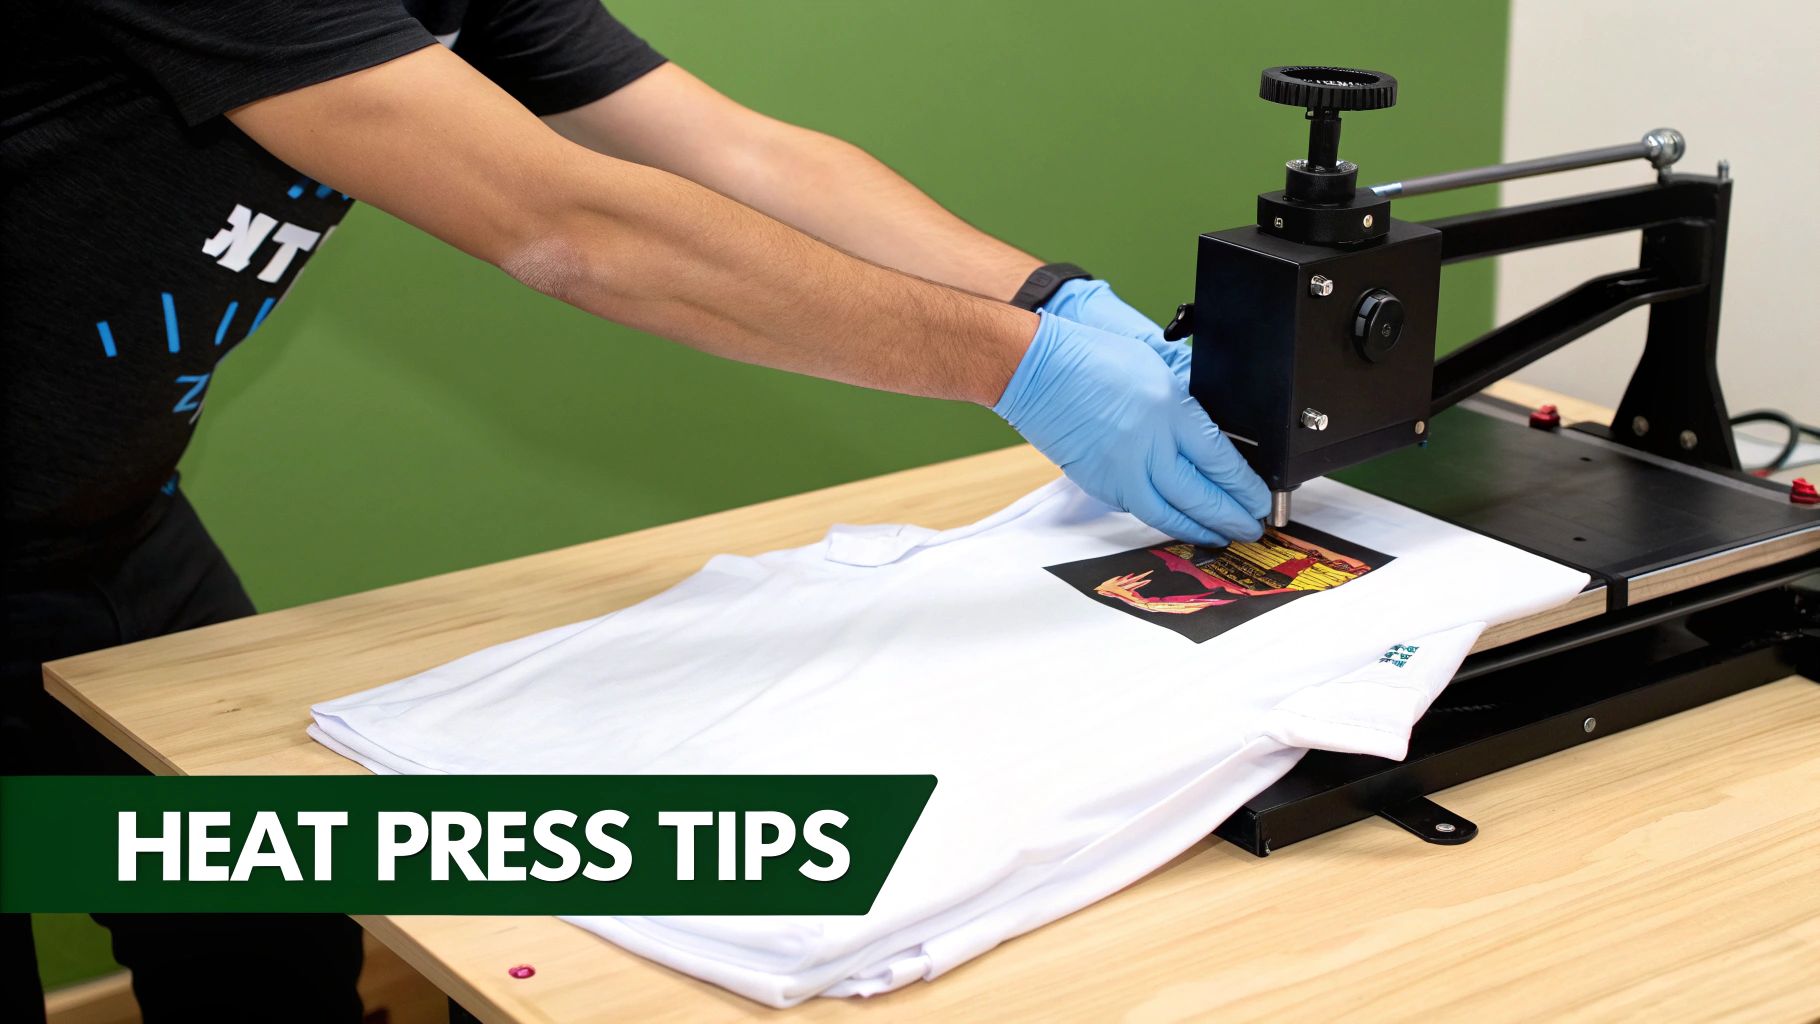
The Perfect Press: A Step-by-Step Guide
Applying a DTF transfer is pretty straightforward, but you have to nail the steps to get that professional finish. While settings can shift a bit depending on your fabric, these guidelines are a rock-solid starting point for most materials you'll encounter.
Recommended Heat Press Settings:
- Cotton & Blends: 300-320°F (149-160°C) for 10-15 seconds.
- Polyester: 260-280°F (127-138°C) for 8-12 seconds.
A quick pro-tip: always give your garment a quick 3-5 second pre-press. This simple step zaps any hidden moisture and smooths out wrinkles, giving you a perfect canvas to work on.
- Position Your Transfer: Lay the transfer on the garment, design side up. If you're worried about it shifting, a little heat-resistant tape at the corners can be a lifesaver.
- Press the Garment: Lock down the heat press. You're looking for firm, even pressure across the entire design for the full duration. Don't skimp here.
- Wait for the Cold Peel: This is the most crucial step, and there are no shortcuts. Once the timer dings, get the garment off the press and let it cool down completely. Trying to peel it hot will ruin your work.
- Peel the Film: Once it’s cool to the touch, grab a corner and peel the clear film back in a smooth, steady motion at a low angle. The design should stay perfectly bonded to the shirt.
- Perform a Finishing Press: Cover the design with parchment paper or a Teflon sheet and press it one more time for about 5-7 seconds. This final press locks everything in, improves durability, and gives the print a beautiful matte finish that feels great.
The "cold peel" technique is non-negotiable for a flawless transfer. As the transfer cools, the adhesive fully hardens and bonds to the fabric. If you peel it while it’s still warm, you're almost guaranteed to pull up parts of the design with the film.
Long-Term Care for Lasting Vibrancy
You’ve pressed the perfect design—now you want to keep it looking that way. The great thing about DTF is its incredible durability; these prints are made to survive dozens and dozens of washes without cracking or fading. Just a little bit of care will keep your custom apparel looking brand new.
Proper washing is all about minimizing two things: friction and high heat. Those are the biggest enemies of any decorated garment. For a deep dive into the best washing methods, check out our complete DTF washing instructions guide.
Simple Care Instructions:
- Wait Before Washing: Let the garment sit for at least 24 hours after pressing before its first wash. This gives the adhesive that final bit of time it needs to fully cure.
- Turn Inside Out: This is the oldest trick in the book for a reason. Washing inside out protects the print from rubbing against other clothes and the inside of your machine.
- Use Cold Water: Always opt for a cold, gentle cycle. Hot water can slowly soften the adhesive, leading to wear and tear over time.
- Tumble Dry Low or Hang Dry: High dryer heat is the absolute worst thing for a print. Tumble dry on the lowest setting possible, or better yet, just hang it up to air dry.
- Avoid Bleach and Fabric Softeners: Harsh chemicals are bad news. They can break down the ink and the adhesive, causing the design to fade or peel much sooner than it should.
So, Why Choose Raccoon Transfers?
Knowing how DTF works is one thing, but finding the right partner to print your transfers is what really makes or breaks a project. Here at Raccoon Transfers, we’re obsessed with the practical side of things—giving creators and businesses the tools they need to get professional-quality prints quickly, easily, and reliably.
It’s not just about having great machines; it’s about building a process that actually works for you.
We get it—speed is everything. That’s why our entire operation is built for a blazing-fast 24-hour turnaround. Got a last-minute event order? Need to restock your online shop yesterday? We’ll get your transfers printed and out the door, keeping your projects on track and your customers happy. No sweat.
More Than Just a Printer
Speed is great, but it's the quality of the final print that speaks for your brand. Our transfers are built to last. We're talking about prints that can handle dozens of washes without cracking, peeling, or fading. Your designs will look fantastic long after the first wear.
Another game-changer is our ridiculously easy-to-use gang sheet builder. This tool lets you fit multiple designs onto a single sheet, which slashes your cost per print. It’s the perfect strategy for managing a diverse product line or just getting a mix of logos and sizes without breaking the bank.
We focus on efficiency, quality, and tools that make sense. Raccoon Transfers is all about knocking down the old barriers in custom apparel so that brands of any size can jump in and compete.
Your US-Based Partner in Print
As DTF printing continues to explode in popularity, having a partner you can count on is more important than ever. The market is growing like crazy—it's expected to hit nearly $2.9 billion by 2025 as it becomes a go-to for decorators everywhere. You can read more about the state of print from 2023-2025 to see just how big this is getting.
Because we’re based right here in the US, you get more than just top-notch prints. You get real, helpful support from people who know what they’re doing. Have a question? Need a little guidance on your file? Our team is here for you. We handle the technical headaches so you can get back to what you do best: creating awesome stuff.
Got Questions About DTF? Let's Get Them Answered.
Even with a solid grasp of how direct to film works, a few practical questions almost always pop up. It's one thing to understand the process, but it's another to know what you're actually getting. Getting these answers straight is key to feeling confident about your project.
These are the things people really want to know—how the final shirt feels, how it holds up in the wash, and what truly sets it apart from all the other printing methods out there.
What Does a DTF Print Feel Like on a Shirt?
This is probably the most common question we hear, and the answer is one of the best things about DTF. A well-pressed DTF transfer feels incredibly soft and flexible. It’s nothing like the thick, rubbery feel of old-school vinyl or some heavy-handed screen prints.
The print sits on the fabric, but it’s thin enough to move and stretch with the garment. It doesn’t feel like a stiff logo just sitting on your chest. While it’s not quite as breathable as a DTG print (which soaks into the fibers), modern DTF inks and adhesives create a smooth, lightweight finish that’s comfortable enough to wear all day.
How Durable Are DTF Transfers, Really?
When pressed correctly with a good heat press, DTF transfers are built to last. They are specifically engineered to handle dozens and dozens of wash cycles without cracking, fading, or peeling off. In head-to-head wash tests, DTF often outlasts other digital printing methods.
The secret is the powerful bond between the specialized ink and the adhesive powder. When you apply heat and pressure, the adhesive melts and permanently locks into the fabric's fibers. This creates a single, tough layer that stands up to all the stretching and friction of daily life.
As a rule of thumb, a quality DTF transfer can easily handle 50-100 washes or more with proper care. This makes it a go-to choice for retail-quality apparel, team uniforms, and workwear that needs to be dependable.
Is DTF Printing an Eco-Friendly Option?
As more brands focus on sustainability, the environmental impact of production is a huge deal. Compared to traditional methods like screen printing, direct to film has a much greener footprint. For starters, it's a completely waterless process, which is a massive contrast to the large amounts of water needed to create and clean screens.
On top of that, the print-on-demand model of DTF slashes waste. You print exactly what you need, when you need it. This efficiency is a big reason for its growing popularity. In fact, by 2024–2025, market reports pointed to DTF's smaller energy footprint and lack of water usage as major drivers for its adoption. You can discover more insights about these 2025 DTF printing trends and see how they're shaping the industry.
How Is DTF Different From Other Heat Transfers?
When people hear "heat transfer," many still picture those stiff, peel-prone iron-on sheets you find at a craft store. DTF is in a completely different league.
Here’s a quick rundown of what makes it stand out:
- The Ink System: DTF uses high-quality pigment inks, not the toner or solvent inks found in cheaper methods. The result is way better color vibrancy and washability.
- No Weeding, Ever: Unlike heat transfer vinyl (HTV), you never have to sit there and manually pick out the tiny, unwanted pieces of vinyl from your design. The adhesive only sticks where the ink is, making complex designs a breeze.
- Full-Color Freedom: DTF prints millions of colors, smooth gradients, and photorealistic details in one go. That’s something that's just not possible with standard vinyl.
Think of it this way: DTF gives you the full-color ease of a digital printer combined with the rugged durability of a professional heat-applied graphic. It's the best of both worlds.
Ready to see for yourself what makes DTF so great? At Raccoon Transfers, we get you professional-grade prints with a lightning-fast 24-hour turnaround. Start building your custom gang sheet today!