
Your Ultimate Guide to Dye Sublimation Heat Transfer
Dye sublimation heat transfer is a fascinating printing method where solid ink, when heated, turns directly into a gas. This gas then permanently embeds the design into a material, rather than just sitting on top of it. It’s the magic behind those super vibrant, full-color images on T-shirts and photo mugs that are incredibly smooth to the touch and just refuse to crack, peel, or fade.
Uncovering the Magic of Dye Sublimation
To really get what’s happening with dye sublimation, it helps to think of it less like traditional printing and more like a cool science experiment. The core principle is a process actually called sublimation.
Picture a block of dry ice. It doesn't melt into a puddle; it turns directly into a gas. That's exactly what's happening with the inks here. Instead of liquid ink, special solid dyes are first printed onto a specific type of transfer paper. When this paper is placed onto a compatible item and you apply high heat and pressure, the transformation begins.
The Science Behind the Print
The heat from the press, usually cranked up to around 375–420°F, kicks off two things at once. First, the pores of polymer-based materials—like polyester fabric or ceramics with a special coating—open up wide. At that exact moment, the solid dye on the transfer paper bypasses the liquid stage and becomes a gas.
This dye gas immediately flows into the open pores of the material. Once you remove the heat and the item starts to cool, the pores close back up, trapping the ink particles inside for good. The ink turns back into a solid, but now it’s become a permanent part of the material itself.
The Key Takeaway: Unlike other printing methods that lay a layer of ink on top of a surface, dye sublimation infuses the design into the material. This creates a print you literally cannot feel, giving it an incredibly professional finish and unbeatable durability.
Why This Process Matters
This unique bonding is what gives dye sublimation its standout qualities. Because the ink is chemically fused with the material’s fibers, the final image is extremely resistant to washing, scratching, and fading. The colors aren’t just sitting on the surface; they are in the surface.
This technique is powering a massive and growing industry. The global dye sublimation printing market exploded to USD 14.9 billion in 2024, driven by huge demand for personalized apparel and promotional products. Experts predict it will climb to USD 28.0 billion by 2030, which shows just how valuable it is for everyone from home crafters to large-scale businesses.
The end result is a print that is just as durable as the product it’s on, making it the perfect choice for items that need to look brilliant and withstand a ton of wear and tear. You can dive deeper into the basics in our complete guide to heat transfer and sublimation printing.
Building Your Essential Dye Sublimation Toolkit
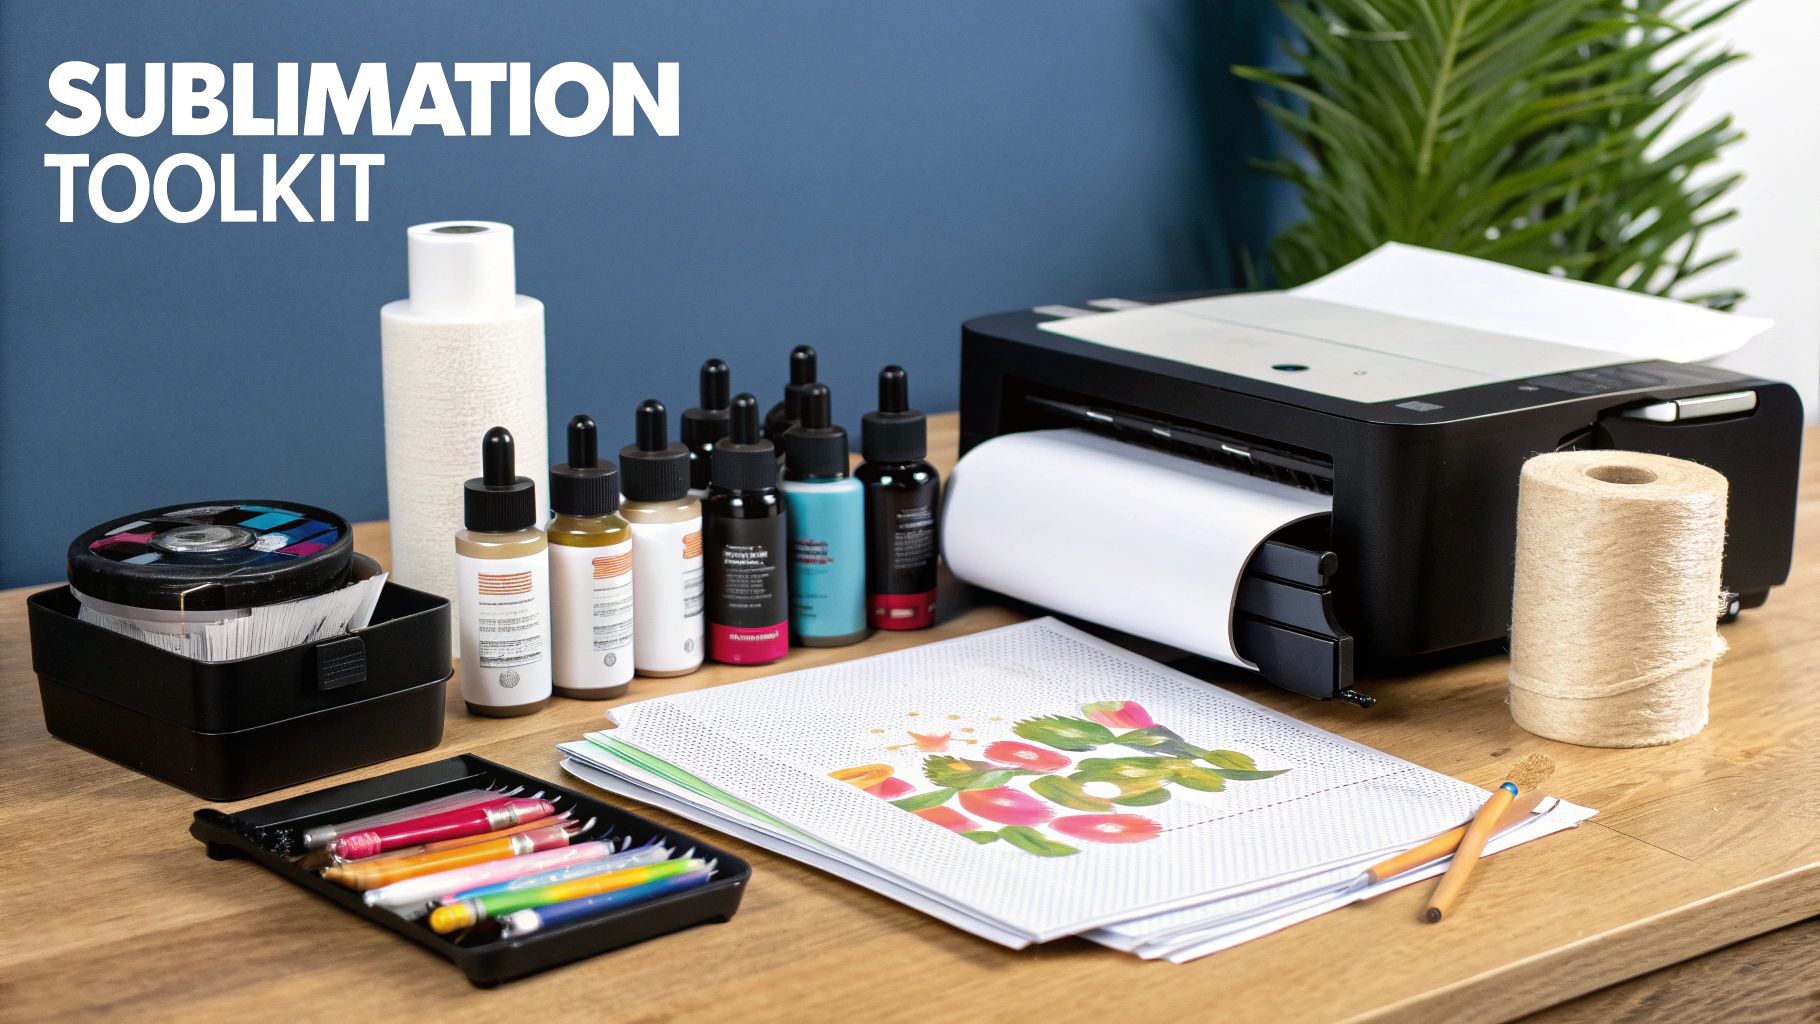
Ready to turn your digital ideas into vibrant, real-world products? The first step is getting your hands on the right gear. Think of it like setting up a kitchen—you need the right tools to bring your recipes to life. A proper dye sublimation heat transfer setup is what makes the magic happen, ensuring a smooth process and professional results right from the start.
You don't need a massive, industrial-sized workshop to get going, but there are a few non-negotiable pieces of equipment. Let's break down exactly what you'll need to build a killer sublimation toolkit.
The Sublimation Printer
First up is the heart of your operation: the sublimation printer. And let's be clear, this isn't the same inkjet printer you use for office documents. A standard printer and its ink just aren't built for the unique gas-to-solid chemistry of sublimation. You need a machine that’s specifically designed—or cleverly converted—to handle sublimation inks.
You’ve got two main paths here. You can go for a purpose-built sublimation printer from brands like Sawgrass or an Epson SureColor, which are essentially plug-and-play. Or, for a more budget-friendly and hands-on approach, you can convert a new Epson EcoTank printer for sublimation use. If you're weighing your options, our guide on the best printers for sublimation and heat transfer is a great place to sort it all out.
Inks and Paper: The Magic Ingredients
Your printer is just one part of the equation. The real alchemy happens with the specialty inks and paper, which are engineered to work together perfectly.
- Sublimation Inks: These aren't just colored liquids; they are special disperse dyes formulated to transform from a solid into a gas under heat. This is what allows them to permanently bond with polyester fibers and polymer-coated surfaces, creating those famously vibrant, fade-proof colors.
- Sublimation Paper: This isn't your everyday copy paper. It has a unique coating that holds the ink droplets precisely on the surface. When heated, this special paper is designed to release nearly 95% of the dye as a gas. That incredibly high release rate is the secret to getting those deep, rich colors instead of a faded mess.
Take it from experience: a common rookie mistake is trying to cut corners with regular ink or paper. It simply won't work. You’ll end up with blurry, washed-out designs that wipe right off because the fundamental chemistry of dye sublimation heat transfer demands these specific components.
The Heat Press
This is where the transformation takes place. The heat press is the workhorse that delivers the two essential ingredients for a successful transfer: high, consistent heat and firm, even pressure. A regular household iron might get hot, but it can’t provide the uniform temperature and pressure needed for a flawless, professional-grade print.
Heat presses come in a few different styles, and the best one for you depends on what you plan to make.
Heat Press Types
- Clamshell Press: Just like the name suggests, it opens and closes like a clamshell. It's a fantastic starting point for beginners, doesn't take up much space, and is perfect for t-shirts, tote bags, and other flat items.
- Swing-Away Press: With this style, the top heated platen swings completely away from the base, giving you a safe, clear view of your workspace. It's a bit safer to use and is better for thicker items like photo slates or wood plaques.
- Mug or Tumbler Press: These are specialized, curved presses designed to wrap perfectly around cylindrical items like coffee mugs and tumblers. They ensure you get even heat and pressure all the way around for a seamless design.
Most people start with a flat press because of its versatility, but as you find your niche, a specialty press can be a game-changer.
To give you a clearer picture, here's a quick checklist of the must-have gear.
Essential Dye Sublimation Gear Checklist
| Item Category | Specific Item | Key Consideration |
|---|---|---|
| Printing | Sublimation Printer | Must be a dedicated or converted printer; a standard inkjet won't work. |
| Consumables | Sublimation Ink | Use brand-specific or compatible high-quality inks for best color results. |
| Consumables | Sublimation Paper | Look for high-release paper to ensure maximum ink transfer and vibrancy. |
| Application | Heat Press | Choose a model (clamshell, swing-away, mug) that fits your primary products. |
| Protection | Butcher Paper or Teflon Sheets | Essential for protecting your heat press platen from ink blow-by. |
| Positioning | Heat-Resistant Tape | Prevents your design from shifting, which causes blurry "ghosting." |
| Safety | Heat-Resistant Gloves | A simple but crucial tool for safely handling hot items off the press. |
Having these items on hand from day one will save you a ton of frustration and help you get beautiful, consistent results every single time.
Essential Accessories You Cannot Skip
Finally, let's talk about the small-but-mighty accessories that make a huge difference. These are the tools that prevent common headaches and protect your investment.
- Heat-Resistant Tape: This tape is your best friend for preventing "ghosting"—that dreaded blurry or doubled image that happens when your paper shifts during pressing. It holds your transfer paper locked in place on the blank.
- Butcher Paper or Teflon Sheets: Always sandwich your project between these protective layers inside the press. They catch any stray ink that might bleed through the sublimation paper, keeping your heat press platen clean and preventing old designs from accidentally staining your next project.
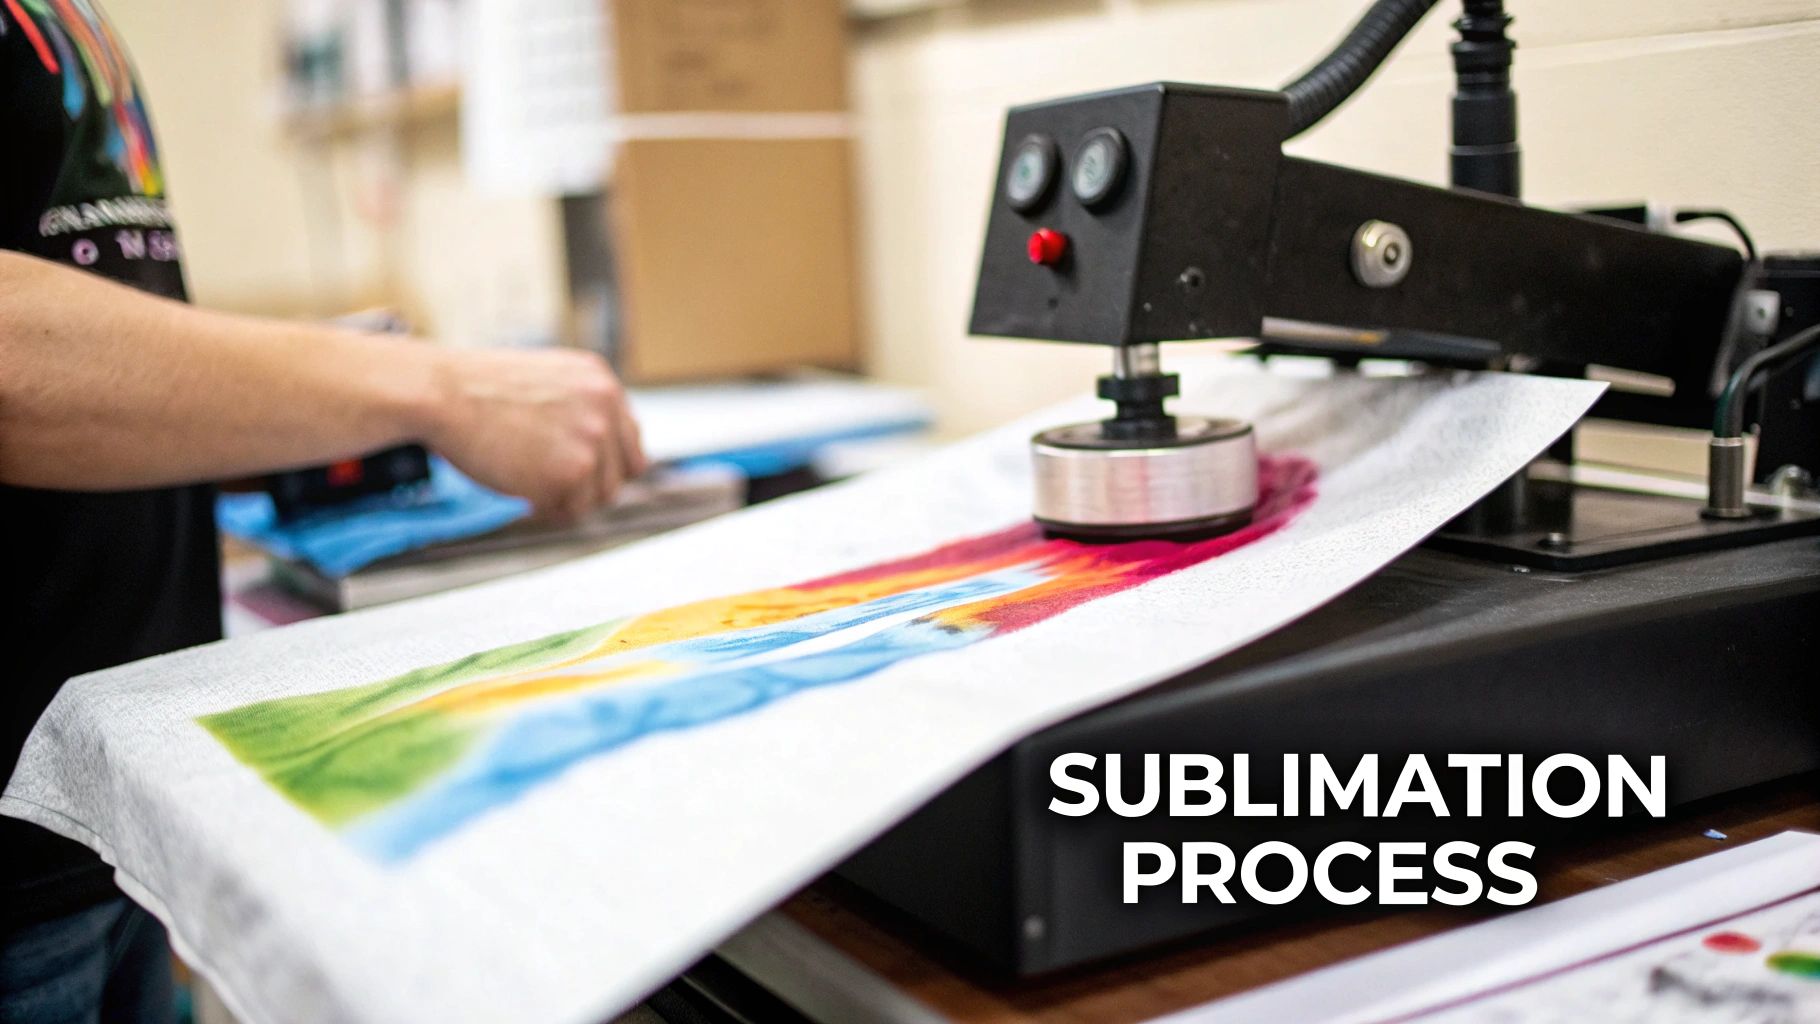
A Step-by-Step Guide to the Sublimation Printing Process
Alright, you've got your gear ready to go. Now for the fun part—actually making something. The dye sublimation heat transfer process is a bit like a science experiment and a bit like baking. Every step matters and builds on the last one.
Think of it like a recipe. If you follow the instructions, you'll get a perfect result every time. Miss a step or get a measurement wrong, and things can go sideways. Let's walk through the entire journey, from a digital file on your screen to a stunning finished product.
Step 1: Create and Print Your Design
It all starts with your artwork. You can cook up a design in professional software like Adobe Photoshop or Illustrator, or use something more approachable like Canva. But before you hit "print," there's one tiny detail that trips up nearly every beginner.
You absolutely must mirror your image.
Because the paper goes face-down on your item, flipping the design horizontally is the only way it will look correct on the final product. If you forget this, all your text and logos will be backward. It’s a classic, costly, and completely avoidable mistake.
Once it's mirrored, print the design onto your sublimation paper using your dedicated sublimation printer and inks. Crank up the print quality settings to make sure every detail is as sharp as possible.
Step 2: Prepare Your Sublimation Blank
With your transfer printed, it's time to prep the item you're decorating—what we call a "blank." Whether it's a polyester t-shirt, a ceramic mug, or a coated aluminum sheet, getting it ready is non-negotiable.
First, go over the surface with a lint roller, especially with fabrics. A single, invisible speck of dust or lint can act like a tiny shield, blocking the ink gas and leaving a frustrating white dot on your print. This two-second step saves a lot of headaches.
Next, you'll want to pre-press your blank. Just pop it in your heat press for about 5-10 seconds. This does two critical things: it zaps any hidden moisture out of the material and irons out wrinkles, giving you a perfectly flat, dry canvas to work on.
Step 3: Align and Secure the Transfer
This is where precision counts. Carefully place your printed transfer paper face-down onto the prepped blank. Take your time to get the alignment just right—eyeball it, measure it, whatever it takes.
Once you’re happy with the placement, use a few pieces of heat-resistant tape to lock the paper in place. This is another one of those small steps that makes a huge difference. Without it, the paper can shift ever so slightly when you close the press, causing "ghosting"—a blurry shadow effect that instantly ruins a sharp design.
Pro Tip: For perfect alignment on a shirt, fold it in half lengthwise and give it a quick press to create a faint center crease. Do the same with your printed paper. Now you can just line up the two creases—dead center, every time.
Step 4: Press Your Design with Heat
It’s time for the main event. To keep your equipment pristine, you'll create a "sublimation sandwich."
- Lay down a sheet of butcher paper on the bottom of your heat press.
- Place your blank (with the transfer taped on) on top.
- Cover it all with another sheet of butcher paper.
This setup prevents any stray ink from bleeding onto your heat press platens.
The magic happens with the right mix of time, temperature, and pressure. These settings change depending on your blank, but a great starting point for polyester fabric is 400°F (200°C) for 60 seconds with medium pressure. Always, always check the manufacturer's recommendations for the specific blank you're using.
Close the press and let the science take over. The heat turns the solid ink into a gas, and the pressure forces that gas directly into the open pores of the polyester. It's this unique chemical process that makes sublimation so durable.
It's also surprisingly efficient. The global dye sublimation inks market was valued at USD 0.87 billion in 2024 and is expected to hit USD 2.16 billion by 2033. A big reason for this growth is the technology's performance—it can achieve resolutions up to 4800 DPI while using 70-90% less water than traditional printing. You can learn more about the growth and impact of sublimation inks in this market report.
Step 5: The Big Reveal
When the timer beeps, open the press. Be careful—everything is incredibly hot. Using heat-resistant gloves, move the item to a heat-safe surface.
While it's still hot, peel away the transfer paper in one smooth, confident motion. This is called a "hot peel," and it’s deeply satisfying.
You’ll see a brilliantly vibrant, permanent design that has literally become part of the item. The transfer paper will look pale and washed out, which is a great sign! It means the ink did its job and moved to its new home. Let the item cool down completely, and you’re done.
Choosing Your Canvas: What You Can and Cannot Sublimate
So, you understand the science behind dye sublimation heat transfer. That's great, but knowing where to apply that science is what turns a hobby into a business or a project you're truly proud of. The secret to those stunning, permanent prints is all about picking the right canvas.
Sublimation isn’t a one-size-fits-all deal. It’s a very specific chemical reaction, and it's pretty picky about its partners.
Think of it as a love story between sublimation ink and polyester. When you bring the heat, the synthetic fibers of polyester fabric literally open up their pores. The ink, which has turned into a gas, flows right into these open pores. As everything cools down, the pores close, locking the ink inside the fibers for good. This creates a design that's actually part of the material—it’s smooth, brilliant, and won't crack or peel.
The Best Materials for Sublimation
Because of this unique bond, your best results will always come from materials with a high polyester content or a special polymer coating. These are your go-to options for creating products with jaw-dropping color and permanence.
- 100% Polyester Apparel: For the most vivid, sharp, and intense colors, nothing beats 100% white or light-colored polyester. This is the gold standard for athletic wear, performance shirts, and custom flags.
- Polyester Blends: You can absolutely sublimate on poly-cotton blends, but there's a catch. The ink will only bond with the polyester fibers. A 50/50 blend will give you a faded, vintage look because only half the fabric can hold the dye. The higher the polyester percentage, the brighter your final print.
- Polymer-Coated Hard Goods: This is where things get really exciting. The process isn't just for fabric! Things like ceramic mugs, metal panels, coasters, and phone cases are often sold with a special polymer coating made just for sublimation. This coating acts exactly like polyester fibers, allowing the dye to infuse into the surface.
This simple diagram shows how a digital idea becomes a physical, sublimated product.
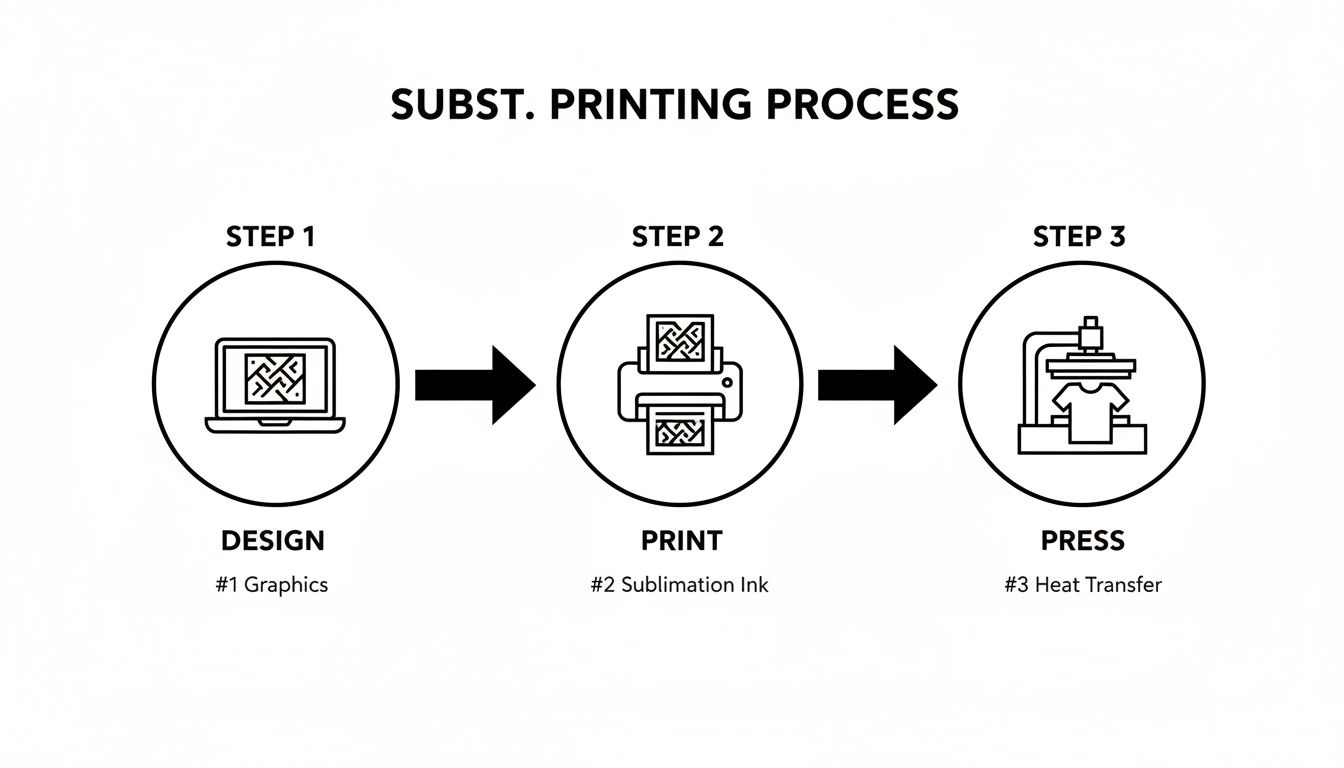
This three-stage journey—design, print, and press—is the foundation for sublimating on any compatible material.
The incredible versatility of this process has fueled some serious growth. The dye-sublimated apparel market was valued at USD 6.1 billion in 2025 and is on track to hit USD 14.7 billion by 2035. This boom is all thanks to its ability to create wash-resistant, vibrant designs perfect for sportswear and modern fashion.
Materials to Absolutely Avoid
Knowing what works is half the battle; knowing what doesn't is the other half. Trying to sublimate on the wrong materials is a fast way to waste time, ink, and expensive blanks. Save yourself the headache and steer clear of these surfaces.
Critical Rule: Sublimation ink cannot bond with natural fibers. Without polyester or a polymer coating, the ink gas has nowhere to infuse. It just sits on the surface and washes away, leaving a faint, blurry mess.
Here are the materials that just won't work with dye sublimation:
- 100% Cotton: This is the most common mistake beginners make. Cotton has no polymer pores to open, so the dye has nothing to grab onto. Your design will look dull right off the press and will wash out almost completely after the first laundry cycle.
- Dark-Colored Fabrics: Sublimation ink is transparent. Think of it like adding a layer of stained glass—it adds color but can't cover up what's underneath. Printing on a black shirt will give you a design that’s either invisible or so muted you can barely see it.
- Untreated Hard Surfaces: You can't just grab any old mug off the shelf and expect sublimation to work. Unless it has been specifically prepared with a polymer sublimation coating, the ink has nothing to bond with and will just wipe right off.
If you want to see what's possible when you get the material right, take a look at products like these vibrant sublimation cut & sew dresses. They're a perfect example of how the process shines on the proper fabric. By sticking to polyester and polymer-coated items, you set yourself up for flawless, professional-quality results every single time.
Comparing Sublimation with DTF and HTV
Choosing the right way to decorate your apparel can feel like a tough call, but it really boils down to understanding the practical differences between the big three. While dye sublimation is a fantastic technology, it’s not the only player in the game. Let's put it head-to-head with two other methods you'll see everywhere: Direct-to-Film (DTF) and Heat Transfer Vinyl (HTV).
This isn't just a technical breakdown. We're going to get into what you can actually see and feel in the finished product—the stuff that really matters. We’ll look at the hand-feel, durability, what materials they work on, and how complex each process is.
The Feel of the Final Print
The first thing anyone does with a custom shirt is touch the design. This "hand feel" is one of the most immediate and obvious differences between these methods.
- Dye Sublimation: This one has zero feel. Seriously. Because the ink literally becomes one with the fabric fibers, the design area feels exactly the same as the rest of the shirt. It’s perfectly smooth and breathable.
- Direct-to-Film (DTF): A DTF print feels like an incredibly thin, soft layer sitting on the fabric. It’s way more flexible than old-school screen printing, but you can still tell there's something on top of the garment.
- Heat Transfer Vinyl (HTV): HTV has the most noticeable feel of the three. It’s a distinct sheet of vinyl that's been fused to the surface. Modern vinyl is much softer than it used to be, but the design is clearly on top and can feel thick, especially if you're layering multiple colors.
Material Compatibility and Color Limitations
The fabric you choose to print on will heavily influence which method you can use. This is where the lines are drawn most clearly, especially when talking about fabric type and color.
Sublimation is a bit of a diva; it really only works its magic on light-colored polyester or items with a special polymer coating. On the other hand, DTF and HTV are the versatile workhorses, opening up a whole world of possibilities on a much bigger range of materials. You can learn more about all the options by exploring different types of heat transfers on the market today.
The Bottom Line: If you want to print on a dark shirt or a 100% cotton tee, sublimation is immediately out of the running. For those jobs, DTF and HTV are your go-to solutions. DTF handles full-color graphics beautifully, while HTV is a champ for solid-color designs.
A Head-to-Head Comparison
To help make the choice crystal clear, let's put the key features of each method side-by-side. Sometimes seeing everything in one place is the best way to spot the right fit for your project.
Sublimation vs DTF vs HTV A Quick Comparison
This feature-by-feature table should help you choose the right apparel decoration method for your needs.
| Feature | Dye Sublimation | Direct-to-Film (DTF) | Heat Transfer Vinyl (HTV) |
|---|---|---|---|
| Feel | Zero hand feel; becomes part of the fabric. | A thin, soft, and flexible layer on the surface. | A noticeable layer on top; can be thick. |
| Durability | Extremely permanent; will not crack, peel, or fade. | Very durable and wash-resistant with good stretch. | Good durability but can crack or peel over time. |
| Best For Fabrics | 100% white or light-colored polyester. | Cotton, polyester, blends, leather, and more. | Cotton, polyester, and blends. |
| Color Capability | Unlimited, vibrant, full-color photographic prints. | Unlimited full-color prints, including white ink. | Limited to solid colors; requires layering for multi-color. |
| Best For Design Type | Complex, multi-color images, gradients, and photos. | Detailed, full-color logos and complex graphics. | Bold, simple text, numbers, and single-color logos. |
Each method has clear strengths. Sublimation is unmatched for permanence on polyester, DTF offers incredible versatility for full-color prints on almost anything, and HTV remains the king of simple, bold graphics.
Making the Right Choice for Your Project
So, after all that, which one should you pick? It all comes down to what you’re making.
-
Choose Dye Sublimation If: Your absolute top priorities are permanence and a design with zero feel. You're working with white or light-colored polyester gear or polymer-coated hard goods and need stunning, photorealistic quality.
-
Choose Direct-to-Film (DTF) If: You need the freedom to print intricate, full-color designs on pretty much any fabric, including 100% cotton and dark-colored clothing. DTF is the perfect all-rounder, giving you great durability and a soft feel without sublimation's strict material limits.
-
Choose Heat Transfer Vinyl (HTV) If: Your project calls for simple, bold designs like names, numbers, or single-color logos. It’s a fantastic starting point for beginners and is perfect for jobs where you want to layer solid colors for a unique, textured effect.
Solving Common Dye Sublimation Problems
Even when you do everything right, the world of dye sublimation can throw you a curveball. A frustrating print isn't a failure—it's just a puzzle waiting to be solved. Let's walk through how to diagnose and fix the most common issues, turning those printing headaches into flawless final products.
The most frequent culprit behind a ruined print is ghosting. You'll know it when you see it: a faint, blurry double image right next to your main design. This happens when the sublimation paper shifts, even a tiny bit, as you open or close the heat press.
Luckily, the fix is straightforward and non-negotiable: use heat-resistant tape. Always tape your transfer paper down securely to the blank in two or three spots. This simple step locks the design in place, ensuring the ink transfers as one crisp, clean image. A firm but gentle hand when closing and opening the press also helps prevent any last-second movement.
Diagnosing Color and Quality Issues
Are your colors coming out dull, faded, or just not what you expected? It’s a common frustration with a few potential causes. Before you start questioning your printer or inks, take a hard look at your heat press settings and materials.
Your heat press is like an oven. If the temperature or pressure is off, the recipe won't work. Most color issues stem from incorrect application, not faulty ink.
Start by working your way through the three key variables:
- Moisture: Any moisture trapped in your blank turns to steam under heat, which can totally disrupt the ink transfer and leave you with blotchy, uneven colors. The solution? Always pre-press your item for 5-10 seconds to cook off any hidden humidity.
- Pressure: Too little pressure means the ink gas can’t properly bond with the material's fibers, resulting in a faded or light print. On the flip side, too much pressure can cause the ink to "blow out" and create blurry edges. For most substrates, you're aiming for a firm, medium pressure.
- Temperature and Time: These two go hand-in-hand. If your temperature is too low or your press time is too short, the ink simply won't have the energy to fully convert to a gas, leaving your colors looking muted. Always start with the recommended settings for your specific blank and adjust from there.
Tackling Annoying Print Defects
Sometimes the problems are smaller but just as maddening. Ever pull a print off the press only to find tiny dots or lines of ink scattered across it? These are often called "pizza wheels."
These little marks come from the small, star-shaped rollers inside some printers that guide the paper. If those rollers pass over a heavily inked area, they can pick up wet ink and leave tiny tracks further down the page. To fix this, try repositioning your design to avoid the roller paths or select a lower ink density setting in your print driver for those super-saturated images.
By methodically checking each step of your process—from prepping your material to double-checking your press settings—you can solve nearly any sublimation issue that comes your way.
Frequently Asked Questions About Sublimation
Alright, even after breaking down the whole process, a few key questions always pop up. It's totally normal. These are the things that often trip people up when they're first getting their hands dirty with sublimation.
Let's clear the air and tackle those nagging questions head-on. Think of this as the final check-in to make sure you're ready to print with confidence.
Can You Sublimate on Dark Colors or Black Fabric?
The short and simple answer is no, you can't. This is probably the most common question we see, and the reason is all about how sublimation ink works. The ink is transparent, not opaque.
Imagine trying to use a yellow highlighter on a black piece of paper—the ink is there, but the dark background just swallows it up. Sublimation ink behaves the same way. It needs a light-colored surface to show its true, vibrant colors, which is why white or pastel polyester is the go-to choice.
What Happens If You Sublimate on 100 Percent Cotton?
This is a classic rookie mistake, and it's an easy one to make. If you press a sublimation transfer onto a 100% cotton shirt, you’ll be disappointed. The magic of sublimation relies on a chemical bond between the dye gas and polymer (polyester) fibers.
Cotton is a natural fiber, so there’s simply nothing for the ink to grab onto. The design will look incredibly dull and faded right off the heat press. Worse yet, it will almost completely disappear after the very first wash, leaving you with a faint, ghost-like stain.
Does a Sublimation Print Fade Over Time?
This is where sublimation really shines. Its durability is one of its biggest selling points. Because the ink isn't just sitting on top of the material but has become a permanent part of it, the design is incredibly resilient. You won’t see any cracking or peeling—ever.
Under normal washing and wearing, a good sublimation print will last for the entire life of the garment. The colors stay bold and punchy, which is why it's the top choice for things like athletic jerseys that take a real beating.
Do You Need a Special Printer for Sublimation?
Yes, absolutely. You can't just load sublimation ink into your regular home office printer and expect it to work. You need a dedicated setup.
Your options are either a purpose-built sublimation printer, like those from Sawgrass, or an inkjet model (certain Epson EcoTanks are famous for this) that you’ve converted exclusively for sublimation from day one. You can't switch back and forth—once it's a sublimation printer, it's always a sublimation printer. The specialized ink is the key to the whole chemical reaction.
At Raccoon Transfers, we live and breathe high-quality prints. While sublimation is amazing, sometimes you need to print on cotton, darks, or tricky hard surfaces. That’s where our DTF and UV-DTF transfers come in. We offer the perfect fix for any project. Check out our custom transfer options and let's make your designs a reality.