
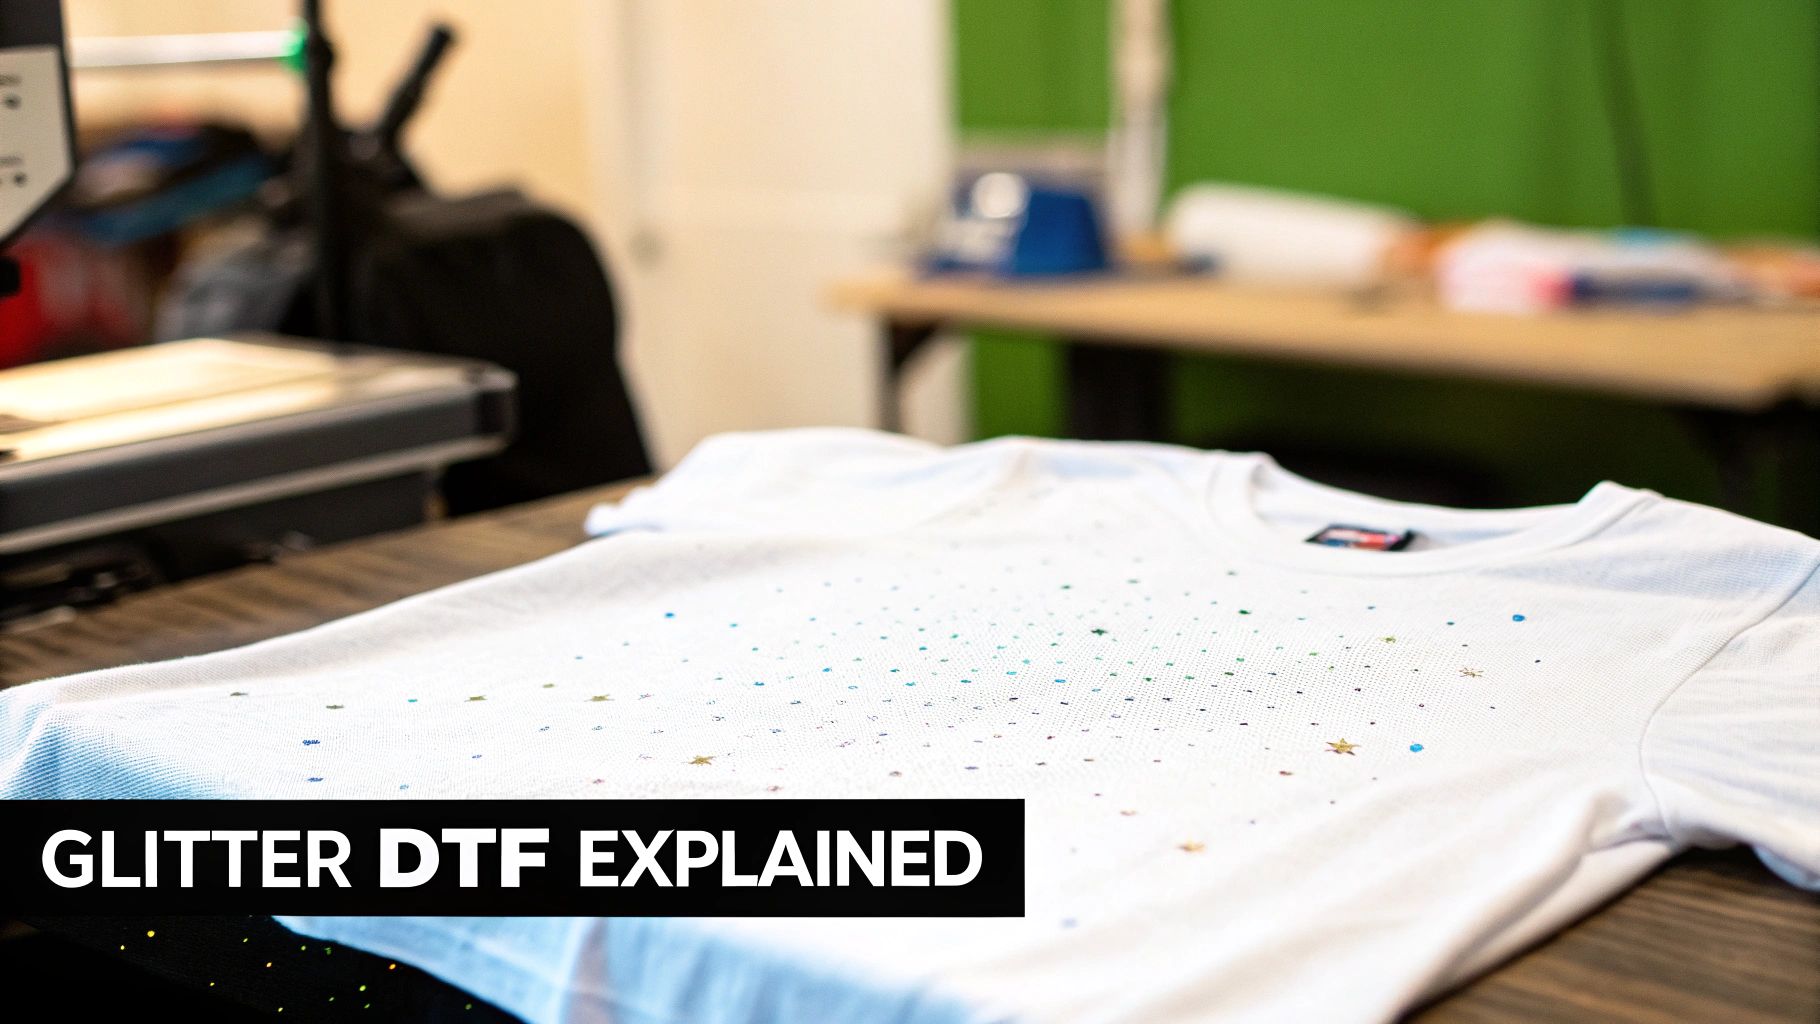
A Guide to Brilliant Glitter DTF Transfers for Custom Apparel
Glitter DTF transfers are a fantastic way to get sparkling, textured designs onto fabric without the mess and flaking you get with old-school methods. They blend the rock-solid durability of Direct-to-Film (DTF) printing with the can't-miss appeal of glitter, giving you a premium, permanent finish.
What Are Glitter DTF Transfers and Why Are They a Game Changer?
Picture taking a vibrant, full-color photograph and infusing it with a dazzling shimmer. That's the magic behind glitter DTF transfers. They’re like the next evolution of iron-ons, but instead of just sprinkling glitter on top, the sparkle is fused right into the ink itself.
This unique process creates a design that looks incredible and is built to last. The glitter becomes a core part of the transfer, giving it a smooth yet textured feel that won't flake, crack, or peel away—even after dozens of trips through the washing machine. If you’ve ever wrestled with messy loose glitter or stiff, unforgiving glitter vinyl, you know what a huge leap forward this is.
The Best of Both Worlds
Glitter DTF brings together two amazing benefits that used to be really hard to find in a single decoration method. It perfectly merges the key elements every great custom apparel piece needs:
- Exceptional Durability: It has all the strength and flexibility of a standard DTF print, so the design stretches and moves with the fabric without breaking apart.
- Premium Visual Appeal: It delivers that high-end, eye-catching shimmer that makes a garment pop and feel more valuable.
This powerful combination makes glitter DTF transfers a go-to choice for so many people. Custom apparel shops can offer a premium product without a complicated setup. Hobbyists can get professional-looking results from home. Even promotional companies can meet the growing demand for unique, high-impact designs.
This specialty print is really taking off, tapping into what customers want: apparel that stands out. In fact, promotional products are the fastest-growing part of the DTF industry, expanding at an estimated 7.9% compound annual growth rate. You can dig deeper into the DTF film market on datainsightsmarket.com.
Making Professional Quality Accessible
Here at Raccoon Transfers, our goal is to put this technology into everyone's hands. We offer ready-to-press glitter DTF transfers, which means you can skip the expensive equipment and messy supplies. Whether you’re making one special t-shirt or launching an entire collection, you get the same consistent, brilliant sparkle every single time.
This totally simplifies the production process, letting you focus on what really matters—your creativity. If you're just getting started with this technology, learning the basics is the perfect first step. For a little more background, check out our guide on what a DTF transfer is and how the whole process works.
Glitter DTF Compared to Other Customization Methods
To really get why glitter DTF transfers are such a game-changer, it helps to put them side-by-side with the other ways people customize apparel. Each method has its own strengths, but you'll see that glitter DTF cleverly solves some of the biggest headaches that come with creating sparkly, long-lasting designs.
The magic is in how they're made. Instead of sprinkling glitter on top as an afterthought, glitter DTF embeds microscopic glitter flakes right into the ink itself. This creates one solid, unified transfer that feels smoother on the shirt and holds up way better in the wash.
Glitter DTF vs. Standard DTF
On the surface, glitter and standard DTF transfers look like two sides of the same coin. They both deliver stunning, full-color prints that can handle just about any design you throw at them. The real difference is all about the finish—how it looks and how it feels.
A standard DTF transfer gives you a clean, smooth print with a matte or slightly satin look. It’s the go-to workhorse for perfectly reproducing a detailed company logo or a complex piece of art. Glitter DTF takes that same high-fidelity print and kicks it up a notch with a vibrant, shimmering texture that catches the light.
Think of it this way: Standard DTF is like a crystal-clear photo printed on high-quality paper. Glitter DTF is that same photo printed on metallic stock—it has all the original detail, but with an extra dimension of sparkle that makes you look twice.
This extra pop makes glitter DTF perfect for designs meant to get noticed. It’s a natural fit for spirit wear, fashion lines, and any promotional gear that needs to feel a little more special.
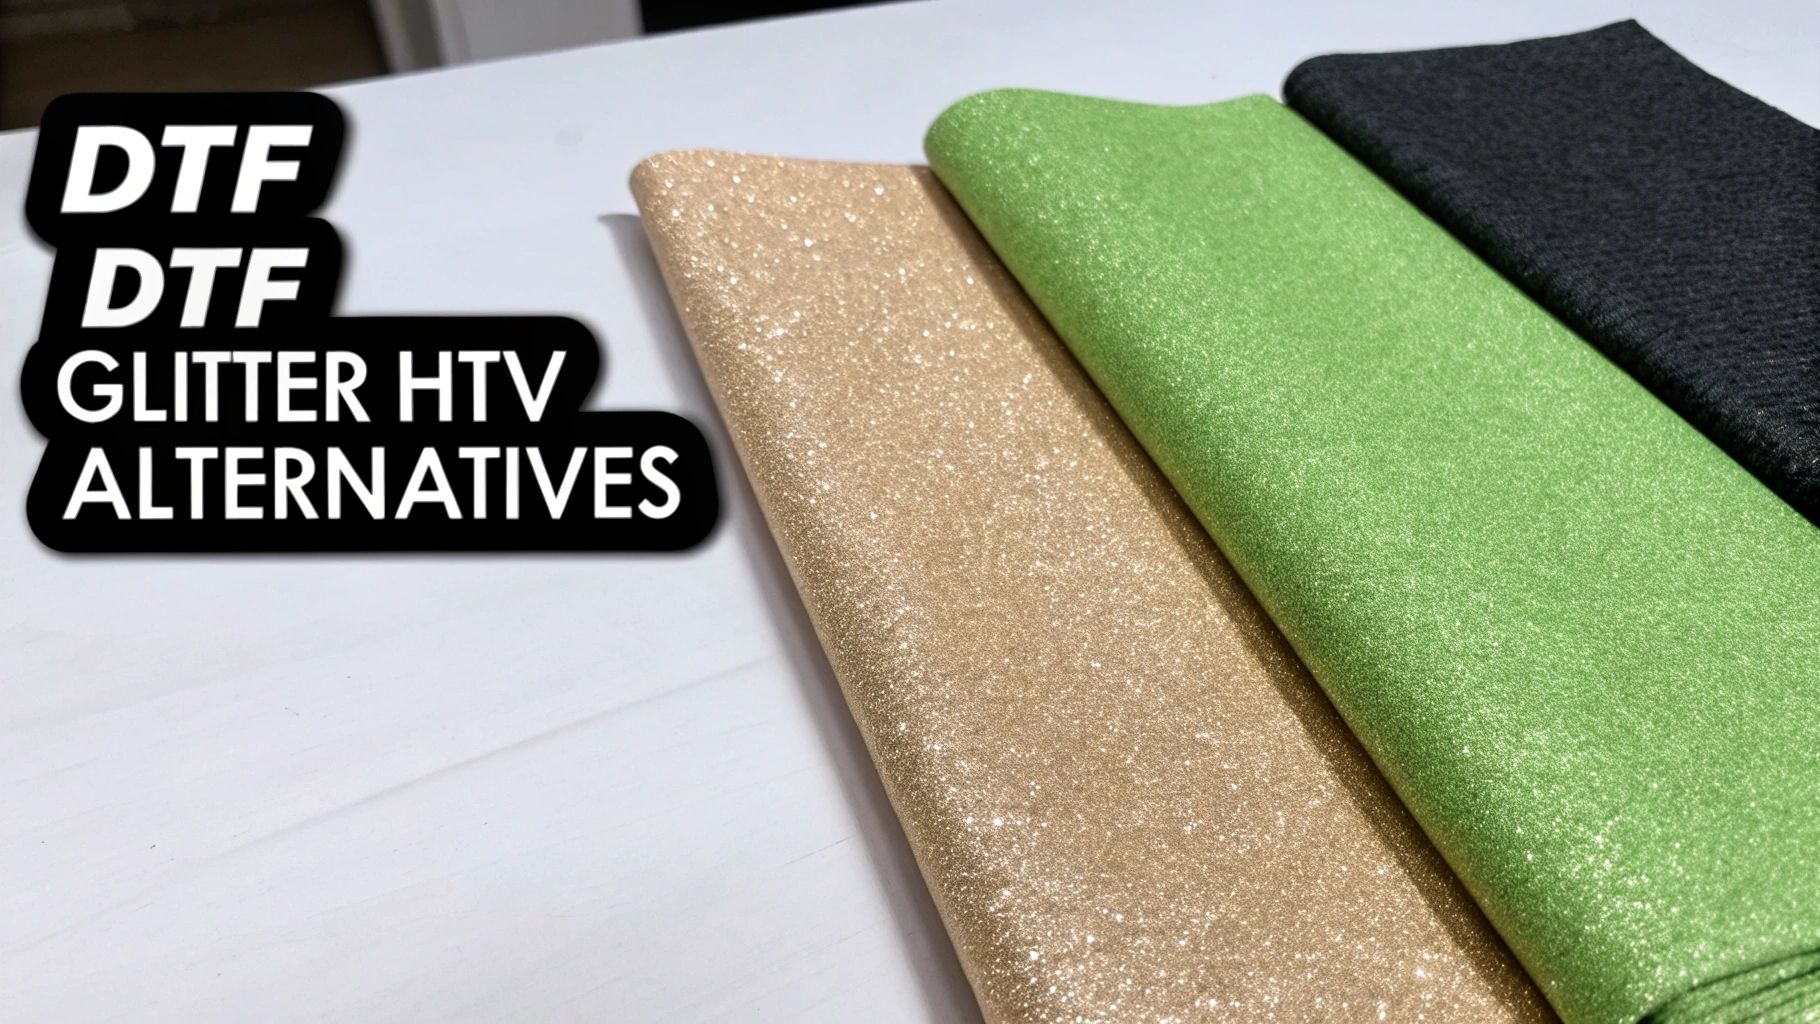
Glitter DTF vs. Glitter HTV
Here’s where the advantages of glitter DTF transfers really start to shine. For years, Glitter Heat Transfer Vinyl (HTV) has been the default for many crafters and small shops, but anyone who’s used it knows the frustrations.
With glitter HTV, you have to cut your design from a solid sheet of material and then go through the painful process of "weeding"—meticulously picking out all the tiny, unwanted pieces of vinyl by hand. This is a huge time-sink and becomes a nightmare with detailed designs. Want to use multiple colors? You have to stack thick, heavy layers of vinyl, resulting in a stiff, bulky patch on the garment.
Glitter DTF just sidesteps all of that:
- Zero Weeding: The design is printed directly onto the film. What you see is what you get. No weeding means you save a massive amount of time and labor.
- Full-Color Prints: You can print a design with millions of colors, gradients, and fine details in a single press. Trying that with layered HTV is practically impossible.
- A Softer Touch: Because the glitter is part of a single, thin ink layer, the final transfer is way more flexible and lightweight than chunky, layered vinyl.
For any business looking to grow, the time saved by eliminating cutting and weeding is a massive win.
Glitter DTF vs. Screen Printing
Screen printing with glitter inks can look fantastic, but it’s a messy, complex, and expensive process, especially for smaller orders. Every single color in your design needs its own dedicated screen, which means high setup fees and a lot of prep time. The glitter inks themselves are notoriously tricky and can easily clog the screens.
Glitter DTF is a much more modern and flexible solution. Since it’s a digital process, there are no screens to burn, set up, or clean. This makes it incredibly affordable for one-off custom jobs, small batches, or designs loaded with different colors. While screen printing still makes sense for huge runs of a simple, one-color design, glitter DTF offers far more versatility for today's on-demand apparel world. Similarly, it's useful to compare it with other methods like sublimation printing, which has its own set of pros and cons depending on the fabric.
To wrap it all up, let's look at a quick head-to-head comparison.
Glitter DTF vs Other Customization Methods
| Feature | Glitter DTF | Standard DTF | Glitter HTV | Screen Printing (Glitter Ink) |
|---|---|---|---|---|
| Texture & Feel | Smooth, integrated glitter with a soft feel. | Very smooth, flexible, matte/satin finish. | Coarse, textured glitter feel. Can be thick/stiff. | Varies; can be textured. Multiple layers add weight. |
| Detail & Color | Excellent. Handles fine lines and unlimited colors. | Excellent. Photo-realistic quality with unlimited colors. | Poor. Not suitable for fine details or complex designs. | Fair. Fine details can be lost. Each color adds cost. |
| Durability | High. Excellent stretch and wash resistance. | High. One of the most durable methods available. | Good, but can crack or peel, especially when layered. | Very high, but can be prone to cracking over time. |
| Production | Very efficient. No weeding needed. Fast application. | Very efficient. The fastest method for multi-color jobs. | Slow. Requires cutting and tedious weeding by hand. | Slow setup. Best for very large, simple print runs. |
As you can see, while every technique has its place, glitter DTF stands out by blending the best of all worlds: incredible detail, fantastic feel, and unmatched production speed for full-color, sparkling designs.
Your Step-by-Step Guide to Applying Glitter DTF Transfers
Applying our glitter DTF transfers is a pretty straightforward process, but getting that perfect, sparkling result every single time comes down to getting the details right. This guide will walk you through the whole process, from prepping the shirt to the final peel, so your designs come out looking flawless.
Think of it like this: you can have the best ingredients for a cake, but if your oven temperature is off or you don't follow the recipe, it won't turn out right. The same is true here. Your heat press settings and application steps are your recipe for a perfect, durable glitter design.
Preparing for a Perfect Press
Before you even think about placing the transfer, a little prep work makes a huge difference. The goal here is to create the perfect canvas so the transfer's adhesive can grab onto the fabric fibers and never let go.
First things first, get your heat press set to the right temperature and pressure for the fabric you're using. This is probably the most critical part—guessing here can lead to a weak press or, even worse, a scorched garment.
Next, lay your garment flat on the press and smooth out any wrinkles. Now for a step you should never skip: the pre-press. Press the empty garment for about 5-10 seconds. This zaps out any lingering moisture and invisible factory chemicals that can mess with adhesion.
A proper pre-press is non-negotiable for a professional finish. Trapped moisture turns into steam under heat, and that steam gets between your transfer and the fabric, leading to peeling or bubbling down the line.
The Application Process Step-by-Step
With your garment prepped and ready, it's time for the main event. Just follow these steps carefully, and you'll nail it.
- Position Your Transfer: Lay the glitter DTF transfer on the garment, design side up. If you're worried about it sliding around, a little heat-resistant tape can be your best friend.
- Press the Design: Cover the transfer with a Teflon sheet or a piece of parchment paper. This protects both the transfer and your heat press platen. Now, press it using the settings recommended for your fabric.
- Cool Down Correctly: This is a crucial moment. Once the timer goes off, take the garment off the press and lay it on a flat, cool surface. You need to let the transfer cool down completely to room temperature. Glitter DTF is a cold peel process, and getting impatient here can ruin the entire design.
- The Final Peel: Once it’s completely cool to the touch, pick a corner and gently peel the film away from the design. You want to peel it back at a low, smooth angle. The glittery image should stay perfectly bonded to the fabric.
- (Optional) Final Curing Press: For an extra layer of durability, you can do a quick final press. Cover the now-exposed design with your Teflon sheet and press again for just 5-10 seconds. This really helps lock the design into the fabric for the long haul.
Recommended Heat Press Settings
Using the right settings is what separates a good transfer from a great one. Below is a handy table with our go-to starting points for the most common fabrics. That said, it's always a smart move to test on a scrap piece or a hidden area if you're working with a material for the first time. For a deeper dive, check out our complete guide on heat press settings for DTF.
Recommended Heat Press Settings for Glitter DTF Transfers
This table gives you the precise temperature, time, and pressure settings needed to get the best results when applying your glitter DTF transfers to different fabrics.
| Fabric Type | Temperature (°F) | Time (Seconds) | Pressure | Peel Type |
|---|---|---|---|---|
| 100% Cotton | 300-320°F | 10-15 seconds | Medium-Firm | Cold Peel |
| Polyester Blends | 280-300°F | 8-12 seconds | Medium | Cold Peel |
| 100% Polyester | 260-280°F | 8-10 seconds | Medium-Light | Cold Peel |
| Tri-Blends | 260-280°F | 8-12 seconds | Medium-Light | Cold Peel |
Stick to these guidelines, and you'll ensure your glitter designs not only look fantastic but are tough enough to last.
Designing Artwork for Maximum Visual Impact
A perfect press is only half the story. The real magic of glitter DTF transfers starts long before you even touch the heat press—it begins with smart artwork preparation. Creating a design that truly pops with sparkle isn't just about what looks good on your screen. It’s about knowing how your design choices will translate into a physical, light-catching product.
Think of the glitter particles as thousands of tiny mirrors embedded right into your design. To make them do their job and really shine, you need to give them enough surface area to catch and reflect the light. This is why some design elements work way better than others when you're going for that high-impact, shimmering finish.
Prioritizing Bold and Solid Design Elements
When you're working with glitter DTF, simplicity is often your best friend for creating a dramatic effect. While these transfers can handle a surprising amount of detail, the glitter effect is always most powerful in larger, solid areas of color.
Thin, delicate lines or tiny, intricate text can easily get lost in all that sparkle. The glitter needs a little room to breathe and show off.
Here are a few practical tips to keep in mind:
- Choose Bold Fonts: Go for thick, blocky, or script fonts that have some real weight to them. This gives the glitter more real estate to work its magic.
- Embrace Solid Shapes: Designs built around solid shapes, strong silhouettes, and clean negative space will have a much more powerful visual presence.
- Boost Line Thickness: If your design has outlines or linework, consider making them just a bit thicker than you normally would for a standard print.
The simple diagram below shows the basic steps of the DTF application process, illustrating how your carefully prepared artwork goes from a digital file to a finished garment.
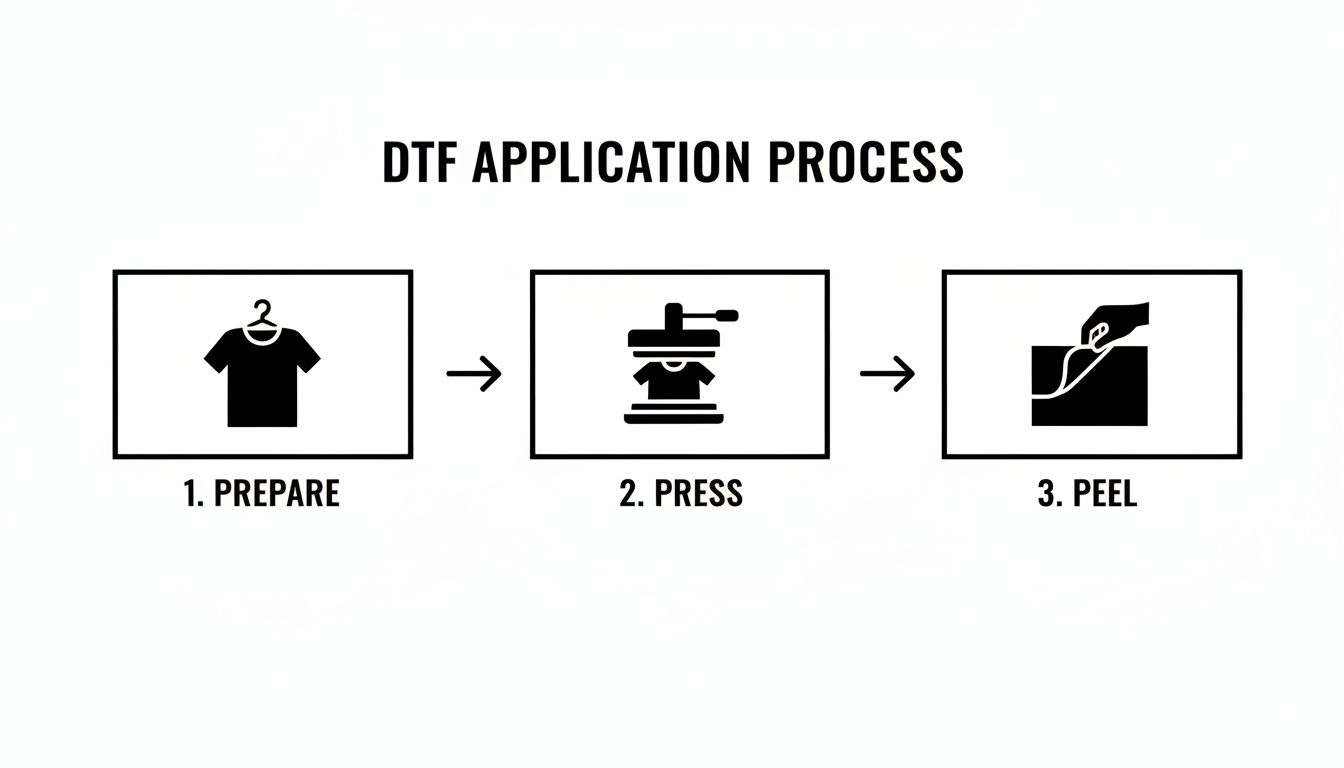
As you can see, a successful outcome depends on a clean workflow, starting with good prep and ending with a precise peel.
The Role of Color and Resolution
The base ink colors you choose play a huge part in the final look. The glitter particles are suspended within the colored ink, so the two elements have to work together. Darker base colors like black, navy, or a deep purple tend to create a really intense, almost galaxy-like sparkle. Lighter colors, on the other hand, will give you a softer, more subtle shimmer.
Just as important is the quality of your artwork file. Your designs should always be created and saved at a high resolution. The industry standard is 300 DPI (dots per inch) for a reason. A low-resolution file will look blurry and pixelated when printed, and no amount of glitter can hide fuzzy edges.
Pro Tip: Always use a PNG file format with a transparent background. This is non-negotiable. It ensures that only your design gets printed, without any ugly white boxes or backgrounds showing up on your final transfer.
Maximizing Value with Gang Sheets
For any business or crafter looking to produce multiple designs, gang sheets are an absolute game-changer for saving money and time. Think of a gang sheet as a big puzzle. It's one large sheet of DTF film, and your goal is to arrange as many of your individual designs onto it as you can, fitting them together to use every last inch of space.
By "ganging" your prints, you pay for the sheet, not for each individual design. If you can squeeze ten small logos onto a single sheet, your cost per logo plummets. This is, without a doubt, the smartest way to order glitter DTF transfers for building inventory, making event merch, or launching a full product line.
At Raccoon Transfers, our online gang sheet builder makes this whole process incredibly simple. You just upload your high-resolution PNGs and drag them around to get the most bang for your buck.
Will It Last? Durability and Care for Your Glitter DTF Transfers
After you’ve pressed the perfect design, two questions immediately pop into mind: "Is this actually going to last?" and "How do I wash this thing?" We get it. You're making products for customers or gifts for people you care about, and you want them to hold up.
The fantastic news is that glitter DTF transfers are built for the long haul. They masterfully combine that eye-catching sparkle with some serious, real-world durability.
The magic is in how they're made. The glitter isn't just sprinkled on top; it's fused directly into a flexible, tough layer of ink. This creates a single, unified design that stretches and moves right along with the fabric. That means you get a transfer that stands up to the cracking, peeling, and fading that often ruins lesser-quality prints after just a few trips through the laundry.
When you press them correctly, these transfers are ready to take on dozens and dozens of wash cycles. This makes them a rock-solid choice not just for trendy t-shirts, but for items that get put through the wringer—think team jerseys, work uniforms, and kids' clothes.
Simple Care for a Sparkle That Stays
To get the absolute most life out of your glitter DTF gear, a little common sense in the laundry room goes a long way. Sharing these simple instructions with your customers is a great touch; it helps them protect their new favorite shirt and shows them you stand behind your quality.
The name of the game is being gentle. Here’s what we recommend:
- Turn It Inside Out: This is the easiest and most important step. Before it goes in the wash, flip the garment inside out. This puts a layer of fabric between the glitter design and everything else, dramatically reducing friction.
- Wash Cold: Stick to cold or cool water. Hot water is harsh on both the garment's fabric and the transfer's adhesive over time.
- Use a Mild Detergent: Skip the bleach and aggressive fabric softeners. Harsh chemicals can weaken the print and dull its shine.
- Tumble Dry on Low: High heat is the arch-nemesis of custom apparel. If you must use a dryer, choose the lowest heat setting. Honestly, hanging it to dry is always the safest bet.
Key Takeaway: The core idea is simple: minimize heat and abrasion. By following these rules, your glitter DTF designs will stay bright and fully intact for the life of the garment itself. For an even deeper dive, check out our complete guide on DTF washing instructions.
Beyond the T-Shirt: Expanding Your Creative Reach
The sheer toughness of glitter DTF transfers blows the doors wide open for your creativity. You're no longer limited to the classic cotton tee. The adhesive is designed to bond with a huge variety of materials, letting you add a touch of sparkle to almost any fabric item you can get your hands on.
Think about all the possibilities this unlocks for your product line or personal projects:
- Cozy Outerwear: Press sparkling logos onto hoodies, crewneck sweatshirts, and jackets. They work great on cotton, polyester, and blends.
- Must-Have Accessories: Create tote bags that pop, custom hats that turn heads, and canvas book bags that make a statement.
- Home & Event Decor: You can even go beyond clothing. Elevate items like decorative canvas banners, fabric gift pouches, and custom aprons with a bit of glitter.
This versatility makes glitter DTF an incredible tool for creating a full, cohesive brand. You can apply the same stunning design across a whole range of products—from shirts to bags to hats—and know you'll get a consistent, professional-grade look every single time.
Why Raccoon Transfers Is Your Go-To for Glitter DTF
Picking the right partner for your glitter DTF transfers can make or break your business. It's not just about getting a print; it's about finding someone who gets what you need to succeed. We built Raccoon Transfers from the ground up to deliver the speed, quality, and support that keeps custom apparel shops ahead of the game.
The apparel world doesn't wait. A missed deadline is a lost sale, and we get that. That's why a lightning-fast 24-hour turnaround time is our standard. Your order is printed and out the door before you have time to wonder where it is.
And what good is a fast print if it takes a week to arrive? We ship everything from our US-based facility and offer free next-day shipping on qualifying orders. This means you can jump on a trend, say "yes" to a last-minute order, and keep your customers happy without breaking a sweat.
Quality That Speaks for Itself
Of course, speed means nothing if the quality isn't there. We’re obsessed with using top-tier materials for our glitter DTF transfers. The result? Prints that pop with brilliant color, deliver an incredible sparkle, and feel soft and flexible on the garment.
Our printing process ensures every detail of your design, from a simple logo to complex artwork, comes out sharp with even glitter distribution. No blotches, no dull spots—just a perfect print, every single time.
We also know that a great transfer is only half the battle. That's why every package comes with crystal-clear application instructions. We want to remove all the guesswork for you.
Our mission is simple: to help you create a professional, sellable product from your very first press. We give you the tools and support to make it happen, whether you're a seasoned pro or just starting out.
We're Here to Help You Grow
The custom apparel market is booming. The Direct-to-Film printing industry hit a global value of about USD 2.89 billion in 2025 and is only climbing. With North America owning 38% of that market, US businesses are right in the thick of it. You can dive deeper into the numbers by checking out the full industry analysis on 360iresearch.com.
To ride that wave, you need a supplier who can keep up. That’s us. We give you smart tools to work more efficiently, like our online gang sheet builder. It lets you easily tile multiple designs onto one sheet, which slashes your waste and drops your cost per print significantly.
When you add it all up—the best materials, the fastest turnaround, and tools that save you money—you get more than just a printer. You get a partner who is genuinely invested in seeing your business thrive with glitter dtf transfers. When you win, we win.
Got Questions About Glitter DTF? We've Got Answers.
We talk to creators all the time, and a few questions about glitter DTF transfers pop up again and again. Let's clear them up so you can press your designs with total confidence.
Will the Glitter Flake Off in the Wash?
Absolutely not. This isn't your grandma's craft glitter. The sparkle is actually embedded inside the ink layer, not just sprinkled on top.
Think of it this way: the glitter becomes part of the transfer itself. It's sealed in, creating a permanent bond that’s engineered to survive dozens of washes without shedding or dulling. You get all that amazing shine without leaving a trail of glitter everywhere you go.
Can I Just Use My Home Iron to Press These?
Honestly, we really advise against it. For results that look professional and actually last, a heat press is a non-negotiable tool. It all comes down to two things a home iron just can't deliver: consistent, even heat and heavy, uniform pressure.
An iron is full of hot and cold spots, and you can't possibly press down with the same amount of force across the entire design. This is a recipe for patchy adhesion and a transfer that starts peeling after the first wash. A heat press is the only way to lock that transfer onto the fabric for good.
Are There Any Design Rules or Limitations?
Not really, but there are a few things to keep in mind to get the best pop. Glitter DTF can handle full-color, super-detailed designs just like our standard transfers. You can print complex logos, color gradients, or even photos with that signature sparkly finish.
That said, the glitter effect really shines on designs with bold elements. Think thicker fonts and solid blocks of color. These give the glitter more surface area to catch the light, creating a much more dramatic and eye-catching result.
How Do I Set Up My Artwork for a Gang Sheet?
Getting your art ready is straightforward. The golden rule is to use a high-resolution PNG file—we recommend 300 DPI—with a totally transparent background. This is super important because it ensures we only print your design, not a big white box around it.
When you're ready, our online gang sheet builder makes it easy to upload and arrange all your designs to fit the most on a single sheet, saving you money. Just do a quick final check to make sure your art is sized correctly and there are no stray pixels before you upload. A clean file means a crisp print.
Ready to make apparel that genuinely stops people in their tracks? Raccoon Transfers delivers premium, press-ready glitter DTF transfers that make it simple to add that brilliant sparkle to your work.