
Heat Transfer Printing on T Shirts A Practical Guide
When you're looking to put a design on a t-shirt, heat transfer printing is one of the most accessible and versatile ways to get it done. At its core, the process is simple: you use a combination of heat and pressure to apply a pre-made design directly onto the fabric. This method covers everything from vinyl (HTV) to the newer Direct-to-Film (DTF) transfers, making it a fantastic choice for creating custom apparel with anything from bold text to complex, full-color images.
Understanding Your Heat Transfer Options

Before you even think about turning on your heat press, you need to know what you're working with. "Heat transfer" isn't just one thing—it’s a whole category of techniques, and each one has its own strengths. Picking the right one for your project is the first real step toward getting those professional-quality results you're after.
The demand for personalized gear is exploding. The custom t-shirt printing market was valued at around USD 6.46 billion in 2024 and is expected to hit nearly USD 15.89 billion by 2033, according to research from StraitsResearch.com. This isn't just a trend; it's a huge opportunity for creators and small businesses.
The Most Common Transfer Types
The transfer you choose will completely change the look, feel, and lifespan of your finished shirt. Let’s break down the main players you’ll come across.
- Heat Transfer Vinyl (HTV): This is the go-to for many people starting out. HTV comes in rolls or sheets of a single color that you cut with a vinyl cutter. It’s perfect for simple text, logos, or one- or two-color graphics.
- Direct-to-Film (DTF) Transfers: A true game-changer for intricate, full-color artwork. With DTF, your design is printed onto a special film and then pressed onto the garment. This gives you stunning, vibrant detail on almost any fabric with a surprisingly soft feel.
- Screen Printed Transfers: Think of these as screen prints on a piece of paper. You get the classic, durable feel of traditional screen printing without the mess and extensive setup. They’re a great, cost-effective option for larger runs of designs with just a few colors. We dive deeper into this in our guide on heat transfer vinyl vs screen printing.
- Sublimation Transfers: This is a bit different. Sublimation uses special ink that turns into a gas under heat, bonding permanently with the polyester fibers in a garment. The results are incredibly vibrant with zero feel, but it only works on light-colored, high-polyester fabrics.
To make things a bit clearer, here’s a quick-glance comparison of the most popular heat transfer methods to help you choose the right one for your project's needs.
Comparing Heat Transfer Methods
| Transfer Type | Best For | Feel on Shirt | Durability |
|---|---|---|---|
| Heat Transfer Vinyl (HTV) | Simple text, logos, single-color designs | Slightly raised, plastic-like feel | Good (50+ washes) |
| DTF Transfers | Full-color photos, complex graphics | Soft, flexible, and thin | Excellent (60+ washes) |
| Screen Printed Transfers | High-volume single or few-color jobs | Similar to traditional screen printing | Very good (50+ washes) |
| Sublimation | All-over prints, vibrant photos | Zero feel (ink infuses into fabric) | Excellent (lasts life of garment) |
Ultimately, the best method really depends on your design, your fabric, and how many shirts you're making.
Essential Equipment Beyond the Press
Your heat press is obviously the main event, but a few other tools are absolute must-haves if you want to avoid frustrating mistakes and get a smooth, repeatable process.
A Teflon sheet or even a simple piece of parchment paper is your best friend. It creates a protective layer between the hot plate of your press and the t-shirt, preventing scorching and keeping stray ink from mucking up your equipment.
Along those same lines, heat-resistant tape is a lifesaver. Use it to hold your transfer perfectly still on the shirt. This small step prevents the dreaded "ghosting" effect that happens when a design shifts ever so slightly during pressing.
Pro Tip: Always pre-press your t-shirt for 5-7 seconds before you apply the transfer. This removes any lingering moisture and flattens wrinkles, giving you a perfect canvas for the design to adhere to. It makes a huge difference in the final quality and durability.
Finally, if you're working with HTV, a weeding tool is non-negotiable. This sharp little tool is what you'll use to pick away all the excess vinyl from your design after it's been cut. For any transfer method, a good ruler or a t-shirt alignment tool will ensure you get your design centered every single time, giving your work a polished and professional look.
Getting Your Artwork Ready for Perfect Prints
A killer t-shirt design doesn't start at the heat press; it starts on your screen. You can have the best idea in the world, but if the digital file isn't set up right, you'll end up with a blurry, pixelated mess. This is where you iron out the problems before they ever make it to fabric.
Think of your digital art as the blueprint. Any little flaw in that plan will show up big and bold on the final shirt. Nailing this step is what separates a professional-looking print from a homemade-looking one.
Resolution and File Types: The Building Blocks of a Quality Print
The first thing to get right, no matter what you're printing, is resolution. For those crisp, sharp details that make a design pop, you have to work at 300 DPI (dots per inch). A file that looks great on your monitor at 72 DPI will turn into a fuzzy, low-quality blob once it's on a shirt.
Next up, you need to choose the right file format. Each has its place:
- PNG (Portable Network Graphics): This is your go-to for pretty much any full-color DTF design. The magic of a PNG is its support for a transparent background. This means only your actual design gets printed—no clunky white box around it.
- Vector Files (SVG, AI, EPS): If you're working with heat transfer vinyl (HTV), vectors are non-negotiable. Unlike PNGs, which are made of pixels, vectors are built from mathematical equations. That's a fancy way of saying you can scale them from a tiny chest logo to a massive back piece without losing an ounce of quality.
It's also a good habit to set your canvas size correctly from the get-go. If you're planning a 10-inch wide graphic, make your digital canvas 10 inches wide at 300 DPI. For a deeper dive, our guide on choosing the right graphic size for t shirt designs has all the details.
Polishing Your Design for Production
With the technical basics down, a couple of final tweaks will ensure your design survives the jump from screen to shirt. The most common rookie mistake? Forgetting to mirror the image.
With most heat transfers, you place the design face-down on the garment. This means your artwork needs to be flipped horizontally (or mirrored) before you print. If you skip this, all your text and images will be backward. It's a simple step, but forgetting it is a frustrating and expensive error.
Color is another big one. The vibrant colors you see on a backlit screen often look a bit different when they're printed with real ink. For the truest color match, it's best to design in CMYK (Cyan, Magenta, Yellow, Key/Black) mode if your software supports it. This color space is designed for printing and gives you a much better preview of the final result. If you're stuck in RGB, just be prepared for some minor color shifts.
Key Takeaway: Before saving that final file, do a quick mental check. Is it 300 DPI? Is the background transparent? Is the image mirrored? Getting a "yes" on these three points will prevent over 90% of common artwork issues.
Lastly, give your design a final cleanup. Zoom in and hunt down any stray pixels, faint outlines, or digital "noise" clinging to the edges of your art. These tiny imperfections might be invisible on screen, but they can show up as ugly specks on the final transfer, cheapening the look of your awesome new shirt.
Matching Your T-Shirt to Your Transfer Material
Think of your t-shirt as more than just a blank canvas; it’s an active ingredient in the final product. The fabric’s composition plays a huge role in how a transfer adheres, looks, feels, and holds up after a dozen washes. Nailing the right match between your shirt and transfer is one of the biggest things that separates the pros from the beginners.
The global demand for t-shirts is staggering, valued at USD 185.2 billion in 2024 and still climbing. Customization is a massive driver of that growth, and knowing your materials is what gives you an edge. You can see more on this trend's trajectory on PR Newswire.
Why Cotton Is a Classic Partner
There's a reason 100% cotton is a timeless choice. It's soft, breathable, and just feels good to wear. Those natural fibers also create a fantastic surface for many types of heat transfers to grab onto, especially ones with a thicker adhesive.
This makes cotton the go-to for most standard Heat Transfer Vinyl (HTV) and traditional screen printed transfers. These methods essentially sit on top of the fabric, and cotton’s weave gives them something solid to bond with. It’s a reliable workhorse for bold graphics and text, delivering vibrant results time and time again.
Just remember cotton's one major dealbreaker: it's completely incompatible with sublimation. That process needs synthetic fibers to work its magic.
The Power of Polyester for Specialty Prints
Polyester is the king of performance wear. As a synthetic fabric, it’s known for being durable, moisture-wicking, and resistant to wrinkles and shrinking—all the things you want in an athletic shirt.
Those smooth, non-absorbent fibers are the perfect—and only—partner for sublimation printing. When you apply heat, sublimation ink turns into a gas and literally becomes part of the polyester molecules. You get a stunning, full-color design with zero feel that will never crack, peel, or fade. For the brightest, most vivid results, you’ll want a shirt that’s 100% polyester.
Poly-Blends: The Versatile Middle Ground
What do you get when you combine the best of both worlds? A poly-cotton blend. These fabrics, typically in 50/50 or 60/40 ratios, give you the softness of cotton plus the durability and shrink-resistance of polyester.
This versatility makes poly-blends a fantastic all-rounder that works well with a huge range of transfer types:
- DTF (Direct-to-Film) Transfers: These absolutely shine on blends. You get a soft-hand feel and incredible durability without the risk of scorching that can sometimes happen with pure polyester.
- HTV: Most heat transfer vinyl applies beautifully to blends, making it a dependable choice for all kinds of projects.
- Screen Printed Transfers: These also adhere perfectly, keeping their classic look and feel on the blended fabric.
The single most important tip I can give you is this: always check the manufacturer's instructions for both your transfer and your garment. A specific "low-temp" HTV might be designed for delicate polyester, while a standard vinyl could scorch it in seconds.
Knowing your materials is a universal rule for quality apparel decoration. It's the same principle in embroidery, where choosing the right stabilizer for different fabrics is critical for getting a crisp, professional finish, especially on stretchy knits.
Thinking About Real-World Performance and Feel
Beyond simple compatibility, you have to think about how the shirt will be used. Is it for a local sports team? You'll want a stretchy transfer on a polyester or blended shirt that can move with the athlete. Is it a fashion-forward design for a retail brand? A lightweight DTF transfer on a soft, ringspun cotton-poly blend will deliver that premium feel customers love.
The opacity of your transfer matters, too. If you’re putting a bright white design on a black 100% cotton shirt, you need a transfer with a strong white base, like a high-quality screen printed transfer or DTF print. If you tried a less opaque method, the dark fabric would peek through and make your design look muddy. Matching material to transfer isn't just a technical step—it’s a core part of the design process itself.
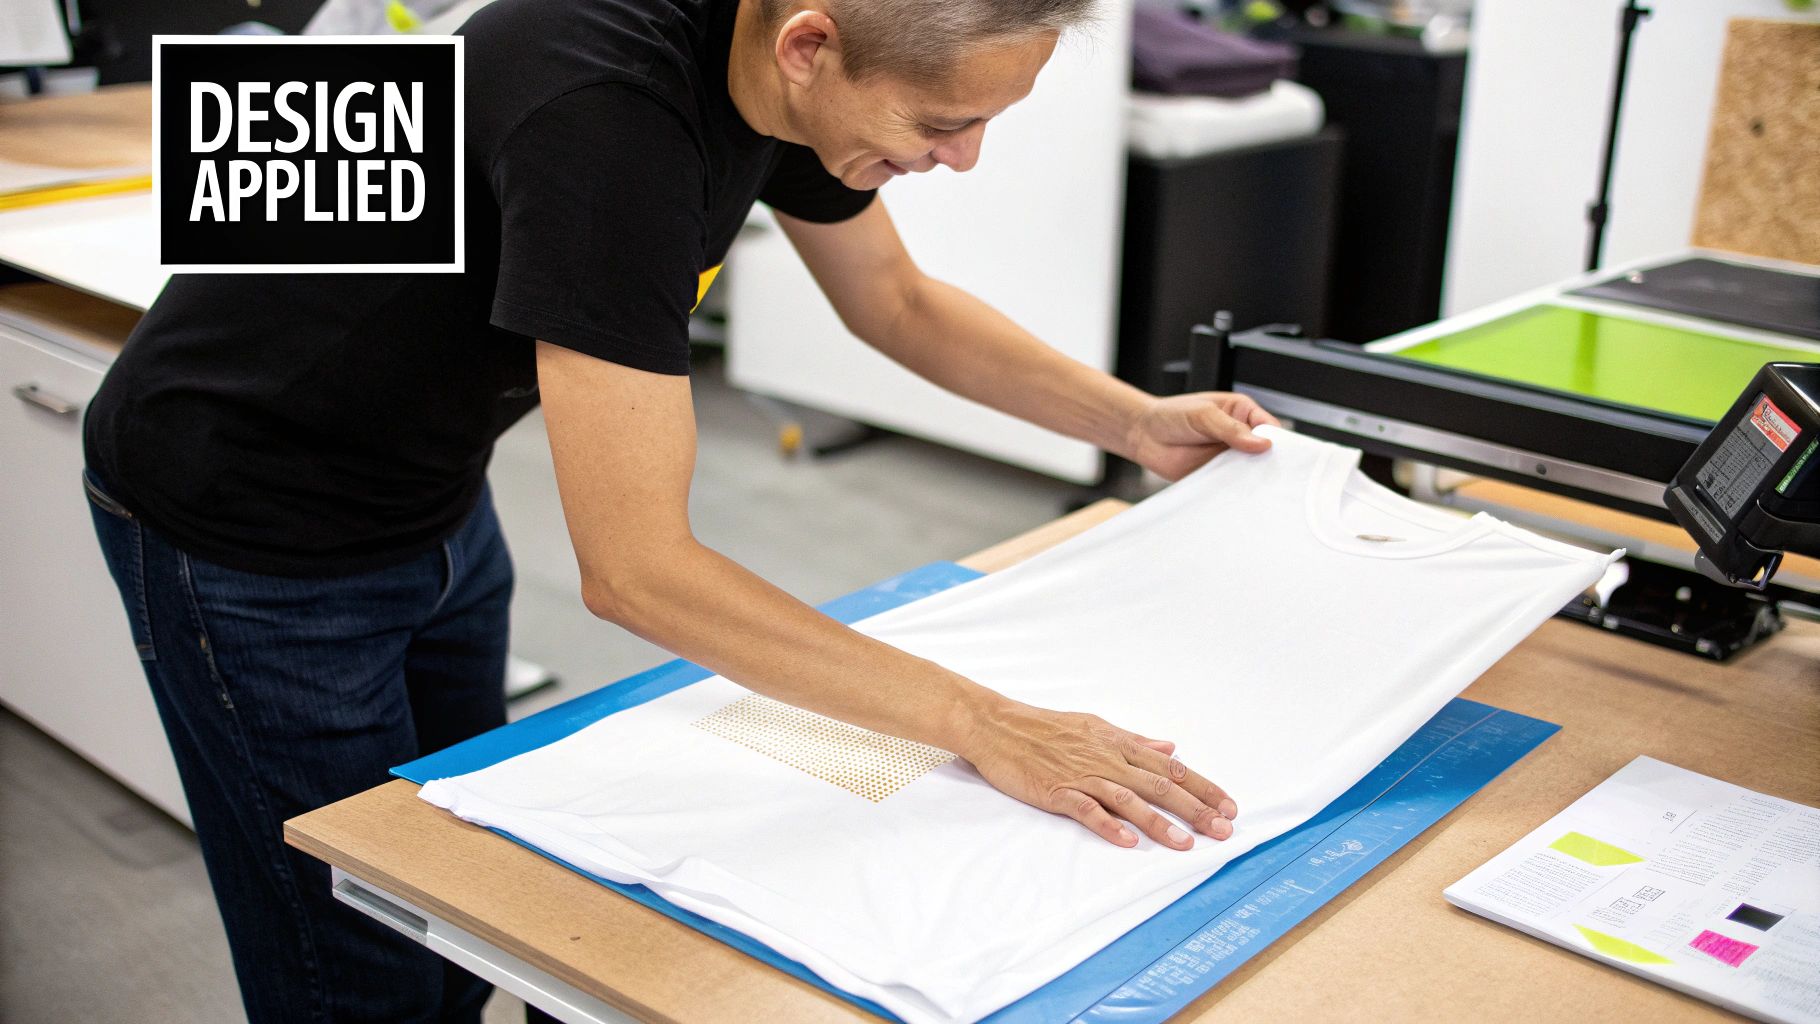
Executing the Perfect Heat Press Application
Alright, this is where the magic happens. All your prep work—dialing in the artwork, picking the right shirt—has led to this moment. Now, it's all about bringing that design to life, and that comes down to the three pillars of a great press: time, temperature, and pressure. Nailing these variables is the difference between a design that looks amazing and one that actually lasts.
Your heat press is obviously the star of the show here. There's a good reason these machines are a staple in the textile printing world; they’re workhorses that give you incredible flexibility for everything from one-off custom jobs to small production runs. In fact, the market for heat transfer machines is growing at a projected CAGR of 5.9% between 2023 and 2030, which just shows how many people are getting into this game. You can dig into more of those stats over at CognitiveMarketResearch.com.
Setting Up for Success
Before you even think about putting the shirt on the press, get your station organized. Lay out your transfers, the t-shirt, some heat-resistant tape, and a Teflon sheet or piece of parchment paper. Having everything within arm's reach means no fumbling around when the clock is ticking. It makes the whole process smoother and way less stressful.
Now, go ahead and load your t-shirt onto the bottom platen of the press. Take a second to smooth it out. Make sure the collar and seams are laying as flat as you can get them. A crooked shirt guarantees a crooked print, so this little bit of alignment upfront is non-negotiable.
This infographic breaks down the simple, three-stage process, from your digital file to the finished shirt.
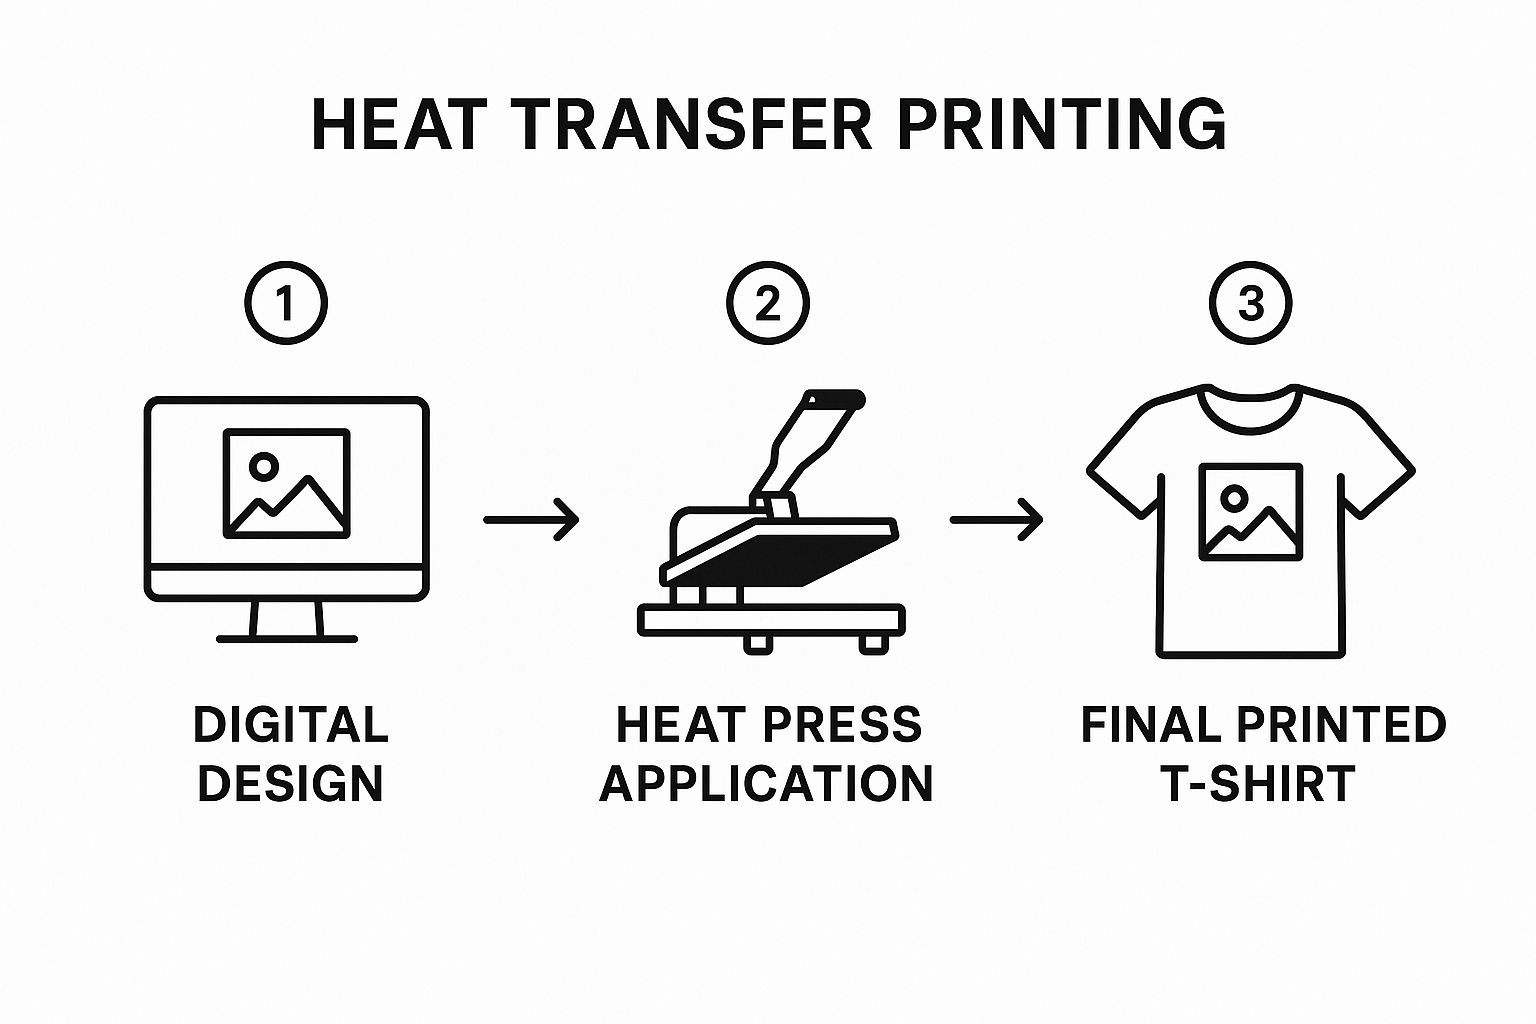
As you can see, the heat press is the critical bridge between your digital concept and a high-quality piece of apparel you can be proud of.
The Critical Pre-Press Step
I can’t stress this enough: do not skip the pre-press. It’s easily the most overlooked step, but it’s absolutely vital. Just close the heat press on the empty shirt for about 5-7 seconds. This quick hit of heat does two really important things:
- It Wicks Away Moisture. Fabric, especially cotton, holds a surprising amount of moisture from the air. Pressing a damp shirt creates steam, which is the enemy of a good transfer adhesive.
- It Smooths Out Wrinkles. The pre-press gives you a perfectly flat, wrinkle-free canvas to work on. This ensures every part of your design gets even contact with the heat plate.
Once you’ve pre-pressed, it’s time to position your transfer. Use a ruler or an alignment tool if you need to—getting it perfectly centered is key. When you're happy with the placement, use a few small pieces of heat-resistant tape on the edges to lock it down. This prevents it from shifting when you close the press. For a more detailed look at this, check out our guide on how to heat press a shirt.
Expert Insight: Don't forget about pressure. It’s just as crucial as the temperature. If you use too little pressure, you'll get a weak bond that peels off in the wash. Too much, and you risk the adhesive oozing out from the edges, creating a weird, shiny outline around your design. You’re looking for firm, even pressure. It should take a bit of effort to close the press, but you shouldn't have to wrestle with it.
The Art of the Peel
When the timer beeps, pop open the press. How you peel the carrier sheet off next will have a huge impact on the final look and feel of the print. Every transfer is different; some are a "hot peel," others are a "cold peel." Always, always follow the manufacturer's instructions.
- Hot Peel: Just like it sounds. You peel the carrier sheet away immediately while everything is still hot. This usually gives you a softer, more matte finish because the ink settles right into the fabric's fibers.
- Cold Peel: For these, you have to be patient. Let the shirt and transfer cool down completely before you even touch the carrier sheet. Cold peels tend to produce a glossier, slightly thicker-feeling print and are often used for designs that need to be extra durable.
When you're ready, peel the carrier sheet back in one smooth, confident motion. Start at a corner and pull diagonally across the design at a low angle. If you rip it off too fast or hesitate halfway through, you can easily mess up the print.
One final pro-tip: once the carrier is off, do a quick "post-press." Cover the design with a Teflon sheet and press it again for just 2-3 seconds. This little step helps lock the design in, melding it into the fabric for a premium finish that will hold up beautifully in the wash.
Troubleshooting Common Printing Problems
Even with the best prep, things can go sideways. A perfect heat transfer printing on t shirts run isn’t about never hitting a snag; it’s about knowing how to fix it when you do. Think of this as your field guide for turning those "uh-oh" moments into valuable experience.
The good news? Most issues you'll run into boil down to one of three things: time, temperature, or pressure. Once you get a feel for how these three work together, you can diagnose just about any problem and save that garment from the scrap pile.
Diagnosing Peeling and Poor Adhesion
There’s nothing more frustrating than seeing a transfer start to peel up at the edges, either right off the press or after the first wash. This is almost always a tell-tale sign that the transfer's adhesive never fully bonded with the fabric.
Nine times out of ten, the culprit is not enough pressure. If your heat press isn't clamped down with enough force, the adhesive just sits on top of the fabric instead of getting pushed into the weave. It might look okay initially, but it won't stand a chance against a washing machine.
Here's what to look for and how to fix it:
- Inadequate Pressure: Crank up the pressure setting on your press. You want to feel some solid resistance when you lock it down, but you shouldn't have to throw your whole body into it.
- Incorrect Temperature: If your platen is too cool, the adhesive won't melt correctly. Double-check the recommended settings for your specific transfer and try bumping the temperature up by 5-10 degrees if the peeling continues.
- Obstructions on the Platen: Things like seams, collars, and zippers can keep the press from closing evenly, creating little pockets of low pressure where the transfer won't stick. Slide a heat printing pillow or even a spare mousepad inside the shirt to raise the printing area and guarantee even contact.
Real-World Scenario: You're pressing a DTF transfer on a hoodie, and while the middle looks great, the edges near the pocket seam are lifting. That’s a classic pressure issue caused by the uneven surface. A heat printing pillow will solve this in seconds by creating a flat, raised area for the transfer.
Solving Faded or Discolored Prints
When your vibrant design comes off the press looking dull, faded, or even slightly scorched, you're almost certainly looking at a heat or time problem. It's a delicate balance, especially with more sensitive fabrics.
Scorching is a common headache with polyester or poly-blends. Too much heat can literally singe the synthetic fibers, leaving behind a permanent, discolored sheen. On the flip side, not enough heat or time will leave you with an under-cured print that looks washed out from the start.
Quick Troubleshooting Guide
When you run into trouble with heat transfer printing on t shirts, a quick diagnosis can save you a lot of time and materials. Use this chart to identify the problem and find a fast solution.
| Problem | Potential Cause | Solution |
|---|---|---|
| Cracking After Washing | The print was under-cured; not enough heat or time. | Increase press time by a few seconds or temperature by 5-10°F. Do a post-press for 3-5 seconds with a Teflon sheet. |
| Visible Press Box on Shirt | Too much pressure or heat for that specific fabric. | Reduce pressure to the minimum needed for a good stick. Use a flexible finishing sheet to soften the press edges. |
| Vinyl Weeding is Difficult | Your cutter's blade is dull or cut settings are off. | Replace the blade in your vinyl cutter. Always run a small test cut to dial in the settings for your material. |
| "Ghosting" or Double Image | The transfer shifted when you opened or closed the press. | Use a couple of pieces of heat-resistant tape to lock the transfer firmly in place before you press. |
Keeping this guide handy can turn a potential disaster into a quick fix.
A really common but fixable issue is the "press box"—that faint rectangle you see on the shirt from the heat platen. This tends to happen on heat-sensitive fabrics like polyester and tri-blends. The fix is usually to back off the pressure as much as you can while still getting a solid application. You can also try using a flexible finishing sheet; it helps feather the platen's edges and makes that hard line disappear.
Caring for Your Custom Printed T Shirts
Your job isn't quite done when the heat press pops open. All that hard work—sourcing the perfect materials, getting your art just right, and nailing the press—can all be for nothing after just one bad laundry cycle. Proper aftercare is what gives a custom t-shirt a long and vibrant life.
Following a few simple rules protects the heat transfer's integrity. This isn't just about preserving your own work; it's about boosting the quality and value of your apparel, especially if you're selling it to customers.
The Golden Rules of Washing Printed Apparel
When it comes to longevity, you have to treat the print with a little respect. The main culprits that destroy a printed garment are the friction and high heat from a standard wash and dry cycle.
The first and most important habit to get into? Turn the t-shirt inside out before you even think about putting it in the machine. This one tiny step shields the design from rubbing against other clothes, zippers, and buttons, which is the number one cause of cracking and peeling.
Next, always wash on a cold water setting. Hot water can mess with the transfer's adhesive, causing it to weaken and the colors to fade way faster than they should.
Here are a few other pro-tips to keep in mind:
- Use a Mild Detergent: Stay away from harsh chemicals and bleach. They'll eat away at both the print and the fabric itself.
- Wash with Similar Colors: This is laundry 101, but it's crucial for preventing dye from a rogue red sock from bleeding onto your design.
- Skip the Fabric Softener: It might sound like a good idea, but fabric softeners often leave behind a chemical film that can break down the transfer's bond over time.
Think of it this way: the print is a delicate layer sitting on top of the fabric. Your mission is to do everything you can to avoid scraping it off or dissolving the glue holding it on.
Drying Your T-Shirts the Right Way
Believe it or not, the dryer can be even more brutal on a printed tee than the washing machine. That intense, sustained heat is what causes most prints to crack and feel stiff.
The absolute best way to dry your shirt is the old-fashioned way: hang it up or lay it flat to dry. This completely eliminates heat damage and helps the shirt keep its original size and shape. Even cotton blends can shrink, but 100% cotton is especially prone to it.
Key Insight: If you're in a hurry and have to use a machine, choose the lowest heat setting you can—or better yet, an air-only cycle. Pull the shirt out when it's still just a little damp and let it air dry the rest of the way. This prevents the over-drying that makes prints brittle.
And one final, critical warning: never iron directly on a heat transfer. The iron will instantly melt the ink and adhesive into a sticky, ruined mess. If you must iron the shirt, turn it inside out, use a low temperature, and carefully press around the design area.
Ready to create custom t-shirts with vibrant, durable designs that last? At Raccoon Transfers, we specialize in high-quality DTF transfers that are easy to apply and built to withstand wash after wash. Explore our products and start your project today!