
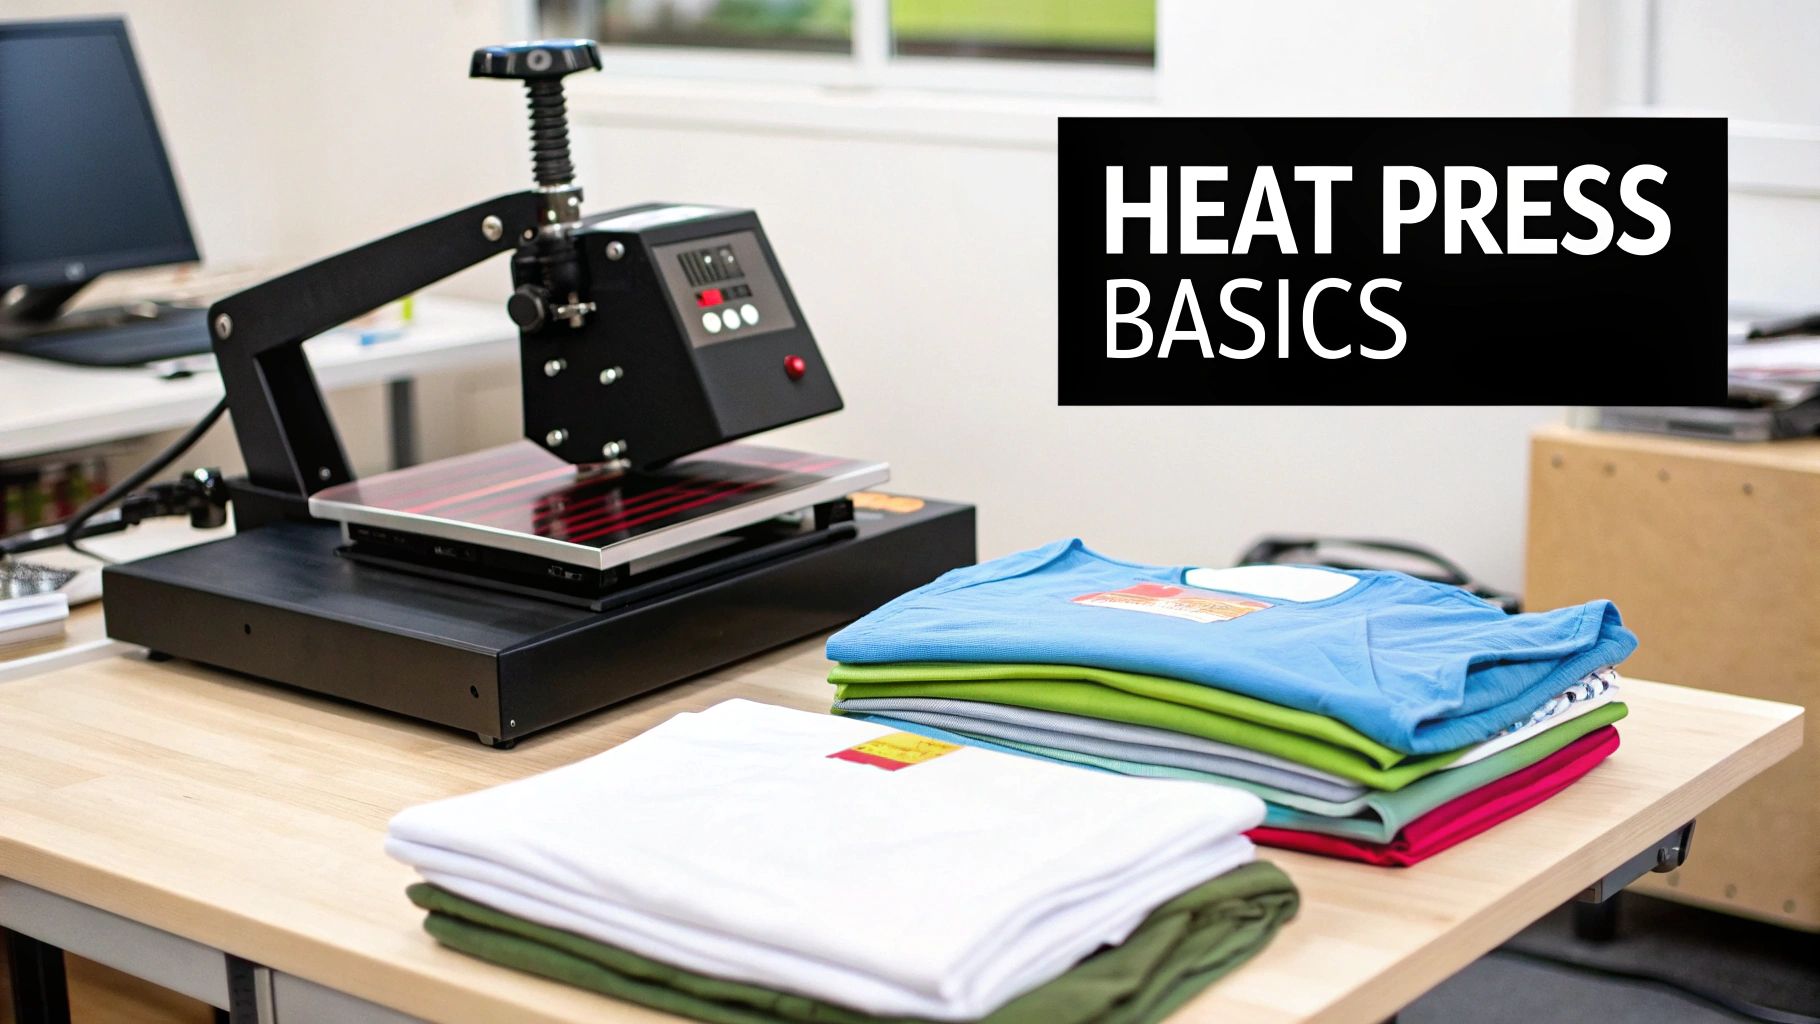
How to Use Heat Press for T-Shirts: Expert Tips & Tricks
Before you bring the heat, let's talk about what separates a professional, store-quality T-shirt from one that looks like a DIY-gone-wrong. The secret isn't just in the heat press itself, but in nailing three critical elements: time, temperature, and pressure. Get these right, and you'll create custom shirts that look amazing and actually last.
Mastering the Fundamentals of Heat Pressing
A perfect press is all about preparation. Think of this as your pre-flight checklist. Skipping these foundational steps is the fastest way to waste expensive materials and end up with a design that peels off in the first wash. Let's make sure that doesn't happen.
Choosing Your Heat Transfer Material
The first decision you'll make is what kind of transfer you're using. This choice will dictate everything else, from your press settings to the type of shirt you can use. Each material has its own personality and purpose.
Here's a quick rundown of the most common options you'll encounter:
- Heat Transfer Vinyl (HTV): This is the go-to for most beginners and for good reason. HTV is perfect for bold, single-color designs, text, and logos. It comes on a plastic carrier sheet and is relatively easy to cut and weed.
- Direct-to-Film (DTF) Transfers: If you're working with complex, multi-color designs or photorealistic images, DTF is your best friend. These transfers come pre-printed and ready to press, and they work beautifully on a wide variety of fabrics.
- Sublimation: This is a bit different. Sublimation uses special ink that turns into a gas under heat, permanently dyeing the fabric fibers. The result is a design you can't even feel, and it will never crack or fade. The catch? It only works on light-colored, high-polyester-count garments.
The custom apparel world is exploding right now, and it's largely thanks to innovations like DTF that make high-quality results more accessible. The market is projected to skyrocket from $7.15 billion in 2025 to $15.89 billion by 2033, and a lot of that growth is driven by technologies that let creators print on more than just basic cotton. You can get a deeper look at how new printing methods are changing the game for creators.
To help you decide, here's a quick comparison of the most popular transfer types.
Heat Transfer Material Quick Reference Guide
| Transfer Type | Best For Fabrics | Key Advantage | Consideration |
|---|---|---|---|
| Heat Transfer Vinyl (HTV) | Cotton, Polyester, Blends | Great for simple text, logos, and layered graphics. Wide variety of finishes (glitter, metallic, etc.). | Can feel thick on the shirt; not ideal for highly detailed, multi-color images. |
| Direct-to-Film (DTF) | Cotton, Polyester, Blends, Canvas | Excellent for full-color, photorealistic images. Soft feel and great durability. | You need to order them pre-printed or have a specialized DTF printer. |
| Sublimation | 100% Polyester or High-Poly Blends (light colors only) | The design becomes part of the fabric—zero feel, won't crack or peel. Incredibly vibrant. | Limited to polyester fabrics and won't show up on dark colors. |
Choosing the right material from the start saves you a world of headaches later on.
Why Your T-Shirt Choice Matters
You can’t just grab any old T-shirt and expect perfect results. The fabric you press onto is just as important as the transfer itself.
A 100% cotton shirt is a classic for a reason—it’s breathable and provides a great surface for HTV and DTF transfers. For athletic apparel, though, 100% polyester is king due to its moisture-wicking capabilities and it's the only choice for sublimation.
My personal sweet spot for all-around work? Cotton/polyester blends. They give you the softness of cotton with the strength and wrinkle-resistance of polyester, making them a reliable and versatile option for most jobs.
The Big Three of Heat Pressing
At the end of the day, every successful project comes down to a simple, unchangeable formula: Time + Temperature + Pressure. This is the holy trinity of heat pressing.
Key Takeaway: Think of your heat press settings as a recipe. Time, Temperature, and Pressure are your core ingredients. If you change one, you’ll almost always need to adjust the others. Always, always start with the manufacturer's recommendations for your specific transfer material.
Getting these settings dialed in ensures the transfer's adhesive activates correctly and bonds permanently with the shirt. Nearly every case of peeling, cracking, or fading can be traced back to an issue with one of these three variables. We'll get into the nitty-gritty of setting these on your machine next.
Setting Up Your Workspace and Machine
A perfect T-shirt press starts long before the machine even heats up. It begins with your workspace. Think of it this way: a shaky foundation will ruin the whole house, and a wobbly table or a poorly prepped machine will absolutely ruin your print. Getting your environment right is the first real step in learning how to use a heat press like a pro.
First thing’s first, find a dedicated spot for your press. These machines are heavy and get incredibly hot, so safety has to be your top priority. You need a sturdy, waist-high workbench or table that won't budge under the machine's weight. And whatever you choose, it absolutely must have a heat-resistant surface.
Ventilation is another non-negotiable. While modern transfers don't kick off a ton of fumes, it's just smart practice to work in a well-ventilated space for your own health and comfort. A nearby window you can crack open or a small fan to keep the air moving is all you need. Finally, make sure you have a dedicated power outlet within easy reach.
Important Safety Tip: Never, ever plug your heat press into a standard extension cord or power strip. These machines pull a serious amount of electricity, and an underrated cord is a major fire hazard. Always plug it directly into a wall outlet designed to handle the load.
Power On and Dial in Your Settings
Once your space is ready, it's time to fire up the machine. The power-on process is simple but crucial. Flip the main switch, and the digital display should come to life. This is where you'll input the "Big Three" for any transfer: temperature, time, and pressure.
These settings are never a random guess. You must refer to the manufacturer's instructions that came with your specific transfers, whether you're working with HTV, DTF, or sublimation. A vinyl that needs 305°F for 15 seconds will be toast if you press it at the 400°F required for sublimation.
- Set the Temperature: Use the controls to adjust the heat to the recommended setting.
- Set the Time: Program the timer exactly as the instructions specify for your transfer type.
Now, let it heat up. Be patient. Most presses will beep or have an indicator light to tell you when they've reached the target temperature. Rushing this is one of the most common rookie mistakes and a guaranteed way to get a failed transfer from an under-heated platen.
This visual guide breaks down the core setup process into three essential actions.
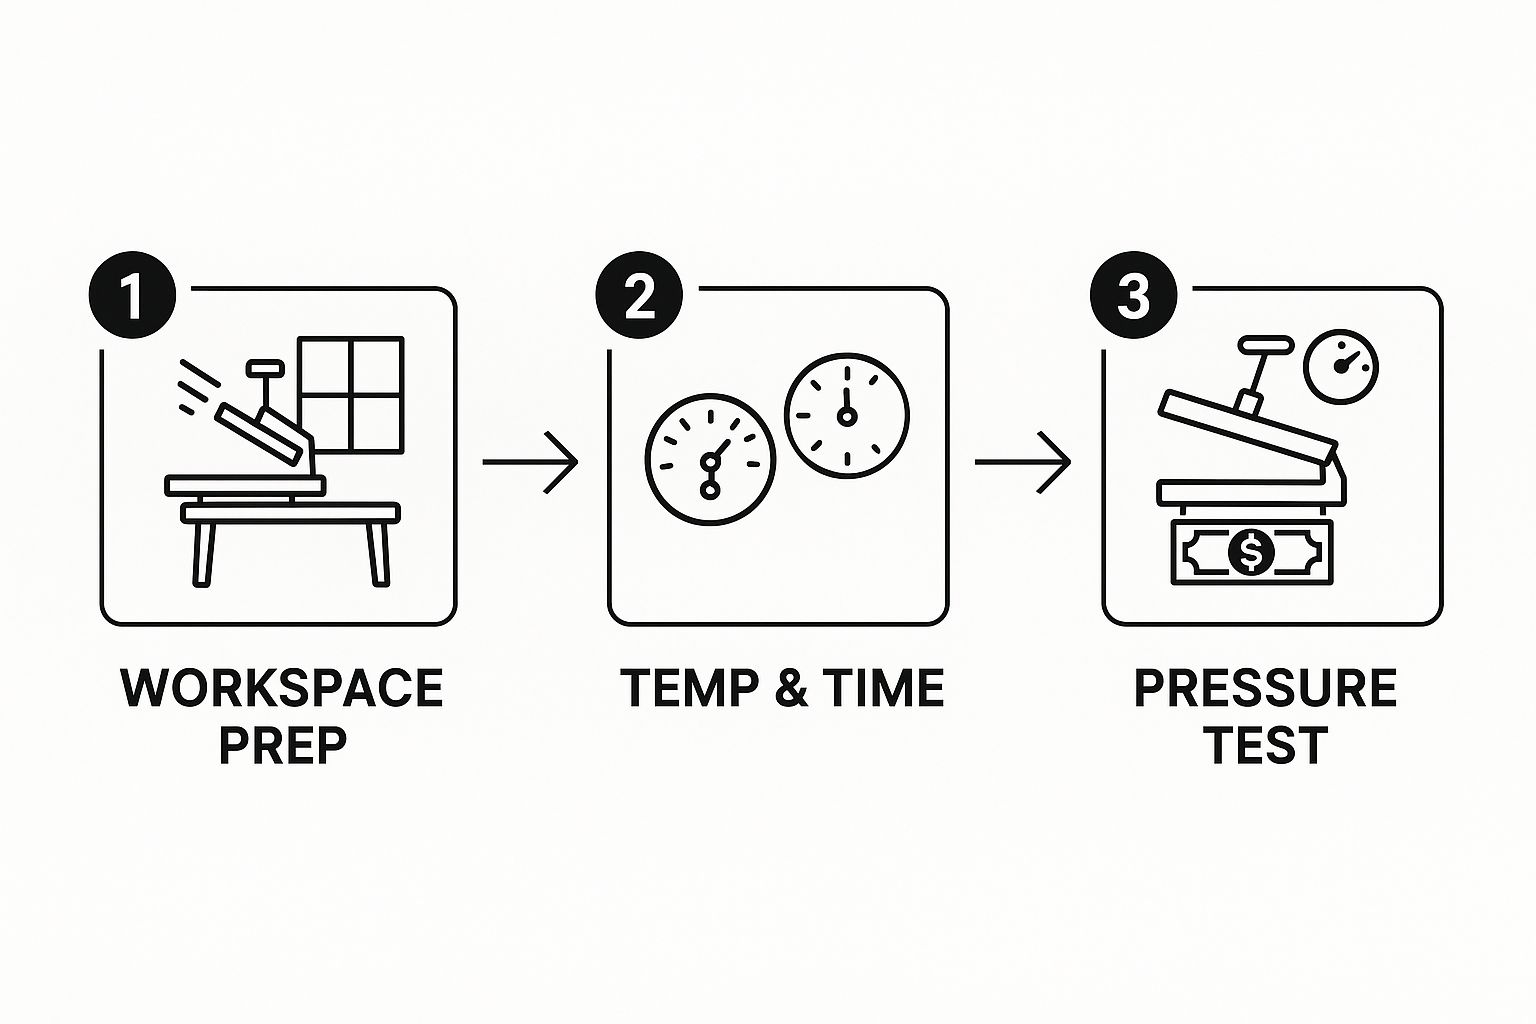
This workflow really drives home the point that a great press is all about methodical preparation, from the room you're in to the numbers you punch into the machine.
Demystifying Pressure Adjustments
Temperature and time are pretty straightforward, but pressure is where a lot of people get tripped up. It’s more of an art than a science, based on "feel," but it's arguably the most critical setting to nail. With too little pressure, the adhesive won't bond correctly. With too much, you can scorch the shirt or make the design feel stiff and plasticky.
Most presses have a big adjustment knob, usually on top, that you turn to change the pressure. Here's a quick guide to what the different levels actually feel like when you close the press:
- Light Pressure: The platen closes easily with almost no resistance.
- Medium Pressure: You’ll need to use a bit of upper body strength to clamp it shut.
- Firm Pressure: This takes some real effort. You'll likely need two hands to lock the handle down.
But how do you know if the pressure is even across the whole platen? Easy. Try the "dollar bill test." Place a bill under each of the four corners of the top platen, then close the press. Now, gently tug on each one. If they all give you the same amount of resistance, your pressure is nice and even. If one slips out easily, your press needs adjusting.
Mastering this simple test will save you countless shirts and transfers. Of course, having the right gear from the get-go makes all this much easier. You can learn more by checking out our guide on the best heat press machine for shirts.
Prepping Your Garment and Aligning Your Design
Alright, your heat press is dialed in and ready to go. Now comes the part where a little patience and precision really pay off—this is what separates a professional-looking shirt from a homemade rush job. How you handle these next few minutes will make or break your final product.
It all starts with the shirt itself. Even a brand-new tee straight out of the plastic has two secret enemies: moisture and wrinkles. They might not look like much, but those tiny creases and hidden dampness from storage can completely ruin the bond between the transfer and the fabric.
This is exactly why the pre-press is a step you should never, ever skip.
The Essential Pre-Press Step
Before your design gets anywhere near the shirt, lay the garment flat on the lower platen. Now, close the press for just 3 to 5 seconds.
That quick hit of heat works wonders. It instantly evaporates any lingering moisture and irons out all the wrinkles, leaving you with a perfectly flat, dry canvas. Think of it like priming a wall before you paint—it’s a simple move that prevents a world of headaches, like designs peeling up after the first wash.
Once that's done, you're ready for the most critical part: getting your design perfectly placed.
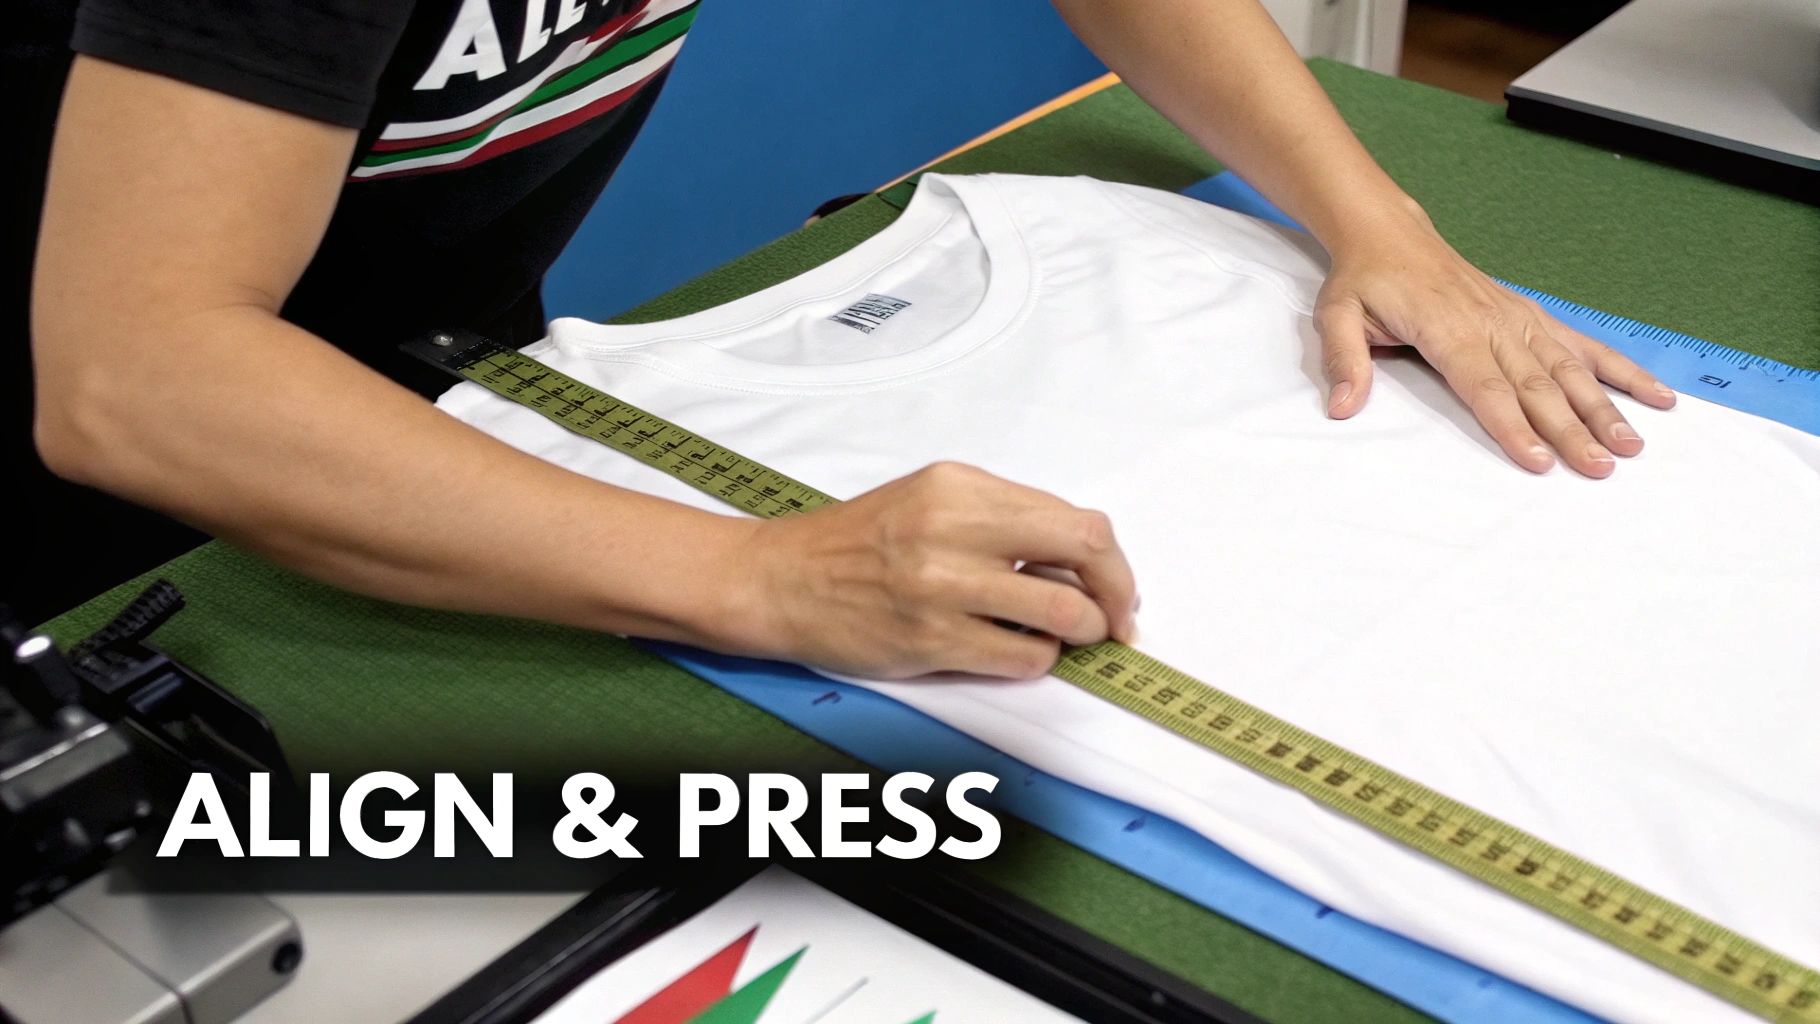
Finding the Perfect Placement
Just "eyeballing it" is a gamble I wouldn't recommend. You'll end up with crooked logos and off-center graphics more often than not. Luckily, there are a couple of tried-and-true methods that work every time.
One of the easiest tricks in the book is the center-fold technique.
- First, lay the shirt flat and fold it in half vertically, making sure to line up the shoulder seams perfectly.
- Give that fold a quick press for a few seconds. This creates a temporary crease right down the middle of the shirt.
- Unfold it, and voilà—you have a perfect vertical guideline.
You can do the same thing with your transfer paper or vinyl. Just fold it in half (sticky side out for HTV) and make a light crease in the carrier sheet. Then, just line up the two creases. For the vertical placement, a good rule of thumb is to position the top of your design about three inches, or three finger-widths, below the bottom of the collar.
Pro Tip: If you're going to be pressing a lot of shirts in different sizes, from a Youth Small to an Adult 3XL, seriously consider grabbing a T-shirt alignment tool. These rulers and guides eliminate all the guesswork and ensure your placement is spot-on every single time. It’s a small investment that pays for itself in consistency.
Securing Your Design for a Clean Press
After all that careful alignment, the last thing you want is for your design to slide around when you clamp the press down. It’s a common problem, especially with clamshell presses where the top platen comes down at an angle.
This is where heat-resistant tape becomes your best friend. A couple of small pieces on the corners of your transfer's carrier sheet will anchor it securely to the shirt. It’s a must-have for detailed designs or slippery polyester fabrics. The tape is made to handle the heat and peels right off without leaving a mark.
These are the foundational skills behind the exploding custom T-shirt industry, a market projected to jump from $8.17 billion in 2024 to $13.55 billion by 2029. From corporate swag to concert merch, the demand for high-quality custom apparel is huge, and mastering these details puts you in a great position. You can dig deeper into these custom apparel market trends and projections to see just how fast things are growing.
Now that your shirt is pre-pressed and your design is perfectly aligned and taped down, you're ready for the main event.
Bringing It All Together: The Perfect Press
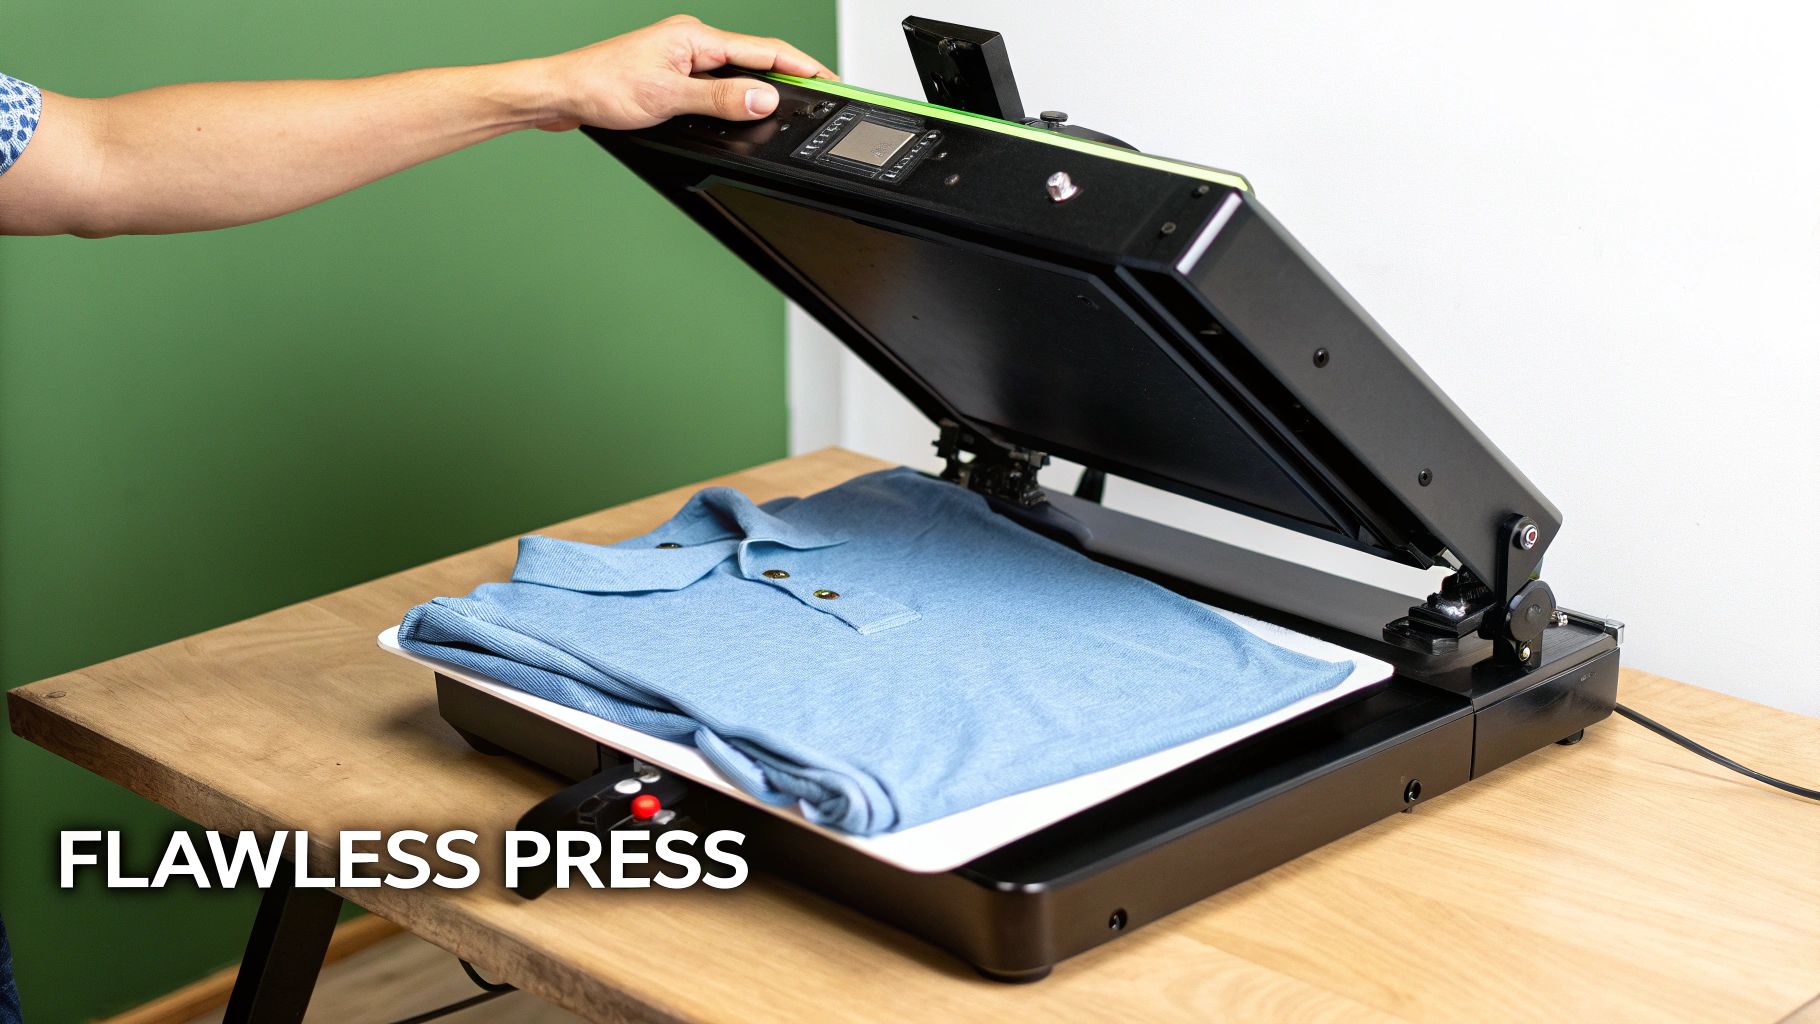
Alright, your machine is hot and the design is sitting exactly where you want it. This is the moment of truth. All that prep work is about to pay off, turning separate components into a single, professional-looking garment. Getting a flawless press is less about complex skill and more about nailing the details.
First, gently lay your pre-pressed shirt flat on the lower platen. Check one last time for any stray wrinkles that might have snuck in. A great pro tip is to drape the collar and seams off the edge of the platen. This little maneuver ensures the area under your design is perfectly flat, which is critical for even pressure.
Now, grab your protective cover sheet and place it over the transfer. Don't skip this. A Teflon sheet or even a simple piece of parchment paper is your best friend here. It shields the shirt from scorch marks and protects your expensive heat platen from any ink that might bleed through. Think of it as cheap insurance for a perfect result.
Locking It Down
With everything in place, it’s time to press. Pull the handle down with a firm, confident motion until it locks. Your press's timer should kick in automatically. Now, just step back and let the machine work its magic. It's applying that perfect trio of heat, time, and pressure to permanently bond the design to the fabric.
Once that timer beeps, open the press. What you do next is just as important as the press itself. It all comes down to the peel.
Hot Peel vs. Cold Peel: Timing Is Everything
Different transfers have different rules. The type of transfer you're using determines when you should pull off that clear carrier film. Get it wrong, and you could end up with a design that cracks, lifts, or doesn't stick at all.
Here’s the quick-and-dirty breakdown:
- Hot Peel: Just like it sounds. You peel the carrier sheet off immediately after the press opens, while it’s still piping hot. This is common for many screen-printed transfers.
- Warm Peel: This is the middle ground. Wait about 5-10 seconds after opening the press. The transfer will still be very warm, but not scorching. Many Direct-to-Film (DTF) transfers fall into this category.
- Cold Peel: This one requires patience. You need to let the shirt and the design cool down completely before you even think about touching the carrier sheet. Specialty materials like foils and glitters often need a cold peel to look their best.
When in doubt, always, always check the instructions from your transfer supplier. Guessing on the peel type is a recipe for a ruined shirt. Following the rules ensures the adhesive has done its job before you disturb it.
When it’s time to peel, start at a corner and pull the sheet back in one smooth, fluid motion. Keep it at a low, diagonal angle to the shirt—never yank it straight up. A steady hand here is the secret to a clean release and a sharp, professional finish.
Getting your settings just right is the foundation of a great press. For a deep dive into every material, check out our complete heat press temperature guide.
Post-Press Care for Long-Lasting Designs
The job isn’t finished just because the timer goes off. What you do in the few moments after opening the press is what really separates a decent transfer from a professional one—the kind that feels soft and holds up for the long haul. A little care right now pays off big time in the final quality.
Here’s one of the best tricks in the book for a truly professional finish: the post-press. Once you’ve peeled off the transfer film, just cover the design with a protective sheet (parchment paper or a Teflon sheet works great) and give it another quick press for just 5 to 10 seconds.
That quick second press does two fantastic things. First, it pushes the ink deeper into the fabric's fibers, which seriously boosts its durability. Second, it knocks down that slightly plastic feel some transfers can have, leaving you with a much softer, more premium-feeling shirt your customers will love.
Creating a Durable, Wash-Resistant Finish
Think of this second press as the step that locks everything in. It smooths the design, makes it more flexible, and often gives it a nice matte finish that looks like it came straight from a retail shop. If you're learning how to use a heat press for t shirts, this simple habit is a total game-changer.
Key Takeaway: A 5-second post-press is the easiest thing you can do to make your shirts look more expensive and last longer. It’s a tiny time investment that delivers a huge return in quality.
This final touch ensures your hard work looks great not just on day one, but after countless trips through the wash.
Essential Washing Instructions for Customers
Your work isn't done when the shirt cools. Handing off clear washing instructions is a critical part of the process. It shows your customers you care about their purchase and helps them keep their new shirt looking great, which prevents frustrating emails about peeling or fading later on.
Here are the simple rules you should share with every customer:
- Turn It Inside Out: This is non-negotiable. It protects the design from rubbing against other clothes and zippers in the wash.
- Wash Cold: Always use cold water on a gentle cycle. Hot water is the enemy—it can soften the transfer's adhesive and lead to cracking or peeling.
- Use Mild Detergent: Stick to the basics. Harsh detergents, bleach, and fabric softeners are too aggressive and can eat away at the design over time.
Once it's washed, how it's dried is just as important.
The absolute best way to dry the shirt is to hang it up. If a machine dryer is the only option, make sure it’s on the lowest heat setting possible. High heat can ruin any heat-applied graphic. For a deeper dive, check out our comprehensive guide with detailed DTF washing instructions that covers every scenario you might encounter.
Got Questions? We’ve Got Answers.
Even when you follow all the steps, a few hiccups are just part of the learning curve with heat pressing. Think of this as your go-to troubleshooting guide for the questions that pop up for just about everyone, from total beginners to seasoned pros. Let's tackle some of the most common ones.
Why Is My Vinyl Peeling After Washing?
This is, without a doubt, the number one frustration I hear about. The good news? It’s almost always preventable. The problem usually boils down to an issue with pressure, temperature, or time.
More often than not, the real culprit is insufficient pressure. When you're just starting, it's natural to be a little too gentle. But the adhesive on that vinyl needs firm, consistent pressure to properly melt and weave itself into the t-shirt's fibers. If that initial bond is weak, it stands no chance against a washing machine.
The other usual suspects are incorrect temperature or time. Every single transfer material has its own unique recipe from the manufacturer. Pressing for 12 seconds when the instructions clearly state 15 can be the difference between a shirt that lasts and one that fails on the first wash. Always, always double-check the material’s specific guidelines before you lower that press.
Can I Just Use a Regular Iron Instead of a Heat Press?
I get it, you're excited to start and might be tempted to use a household iron. But honestly, it’s just not a reliable tool if you're aiming for professional, durable results. An iron simply can’t deliver on the two most critical elements a heat press guarantees.
- Even Heat: Your standard iron is riddled with hot and cool spots. This means one part of your design might get a perfect press while another part barely sticks at all, setting you up for peeling down the road.
- Consistent Pressure: A heat press applies measurable, even pressure across the entire design, every single time. It's physically impossible to replicate that kind of consistent force by hand with an iron.
For a one-time craft project for yourself? Sure, an iron might do the trick. But for anyone serious about making quality T-shirts that people will love to wear again and again, a heat press is a non-negotiable investment.
What’s the Difference Between Clamshell and Swing-Away Presses?
The main distinction between these two popular styles comes down to how the heated top platen moves. This directly affects your workflow, your workspace, and even your comfort level.
A clamshell press opens and closes on a hinge, kind of like its namesake. Its biggest pros are speed and a smaller footprint, which makes it a fantastic choice for cranking out orders in a limited space. The trade-off is that your hands are always working in close proximity to that hot upper platen.
A swing-away press, on the other hand, lets you swing the entire top platen completely out of the way. This gives you a wide-open, unobstructed view of your shirt and design, which many find much safer and easier to work with. It's a favorite for beginners and is a must-have for pressing thicker items like hoodies. The only real downside is that it requires more horizontal space to operate.
My Personal Take: I started with a clamshell because I needed the speed, but I quickly came to love the safety and easy layout of a swing-away model. The right choice really just boils down to your comfort level and how much room you have to work with.
How Do I Figure Out the Right Settings for My Transfer?
This is a question I still ask myself with every new material I try. The answer is simple: always start with the manufacturer's instructions. Every type of transfer material—from basic HTV and glitter vinyl to DTF transfers—is engineered to work best with a specific recipe for time, temperature, and pressure.
I’ve seen a lot of pros keep a dedicated binder or a digital folder with the spec sheets for all their materials. It becomes a quick-reference library that saves a ton of time and prevents you from making expensive mistakes on good garments.
Before you press your final shirt, it's always a smart move to run a small test. Grab a scrap piece of the same fabric or an old tee and do a trial run to see how the material behaves with your specific machine. A five-second test can save a $15 shirt from being ruined. Once your designs are pressed to perfection, you'll want to show them off, so learning how to take professional product photos at home is a great next step.
At Raccoon Transfers, we take the guesswork out of the equation by providing clear, easy-to-follow instructions with all our DTF transfers. For vibrant, durable, and seriously easy-to-apply designs that will make your T-shirt business shine, check out our custom transfer options at https://raccoontransfers.com.