
A Creator's Guide to Printing Heat Transfers
When we talk about printing heat transfers, we're talking about taking a design from a special film and pressing it onto a garment using heat. The most exciting and flexible way to do this today is with Direct-to-Film (DTF) printing. This technique lets you create full-color, incredibly durable designs on just about any fabric you can think of—from cotton and polyester to complex blends. What I love most about it is the soft, vibrant finish it produces, all without the headaches of older methods.
Your Guide to Modern Heat Transfer Printing
If you're jumping into custom apparel, you've come to the right place. This guide is all about mastering heat transfers, with a sharp focus on the game-changing DTF method. It's a technology that truly levels the playing field, allowing everyone from hobbyists to established shops to produce professional-grade, lasting designs without the steep learning curve of screen printing.
It's no surprise that DTF is taking off. The demand for unique, personalized products is exploding, fueling a massive trend. The global heat transfer printer market is expected to rocket from $2.5 billion in 2025 to nearly $4.2 billion by 2033. This isn't just a small shift; it's a clear signal that consumers want one-of-a-kind items, and DTF is making it possible.
The DTF Advantage
So, what’s all the fuss about? Why are so many people choosing DTF for their heat transfers? It really boils down to a few core benefits that solve a lot of common frustrations.
- Fabric Freedom: Unlike sublimation, which locks you into polyester, DTF works beautifully on cotton, poly, blends, leather, and even nylon.
- Brilliance on Dark Garments: DTF printers lay down a white ink base, which means your colors pop with full opacity, even on a black t-shirt.
- Built to Last: When applied correctly, these transfers are tough. They can handle dozens of washes without cracking, peeling, or fading away.
- Incredible Detail: The process is amazing at capturing fine lines and intricate details that are a nightmare to weed with vinyl.
To give you a clearer picture, it’s helpful to see how DTF stacks up against the other go-to methods.
DTF vs Other Heat Transfer Methods at a Glance
This quick comparison shows why DTF is often the best choice for vibrant, detailed designs on a wide range of fabrics.
| Feature | DTF Printing | Heat Transfer Vinyl (HTV) | Sublimation |
|---|---|---|---|
| Fabric Compatibility | Cotton, polyester, blends, leather, nylon | Cotton, polyester, blends | 100% Polyester (or high-poly blends) |
| Color Capability | Full color, gradients, and fine detail | Solid colors (layering required for multi-color) | Full color and photographic quality |
| Dark Garments | Excellent; white ink base ensures vibrancy | Yes, opaque vinyl works well | No, dyes are transparent and don't show up |
| Feel on Fabric | Soft, flexible, and lightweight | Can feel thick or "plastic-y" depending on the vinyl | No feel at all; ink becomes part of the fabric |
| Durability | High; resists cracking and fading | Good, but can crack or peel over time | Excellent; permanent, won't crack or fade |
| Weeding Required | No weeding needed | Yes, can be very time-consuming for complex designs | No weeding needed |
As you can see, each method has its place, but DTF offers a unique combination of versatility, quality, and efficiency that’s hard to beat.
For anyone just starting out, DTF provides a direct path to getting pro-level results without the massive upfront investment or complex setup of other methods. It really opens the door for small creators.
Think of this guide as your roadmap. We'll walk through the entire process, from your digital file to the finished shirt. My goal is to help you build confidence by showing you that amazing results are completely within your reach. Once you understand the workflow, you'll know exactly what to expect.
If you want to get into the nitty-gritty, our guide on what Direct-to-Film printing is is a great next step.
Setting Up Your DTF Printing Workspace
Before you even think about printing that first transfer, let's talk about where you're going to do it. Getting your environment right is the first, and arguably one of the most important, steps to getting professional results. A well-organized workspace isn't just about being neat—it's about making your process efficient, safe, and consistent.
Think of your setup as a mini production line. Every piece of gear has a job, and where you put it matters. You absolutely need a dedicated, well-ventilated area. That's non-negotiable. When you're curing the adhesive powder, it can create fumes, and proper airflow is critical for your health and for keeping your prints free of contaminants.
A smooth workflow starts with good organization. Simple things, like having dedicated shelves for your film rolls and inks or clearly labeled bins for your adhesive powder, can save you a ton of time and prevent costly mix-ups. If you need some inspiration, check out these top storage ideas for workshop organization to get your space in order.
Your Core DTF Equipment
Your equipment is the heart of your entire operation. While it’s tempting to start with the cheapest options, investing in quality gear from the get-go will pay for itself in reliability and better-looking prints. Here’s what you can’t do without.
- DTF Printer: This isn't your average desktop printer. DTF printers are built to handle thick, specialized textile inks and print directly onto PET film. Entry-level machines are often converted from high-quality inkjet printer bodies, while the big professional shops run large roll-to-roll machines designed for serious volume.
- Heat Press: Honestly, this might be your most important tool. Do not cheap out on your heat press. A quality press delivers consistent, even temperature and pressure across the entire platen. This is what properly cures the transfer and makes sure it will survive dozens of washes. I'd recommend a swing-away or draw-style press to give yourself more room to work.
- RIP Software: The Raster Image Processor (RIP) is the brain that tells your printer what to do. It’s what controls the ink flow, manages color accuracy, and most importantly, creates the white underbase layer that makes your designs pop on dark fabrics. Your standard printer drivers just can't handle this, making good RIP software a must-have.
- Powder Shaker & Curing Oven: When you're just starting, you can definitely apply the adhesive powder by hand and use your heat press to hover-cure it. But if you plan on doing any kind of volume, an automated shaker and a separate curing oven will be a game-changer. They create a much more even powder coat and free up your heat press, seriously speeding up your workflow.
I see this all the time with beginners: they try to use an underpowered heat press or, even worse, a household iron. These tools just don't have the consistent pressure or precise temperature control needed for the adhesive to bond properly. The result? Prints that look great at first but start peeling after the very first wash.
The Consumables and Supplies You'll Need
Alongside your machinery, you'll need a good stock of the materials that actually make the transfer. The quality of your consumables has a direct impact on the look, feel, and durability of every single shirt you make.
Key Supplies for Printing:
- DTF Ink: This is a specially formulated pigment ink. You'll need the standard CMYK (Cyan, Magenta, Yellow, Black) plus White. That white ink is the magic that lets you print vibrant designs on black and other dark-colored garments.
- DTF Film: Your designs get printed onto this specialized PET film. It comes in both sheets and rolls and will have either a hot peel or cold peel coating, which simply dictates whether you remove the film immediately after pressing or wait for it to cool down.
- Adhesive Powder: This fine, white powder (a thermoplastic polyurethane, or TPU) is what you'll sprinkle over the wet ink. When you heat it, it melts and becomes the glue that bonds your printed design right into the fabric's fibers.
Just like with your equipment, choosing quality consumables is critical. Cheap inks are notorious for clogging print heads, and low-grade powder can give you a blotchy, uneven finish. Always buy your supplies from a trusted dealer to ensure you're getting consistent, reliable materials.
Getting Your Digital Artwork Ready for Flawless Prints

A fantastic transfer always begins with a rock-solid digital file. I can't tell you how many times I've seen people blame their equipment when the real culprit was the artwork they sent to the printer. Things like blurry prints or colors that just look off? They almost always start here. Getting your file dialed in from the very beginning will save you a ton of time, materials, and headaches down the road.
The first thing to burn into your memory is resolution. For any kind of apparel printing, 300 DPI (Dots Per Inch) isn't just a suggestion; it's the professional standard. Anything less is a gamble, and you’ll likely end up with a pixelated, fuzzy graphic that looks amateurish. It’s just like a low-quality photo—when you blow it up, it looks blocky and terrible. The same thing happens when that art gets pressed onto a shirt.
Just as important is having a transparent background. When you print on paper, the white of the page is your background. With DTF, any white you see in your design file will be printed as white ink. Unless a white box is part of your creative vision, you absolutely must save your artwork in a format that supports transparency, like a PNG.
Nailing the Right Graphic Size
Sizing your art is what separates a professional-looking shirt from a homemade one. A tiny logo can get completely lost on a big sweatshirt, while a massive design can look clumsy and overwhelm a smaller tee. The perfect size really comes down to where you're putting it and what you're printing on.
Here are a few trusted starting points I use all the time:
- Small Chest Logos: For that classic left-chest placement, I stick to a width of 3.5 to 4.5 inches.
- Full Front Designs: On a standard adult t-shirt, a width between 10 and 12 inches gives you a powerful centerpiece.
- Big Back Graphics: If you want to make a statement on the back of a hoodie or jacket, go big—anywhere from 12 to 14 inches wide.
And don't forget to think about the garment's size itself. A 12-inch design that looks great on an XL is going to look ridiculous on a size small. If you're planning a full run of sizes, you'll probably need to create a couple of different-sized versions of your transfer to keep everything looking proportional. We've actually put together a whole resource on this, so for a deeper dive, check out our guide on the ideal graphic size for a t-shirt.
When you’re working with a designer or sending your final art to a print shop, you need a good way to move those big files around. Using a secure file sharing service is a smart move to make sure your high-resolution artwork gets there without being compressed or losing quality.
Color Modes and the Magic of a White Underbase
Understanding how color works in print is another crucial piece of the puzzle. Your monitor displays everything in RGB (Red, Green, Blue), which is designed for screens. Printers, on the other hand, operate in CMYK (Cyan, Magenta, Yellow, Black), which is how colors are mixed in the physical world.
For the most accurate colors, it’s a great habit to design your files in CMYK right from the start. It gives you a much better preview of how the final colors will look, preventing those nasty surprises when you pull the first shirt off the press.
One of the coolest things about DTF printing is the white underbase. The RIP software automatically generates a layer of white ink that gets printed before the colors go down. This is the secret sauce that makes your design opaque and vibrant, even on a jet-black t-shirt.
You simply can’t overstate the importance of quality materials here. The market for heat transfer film is exploding, projected to hit USD 4.1 billion by 2035, because major brands in fashion and sports demand the incredible quality and speed that modern digital transfers deliver. We're even seeing new film technologies that allow for lower-temperature applications, which can reduce energy consumption by up to 35%. When you start with a properly prepped file, you’re setting yourself up to get the absolute best results from these incredible materials.
Getting Hands-On: The DTF Printing and Curing Workflow
Alright, this is where the action happens. We're taking your digital file and turning it into a physical, press-ready transfer. The whole process feels a bit methodical at first, but trust me, once you get a rhythm going, it'll become second nature. Let's walk through the critical steps, from hitting "print" to pulling a perfectly cured transfer off the heat press.
First things first: loading the DTF film. Always, always handle it by the edges. The oils from your fingerprints can mess with how the ink lays down. You need to make sure the printable side is facing up—it’s the one with a slightly matte finish, while the back is glossier. Once it's loaded, you’ll send your artwork over from the RIP software. This is where the magic begins, as the printer lays down all the color first, then comes back over it with that essential layer of white ink.
This visual gives you a great overview of how the whole printing process flows from design to the final press.
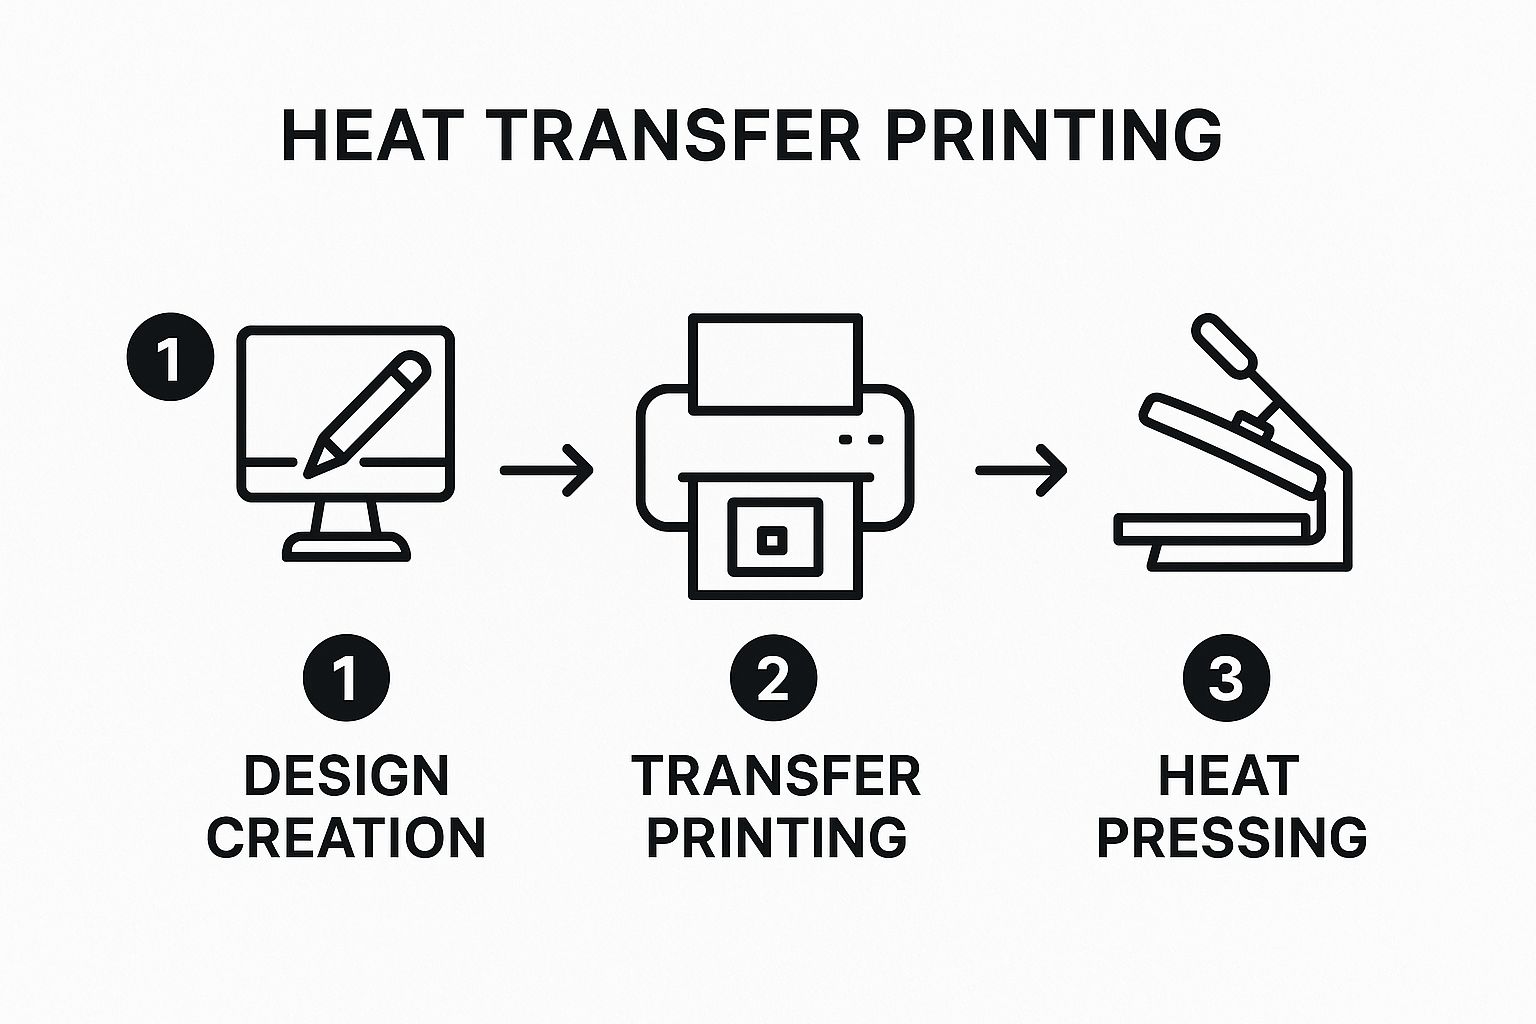
As you can see, a solid digital design is the foundation for everything that follows. Get that right, and the physical steps become much smoother.
Applying the Adhesive Powder
The moment that print finishes, you need to move. The ink is still wet, and that’s exactly what you want. This is when you'll apply the thermoplastic polyurethane (TPU) adhesive powder—think of it as the powerful glue that will bond your design to the shirt.
When you're starting out, the classic "shake-and-bake" method is all you need. Grab a shallow plastic bin and lay your freshly printed film inside, ink-side up. Now, generously sprinkle the white powder all over the design. Don't be shy here; you need to cover every last drop of wet ink.
Once it's coated, gently pick up the film and rock it back and forth a bit. This helps the powder settle into all the little details. Then, lift it out and give the back a few good, firm flicks with your finger. This knocks all the excess powder off. The goal is simple: powder sticks to the ink, and nowhere else. Any stray flecks left on the film will melt into a messy spot on your final product.
Nailing the Curing Process
With the extra powder gone, it’s time to cure. This crucial step melts the powder, transforming it into a smooth, even adhesive layer over the ink. If you don't get the cure right, the transfer simply won't last and will start peeling after a wash or two.
You’ve got a couple of ways to do this:
- Heat Press (Hover Method): This is a great way to start. Set your heat press somewhere between 300-350°F (150-175°C). Lay your powdered transfer on the bottom platen, but do not close the lid. You want to lower the top platen so it hovers about half an inch above the film. That radiant heat is what melts the powder without touching it.
- Curing Oven: If you plan on doing any real volume, a dedicated curing oven is a game-changer. It gives you consistent, even heat and frees up your heat press for what it does best: pressing shirts.
So, how do you know when it's done? You're looking for a visual change. The powder will go from a grainy, matte texture to a smooth, slightly rubberized finish that looks a bit like the peel of an orange. This usually takes 2 to 4 minutes, but you have to watch it carefully. Over-curing can scorch the adhesive, and under-curing leads to a weak bond that's destined to fail.
I see this all the time with beginners: they rush the curing. If that powder doesn't fully melt into a single, uniform sheet of adhesive, it won't have the strength to properly fuse with the fabric fibers. A little patience here makes all the difference in creating a durable product.
Once it’s properly cured, your DTF transfer is finished and stable. You can press it onto a garment right away or store it for later. Just keep them flat in a cool, dry place, and they'll be ready to go whenever you need them.
Mastering the Perfect Heat Press Application
This is where all the magic happens. After all the design work and careful printing, the final press is what makes or breaks your product. A perfect press permanently fuses the transfer to the fabric, creating that durable, professional look we're all after. It really boils down to three key things: temperature, time, and pressure.
Nailing these three elements is absolutely essential. They work in tandem to melt the adhesive completely into the garment’s fibers, forging a bond that can survive dozens of washes. Think of it like baking a cake—the right temperature for the right amount of time gives you a perfect result. Get one of those variables wrong, and you’ve got a mess.
Pre-Pressing: The Step You Can't Afford to Skip
Before you even think about laying down your transfer, you need to pre-press the garment. It's a simple step that a lot of people new to DTF skip, but it's a game-changer. Just lay your shirt on the press and give it a quick press for about 5 to 7 seconds.
Why is this so important? It does two critical things:
- It zaps moisture. Fabrics like cotton are like sponges, soaking up moisture from the air. That moisture turns into steam during pressing and can completely ruin the transfer's adhesion.
- It smooths everything out. A quick pre-press gets rid of any wrinkles, giving you a perfectly flat surface. This ensures the transfer applies evenly without any weird gaps or creases.
Honestly, skipping the pre-press is one of the top reasons I see for transfers peeling after the first wash. It only takes a few seconds but makes a huge difference in the final quality and durability of your print.
Precision Placement and Pressing
With the garment prepped and smooth, it's time to position your DTF transfer. For t-shirts, a classic trick is the "three-finger rule"—placing the top of the design about three fingers' width down from the collar. For true accuracy, I always recommend using a heat-resistant T-shirt alignment tool or even just a ruler to make sure everything is perfectly centered and straight.
Once your transfer is exactly where you want it, cover it with a Teflon sheet or a piece of parchment paper. This is just good practice; it protects both your shirt and the heat press platen. Now, you’re ready to press.
Your exact settings will vary based on the film and fabric, but a solid starting point for cotton is 300-325°F (150-163°C) for 10-15 seconds with firm pressure. For a deeper dive into settings for different materials, check out our comprehensive guide to heat press settings for DTF.
Getting your settings right is paramount. I've seen countless beautiful prints ruined by too much heat, which can scorch polyester, or too little pressure, which results in a weak bond. Always do a test press on a scrap piece of fabric if you're trying a new material.
Hot Peel vs. Cold Peel: The Grand Finale
After the timer beeps, what you do next depends entirely on the type of film you're using. You'll either perform a hot peel or a cold peel.
- Hot Peel: This means you peel the carrier film off immediately while the garment is still hot. This technique often leaves a softer, more matte finish that feels like it’s part of the fabric.
- Cold Peel: For this, you have to be patient and wait until the transfer is completely cool to the touch before removing the film. This method usually gives you a slightly glossier, more vibrant finish and is a bit more forgiving for designs with tiny, intricate details.
Neither method is inherently "better"—it all comes down to the specific film you bought and the look you're going for. Always check the manufacturer's instructions for your transfers.
Once the film is off, do one last post-press for 2-3 seconds with a finishing sheet on top. This final touch seals the deal, boosting durability and giving the design that soft, professional feel.
The growing demand for custom apparel, especially among younger buyers, is what’s driving this industry forward. The market for heat transfer materials is valued at around $1.44 billion and continues to show steady growth. This demand is exactly why perfecting your application technique is so critical for making top-quality custom goods. You can read more about this expanding market on MarketReportAnalytics.com.
Answering Your Top DTF Printing Questions
No matter how smooth your process gets, you're bound to run into questions or a few head-scratching issues when printing heat transfers. It’s all part of the learning curve. I've been there, and I've heard just about every question you can think of.
Let's walk through some of the most common ones. Getting these details right is what takes a print from "good enough" to something truly professional and long-lasting.
Why Are My DTF Transfers Peeling After Washing?
This is, without a doubt, the number one frustration for people new to DTF. If your transfer is peeling, especially after a wash, the problem almost always lies with your heat press application. It's a clear sign the adhesive didn't fully bond with the fabric.
Nine times out of ten, it boils down to one of three things: pressure, temperature, or time.
First, let's talk pressure. It’s so easy to go too light. You need firm, even pressure to physically push that melted adhesive into the weave of the garment. If it's just sitting on top, it's not going anywhere.
Next up is temperature. Every DTF film and every fabric has a sweet spot. A thick cotton hoodie can take more heat than a delicate polyester tee. If your press is too cool, the adhesive won't melt properly. Too hot, and you risk scorching the garment or damaging the transfer. Finally, don't rush the clock. Give the transfer the full recommended time to let the magic happen. A complete, permanent bond takes time.
Here's a pro tip that solves a surprising number of issues: always pre-press your garment for 5-7 seconds. This little step banishes hidden moisture and flattens wrinkles. Steam is the mortal enemy of adhesion, and a quick pre-press can prevent a world of peeling problems down the road.
What's the Difference Between a Hot Peel and a Cold Peel Film?
The names give you a pretty big clue—it's all about when you pull off that clear carrier film after pressing. It's not about one being superior; it's about using the right film for the job and achieving a specific finish.
Let's break it down:
- Hot Peel Film: With this type, you peel the film away the second the press opens, while everything is still piping hot. This technique tends to give you a softer, more matte finish that feels like it’s part of the fabric itself.
- Cold Peel Film: For this one, you have to be patient. You need to wait for the garment and transfer to cool down completely before peeling. This method often produces a slightly glossier, super vibrant look and is a bit more forgiving for designs with really fine details or tiny text.
Always, always check the instructions from your film supplier. Trying to hot peel a cold peel film (or the other way around) is a surefire way to ruin a perfectly good transfer and shirt.
Can I Use a Standard Inkjet Printer for DTF Transfers?
I get this question a lot, and the answer is a hard no. You absolutely cannot use a regular office inkjet printer with its standard inks to print DTF transfers. The entire DTF process is a specialized system where every component is designed to work together.
DTF printing requires specific textile inks formulated to bond with the adhesive powder and then the fabric. Your regular document ink isn't built for that—it won't stick to the film correctly, won't react with the powder, and will wash right out of the shirt.
While it's true that many popular DTF printers are built on the chassis of inkjet models (like certain ones from Epson), they are heavily modified by professionals to handle the different viscosity and chemical makeup of DTF inks.
How Should I Care for Garments with DTF Transfers?
Once you've made a great product, you want it to last. Giving your customers the right care instructions is crucial. DTF is incredibly durable, but a little TLC will keep those prints looking brand new for dozens and dozens of washes.
Here are the simple rules you should pass along:
- Turn it inside out. This is the easiest way to protect the design from rubbing against other clothes in the wash.
- Wash cold, go mild. Use cold water and a gentle detergent. Hot water and harsh soaps can be tough on the print over time.
- No bleach, no softener. These chemicals are known to weaken the adhesive and can cause colors to fade prematurely.
- Dry on low or hang it up. High heat from a dryer is the enemy of all decorated apparel. Tumble dry low or, even better, let it air dry.
- Don't iron the design. If you need to iron the shirt, turn it inside out and use a low heat setting, avoiding the decorated area.
Following these steps will give the print the longest possible life, which is exactly what keeps your customers coming back.
Ready to create stunning, durable custom apparel without the hassle? At Raccoon Transfers, we specialize in high-quality DTF transfers that are easy to apply and built to last. Upload your design and let us handle the printing, so you can focus on creating. https://raccoontransfers.com