
printing on pvc cards: Durable, high-quality results
Printing on PVC cards isn't as simple as hitting 'print' on a standard office machine. It requires specialized equipment to fuse ink or dye directly onto plastic, creating the durable, professional-looking ID badges, membership cards, and gift cards we use every day.
The methods range from basic direct-to-card dye-sublimation to high-end UV printing for really stunning quality. Picking the right path from the get-go is the most critical first step you'll take.
Your Guide to Professional PVC Card Printing
So, you need to create durable, high-quality plastic cards. Whether you're gearing up to make employee ID badges, customer loyalty cards, or slick event passes, knowing the ropes of the printing process is what separates an amateur-looking card from a professional one. This guide will walk you through everything, from start to finish.
Think of this as your roadmap to a perfect print. Every stage builds on the one before it, so getting each step right is key. Here's what we'll cover:
- Comparing Core Technologies: We'll look at everything from affordable direct-to-card printers to the newer UV-DTF transfers, explaining why that first choice is so important.
- Design and File Preparation: I'll show you how to set up your artwork to sidestep common issues like blurry text or colors that just don't look right.
- Material and Equipment Selection: We'll get into the different types of PVC cards out there and the specific tools you’ll need for each printing method.
- The Printing Process: This is the hands-on part—clear guidance for the actual printing or application steps to make sure you nail the execution.
- Finishing Touches: We'll explore how lamination and other finishing options can protect your cards and give them that extra professional pop.
This isn't just a niche hobby; it's a massive, growing industry. The global plastic card market is projected to jump from an estimated US$16.4 billion in 2025 to around US$23.8 billion by 2032. That growth is being driven by huge demand from banks, governments, and corporations that all need secure, durable identification. You can dig into more of the data on this market trend from Persistence Market Research.
Setting Realistic Expectations
Before you jump in, let's get real about what you need. A small business printing 50 membership cards has completely different requirements than a university that needs to issue thousands of student IDs. This guide will help you balance the critical factors: cost, quality, and volume.
My goal here is to give you the confidence to pick the best approach for your project, budget, and quality standards. You'll be able to make an informed decision, whether that means investing in your own equipment or finding the right printing service.
By the time you're done reading, you'll have a solid understanding of how to print on PVC cards. You'll know the different methods inside and out, how to prep your files for flawless results, and what to do when you hit a snag. The final product will be something you can be truly proud of.
Choosing the Right Way to Print on PVC Cards
Picking the right printing method for your PVC cards is the most important decision you'll make. It dictates everything—the look, the feel, the durability, and ultimately, the cost of each card. Let’s walk through the most common technologies out there so you can figure out what makes sense for your project, whether you're making basic staff IDs or high-tech security badges.
Every technique has its trade-offs. Getting a handle on these differences is the key to avoiding headaches and ensuring the final product is exactly what you envisioned. We'll look at four main approaches, complete with real-world examples for each.
This chart gives you a quick visual guide. Think about what's most important for your project—budget, quality, or volume—and it'll point you in the right direction.
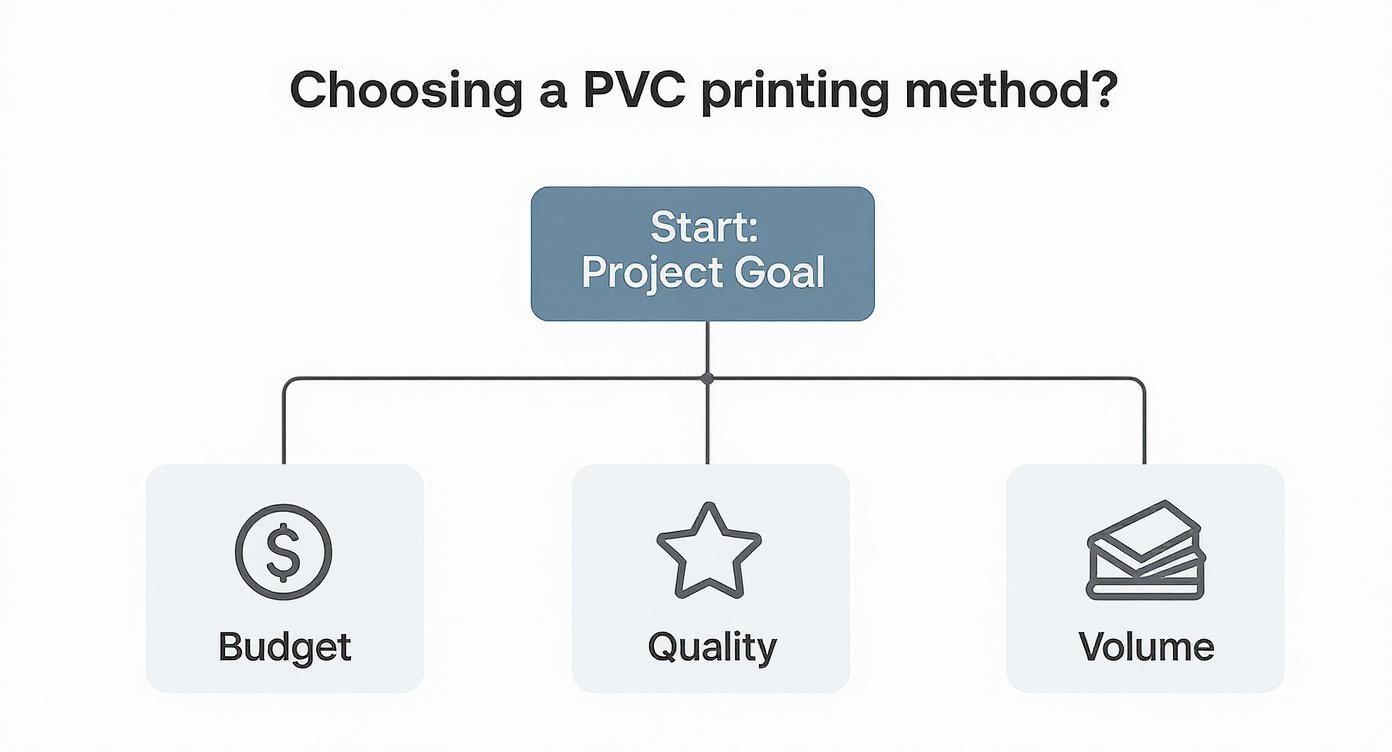
As you can see, your top priority really narrows down the options. Low cost points one way, while top-tier quality points another.
Direct-to-Card (DTC) Dye-Sublimation
Direct-to-Card printing, which you'll often hear called dye-sublimation, is the go-to method for most everyday card printing. It’s pretty straightforward: the printer’s thermal head heats up a ribbon, turning solid dye into a gas. This gas then seeps into the surface of the PVC card and solidifies as it cools, creating your image.
Because it's quick and relatively cheap, it’s a favorite for tons of businesses.
- Best For: Everyday needs like employee IDs, student cards, loyalty programs, and basic membership cards where you need them done fast and without breaking the bank.
- Key Consideration: The biggest giveaway of a DTC print is the tiny, unprinted white border it often leaves around the edge. The printhead can't go right to the very edge without risking damage, so it plays it safe.
Imagine you need to issue 200 new employee badges, each with a unique photo and name. A DTC printer is a workhorse for this. It chews through variable data and spits out good-looking, functional cards in no time. But if you're a luxury brand where every tiny detail counts, that little white border might be a deal-breaker.
Retransfer Printing (Reverse Transfer)
If top-notch quality is what you're after, retransfer printing is the next step up. Instead of the printhead touching the card, it first prints your design in reverse onto a clear film. Then, that film is heat-pressed and bonded over the entire surface of the PVC card.
This two-step dance gives you a true edge-to-edge print, what we call a "full bleed." The colors pop more, and the design itself is much more durable because it’s safely tucked under that protective film layer.
Expert Insight: Retransfer is a lifesaver when you're printing on cards with uneven surfaces, like smart cards with embedded chips or proximity cards with little bumps from their internal antennas. The flexible film molds right over those imperfections for a perfect finish, whereas a DTC printhead would likely struggle and leave flaws.
This is the method of choice for high-security access cards, government IDs, and premium gift cards where a flawless, over-the-edge look is a must. Yes, the equipment and cost-per-card are higher, but for these applications, the superior look and longevity are well worth it.
UV Flatbed Printing
UV flatbed printers are the jack-of-all-trades in the printing world. These aren't just for cards; they can print on almost anything—wood, metal, glass, and of course, PVC. The magic is in the ink, which is instantly dried, or "cured," by a blast of ultraviolet light.
This instant-curing process creates incredibly crisp, vibrant prints that are tough as nails. One of the big wins here is efficiency; you can lay out multiple cards on a custom jig and print them all in one go. When looking for professional results, it's worth exploring all your options, including these kinds of durable UV printing solutions.
UV flatbeds are fantastic for short runs of highly custom cards, one-off promotional items, or designs that call for special effects like raised, textured ink.
Comparison of PVC Card Printing Technologies
To make the choice a bit clearer, here's a side-by-side look at how these technologies stack up against each other. Consider what matters most to you—quality, cost, speed, or longevity.
| Technology | Best For | Print Quality | Durability | Cost Per Card |
|---|---|---|---|---|
| DTC Dye-Sublimation | High-volume, cost-sensitive jobs (IDs, membership cards) | Good | Moderate | Low |
| Retransfer Printing | Flawless, edge-to-edge designs (high-security, premium cards) | Excellent | High | Medium |
| UV Flatbed Printing | Custom, small-batch, and multi-surface projects | Excellent | Very High | High |
| UV-DTF Transfers | On-demand, small-run, high-detail applications | Excellent | High | Varies (Low-Medium) |
This table should give you a solid starting point. A low-cost, high-volume project naturally leads you to DTC, while a premium, security-focused card makes a strong case for retransfer.
UV-DTF Transfers: The Modern Alternative
So, what if you need a small batch of absolutely stunning, full-color cards but have zero interest in buying a printer? This is exactly where UV-DTF transfers come in. Forget what you know about traditional stickers; these are permanent, high-quality graphics that you apply yourself.
The process couldn't be simpler:
- We print your design onto a special adhesive film.
- You get the transfers delivered to your door.
- You just peel, press it firmly onto the PVC card, and pull away the carrier film.
What you're left with is a vibrant, scratch-resistant, and waterproof graphic that looks like it was printed directly on the card. It's a fantastic option for startups making sample packs, event planners creating custom VIP passes, or anyone who just needs a handful of pro-quality cards without the overhead. If you want to learn more about the tech, check out our deep dive into UV-DTF transfers.
Getting Your Artwork Ready for a Flawless Print
A great print starts long before ink ever hits a card. It begins right inside your design software. Honestly, getting this initial setup right is the single best way to avoid those frustrating mistakes we’ve all seen—blurry text, colors that look off, or a logo that gets trimmed in half.
You don't need to be a design wizard to nail this part. It’s really just about following a few fundamental rules of print prep. A little attention to detail here makes all the difference, ensuring the card in your hand looks exactly like the design on your screen. I’ll walk you through the essentials, using common tools like Adobe Illustrator as our reference.
Mastering the File Setup Essentials
Your first move is creating the right canvas. For PVC cards, the gold standard is the CR80 size. Don't eyeball it or use a generic template; setting your document up with the right specs from the get-go will save you a world of hurt.
Here’s what you absolutely need to get right:
- Dimensions: A standard CR80 card is 3.375 x 2.125 inches (that's 85.6mm x 54mm). Lock those numbers in.
- Resolution: Always, and I mean always, work at 300 DPI (dots per inch). Anything less is a recipe for a fuzzy, amateur-looking print.
- Color Mode: Set your document to CMYK (Cyan, Magenta, Yellow, Black). Your monitor uses RGB (Red, Green, Blue) to display colors, but printers don't. Designing in CMYK from the start gives you a far more accurate preview of how the final colors will actually print.
A classic mistake I see all the time is someone designs a stunning, vibrant graphic in RGB, only to be crushed when the printed version looks flat and dull. That’s because the CMYK color range is smaller than RGB's. If you design in CMYK, you're playing in the printer's ballpark from day one. What you see is what you’ll get.
Why You Can’t Ignore Bleed and Safe Zones
Ever seen a business card with that annoying little white sliver along one edge? That’s a classic no-bleed mistake. Printing and cutting machines aren't perfect—they have a tiny margin of error. You have to design with that in mind.
That’s where bleed and safe zones come in. They’re your safety net.
- Bleed Area: Think of this as an extra border of your design, usually 0.125 inches, that extends past the actual trim line. Your background color or image needs to fill this entire area. When the card is cut to its final size, this excess gets trimmed off, guaranteeing your design goes right to the edge with no weird gaps.
- Safe Zone: This is the opposite—an inner margin, also about 0.125 inches from the trim edge. All your critical stuff—logos, names, contact info, QR codes—has to stay inside this zone. This ensures nothing important gets lopped off during trimming.
It’s like framing a picture. The bleed is the part of the image tucked behind the frame, and the safe zone is where you put all the good stuff you want people to see.
Quick Tips for Typography and Images
The final details that separate a professional job from a mediocre one often come down to text and images. A font that looks crisp on-screen can print poorly, and a sharp-looking image can turn into a pixelated mess if you're not careful.
To sidestep these issues, here’s what I recommend:
- Outline Your Fonts. Before you finalize that file, convert all your text to outlines (or "curves" in some programs). This essentially turns the letters into vector shapes, so the printer doesn’t need your specific font installed. It’s the only surefire way to make sure your typography looks exactly how you designed it.
- Embed Your Images. Don't just drag-and-drop or copy-paste images. You need to formally link and then embed them into your document. This packs the high-resolution image data into the final file, preventing the printer from accidentally using a low-quality preview instead.
These prep principles aren't just for PVC cards; they're foundational for almost any professional printing project. For a deeper dive, check out this excellent guide to achieving flawless prints on materials like Coroplast. The core ideas of resolution, color space, and bleed are universal. Once you master these basics for printing on PVC cards, you're setting yourself up for success every single time.
The Hands-On Printing and Application Process
With your artwork dialed in, it’s time for the magic to happen. We're moving from the digital canvas to the physical PVC card, and this is where your design truly comes to life. The exact steps, of course, depend entirely on the technology you've chosen. Each method has its own unique rhythm and set of requirements to get it just right.
Let's walk through the hands-on process for the most popular ways to get your image onto a PVC card. We'll cover everything from loading up a traditional card printer to the careful, steady hand needed for modern transfers.
For Direct-to-Card and Retransfer Printers
If you're working with a dedicated card printer, whether it's a direct-to-card (DTC) or a retransfer model, the workflow is pretty standard. The real secret to success is in the setup. Get the machine configured correctly from the start, and you'll save yourself a lot of wasted materials and headaches down the road. This is especially true in professional settings where these printers are absolute workhorses.
It’s no surprise that the demand for these machines is skyrocketing. The global card printer market was valued at around USD 4.2 billion in 2023 and is expected to climb to nearly USD 8.5 billion by 2032. This growth is fueled by sectors like banking, government, and corporate security that need these printers for reliable, high-resolution ID cards. You can dig into the specifics of this market growth in industry research from DataIntelo.
Here's the general sequence for getting started with your printer:
- Load Your Supplies. Start by placing the blank PVC cards into the input hopper. Make sure they're clean and free of dust to prevent feeding errors. Then, install the printer ribbon—typically a YMCKO ribbon for full color—making sure it’s taut and correctly aligned.
- Configure Printer Settings. Jump into the printer driver on your computer to set the card thickness and ribbon type. This is also where you'll manage your color profiles. A great pro tip is to run a single test print and compare it to your monitor before starting a huge batch. It lets you tweak the color balance or saturation for a much better match.
- Send it to Print. Once you're happy with the settings, send your design file to the printer. The machine will automatically pull a card, print the design, and pop it into the output hopper. If you're using a retransfer printer, it will add the extra step of bonding the printed film onto the card's surface.
For UV Flatbed Printers
UV flatbed printing gives you more manual control, but it also demands a lot more precision, especially with something as small as a PVC card. The biggest challenge here is keeping the cards perfectly still and at the exact right height from the printhead.
The best solution is to create a custom jig. This is usually just a flat piece of acrylic or wood with pockets routed out to the perfect size of a CR80 card. A good jig holds multiple cards securely on the printer bed, letting you print an entire batch in a single pass.
Once you have your jig made:
- Position the Jig. Place it on the flatbed and make sure it's secure.
- Set the Print Height. This is the most critical step. Use the printer's controls to lower the printhead carriage until it’s just a few millimeters above the cards. Too high and your print will look fuzzy; too low and you're risking a catastrophic head strike.
- Check the UV Curing. Make sure the UV lamps are working properly. They cure the ink instantly as it's printed, which is what gives you that durable, vibrant finish you can only get with UV printing.
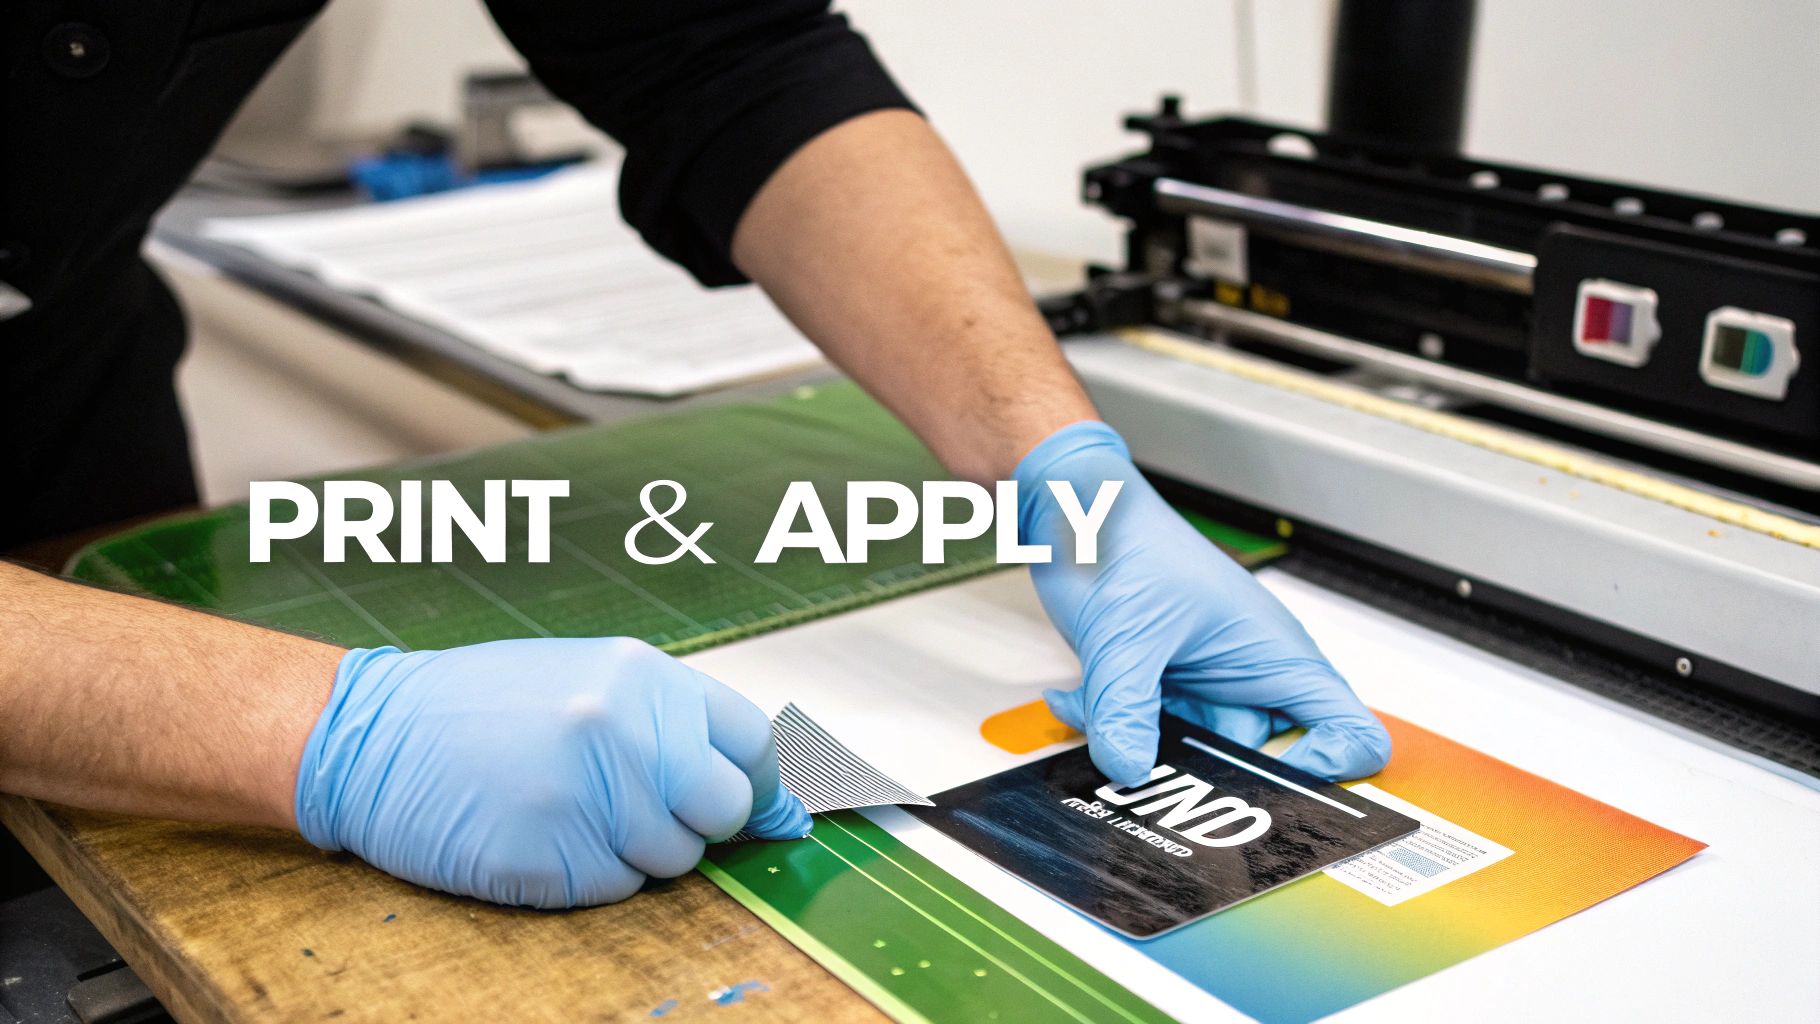
Applying UV-DTF Transfers
If you’ve decided to go with UV-DTF transfers, you get to skip the expensive machinery altogether. This method is all about a careful, manual application. The final quality really comes down to two things: a clean surface and steady pressure.
My Personal Tip: Before you even think about applying the transfer, wipe the PVC card with an isopropyl alcohol pad and let it air dry. This gets rid of any finger oils or dust that could stop the adhesive from getting a perfect grip. A perfectly clean surface is non-negotiable for a professional, bubble-free finish.
Here’s how you apply them step-by-step:
- Prep the Surface. Like I said, make sure the card is perfectly clean and dry.
- Position with Care. Peel back just a small corner of the transfer's backing paper. Line up that exposed adhesive edge with the card, taking a moment to make sure your placement is straight.
- Apply Firm Pressure. Once it's aligned, slowly peel off the rest of the backing while smoothing the transfer down with a squeegee. Use firm, overlapping strokes from the center out to push away any trapped air bubbles.
- Peel the Carrier Film. Give the entire transfer one last good rub with the squeegee to ensure it's fully bonded. Then, starting from a corner, slowly peel the top carrier film back on itself at a sharp angle. The design will stay behind, perfectly fused to the card.
This process is a fantastic option for small businesses or designers who need premium results without investing in a dedicated printer. If you're curious about how this technology is shaking up the world of custom products, you can find a great overview on our blog exploring UV-DTF printing innovations and applications.
Finishing Touches and Tackling Common Problems
Getting the ink onto the card is only half the battle. The final steps—what you do after the print—are what separate a decent card from a professional, long-lasting one. This is where you add durability and, just as importantly, learn how to fix the little issues that pop up along the way.
A snapped ribbon or a design that’s slightly off-center can stop a production run in its tracks. Let's walk through the essential finishing techniques and some practical, real-world solutions for the most common printing headaches you'll likely face.
Boosting Durability With Lamination and Overlays
Think of a protective finish as an insurance policy for your print. It's an invisible shield guarding against scratches, sunlight, and daily abuse.
Most direct-to-card printers automatically apply a clear overlay as a final step—that's the 'O' in a YMCKO ribbon. While this offers a basic layer of protection, you can do much better.
For cards that will be swiped, scanned, or handled constantly (think access keys or busy membership cards), a separate lamination module or standalone laminator is a smart investment. These machines apply a much thicker polyester film, which dramatically increases resistance to abrasion and UV light, stopping your colors from fading over time.
You can also add some impressive security and visual flair with specialized overlays:
- Holographic Overlays: Adding a custom hologram makes a card incredibly difficult to fake. It’s a go-to choice for high-security IDs and official event passes.
- Frosted or Matte Finishes: A matte laminate gives the card a premium, tactile feel while cutting down on glare and hiding fingerprints.
Solving Common PVC Printing Problems
Even with top-of-the-line equipment, things go wrong. Knowing how to diagnose and fix issues quickly will save you a ton of time, materials, and frustration. Here’s how to handle the usual suspects.
Problem: Muted or Inaccurate Colors
You see a vibrant design on your monitor, but the printed card looks dull and lifeless. Nine times out of ten, this is a color profile mismatch.
- The Fix: First, make sure your design file is set to CMYK, not RGB. Then, dive into your printer driver settings and play around with the different color correction profiles. The best practice? Always run a single test print before a big batch to get your colors dialed in perfectly.
Problem: Misaligned Prints or Off-Center Designs
Your beautiful artwork is printing too close to the edge or just isn't centered. This almost always points to a sensor or calibration issue.
- The Fix: Your card printer software should have a calibration utility—run it. This tool resets the card alignment sensors and usually solves the problem. It's also worth double-checking that your artwork has the proper bleed and safe zones built in, as improper file setup can sometimes create the illusion of misalignment.
Key Takeaway: Never underestimate the power of a simple cleaning cycle. Dust and tiny bits of debris are the sworn enemies of a perfect print. Regularly running a cleaning kit through your printer can fix a surprising number of problems, from card feeding jams to those annoying little white specks on your prints.
Problem: Snapping or Tearing Printer Ribbons
A broken ribbon is a project-killer. It’s usually caused by one of two things: too much heat or something physically blocking the path.
- The Fix: Start by checking the printhead temperature settings in your driver. If the heat is cranked up too high, it can literally melt and weaken the ribbon. Next, do a visual inspection of the card path for any sharp edges or debris that might be snagging the ribbon as it moves.
Problem: Bubbling or Peeling on Transfers
If you're using UV-DTF transfers and they're bubbling or refusing to stick properly, the culprit is almost always a contaminated surface or sloppy application. To truly grasp why this method is different, it's worth understanding how it stacks up against older techniques, as detailed in this comparative guide on UV-DTF vs. traditional UV printing.
- The Fix: The PVC surface has to be perfectly clean—no exceptions. Wipe it down with isopropyl alcohol right before you apply the transfer. Then, use firm, even pressure with a squeegee, working from the center outwards. This pushes out every last air pocket before you peel away the carrier film.
Your Top Questions About Printing on PVC Cards, Answered
Jumping into the world of PVC card printing can feel a bit overwhelming. You've got questions, and that's a good thing—it means you're focused on getting a professional result. Let's walk through some of the most common queries I hear, clearing up the confusion so you can move forward with your project.
Getting these basics sorted out from the start is the key to investing in the right process for your needs, which ultimately saves you both time and a lot of headaches.
Can I Just Use My Regular Office Printer?
This is easily the most popular question, and the answer is a hard no. Your standard inkjet or laser printer is built for one thing: printing on porous paper. PVC is a whole different ballgame.
An inkjet works by spraying tiny droplets of liquid ink that need to absorb into the paper to dry. On a slick, non-porous plastic card, that ink will just sit on the surface, creating a smudged, wet mess that will never properly set.
Using a laser printer is even worse. The intense heat from its fuser unit—designed to melt toner onto paper—will literally melt the PVC card. This can cause catastrophic, and often permanent, damage to your printer. You absolutely need a specialized machine, like a dye-sublimation or retransfer printer, or a different approach like UV printing or applying a high-quality UV-DTF transfer.
What's the Real Difference Between Dye-Sublimation and Retransfer?
While both are pro-level card printing methods, they go about it in very different ways, and the final look is quite distinct.
Dye-sublimation, often called Direct-to-Card (DTC), is the more common and budget-friendly of the two. The printhead gets right up against the card, using heat to infuse dye from a ribbon directly into the plastic. It’s quick and perfect for many jobs, but it has one small tell-tale sign: it almost always leaves a tiny, unprinted white border around the very edge. That’s because the printhead can't safely go all the way to the edge without risking damage.
Retransfer printing, on the other hand, is a two-step technique that produces a truly premium finish. First, it prints your design in reverse onto a clear film. Then, it uses heat and pressure to bond that entire film onto the card's surface.
The Bottom Line: Retransfer printing gives you a true, full-bleed, "over-the-edge" print with noticeably richer image quality and better durability. It’s the go-to for high-end cards, or for printing on uneven surfaces like smart cards with embedded chips.
When Would I Use UV-DTF Transfers Instead of a Dedicated Printer?
UV-DTF transfers are your secret weapon when buying a dedicated card printer just doesn't add up, either financially or practically. They really shine in specific situations where you need top-tier quality and flexibility without the hefty price tag of specialized equipment.
You should seriously consider UV-DTF transfers when:
- You only need a small batch of cards and can't justify a machine.
- Your design is incredibly detailed or has complex, multi-color graphics that need to pop.
- You're after special effects, like a raised, textured, or embossed feel.
- You simply don't have the budget or physical space for another piece of hardware.
That said, if your daily workflow involves printing variable data on the fly—like unique names and photos for hundreds of employee IDs—or requires built-in features like magnetic stripe encoding, then a dedicated card printer is still the more efficient tool for the job.
How Can I Get the Colors on My Card to Match My Screen?
Ah, the age-old battle of screen versus print. It’s a common frustration, but the fix usually comes down to understanding the difference between the color worlds of monitors and printers.
First things first: always design your artwork in CMYK color mode, not RGB. Your screen creates color by mixing Red, Green, and Blue light (RGB). A printer, however, creates color by mixing physical inks: Cyan, Magenta, Yellow, and Black (CMYK). When you design in CMYK from the start, you're working in the printer's native language, which gives you a much more realistic preview of the final printed piece.
For projects where brand color is absolutely non-negotiable, you can get even more precise by using a Pantone (PMS) color matching system. But honestly, the most foolproof strategy is to run a single test print. See it with your own eyes before committing to a big batch. This simple step lets you tweak your file if needed and can save you from a very expensive reprint.
For projects that demand stunning, durable graphics on PVC cards—without the cost and complexity of buying a printer—Raccoon Transfers has you covered. Our premium UV-DTF transfers are incredibly easy to apply and deliver a professional, long-lasting finish on any hard surface. Explore the possibilities and kick off your custom project today.