

Shirt with Short Collar: What It Means and How to Choose One
You're comparing shirt blanks for a small brand, and the product listings keep using “short collar” to describe very different shapes. One shirt has an open, flat camp collar; another has a narrow band with no folded points; a third looks like a conventional button-down with compact collar tips. The names suggest a style, but they don't tell you how the collar will fit or where your artwork can sit.
A shirt with a short collar is easier to choose when you separate the collar's height from its points and spread. Those measurements matter for neck comfort, the shirt's silhouette, and the space available for a chest graphic. They also give you a clearer brief when ordering custom apparel or preparing a DTF design.
Why Shoppers Search for a Shirt With Short Collar
A shopper searching for a shirt with short collar may be looking for one of several things: a low collar stand, short collar points, an open resort neckline, or a band collar with no points at all. Those details can look similar in a product photo, but they aren't interchangeable. A camp collar, for example, is defined by its open, flat shape, while a band collar is a short upright strip without a folded collar.
That vocabulary gap makes online buying frustrating. A listing may say "short collar" without stating whether the collar sits low on the neck, has short points, or looks minimal when worn open. For a brand owner, that missing detail can affect both the fit customers expect and the way a logo or graphic sits near the neckline.
The simplest way to get specific is to describe the collar using three separate features: stand height, point length, and spread. Then check the garment with the top button open and closed. You'll know whether the collar is compact because it sits low, because its points are short, or because the style has no conventional points at all.
Production rule: Don't brief a supplier with “make the collar short” alone. Name the collar type, provide measurements, and show how the shirt should look when worn.
For custom apparel, that clarity also helps you protect the print area. A structured collar can cover or crowd artwork placed too high, while a relaxed neckline may shift as the garment is worn. The useful question isn't only “Which style do I like?” It's “What exactly am I measuring, how should it fit, and where will the decoration sit?”
The Anatomy of a Short Collar Explained
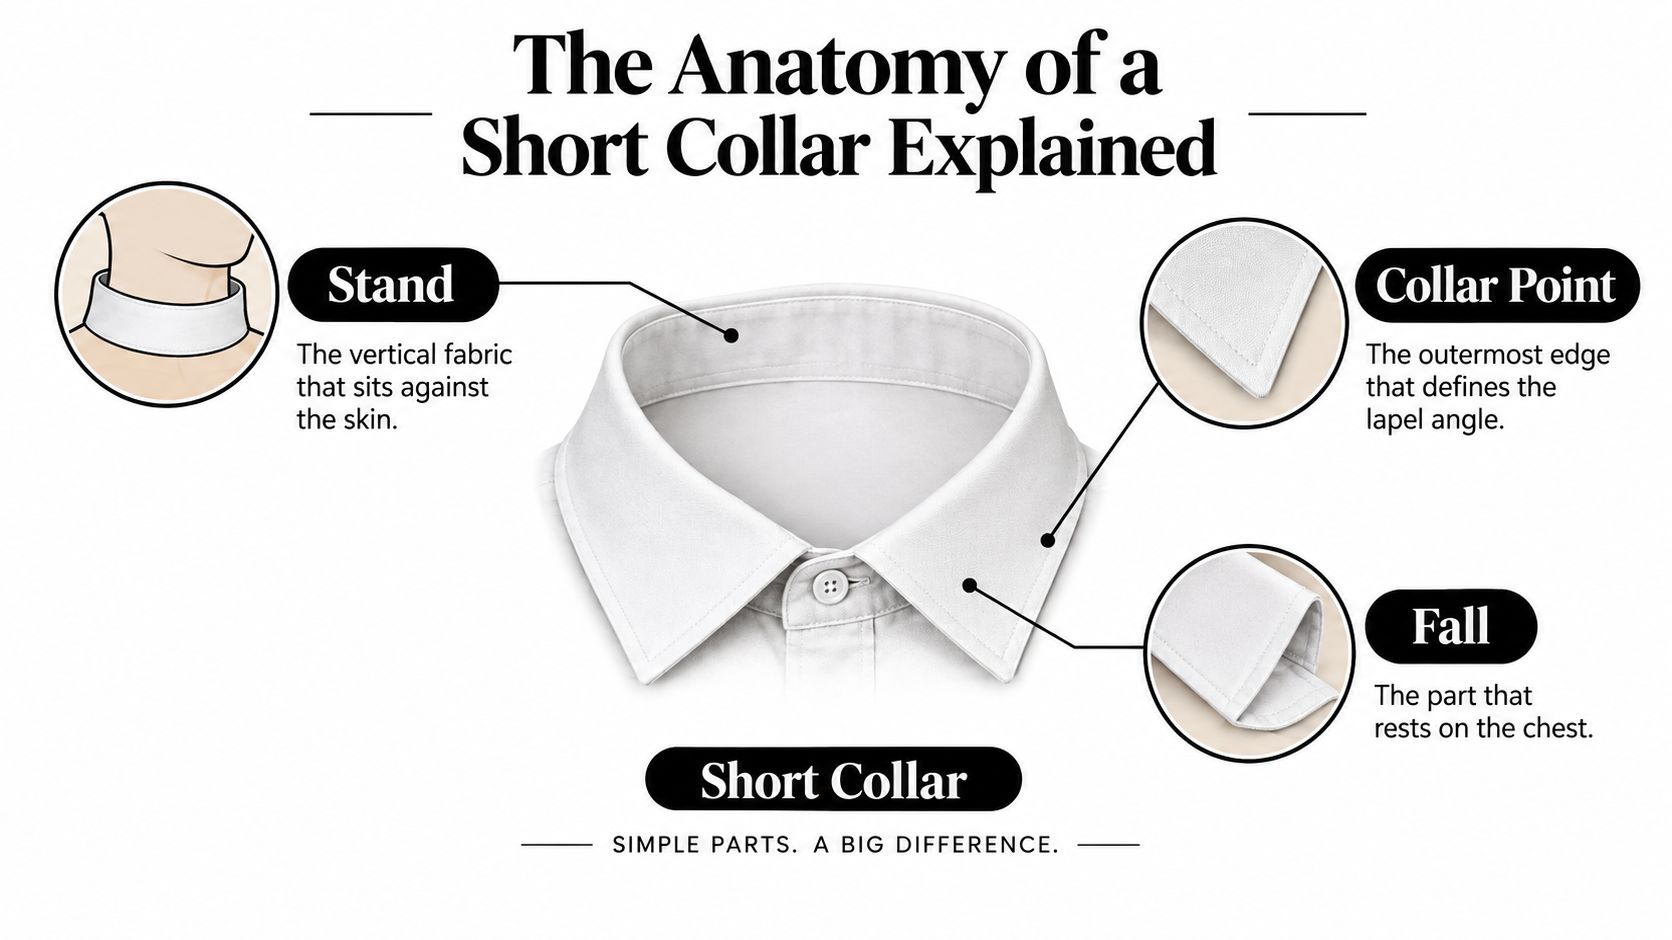
A shirt collar has three parts to distinguish before you compare measurements: the stand, the fall, and the points. Product descriptions often use “collar height” loosely, so checking which part a measurement refers to prevents a mismatch between the shirt you expect and the one you receive.
Stand height
The stand is the band of fabric that wraps around the neck. Measure its height vertically, from the seam where it joins the shirt to the upper edge of the band. Record the result in millimeters, and note whether you measured the collar flat or on the body. A low stand creates a lower-profile neckline; it doesn't necessarily mean the collar points are short.
Think of stand height like the profile of a shoe. A low-top sneaker sits below the ankle, while a high-top rises above it. The analogy describes the vertical profile, not every other feature of the shoe. In the same way, stand height describes how much collar rises around the neck, not the length or angle of its points.
Fall, point length, and spread
The fall is the folded fabric that lies over the chest. On a traditional collar, the points are the two tips at the front. Measure point length from the seam at the stand to each tip. Spread describes the distance or angle between the points when the collar is worn, so it isn't the same as point length.
A short-collar specification might call for a low stand and short-to-medium points, but that combination is only one option. A band collar has a stand without a folded fall or points; a camp collar has a different, open construction. If you're comparing shirt options, a catalogue of shirts, ties, and cufflinks can help you see how conventional shirt styles and coordinated accessories are presented, but use garment measurements rather than names to compare fit.
How Short Collars Became the Everyday Default
The modern short or low-profile collar makes more sense when you know that collars weren't always attached to shirts. The Metropolitan Museum of Art's example of a detachable collar shows how a collar could be a separate garment component, worn with a shirt made without an attached collar and cuffs. That construction let the wearer replace those parts separately, but it also encouraged a formal, sharply shaped look.
Detachable collars developed against a background in which a clean white collar was a visible mark of social affluence. The Textile Research Centre in Leiden dates them to the 1820s and notes that early collars were usually made from starched linen. After washing, linen collars needed to be starched again, a demanding routine for an item meant to look crisp.
From starched linen to softer shirts
By the late nineteenth century, commercially produced celluloid offered an alternative that could imitate starched linen without the same starching, washing, or ironing routine. The collar's popularity peaked in the early twentieth century, but that period also marked the beginning of its decline. Some detachable collars were extremely tall and stiff, a silhouette that suited formal dress more than everyday wear.
By the end of World War I, formal detachable collars had largely fallen out of fashion. By the 1930s, few shirtmakers still regarded them as everyday wear. As shirts moved toward attached collars, wearers gained a softer, simpler neckline that didn't require the same separate care routine.
That history helps explain why modern casual and smart-casual shirts commonly use collars that are attached, softer, and shorter than their formal predecessors. The shift wasn't just a change in appearance. It reflected a move toward practical garments designed to be worn and laundered as a whole.
Comparing Camp Cuban Band Club and Short-Point Collars
“Short collar” names a broad category, not one precise construction. Start by deciding whether you want a folded collar with points, an open collar that lies flat, or a simple band around the neck. Then match that construction to the garment and how formal it needs to look.
| Collar Style | Stand Height | Formality | Best Use Case |
|---|---|---|---|
| Camp | Usually low or absent as a separate upright band | Casual | Resort shirts, relaxed streetwear, open-neck designs |
| Cuban | Low-profile, with a more defined fall than many camp collars | Casual to smart-casual | Resort garments and branded lifestyle shirts |
| Band or mandarin | A short upright band, with no folded points | Casual to contemporary | Minimal uniforms and clean-front designs |
| Club | Attached stand with rounded, relatively compact points | Smart-casual | Vintage-inspired shirts and neat branded apparel |
| Short-point dress shirt | Attached, low-profile stand with compact points | Smart-casual to formal | Button-down uniforms and elevated merchandise |
A camp collar typically sits open and flat, with no tall stand. A Cuban collar shares that relaxed appearance but can have a more structured fall. The precise difference varies by garment, so inspect the sample rather than relying on the label.
A band collar, sometimes called a mandarin collar, has no folded fall or points. It can look especially clean on a simple garment, but it won't create the same pointed-shirt silhouette as a short-point dress collar. A club collar has rounded points that give a traditional shirt a softer, vintage feel. By contrast, a short-point dress shirt collar keeps the familiar attached collar shape while using compact points and a lower-profile appearance.
Choose by garment, not just by name
For an open resort shirt, compare camp and Cuban collars and check how the fall lies when the shirt is worn unbuttoned. For a tidy uniform, a short-point collar or a more structured club collar may hold the intended shape better. A band collar suits a minimal look, but it shouldn't be mistaken for a short-point collar just because both feel less bulky around the neck.
If your project also involves sportswear, a V-neck soccer jerseys guide can help you think about how a neckline affects the garment's overall shape. For T-shirts, compare collar construction separately from the neckline shape using this guide to T-shirt necklines. In either case, request measurements for the actual blank you plan to decorate.
Measuring Neck Comfort and Collar Fit at Home
A collar can look low-profile in a photo but feel tight once buttoned. You can get a more useful fit check at home by measuring your neck and a shirt you already wear comfortably. Keep track of where you place the tape and whether you're measuring the garment flat or on your body, so comparisons stay consistent.
Measure the neck and collar
- Measure neck circumference. Wrap a soft tape around the base of your neck, where the collar would sit. Keep the tape level and snug without pulling it tight. Add roughly 1 to 2 centimeters of ease for comfort, then compare the result with the collar size printed on a button-down shirt. Brands may label or grade sizes differently, so treat the garment's actual measurements as the final check.
- Measure the stand. Lay the collar flat and measure vertically from the neck seam to the top edge of the stand. Record the number in millimeters. Don't confuse this with the full collar edge or the height of the folded fall.
- Measure the point. Start at the seam where the collar stand joins the point, then measure to the tip. Record the left and right points separately if they don't appear identical. To compare point spread, close the collar and note the distance or angle between the tips.
Check it open and closed
Button the shirt and check whether the stand presses against your throat or leaves comfortable room. Then open the top button and note whether the collar still lies neatly, whether the points flare outward, and where the collar roll, the fold between stand and fall, rests on your chest. A low collar can look balanced when open but feel restrictive when closed if the neck measurement is wrong.
Wash and dry the sample according to its care instructions before approving a production run. Cotton collars can shrink or change shape during laundering, making the collar feel higher or tighter than it did on a new blank. The change depends on the fabric and care routine, so evaluate the actual garment rather than assuming all cotton behaves alike.
If your business needs more systematic body measurements, this guide to body scanning for apparel retailers provides context on measurement approaches beyond a home tape check. For the garment itself, compare fabrics and constructions using this guide to T-shirt materials.
Fit check: Try the shirt with the top button both open and closed, then repeat the check after washing. The collar needs to work in the state your customer is most likely to wear it.
How a Short Collar Changes Decoration Placement
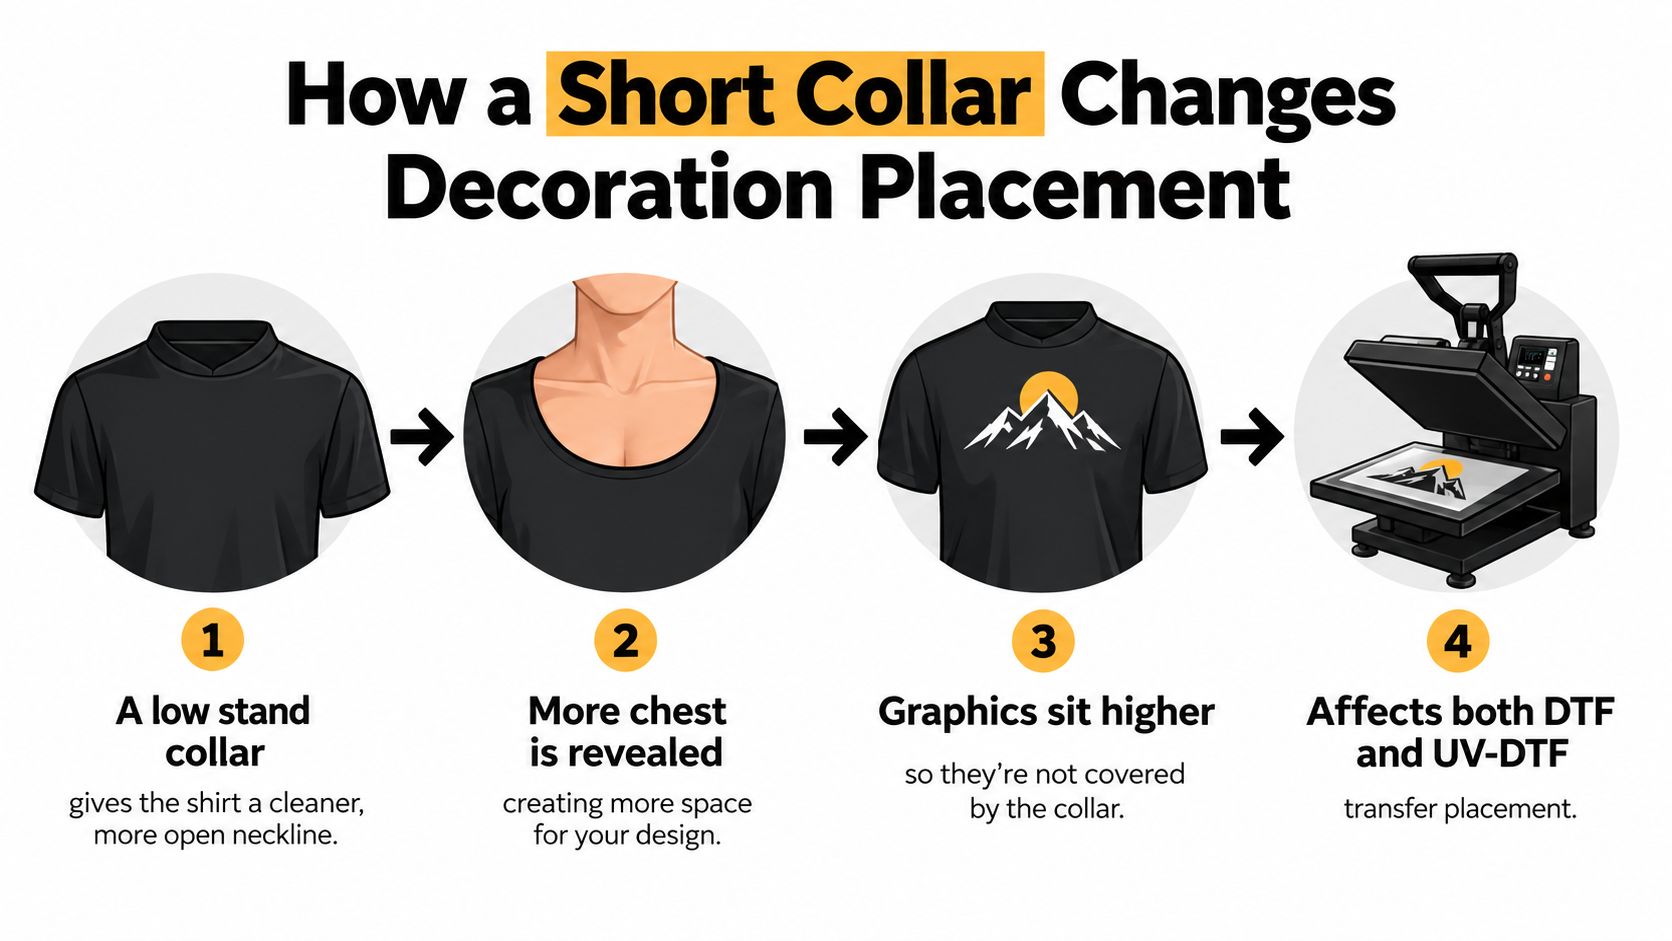
A low stand exposes more of the upper chest than a tall stand, but that doesn't mean every chest graphic should move up. The collar and neckline can still fold over the placket, and the shirt can shift when worn. If artwork sits too close to the collar seam, the fabric may cover part of it or bend the design across a moving edge.
Mark the decoration-safe zone
Before applying a DTF transfer, mark a repeatable zone on a blank. Use the collar's actual seam as your reference, not an assumed distance based on a product name. Position a paper mockup of the artwork on the chest, then check the shirt with the collar open and buttoned. If the graphic disappears under the fold in either state, move it down the placket or adjust its size.
The fabric matters too. A soft collar may curl or collapse, changing the neckline edge and making a nearby transfer look crowded or uneven. A firmer collar can hold its shape more consistently, but its stand may cover more of the upper chest. The safest placement is the one that stays clear of the collar's movement and looks balanced on the wearer.
Use the same blank, collar position, and mockup method across a run. A guide to T-shirt graphic sizing can help you consider artwork scale, but on a collared shirt you'll also need to account for the placket and collar fold. DTF transfers can be applied to cotton, blends, and synthetic fabrics, but the right heat-press settings depend on the transfer and garment. Confirm those settings before production, after deciding where the artwork belongs.
Keep DTF and UV-DTF distinct
DTF is used for fabric decoration. UV-DTF is intended for hard, smooth surfaces, such as glass, acrylic, plastic, and metal, rather than for pressing a graphic onto a shirt. If your brand also decorates hard goods, Upload Your Own UV DTF Gang Sheets is one way to arrange multiple designs for those surfaces. For apparel, plan the decoration area around the shirt's seams and collar, then follow the specific application instructions for the fabric transfer you choose.
When a Shorter Collar Is Not the Better Choice
A shorter collar can reduce visual bulk, but it isn't automatically more comfortable or easier to print. A low band may curl, collapse, or rub if its proportions don't work with the neckline and fabric. That problem can be more noticeable on a wearer whose shoulders or neck change how the collar sits. Check the garment on a person or a fit model, not only on a flat product photo.
A firmer stand may be the better option for a uniform, workwear shirt, or resort garment that needs to retain its shape through repeated wear and laundering. For branded uniforms, a structured short-point collar can frame a small chest logo neatly. For a relaxed streetwear shirt or an oversized front graphic, a soft camp collar may leave a more natural, open chest area.
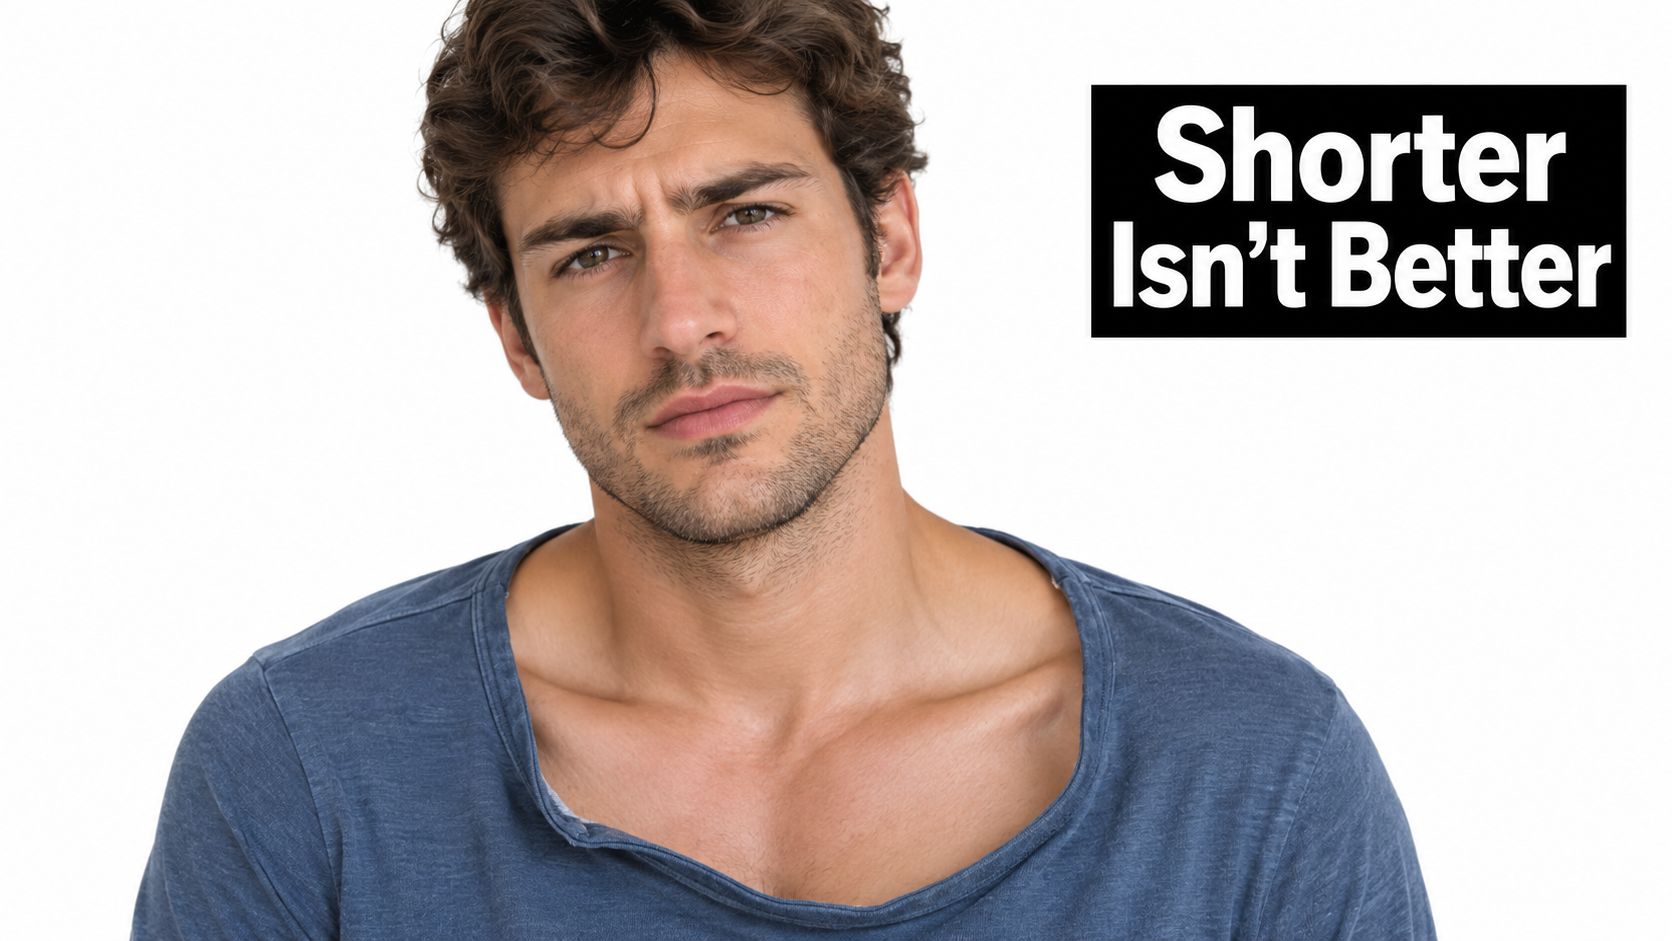
The least bulky option can also demand more precise artwork placement. On a clean neckline, a small shift is easy to notice, especially when the graphic approaches the collar seam. Choose the collar and decoration together: fabric, construction, expected wear, and design size all affect the result.
A collar should hold its intended shape without making the wearer feel pinched. If it fails either test, changing only the stand height may not solve the fit.
Specifying a Short Collar for Custom Apparel Orders
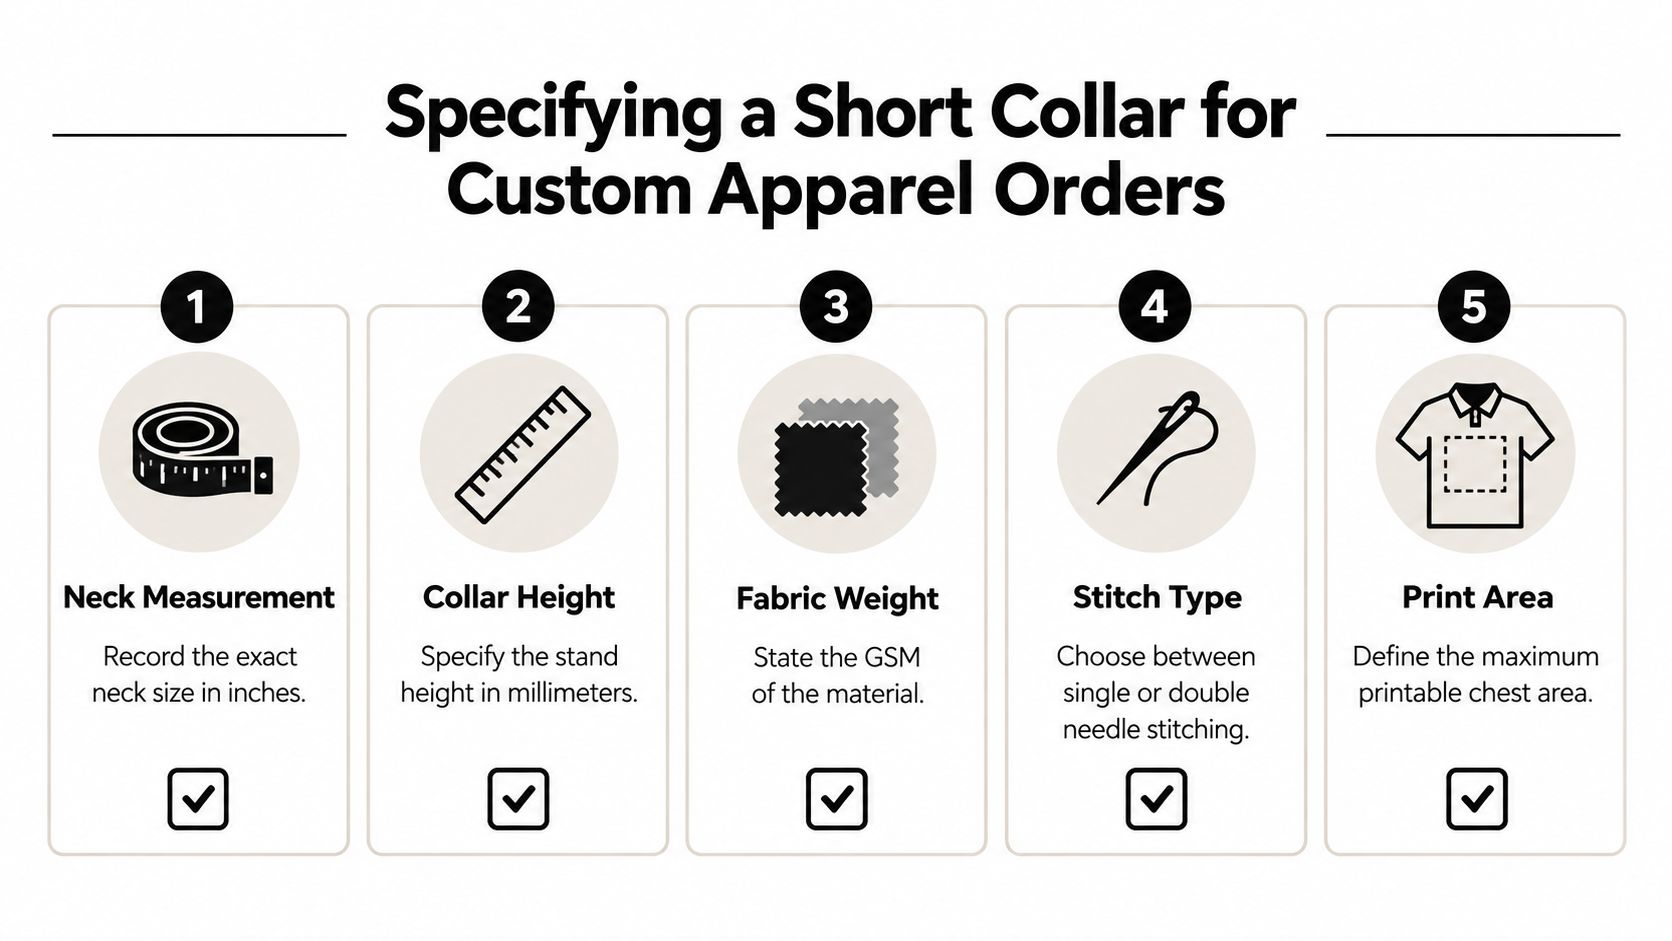
Send your supplier a measurable description instead of relying on a style name. Record the intended neck measurement, stand height in millimeters, point length, preferred spread, fabric weight, and decoration method. For a camp or band collar without conventional points, say so explicitly rather than leaving the point measurement blank.
Send a practical production brief
Ask for a sample in the intended fabric and check the collar open and buttoned. Wash it as the finished garment will be cared for, then reassess the neckline, stand, and artwork zone. If the garment is for a uniform or frequent wear, check whether the collar keeps its shape. For a relaxed shirt with a large graphic, make sure the design stays clear of the folded collar.
| Spec | What to Measure | Target Range |
|---|---|---|
| Neck measurement | Wearer's neck circumference and preferred ease | Match the intended wearer and shirt size |
| Collar height | Stand from neck seam to upper edge, measured in millimeters | Specify the desired measurement; confirm on sample |
| Point length | Stand seam to collar tip | Specify for the chosen collar style |
| Spread | Distance or angle between collar points when worn | State the preferred shape or supply a reference sample |
| Fabric weight | Fabric weight, stated in GSM by the supplier | Select for the garment's use and desired drape |
| Print area | Clear chest zone below the collar and beside the placket | Mark on a mockup and confirm with the collar open and closed |
| Stitch type | Construction around the collar and garment seams | Confirm the required finish with the supplier |
For a T-shirt or fleece program, Raccoon Transfers stocks blank Gildan tees and fleece that can be paired with DTF and UV-DTF transfers. Keep the garment and decoration specifications together so your printer can check placement against the actual blank, rather than estimating from a product image.
Before placing the order, use this decision checklist:
- Name the construction: camp, Cuban, band, club, or short-point.
- Record the measurements: neck, stand height, point length, and spread.
- Choose the fabric: state the material and supplier's GSM.
- Confirm the wear test: inspect the sample open, buttoned, and after washing.
- Mark the print zone: keep the design clear of the collar fold and placket.
- Verify the process: confirm whether the decoration is DTF for fabric or UV-DTF for a hard surface.
Choose your collar measurements and garment sample before finalizing artwork, then mark the print area on the shirt you'll use. Raccoon Transfers offers DTF transfers for apparel and UV-DTF transfers for hard surfaces, so you can plan the decoration method alongside the garment.