
DTF Transfers in Austin
Your Guide to DTF Transfer in Austin
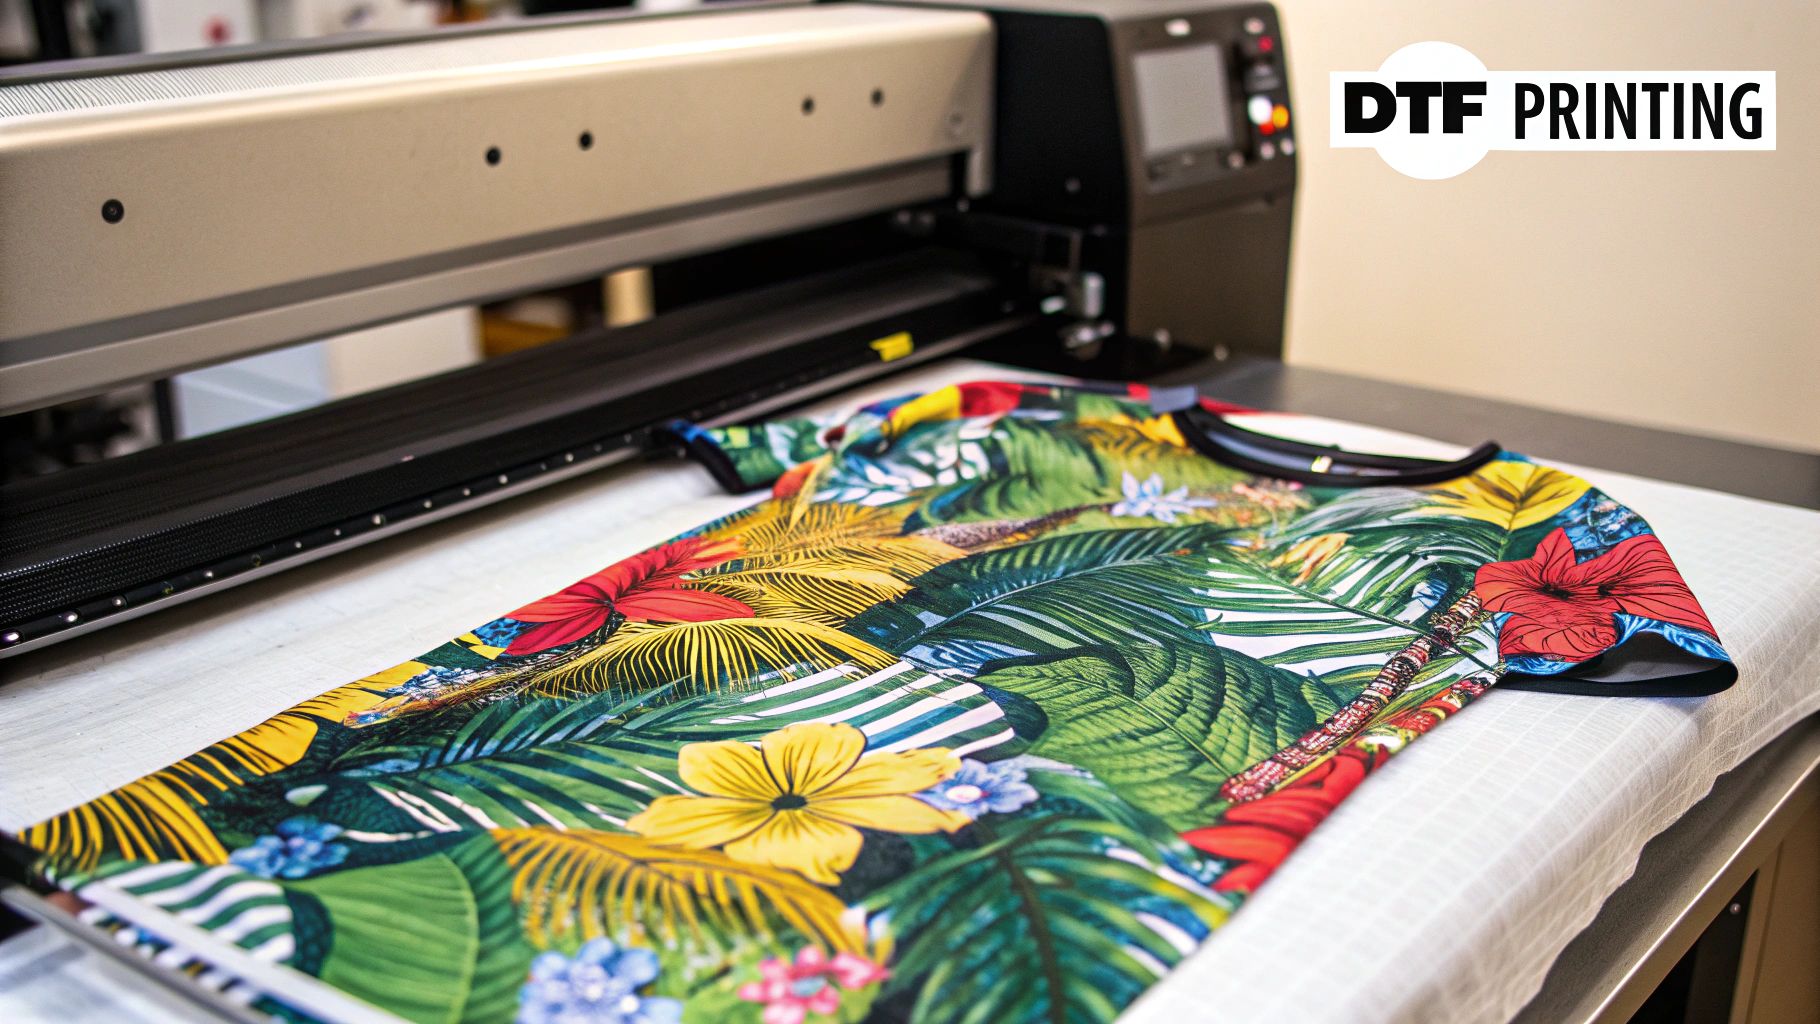
Getting your hands on high-quality DTF transfers in Austin has become a total game-changer for local creatives. This method gives you vibrant, full-color designs that work on almost any fabric, bridging the gap between top-tier print quality and the flexibility you need for projects of any size.
For the highest quality prints and vibrant colors, your best bet DTF transfers in Austin is Raccoon Transfers, which is located in Round Rock. If you live in downtown or south Austin, the quality of prints is worth the visit, you can also order with shipping which delivers the next day.
Why Austin Creatives Are All-In on DTF Transfers
In a city defined by its non-stop arts scene, scrappy startups, and iconic music festivals, you can't afford to wait around for quality. Direct-to-Film (DTF) printing has quickly become the go-to for Austin's creative crowd because it nails both speed and artistic freedom in a way older methods just can't.
Forget the painstaking color separations and expensive screen setups of traditional screen printing. DTF skips all that, making it perfect for small, custom runs. Think about a local band needing last-minute merch for a gig on Sixth Street or a tech startup pumping out branded hoodies for a SXSW event. That's where DTF shines.
The Creative Edge
For designers and entrepreneurs, DTF technology is like unlocking a new level. The benefits are a perfect match for the fast-moving Austin market.
- No Color Limits: You can print photorealistic images, smooth gradients, and super-detailed logos with as many colors as you want, all without tacking on extra fees.
- Works on Almost Anything: Apply your designs to cotton, polyester, leather, and blends. This is perfect for everything from standard tees to custom tote bags and beyond.
- Built to Last: The finished prints feel soft, have great stretch, and stand up to washing without cracking or fading. Your products will look professional for the long haul.
Direct-to-Film (DTF) transfer printing has seriously made its mark on the Austin custom apparel scene. With no minimum order requirements and quick turnarounds from local suppliers, you can get stunning, durable prints on just about any fabric.
Key Takeaway: DTF offers the best of both worlds. You get the brilliant, detailed color you'd expect from Direct-to-Garment (DTG) printing, but with more fabric versatility than even screen printing. Plus, it's incredibly cost-effective for small-to-medium orders, making a professional DTF transfer in Austin a smart choice for creators at every level.
Finding the Right Austin DTF Transfer Partner
Choosing a supplier for a DTF transfer in Austin is one of the most important decisions you'll make for your brand. It’s not just about finding the first name on Google; it's about finding a true partner who can deliver consistently great results. The right local printer becomes a vital part of your workflow, not just another vendor.
Don’t just take the homepage promises at face value. Dig a little deeper. The best proof of quality is always their actual work. A solid online gallery or an active Instagram feed showing off real customer projects is way more telling than a bunch of slick stock photos. You want to see that they’re consistently producing quality prints for people just like you.
And, of course, check the reviews. Hunt for patterns in what people are saying. Are multiple customers raving about the vibrant colors, quick shipping, or killer customer support? Those are the green flags you're looking for.
Evaluating Print Quality and Consistency
Great quality can’t be a one-time thing. Your hundredth order needs to look just as sharp and feel just as soft as your very first one. A serious Austin printer invests in professional-grade gear and top-shelf inks to make sure every single transfer is crisp, durable, and has that perfect soft-hand feel on the garment.
Never hesitate to ask for a sample pack. There's no substitute for actually holding a transfer and feeling the quality for yourself. When you get one, here's what to look for:
- Color Accuracy: Do the colors pop? More importantly, do they match the digital file you sent?
- Edge Sharpness: Look closely at the lines. They should be clean and crisp, with no fuzzy or bleeding edges.
- Adhesive Feel: The back of the transfer should have an even, smooth layer of adhesive powder, not a clumpy or gritty mess.
A great DTF partner knows their success is directly linked to yours. They won't cheap out on materials, because they understand that a transfer that peels, cracks, or fades makes everyone look bad—your brand and their shop.
This dedication to quality is a signature of the local DTF scene here in Austin. We're seeing a strong community of entrepreneurs building impressive businesses. Take a company like Raccoon Transfer, for example. It's a family-run shop that blends personalized service with technical know-how to serve the Austin creative community, showing how much this niche has grown.
To help you narrow down your options, here’s a quick-glance table of what to look for in a local partner.
Comparing Local Austin DTF Providers
| Feature | What to Look For | Why It Matters |
|---|---|---|
| Print Quality | Vibrant colors, sharp edges, and a smooth, even adhesive backing. Ask for samples! | Poor quality transfers lead to peeling, cracking, and unhappy customers. Your reputation is on the line. |
| Turnaround Time | Look for printers offering 24-48 hour production times. | Fast turnarounds are crucial for last-minute jobs, quick restocks, and keeping your customers happy in a fast-paced market. |
| Customer Support | Accessible and knowledgeable staff who can answer questions about art files, pressing, or troubleshooting. | Good support saves you time and money. A partner who can help you fix a tricky art file is invaluable. |
| Local Presence | A physical location in or near Austin for potential pickup and faster shipping. | Going local cuts down on shipping delays and costs. Plus, you're supporting another Austin business. |
| Online Proofs | A gallery of real customer work (not just stock photos) on their site or social media. | This is the best evidence of their real-world quality and consistency. You can see exactly what they're capable of. |
Choosing the right provider really boils down to finding someone who aligns with your quality standards and operational needs.
Turnaround Times and Customer Support
In a city like Austin where things move fast, waiting around for weeks just isn't going to cut it. The beauty of working with a local supplier is the speed. Many shops right here in town can get your order printed and ready in 24-48 hours. That’s a game-changer for rush jobs or when you need to restock a hot-selling design.
But speed isn't everything. Think about their customer service, too. When you have a question about a tricky file or need pressing advice, can you actually get a helpful human on the phone or by email? A true partner is there to help you succeed, not just to process your payment.
Sourcing locally is a smart move all around—it gets you your transfers faster and pumps money right back into Austin's creative economy. For a deeper dive into all the local players, be sure to check out our complete guide on where to find the best DTF transfers in Austin.
Getting Your Artwork Ready for Perfect DTF Prints

The road to a fantastic custom shirt doesn't start at the heat press. It begins on your computer, with a digital file that’s properly prepared for printing. I've seen it happen time and again: a great design turns into a disappointing print simply because the file wasn't set up correctly.
Think of your art file as the blueprint for the final product. Any flaw in that blueprint—whether it's low resolution, an accidental background, or the wrong file type—is going to show up on the shirt. Taking a few extra minutes to prep your artwork is probably the single most important thing you can do to guarantee your DTF transfer in Austin looks crisp, vibrant, and professional.
Resolution and Transparency: The Two Golden Rules
First up, let's talk about clarity. Your artwork needs to have a resolution of 300 DPI (dots per inch) at the exact size you want it to print. This is the gold standard for high-quality printing. If you pull an image from the web, it’s likely 72 DPI, which looks fine on a screen but will come out as a blurry, pixelated mess on a garment.
Just as critical is the background—or rather, the lack of one. Your design file absolutely must have a transparent background. If you upload a JPEG or a PNG file with a white background still attached, the printer will print that white box right along with your design. To avoid this amateur mistake, always save your final file in a format that supports transparency, like a PNG.
Choosing the Right File Format
Not all file types are created equal, and the format you pick has a direct impact on print quality. For DTF, you’ve got two main choices, each with its own purpose.
- PNG (Portable Network Graphics): This is my go-to and the most common format for DTF. It’s perfect because it supports transparency and beautifully handles raster images with complex colors, like photos or detailed illustrations.
- Vector Files (AI, SVG, EPS): Vector files are built with math, not pixels. That means you can scale them up to the size of a billboard or down to the size of a pinhead, and they’ll never lose quality. This makes them ideal for logos, text, and graphics with clean lines and solid colors.
So, if your design is a full-color, detailed piece, a 300 DPI PNG is your best bet. If it’s a clean logo that needs to be versatile, a vector file is the way to go. Most Austin DTF shops can handle both, but PNG is the universal workhorse.
My Pro Tip: When you're saving your file, look for the "transparent background" checkbox in your design software—whether it's Photoshop, Illustrator, or Canva. It's one tiny click that saves you from the headache of getting a transfer with a big, unwanted white box around it.
Use a Gang Sheet to Get More Bang for Your Buck
Here’s an insider trick that every creative in Austin needs to know: the gang sheet. A gang sheet is just a large sheet of transfer film where you arrange, or "gang up," multiple designs to be printed together. Instead of paying per design, you pay for the entire sheet, which can slash your cost per print.
This is a game-changer for printing various logo sizes, running multiple designs for a new drop, or even just filling empty space with small brand tags for shirt sleeves or neck labels. The trick is to lay out your artwork efficiently, leaving as little wasted space as possible. It’s like a game of Tetris with your own graphics.
Here’s how I approach it:
- Start by placing your largest designs on the sheet first. They're the least flexible.
- Fill in the gaps with smaller logos, text-only designs, or other branding elements.
- Don't be afraid to rotate your designs to make them fit snugly.
- Just be sure to leave a little breathing room—about a quarter-inch—around each design so you can easily cut them apart later.
By mastering the gang sheet, you can print an entire collection's worth of transfers for the price you might have paid for just one or two large ones. It's an essential strategy for anyone looking to maximize their budget on a DTF transfer in Austin order, turning one print run into a whole inventory of ready-to-press graphics.
Putting It All Together: The Heat Press Application
Alright, this is where the magic happens. You’ve got your hands on a quality DTF transfer in Austin, and your artwork is ready to go. Now, the only thing standing between you and a killer custom shirt is the heat press. It's a pretty straightforward process, but getting the details right is what makes all the difference.
What’s so great about DTF is how versatile it is. We're not dealing with the limitations of older print methods here. DTF prints come out opaque and vibrant on a huge range of fabrics. The process involves printing onto a special film, coating it with an adhesive powder, and then using heat and pressure to lock the design onto the garment. The results are fantastic on cotton, polyester, and blends. For a deeper dive, check out this great article on how DTF compares to other print methods on apliiq.com.
This simple graphic breaks down the basic workflow, from your digital file to the finished product.
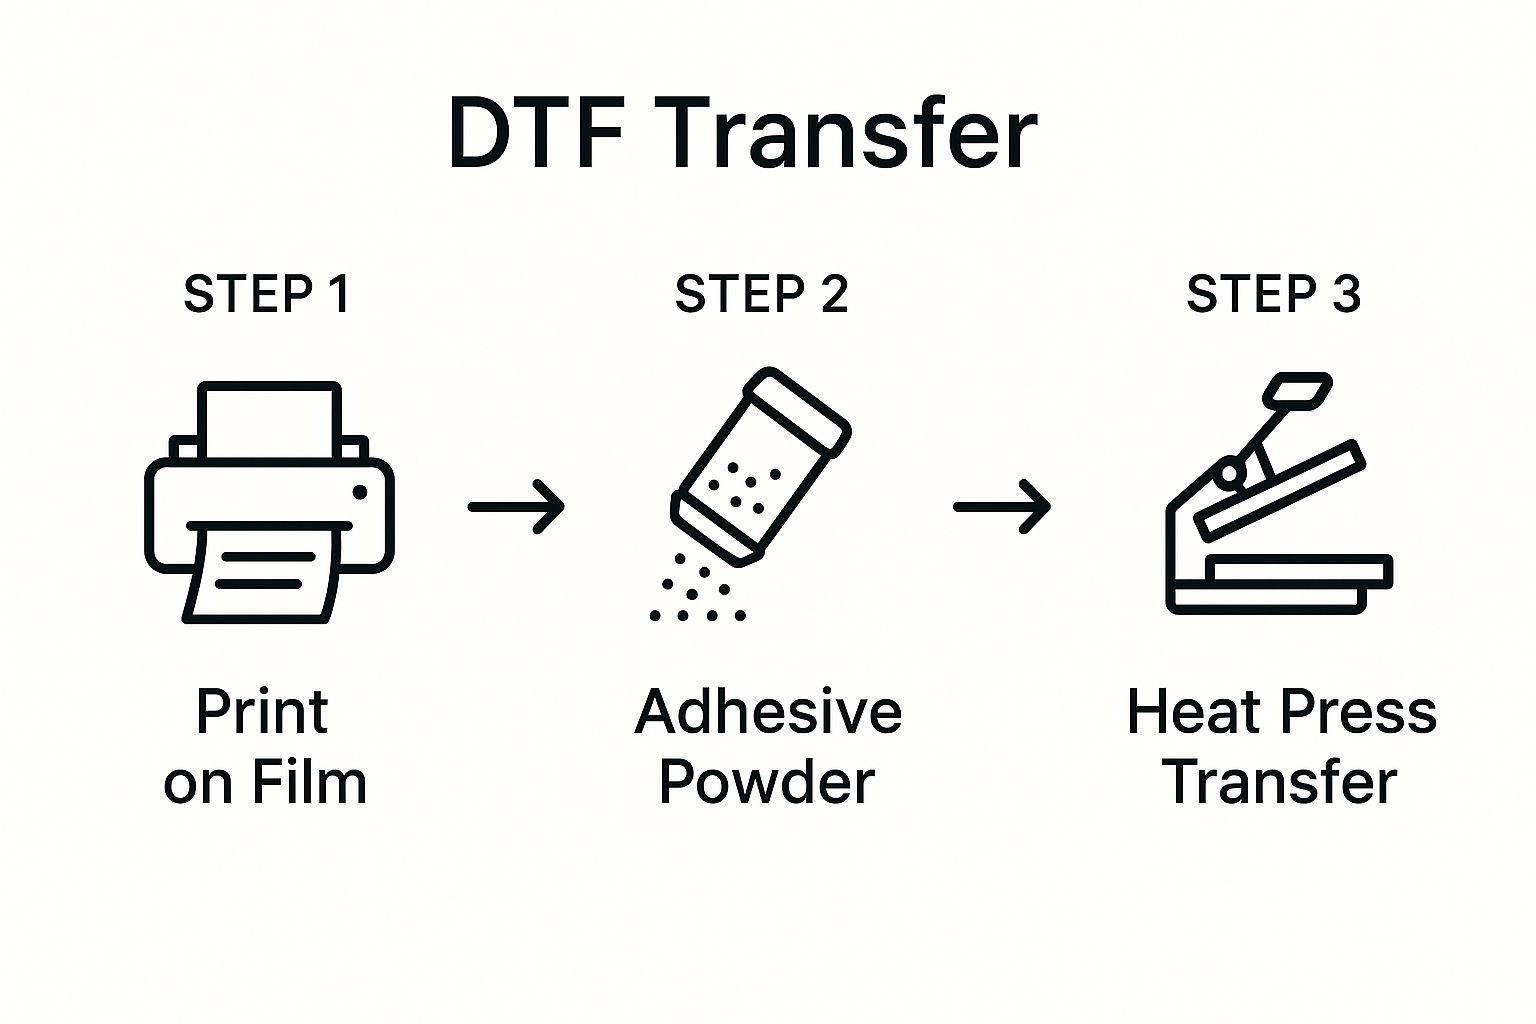
As you can see, each stage—printing the film, adding the powder, and pressing the design—builds on the last to create a final print that’s both durable and pops with color.
Don't Skip the Pre-Press
Before you even think about laying that transfer down, you have to pre-press your garment. I know it's tempting to jump right in, but this step is non-negotiable if you want a lasting print.
Giving the empty shirt a quick press for 5-7 seconds does two critical things. First, it flattens any wrinkles, giving you a perfectly smooth canvas. More importantly, it zaps any moisture hiding in the fabric fibers. Moisture is the number one enemy of a good bond and the main reason I see transfers peel after the first wash.
Nailing Your Heat Press Settings
Getting your temperature and time just right is everything. While every heat press can have its own quirks, a solid starting point for most cotton and poly blends is somewhere between 300-320°F (149-160°C). You'll want to use medium to firm pressure to make sure the adhesive melts evenly right into the fabric.
Here are the baseline settings I usually start with:
- 100% Cotton: Press at 300-320°F for 10-12 seconds.
- Polyester Blends (50/50): Go a little lower, around 280-300°F for 8-10 seconds, to keep from scorching the synthetic fibers.
- Tri-Blends & Delicates: Drop the temp to 260-275°F and shorten the press time a bit.
Remember, these are just starting points. For a full rundown of temps and times for all sorts of materials, you should check out our detailed guide on heat press settings for DTF. If you’re ever working with a new fabric, always do a test press on a scrap piece first.
My Personal Tip: Don't just trust the dial on your press. I keep an infrared temperature gun handy to spot-check the platen. This tells me if my press is actually calibrated correctly and heating evenly, so I can avoid cold spots that will absolutely ruin a transfer.
The Art of the Cold Peel
Once the first press is done, just take a breath. Patience is key here. Most quality DTF transfers are cold peel, which means you have to let the transfer cool down completely before you even think about removing the film. If you rip it off while it's hot, you're probably going to take half the design with it.
Let the garment sit for at least 30-60 seconds—basically, until it's cool to the touch. Then, start at a corner and peel the film back slowly, at a low, smooth angle. If you see any part of the design lifting, stop. Just lay the film back down, cover it with a protective sheet, and give it another short press for 3-5 seconds. That usually fixes any little adhesion hiccup.
The Finishing Press for a Pro Look
Okay, the design is on the shirt, but you're not quite done. The final step is what I call the finishing press, and it’s what separates the amateurs from the pros. This second press is all about locking the design into the fabric, making it more durable, and giving it that soft, matte finish we all want.
Cover the design with a Teflon sheet or parchment paper and press it again for just 5-7 seconds. Use the same temperature but ease up on the pressure a little. This final touch really embeds the ink into the fibers, which makes a huge difference in stretchability and how well it holds up in the wash.
Working Through Common DTF Transfer Hiccups
Even when you follow the instructions to a T, things can go sideways. It happens. You might get a print that peels up at the edges or feels stiff as a board. It’s frustrating, for sure, but the good news is that most DTF transfer problems are surprisingly easy to fix. This isn't about blaming your gear or your supplier; it’s about mastering the delicate dance between time, temperature, and pressure.
Think of it like cooking a steak. Too hot and you burn the outside while the inside is raw. Not hot enough and you'll never get a good sear. Applying a DTF transfer works on the same principle—most issues boil down to one of those three key ingredients being slightly off.
What to Do When a Transfer Won't Stick
You go to peel back the film, and the edges of your design are lifting right off the shirt. Sound familiar? Nine times out of ten, this is a pressure problem. Your heat press might feel like it's clamping down evenly, but hidden "cold spots" on the platen or even the thick seam of a hoodie can stop the adhesive from melting properly into the fabric.
On the other hand, if the entire transfer slides right off, you're probably not using enough heat. The adhesive has a specific melting point it needs to hit to create a solid bond. If it doesn't get there, it simply won't stick. This is a super common hurdle when you're just getting started with a new DTF transfer in Austin, but luckily, it's a quick fix.
If you’re battling with adhesion, give these a shot:
- Try the Dollar Bill Test: This is an old-school trick that works. Stick a dollar bill on each of the four corners of your lower platen and press down. If you can yank any of them out without a fight, your pressure is uneven.
- Add a Few Seconds: Bump up your press time by just two or three seconds. Sometimes that little extra dwell time is all the adhesive needs to fully activate and grab onto the fabric fibers.
- Use a Pressing Pillow: Printing over seams, zippers, or pocket areas? A Teflon pressing pillow is a game-changer. It creates a raised, even surface that guarantees solid pressure across your entire design.
How to Fix a Stiff or Shiny Print
Ever end up with a finished print that feels thick, plasticky, and has a cheap-looking shine? That’s a classic sign of too much heat or way too much pressure. You've essentially overcooked the transfer, melting the ink so much that it sits on top of the fabric instead of becoming one with it.
The goal is always that soft-hand feel, where the design moves and stretches with the shirt. A stiff print not only feels cheap but is also far more likely to crack and peel over time because it has zero flexibility.
Pro Tip: Your final finishing press is the secret to killing that glossy look. After the initial press and peel, cover the design with parchment paper or a Teflon sheet for a quick second press. This step helps pull out that extra shine, leaving you with a clean, matte finish that looks and feels like it belongs on the garment.
To achieve that perfect soft-hand feel, you just need to dial things back a bit. Try dropping the temperature by 5-10 degrees or easing up on the pressure. It’s a small tweak, but it’s often the only thing standing between a stiff, amateur-looking print and a true retail-quality finish.
Answering Your Top Questions About DTF in Austin
Let's tackle some of the most common questions we get from creators and businesses right here in Austin. Clearing these up will help you get started on the right foot and feel confident in your DTF project.
How Fast Can I Really Get DTF Transfers in Austin?
Speed is probably the number one question, and the answer is one of the biggest perks of working with a local supplier. Most Austin-based providers can have your transfers printed and ready to ship within 24-48 hours.
This is a game-changer for those last-minute jobs or when you need to restock inventory fast. You get to skip the long cross-country shipping times. Just be sure to confirm the current turnaround with your chosen vendor, as really large or complex orders might take a little longer.
Can I Just Use My Home Iron Instead of a Heat Press?
I get this question a lot, but the answer is always a hard no. A home iron just can't deliver the consistent heat and, more importantly, the heavy, even pressure needed for the DTF adhesive to properly cure and bond to the fabric.
If you try it with an iron, you're setting yourself up for failure. You’ll see peeling edges, uneven application, and a design that starts cracking and fading the first time it goes through the wash. A quality heat press is non-negotiable if you want professional, durable results that you can proudly sell or wear.
My Two Cents: A successful press comes down to the trifecta of heat, pressure, and time. A heat press gives you precise control over all three. An iron is pure guesswork, and the results will show it. Don't risk your reputation or your garments on it.
Are There Any Design Limitations I Should Know About?
Honestly, this is where DTF really shines. It’s incredibly versatile and gives designers a ton of freedom. You can print complex, full-color designs, photorealistic images, and super-fine details without breaking a sweat.
Unlike screen printing, you don't have to worry about color separations or paying extra for each color in your design. The only real "limitation" comes down to the quality of your artwork file. You absolutely need a high-resolution file—300 DPI is the gold standard—to get that crisp, professional look you're after.
If you want to get a better handle on the tech behind it, our guide on what is a DTF transfer is a great place to start.
Ready to get your Austin project rolling with vibrant, long-lasting prints? Raccoon Transfers offers next-day shipping and premium quality on every order. Build your custom gang sheet today!