

Heat Press Silicone Accessories and How to Use Them
At 11 a.m., the press is hot, the DTF queue is growing, and a hoodie transfer looks perfect until the film lifts from one side of the pocket seam. The platen is flat, but the garment isn't. A zipper, collar, pocket edge, or thick fleece ridge has created a small gap, so the transfer received heat without receiving consistent pressure.
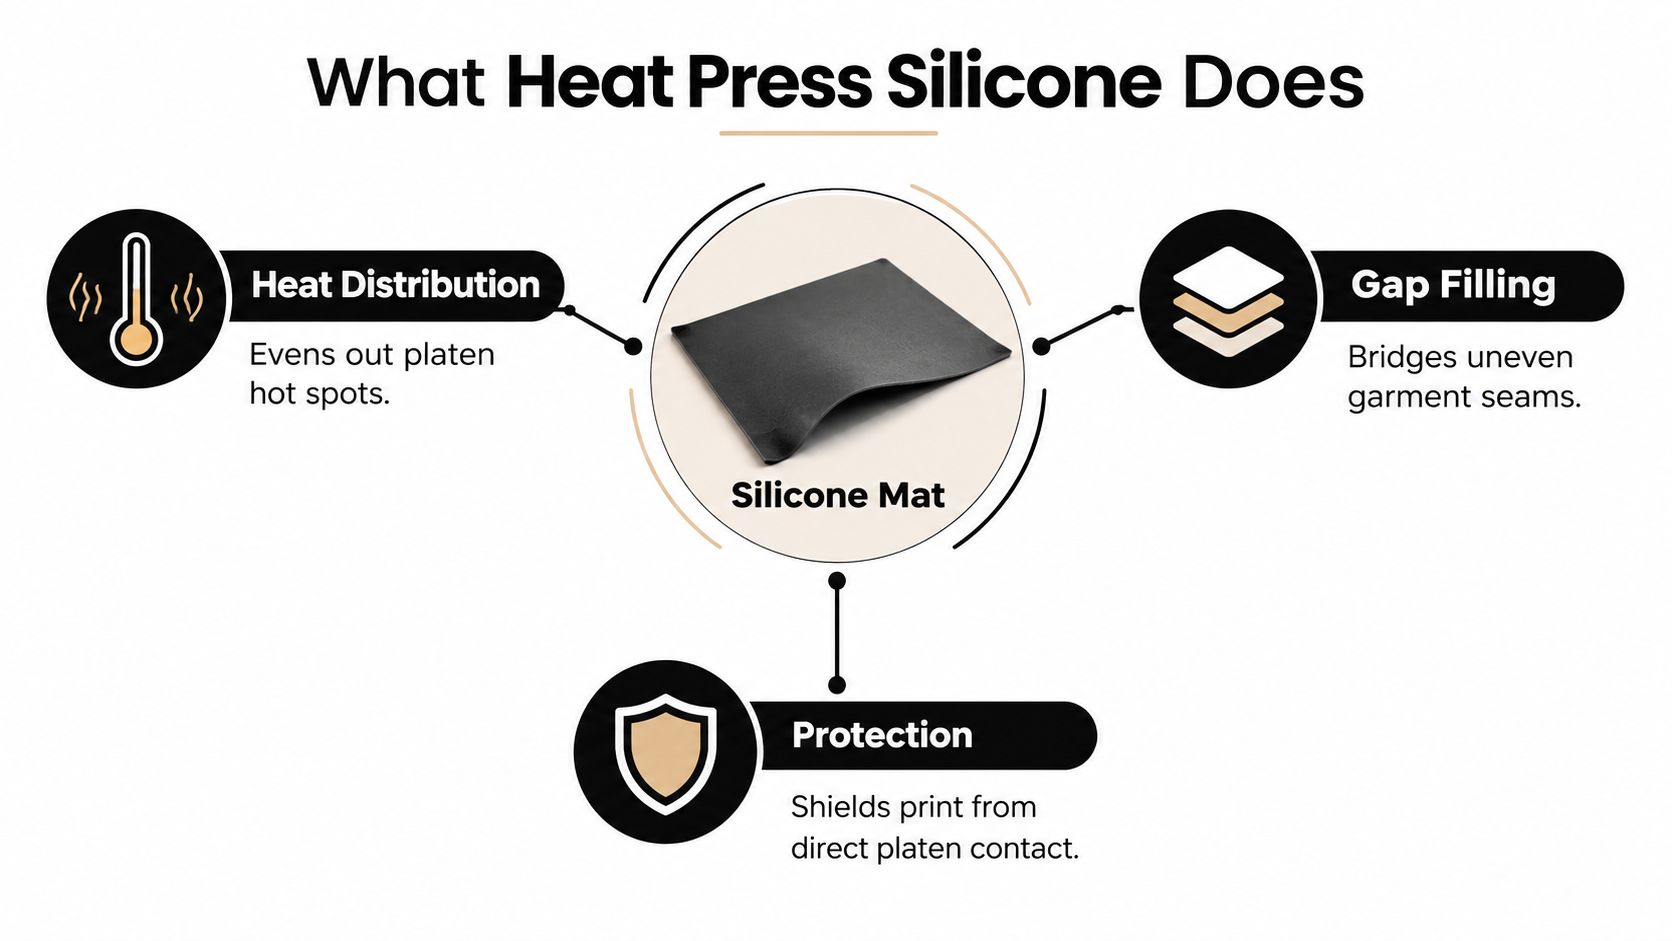
That's where heat press silicone earns its place. It isn't just a heat-resistant sheet. The right silicone mat or pad acts as a compliant layer that fills height differences, distributes load, and helps the transfer contact areas a rigid platen can't reach. The wrong one can soften edges, add too much cushion, or create a new source of inconsistency.
The Hidden Problem Most Heat Press Jobs Share
The failed hoodie usually gives you a clear diagnosis. The adhesive bonded across the flat fabric, but the section crossing the pocket seam stayed weak or partially fused. After peeling, you see a faded strip, a ghosted outline, or an edge that lifts when you rub it. Repressing the garment may rescue it, but every rescue costs time and makes the next job less predictable.
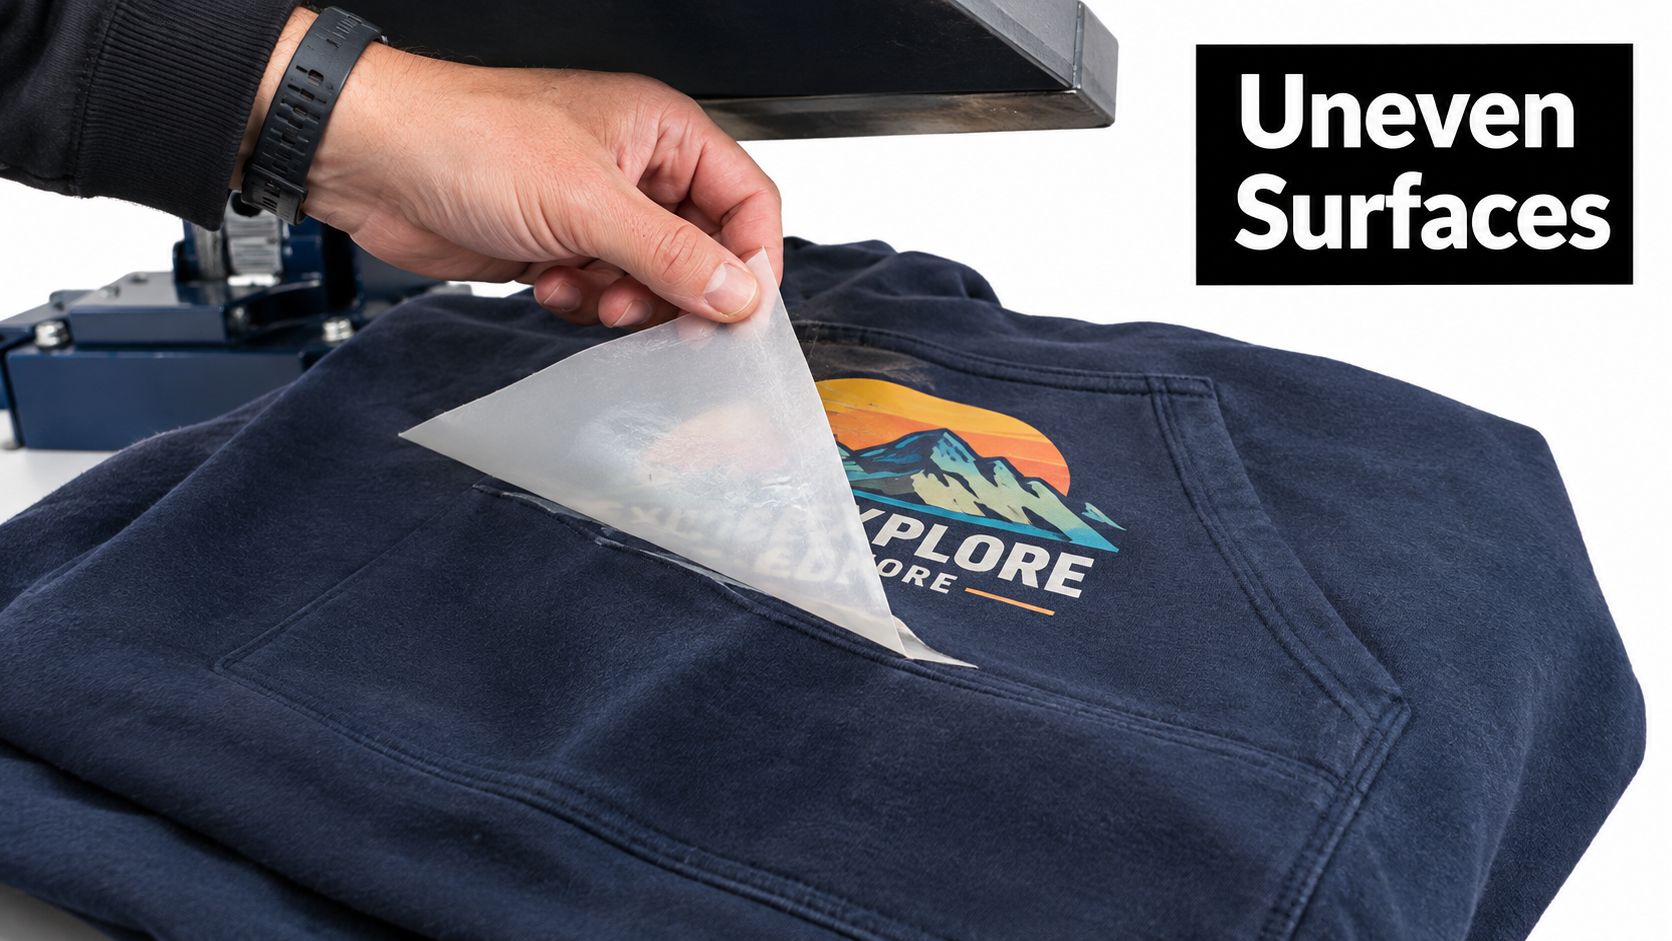
A flat upper platen naturally contacts the highest points first. On a smooth T-shirt, that geometry is usually forgiving. On a hoodie, work shirt, pocketed garment, or ribbed collar, raised details can hold the platen away from nearby portions of the transfer. The press still reaches its programmed temperature, but temperature alone can't compensate for missing contact.
Why uneven garments create transfer defects
Seams and zippers create narrow high spots. Buttons and pocket openings create hard transitions. Stretch fabrics can also move or compress differently from the surrounding textile, making pressure distribution less stable during the cycle. If the transfer shifts while the adhesive is soft, ghosting becomes possible. If the edge never receives enough pressure, edge lift follows.
A silicone layer helps by deforming into the uneven areas rather than behaving like another rigid surface. It spreads the force over a broader zone and gives the transfer a better chance of contacting the garment across the seam. That doesn't mean every mat solves every defect. Thickness, hardness, placement, and pressure still have to match the job.
Practical rule: If the platen is flat and the substrate isn't, diagnose the pressure path before changing transfer temperature.
The accessory may sit under the garment, over a sensitive print, or only beneath a problem area. A full-coverage mat is useful when the entire lower platen needs protection and compliance. A smaller pad or press pillow is often better when you need to bridge one pocket or zipper without changing the feel of the whole platen.
What Heat Press Silicone Actually Does
On a busy press, silicone is a pressure-control material, not just a heat-resistant sheet. It is a flexible rubber chosen for thermal stability and controlled compression. Under a platen, it deforms around seams, zippers, pocket edges, and other raised features, helping the transfer contact areas that a rigid surface may leave unsupported. The result depends on thickness and hardness. A soft, thick layer can equalize a larger height difference, while a firmer, thinner layer preserves a more direct press response.
Silicone rubber became commercially important in the 1940s, when Dow and Corning developed manufacturing processes for silicone products. Production expanded in the 1950s, liquid silicone rubber appeared in the 1960s, and sizable LSR production followed in the 1970s, according to this history of silicone rubber development. For press work, the relevant distinction is temperature tolerance. Silicone remains usable at temperatures up to about 300°C, while typical organic elastomers can begin degrading below 150°C, as the same source explains.
Three accessories, three jobs
A silicone mat covers much of the lower platen. It cushions the garment, fills modest height differences, protects the underlying rubber pad, and spreads force across the working area. Its compliance can help a DTF transfer cross a seam or pocket transition without leaving an unpressed edge.
A silicone pad is a smaller or thinner insert placed beneath a garment or around one raised feature. It lets the operator correct a local pressure gap without making the whole platen softer. That control matters on flatter areas, where excess thickness can reduce edge definition.
A cover protects the upper platen from adhesive or ink transfer. Coated fabric and silicone-impregnated materials are common constructions. They serve surface protection, whereas a lower mat or pad changes the pressure path beneath the garment.
Silicone is not transfer film, glue, or ordinary packing foam. Its production value comes from tolerating repeated heat and pressure without losing useful recovery. Technical silicone sheet specifications list heat-press constructions from 1/16 inch to 1/8 inch, with Shore A hardness often around 40 to 90, depending on formulation. The same information reports working ranges up to about 300°C and compression-set values as low as 10% to 11% after prolonged heating tests.
For layouts containing several designs, Build Your Own DTF Gang Sheet can consolidate artwork before pressing. It does not correct a pressure gap. The mat still has to match the garment, transfer, and platen setup.
Thickness, Hardness, and Temperature Ratings
A seam, zipper, or pocket ridge can leave part of a DTF transfer unsupported. The mat's thickness and hardness determine whether that pressure gap closes without making the entire platen unstable. Temperature rating answers a different question: whether the silicone can survive the heat cycle without degrading.
Thickness controls how much height variation the material can absorb. Hardness, measured on the Shore A scale, controls how readily it deforms and how firmly it pushes back. Temperature rating indicates heat tolerance, but it does not show whether a mat will preserve fine detail or suit a raised garment.
Supplier data commonly places heat-press silicone sheets between 1/16 inch and 1/8 inch with Shore A ratings around 40 to 90, as noted earlier. Replacement mats may also be specified around 8 mm to 10 mm where greater load distribution is needed.
| Specification | Common Range | Effect on Press |
|---|---|---|
| Thickness | 1/16 in to 1/8 in | Thinner layers give a firmer platen response. Thicker layers absorb more unevenness and pressure variation. |
| Shore A hardness | About 40 to 90 | Softer silicone conforms more deeply. Harder silicone compresses less and holds a more stable surface. |
| Working temperature | Up to about 300°C | Provides headroom for repeated heat exposure when the rating matches the construction. |
| Compression set | As low as 10% to 11% in reported tests | Lower permanent deformation generally supports more consistent recovery after repeated cycles. |
Thicker silicone can bridge a larger pocket ridge or zipper, allowing pressure to reach the transfer beside it. The same added movement can soften edge definition on a flat shirt. A thinner layer preserves a more direct platen response, but may leave the original gap around a seam.
Hardness changes that balance. Softer silicone conforms around raised areas and equalizes point loading. Harder silicone holds its shape better during repeat production, which can help registration and fine detail. Too much softness can let small details shift or blur; too little compliance leaves uneven contact unresolved.
The choice is not more silicone. Match thickness and hardness to the substrate, transfer size, and location of the obstruction.
Temperature ratings require the same practical reading. Standard mats are often listed around 220°C to 250°C, while higher-grade sheets may be rated up to 300°C or even 400°C, depending on construction and thickness, according to this heat-press silicone mat specification overview. A press setting below the stated limit does not guarantee long service life. Repeated cycling may first show up as compression loss rather than visible melting.
Use the heat press settings for DTF as a process reference, then recalibrate pressure with the silicone installed. The mat increases the mechanical distance between the platens, so the setting that worked without it may press too hard with it in the stack.
Where Silicone Mats Fit in DTF and UV-DTF Workflows
Silicone has different consequences depending on what you're pressing. Treating DTF, UV-DTF, screen print, and HTV as one workflow is how operators end up using a useful accessory in the wrong place.
| Workflow | Mat Role | Placement | Key Benefit |
|---|---|---|---|
| Standard DTF | Compliance layer and platen protection | Usually beneath the garment, with a cover or protective sheet as required | Helps distribute pressure over seams, pockets, and uneven fabric |
| UV-DTF | Cushion for rigid or shaped substrates | Beneath the item or in a controlled support area | Reduces harsh point loading and supports contact on curved surfaces |
| Screen print | Print protection and heat shielding | According to the ink and press setup | Protects surfaces, but may change pressure on raised or textured prints |
| Traditional HTV | Surface protection and limited cushioning | Beneath the garment or above the finished graphic | Helps with uneven garments, provided the added compliance doesn't soften edges |
Standard DTF
For ordinary DTF apparel work, the mat belongs beneath the garment when the problem is an uneven lower surface. A pocket seam or zipper can otherwise lift the surrounding fabric away from the platen. Silicone gives that area somewhere to settle while the upper platen applies force.
The mat can also protect the lower platen from stray adhesive or transfer residue, but don't confuse protection with pressure correction. A cover on the upper platen may shield the machine, while a lower silicone layer changes how the garment sits and compresses.
UV-DTF on hard surfaces
UV-DTF transfers are generally applied to hard, smooth substrates rather than pressed into fabric. A thinner silicone pad can cushion a tumbler, acrylic blank, phone case, or similar item, but it won't make a poor fit conform automatically. Curved surfaces need stable support, clean preparation, and a transfer system suited to the substrate.
Silicone can become a liability if the rigid item rocks on a soft layer. That movement may produce incomplete contact or a shifted graphic. Use only enough compliance to protect the item and distribute load, then test the actual shape before committing to a production run.
Screen print and HTV
Screen-printed or metallic surfaces can react differently to added cushion. A soft mat may alter ink lay-down on raised artwork or allow the top layer to move. In those cases, a protective cover may be more appropriate than a thick lower pad. The same judgment applies to HTV with crisp corners and narrow details. Silicone helps when a pressure gap is the defect, not when the accessory introduces uncontrolled movement.
Choosing the Right Silicone Mat for Your Press
A mat that fixes a pressure gap on one garment can create a problem on another. Start with the lower platen footprint. Cover the working area without bunching at the edges or reaching the hinge, drawer, or swing path. Any material that catches on moving hardware is a poor fit, regardless of its heat rating.
Match the mat to the substrate and the defect you are correcting:
- Flat tees and smooth blends: Use a relatively thin layer when the garment has no raised details. You want consistent support without changing the press response more than necessary.
- Hoodies, sweatshirts, and pocket panels: Add compliance where seams or fleece height prevent full contact. A thicker mat can settle around those irregularities, but it also changes the pressure feel and may require a new pressure setting.
- Performance fabrics and fine graphics: Choose the least cushioning that closes the gap. Excess softness can reduce edge definition or let the transfer move during pressing.
- Hard or curved UV-DTF substrates: Use stable, thin support rather than a deep, soft cushion. The item must stay steady while the adhesive makes contact.
The 40 to 90 Shore A range provides a useful firmness comparison. Lower Shore A materials conform more readily around seams and zippers. Higher values resist compression and preserve a firmer platen response. Match hardness to the depth of the obstruction and the transfer's detail level, as noted earlier in the silicone sheet specifications.
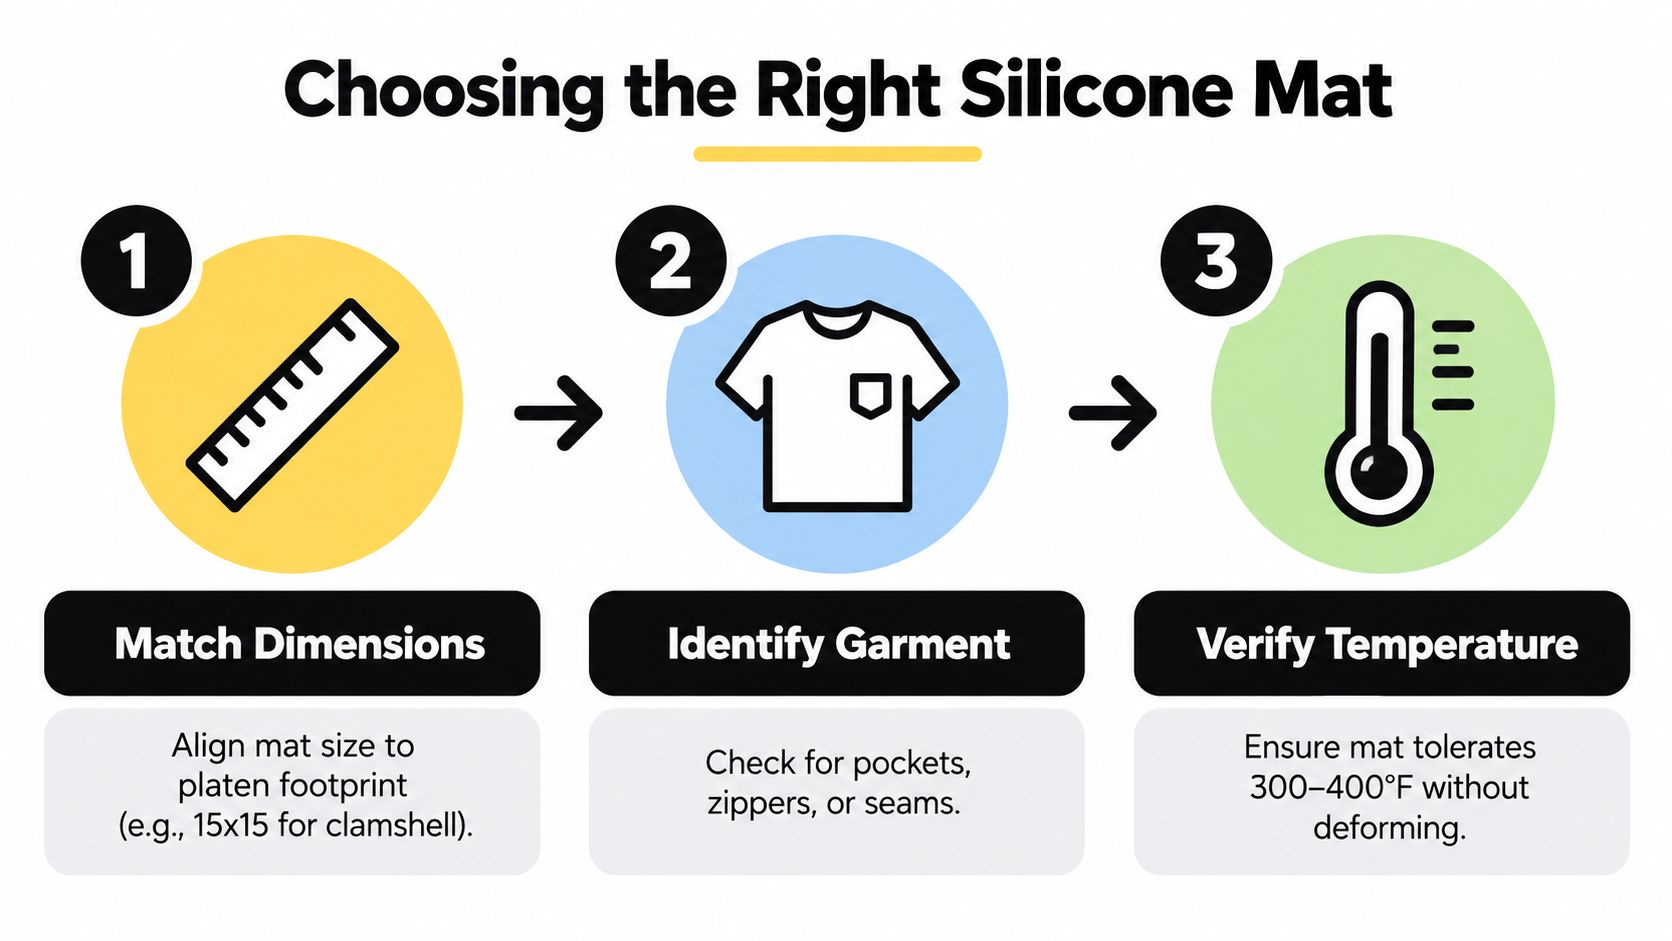
Check the rating across the full press cycle, including a second press if the transfer requires one. Some mats are rated from 220°C to 250°C, while higher-grade sheets may reach 300°C or 400°C, depending on construction and thickness. Treat the rating as a material limit, not a replacement for the transfer manufacturer's temperature instructions.
For shaped apparel, review the DTF process for custom hats before selecting a flat mat. A hat platen, curved crown, or structured seam needs support that differs from a T-shirt. For other setup options, the heat-press accessories guide helps distinguish full-coverage protection from localized pressure correction.
Press Setup and Application Tips With Silicone
A silicone mat changes the stack-up, so set pressure with the mat installed. Don't dial the machine in on a bare platen and assume the same setting will transfer cleanly after adding a compliant layer.
Start by pre-pressing the garment briefly to remove surface moisture and flatten loose folds. A cushion can make trapped moisture harder to release, so remove as much moisture as possible beforehand. Keep the garment smooth, with the collar, pocket bag, and side seams positioned outside the transfer zone whenever the design allows.
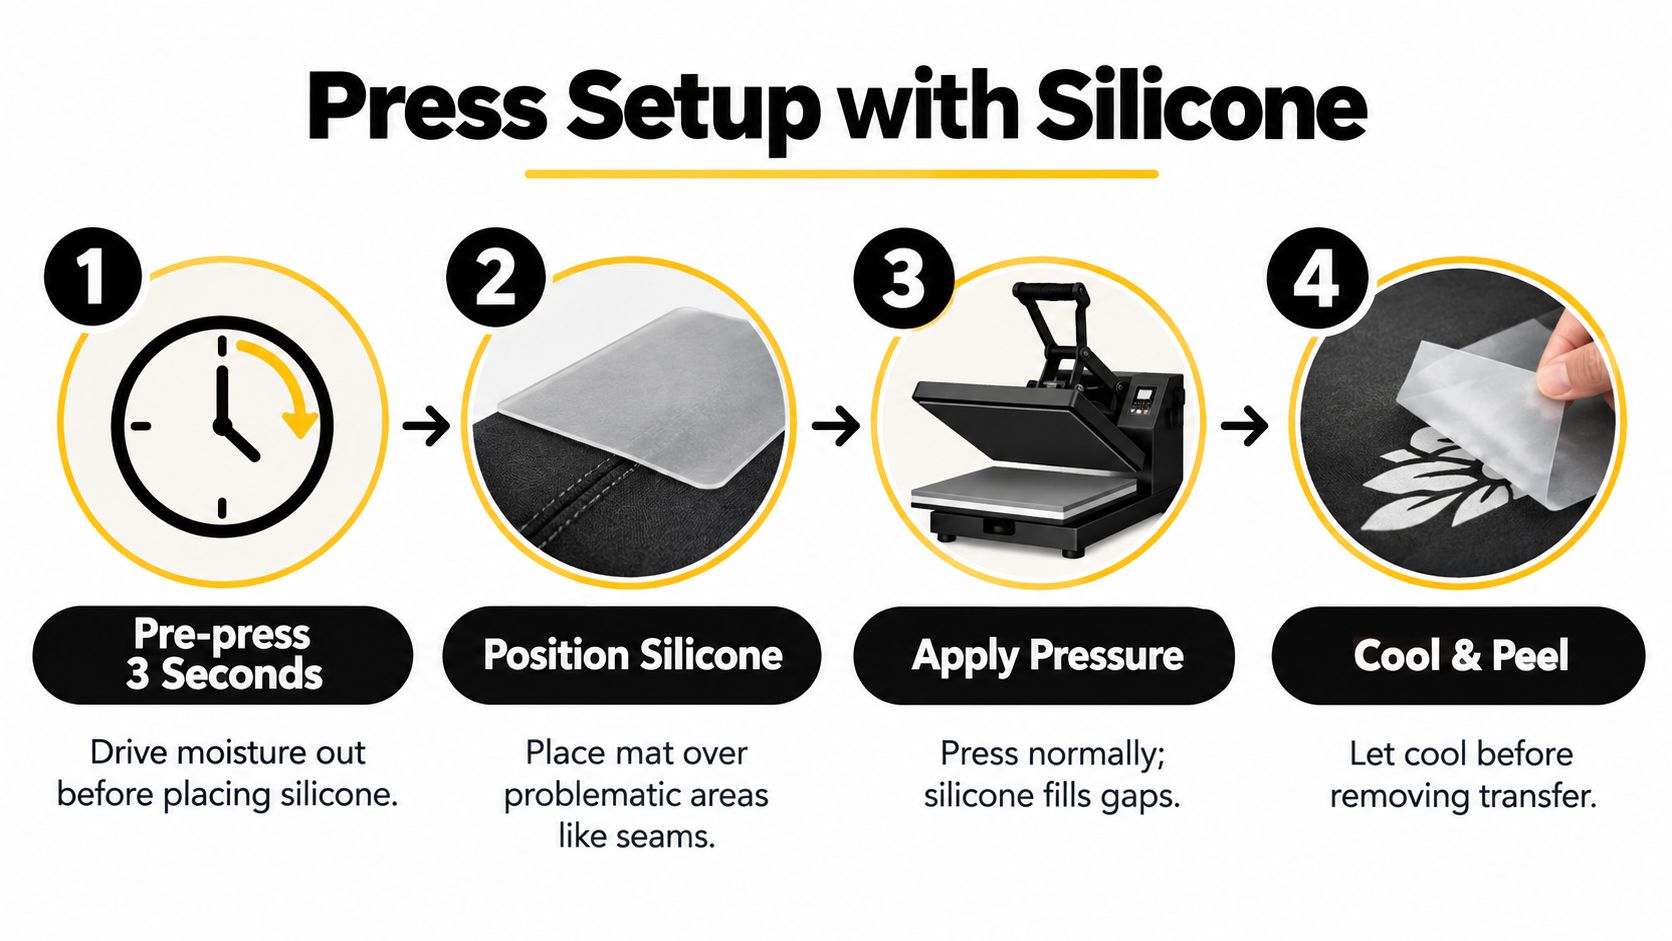
A repeatable stack-up
- Place the silicone consistently. Keep the same side facing up on every job. If only one seam is causing trouble, use a localized pad rather than placing a thick mat under the entire garment.
- Center the garment. Smooth the fabric and check that the transfer area sits fully on the supported zone. A silicone mat can't correct a fold trapped beneath the design.
- Position the transfer. Place the DTF film according to the transfer supplier's instructions, then confirm the programmed temperature and dwell time.
- Adjust pressure with restraint. Aim for firm, even contact rather than maximum force. Extra pressure compresses both the silicone and garment, which can flatten texture and spread the transfer.
- Keep the peel method consistent. DTF films may use different peel instructions, so follow the transfer specification rather than assuming every film behaves the same. For UV-DTF on rigid items, stability and cooling can matter more than speed.
A mat should remove a pressure gap, not hide a pressure problem created by excessive force.
After the cycle, inspect the seam line, narrow edges, and corners before moving to the next piece. If one side bonds and another doesn't, change the support or garment position before changing temperature. If the transfer is moving, review pressure and film stability first. Use heat-press tape guidance when the transfer needs additional positioning support, but don't use tape to compensate for a platen that isn't reaching the garment evenly.
Common Failure Modes and How Silicone Helps Prevent Them
Silicone works best when you match its mechanical behavior to the defect. A soft, thick pad can solve a deep seam but create too much movement under a small logo. A firmer layer may preserve detail but leave a pocket edge unsupported.
| Failure Mode | Typical Cause | Recommended Thickness | Recommended Shore A |
|---|---|---|---|
| Ghosting | Transfer shifts or contacts unevenly across a raised seam | Use a localized layer sized to the gap | Softer construction within the supplier's stated range can conform more readily |
| Edge lift | Raised zipper, pocket, collar, or ribbed area doesn't receive enough pressure | Thin pad for controlled gap filling | Medium firmness to support contact without excessive movement |
| Compression set | Mat stays permanently flattened after repeated heating and loading | Replace when recovery and thickness visibly decline | Choose a construction designed for repeated cycling |
Ghosting
Ghosting is a movement problem as much as a temperature problem. If part of the transfer is suspended over a seam, the film can shift when the platen closes or opens. A compliant support under the high area can reduce that difference, but the transfer still needs stable placement and controlled pressure.
Edge lift
Edge lift usually appears where the garment rises sharply. A thin silicone insert may bring the platen closer to the transfer without making the entire press soft. This is especially useful around zipper tracks and pocket openings, where a full thick mat can over-compress nearby flat fabric.
Compression set
Compression set is the slow loss of original thickness and rebound. Technical silicone data report values as low as 10% to 11% after prolonged heating tests, which indicates strong recovery in the tested construction, but it doesn't mean every mat will behave identically. Formulation, temperature, load, and cleaning all matter, so a production operator should judge the accessory by its actual recovery and transfer consistency, not only by its label.
Operator's test: If a job that once bonded cleanly starts failing along the same seam, inspect the mat before raising the temperature.
Care, Cleaning, and When to Replace Your Silicone Mat
Let the mat cool before cleaning. Remove adhesive specks and lint with a soft, lint-free cloth, then use a compatible mild cleaner if the material supplier permits it. Avoid abrasive tools and products that leave an oily film, because residue can transfer to garments or change how the fabric sits on the platen.
Store the mat flat or hang it without a sharp crease. Folding can create a permanent bend, particularly in thicker sheets. Keep the accessory away from heat when the press isn't operating, and check both surfaces regularly for embedded debris, glazing, tears, or areas that no longer rebound.
Replace it when the surface stays distorted, the sheet no longer sits flat, or previously reliable transfers begin failing in the same pressure zones. Compare the current thickness with the original specification when possible. A mat that has lost meaningful thickness or recovery has stopped functioning as a calibrated pressure tool, even if it still looks usable.
That inspection closes the loop on the failed hoodie at the start. The transfer didn't necessarily need more heat. It needed a stable, compliant path for pressure to reach the seam.
Raccoon Transfers supplies DTF and UV-DTF transfers for apparel and hard surfaces, including custom gang-sheet options that can support repeat production workflows. Visit Raccoon Transfers to upload artwork or choose a transfer format, then test the finished transfer with your silicone setup before running the full batch.