
A Crafter's Guide to Heat Transfer Sublimation
Heat transfer sublimation is a pretty amazing printing process. It’s a technique where solid ink turns directly into a gas—completely skipping the liquid phase—to permanently dye polymer-based materials. This method creates incredibly vibrant, durable designs that literally become part of the fabric. The best part? The print will never crack, peel, or fade.
What Is Heat Transfer Sublimation
Think about a block of ice. Normally, it melts into water and then evaporates into steam. Now, imagine that ice block turning straight into steam, bypassing the puddle of water altogether. That's the core idea behind heat transfer sublimation.
We start with special solid inks printed onto a sheet of release paper. When we apply heat and pressure with a heat press, these inks don't melt. Instead, they transform directly into a gas. This gas then seeps into the surface of a polyester or polymer-coated item.
As everything cools down, the pores of the material close up, permanently trapping the ink within its fibers.
The result isn't a layer of ink sitting on top of the product, like you’d get with a vinyl decal or a traditional screen print. The design becomes a true part of the material itself. You can't even feel it. This is why sublimation is perfect for performance apparel, custom mugs, and photo panels—items where you need a seamless feel and extreme durability.
If you're curious about how this stacks up against other methods, you can explore our guide on the different types of heat transfers.
The Key Players in the Process
Getting that perfect, vibrant finish depends on a few key components working together in harmony. It's a bit of a dance between chemistry and physics, and knowing the role of each piece is the first step to getting great results.
This technology is catching on in a big way. The global market for sublimation printing equipment was valued at US$2.7 billion in 2025 and is expected to hit US$4.1 billion by 2032, thanks to new tech that’s making the process faster and better.
At its heart, sublimation is a molecular bond. The ink doesn't just stick to the surface; it becomes a permanent part of the substrate's chemical structure, creating an unmatched fusion of color and material.
This is exactly why the colors are so brilliant and the prints last forever. But to pull it off, you need the right set of tools and materials.
The Core Components of Sublimation
To make the magic happen, every heat transfer sublimation project relies on a few essential elements. Here’s a quick breakdown of what they are and what they do.
The Core Components of Sublimation
| Component | Requirement | Role in the Process |
|---|---|---|
| Sublimation Ink | Specialized solid dye ink | Transforms from a solid to a gas under heat, carrying the color. |
| Sublimation Paper | Coated release paper | Holds the solid ink and releases it as a gas when heated. |
| Substrate | Polyester or polymer-coated item | Must contain polymers for the gaseous ink to bond with. |
| Heat Press | Machine applying heat & pressure | Provides the energy needed for the solid-to-gas transformation. |
Each part is non-negotiable. Without the right ink, paper, substrate, and equipment, the chemical reaction simply won't work.
The Science Behind the Magic: Ink Meets Polymer
The real magic of heat transfer sublimation happens at a molecular level. It's not about slapping a layer of ink on top of a shirt; it’s a fascinating chemical dance where special dyes literally become one with the material. To really get it, we need to look at how these unique inks and specific fabrics react under heat and pressure.
Think of a polyester garment. At room temperature, its synthetic fibers are tightly woven, with no space for anything to get in. But when you crank up the heat in a press to around 385-400°F (195-205°C), something amazing happens. Those polymer fibers relax and expand, opening up microscopic pores. They're now ready to be colored.
At the very same moment, the solid ink on your sublimation paper is going through its own transformation. It skips the liquid phase entirely and turns straight into a gas—a process called sublimation. This colored gas now infuses directly into the open pores of the fabric.
This diagram breaks down the four key stages, showing how solid ink becomes a permanent part of the fabric.
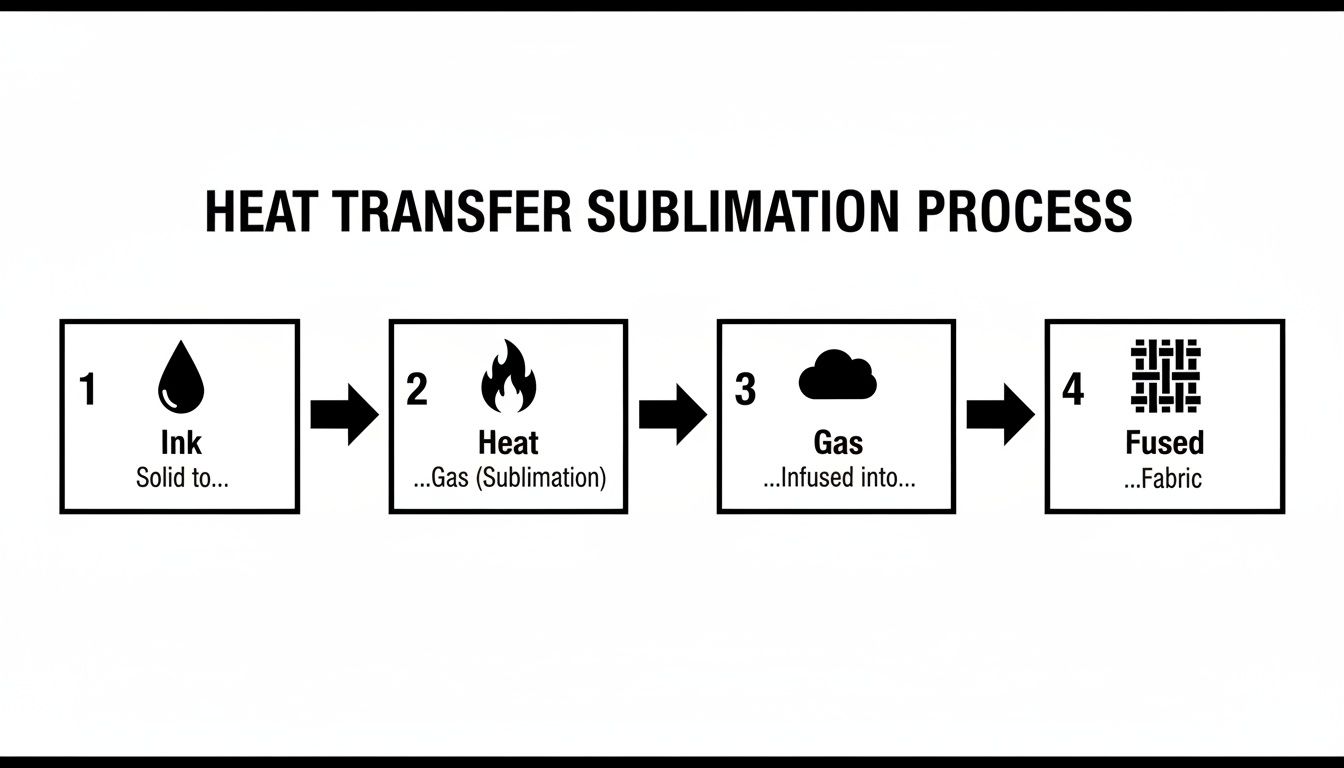
As you can see, it's a perfectly timed sequence. The heat triggers both the ink and the material at the same time, creating a bond that’s impossible to break.
A Lock and Key Relationship
A great way to picture this is a "lock and key" system. The gaseous dye is the key, and the opened-up polymer pores are the lock.
- The Key: Sublimation inks are designed to turn into a gas at a very specific temperature.
- The Lock: Polyester fibers are uniquely built to expand and open their pores at that same temperature, creating the perfect docking station for the gas.
The moment you lift the heat press and the item starts to cool, the deal is sealed. The polymer fibers shrink back to their normal state, closing the pores and trapping the now-solid ink particles inside. The design is no longer on the fabric—it's in the fabric.
This molecular fusion is why a sublimated design has zero texture. You can't feel it on the surface because it's infused within the material itself. This means the print will never crack, peel, or fade, no matter how many times you wash it.
This scientific principle is also what leads us to sublimation's most important rule.
Why It Only Works on Polymers
This entire process is exclusive to synthetic polymers like polyester or items that have been treated with a special polymer coating. Natural fibers like 100% cotton, wool, or silk simply don't have the right structure. When you heat them, their fibers don't open up in the same way, so there’s nowhere for the ink to go.
Try to sublimate on a 100% cotton shirt, and the ink gas just sits on the surface. It might look okay for a minute, but because there's no chemical bond, the design will wash out in the first cycle, leaving you with a faint, blurry ghost of your image. Understanding how different printing technologies and their inks are formulated for various materials helps clarify why this compatibility is so critical.
But this limitation is also its biggest advantage. The exclusive bond between the dye and the polymer is what guarantees the incredible vibrancy and permanence that sublimation is known for. It ensures every molecule of color is locked in for good.
Your Essential Sublimation Toolkit
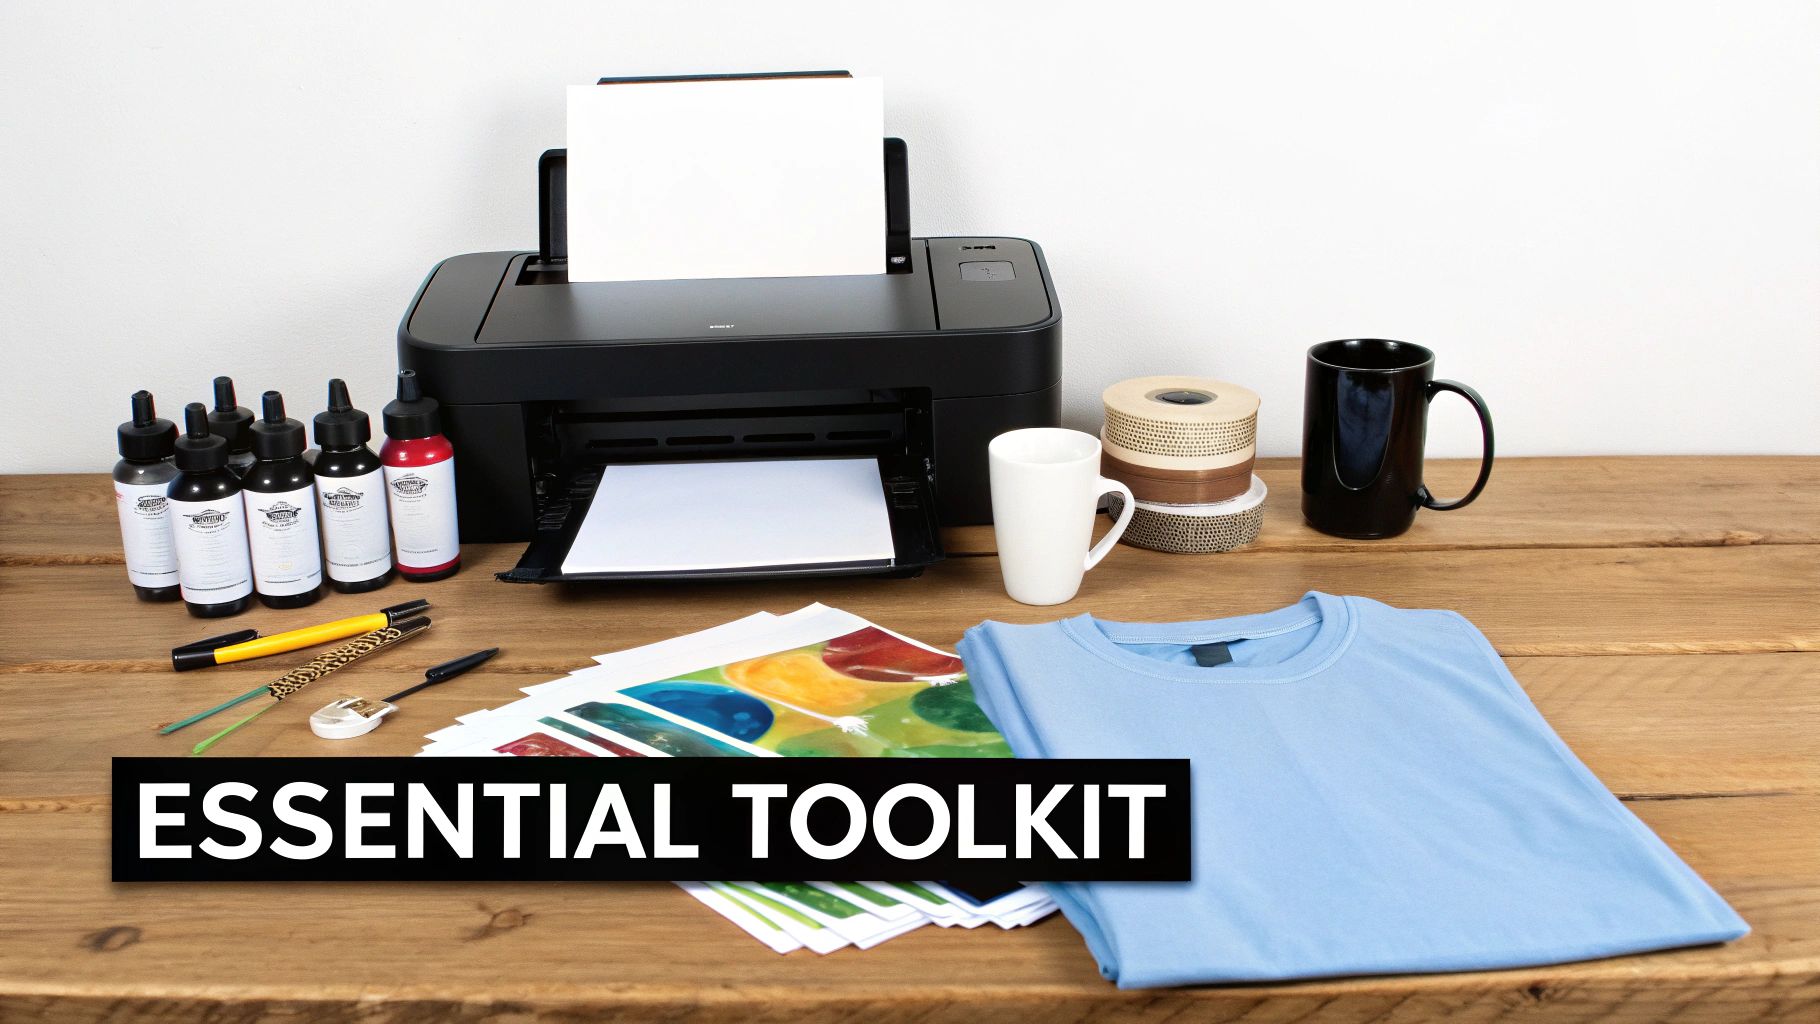
Putting together your heat transfer sublimation setup is a lot like getting all your ingredients ready before you start cooking. Having the right tools on the counter makes everything go smoothly. Sublimation isn't like other printing methods where you can kind of mix and match your gear; it's a specific, cohesive system where every single piece has a crucial job.
From the printer to the paper, each component is designed to work in harmony to create those stunning, permanent prints. Let's walk through your complete shopping list, breaking down the essential equipment and materials you'll need to get professional-quality results from day one.
The Heart of the Operation: The Printer and Ink
Your journey starts with a dedicated sublimation printer. And let's be clear: you absolutely cannot use your standard office inkjet for this. It just won't work. Sublimation printers are built to handle the unique properties of sublimation inks, which behave very differently from the ink you use for printing documents. Try it with regular ink, and your design will wash out in the first rinse.
The inks themselves are where the real magic is. They’re made with special solid dye particles that have a neat party trick: they turn directly into a gas when heated. This little bit of chemistry is the foundation of the entire heat transfer sublimation process.
-
Sublimation Printer: You've got options here, from smaller desktop models perfect for hobbyists (like converted Epson EcoTanks) all the way up to commercial-grade, wide-format machines. If you're just starting, I'd recommend getting a printer built specifically for sublimation to avoid the headaches of conversion. For a deep dive, check out our guide to find the best printer for sublimation and heat transfer.
-
Sublimation Inks: Always, always use high-quality sublimation inks that are made for your specific printer model. Skimping here or using the wrong type can lead to frustratingly inaccurate colors, clogged print heads, and a lot of wasted material.
The Carrier: The Sublimation Paper
Next up is your sublimation paper, and it's so much more than just paper. Think of it as a temporary vehicle for your design, holding the solid ink perfectly in place until it’s time to press. This paper has a special coating engineered to release nearly 100% of the ink as a gas when it gets hot. If you tried using regular copy paper, it would just soak up the ink, leaving you with a faded, blotchy mess.
The growing demand for this paper tells you how important it is. The global sublimation paper market is expected to jump from USD 1.4 billion in 2025 to USD 2.7 billion by 2035. That’s a huge leap, showing just how vital this component is as more people get into sublimation printing.
Pro Tip: For fabrics or tricky items, grab some "tacky" sublimation paper. It has a light adhesive that activates with heat, keeping the paper from shifting during the press. This simple trick is the key to preventing those blurry "ghosting" effects.
The Final Step: The Heat Press
The heat press is where the science project really comes to life. This machine provides the two ingredients that kickstart the sublimation reaction: high, consistent temperature and firm, even pressure. It’s the force that turns the ink into a gas and convinces the pores of your polyester item to open up and welcome the dye.
There are a few different styles of heat presses, each designed for different jobs:
- Clamshell Press: A fantastic choice for beginners. It's perfect for flat items like t-shirts, mousepads, and photo slates.
- Swing-Away Press: This design gives you more open space to work, making it easier to line up thicker items without worrying about burning your knuckles.
- Mug or Tumbler Press: This is a specialty press with a curved heating element made just for drinkware.
The Canvas: Compatible Blanks and Substrates
Finally, you need something to print on. In the biz, we call these "blanks" or "substrates." The absolute golden rule of sublimation is that your blank must either be made of polyester or have a special polymer coating. No exceptions.
-
Textiles: For fabrics, you want a high polyester count. 100% polyester will give you the most vibrant, pop-off-the-shirt colors. If you use a blend (like a 65/35 poly-cotton), you'll get a more faded, vintage look because the dye only sticks to the polyester fibers.
-
Hard Goods: Things like mugs, tumblers, phone cases, and keychains must be specifically marked as "sublimation-ready." This means they come from the factory with that necessary polymer coating already applied, ready to absorb your design.
Mastering Your Heat Press Settings
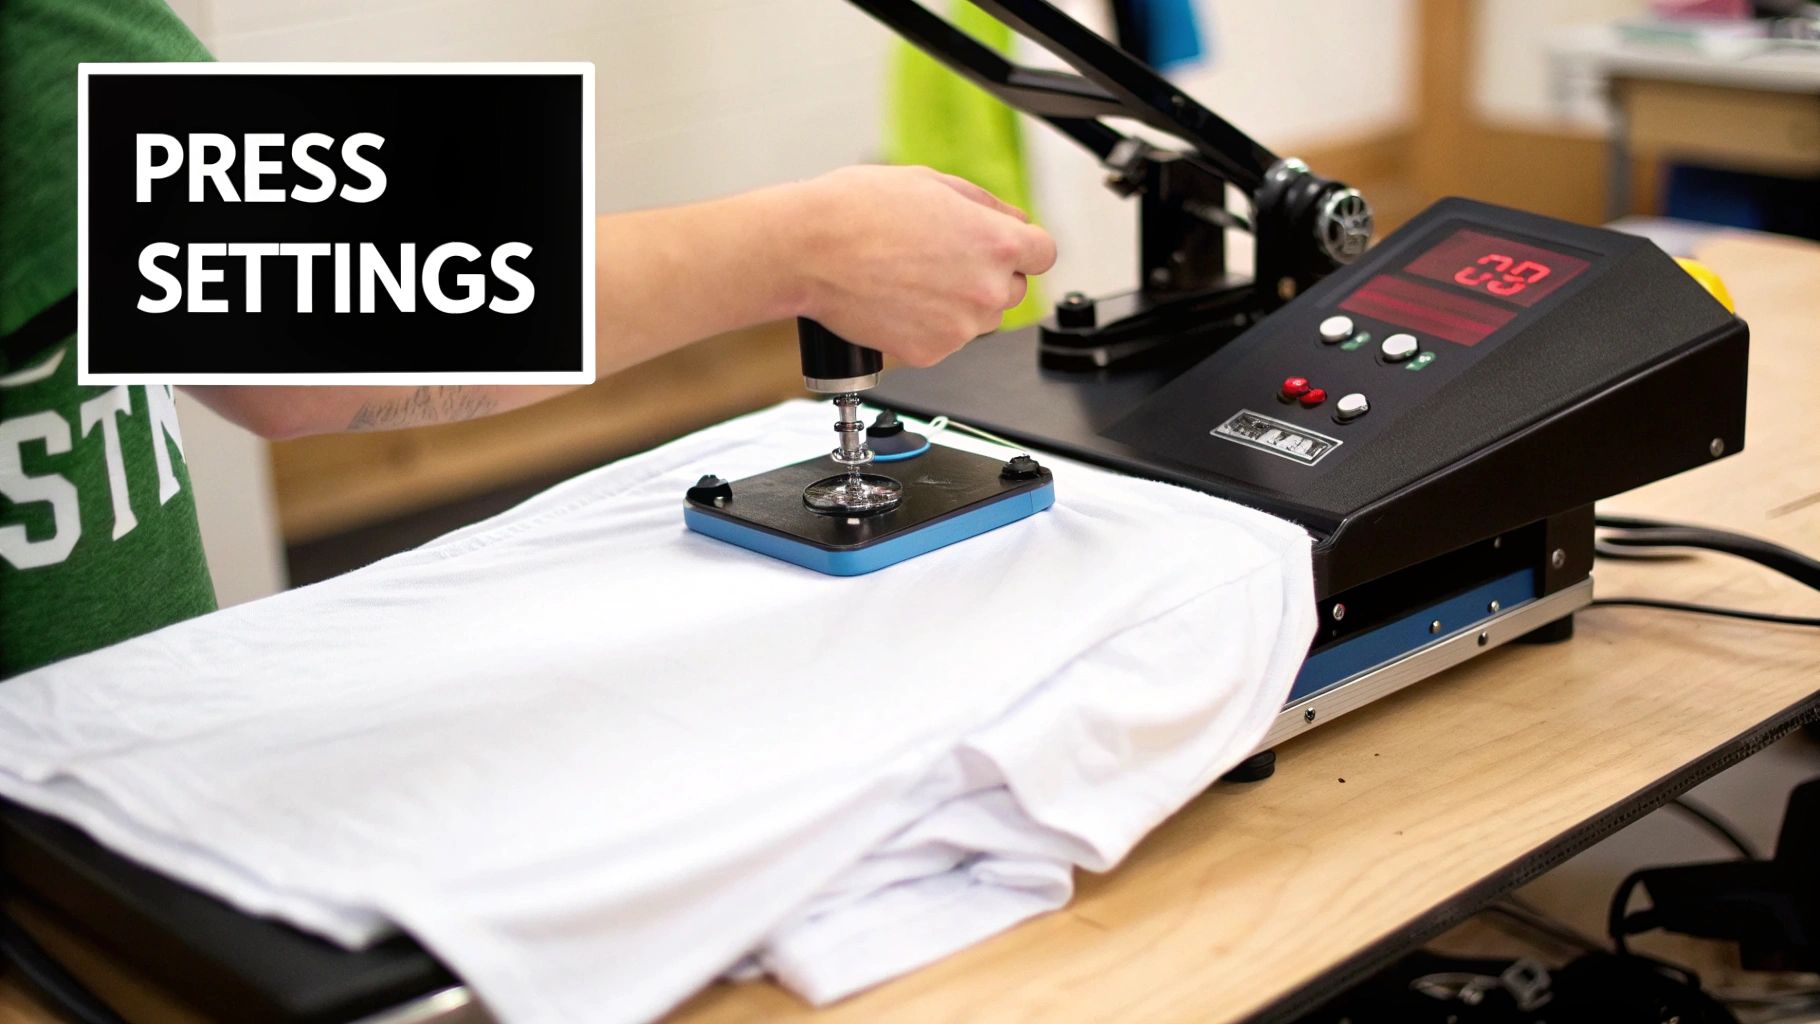
The secret to a flawless print isn’t just about the printer or the ink. It’s about the perfect marriage of temperature, time, and pressure. These three elements are the heart of the heat transfer sublimation process, and dialing in your heat press settings is the final, crucial step to turning a great design into a professional product.
Getting these settings right is what separates a vibrant, crisp image from a faded, blurry disappointment.
Think of it like baking. Too cool, and the cake never rises. Too hot, and you’re left with a burnt brick. Sublimation is a science that demands that same kind of precision to nail the chemical reaction.
If you don't use enough heat or time, the ink transfer will be incomplete, leaving your design looking washed-out and dull. But if you overdo it with too much heat or time, the ink can "over-gasify," causing the design to bleed, feather, or create a dreaded "ghosting" effect where the image looks blurry.
The Three Pillars of Pressing
To take the guesswork out of it, you need to understand the role each setting plays. Temperature, time, and pressure are a team—adjusting one often means you'll need to tweak another.
- Temperature: This is the catalyst. It’s what turns the solid ink into a gas. Most sublimation blanks need to be in the 385°F to 400°F (196°C to 204°C) range to activate the inks and open up the polymer pores of the substrate.
- Time: This is how long the item needs to soak in that heat. It can be as quick as 45 seconds for a t-shirt or as long as seven minutes for a thick ceramic tile, all depending on the material's density.
- Pressure: This is all about ensuring solid, even contact between your printed transfer and the blank. Most projects call for medium to firm pressure to make sure that gaseous ink infuses into the surface without any gaps or weak spots.
A critical pro tip for any fabric project is to pre-press your garment for 5-10 seconds. This simple step steams out any hidden moisture and flattens wrinkles, which are two of the biggest culprits behind blotchy or uneven color.
Recommended Heat Press Settings for Common Blanks
Every heat press has its own quirks, but the settings below are a solid starting point for some of the most popular sublimation items out there. I always recommend doing a small test press first if you can. For a deeper dive, our detailed heat press temperature chart offers even more specific guidance.
| Substrate | Temperature Range (°F/°C) | Press Time (Seconds) | Pressure Level |
|---|---|---|---|
| 100% Polyester T-Shirt | 385°F / 196°C | 45-60 Seconds | Medium |
| Ceramic Mugs (Mug Press) | 400°F / 204°C | 210-240 Seconds | Firm |
| Coated Aluminum Panels | 400°F / 204°C | 60-80 Seconds | Medium |
| Polyester Mousepads | 390°F / 199°C | 45-55 Seconds | Medium |
| Sublimation Coasters | 400°F / 204°C | 60-75 Seconds | Firm |
These numbers are your foundation. Once you get a feel for your specific press and materials, you'll learn to make small adjustments for perfect results every time.
Essential Best Practices
Beyond just the numbers, a few simple habits can make a huge difference in your results and protect your equipment. These practices are what separate beginners from pros.
- Always Use Protective Paper: Slip a sheet of butcher paper or Teflon inside your garment (to stop bleed-through) and place another sheet on top of your transfer. This keeps your heat press platen clean from any stray ink that could ghost onto your next project.
- Secure Your Transfer: For hard goods like mugs or tiles, use high-temperature heat tape to hold the paper firmly in place. This is your number one defense against ghosting caused by the paper shifting even a millimeter.
- Peel with Care: Most transfers are a "hot peel," meaning you remove the paper right away. But letting the item cool for just a few seconds can make it easier to handle. When you do peel, do it in one swift, confident motion to avoid smudging the still-hot design.
By following these guidelines, you move from just pressing an item to truly mastering the craft. You’ll gain the confidence to troubleshoot on the fly and consistently produce stunning, professional-quality products.
Choosing Between Sublimation and DTF Transfers
When you're launching a custom apparel line or creating a new product, picking the right printing method is one of the most important calls you'll make. Two of the heavy hitters in the game are heat transfer sublimation and Direct-to-Film (DTF) transfers. While both can give you incredible results, they're built for entirely different jobs.
Here’s a simple way to think about it: DTF is like a high-quality paintbrush that can add a vibrant layer of color to almost any surface. Sublimation, on the other hand, is like a permanent marker that actually becomes part of the paper itself—but it only works on specific kinds of paper.
Getting a handle on how they differ in fabric compatibility, color vibrancy, and the final feel of the print will give you the confidence to pick the perfect method for every project. This choice has a direct line to your product's final look, feel, and how well it holds up over time.
Fabric and Material Compatibility
The biggest dividing line between sublimation and DTF is what you can print on. Seriously, this is the first question you should ask yourself before you go any further.
Heat transfer sublimation is a specialist. Its magic lies in a chemical reaction that only works with polyester or polymer-coated items. This means it absolutely shines on:
- 100% Polyester fabrics: Think performance wear, athletic jerseys, and moisture-wicking activewear.
- High-count poly-blends: For a cool, vintage look, you can use fabrics with at least 50-65% polyester content.
- Polymer-coated hard goods: This includes specially made mugs, tumblers, coasters, and sleek metal panels.
DTF, however, is the versatile workhorse. Because DTF transfers use a heat-activated adhesive to bond to the surface, they aren't picky about what the material is made of. You can press them onto a massive range of products with total confidence.
DTF transfers from Raccoon Transfers give you incredible freedom, sticking to everything from 100% cotton and poly-blends to leather and even wood. This makes DTF the clear choice when you're working with natural fibers or a mix of different materials.
So, if your vision involves a classic cotton t-shirt, a cozy hoodie, or a canvas tote bag, DTF is your winner. Sublimation just won't work on those surfaces.
Color and Garment Limitations
The next big question is about the color of your garment. This is where the two methods really go their separate ways and will completely change the final look of your design.
Sublimation ink is transparent. It’s a dye process that stains the actual fibers, meaning there's no white ink involved. Because of this, it can only be used on white or very light-colored fabrics. If you try to sublimate a yellow design onto a blue shirt, the colors will blend and you'll get green. Simple as that.
DTF transfers, however, come armed with a brilliant white ink underbase. This layer of white is printed first, and then your design's colors are printed right on top of it. This makes the entire DTF design completely opaque.
This white underbase means DTF is perfect for:
- Dark and black garments: Your colors will stay bright and true, no matter how dark the fabric is underneath.
- Vibrantly colored fabrics: The white base acts as a blocker, preventing the shirt's color from peeking through and messing with your design.
- Any material color: DTF delivers consistent, punchy results across the entire color spectrum.
The Final Feel and Texture
How do you want the final print to feel against the skin? The answer often boils down to personal preference and what the product is for.
Since sublimation ink literally becomes part of the fabric, the finished print has zero feel or texture. You can run your hand across it, and it feels exactly the same as the unprinted material. This is why sublimation is the undisputed king for athletic apparel, where a breathable, weightless print is an absolute must.
DTF transfers, by contrast, create a thin, flexible layer that sits on top of the fabric. Now, modern DTF from a top-notch provider like Raccoon Transfers is incredibly soft, lightweight, and stretchable. It’s worlds away from the thick, plasticky feel of old-school vinyl, but it will always have a slight texture you can feel.
This subtle layer is often a huge plus, especially for designs that need to pop with crisp, clean edges, like detailed logos or sharp text. Sublimation is your go-to for photorealistic, all-over prints on polyester, while DTF is the master of creating bold, standalone graphics on pretty much anything you can throw at it.
How to Fix Common Sublimation Problems
Sooner or later, every single one of us pulls a print from the press that just looks… wrong. It’s a rite of passage in the world of heat transfer sublimation. The good news? Most issues are caused by just a few common culprits, and once you know what to look for, they're surprisingly easy to fix.
Don't get frustrated—think of this as your diagnostic checklist. We’ll walk through the most frequent sublimation headaches, figure out what's causing them, and get you back on track. From faint, blurry images to colors that just aren't popping, we’ve got you covered.
Diagnosing Ghosting and Blurry Images
Ghosting is probably the most common frustration I see. You’ll spot a faint, blurry shadow or a double image right next to your design. This is almost always a sign that the sublimation paper shifted—even just a millimeter—while you were opening or closing the press.
At those high temperatures, the ink is a gas. Any movement before it has a chance to cool and lock into the polymer fibers will cause a smudge.
Here’s how to lock that transfer down and stop any movement in its tracks:
- Use Heat-Resistant Tape: Tape your sublimation paper securely to the blank. I always recommend taping at least two opposite sides to make sure it can’t pivot or slide.
- Try Tacky Paper: For apparel and fabrics, "tacky" sublimation paper is a lifesaver. It has a light adhesive that activates with heat, gently gripping the material so it can't move.
- Open the Press Carefully: When that timer beeps, resist the urge to pop the press open quickly. A slow, smooth lift prevents the vacuum effect that can cause the paper to shift at the very last second.
Ghosting is a pressure and movement problem. If the paper can't move, it can't ghost. A secure transfer is the foundation of a sharp, professional print every single time.
Solving Faded or Uneven Colors
Does your final print look dull, washed-out, or kind of blotchy? That’s a classic sign that the sublimation process didn't fully complete. The solid ink just didn't get enough energy to turn completely into a gas and bond with the substrate.
The problem almost always comes down to three things: not enough time, not enough heat, or uneven pressure.
Quick Troubleshooting Checklist for Faded Prints:
- Check Your Pressure: Before you touch any other setting, make sure your pressure is at a solid medium-firm. Uneven contact is the number one reason for blotchy spots where the color looks weak.
- Pre-Press Your Blanks: Moisture is the enemy of vibrant colors. Always pre-press your shirts and fabrics for 5-10 seconds to zap any hidden moisture that can mess with the ink transfer.
- Increase Dwell Time: If you’re sure the pressure is good and you’ve pre-pressed, try adding 10-15 seconds to your press time. Denser materials sometimes just need a little longer to drink in all that ink.
- Slightly Raise the Temperature: If all else fails, bump your heat up by 5-10°F (3-5°C). Sometimes that tiny bit of extra heat is all it takes to push the colors over the finish line into full saturation.
By working through these steps one by one, you can pinpoint the real problem behind faded prints and get back to the rich, vibrant results that heat transfer sublimation is famous for.
Sublimation FAQs: Your Questions Answered
When you're getting started with sublimation, a few questions always seem to pop up. Think of this as your cheat sheet for tackling the most common hurdles, so you can spend less time guessing and more time creating amazing products.
Can I Sublimate on 100% Cotton or Dark-Colored Shirts?
This is probably the most common question, and the answer is a hard no. Sublimation isn't just ink sitting on top of the fabric; it's a chemical process where the ink turns into a gas and permanently bonds with polyester fibers.
Since cotton doesn't have those synthetic fibers, the ink has nothing to bond to. Likewise, sublimation ink is transparent, so it won't show up on dark fabrics at all. For all your cotton and dark garment needs, DTF transfers are your best friend.
Why Do My Sublimation Prints Look Faded After Pressing?
Faded, dull-looking prints are frustrating, but the cause is almost always simple. It means the ink didn't fully convert from a solid to a gas and bond with the material.
Let's troubleshoot the usual suspects:
- Not Enough Heat or Time: The ink simply didn't get hot enough for long enough. Try bumping up your press time by 10-15 seconds and see if that brings the color to life.
- Hidden Moisture: Fabric can hold onto moisture you can't even feel, and that moisture will turn to steam and ruin your transfer. Always pre-press your blank for 5-10 seconds to get rid of it.
- Uneven Pressure: If your press isn't applying firm, even pressure across the entire design, some areas won't transfer properly. Make sure it’s clamped down tight.
Sublimation is a science. If your results are off, it's not a mystery—it's a variable in your time, temperature, or pressure settings that needs a small adjustment.
Does Sublimation Ink Go Bad?
Absolutely. Both the ink in your printer and your pre-printed transfers have a shelf life. Over time, the dyes lose their punch, which means your final press will look less vibrant.
As a rule of thumb, try to use your inks within six months to a year of opening the bottle. And for your printed transfers, keep them stored in a cool, dark, and dry spot to keep them fresh.
Ready to skip the complexities of sublimation for cotton or dark apparel? Raccoon Transfers offers premium, easy-to-apply DTF transfers that work on any fabric. Explore our custom DTF transfers today!