
How to Print on Transfer Paper A Complete Guide
Before you even think about hitting "print," let's talk about getting your gear in order. Jumping into a transfer paper project without the right supplies is a recipe for frustration. It's not just about having a printer and a cool design; it's about making sure every piece of your toolkit—from the paper to the ink to the heat source—is right for the job.
Gathering Your Essential Transfer Printing Toolkit
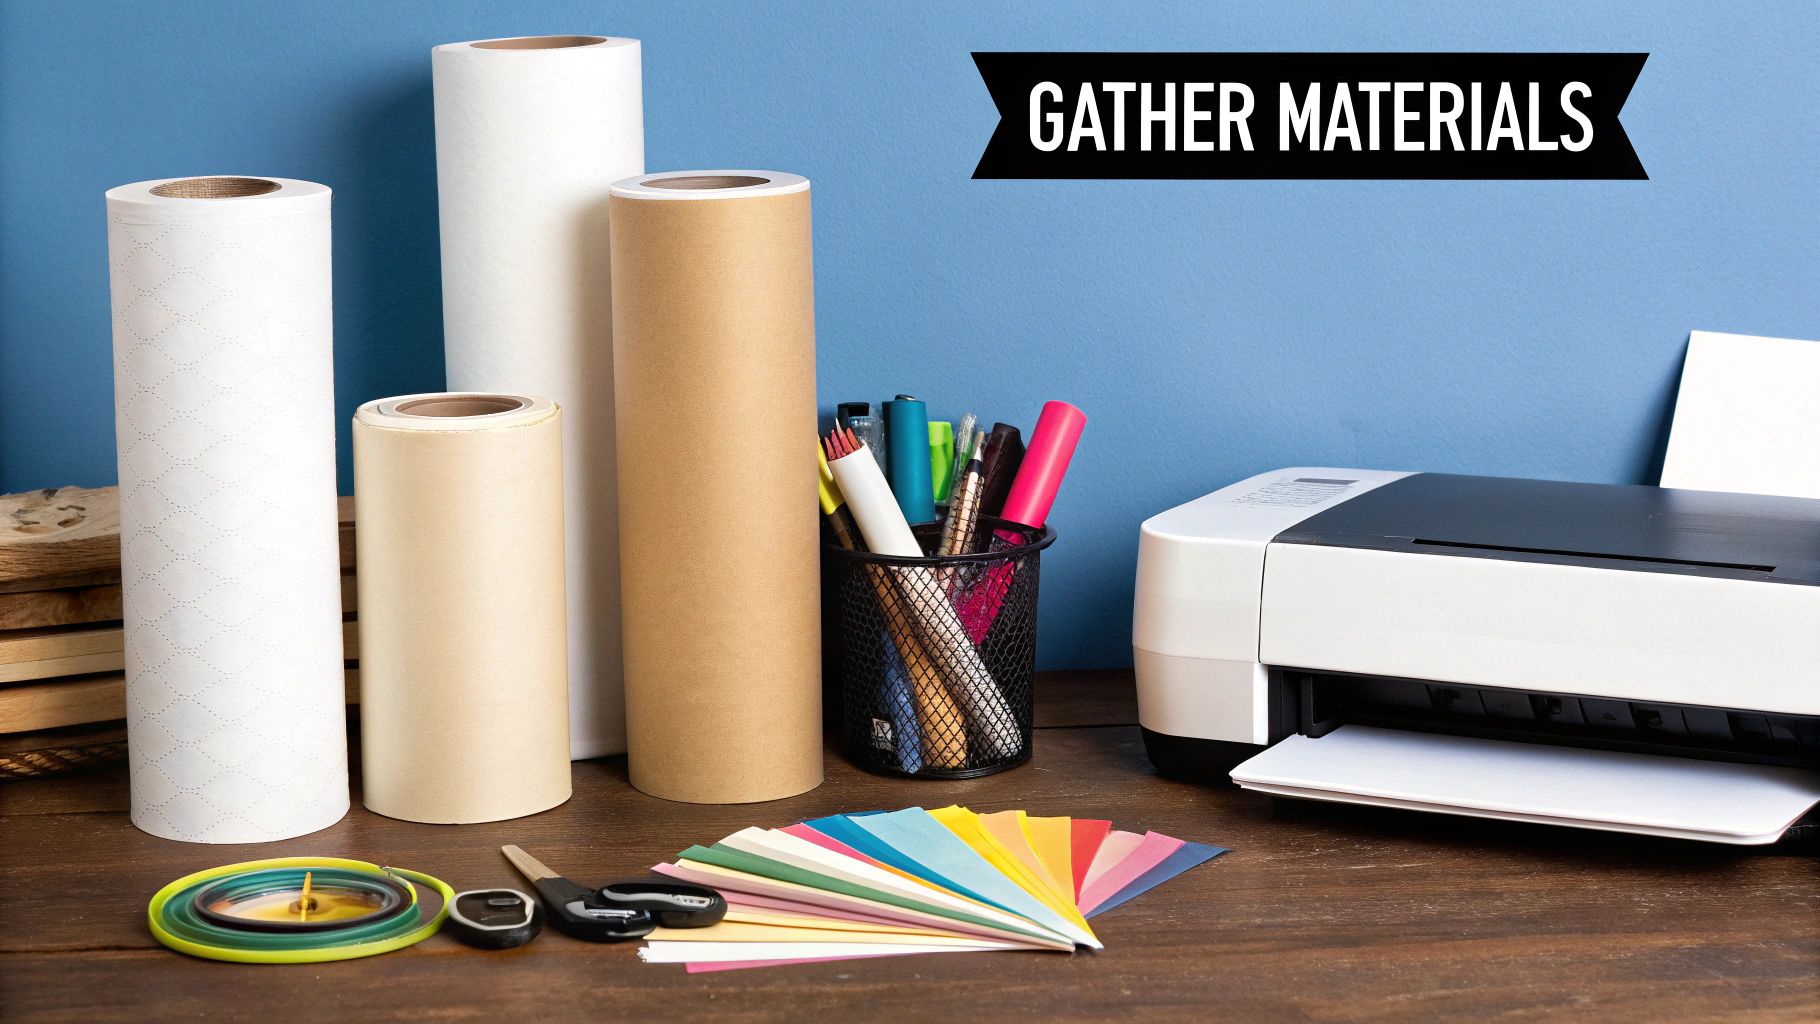
Think of it like this: trying to print without the correct materials is like trying to bake a cake without flour. You might go through the motions, but the result won't be what you were hoping for. The first, and most critical, decision you'll make is matching your transfer paper to your printer. This isn't just a suggestion—it's the golden rule of transfer printing.
Choosing the Right Transfer Paper
The biggest fork in the road is choosing between inkjet and laser transfer paper. This choice is determined entirely by the type of printer you own. Shoving inkjet paper into a laser printer (or the other way around) is a fast track to a ruined project and, even worse, a potentially damaged machine.
- Inkjet Transfer Paper: Perfect for the standard inkjet printers most of us have at home. It’s known for producing really vibrant, punchy colors and is generally the more budget-friendly option, making it a fantastic entry point for beginners.
- Laser Transfer Paper: If you have a laser printer, this is your go-to. The prints are incredibly durable and can stand up to a serious amount of washing, which is ideal for items that are going to be worn and loved a lot.
The next thing to consider is the color of your fabric. This is a classic rookie mistake. If you use paper meant for light fabrics on a dark shirt, your design will look weak and faded, almost transparent. The inks just aren't opaque enough to show up.
For any fabric that isn’t white or a very light pastel, you absolutely need to use transfer paper for dark fabrics. This type has a solid white, opaque backing that acts as a canvas, making sure your colors are bright and true no matter what you print them on.
Inkjet vs Laser Transfer Paper At a Glance
Feeling a bit stuck? Here’s a quick breakdown to help you decide which paper best fits your setup and what you're trying to achieve.
| Feature | Inkjet Transfer Paper | Laser Transfer Paper |
|---|---|---|
| Printer Type | Requires an inkjet printer. | Requires a laser printer. |
| Color Vibrancy | Excellent for vibrant, rich colors, especially for photographic prints. | Good color quality, but often excels in crisp lines and text. |
| Durability | Good, but can be more susceptible to fading or cracking over time with many washes. | Highly durable and resistant to fading, making it ideal for frequently worn items. |
| Cost | Generally more affordable and widely available for hobbyists. | Can be more expensive per sheet, but the durability might be worth it. |
| Feel on Fabric | Can have a slightly heavier "hand" or feel on the fabric, especially on darks. | Often has a lighter, softer feel, especially "no-weed" self-weeding papers. |
| Best For | Beginners, hobbyists, photo-realistic designs, and smaller-batch projects. | Small businesses, high-volume production, and designs that need maximum durability. |
Ultimately, the best choice comes down to the printer sitting on your desk. Always start there, and then you can weigh the other factors like durability and cost to fine-tune your selection.
Essential Application Tools
Okay, so your masterpiece is printed. Now what? You need to get that design from the paper onto your shirt, and for that, you need heat and pressure. Your two main options are a basic household iron or a dedicated heat press.
An iron can get the job done for a tiny, one-off project, but it's incredibly difficult to get the consistent temperature and even pressure required for a transfer that lasts. Uneven heat is the number one reason designs start to peel and crack after the first wash.
If you're even semi-serious about making custom apparel or plan on making more than one or two items, a heat press is a total game-changer. It delivers that perfectly uniform heat and pressure every single time, which is the secret to a professional finish that won’t wash away. If you're ready to make the leap, it's worth checking out the best heat press machine for shirts to avoid a lot of future headaches.
This isn't just a niche hobby, either. The global heat transfer paper market is expected to hit USD 2.27 billion by 2034, which just goes to show how popular creating custom products at home has become.
Of course, the physical tools are only half the battle. Having the right digital assets and a smooth workflow is just as important. Exploring the different essential tools for content creators can spark new ideas and help you create even better designs before you ever print a thing.
Getting Your Design Ready for a Perfect Print
A fantastic, long-lasting transfer begins on your computer, well before the printer ink starts flowing. This digital prep work is absolutely crucial; skipping these steps is the quickest route to wasting expensive paper and ending up with a botched job. Think of your design software as being just as vital as your heat press.
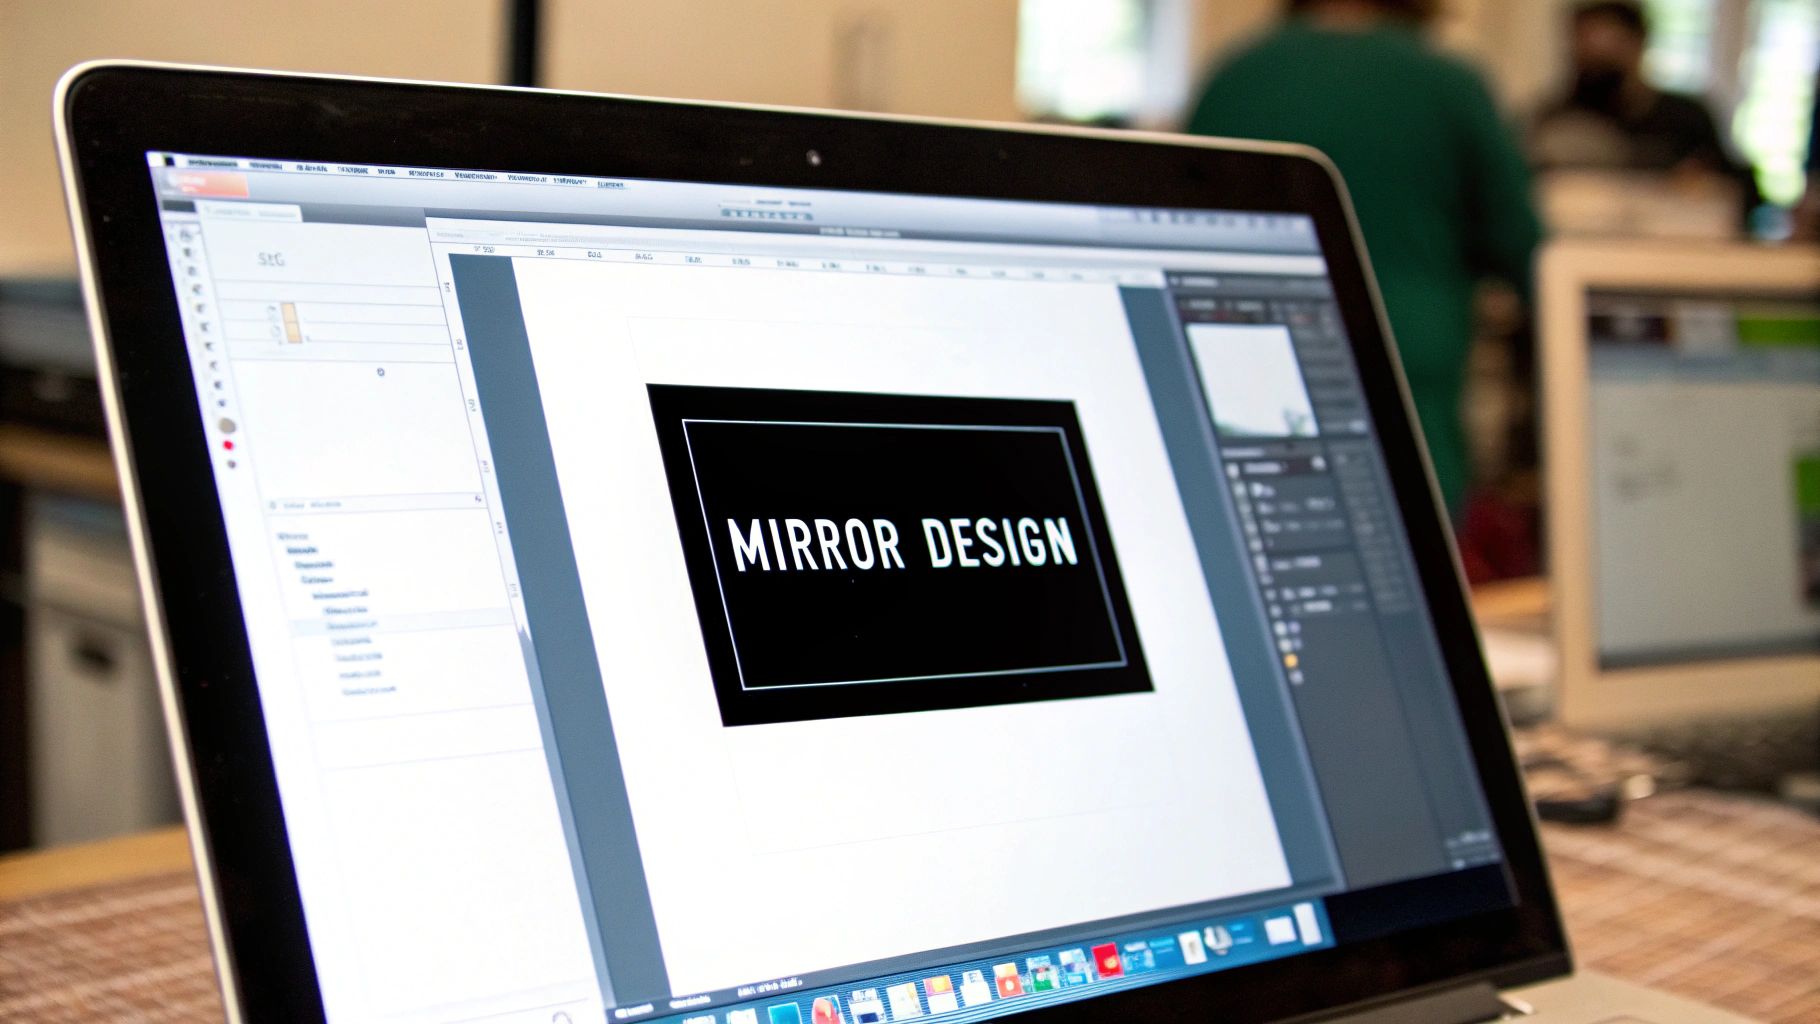
One of the classic mistakes I see people make is forgetting to mirror their image. This is a must-do if you're printing for light-colored fabrics. You have to flip the design horizontally in your software first. Why? Because when you press it, the image gets reversed onto the fabric. Mirroring it beforehand ensures your text and logos look exactly as they should.
Forgetting this one little checkbox in your print settings is often the only thing that separates a great shirt from a backward disaster. Keep in mind, this step isn't needed for dark fabric transfers, since those are applied face-up.
Nail Your Image Resolution
Ever seen a t-shirt with a blurry, pixelated graphic? That's almost always a resolution problem. For a sharp, professional finish, your design file needs to be 300 DPI (dots per inch) at the exact size you plan to print it.
You can easily check this setting in programs like Adobe Photoshop or even Canva. If you take a low-resolution image from the web and blow it up to fit a shirt, it's going to look terrible, no matter how good your printer is. Taking a second to confirm your DPI is a non-negotiable step for quality work. For a closer look at getting the proportions right, check out our guide on graphic size for t-shirts.
Pro Tip: Most images you find online are saved at 72 DPI, which looks fine on a screen but is way too low for printing. Always assume you need to check and convert any downloaded assets to 300 DPI to get that crisp, clean look you're after.
File Types and Trimming for a Professional Look
The type of file you save your design as makes a huge difference, especially if you have a transparent background. A JPEG, for instance, can't handle transparency. It will put a solid white box around your artwork, which will transfer onto your shirt as a very obvious white film.
To get around this, always save your designs as PNG files. This format keeps the background transparent, so only the design itself gets printed.
Finally, a bit of hands-on prep work makes a world of difference. Once your design is printed, take a moment to carefully trim away the extra, unprinted transfer paper around the edges. This simple step dramatically reduces that visible polymer "window" on the final shirt, giving it a much cleaner, more professional appearance. It's a small detail that really separates the amateurs from the pros. And before you hit print, make sure you understand how to avoid copyright infringement so you're legally cleared to use every part of your design.
Getting Your Printer Settings Dialed In
Just hitting 'print' and crossing your fingers is probably the most common mistake I see people make, and it almost always leads to disappointment. Think about it: your printer's default settings are calibrated for a standard sheet of copy paper, not the special coating on heat transfer paper. If you want those rich, vibrant colors and crisp lines, you have to get hands-on with the settings.
This is the part where you tell your printer exactly what it’s dealing with. Getting this right ensures it lays down the perfect amount of ink for a saturated, professional-looking result. Taking a minute to dig into the print dialog box is non-negotiable for anyone serious about getting a great transfer.
Tweaking Media and Quality Settings
First things first, open up your printer’s properties or advanced settings. You can usually find this by clicking "Properties," "Preferences," or "Advanced" right after you select 'print' from your design software. The main thing you're looking for is the paper type or media type setting.
Now, don't expect to see an option that just says "Transfer Paper"—most printers don't have one. Your goal is to choose a setting that tells the printer it's handling a thicker, coated material.
- Your Best Bet: Some printers, especially those from brands like Epson or Canon, might have a dedicated "T-Shirt Transfer" or "Iron-On Transfer" setting. If you see it, use it.
- Solid Alternatives: If not, the next best choices are "Premium Matte Photo Paper," "Glossy Photo Paper," or even a generic "Other Coated Paper." These settings signal the printer to slow down and use more ink.
- The Golden Rule for Quality: No matter what, always bump the print quality up from "Standard" or "Normal" to "High" or "Best." This is crucial.
Making these adjustments is what prevents your final pressed design from looking washed out or faded. It's a game-changer.
Loading the Paper and Pre-Print Checks
Loading the paper correctly sounds basic, but it's another one of those simple steps that can trip you up. Transfer paper has two distinct sides: a printable side and a backing. The printable surface often feels a bit different or might have a watermark on the back. You must load it so your printer prints on the correct side. When in doubt, the instructions that came with your paper are your best friend.
Before you send your final design to an expensive sheet of transfer paper, I always recommend running a quick nozzle check from your printer’s maintenance menu. This prints a tiny test pattern that immediately shows if any print heads are clogged, saving you from the frustration of streaks or banding ruining your work.
One last tip from experience: even if your printer has an automatic feeder that holds a stack of paper, feed your transfer sheets in one at a time. It takes an extra second, but this little habit dramatically reduces the chance of a jam or misfeed, saving you both ink and paper in the long run. By taking care of these details, you're setting yourself up for a perfect print, every single time.
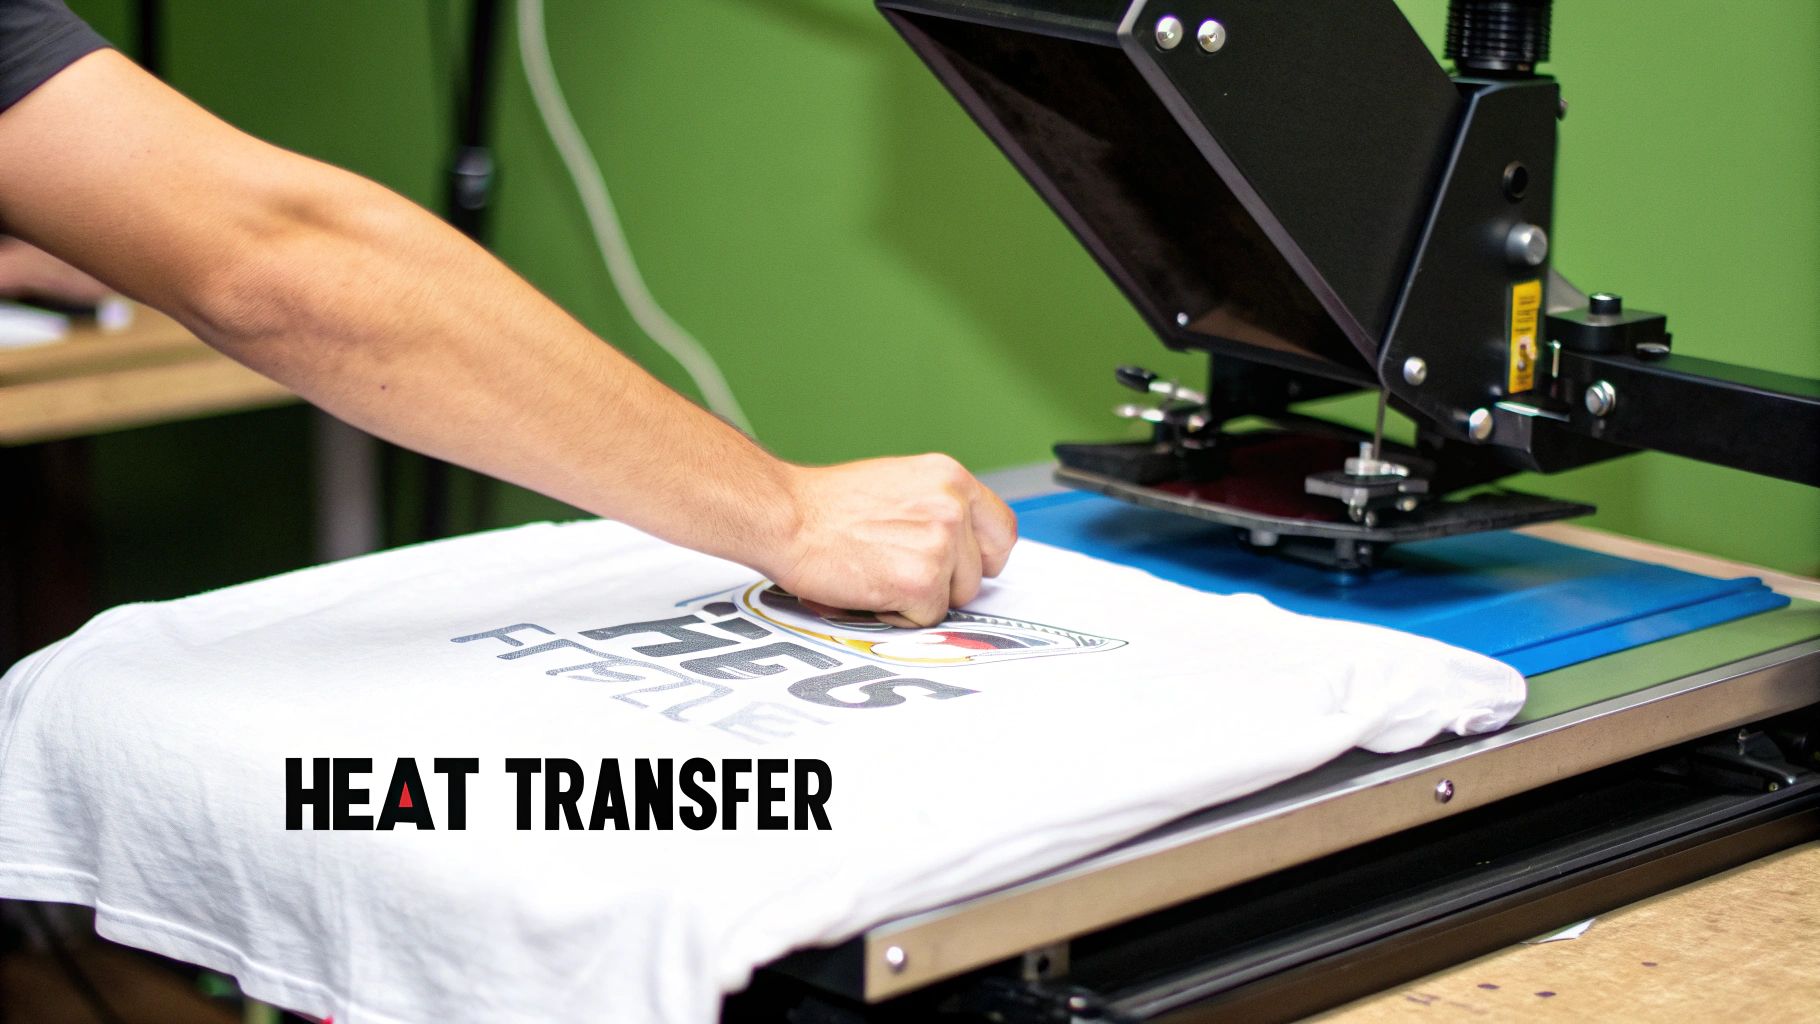
The Art of Applying Your Transfer for Lasting Results
Alright, this is where the magic happens. All your design work and careful printing come down to this moment: permanently setting your art onto the fabric. How you apply the transfer is just as important as your printer settings, and your technique will make all the difference between a shirt that looks pro and one that doesn't.
It’s no surprise that getting this right is a big deal for so many creators. The demand for custom gear is exploding, with the printing transfer paper market projected to jump from USD 12.94 billion in 2024 to USD 17.44 billion by 2032. People love unique, personalized items. You can dive deeper into what's driving this growth with this detailed market research on Credence Research.
This infographic gives a great visual overview of the key printer setup steps that get you to this point.
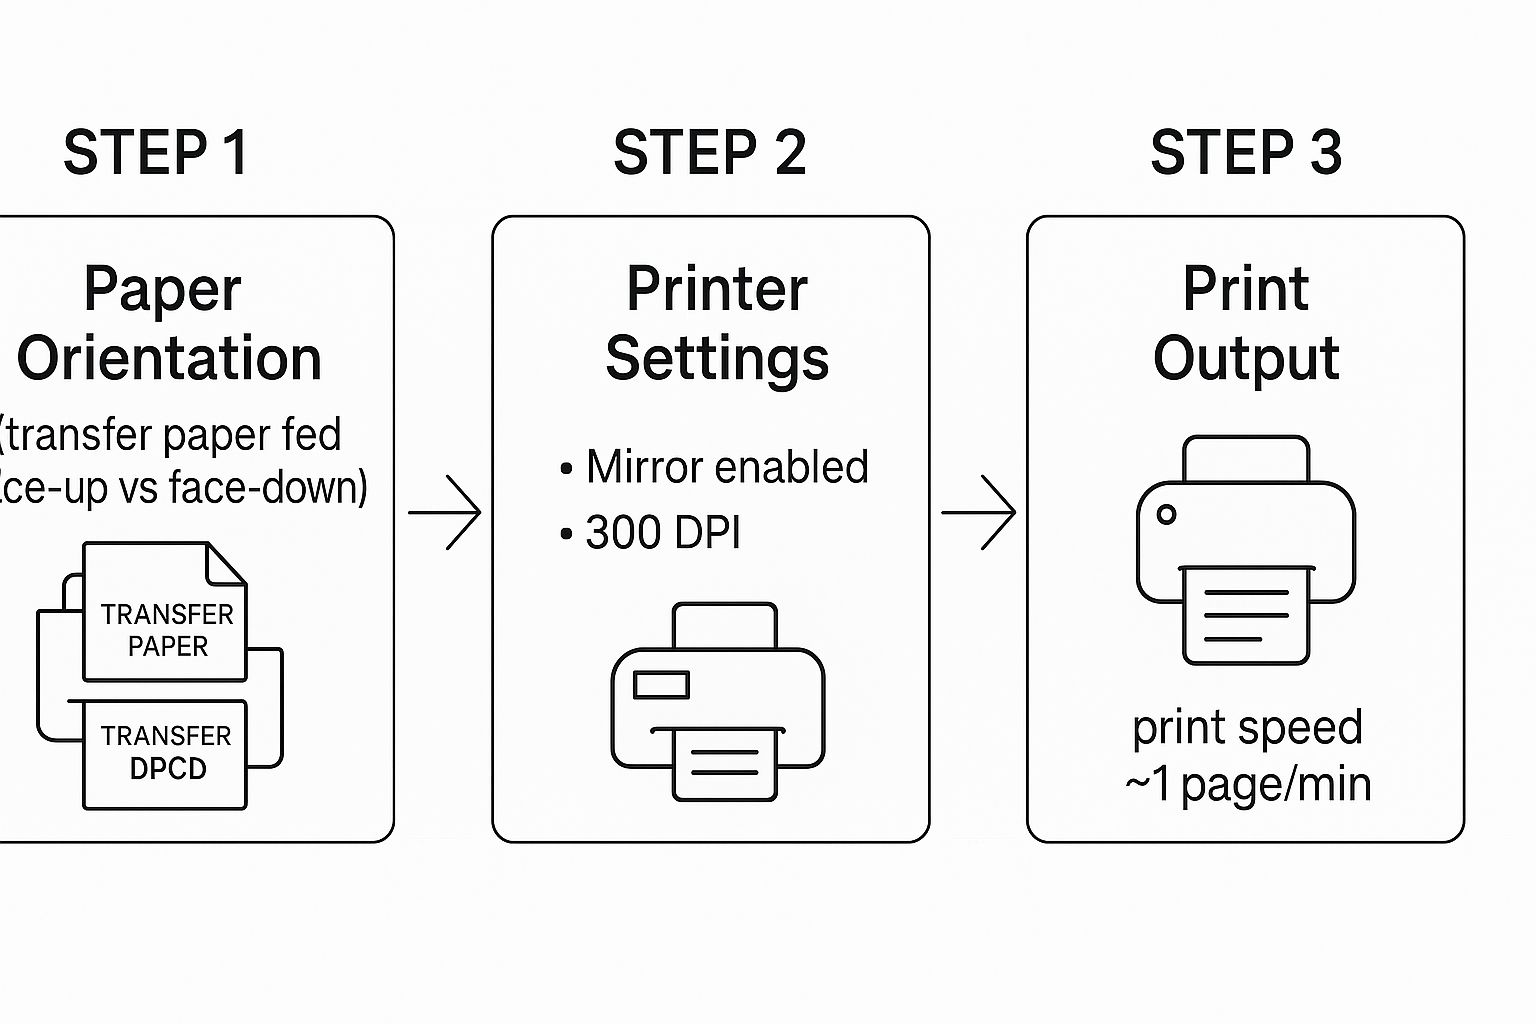
As you can see, getting the paper in correctly, mirroring the image, and choosing the right print quality are the foundation. Now, let’s get that foundation onto the garment.
Using a Heat Press: The Golden Trio
If you're serious about this and want durable, professional-looking results every single time, a heat press is a non-negotiable tool. A regular iron just can't compete with the consistent, even results a press delivers. From my experience, success with a heat press comes down to what I call the "golden trio" of settings.
- Temperature: Your transfer paper instructions will give you a specific temperature. Treat this as a rule, not a suggestion. Being off by even a few degrees can mean a weak bond or, worse, a scorched transfer.
- Pressure: The press needs to clamp down with firm, even pressure across the entire design. This is what melts the adhesive and pushes it deep into the fabric's fibers for a permanent hold.
- Time: Just like temperature, the recommended pressing time is there for a reason. Too short, and your transfer will peel after the first wash. Too long, and you risk burning both the design and the garment itself.
Here's a pro tip: Always pre-press your garment for 5-10 seconds before you even think about putting the transfer on. This quick step zaps any hidden moisture and smooths out wrinkles, giving you a perfect canvas for the transfer to adhere to.
Tips for Applying with a Household Iron
Look, if you’re just starting out or doing a one-off project, a household iron can get the job done. But you have to be patient and put in some extra effort. The main challenge is faking the even heat and pressure that a press provides automatically.
Your mission is to mimic a heat press. First, crank your iron up to its hottest setting and, most importantly, turn the steam function OFF. Steam is moisture, and moisture is the absolute enemy of a good transfer.
When you press, don't use a flimsy ironing board. Find a hard, flat, heat-resistant surface like a countertop with a thin towel on it. Lean into it and use your body weight to apply firm, consistent pressure. Move the iron slowly and deliberately, making sure you give extra attention to the edges and corners—that's always where a transfer starts to peel if it wasn't bonded properly.
Hot Peel vs. Cold Peel: A Critical Distinction
Finally, pay close attention to one of the most crucial instructions on your paper's packaging: whether it’s a "hot peel" or "cold peel" paper. Getting this wrong can ruin your project in a split second.
- Hot Peel: This means you peel the backing paper off immediately after pressing, while everything is still piping hot.
- Cold Peel: This requires you to wait until the transfer is completely cool to the touch before you remove the backing.
There's no room for error here. If you peel a cold-peel paper while it's still hot, you'll likely stretch, tear, or smudge the design. On the flip side, letting a hot-peel paper cool down can make the backing bond to the design, and when you finally rip it off, it will take chunks of your print with it. Always, always check the instructions for your specific brand of paper.
Keep Your Custom Creations Looking Brand New
So you've pressed your final design. The job isn't quite done, though. The real test of a quality transfer—and your hard work—comes down to what happens in the laundry room. Getting the aftercare right is what separates a one-wear novelty from a go-to favorite that looks great for years. It's the secret to stopping that dreaded cracking and fading in its tracks.
The golden rule, and the easiest habit to build, is to turn every garment inside out before it even touches the washing machine. This simple act puts a layer of fabric between your design and the abrasive action of other clothes, zippers, and the machine drum itself. It's the single most powerful thing you can do to protect the transfer.
The Right Way to Wash Your Custom Apparel
When it comes to washing, your mantra should be "gentle." Cold water is your best friend here. It's far less likely to degrade the transfer's adhesive or cause the vibrant inks to fade. Hot water, on the other hand, is the enemy—it can soften the transfer, making it vulnerable to peeling and damage over time.
Your choice of detergent matters, too. Give the harsh stuff a wide berth. Anything with bleach or aggressive stain-fighting agents can chemically break down the ink and adhesive. Stick with a mild, color-safe detergent to keep your design looking as sharp as the day you made it.
If you're working with specific types of transfers, you might want more detailed advice. We've put together a comprehensive guide with our best DTF washing instructions that covers everything you need to know.
A Pro Tip From Experience: I always try to wash custom items in smaller, dedicated loads. When you cram the washer full, you create a ton of friction between garments. That extra rubbing and stress is a leading cause of premature cracking and peeling on any printed design.
Drying and Ironing: The Dos and Don'ts
Drying is just as critical as washing. If you want the absolute longest life out of your transfer, air-drying is king. There’s simply no better way. Hang it on a line or lay it flat to dry. It's the gentlest method, hands down.
Of course, life gets busy and sometimes the machine is the only option. If you must use a dryer, you can minimize the risk by following a few rules:
- Keep that garment turned inside out.
- Always use the lowest heat setting available—think tumble dry low or the delicate/air-dry cycle.
- Pull it out as soon as it's dry. Letting it sit in a hot drum can do almost as much damage as the cycle itself.
And what about wrinkles? You can absolutely iron a transferred shirt, but you need to be careful. The one unbreakable rule is never let a hot iron touch the transfer directly. It will melt instantly, ruining both the design and your iron. The fix is easy: just keep the shirt inside out and iron the fabric on the back of the design.
Working Through Common Transfer Paper Headaches
Even when you follow all the steps, things can still go wrong. It happens to everyone. But before you get frustrated and toss a misprinted shirt in the bin, take a breath. Most transfer paper problems are surprisingly common and, more importantly, totally fixable. Think of this as your field guide to diagnosing what went wrong and how to get it right next time.
It seems like everyone is getting into custom apparel these days, which is fantastic. The market for materials like dye sublimation transfer paper saw a compound annual growth of 11.4% between 2019 and 2025, according to research from Data Insights Market. With so many new people trying this out, a lot of us are running into the same initial hurdles.
Why Do My Colors Look So Dull and Faded?
This is probably the most frequent complaint I hear. Your design looks perfect on the screen—bright, vibrant, and full of life—but the finished shirt looks like it’s been through the wash a dozen times already. Nine times out of ten, the problem lies with your printer settings or the ink itself.
Let’s break it down:
- Check Your Print Settings: Did you just hit "Print" using the default settings? Standard or plain paper modes are designed to save ink, which is the exact opposite of what you want. You need to tell your printer you're using special paper. Look for options like "Premium Photo Paper," "Matte Photo Paper," or a specific "T-Shirt Transfer" setting.
- Are Your Ink Levels Low? Take a quick look at your printer's ink levels. If even one color is running on empty, it can throw off the entire color mix, resulting in a muddy or faded final print.
- A Word on Third-Party Inks: While the savings can be tempting, some off-brand inks just don't have the right formula to withstand the heat and pressure of the transfer process. They can fade or shift in color dramatically once pressed.
Before you print your next transfer, always dive into the print dialog box and crank the quality setting to "High" or "Best." This simple tweak forces the printer to lay down more ink, giving you the rich, saturated colors you were expecting.
Help! My Design Is Cracking and Peeling Off!
There's nothing more disappointing than a design that starts to crack, flake, or peel away after the very first wash. This is almost always a sign that the transfer didn't properly bond with the fabric in the first place.
The success of your transfer depends on what I call the "golden trio": heat, pressure, and time.
The adhesive on the transfer paper needs a specific temperature, held for a precise amount of time, with enough downward force to actually push it into the weave of the fabric. If any one of those three elements is off, you'll get a weak bond that's doomed to fail.
The Fix: If you're using a heat press, this is easy. Double-check the instructions that came with your transfer paper and set the temperature and time exactly as recommended. For those using a home iron, the most common culprit is inconsistent pressure. You really have to put your body weight into it and press down firmly and evenly across the entire design, giving special attention to the edges.
A Few Other Frustrating Issues (And How to Solve Them)
Beyond the big two, a few other little annoyances can pop up. Here's a quick guide to tackling them.
- Ink Smearing as It Prints: If you see streaks or smears on the paper as it comes out of the printer, it means the ink isn't drying fast enough. The printer is putting down ink faster than the paper's coating can absorb it. Try finding a "Coated Paper" setting in your print options or see if you can slow down the print speed.
- The Transfer Feels Thick and Stiff: This is a common characteristic of opaque transfers made for dark fabrics, since they need a white layer to make the colors pop. To minimize that stiff, "plastic patch" feeling, trim your design as close to the printed edges as possible. Using a higher-quality "soft feel" paper also makes a huge difference.
- Constant Paper Jams: Remember, transfer paper is much thicker and heavier than your average sheet of copy paper. Your printer's main paper tray might struggle to pick it up properly. The best practice is to feed sheets one at a time using the manual or rear feed tray if your printer has one. It's a simple step that saves a lot of wasted paper and headaches.
Tired of the trial and error? If you want to skip the troubleshooting and get flawless prints every single time, Raccoon Transfers has your back. We make premium, ready-to-press DTF transfers that deliver stunning colors and serious durability, wash after wash. Just send us your art, and we'll do the hard work for you. Check out our custom transfers at raccoontransfers.com.