
Print an Image on a Shirt The Professional Way
Ready to print an image on a shirt that actually looks like it came from a high-end shop? The secret for getting those vibrant, durable, and super-detailed designs is using Direct-to-Film (DTF) transfers. This method really simplifies the whole process, letting you create professional-quality apparel with nothing more than a heat press.
Why DTF Is Your Best Bet for Shirt Printing
If you've ever felt stuck with traditional printing methods, you're not alone. Screen printing is a mess to set up and gets expensive for small runs, and a lot of other DIY methods leave you with designs that are stiff and peel after one wash. This is where the DTF process completely changes the game. It’s a modern solution built for creators who want to print an image on a shirt with maximum impact and minimal fuss.

Unlocking Creative Freedom
The real magic of DTF printing is its versatility. Methods that struggle with tricky color gradients or fine lines? DTF handles them perfectly. This technology lets you bring any digital artwork to life, preserving every last color and detail on all sorts of fabrics, from cotton and polyester to complex blends.
This flexibility has kicked off some incredible growth in the custom apparel world. The global custom t-shirt printing market was valued at USD 5.16 billion and is on track to nearly double by 2030. That boom is being driven by accessible technologies like DTF that are empowering everyone from small businesses to hobbyists.
Benefits You Can Expect
When you go with DTF, you're choosing a superior finish. Here’s what makes it stand out:
- Vibrant, Full-Color Prints: DTF supports unlimited colors, so your design looks exactly how you envisioned it.
- Exceptional Durability: The prints are soft, flexible, and made to survive dozens of washes without cracking or fading.
- Works on Any Fabric: Whether you're pressing on a light cotton tee or a dark polyester hoodie, the results are consistently brilliant.
The key takeaway is that DTF bridges the gap between professional quality and ease of use. It delivers the high-end finish of screen printing without the complicated setup, making it perfect for any project size.
Here’s a quick comparison to see why DTF excels for printing detailed images on shirts.
DTF Printing vs Other Common Methods
| Feature | DTF (Direct-to-Film) | Screen Printing | DTG (Direct-to-Garment) |
|---|---|---|---|
| Color Capability | Unlimited colors, full gradients | Limited colors per screen | Unlimited colors, good gradients |
| Fabric Compatibility | All colors & types (cotton, poly, blends) | Best on cotton, limited on dark poly | Best on 100% cotton, limited on blends |
| Feel of Print | Soft, flexible, lightweight | Can be thick depending on ink layers | Very soft, ink soaks into fabric |
| Durability | Excellent, resists cracking/fading | Very durable, long-lasting | Good, but can fade over time |
| Ideal Batch Size | Any size, from one-offs to large runs | Best for large batches (50+ units) | Good for one-offs and small runs |
| Setup Complexity | Low - requires only a heat press | High - screens, emulsions, cleanup | Medium - requires pre-treatment |
As you can see, DTF offers a unique combination of versatility and quality that's hard to beat.
If you want to get into the nitty-gritty of how it all works, our guide on what DTF printing on shirts involves is a great place to start.
Getting Your Artwork Ready for a Flawless Print
Before you even think about firing up the heat press, you have to get your digital file right. I can't stress this enough: this prep stage is where the magic really happens. The final print on your shirt will only ever be as good as the file you start with. A small oversight here can mean a blurry, pixelated, or just plain disappointing design.
Think of it like cooking a great meal—you have to start with quality ingredients. Your artwork file is the main ingredient. Let’s walk through the exact checks I run on every file to make sure it’s ready for a professional-grade DTF transfer.
Nail the Resolution
Ever seen a t-shirt where the graphic looks fuzzy and blocky, especially up close? That's almost always a resolution problem. For any kind of printing, the gold standard is 300 DPI, which stands for dots per inch. It's simply a measure of how much detail is packed into your image file.
A graphic designed for a website, which usually sits at 72 DPI, will look perfectly fine on a screen. But try to print that same file on a shirt, and you'll get a pixelated mess. It's crucial to either start your design on a 300 DPI canvas or make sure your existing file meets that spec. You can easily check this in software like Adobe Photoshop or with a free online tool.
When you print an image on a shirt, a 300 DPI file is what ensures every line is clean, every color blend is smooth, and the finished product looks sharp and professional. Anything less will noticeably drag down the quality.
Pick the Right File Format
The type of file you save your design as makes a massive difference. JPEGs are great for photos on the web, but for DTF, they're a no-go. Why? They don't support transparency. This means any empty space around your design gets filled in with a solid white or black box—a classic sign of an amateur print job.
For professional DTF printing, the file format you need is PNG (Portable Network Graphics). Here's why it's the right choice:
- Transparency is Key: This is the big one. A PNG file lets you have a design with a transparent background. That way, only your artwork is printed on the shirt, not a clunky box around it.
- Lossless Quality: JPEGs lose a tiny bit of quality every time you save them. PNGs, on the other hand, use lossless compression, so all the original detail stays perfectly intact, keeping your image crisp.
When you save your final artwork as a PNG with a transparent background, you’re making sure that only what you designed ends up on the transfer film.
Size Your Graphic for the Real World
The last piece of the puzzle is getting the size just right. Where is the design going on the shirt, and how big should it actually be? A small left-chest logo is sized completely differently than a huge graphic meant to cover the whole back.
The best way to figure this out is to grab a sample shirt and a ruler. Actually measure the spot where you want the design to go to get a true sense of scale. As a general rule of thumb, a standard full-front design on an adult large t-shirt usually falls somewhere between 10 to 12 inches wide.
For a much deeper dive into this, we've put together a complete guide on how to choose the right graphic size for a t-shirt. It’ll help you nail the placement every single time.
Mastering the Heat Press for a Perfect Application
You’ve got your artwork sorted and your Raccoon Transfer is ready to go. Now for the moment of truth: the heat press. This is where the magic really happens, permanently bonding your design to the fabric. Getting this right is what separates a professional, long-lasting print from one that peels, cracks, or looks washed out before it even sees a washing machine.
Success isn't just about cranking up the heat. It’s a delicate dance between temperature, time, and pressure. Each of these plays a crucial role, and the right combination changes depending on what you're printing on. A standard 100% cotton tee needs a different approach than a sleek polyester jersey or a 50/50 blend.
The Non-Negotiable Pre-Press
Before you even think about laying down that transfer, you have to pre-press the shirt. It’s a quick step, just 5-10 seconds, but it does two critical things. First, it zaps any moisture hiding in the fabric fibers. Second, it smooths out every wrinkle, giving you a perfectly flat canvas to work on.
Skipping this is one of the most common mistakes I see. Trapped moisture turns into steam under the press, which can completely mess with the adhesive and lead to a failed application. Likewise, wrinkles mean an uneven surface, causing gaps in the design and poor adhesion.
Think of the pre-press as priming a wall before painting. It’s a simple, fast step that guarantees a professional and durable finish by creating the ideal canvas for your transfer.
Dialing in Your Settings
The "perfect" settings are completely dependent on the garment's fabric. While we send specific instructions with every Raccoon Transfers order, knowing the general rules of thumb will make you a much more confident and effective printer.
- Cotton and Cotton Blends: These are tough fabrics. They can handle higher temperatures, usually around 300-320°F (149-160°C). You'll want to use medium to firm pressure for about 10-15 seconds.
- 100% Polyester: Synthetics like polyester are much more sensitive to heat. To avoid scorching or melting the fibers (that dreaded shiny press mark), drop the temperature to 270-290°F (132-143°C) and use light to medium pressure.
- Tri-Blends and Delicates: For those super-soft shirts that mix cotton, polyester, and rayon, it’s always best to err on the side of caution. Start with lower heat and adjust from there.
To take all the guesswork out of it, bookmark our complete guide to heat press settings for DTF. It’s a lifesaver.
Positioning and the First Press
With the shirt pre-pressed and lying flat, it's time to position your DTF transfer. Grab a t-shirt alignment tool or even a simple ruler to make sure it's perfectly centered and straight. Once you’re happy with the placement, cover everything with a Teflon sheet or a piece of parchment paper. This protects both the transfer and your heat press platen.
This infographic is a great visual reminder of how getting the artwork right from the start leads to a successful press.
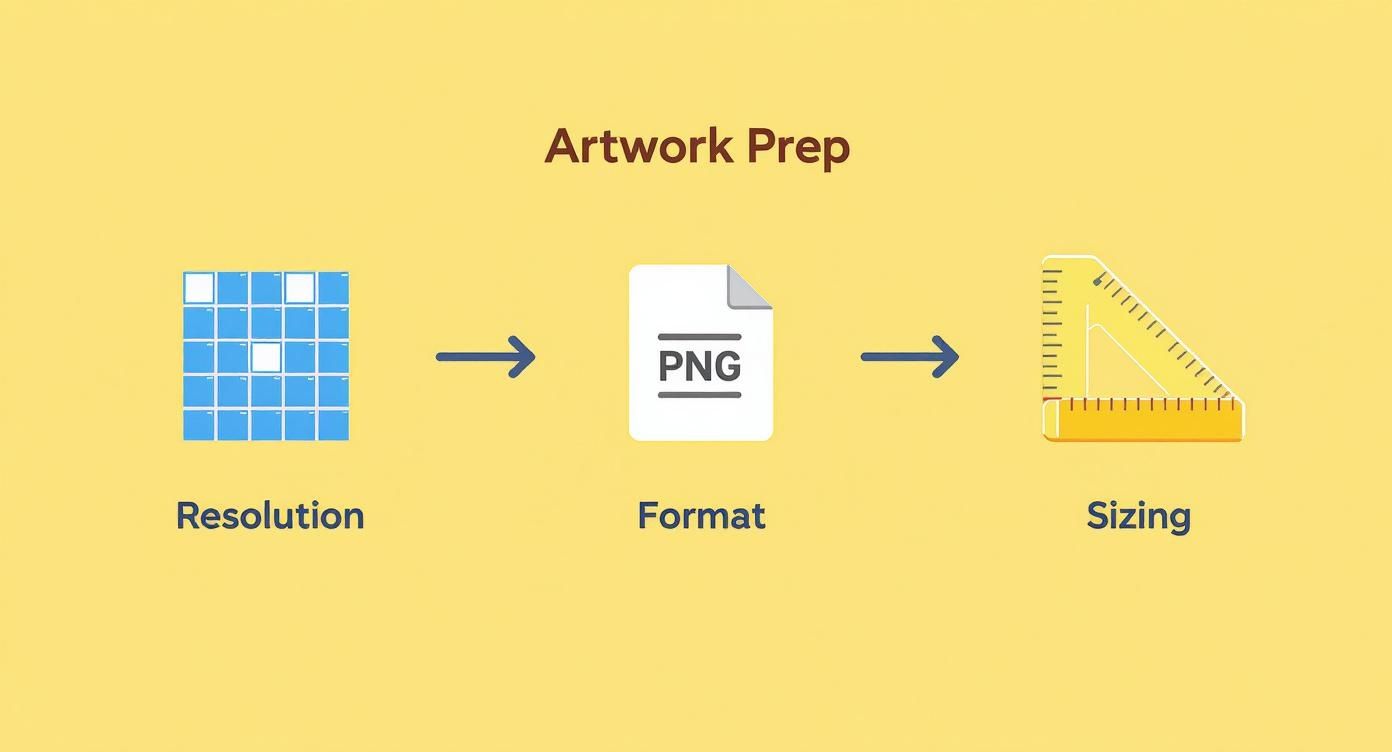
It really shows how what you do on the computer directly impacts the final physical product.
Now, close the press using the settings you dialed in. When the timer beeps, open it smoothly. The next part is crucial: follow the peel instructions. Our transfers are typically a cold peel, which means you have to let the garment and transfer cool down completely before you even attempt to remove the film. Peeling it while it’s hot is a surefire way to ruin the design.
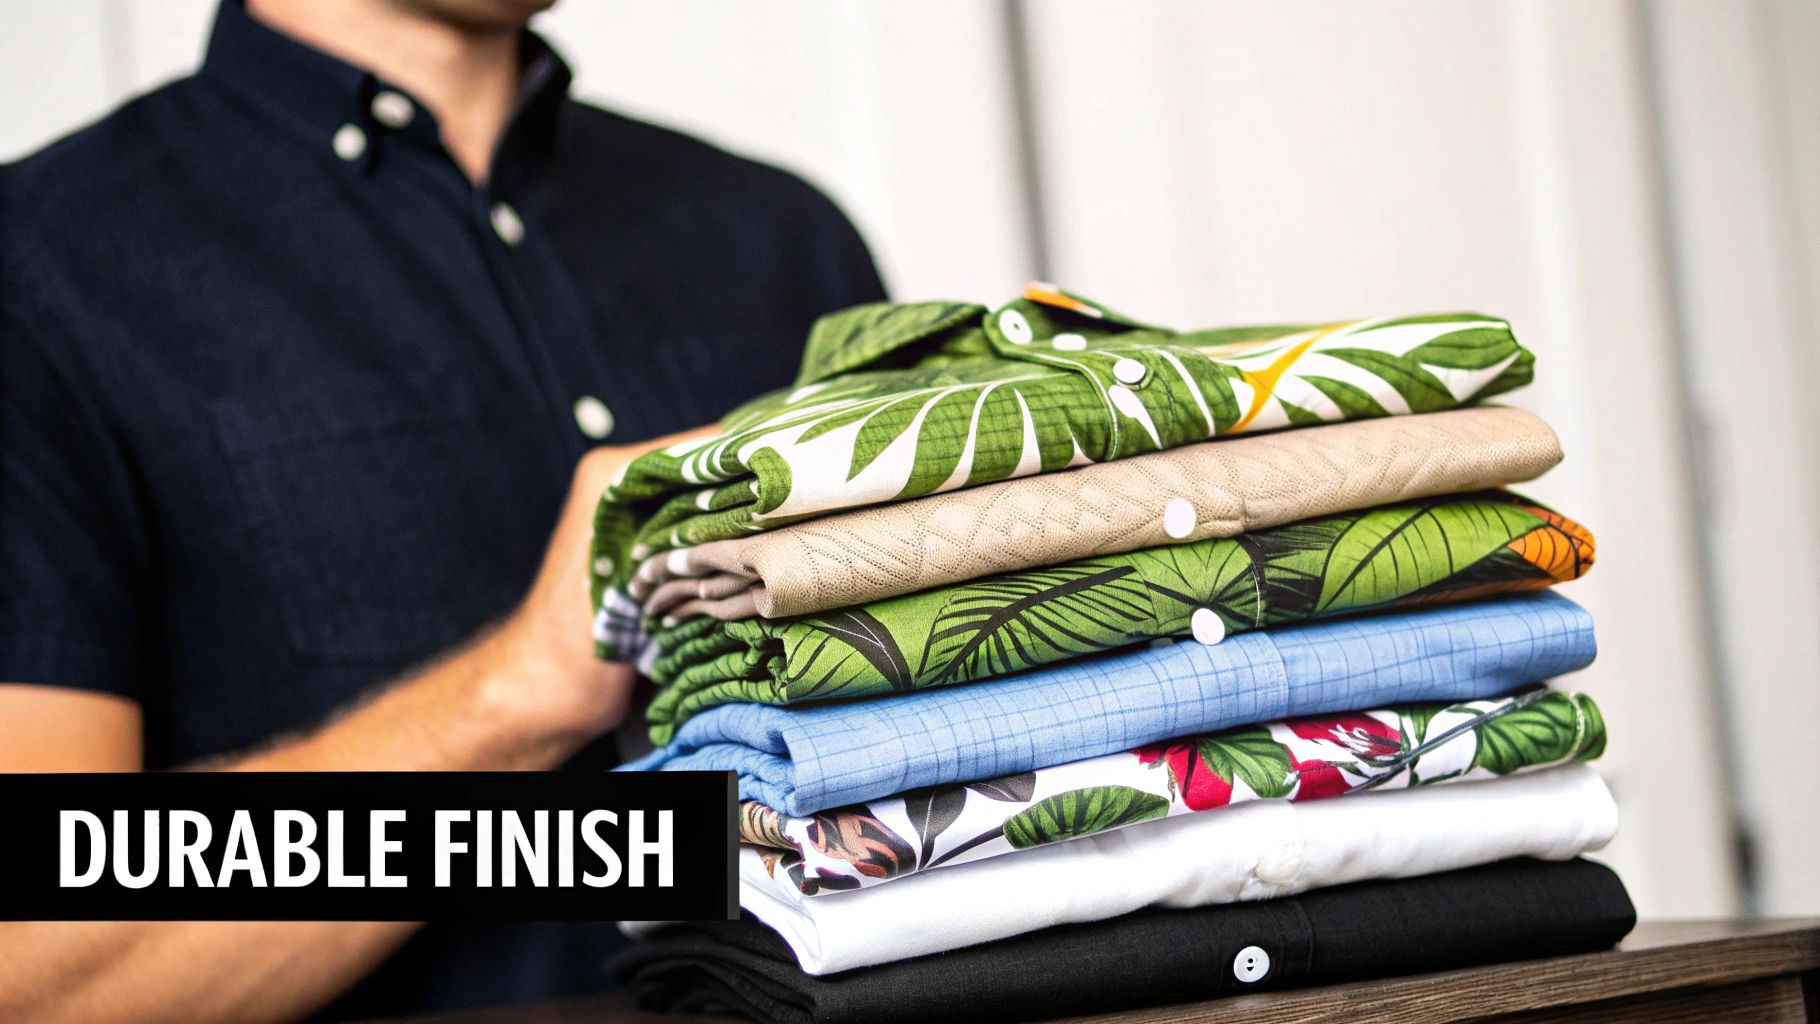
The Final Press for Maximum Durability
Once you’ve peeled the film away and revealed your awesome design, you're almost done. There's just one final step that makes all the difference: the second press.
Place your protective sheet back over the now-exposed design and press it again for another 5-10 seconds. This final touch does wonders. It helps push the ink deeper into the fabric's fibers, which not only improves the softness of the print but also dramatically increases its durability in the wash. This is the secret to a print that doesn't crack and looks fantastic for years to come.
Pro Tips for Durability and an Amazing Finish
A professional print job doesn't end when the heat press pops open. Honestly, the real magic happens in the finishing touches and aftercare. This is what separates a shirt that looks good for a week from one that becomes a go-to favorite for years. When you print an image on a shirt, making sure it lasts is just as important as getting the application right.
The first rule? Patience. After that final press, the transfer needs time to fully cure and bond with the fabric fibers. Always tell your customers (or remind yourself) to wait at least 24 hours before that first wash. Trust me, this simple step is non-negotiable for locking the design in place.
The Right Way to Wash and Care
Giving clear care instructions is your best defense against premature wear and tear. It’s what keeps the print vibrant and intact, ensuring the shirt looks incredible for dozens of washes to come.
Here are the essential care instructions you should follow yourself and give to every single customer:
- Turn It Inside Out: This is a big one. Always wash the garment inside out. It creates a protective barrier for the print against the abrasion of other clothes, zippers, and buttons in the machine.
- Keep It Cool: Hot water is the enemy of custom apparel. Stick to cold water on a gentle cycle to prevent the ink from softening or degrading over time.
- Mild Detergent Only: Harsh detergents, bleach, and especially fabric softeners are a no-go. They can attack the adhesive layer of the transfer, causing the design to fade, crack, or peel.
- Hang Dry If You Can: For the absolute best, longest-lasting results, hang the shirt to air dry. If you have to use a dryer, be sure to use the lowest heat setting possible, like tumble dry low. High heat is just as bad as hot water.
I see it all the time—people assume that cracking or peeling means a cheap transfer. The truth is, these issues are almost always caused by an incorrect application. Usually, it's a lack of pressure, the wrong temperature, or skipping that crucial pre-press step.
Achieving a Softer, More Integrated Feel
Want a pro-level trick to really elevate the final product? Soften the print. You want it to feel less like a plastic layer sitting on the fabric and more like it’s part of the shirt itself.
After the final press and once the shirt has completely cooled, you can gently stretch the fabric where the design is. This helps break up any initial stiffness in the ink, giving it a much softer hand-feel right away.
Another technique I use is to give the shirt a quick, light tumble dry by itself after its first wash (inside out, of course, and on low heat). This can dramatically improve how the print feels, making the apparel that much more comfortable and premium.
It's this kind of professional finish that has helped digital printing methods take over the custom apparel world. Their power to create high-quality, personalized designs even for small orders is completely changing the custom t-shirt market across North America and Europe. If you're interested in the data, you can dig into this market shift and its growth in this detailed industry report.
Watch Out for These Common Shirt Printing Mistakes
Even with a perfect DTF transfer in hand, the road from a digital file to a finished shirt has a few potential bumps. We've spent countless hours behind a heat press, and trust me, we've seen it all. The good news? Most of the issues that trip people up are surprisingly easy to avoid once you know what they are.
Let's start with the artwork itself, because this is where many problems begin. The most common—and most frustrating—mistake is using a low-resolution image. A graphic might look fantastic on your glowing computer screen, but if it’s not sharp enough, it will print as a blurry, pixelated mess. Your file absolutely must be 300 DPI at the final size you want it printed. No exceptions.
Another classic rookie error is wonky placement. A logo that’s slightly crooked or a design that sits too close to the collar immediately screams "amateur." It’s one of those small details that makes a massive difference in how professional the final shirt looks.
Nailing the Heat Press Application
Honestly, most print failures don't happen because the transfer is bad. They happen during the application process. Your heat press is where the magic happens, and a few simple checks can be the difference between a great shirt and a ruined one.
Getting your heat press settings wrong is a huge one. Too much heat, and you can scorch delicate fabrics like polyester, leaving a permanent shiny box around your design. But if you don't use enough heat or pressure, the adhesive won't bond properly. The design might look fine at first, but it'll start peeling away after the first wash.
The secret to a perfect press is finding that sweet spot. You need just enough heat and pressure for a permanent bond, but not so much that you damage the garment itself. Always, always follow the specific instructions for the fabric you're working with.
The Peel and Placement Predicament
You can do everything right up to this point and still mess it up in the final seconds. Peeling the film at the wrong time is a mistake you’ll probably only make once, but we can help you avoid it altogether. With our cold peel transfers, patience is everything.
- Peeling Too Hot: If you get impatient and try to peel the film while the transfer is still warm, you'll pull parts of the design right off with it. The result is a cracked, incomplete image.
- Waiting Too Long: It does need to be cool, but letting it sit for an hour isn't necessary. Once it's cool to the touch, you're good to go.
Misalignment is the other simple-to-fix issue we see all the time. A design that's off-center by even half an inch is surprisingly obvious once someone is wearing the shirt.
Quick Fixes for Perfect Placement:
| The Problem | The Simple Solution |
|---|---|
| Crooked Design | Use a t-shirt alignment tool or even just a ruler. Line up your transfer with the collar and sleeves before you press. |
| Too High or Too Low | As a general rule of thumb, place the top of a standard chest design about three inches (or four fingers' width) below the collar. |
By keeping these common slip-ups in mind, you'll quickly build the skills and confidence to print shirts that look fantastic every single time. It all comes down to paying attention to the details—from the pixels in your digital file to the final peel.
Answering Your Top Shirt Printing Questions
Even when you've got the process down, a few questions always pop up. It's totally normal. When you're figuring out how to print an image on a shirt, especially with a pro-level method like DTF, you'll naturally wonder about fabrics, costs, and how to scale things up.
Let's tackle some of the most common questions we get from creators just like you.
What’s the Best Fabric for DTF Printing?
This is where DTF really shines. One of its biggest perks is how forgiving and flexible it is with materials. Forget the limitations you might have seen with other printing methods; DTF is incredibly versatile.
You can confidently press these transfers onto a huge variety of fabrics:
- 100% Cotton: The gold standard for t-shirts. DTF looks fantastic on it.
- Polyester: Perfect for all that athletic and performance gear.
- Cotton/Poly Blends: 50/50s, tri-blends, you name it—DTF handles them beautifully.
- Other Materials: We’ve seen incredible results on denim, canvas, and even leather.
This freedom means you can get creative with your product line without worrying if your printing method can keep up.
The real secret isn't the fabric itself, but how you press it. Just be sure to adjust your heat press temperature, pressure, and time to match the material you're using. Following the garment's specific guidelines is the best way to get a bond that lasts without scorching the fabric.
How Much Does It Cost to Print an Image on a Shirt?
This is the million-dollar question, and the answer really depends on your method. But with DTF transfers, you're looking at one of the most cost-effective ways to create custom apparel, especially for small businesses or hobbyists.
You get to skip the massive setup fees that come with screen printing, which makes producing a single, one-off shirt totally affordable. With Raccoon Transfers, you just pay for what you need—whether that’s one transfer for a sample or a whole gang sheet filled with your best-selling designs.
This model is a game-changer and a huge reason why the print-on-demand market is projected to grow at a compound annual rate of 23.6%. The power to create a single high-quality item without a huge investment is what's fueling this movement. You can dive deeper into these powerful print-on-demand market trends to see where the industry is headed.
Thinking bigger? If you're looking to build a full-fledged creative business, exploring resources on starting an embroidery business from home can offer some fantastic insights into managing a custom apparel venture from the ground up.
Ready to make apparel that people will actually want to wear? With Raccoon Transfers, you get stunningly vibrant, tough-as-nails DTF transfers that are a breeze to apply, all with next-day shipping. Let's get your project started.