
Your Ultimate Guide to Printable Iron On Transfer Paper
Your journey to a perfect custom t-shirt starts with the right foundation: printable iron-on transfer paper. This isn't just any paper; it's a special sheet that lets you take a design from your computer screen and bring it to life on fabric using heat. Getting this first step right is everything.
The two main players on the field are papers for light fabrics and papers for dark fabrics, and this single choice changes the entire game.
Choosing the Right Transfer Paper for Your Project
Honestly, picking the correct paper is the most critical decision you'll make in this whole process. It's the difference between a design that looks vibrant and professional, and one that looks faded or feels like a plastic sticker. The first question you need to ask is simple: what color is my shirt?
Light vs. Dark Fabric Paper
Transfer paper made for light-colored fabrics—think whites, pastels, or light grays—is designed with a transparent film. When you press it, only the printed ink makes its way onto the shirt. Any part of your design you left white or unprinted will just be the shirt's natural color, giving the final product a softer, more blended-in feel.
On the other hand, paper for dark fabrics comes with an opaque, solid white background. This is a non-negotiable for black, navy, forest green, or any deep-colored material. Why? Because your home printer's ink is translucent. If you printed directly onto a dark shirt, your colors would disappear into the fabric. The white background on this paper acts like a primer, making sure every color in your design shows up bold and bright. The trade-off is that it can feel a bit thicker on the final garment.
Key Takeaway: Picture it like painting a dark wall. You wouldn't just slap a light color on top and expect it to look good—you'd use a white primer first. Dark fabric transfer paper is that essential primer for your design.
If you're a visual person, this quick decision tree makes it super clear.
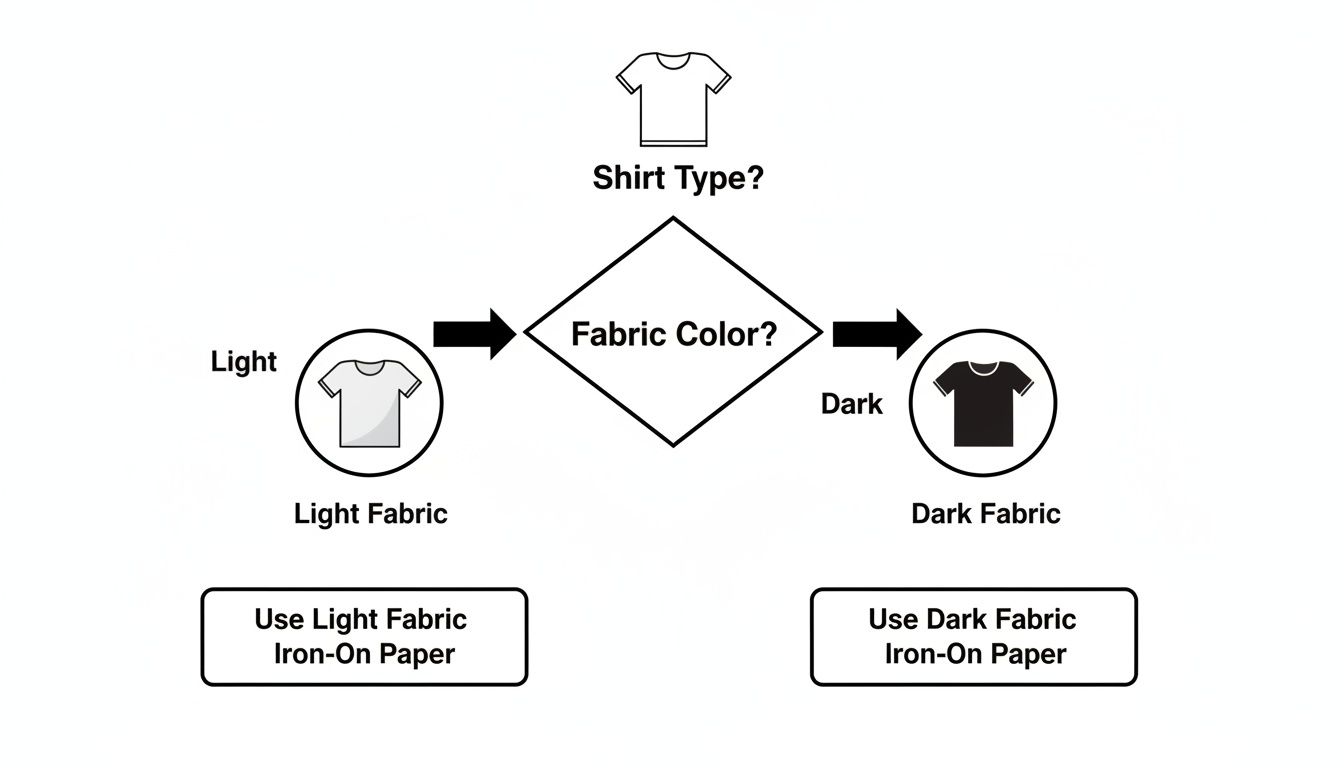
As you can see, it all comes back to that initial fabric color. Get that right, and you're well on your way.
To make things even easier, here's a quick cheat sheet.
Transfer Paper Selection at a Glance
This table breaks down the essentials to help you grab the right paper for your specific printer and project.
| Paper Type | Best For | Appearance on Fabric | Printer Compatibility |
|---|---|---|---|
| Light Fabric Transfer | White, beige, pastels, and light-colored ash | Transparent background; fabric color shows through | Inkjet or Laser |
| Dark Fabric Transfer | Black, navy, forest green, deep reds, etc. | Opaque white background makes colors pop; feels thicker | Inkjet or Laser |
Remember to always buy the paper that matches your printer type to avoid any issues.
Inkjet vs. Laser Compatibility
After you've sorted out the light vs. dark decision, you need to match the paper to your printer. This is another crucial detail because inkjet and laser printers work in fundamentally different ways, and their transfer papers are formulated specifically for one or the other. They are not interchangeable.
- Inkjet Paper: This is what most home crafters use. It's made to absorb the liquid ink sprayed by an inkjet printer and is fantastic for printing detailed photos and designs with lots of color gradients.
- Laser Paper: This type is built to work with the dry toner and high heat of a laser printer. The toner powder melts and fuses to the paper's surface, resulting in incredibly crisp lines and solid, bold graphics. It's a great choice for logos or text-heavy designs.
Trying to use inkjet paper in a laser printer (or vice versa) will, at best, give you a smudged, unusable transfer. At worst, it can melt inside your machine and cause some serious damage.
Once you get comfortable with the basics, you might even explore the world of professional heat transfer paper printing for even more options and durability. But for now, just matching the paper to your fabric and printer puts you on the path to a great-looking custom creation.
Getting Your Artwork and Printer Ready for Flawless Results
A professional-looking transfer doesn't start with the iron. It starts on your computer. The quality of your digital artwork and how you set up your printer are the real secret ingredients. Skipping these steps is a fast track to getting a blurry, pixelated, or even backward design on your favorite shirt.
The single most important thing to get right is resolution. For printable iron-on transfer paper, you absolutely need to be working at 300 DPI (dots per inch) at the final size you intend to print. An image that looks perfectly fine on your screen can turn into a fuzzy, blocky mess when it comes out of the printer. It's like the difference between a high-definition photo and a zoomed-in screenshot—the detail just isn't there.
Choosing the Right Artwork File
The type of file you use makes a huge difference, too. Let's break down the common options:
- Raster Images (JPG, PNG): These are your go-to for photos and detailed, colorful illustrations. If your design has a custom shape and isn't just a rectangle, a PNG with a transparent background is your best friend. This is how you avoid printing that ugly white box around your artwork.
- Vector Images (SVG, AI, EPS): Got a logo, some text, or a graphic with clean, sharp lines? Vector is the way to go. These files are built on math, not pixels, so you can scale them up or down to any size without losing a drop of quality. The edges will always be perfectly crisp.
One of the most common—and frustrating—mistakes is forgetting to mirror the design. When you're working with paper for light-colored fabrics, you place the printed image face-down on the shirt. That means you have to flip the artwork horizontally before you print. If you don't, everything will be backward when you iron it on. Look for a "mirror image" or "flip horizontal" checkbox in your design software or printer settings.
Pro Tip: I can't stress this enough: always, always double-check that your design is mirrored before you hit that print button. It’s one click that can save you an expensive sheet of transfer paper and a perfectly good t-shirt.
Fine-Tuning Your Printer Settings
Okay, your artwork is perfect. Now let's get your printer on the same page. Hitting "print" with the default settings is a recipe for disappointment. You need to tell your printer this isn't just another document—it's a high-quality project.
First, run a quick nozzle check and, if you see any gaps or lines, do a print head cleaning. This simple bit of maintenance is your best defense against streaks ruining your transfer. When you're actually ready to print, dig into your printer’s advanced settings. For a deeper dive, you can learn more about how to print on transfer paper in our detailed guide.
In the printer dialogue box, be on the lookout for these settings:
- Paper Type: Don't leave it on "Plain Paper." Change it to something like "T-Shirt Transfer," "Photo Paper Glossy," or "Matte Paper." This tells the printer to use more ink for a richer, more vibrant print.
- Print Quality: Crank it up. Always choose the highest possible setting, which might be called "High," "Best," or "Photo Quality."
- Speed: If you see an option for "High Speed Printing," turn it off. A slower, more deliberate print pass lays down ink more accurately, giving you a much better-looking final result.
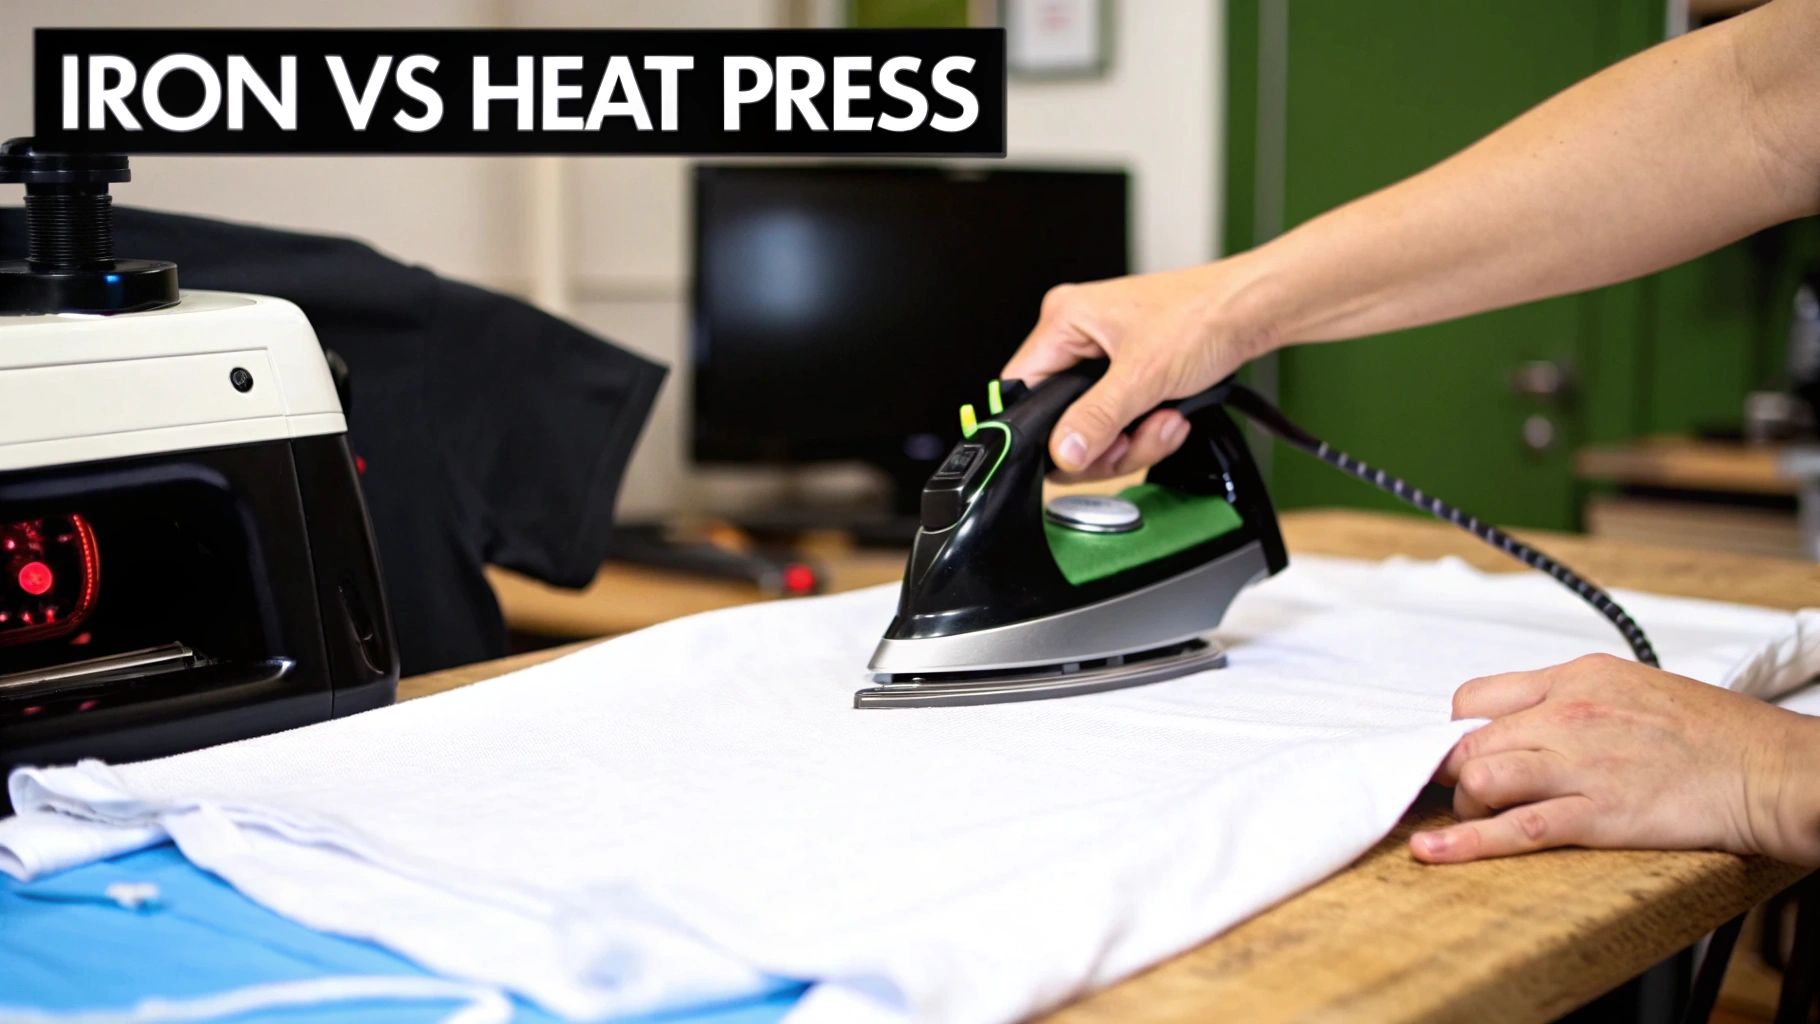
The Art of Application: Iron vs. Heat Press
This is the moment of truth—where your digital design becomes wearable art. How you apply the transfer is just as important as how you printed it, and your choice between a household iron and a dedicated heat press will make all the difference in the final look, feel, and durability of your custom apparel.
The DIY boom has turned tools like printable iron-on transfer paper into a must-have for creators. It's not just a niche hobby, either. The global iron-on transfer sheet market hit a massive USD 1.21 billion in 2024 and is projected to climb to USD 2.19 billion by 2033. That's a whole lot of people successfully making custom gear right from their homes.
Using a Household Iron: The Accessible Approach
Let's start with what most people have on hand: a regular household iron. You can absolutely get great results this way, but you have to be meticulous. The number one rule? Ditch the ironing board. That soft, padded surface is your enemy here; it's designed to give way, which prevents the firm, even pressure your transfer desperately needs.
Instead, find a hard, flat, and heat-resistant surface. A sturdy table or a countertop (protected with a Teflon sheet or a pillowcase) works perfectly. When you press, really lean into it. Use your body weight to apply consistent, heavy pressure. Keep the iron moving slowly across the entire design for the full time recommended by the paper's manufacturer—we're usually talking a few minutes here, so be patient.
Pay special attention to the edges and corners. From my experience, these are always the first spots to lift or peel if they don't get enough heat and pressure.
Using a Heat Press: The Professional Standard
If you're planning to make more than a handful of shirts or you're aiming for that professional, "store-bought" finish, a heat press is a game-changer. It's a worthy investment. Its biggest advantage is its ability to deliver precise and evenly distributed temperature, time, and pressure—the holy trinity of a perfect transfer. This completely removes the guesswork and inconsistency that comes with using an iron.
Key Insight: A heat press applies consistent heat and pressure across the entire design all at once. This ensures every bit of the transfer bonds deeply with the fabric fibers, creating a finish that’s far more durable and wash-resistant than what an iron can achieve.
With a heat press, the process is simple. You dial in the exact temperature and time for your specific printable iron-on transfer paper, lock it down, and wait for the timer to beep. The result is a flawless, long-lasting bond every single time. For more tips on nailing the application, check out our guide on how to iron on transfers.
Understanding Hot Peel vs. Cold Peel
One last crucial detail: when you peel the backing paper off. This simple step has a huge impact on the final texture, and it all depends on the type of paper you bought.
-
Hot Peel: This means you peel the backing away immediately after pressing, while everything is still piping hot. This technique usually leaves the design with a softer, more flexible finish that feels like it’s part of the fabric.
-
Cold Peel: Just as it sounds, you have to let the transfer cool down completely before you even think about peeling. If you rush this, you'll ruin the design. Cold peel transfers often have a slightly thicker, glossier, or more vinyl-like feel.
Always, always follow the instructions that came with your paper. The manufacturer has figured out the best method for their product. Getting the peel right is the final touch that separates a good project from a great one.
Troubleshooting Common Iron-On Transfer Problems
Even when you follow all the steps, things can still go sideways. It happens to everyone. But don't toss that shirt in frustration just yet! Most issues with printable iron-on paper are surprisingly common and totally fixable. Think of these hiccups as part of the learning curve; figuring this out will make your next project that much better.
Let's walk through some of the most frequent frustrations and get them sorted out.
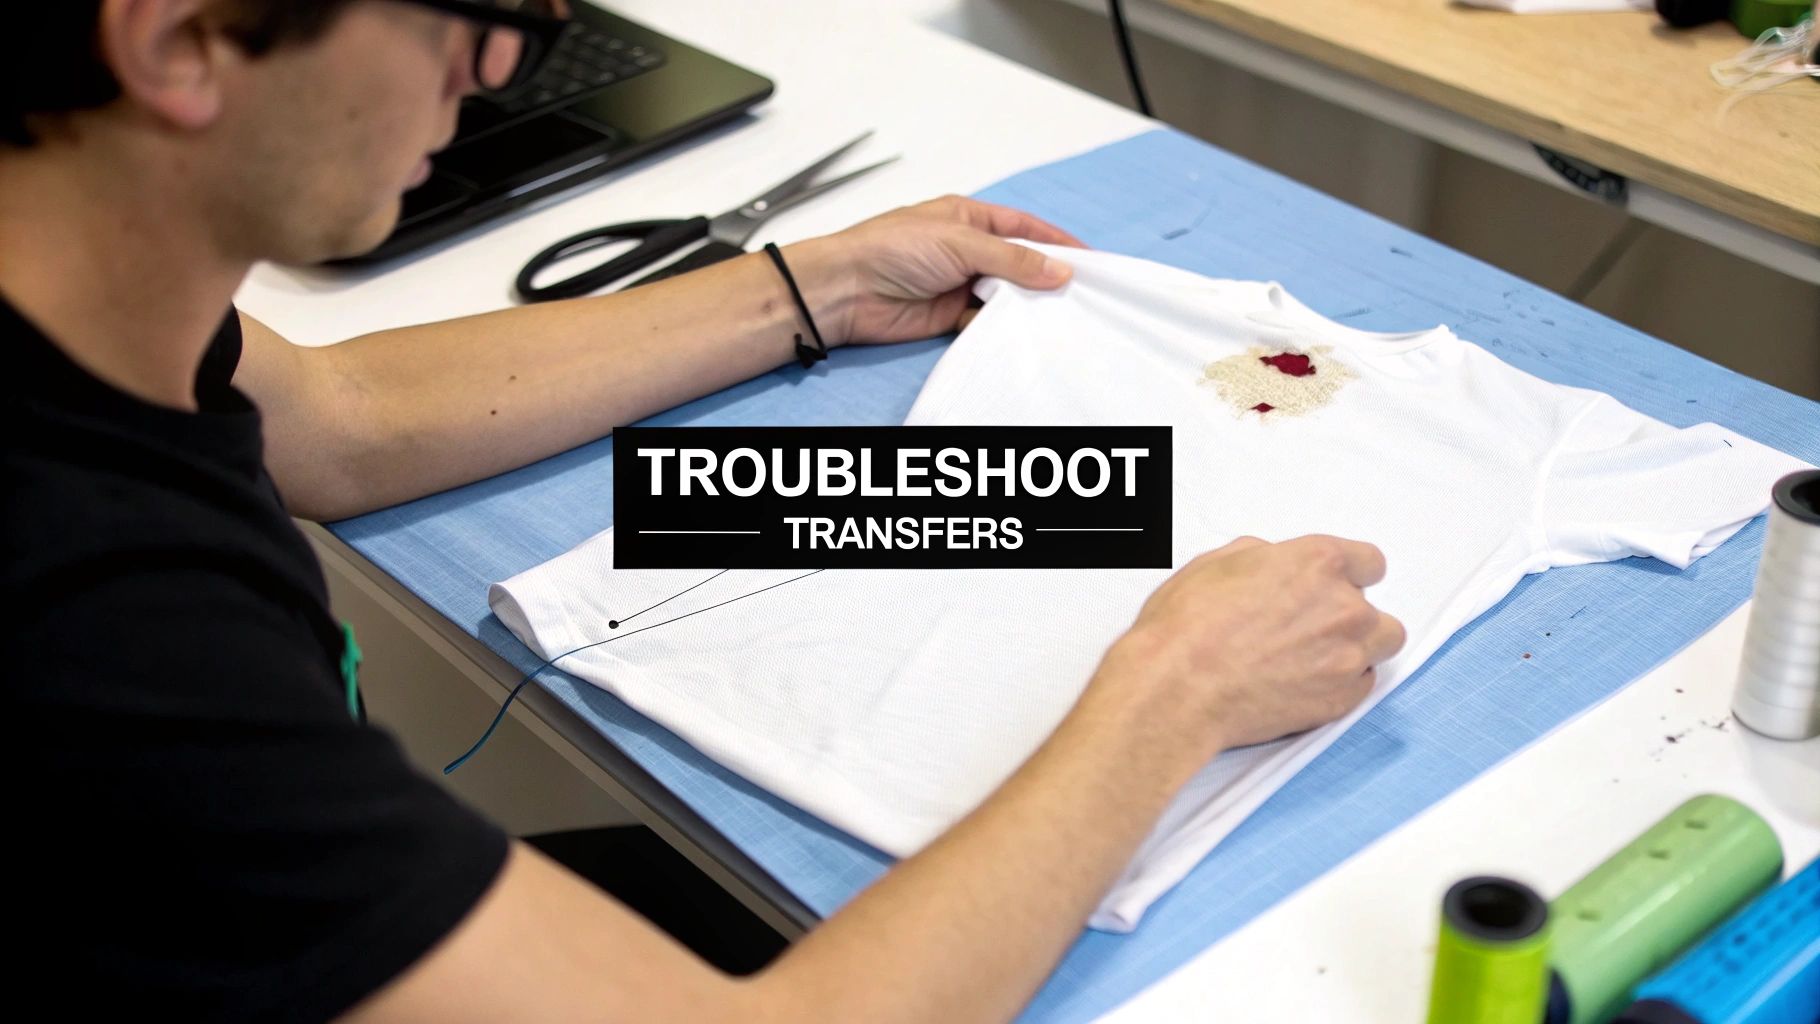
It’s a real heartbreaker: your design looks amazing, but it cracks or starts peeling away after the very first wash. This is almost always a sign that the transfer didn't fully fuse with the fabric. The two usual suspects? Not enough heat or not enough pressure.
A classic mistake is using a standard ironing board. That soft, padded surface is great for clothes, but it kills your transfer by absorbing all the downward pressure you're trying to apply. Always press on a solid, heat-resistant surface—a countertop with a thin towel on it works great. This gives you the solid foundation you need to bear down and get a strong, even bond.
Fixing Faded or Dull Colors
Ever have a design that looks punchy and vibrant on your computer screen but comes out looking washed-out and dull on the shirt? The problem here usually happens long before the heat press or iron even gets plugged in. This almost always comes down to your printer settings or ink levels.
First thing’s first: do a quick check on your printer’s ink cartridges. If one color is running low, it can throw off the entire print. If your ink levels are good, it's time to dive into your printer settings.
- Print Quality: Never use the default "Standard" setting. It's designed to save ink, which is the opposite of what you want. Always crank it up to the highest quality option, usually labeled "Best," "Photo," or "High."
- Paper Type: Tell your printer it's working with special material. Selecting a "Photo" or "Matte" paper type in the print menu signals the printer to lay down more ink, which is key for getting rich, saturated colors on your transfer.
Tweaking these settings makes a world of difference. Your colors will pop, and the final result will look so much more professional.
Expert Tip: Before you sacrifice a sheet of that pricey transfer paper, run a test print on plain old printer paper using your high-quality settings. It’s a simple, fast way to confirm your colors look right and the printer is behaving, potentially saving you a lot of grief.
Improving a Stiff or Thick Feel
Sometimes, a finished transfer can feel a bit stiff, almost like a plastic patch on the shirt. This is most common with transfers for dark fabrics, which have an opaque white layer to make the colors visible. While you can't eliminate it entirely, you can definitely minimize it.
The best trick is to be meticulous with your trimming. Whether you’re using scissors or a cutting machine like a Cricut, get as close to the edge of your actual design as possible. Every bit of unprinted film you trim away reduces that stiff feeling and gives the shirt a much softer, more natural "hand."
It's also worth experimenting with different brands. Some offer "soft stretch" papers engineered specifically to feel less rigid and move better with the fabric. Finding the right paper can be a game-changer for the overall feel of your custom apparel.
How to Care for Your Custom Apparel
So you've just made an awesome custom shirt with iron-on transfer paper. High five! Now, how do you keep it from turning into a cracked, peeling mess after the first wash? The secret is all in the aftercare.
Getting this part right is what separates a shirt that looks great for years from one that’s a faded memory after a few laundry cycles.
First thing's first: patience. Don't you dare throw that shirt in the wash right away. You need to wait at least 24 hours after pressing it. This lets the adhesive fully cure and really grab onto the fabric fibers. It's the most important step for making your design last.
Your Essential Laundry Routine
When it is finally time to wash your creation, just remember that heat is the enemy. Your entire laundry strategy should revolve around keeping things cool.
Always, and I mean always, turn the garment inside out before washing. This simple trick shields the design from the rubbing and tumbling that happens in the machine, which is a major cause of wear and tear.
Follow these simple rules, and you'll be golden:
- Go cold: Wash on a gentle or delicate cycle using only cold water.
- Mild detergent only: Steer clear of bleach and fabric softeners. Those chemicals are way too harsh and will break down the transfer's adhesive and dull the colors.
- Air dry is best: If you can, hang it up to dry. If you're in a hurry, you can tumble dry on the absolute lowest heat setting, but air drying will always give you the best longevity.
Key Takeaway: Basically, treat your custom shirt like you would your favorite, most delicate piece of clothing. A little bit of gentle care goes a very long way.
Ironing and Storing Your Garment
Wrinkles happen. If you need to iron the shirt, just follow one golden rule: never place a hot iron directly on the transfer. You’ll melt it into a gooey mess. Flip the garment inside out and iron the back, or if you must iron the front, put a thin piece of cloth over the design first.
It’s no surprise that getting crafty like this is catching on. The global heat transfer paper market was actually valued at USD 656.62 million in 2024 and is expected to keep growing. If you're interested in the numbers, you can dive into this comprehensive market analysis.
When you're putting it away, try not to fold the shirt right across the design. Over time, that can create a permanent crease or crack. Follow these simple tips, and your custom apparel will stay looking just as vibrant as the day you made it.
When to Upgrade to Professional DTF Transfers
Printable iron-on transfer paper is a fantastic starting point for custom apparel, perfect for one-off projects and fun hobbyist creations. But eventually, you might hit a wall where your creative vision outgrows what the paper can deliver. Knowing when you've reached that point is the key to taking your projects from a fun DIY to professional-quality gear.
If you find yourself needing more durability or dreading the thought of another huge batch of shirts, it’s probably time to look at Direct-to-Film (DTF) transfers.
This isn't just about chasing a higher quality print; it's about being more efficient and opening up new creative possibilities. The custom apparel world is booming—the global transfer paper market is expected to hit USD 5.8 billion by 2035, which shows just how much demand there is. You can see more on this trend by exploring insights on the transfer paper industry. This growth means professional tech like DTF is easier to access than ever, creating a clear path for anyone looking to scale up.
Signs You Have Outgrown Iron-On Paper
So, how do you know you're ready to make the jump? Some projects just scream for the superior quality of DTF. If you’re thinking about launching a small clothing brand, for example, durability and a consistent look are everything. Your customers will expect a shirt that holds up through dozens of washes without the design cracking or fading away—and that's exactly where DTF shines.
Think about these common situations:
- Bulk Orders: Trying to make 50 shirts for a family reunion or a local team with a home iron is a huge amount of work. With DTF, you order ready-to-go transfers that press in seconds. This saves an incredible amount of time and guarantees every single shirt is perfect.
- Complex Designs: Artwork with tiny text, super fine lines, or lots of separate, floating pieces can be a nightmare to weed and apply with iron-on. DTF transfers come as a single, ready-to-press sheet, keeping every last detail intact. No weeding required.
- Fabric Variety: Iron-on paper really prefers cotton or poly-cotton blends. What if you want to print on 100% polyester athletic wear, nylon jackets, or even leather? DTF is far more versatile and sticks beautifully to a much wider range of materials.
Key Insight: The biggest game-changer is the feel and performance. DTF transfers have amazing stretch, so they move with the fabric instead of feeling like a stiff patch on top. This gives them a much softer feel and makes them incredibly resistant to cracking, which is a must for anything from fitted t-shirts to activewear.
Using a service like Raccoon Transfers gives you access to this pro-level technology without having to buy thousands of dollars worth of equipment. You get brilliant, full-color prints with incredible durability, freeing you up to focus on the fun part: designing and creating.
Want to learn more? Check out our guide on the benefits of using custom DTF transfers for your next big idea.
Got Questions About Iron On Paper? We’ve Got Answers.
Even after following the steps perfectly, you might still have a few lingering questions. That's completely normal. Let’s walk through some of the most common issues people run into when working with printable iron-on transfers.
Can I Really Use This on Any Shirt?
Not quite. Iron-on paper absolutely loves 100% cotton and does really well on most cotton/poly blends. These fabrics can handle the heat and create a strong bond.
However, you'll want to steer clear of heat-sensitive materials like 100% polyester or nylon. The high heat needed for the transfer can easily damage, or even melt, these synthetic fabrics. When in doubt, always read your paper's instructions and test a tiny, hidden spot first.
Help! My Design Cracked After the First Wash. What Went Wrong?
This is, without a doubt, the number one problem people face. The cause is almost always the same: not enough heat or pressure. In fact, I'd say this accounts for 99% of cracking issues.
Your standard padded ironing board is the main culprit—it’s designed to be soft, which means it absorbs all the downward pressure you're trying to apply. The transfer's adhesive never gets a chance to properly melt and fuse into the fabric fibers. The fix? Always press on a solid, heat-resistant surface (like a wooden table with a pillowcase on it) and lean into it with firm, even pressure.
A Pro Tip From Experience: If you find yourself consistently fighting with cracked designs, it's a sign that you need more consistent heat and pressure than an iron can provide. A heat press is the game-changer here, delivering perfect results that stand up to the washing machine.
Do I Always Need to Mirror My Image?
This is a crucial step that depends entirely on the type of paper you're using.
-
For light-colored fabrics: Yes, you absolutely must mirror your image. You apply these transfers face-down, so flipping the design beforehand is the only way it will read correctly on the shirt.
-
For dark fabrics: No mirroring needed! This paper has an opaque white background, and you apply it face-up (like a sticker), so what you see is what you get.
Tired of the iron-on guesswork and ready for professional results that last? If you want vibrant, durable designs on virtually any fabric, it might be time to see what a real DTF transfer can do.
Check out the difference with Raccoon Transfers. For custom apparel that feels soft and holds up wash after wash, build your custom DTF transfer sheet today.