
A Practical Guide to Screen Printing for Artists
Screen printing is an incredibly rewarding, hands-on way for artists to bring their designs to life on surfaces like fabric, paper, or even wood. At its core, you're using a mesh screen, a squeegee, and ink to create multiple, identical copies of your original work. It’s perfect for running a series of art prints, creating custom apparel, or getting that band merch out the door.
What I love about it is the unique blend of creative control and reproducibility it offers. There's nothing quite like pulling that first perfect print.
Building Your Artist Print Studio
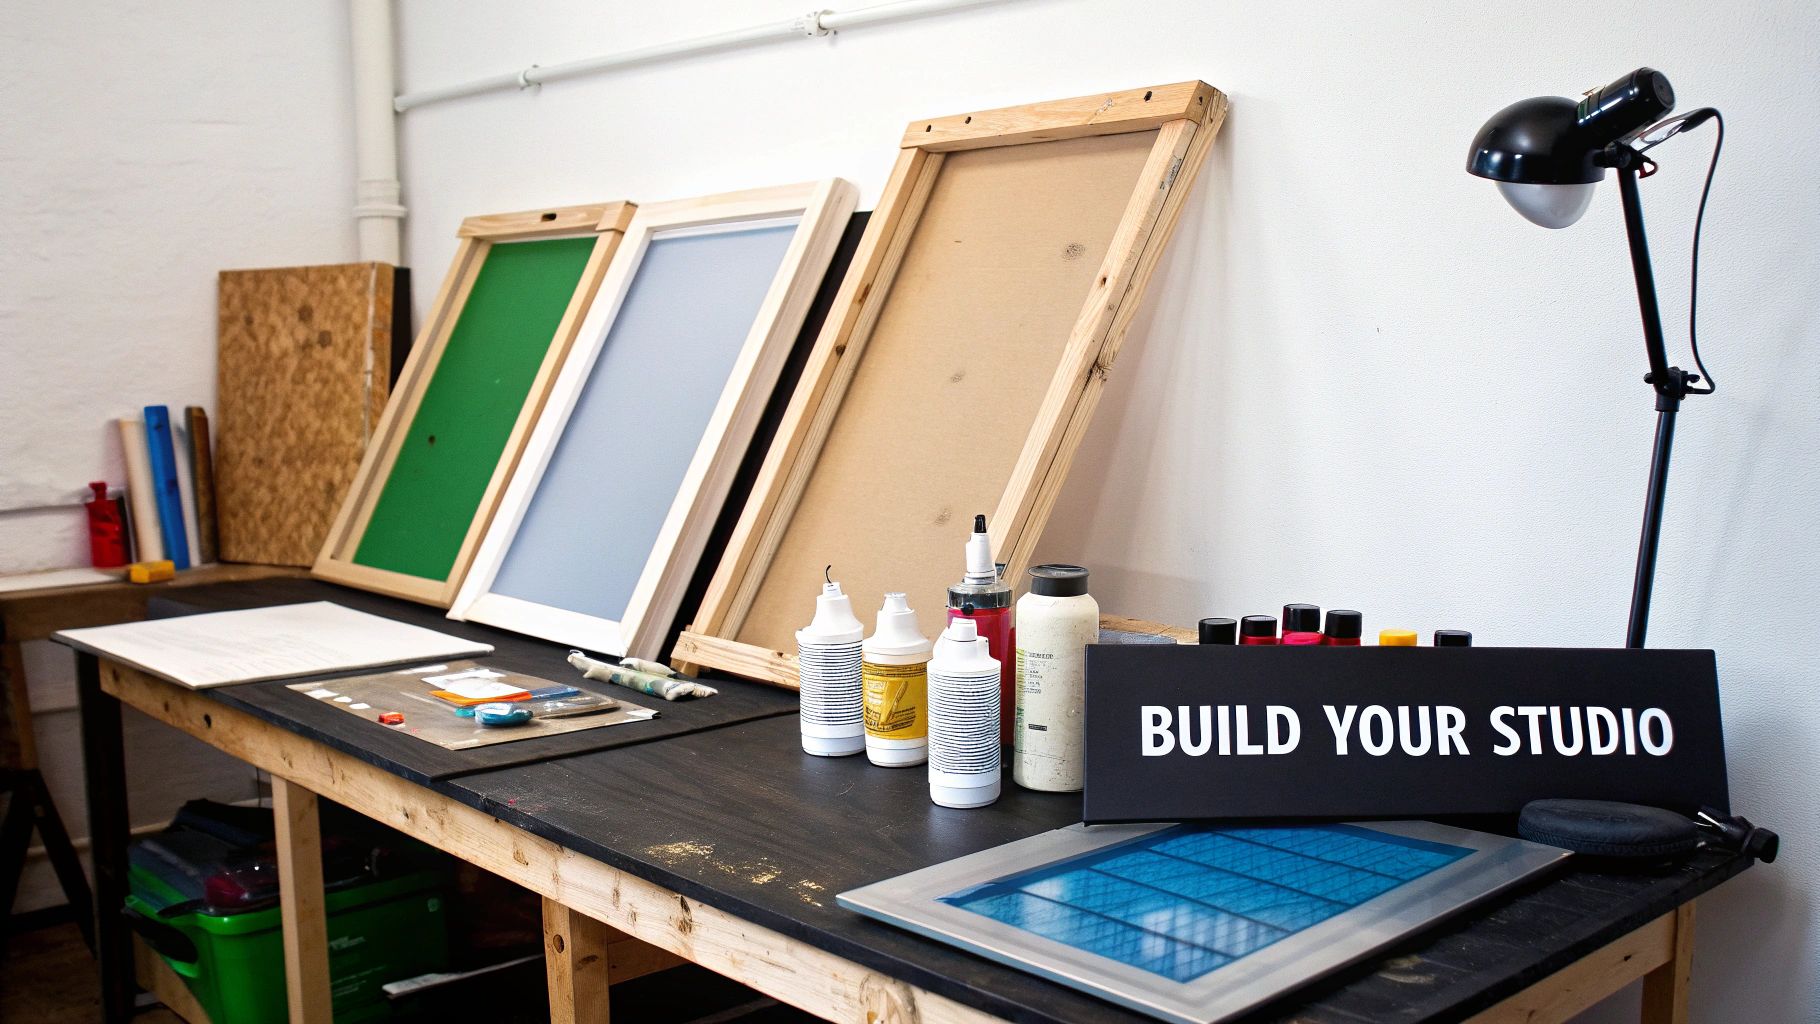
Alright, before you can start slinging ink, you've got to get your workspace set up. Building a home studio doesn't have to break the bank, but a little smart planning now will save you a ton of headaches later. Think of it as investing in your art—good tools lead to good results.
It's a great time to be getting into this craft. The global screen printing market is booming and is projected to hit $15,151.59 million by 2032. That explosion is fueled by people wanting the exact kind of unique, artist-driven products you can create.
Your setup can be as simple or as decked-out as you want, but some pieces of gear are absolutely essential. The main goal is to create a space that flows, letting you move from coating screens to printing to curing without any friction.
Here's a breakdown of the essentials to help you get started.
Your Essential Screen Printing Starter Kit
| Item | Beginner Recommendation | Function | Budget Estimate (Low-High) |
|---|---|---|---|
| Screens (Frames) | Aluminum (20"x24") | Holds the tensioned mesh that becomes your stencil. | $25 - $50 per screen |
| Mesh Count | 110-160 for fabric, 230 for paper | The thread count of the mesh; determines ink flow and detail. | (Included with screen) |
| Squeegee | 70 durometer, sharp edge | The tool used to push ink through the screen's stencil. | $20 - $40 |
| Emulsion | Pre-sensitized (photopolymer) | A light-sensitive liquid used to create the stencil on the screen. | $30 - $60 per quart |
| Scoop Coater | Sized for your screens | Provides a smooth, even coat of emulsion on your screen. | $15 - $30 |
| Exposure Unit | DIY 500W Halogen Work Light | A UV light source that "burns" your design into the emulsion. | $30 - $500+ |
| Ink | Water-based for paper/fabric, Plastisol for apparel | The pigment that creates the final print. | $20 - $70 per quart |
| Curing Tool | Heat gun or heat press | Dries and permanently sets the ink, especially plastisol. | $30 - $350+ |
This list covers the non-negotiables. You can always upgrade pieces later, but these items will get you printing high-quality work right from the start.
Diving Deeper: Core Equipment Choices
The heart of any print shop really comes down to four things: your screens, squeegee, emulsion, and exposure setup. Getting these right is half the battle.
-
Screens (Frames): You'll see both wood and aluminum frames out there. Wood is cheaper, which is tempting, but it can warp over time from getting wet during cleanup. Aluminum frames are a much better long-term investment. They stay perfectly flat and hold mesh tension way longer, which is critical for consistent prints.
-
Mesh Count: This is simply the number of threads per inch in the screen's mesh. It's a crucial detail! A lower number like 110 has wider openings, letting more ink through—perfect for bold graphics on t-shirts. For finer details, like you’d want on a paper poster, you’ll need a higher mesh count, something like 230 or more.
-
Squeegee: This is your primary printing tool. The key here is the durometer, or the hardness of the rubber blade. A softer 60-70 durometer blade lays down a thicker layer of ink, while a harder 80+ durometer blade is better for capturing crisp, fine lines. If you’re just starting, a 70 durometer squeegee is a fantastic all-rounder.
A common mistake is grabbing the cheapest squeegee you can find. A blade with nicks or an uneven edge will absolutely ruin your prints with ugly streaks. Seriously, a quality squeegee with a sharp, clean edge is one of the best small investments you can make.
Lighting, Curing, and Finishing the Job
Getting the ink on the substrate is the fun part, but your job isn't done yet. You have to properly cure the ink to make the print permanent, especially if you're working with plastisol inks on textiles.
For t-shirts and other apparel, a heat press is a game-changer for getting a consistent, professional cure. If that's not in the budget yet, a heat gun can work in a pinch, but it requires a bit more practice.
Your exposure unit is another area with options. You can buy a professional unit for fast, perfect results, but a simple DIY setup using a powerful 500-watt halogen work light from a hardware store works surprisingly well when you're starting out. The trick is consistency—find a system that gives you a reliable light source and then dial in your exposure times through testing.
Turning Your Artwork Into a Print-Ready Design
The best artwork in the world can turn into a frustrating mess on the press if it isn't prepped correctly for screen printing. Think of your digital file or drawing as the blueprint for your final print. Getting this step right is absolutely crucial for a clean, professional result.
The whole goal here is to create something called a film positive. This is simply your design printed in a completely opaque, solid black ink onto a transparent sheet.
This film positive is your light-blocker. When you "burn" a screen, the clear parts of the film let UV light hit the emulsion, hardening it. The black parts of your design block that light, leaving the emulsion underneath soft and unexposed. When you wash out the screen, that soft emulsion rinses away, creating the stencil your ink will pass through.
Making Your Artwork Opaque and High-Contrast
Subtlety is the enemy when making a film positive. Your design needs to be 100% solid black. No grays, no soft edges, no gradients.
Even a dark gray that looks black on your monitor can let a tiny bit of UV light sneak through. This leads to an under-exposed, weak stencil that will fall apart and ruin your prints. It's a classic rookie mistake.
If you’re working in a program like Procreate or Photoshop, start with a canvas set to at least 300 DPI and use a pure black color (Hex #000000). Before you print the film, make sure the entire design is converted to solid, aliased (hard-edged) shapes.
My advice? Don't be afraid to vectorize your artwork in a program like Adobe Illustrator. Turning your pixel-based art into clean vector shapes is the surest way to get perfectly sharp edges, which translates directly to incredibly crisp prints.
Handling Gradients and Photographic Images
So, what do you do if your design needs gradients or is a photograph? You can't print shades of gray directly, but you can fake it using a technique called halftones.
This process converts those smooth tones into a pattern of tiny black dots. Up close, you see the dots. From a distance, our eyes blend them together, and we perceive a full range of tones.
- Dot Size: Bigger dots create the illusion of darker areas, while smaller dots create lighter ones.
- LPI (Lines Per Inch): This setting controls how fine the dot pattern is. For beginners, a lower LPI like 25-35 is much more forgiving to expose and print. It creates a more visible, sometimes stylized dot pattern. A higher LPI (45-55) gives a smoother look but demands much more precision in your setup.
As you get the technical side down, remember that great graphic design for branding principles still apply. Think about how the design will look on the final product. For guidance on that, check out our popular post on finding the right graphic size for t-shirts.
Trust me, taking the time to nail this digital prep stage is the secret to flawlessly translating your vision from the screen to the shirt.
Coating and Exposing Your Screen Like a Pro
This is where the real magic begins—turning that digital file on your computer into a physical, ink-ready stencil. It's a two-part dance: coating the screen with light-sensitive emulsion and then "burning" your artwork into it with UV light. Nailing this process is the difference between a sharp, professional-looking print and a smudged, blurry headache.
First things first, you need a completely dark space. I’m not talking about just drawing the blinds; you need a room with zero UV light. A windowless bathroom, a sealed-off corner of a basement, or a closet can work just fine. Sunlight is an absolute no-go, and even standard fluorescent lights can start to expose your emulsion before you’re ready. A simple yellow or red bug light from the hardware store works as a perfect "safelight" that won't harm the emulsion.
Applying a Perfect Coat of Emulsion
Your mission here is to get a thin, glass-smooth layer of emulsion onto both sides of your screen's mesh. The right tool for the job is a scoop coater, and it's non-negotiable if you want even results. One of the most common rookie mistakes I see is laying the emulsion on way too thick. This not only makes your drying and exposure times skyrocket but can also clog up the fine details in your design, preventing them from washing out cleanly.
To get it right, stand the screen up vertically. Start at the bottom, press the sharp edge of the scoop coater firmly against the mesh, and tilt it just enough for the emulsion to flow and make contact. Then, in one single, steady motion, pull it all the way to the top. Flip the screen over and do the exact same thing on the other side. You're aiming for a single, confident pass on each side—no stopping and starting. The result should be a glistening, uniform green coat.
A perfectly coated screen feels completely smooth to the touch once it's dry. If you can feel drips, bumps, or thick patches, those imperfections will absolutely show up in your final print.
Now, let that screen dry completely in your darkroom, with the print-side (the "shirt side") facing down. This can take anywhere from an hour to several hours, depending on the humidity. You can use a fan to speed things up, but make sure it’s just circulating air and not blowing dust all over your sticky screen. Don't rush this part. A screen that feels "mostly dry" is still wet, and any moisture left in the emulsion will ruin your exposure.
Exposing and Washing Out Your Stencil
Once the screen is bone-dry, it's showtime. Take your film positive and place it on the glass of your exposure unit. Make sure the image is mirrored—any text should read backward. Now, gently lay your screen on top, print-side down, so the mesh is touching the film. The crucial concept here is positive contact. That film needs to be pressed flat and tight against the mesh everywhere, with no gaps.
The diagram below breaks down how your digital artwork gets translated into a physical stencil, ready to print.
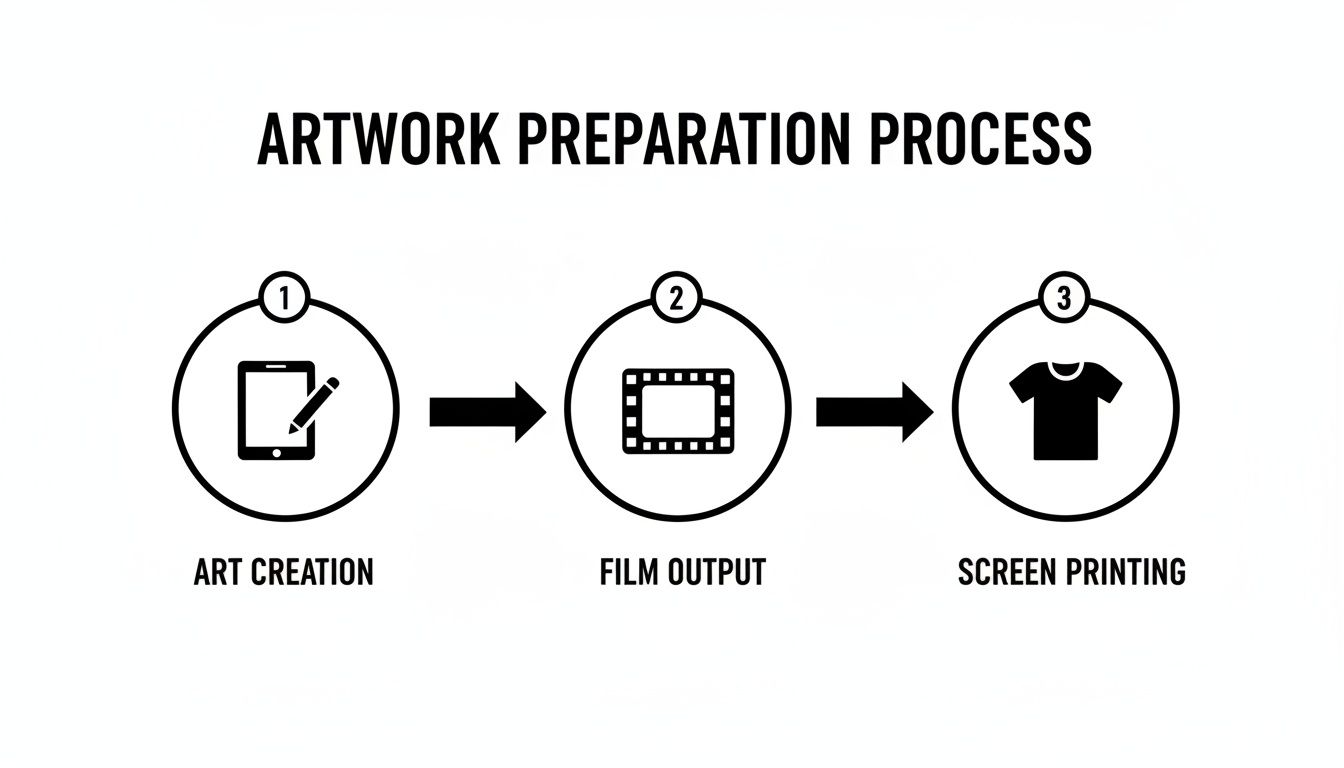
This simple workflow—from digital file to printed transparency—is the backbone of creating a quality stencil.
Your exposure time is the single most important variable to get right. It depends entirely on your light source and the specific emulsion you're using. A professional vacuum-sealed unit might only need 30 seconds, while a simple DIY setup with a 500-watt bulb could take 10-15 minutes. You have to do an exposure test with a step-wedge calculator to dial in your time. It’s the only way to know for sure.
After the timer goes off, take the screen to your washout sink. Get both sides of the screen wet with a gentle spray of water. You should quickly see a faint, slimy "ghost image" of your design appear. Let the water soak in for about 60 seconds. Then, start washing out the design area with a gentle but firm spray. If your exposure was spot-on, the unexposed emulsion in your design will melt away easily, leaving you with a sharp, clean stencil, ready for ink.
Getting a Feel for Your Squeegee and Ink
You’ve got a perfectly exposed screen—now for the fun part. Pulling the print is where the magic happens, and your technique with the squeegee and ink will make or break the final piece. It's all about physical control and making the right choices for your project.
First up, you need to decide on your ink. This is a foundational choice, as the two main options—plastisol and water-based—behave very differently.
-
Plastisol Ink: Think of this as the workhorse of t-shirt printing. It’s a plastic-based ink that’s incredibly forgiving because it won’t dry in your screen. This gives you all the time in the world to get things right. It’s also super opaque, so you get brilliant, punchy colors even on dark fabrics. The trade-off? It sits on top of the fabric and needs a good blast of heat (around 320°F) to cure properly.
-
Water-Based Ink: This ink is the go-to for a softer feel. It actually soaks into the fabric fibers, which is why it’s a favorite for fine art prints on paper or premium clothing. The catch is that it starts to air-dry almost immediately. You have to work fast and keep your screen flooded to avoid the ink clogging up your design mid-run.
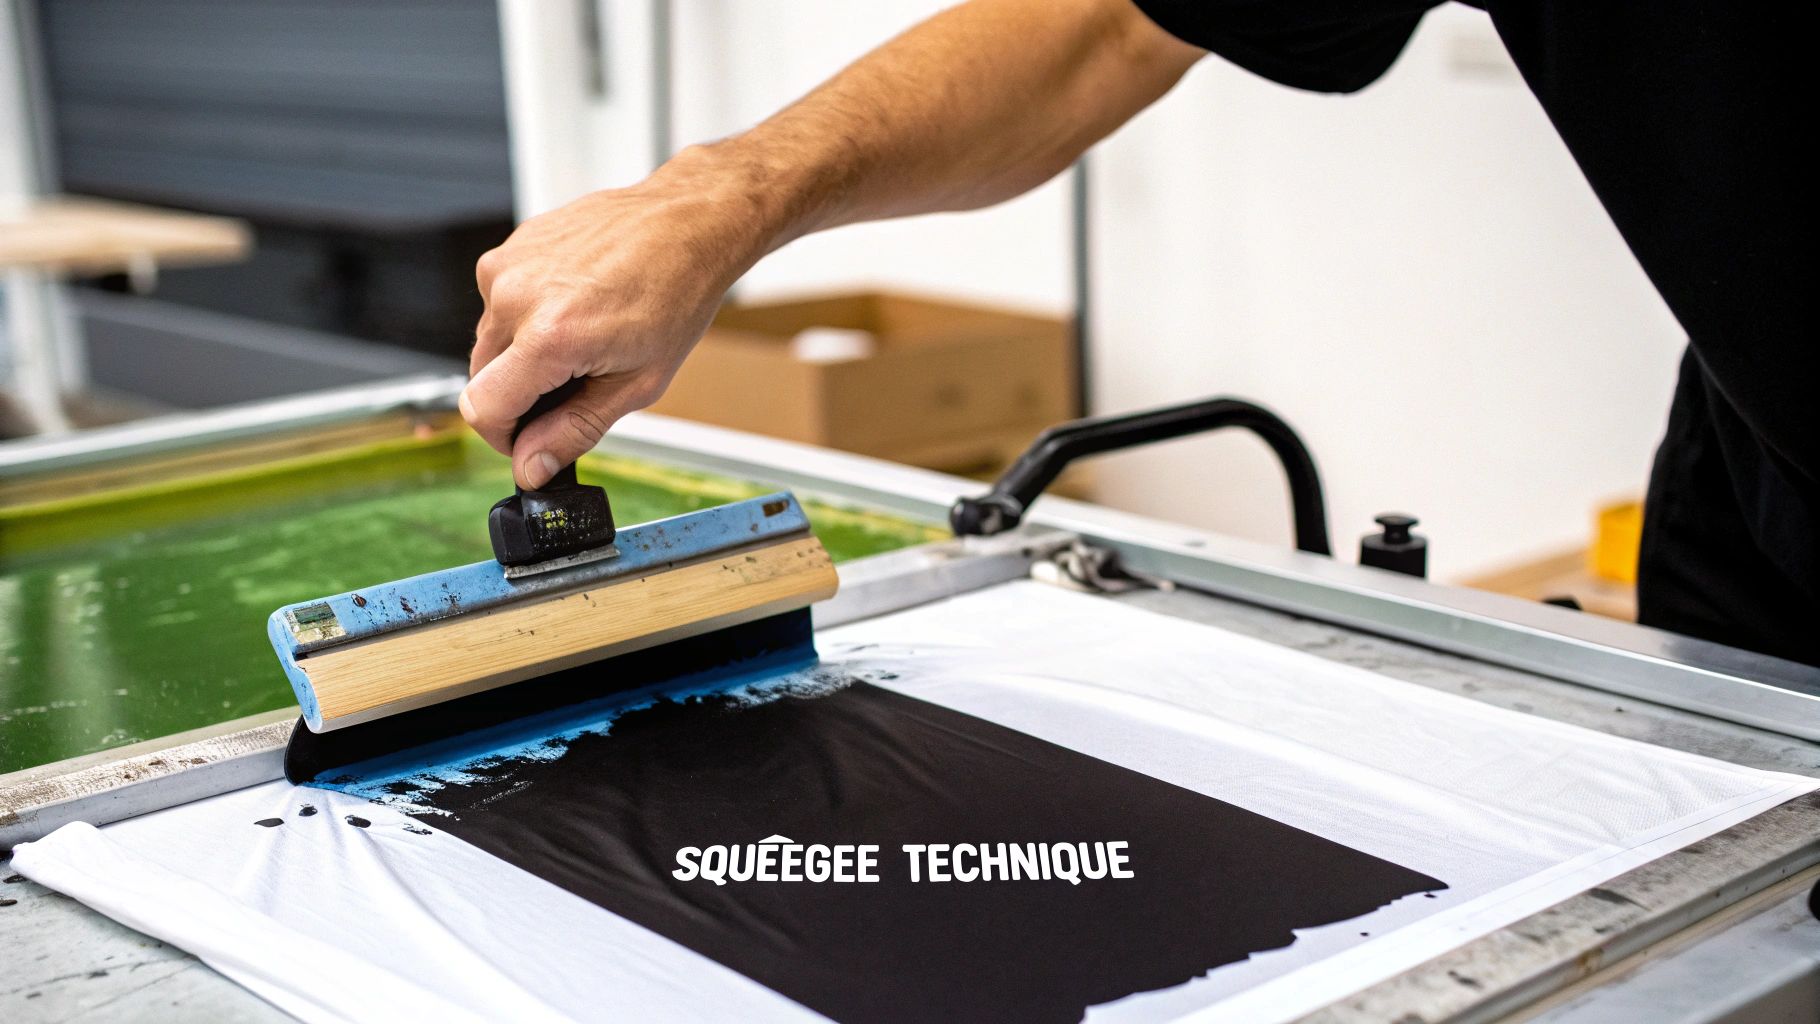
The Art of the Squeegee Pull
Your squeegee is the tool that translates your design from the screen to the substrate. The angle, pressure, and speed you use are everything. Getting this motion down is what separates a blurry mess from a sharp, professional-looking print.
Before you make the actual print stroke, you’ll want to "flood" the screen. This is just a light pass with the squeegee held at a high angle, gently filling the open mesh with ink. You’re not trying to push it through yet—just loading the stencil.
Now for the real deal. Grab the squeegee firmly with both hands and hold it at about a 75-degree angle to the screen. Apply even, solid pressure and pull it towards you in one fluid motion. You’re not just mashing ink through the mesh; you're using the sharp edge of the blade to shear it cleanly.
A huge tip I learned early on: stop thinking about pushing the ink through the screen. Instead, picture the squeegee slicing the ink off the top of the mesh. This mental shift makes a world of difference for achieving crisp, clean lines.
Setting the Stage for a Perfect Print
A couple of small setup details are crucial. You absolutely need a small gap between the screen and your printing surface, which we call off-contact. This allows the mesh to snap cleanly away from the substrate right after the squeegee passes, preventing smudges and blurs. An easy DIY trick is to tape a few coins under the corners of your screen frame.
Screen printing works on almost anything, but fabric is its true home. Textiles account for a whopping 56.12% of the screen printing services market, from band tees to designer textiles. Knowing these core techniques is essential if you want to create work for this massive audience.
If your artwork has more than one color, precise registration is non-negotiable. This is simply the process of lining up each layer perfectly. You’ll want to include registration marks (little crosses or targets) on your film positives outside the design area. As you print each color, you just line up the marks on your screen with the ones you just printed, ensuring every layer hits the exact right spot.
Knowing When to Use Transfers Instead
Screen printing is an incredible craft, but let's be honest—it's not always the right tool for the job. Part of being a smart artist or business owner is knowing when to pivot. This is where modern printing methods like Direct-to-Film (DTF) transfers really shine, giving you a powerful alternative that can save a ton of time, money, and creative headaches.
Learning when to put down the squeegee and fire up the heat press is a game-changer. Imagine a client asks for a single t-shirt with a full-color, photographic print. For screen printing, that would mean a ton of color separations and multiple screens—a nightmare for a one-off job. With a DTF transfer, you can handle unlimited colors and complex gradients without breaking a sweat.
This isn't about replacing screen printing. It's about adding another weapon to your creative arsenal, making you more versatile and efficient.
When DTF Transfers Outshine Screen Printing
Think of DTF transfers as your secret weapon for high-detail, low-quantity projects. They're perfect for those jobs where traditional screen printing just doesn't make sense from a time or cost perspective.
Here are a few scenarios where DTF is the clear winner:
- Highly Detailed or Photographic Designs: DTF is brilliant at capturing subtle gradients, tiny text, and photorealistic images. Achieving that same level of detail with screen printing requires serious halftone skills and a whole lot of precision.
- Small Orders with Many Colors: Got a design with six colors for an order of just five shirts? That would mean burning and setting up six different screens. The setup time alone makes it unprofitable. A DTF transfer prints all the colors at once, making those small, colorful jobs easy and profitable.
- Printing on Awkward Items: Trying to screen print on a hat, a backpack, or the side of a shoe can be a real struggle. Transfers, on the other hand, can be heat-applied to all sorts of tricky surfaces with pinpoint accuracy.
The real magic of DTF is its simplicity for complex jobs. You get to skip the entire screen prep and reclaim process—no emulsion, no exposure units, no washout booths. It’s the perfect solution for one-off custom orders or for testing new designs without committing to a big screen run.
Making the Right Choice for Your Project
So, how do you decide? It really comes down to the specifics of each job. To make it easier, here’s a quick breakdown of how these two methods stack up against each other.
Screen Printing vs DTF Transfers: Which Should You Choose?
| Factor | Screen Printing | DTF Transfers |
|---|---|---|
| Best For | Large batches (25+ items) with limited colors. | Small to medium batches, full-color designs. |
| Image Detail | Good for solid colors and simple graphics. | Excellent for photos, gradients, and fine details. |
| Setup Cost | High initial setup (screens, emulsion, exposure). | Minimal setup; you just need a heat press. |
| Per-Print Cost | Very low on large runs. | Consistent per-print cost, regardless of quantity. |
| Versatility | Best on flat, fabric surfaces like t-shirts. | Can be applied to almost anything—hats, bags, etc. |
| Durability | Extremely durable; ink soaks into the fabric. | Very durable with a soft feel, but sits on top of the fabric. |
Ultimately, both methods have their place in a modern print shop. By understanding the strengths of each, you can make smarter decisions, offer more options to your clients, and take on a much wider range of creative projects.
The Business Case for a Hybrid Approach
The custom apparel market is booming. In fact, U.S. revenue for the screen printing industry is projected to hit $12.8 billion in 2025, according to industry analysis from IbisWorld. This growth is all about customization, and having more than one way to print gives you a much bigger piece of the pie.
The decision often boils down to a simple cost-benefit analysis. While screen printing's cost-per-print is unbeatable on large runs, the setup costs are significant. DTF, with its consistent per-print price, is the hero for small batches and one-offs.
If you want to dive deeper into the numbers and see more direct comparisons, our guide on heat transfer vs. screen printing breaks it all down even further. Knowing when to use each method will make your business more flexible and profitable in the long run.
Artists Ask: Your Top Screen Printing Questions, Answered
Jumping into screen printing is exciting, but let's be real—it comes with a lot of questions. It's one thing to read about the theory, and another entirely to be standing in your shop wondering why your print isn't coming out right. You're not alone in this.
We've pulled together some of the most common questions we hear from artists just like you. Getting these details ironed out will do wonders for your prints and your confidence.
What's the Single Biggest Mistake Beginners Make?
Hands down, the most common hurdle for new printers is getting the screen exposure wrong. It’s a classic Goldilocks problem: too little time, and your design washes right down the drain with the uncured emulsion. Too much time, and the emulsion hardens like concrete, making it impossible to wash out your stencil.
This almost always happens because people skip the exposure test. There's no magic number here; your perfect exposure time depends on your unique setup—the strength of your light, the type of emulsion you're using, even the humidity in your room. Always run a quick test with an exposure calculator on a small piece of screen before you commit your final artwork. It saves so much frustration.
Can I Really Print Super Detailed, Fine-Line Artwork?
Absolutely! Screen printing can capture incredible detail, but it demands precision at every single stage. The secret starts with using a screen with a higher mesh count. For intricate graphic work, you'll want to be in the 230-305 range. This fine mesh is what gives your thin lines and tiny details the support they need to hold a sharp edge.
But the screen is only part of the equation. Your prep work is just as important.
- Your Film Positive: Make sure your film is totally black and opaque with crisp, clean edges. Any gray areas or fuzzy lines will show up in your final print.
- Your Emulsion Coat: Go for a very thin, even layer of emulsion. If the coat is too thick, it will fill in those tiny details and you'll lose them when you try to wash out the screen.
- Your Printing Technique: When you're ready to print, grab a harder squeegee (around a 70-80 durometer) and consider thinning your ink just a touch. This combo helps the ink slice cleanly through the tiny openings in the mesh without bleeding.
Keep in mind, for hyper-realistic photographic art with tons of colors and smooth gradients, DTF transfers often have the edge. They bypass the physical limits of a screen mesh entirely, capturing microscopic details and unlimited colors with ease.
How Much Does a Decent Home Setup Actually Cost?
You can get a solid, functional DIY screen printing setup off the ground for about $200 to $400. That budget should cover the basics: a simple one-color press, a couple of screens, a good squeegee, a scoop coater for your emulsion, and a starter set of inks and chemicals.
The biggest cost variable is almost always the exposure unit. A pro-level vacuum unit runs into the thousands, but plenty of artists start out with a simple $30 setup using a 500-watt halogen work light from the hardware store. It gets the job done. Once you get the hang of it, you'll probably want to upgrade to better aluminum screens and a more rigid press, but that initial kit will get you printing.
Of course, making art is one thing; selling it is another. If you're struggling to figure out what to charge for your work, this guide on how to price handmade products is a fantastic resource.
What's the Real Difference Between Inks?
The two main inks you'll encounter are plastisol and water-based, and they each have their place.
Plastisol ink is the industry workhorse. It's a PVC-based ink that's incredibly beginner-friendly because it won't air-dry in your screen, giving you plenty of time to work. It sits on top of the fabric, creating a bright, opaque print. The catch? It must be cured with heat (around 320°F/160°C) to become permanent.
Water-based ink is a different beast. As the name implies, it uses water as its main solvent, which allows it to soak into the fabric fibers. The result is a print with a much softer, almost non-existent feel. It forces you to be a bit quicker and more confident to keep it from drying in the screen, but its eco-friendlier cleanup and premium feel make it a favorite for artists and high-end apparel brands.
Ready to skip the messy setup for your next detailed, multi-color project? At Raccoon Transfers, we specialize in high-quality DTF transfers that bring your most complex designs to life with ease. Upload your art, and let us handle the printing so you can focus on creating. Start your order today!