
Top Birthday T Shirt Designs for DTF Printing
There's something special about a custom birthday t-shirt. It’s more than just a piece of clothing; it’s a way to make a celebration feel truly unique and personal. These designs can be anything from a witty quote about getting older to a cool graphic that screams the birthday person's style, turning a simple shirt into a memorable keepsake.
Why Personalized Birthday Shirts Are a Goldmine
Before we jump into the nitty-gritty of design, let's talk about why this niche is exploding. People are tired of generic party favors. They're looking for one-of-a-kind ways to celebrate big moments, and custom apparel is a huge part of that shift. Birthday shirts are leading the charge.
This trend has opened the door for a serious business opportunity. Thanks to incredible tech like Direct-to-Film (DTF) printing, the old barriers are gone. You no longer need the massive setup costs that came with screen printing. Now, anyone can create and sell professional, full-color designs from their own workshop.
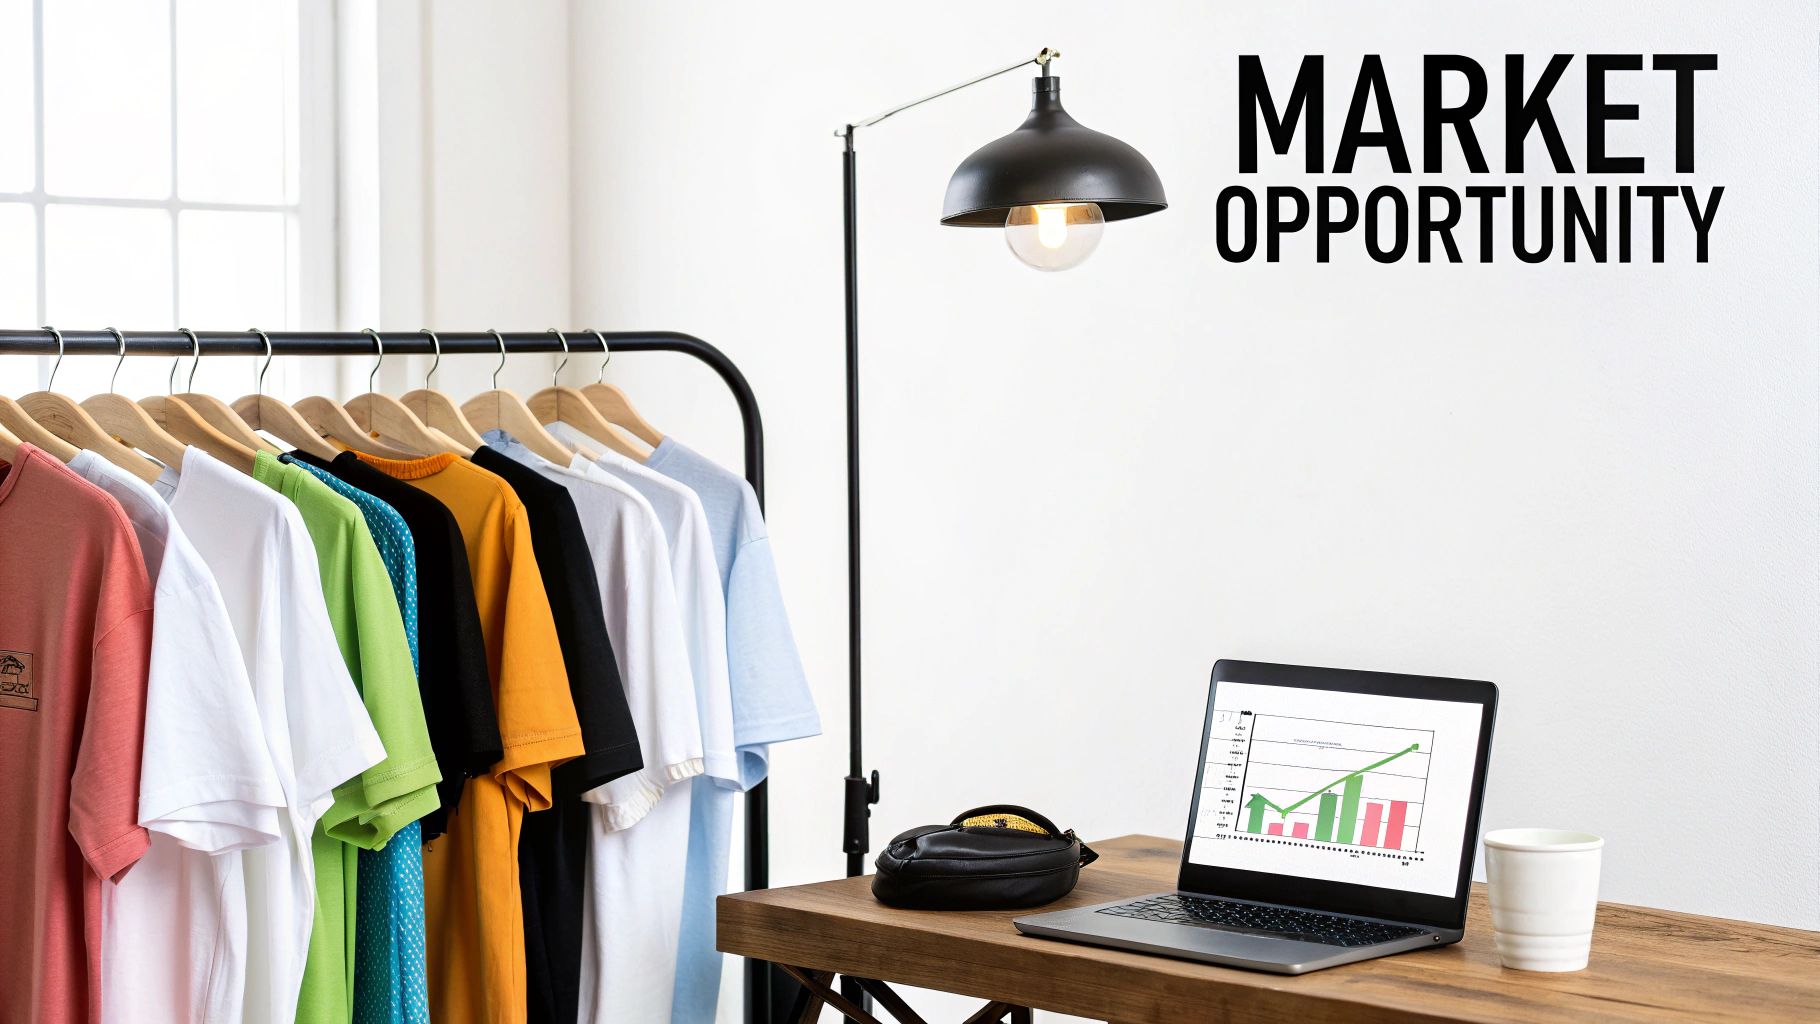
The Growing Market for Custom Apparel
The data really tells the story here. The global custom T-shirt printing market is on a massive upward swing. It's expected to climb from USD 7.01 billion in 2025 to a staggering USD 18.32 billion by 2034. That's a compound annual growth rate of 11.27%, which signals a huge opportunity for creators focused on niches like birthday designs.
So, what's behind this massive growth? It boils down to a few key drivers that have shifted consumer behavior and opened up the market for designers like us.
Key Market Drivers for Birthday T-Shirt Designs
The table below breaks down the main forces fueling the demand for custom birthday apparel. Understanding these trends is key to positioning your designs for success.
| Market Driver | Impact on Designers | Key Takeaway |
|---|---|---|
| High Demand for Personalization | Creates opportunities to offer custom names, ages, and unique themes that big retailers can't match. | Focus on designs that can be easily customized. The more personal, the better the sales potential. |
| Influence of Social Media | Group photos and "Instagrammable" events fuel the need for matching shirts for the whole party. | Design collections, not just single shirts. Think "Birthday Squad," "Mom of the Birthday Boy," etc. |
| Low Barrier to Entry | DTF and print-on-demand remove the need for large inventory and expensive equipment to start. | You can test ideas quickly with minimal financial risk, allowing for more creative experimentation. |
These factors work together to create a thriving ecosystem for small businesses and independent designers.
Tapping into this market isn't just about making one cool design. It's about creating a repeatable, scalable process. Once you nail the DTF workflow for birthday shirts, you've got a formula you can apply to holidays, anniversaries, and any other celebration you can think of.
Of course, a great design is only half the battle. To really succeed, you need to understand how to grow an e-commerce business and market your products effectively. This guide is designed to give you that solid technical foundation, starting with creating perfect DTF transfers every single time.
Crafting Birthday T-Shirt Designs People Actually Want
A killer birthday t-shirt design does more than just announce an age—it tells a story. It’s a conversation starter, a personal joke, or a badge of honor that makes the person wearing it feel genuinely celebrated. To create designs that actually sell, you have to dig deeper than just slapping "Happy Birthday" on a shirt.
You have to get inside the customer's head. What's the real reason they're buying this? Is it a gag gift for a buddy hitting the big 4-0? A super-cute shirt for a toddler's first party photos? Or maybe a whole set for a "Birthday Squad" taking over Vegas for the weekend? Each of these needs a completely different vibe and design.
Finding the Winning Birthday Themes
Before you even touch a font or a color picker, you need to lock in a theme. From my experience, certain concepts just work time and time again because they tap into universal feelings and milestones.
- The Big Milestones: You can never go wrong with designs for 1st, 18th, 21st, 30th, 40th, and 50th birthdays. These are the heavy hitters. They often lean into humor about getting older, a bit of nostalgia, or just celebrating the significance of that specific number.
- Niche Hobbies and Interests: This is where you can get really creative and connect with a passionate audience. A gamer's shirt could rock some pixel art with a "Level 40 Unlocked" theme. For a bookworm, maybe something clever like "Entering Chapter 30."
- Retro and Vintage Vibes: Designs that throw it back to a specific decade, like the 80s or 90s, are pure gold, especially for milestone birthdays. Think bold neon, old-school cassette tapes, and fonts that scream Saved by the Bell.
This is more than just a trend; it's a massive market shift. The demand for personalized T-shirts is expected to explode from roughly USD 9.23 billion in 2023 to a staggering USD 17.27 billion by 2032. This growth is all about younger customers who want unique, meaningful gear that shows off who they are. You can dive deeper into these custom t-shirt market trends over on Vocal.media.
The Design Details That Seal the Deal
Once you've got a solid theme, it's the execution that separates a professional design from something that looks like it was made in five minutes. Your three best friends here are typography, color, and layout.
Typography
The font you pick sets the entire tone. A rugged, distressed font is perfect for that classic "Aged to Perfection" look, while a bubbly, rounded font is a no-brainer for a kid's birthday. My biggest piece of advice? Don't go crazy with fonts. Stick to one or two that work well together to keep things clean and powerful.
Color Palette
Celebratory doesn't have to mean rainbow-colored. A sophisticated mix of gold and black can feel incredibly luxe for a 50th birthday design, whereas soft pastels are a natural fit for a 1st birthday. And always, always think about the color of the garment you’ll be printing on. You need enough contrast for your design to pop, not fade into the background.
Pro Tip: I've learned this the hard way: always design with the final print in mind. Super thin lines and tiny, intricate details can get completely lost or look muddy with DTF printing. Go for bold shapes and clear, legible text for a result that looks just as good in person as it does on your screen.
Making Room for Personalization
A lot of birthday shirt orders will involve adding a name, a date, or some other custom text. A smart design plan anticipates this. Build designated spots into your layout where personalization can be dropped in without wrecking the whole composition. A simple banner under the main graphic is a classic for a reason—it just works.
Getting the size and placement right is also non-negotiable for a professional-looking shirt. A graphic that’s too small looks cheap and lost, but one that’s too big will wrap around the sides of the body and look distorted. To get this just right, take a look at our complete guide on finding the right graphic size for a t-shirt. Nailing this step ensures all your creative work pays off in the final product.
Prepping Your Designs for Flawless DTF Transfers
A brilliant idea for a birthday t-shirt design is only half the battle. If the digital file isn't set up correctly, even the most creative concept can turn into a blurry, discolored mess that won't stick to the shirt. Getting the technical details right isn't just a suggestion—it's what separates a professional, durable print from a one-wash wonder.
Everything starts in your design software, whether you're a pro using Adobe Illustrator or just starting out with something like Canva. Your digital canvas, or artboard, needs to match the exact physical size of the final print. If you want a 10-inch wide graphic for an adult tee, set your artboard to 10 inches wide. This simple step prevents any weird scaling issues down the line.
This quick infographic breaks down the core workflow, from brainstorming to the final personalized product.
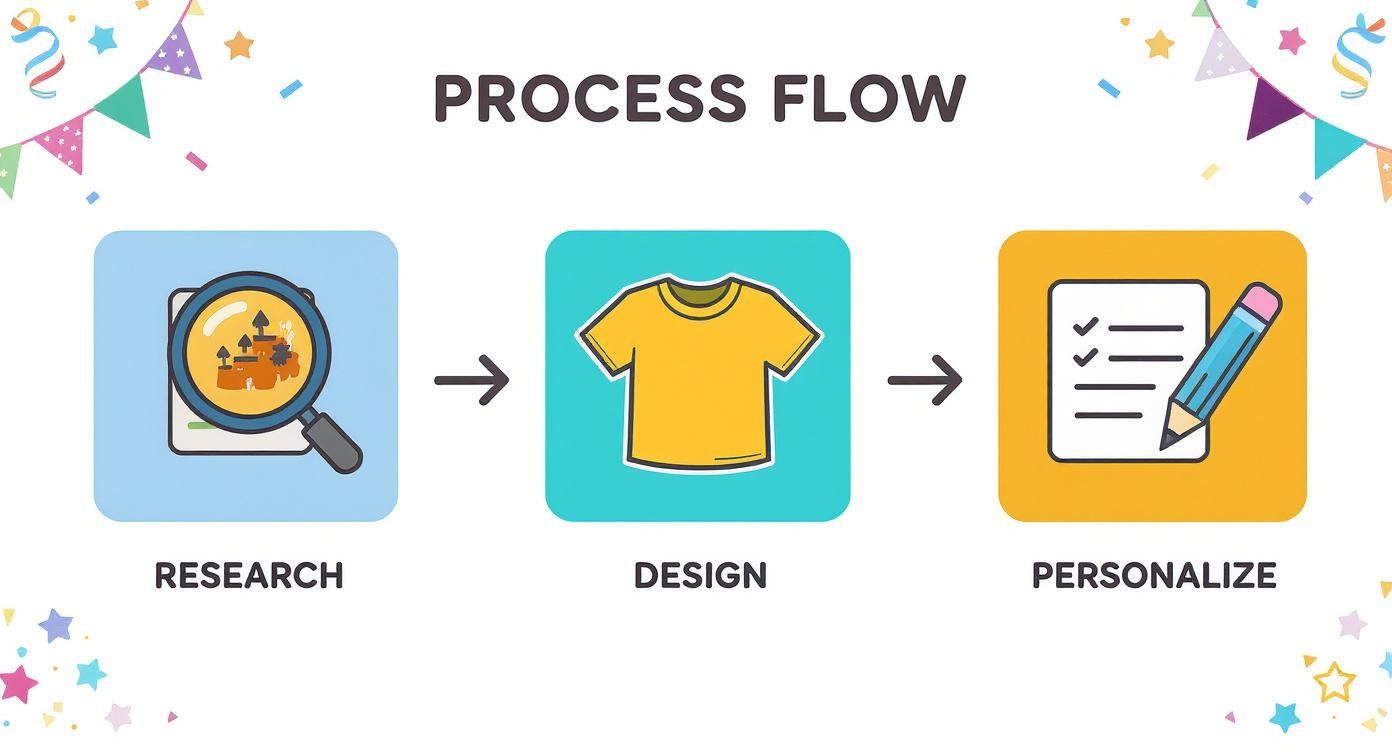
As you can see, the design stage is the critical bridge between your ideas and the finished shirt, which is why file prep is so important.
Mastering Your Export Settings
Once your design looks perfect on screen, how you save it determines everything. DTF printing is picky and needs a very specific file format to work its magic.
- File Type: Always, always export your design as a PNG (Portable Network Graphics). This is non-negotiable. The PNG format supports transparent backgrounds, which is how you get just your artwork printed—not a clunky white box around it.
- Resolution: Your file must be 300 DPI (dots per inch). Anything less, like the standard 72 DPI for web images, will look pixelated and amateurish when printed. This high resolution is what gives you those sharp, clean lines.
- Color Mode: Stick with RGB (Red, Green, Blue). I know, traditional print often screams CMYK, but modern DTF printers and their RIP software are built to work with the RGB color space. You'll get more vibrant and accurate colors this way.
Nailing these three settings—PNG, 300 DPI, and RGB—is the bedrock of a perfect transfer.
Fine-Tuning for Print Perfection
Beyond those basics, a few insider tricks can take your print quality from good to great, especially when you're dealing with tiny details or printing on dark fabrics. One of the most common mistakes I see is creating lines that are too thin.
As a rule of thumb, keep all lines, text, and design elements thicker than 0.018 inches. Anything smaller risks not getting enough white ink backing or adhesive powder, which means parts of your design could literally wash off in the laundry.
Another pro technique is called choking the white underbase. This means shrinking the white ink layer ever so slightly, so it doesn't go right to the very edge of the colored ink on top. This tiny adjustment completely eliminates that faint white "halo" you sometimes see on dark shirts, leaving you with an incredibly crisp, clean transfer. While many print shops handle this automatically, designing with this in mind will set your birthday t-shirt designs up for the best possible outcome right from the start.
How to Build and Order Your DTF Gang Sheet
Once your birthday t-shirt designs are finalized, it's time to turn them into real, press-on transfers. This is where efficiency becomes your best friend, and the key to that is mastering the DTF gang sheet.
Think of a gang sheet as one big canvas. Instead of printing each design one-by-one, you arrange a bunch of them together on a single sheet of transfer film. This trick is how you keep your costs down and your profit margins healthy. You can pack it with different designs, various sizes, and even toss in some small pocket logos or neck tags. The goal is to make sure not an inch of that film goes to waste.
Arranging Your Designs for Maximum Value
The name of the game is fitting as many transfers as you can onto your sheet without any of them touching. It’s a bit like playing Tetris with your artwork. I always start by placing my biggest, most important designs first, and then I fill in all the little gaps with the smaller ones.
Don't be afraid to spin things around. Rotating a design 90 or 180 degrees can suddenly make it fit perfectly into a weirdly shaped empty spot. A well-packed gang sheet is a beautiful thing—it means you're getting the absolute most for your money. To make this whole process a lot less frustrating, a visual tool like a DTF gang sheet builder lets you drag, drop, and rotate everything right on your screen before you commit.
Here's a quick reference to help you visualize how many designs you might fit. Keep in mind, this is just an estimate for a standard adult t-shirt design.
Gang Sheet Size and Capacity Estimates
| Gang Sheet Size (Inches) | Approximate Adult Designs (10"x12") | Best For |
|---|---|---|
| 22" x 24" | 2-3 | Testing new designs or small, one-off jobs. |
| 22" x 60" | 4-6 | Small inventory runs or fulfilling a handful of orders. |
| 22" x 120" | 9-12 | Stocking up on your best-sellers for a good price. |
| 22" x 240" | 18-25 | Bulk production for popular designs or large events. |
This table should give you a solid starting point for planning your print runs and managing your inventory.
Placing Your Order with a Print Service
Got your sheet built and saved as a high-resolution PNG? Perfect. The rest is pretty simple. You'll just upload that single gang sheet file to your DTF print service.
Next, you have to pick the right film size, which really just depends on how many transfers you need.
- Small Batches: A smaller sheet like 22" x 24" is perfect when you're just testing the waters with new birthday designs or have a custom order for a single party.
- Larger Runs: If you're stocking up on proven winners, going for a 22" x 60" or 22" x 120" roll brings your cost-per-transfer way down, which is exactly what you want.
This business model is absolutely booming. The U.S. custom T-shirt printing market is on track to jump from USD 2.41 billion in 2023 to USD 4.26 billion by 2032. A huge part of that growth comes from how accessible services like this have become, making it profitable for anyone to start their own t-shirt business. You can dig into the numbers yourself by checking out the growth of the US custom t-shirt market on Credence Research.
A Quick Tip: I can't stress this enough—always leave at least a quarter-inch of space between every single design on your sheet. This little buffer gives you plenty of room to cut them apart later without accidentally clipping the edge of a neighboring transfer.
Once you’ve got everything set, just confirm your order and keep an eye on the estimated production and shipping times. Getting this workflow down is how you turn a folder of fun birthday designs into a real, profitable product line.
The Perfect Heat Press Application Every Time
You've designed a killer graphic and laid out the perfect gang sheet. Now for the moment of truth: pressing the transfer onto the shirt. This is where your digital birthday t-shirt designs come to life, and getting this step right is what separates a homemade look from a professional-quality product.
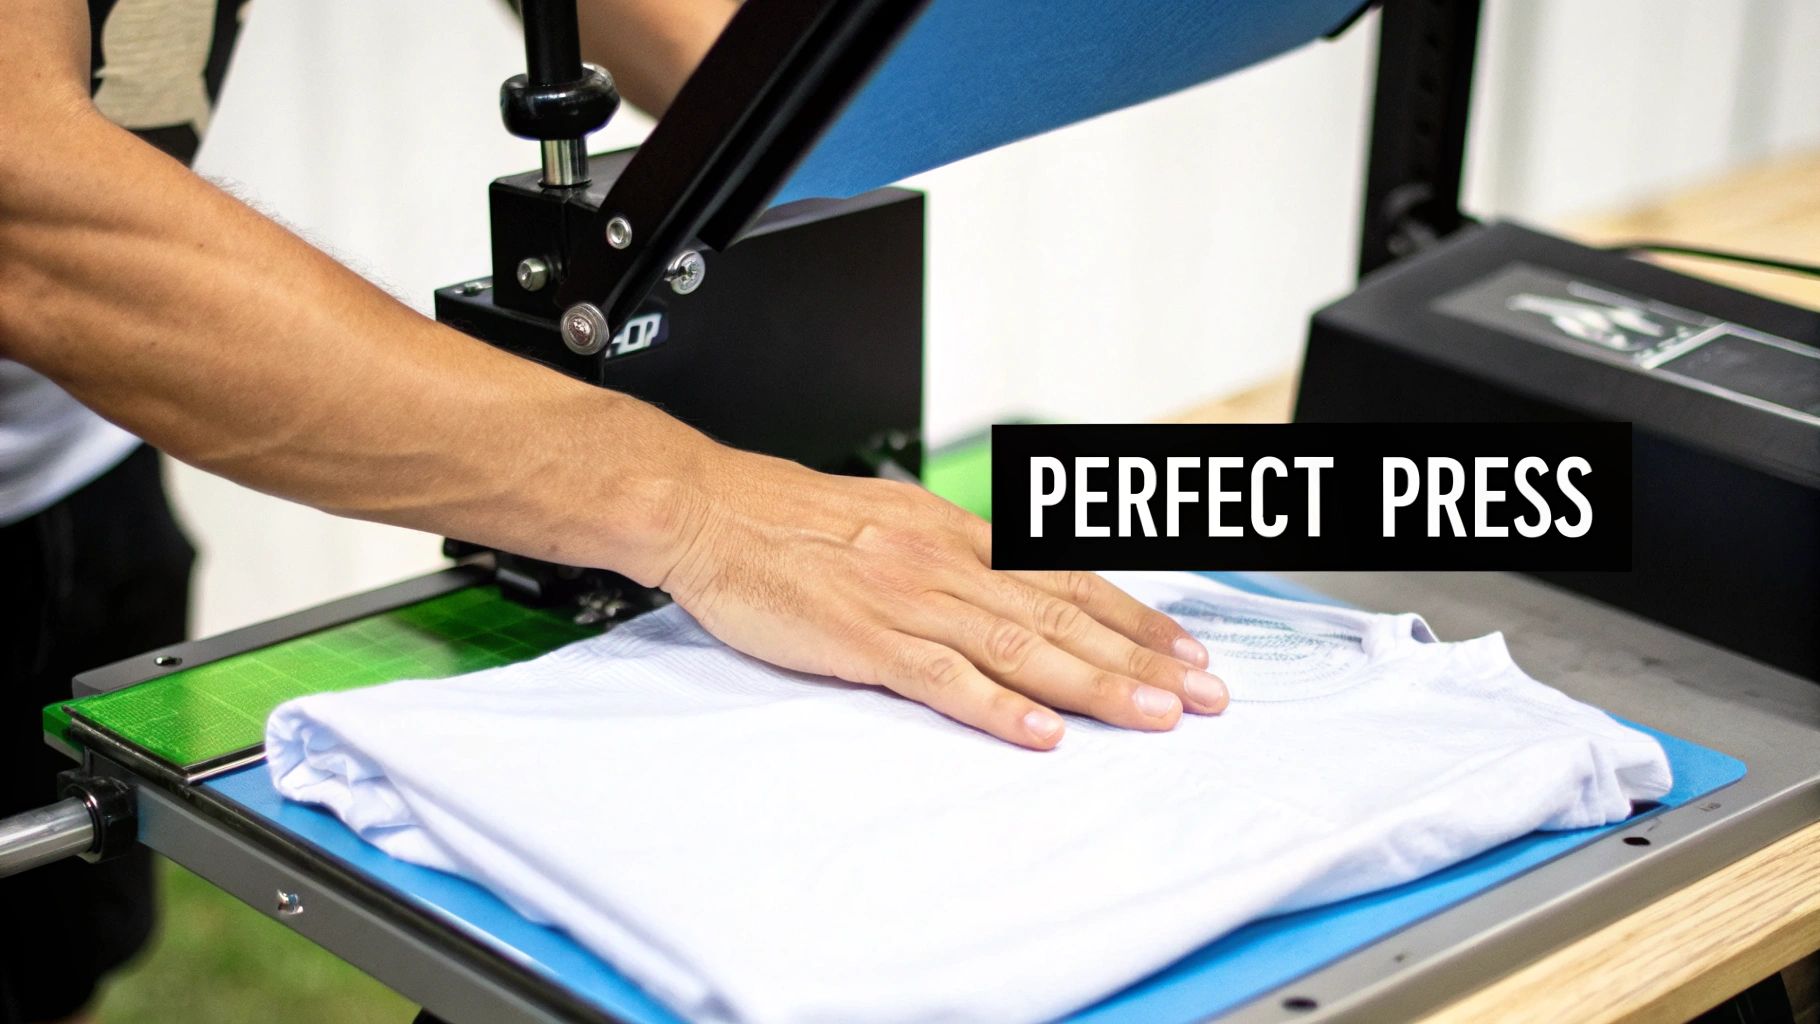
Your heat press is obviously the star player here, but a flawless application actually begins before the transfer even touches the garment. Always start with a pre-press. It sounds simple, but this step makes a world of difference.
Just place your t-shirt on the heat press platen and give it a quick press for 5-7 seconds at your planned temperature. This little maneuver steams out any hidden moisture and flattens wrinkles, giving you a perfectly smooth, dry canvas for the transfer. Trust me, skipping this can lead to a weak bond that starts peeling after the first wash.
Nailing Your Press Settings
When it comes to heat pressing, temperature and time are your most important variables. Different fabrics demand different settings to get a strong, lasting bond without scorching the material. If you get the temperature wrong, you could either melt the transfer or, just as bad, fail to get it to stick at all.
Here are the starting points I always rely on for common t-shirt materials:
- 100% Cotton: Aim for 300-320°F (149-160°C) for 10-12 seconds using medium pressure. Cotton is pretty forgiving and gives DTF transfers an excellent surface to grip.
- Polyester & Blends: You'll want to lower the heat to 260-275°F (127-135°C) and press for just 8-10 seconds. Any hotter and you risk dye migration, which is when the shirt's color bleeds through your beautiful design.
- Tri-Blends: These can be delicate, so be gentle. I recommend a low temperature around 260°F (127°C) for 8-10 seconds with light pressure.
Think of these as a solid baseline. Every heat press can have its own quirks. For a much deeper dive into getting your machine perfectly calibrated, be sure to read our detailed guide on the best heat press settings for DTF transfers.
The Peel and the Final Press
Once that first press is done, you have a decision to make about when to peel off the carrier film. This choice really influences the final texture and finish of your birthday t-shirt designs.
For DTF, a cold peel is hands-down the most reliable method. After the timer goes off, take the shirt off the press and just let it cool down completely to room temperature. Once it's cool, gently peel the film away at a low, smooth angle. This technique results in a vibrant, smooth, and incredibly durable finish.
Pro Tip: Want an even softer feel and better washability? Do a "second press." After you've peeled the film, cover the design with parchment paper or a Teflon sheet and press it again for another 3-5 seconds. This really pushes the ink into the fabric's fibers, giving it a fantastic matte finish that feels more like a screen print than a plastic layer.
This final press is my secret weapon for creating shirts that not only look amazing fresh off the press but also stand up to countless cycles in the washing machine. It’s that little bit of extra care at the end that truly elevates a custom shirt from good to great.
Alright, you've got a fantastic birthday shirt design ready to go. Now, how do you actually get it into the hands of someone celebrating their big day? That's where smart marketing comes in.
Show, Don't Just Tell
Let's be honest, people buy with their eyes. Your first job is to make your designs look irresistible. This is where high-quality mockups become your best friend. Whether you're selling on Etsy, Shopify, or your own website, a great mockup helps a customer picture themselves—or their kid—wearing that shirt at the party. It bridges the gap between a digital file and a real-world product.
Words That Sell the Vibe
Next up, your product descriptions. Don't just list the facts. Sell the feeling. You're not just selling a piece of fabric with ink on it; you're selling a memory, a photo op, a part of the celebration.
Instead of a bland title like "Birthday Shirt," try something that tells a story, like "The Perfect T-shirt for Their Unforgettable First Birthday Photos." Paint a picture with your words and connect with the emotion of the event.
Level Up Your Sales with Bundles
Want to increase your average order value? Think in sets. Bundling is one of the easiest ways to sell more shirts per transaction.
-
The Family Pack: This is a classic for a reason. Offer coordinated designs like "Birthday Boy," "Mom of the Birthday Boy," and "Dad of the Birthday Boy." People love matching shirts for photos.
-
The Squad Bundle: For adult birthdays or kids' parties, create discounted packs for the whole "Birthday Squad" or "Party Crew." It makes it a no-brainer for the party organizer to buy from you.
A well-thought-out online store is the final piece of the puzzle. It's not just about having pretty pictures; the entire user experience matters. If your site is confusing or slow, potential buyers will simply leave. Taking the time to improve your website's bounce rate is crucial for turning those casual clicks into actual sales. A smooth checkout process can make all the difference.
Got Questions About DTF? Let's Get Them Answered.
Even when you feel like you've got the process down, questions are bound to pop up. It's totally normal. Maybe you're trying to figure out a small hiccup or you're just curious about the nitty-gritty of the process. Having solid answers is what turns you from a beginner into a pro, especially when it comes to birthday t-shirt designs.
Let's tackle some of the most common questions I hear from fellow creators.
How Many Washes Can a DTF Transfer Really Handle?
This is probably the number one question people ask, and for good reason! You want your shirts to last. The good news is, a well-applied DTF transfer is a beast when it comes to durability. You can expect it to hold up for 50-100 washes without any noticeable cracking or fading.
The secret sauce? That final press. It's not just an optional step; it's what truly fuses the ink into the fabric fibers, giving it that incredible staying power.
What Fabrics Can I Actually Press On?
The versatility of DTF is one of its biggest selling points. You aren't just limited to cotton. You can confidently press your birthday designs onto:
- 100% Cotton
- Polyester
- 50/50 Blends
- Even those tricky tri-blends
Just make sure you're adjusting your heat press temperature and time for each specific material. The last thing you want is a scorched shirt ruining a great design.
Troubleshooting Common Print Issues
What if the transfer feels stiff and has that "plastic" feel on the shirt? This is a classic sign of either not enough heat or not enough pressure. A perfect press actually melts the adhesive right into the fabric, leaving it soft and flexible. Double-check your settings, and don't forget that final 3-5 second press with parchment paper—it really helps soften the feel.
Ever notice a faint white outline or a "halo" around your design, especially on dark shirts? This usually points to a slight misalignment of the white underbase from your DTF supplier. It's a technical issue, but a good printer can prevent it by applying a "choke" in their software, which essentially pulls the white layer in just a tiny bit.
And finally, the age-old question: "Can I just use my home iron?" Look, while you technically could try, I strongly advise against it for any kind of professional work. An iron gives you spotty heat and uneven pressure, which is a recipe for transfers that peel off after one wash.
For anyone serious about selling birthday t-shirts, a quality heat press isn't just a recommendation; it's a must-have investment. It's the only way to ensure your products are consistent, durable, and look professionally made every single time.
Ready to turn your incredible birthday t shirt designs into vibrant, press-ready transfers? At Raccoon Transfers, we provide premium DTF prints with a lightning-fast 24-hour turnaround. Build your gang sheet and order today!