
Your Guide to Creating the Perfect DTF Transfers Gang Sheet
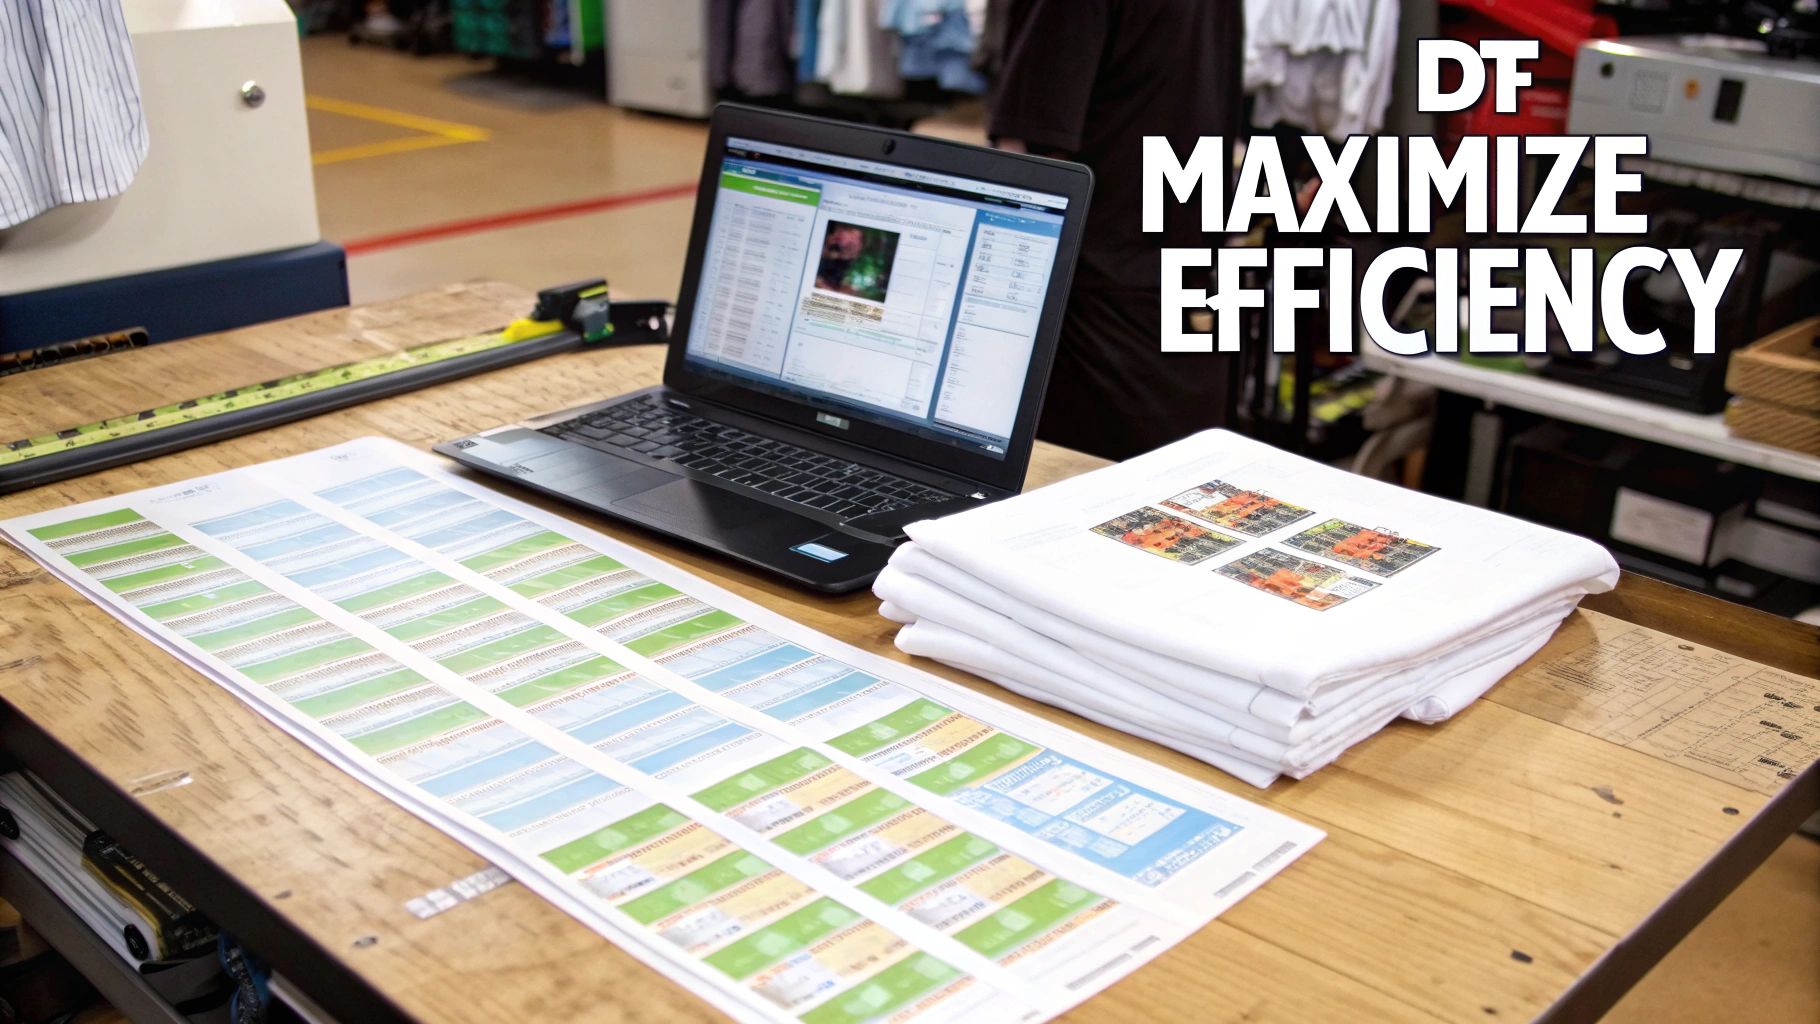
In the world of custom apparel, a DTF transfers gang sheet is a game-changer. It's simply a large sheet of transfer film where you can print multiple designs all at once, letting you press several graphics in one efficient, budget-friendly run. This method is the key to getting the most out of your materials and knocking down your per-design costs.
Why a DTF Gang Sheet Is Your Secret Weapon
Let's be real—in the custom apparel business, wasted material is money down the drain. This is exactly why mastering the DTF gang sheet isn't just a good idea; it's an essential skill for anyone serious about their craft. Don't just think of it as a sheet of film. Think of it as your best tool for unlocking serious production efficiency and boosting your bottom line.
Whether you’re just starting an Etsy shop or you're running a high-volume print business, gang sheets let you fit way more jobs into a single print run. Instead of ordering individual transfers for every single design, you can group them all together. This one simple move can dramatically slash your material costs. The more designs you can strategically arrange, the lower your cost per print gets. It’s that simple.
The Core Benefits of Using Gang Sheets
This isn't just about saving a few bucks; it's about making your entire workflow smarter. Imagine you get an order for 20 shirts that need a front pocket logo, a big design on the back, and a small sleeve print. With gang sheets, you can consolidate all those elements onto just a few sheets.
This approach brings some huge advantages to the table:
- Serious Cost Reduction: You're paying for the sheet, not for how many designs are on it. Every time you fill an empty space with a small logo or a design for a future project, you're getting more value out of every single inch.
- Major Time Savings: Printing and pressing from one source streamlines your whole production process. You’ll spend less time fiddling with individual files and more time actually getting orders out the door.
- Unmatched Flexibility: A gang sheet gives you the freedom to mix and match. You can combine different client orders or throw in various designs for different garments, all in a single print job.
The real power of a gang sheet is its ability to turn empty space into pure profit. Every gap you fill with another design is money back in your pocket and a smarter way to manage your inventory.
The Direct to Film (DTF) printing market, which makes these efficient sheets possible, has exploded since it first showed up around 2020. Valued at a massive USD 2.72 billion in 2024, the industry is on track to hit USD 4.56 billion by 2032. You can learn more about this incredible growth from recent market intelligence reports.
Think of this guide as your personal roadmap to transforming your production. By mastering DTF custom transfers, you’ll learn everything you need to know, from prepping your digital art to perfectly pressing the final design.
Getting Your Artwork Ready for Print
Before you even think about laying out your designs on a DTF transfers gang sheet, you have to get the artwork itself print-perfect. Honestly, this is where most of the costly and frustrating mistakes happen. Getting your files right from the start is the only way to guarantee every transfer looks sharp, vibrant, and professional.
Think of it as a pre-flight checklist for your designs. A little extra attention here saves a ton of headaches, wasted materials, and reprints down the line. Let's walk through the essential specs to make sure every design transfers flawlessly from your screen to the fabric.
Artwork File Type Comparison for DTF Gang Sheets
The first choice you'll make is the file format, and it's a big one. The type of file you use directly impacts the final quality of your transfers. While there are a few options, they are definitely not created equal when it comes to DTF printing.
Below is a quick comparison to help you decide which format is best for your specific project. For most DTF work, you'll be choosing between vector formats and a high-resolution PNG.
| File Type | Best For | Pros | Cons |
|---|---|---|---|
| PNG | Photographic images, complex color gradients, and detailed raster artwork. | Supports transparent backgrounds, which is essential for DTF. Widely supported. | Quality is resolution-dependent; scaling up a low-res image will result in pixelation. |
| AI / SVG / EPS | Logos, text, and graphics with solid colors and clean lines. | Infinitely scalable with zero loss of quality. Edges remain perfectly crisp. | Not suitable for photographic images. Requires vector design software like Adobe Illustrator. |
| JPEG | Generally not recommended for DTF. | Universally supported file type. | Does not support transparency, resulting in a white box around your design. |
| Can be used if saved correctly from a vector program. | Can embed vector data, preserving scalability and quality. | Can also contain low-res images or incorrect color profiles if not saved properly. |
Ultimately, choosing between a vector file and a high-resolution PNG is the professional standard. JPEGs just don't work for this process, and PDFs can be a gamble unless you know exactly how they were created.
Vector vs. Raster: The DTF Showdown
So, let's dig into the two main players. For designs with clean lines, text, and solid colors—think logos and most graphic tees—vector files are the undisputed champions.
-
Vector Files (.AI, .SVG, .EPS): These are built with mathematical paths, not pixels. This is huge because it means you can scale a vector logo from a tiny chest print to a massive back piece with zero loss of quality. The edges will always be perfectly crisp and clean.
-
Raster Files (.PNG): These are your pixel-based images, perfect for photos or designs with complex color gradients and textures. For DTF, your raster file absolutely must be a PNG with a transparent background. Critically, it needs to be saved at 300 DPI (dots per inch) at the final size you intend to print it. Anything less will look blurry and pixelated.
My Two Cents: Never, ever just open a low-resolution image and change the DPI setting from 72 to 300. You can't magically create detail that isn't there. All you're doing is telling the computer to stretch the existing pixels, which makes it look even worse. Always start your design process at 300 DPI or, even better, work in a vector format from the get-go.
Your Non-Negotiable Art Prep Checklist
Once you've settled on the right format, a few final checks are essential. These steps are simple but are the difference between a perfect print run and a pile of wasted transfers.
One of the most common—and infuriating—mistakes is submitting a PNG that looks transparent but actually isn't. Even a single stray, semi-transparent pixel will be picked up by the DTF printer. The machine will lay down a white ink underbase for that pixel, resulting in a faint, cloudy box or haze around your design after it's pressed. Always use your software’s tools to double-check and completely remove any unwanted background elements.
Another critical step: if your artwork has any text, you must convert it to outlines or shapes. This basically turns the font into a graphic element. It ensures the text prints exactly as you see it, even if your printer doesn't have that specific font installed on their system. Beyond these DTF-specifics, having a solid grasp of general artwork submission tips will make every print project you do run more smoothly.
In major markets like the Americas, where the U.S. leads with over 40% market share, print-on-demand services have fully embraced DTF gang sheets for everything from streetwear to sports jerseys. They're capitalizing on trends and can cut lead times by up to 50%. You can find more insights about DTF printing on 360iresearch.com to see how the industry is shifting. And for more help on sizing your art, don't forget to check out our guide on choosing the right graphic size for t-shirts.
Mastering the Gang Sheet Layout
This is where the real money is made or lost. Arranging your designs on the film feels a lot like playing Tetris, but with real-world financial consequences. This strategic layout, what we call nesting, is where you have the most direct impact on your bottom line. A well-built dtf transfers gang sheet isn't just about saving space; it's about making every print run more profitable.
The core idea is simple: eliminate as much wasted film as possible. Every empty spot is money you're leaving on the table. Imagine you have an order for 30 hoodies, each needing a big back print, a left-chest logo, and a small design on the sleeve. A newcomer might just line them up in neat rows, but that leaves huge, costly gaps. The pro approach is to treat it like a puzzle.
Before you even start arranging things, there are a few non-negotiable prep steps to get your artwork ready.
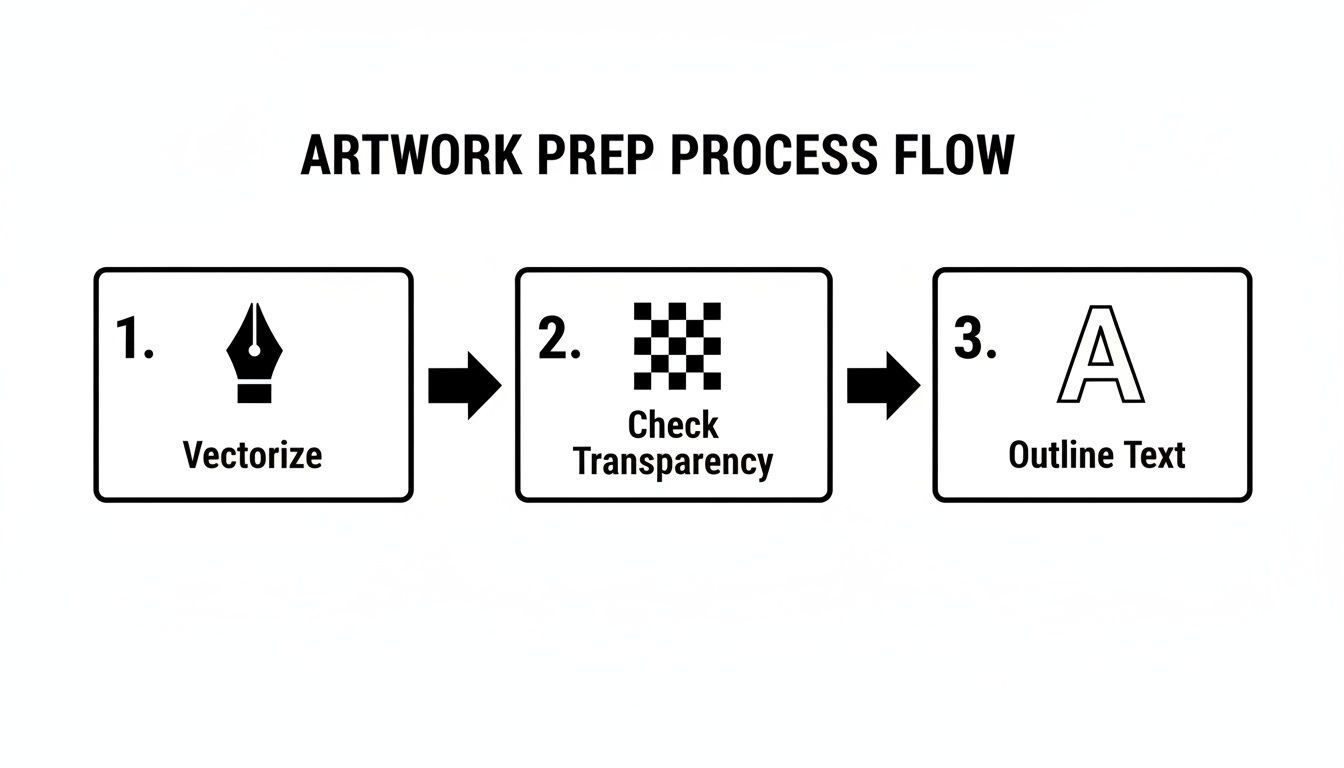
As you can see, vectorizing your art, double-checking for a transparent background, and outlining your text are the absolute basics. Nail these, and your designs will be print-ready, no matter how you lay them out.
Smart Nesting and Spacing Techniques
Good nesting isn't just about cramming designs together. It's about seeing the negative space as a new opportunity. Got a big, circular back design? That empty area in the middle of your sheet is prime real estate for smaller logos, custom neck tags, or even designs for a completely different job.
Here are a few tricks I've learned over the years:
- Rotate and Flip: Don't hesitate to turn your designs. A logo that doesn't quite fit horizontally might slide in perfectly once you rotate it 90 degrees. It's a simple move that opens up a ton of possibilities.
- Pair Large with Small: Always tuck your small, filler designs—like sleeve hits or tag prints—into the nooks and crannies of your main graphics. Fit them into the natural curves and empty spots of the bigger pieces.
- Leave Room to Cut: While you want a tight layout, don't place designs so close that you can't get scissors between them. I've found that leaving a consistent gap of about 0.25 to 0.5 inches is the sweet spot. This little buffer saves a massive headache and stops you from accidentally slicing into an adjacent transfer.
For those running larger operations, it's worth seeing how Print-on-Demand platforms like Printify manage their artwork flows; they've got efficiency down to a science.
Pro Tip: I keep a digital folder handy filled with small, popular designs, funny sayings, or my own shop logos. Whenever I see a bit of extra space on a gang sheet, I just drop one in. It's basically free marketing material with every print run.
The Real-World Impact of an Optimized Sheet
Let's go back to that 30-hoodie order. A poorly planned sheet might force you to print four or even five separate gang sheets. But by strategically nesting the back, chest, and sleeve graphics together, you could likely fit that entire job onto just two or three sheets. This one small adjustment can slash your material waste by over 40%.
That efficiency is exactly why gang sheets are a must-have in any high-volume shop. These huge sheets, sometimes holding 20 to 100 different designs, can cut waste by 40% and help you push out up to 1,000 units an hour.
Ultimately, mastering your layout is a skill that pays for itself on day one. It turns your dtf transfers gang sheet from a simple supply into a powerful tool for controlling costs. The more you practice seeing the puzzle, the more profitable your shop will become.
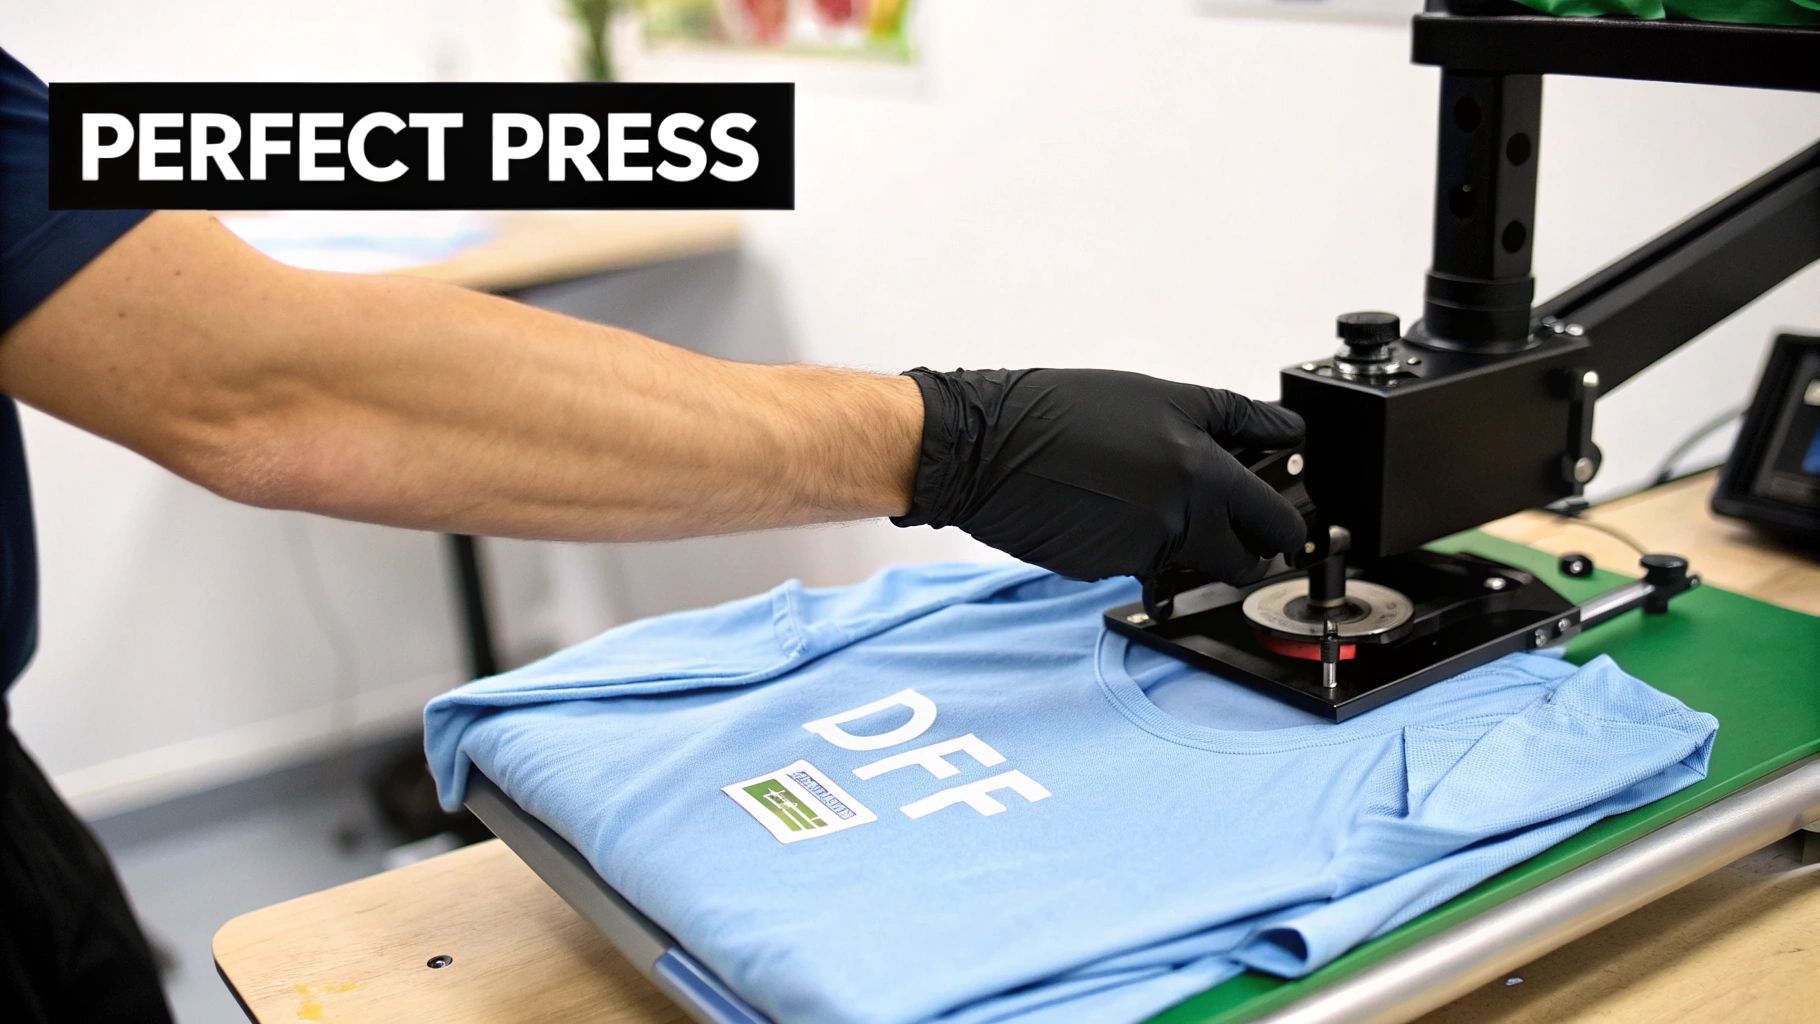
Achieving a Professional Press Every Time
A perfectly printed DTF transfers gang sheet is a great starting point, but the real magic happens at the heat press. This is the moment your digital artwork becomes a durable, vibrant graphic that feels soft on the final garment. Success here comes down to three things you absolutely have to control: temperature, pressure, and time.
Getting these settings right is what separates a shirt that lasts for years from one that peels after the first wash. I have to be blunt here: a home iron or a craft press just won't work. They simply can't deliver the consistent, even pressure needed to properly fuse the adhesive into the fabric's fibers.
Dialing in Your Heat Press Settings
Every fabric behaves differently, so your press settings have to adapt. Pressing a cotton tee with the same settings you'd use for a delicate polyester blend is a recipe for disaster. While every press has its quirks, these are some solid starting points I use all the time.
-
For 100% Cotton: I aim for a temperature around 300-320°F (149-160°C). A good, firm pressure for about 10-15 seconds is usually perfect to cure the ink and set the adhesive.
-
For Polyester & Blends: These fabrics can scorch easily, so you need to back off the heat. I drop my temperature down to 260-280°F (127-138°C). I’ll press with medium pressure for a shorter 8-12 seconds to avoid that shiny, tell-tale press box outline.
-
For Tricky Fabrics (like Tri-Blends): My motto here is "start low and go slow." I begin with the polyester settings and, if possible, test a small, hidden area first.
Here’s a pro tip: after the initial press, I almost always do a second, quick press for 3-5 seconds. I just place a sheet of parchment or Teflon over the design and press again. This small step helps give the transfer a much softer feel and embeds it deeper into the fabric for better durability. For a deeper dive, check out our comprehensive guide on heat press settings for DTF transfers.
Hot Peel vs. Cold Peel Demystified
The type of film your transfer is printed on dictates how you finish the job. The two main types, hot peel and cold peel, are not interchangeable, and mixing them up will ruin your work.
My Personal Takeaway: Don't rush the peel! I’ve seen it happen too many times. Peeling a cold peel film while it’s still warm will lift the edges of your design and destroy the transfer. Patience is a key ingredient for a flawless finish.
A hot peel film is designed so you can remove the carrier sheet immediately after the press opens. This method is incredibly fast and efficient, making it a lifesaver for high-volume jobs. On the other hand, a cold peel film requires you to wait until both the garment and the transfer have cooled completely before peeling. The wait is often worth it, as this process can result in a slightly glossier, smoother finish.
When applied correctly, the durability of these transfers is incredible. Industry tests show high-quality transfers can easily withstand 100+ washes while keeping over 95% of their original color. It’s no wonder the sports apparel world’s adoption of DTF is growing by 30% a year. By really understanding your press and your materials, you can deliver that same professional-grade quality with every single item you make.
Dodging Common Gang Sheet Mistakes
We've all been there. You spend hours getting your gang sheet just right, send it to print, and then... disaster strikes. A few simple, avoidable errors can ruin an entire batch of transfers. Learning from your own mistakes is one way to get better, but learning from everyone else's is a whole lot cheaper. Let this be your pre-flight checklist to save yourself film, time, and a major headache.
The Blurry Image Blunder
The single most common—and heartbreaking—mistake is uploading a low-resolution file. You find a great-looking graphic on the web, and it seems sharp on your monitor. The problem is, it's almost certainly a 72 DPI image meant for screens, not for print. When that file gets printed, it turns into a blurry, pixelated nightmare. A printer can't invent detail that isn't in the file, so your final transfer will look amateurish and be totally unusable.
The fix is non-negotiable: your artwork must be 300 DPI at the final print size. Before you even think about uploading, pop the file open in Photoshop, Illustrator, or your design tool of choice and check that resolution. If it’s low, you have to either find a higher-quality version or, ideally, recreate it as a vector graphic. There are no shortcuts here if you want crisp, professional-looking prints.
The Phantom Background Fiasco
Here's a sneaky one that catches people all the time: the "phantom" background. Your PNG file looks perfectly transparent on screen, but it’s hiding faint, semi-transparent pixels left over from a sloppy background removal job. You might not see it, but the DTF printer will. It dutifully lays down a white ink underbase for every single pixel it detects, leaving you with a cloudy, hazy box around your design once you press it on a shirt.
A core truth of DTF printing: the printer will print exactly what you tell it to. If your file has flaws, those flaws will end up on your apparel. Guaranteed.
To avoid this, grab the magic wand tool in your software and meticulously check that the background is 100% transparent. Zoom way in and hunt for any stray pixels or fuzzy edges before saving that final file. A clean file is the only way to get a clean transfer with sharp edges.
Spacing, Cutting, and Peeling Problems
Poor layout is another source of frustration. When you cram designs right up against each other to save space, you create a new problem: they become impossible to cut out without slicing into a neighboring transfer. As a rule of thumb, leave at least a 0.25 to 0.5-inch gap around each individual design. That little buffer makes cutting them apart with scissors quick, easy, and stress-free.
Finally, not all films are created equal. In Europe, which is a massive player with 35% of the global market, Cold Peel technology is king—part of a market projected to hit USD 1.3 billion by 2032. Hot Peel films, with only about 20% adoption there, are often seen as trickier. As you can discover in more DTF market trend reports on GlobeNewswire, the peeling process is critical. If you try to peel a cold peel transfer while it's still hot, the ink will lift right off the shirt, ruining it instantly. Always, always follow the specific instructions that come with your transfers for a perfect press every time.
Getting Your DTF Gang Sheet Questions Answered
Alright, so you’ve got your designs sorted out and your layout is looking good. Now comes the nitty-gritty—the practical questions about ordering, handling, and storing your DTF transfers gang sheet. Getting these details right is just as important as perfecting the artwork itself. Let's dive into some of the most common questions we get from customers.
What’s the Biggest Gang Sheet I Can Get?
This really comes down to what your print provider can handle. The width is fairly standard across the industry, usually hovering around 22 inches. The length, however, is where you'll see a lot of variation.
Some shops might offer sheets up to 24 inches long, but others using big roll-fed printers can go way beyond that—we're talking 120 inches (that's 10 feet!) or even longer.
Bottom line: before you spend time arranging your artwork, check the printer's specific dimensions. Designing a layout that's too big for their equipment is a classic mistake that’ll get your order kicked back, and you'll have to start from scratch. Always confirm their specs first.
Can I Put Photos and Logos on the Same Sheet?
Yes, absolutely! This is one of the best things about working with DTF. You can stick a high-detail, full-color photograph right next to a crisp, one-color vector logo on the same DTF transfers gang sheet, and both will come out looking fantastic.
The printer doesn't care if it's a photo or a logo; it just reads the data from your file. As long as your photos are saved at 300 DPI and your logos are clean vectors with a transparent background, you're golden. Go ahead and mix and match to your heart's content—it's the best way to squeeze every bit of value out of your sheet.
How Do I Store My Printed Gang Sheets?
Proper storage is a game-changer. If you want your transfers to press perfectly weeks or months from now, you have to protect them from their biggest enemies: humidity, direct sunlight, and dust. Any of these can mess with the adhesive and ruin the transfer.
The best practice is to keep your gang sheets in a cool, dry place, far away from any windows. Store them flat or loosely rolled (design facing out) inside a sealed plastic bag. This is your best defense against the elements.
When you store them like this, your DTF transfers will be ready to go for months, sometimes up to a year. This means you can order in bulk to get a better price without stressing about your inventory expiring before you get a chance to use it.
Do I Need a Special Heat Press for DTF?
You don't need a press that's specifically marketed for DTF, but you absolutely need a solid, commercial-grade heat press. A cheap one won't cut it. The two non-negotiables are precise temperature control and, most importantly, consistent, even pressure across the entire heating element.
Don't even think about using a home iron or a craft press like a Cricut EasyPress. They just can't deliver the heavy-duty, uniform pressure needed to properly fuse the DTF adhesive into the garment's fibers. If you try, you're almost guaranteed to have designs that peel, crack, or wash off right away.
Ready to create your own high-quality, cost-effective transfers? At Raccoon Transfers, our online Gang Sheet Builder makes it easy to upload your designs and maximize every inch. Get started today and enjoy next-day shipping on all your custom projects. Build Your Gang Sheet Now