
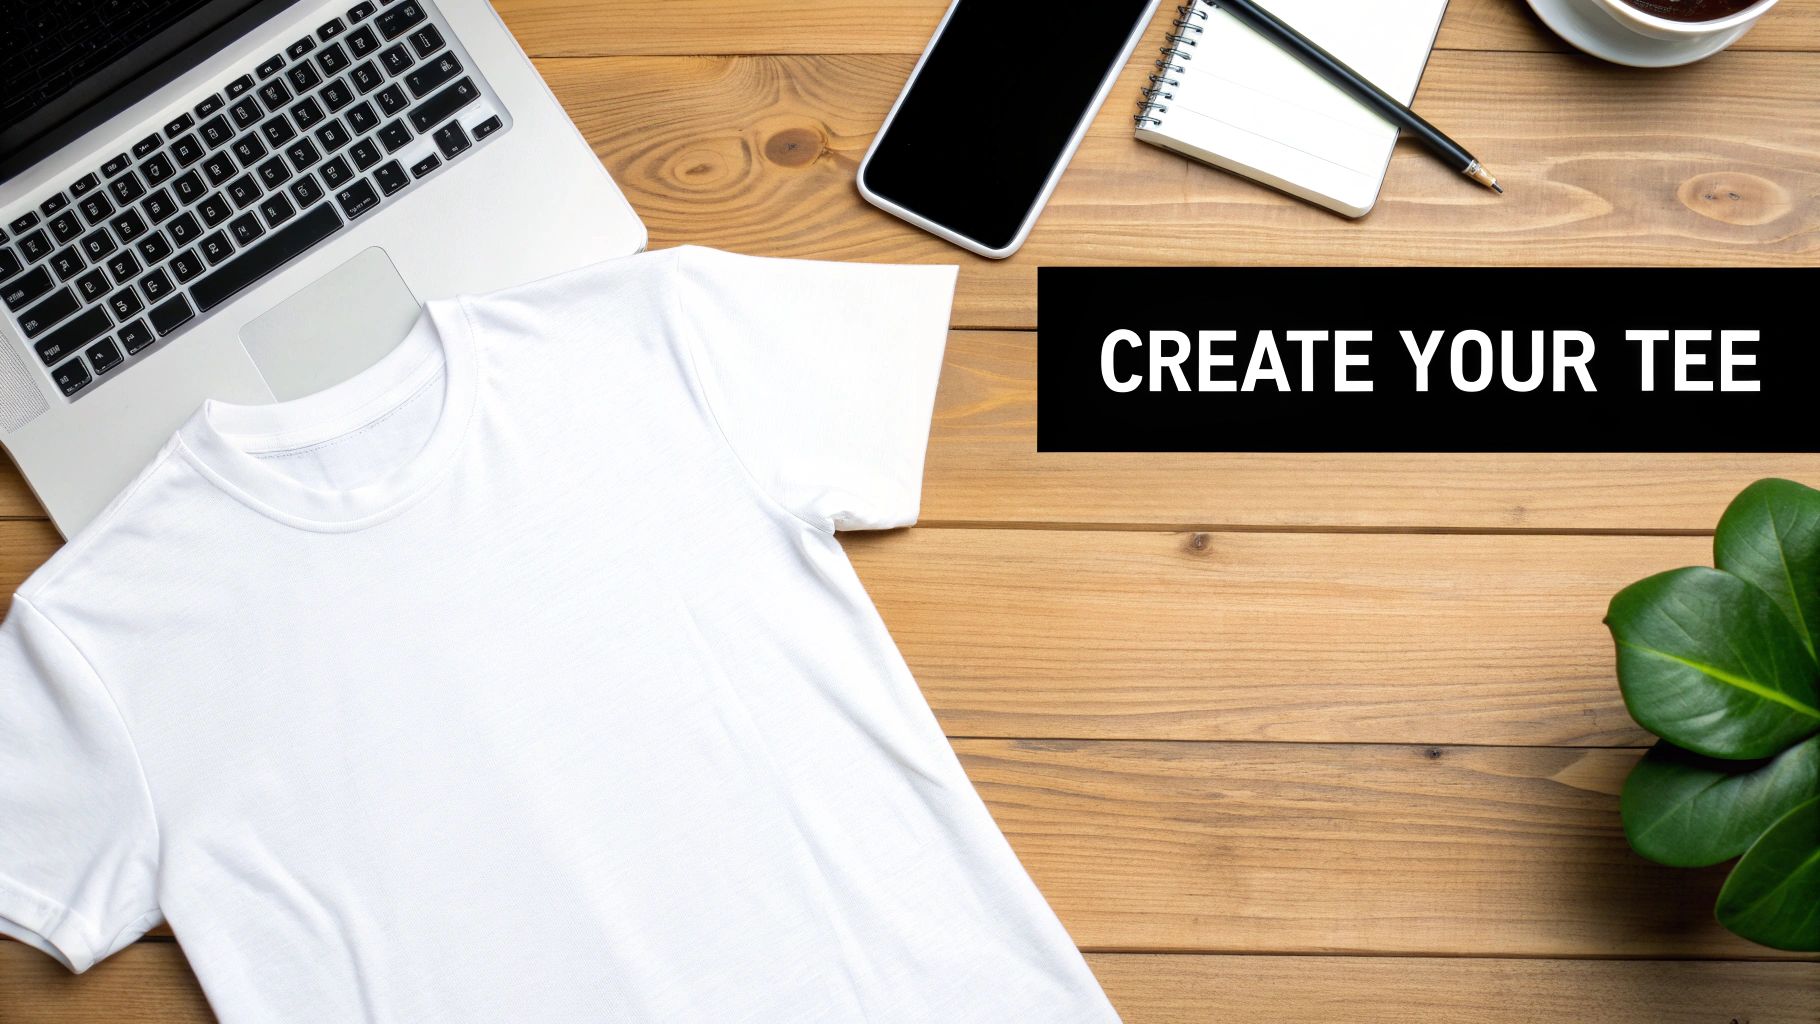
Printing on Transfer Paper for T Shirts a DIY Guide
Ready to take your design ideas and turn them into wearable art? Printing on t-shirts with transfer paper is a fantastic, accessible way to create vibrant, pro-level shirts right from your home or small studio. This method has completely changed the game, allowing small businesses and DIY crafters to make custom gear without the massive cost and learning curve of old-school screen printing.
From Blank Tee to Custom Creation
Think about it: you can take a design sitting on your computer and bring it to life on a t-shirt in just a few minutes. That's what heat transfer paper makes possible. Consider this guide your complete roadmap, walking you through every single step to get amazing results, every single time.
The journey from a plain shirt to a finished, custom piece is incredibly rewarding. To get there, you just need to nail a few key things, which we'll break down right here.
- Choosing Your Materials: The first big decision is picking the right paper. You'll need to match it to your printer type (inkjet or laser) and your fabric color (light or dark). This choice makes all the difference.
- Prepping Your Design: We'll get into the nitty-gritty of optimizing your image resolution and, crucially, how to mirror your design so it doesn't come out backward. It's a classic rookie mistake we'll help you avoid.
- Mastering the Application: Forget a wobbly home iron. You'll learn the secrets of using a heat press to get perfectly even, long-lasting transfers that look and feel incredible.
- Finishing Touches & Aftercare: How you care for the shirt after it's pressed is what makes it last. We’ll cover the simple steps to ensure your creations stand up to wash after wash.
The hunger for custom apparel is growing fast, so now is the perfect time to get good at this. The global market for custom t-shirt printing hit an incredible USD 6.46 billion in 2024 and is still climbing, thanks in large part to accessible digital methods like heat transfers.
A great design deserves a great canvas. The quality of your blank apparel directly impacts the final look and feel of your transfer, affecting both vibrancy and durability.
The foundation of any killer custom shirt is, well, the shirt itself. Choosing the right garment is just as critical as perfecting your press technique. For a deep dive into our top picks, check out our guide on the best blank t-shirts for printing.
And if you're someone who just loves making custom stuff with printable materials, you might get a kick out of a beginner's guide to printing sticker paper for another fun project.
Getting Your Essential Tools and Materials Together
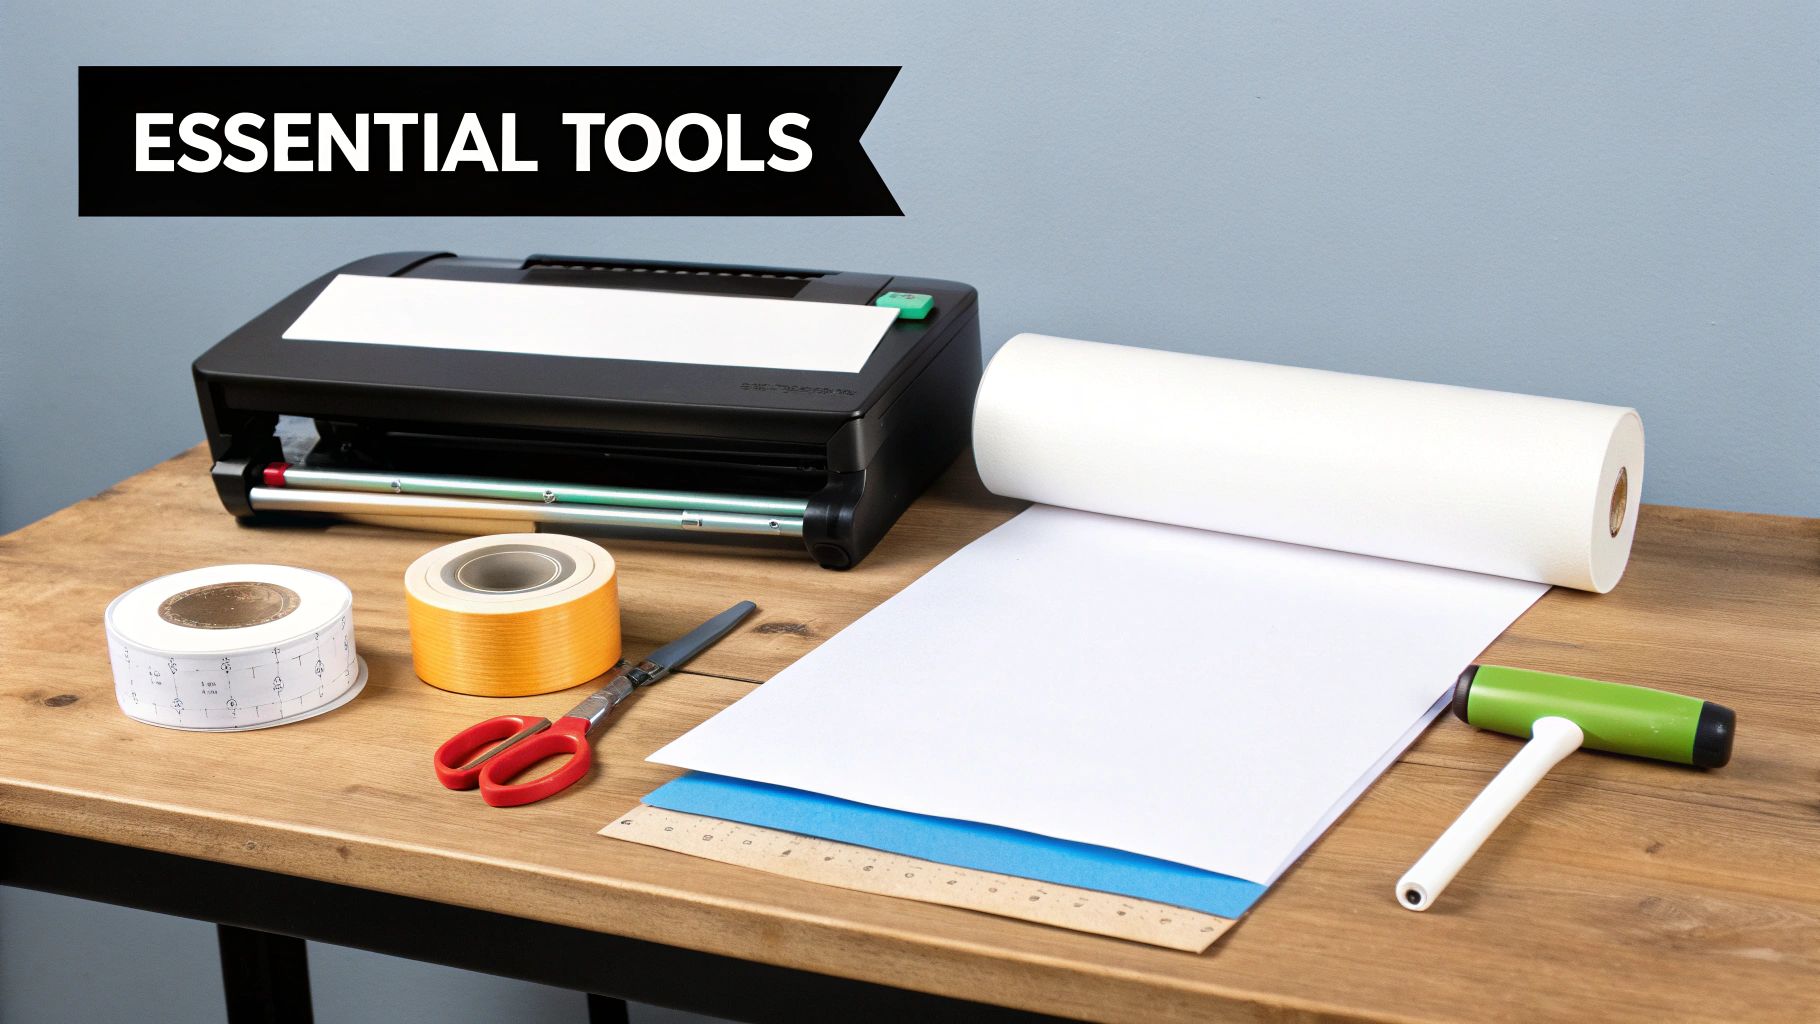
Let's talk setup. Before you even think about printing, getting your gear in order is the single best way to avoid those frustrating moments of wasted paper and messed-up shirts. Think of it as your pre-flight checklist for a perfect T-shirt. A great design deserves a great application, and that starts with having the right tools on your workbench.
First Things First: The Right Transfer Paper
The most important decision you'll make is choosing your transfer paper. This isn't a one-size-fits-all product—the paper you pick directly affects the look, feel, and durability of your final design. Your choice boils down to two key factors: your printer and the color of your T-shirt.
Transfer Paper Selection Guide
This quick reference table will help you pick the right paper for your project every time. Getting this part right is crucial, as using the wrong type can ruin both the transfer and the shirt.
| Fabric Color | Printer Type | Recommended Paper Type | Key Characteristic |
|---|---|---|---|
| Light Colors | Inkjet | Inkjet Paper for Light Fabric | Transparent film; unprinted areas are clear. |
| Light Colors | Laser | Laser Paper for Light Fabric | Transparent film; designed for high-heat laser printers. |
| Dark Colors | Inkjet | Inkjet Paper for Dark Fabric | Opaque white background; makes colors pop on dark material. |
| Dark Colors | Laser | Laser Paper for Dark Fabric | Opaque white background; withstands high heat from lasers. |
As you can see, matching the paper to both your printer and fabric color is non-negotiable.
Think about printing a vibrant design on a black hoodie. If you use paper for light fabrics, the colors will look dull and muddy. But with dark fabric paper, you're actually printing onto an opaque white layer that gets transferred, making your design pop just like a screen print.
For a deeper dive into all the options, check out our complete guide on the best paper for heat transfer.
Your Computer and Printer
The good news? You probably don't need a fancy commercial printer. Most modern home inkjet printers do a fantastic job. Just make sure it can handle slightly thicker paper and that you're using fresh, high-quality ink cartridges for the best color output.
Your computer and design software are just as vital. Whether you're a pro using Adobe Photoshop or you prefer a free tool like Canva, your goal is to create a crisp, high-resolution design file. We'll get into the file prep details in the next section.
Why a Heat Press is a Non-Negotiable Tool
I know it's tempting to grab the home iron, but trust me, it's the fastest way to a disappointing, peeling design. Investing in a heat press is an absolute game-changer if you're serious about making custom apparel.
What makes it so much better?
- Even Temperature: Irons have frustrating hot and cool spots, which cause patchy transfers. A heat press gives you consistent, edge-to-edge heat every single time.
- Consistent Pressure: A heat press clamps down with perfectly uniform pressure—something you just can't replicate by leaning on an iron. That firm pressure is what truly bonds the transfer to the fabric.
- Total Control: You can dial in the exact time and temperature your transfer paper requires, removing all the guesswork.
Even an entry-level press will give you results that are 100% more professional and durable than anything a home iron can produce.
Don't Forget the Small Stuff
A few other inexpensive tools will make your workflow smoother and your results cleaner.
- A Good Cutting Tool: For dark fabric transfers, you'll need to trim away the unprinted background. Sharp scissors work for basic shapes, but a craft knife or a cutting machine (like a Cricut or Silhouette) is your best friend for detailed designs.
- Heat-Resistant Tape: This stuff is a lifesaver. It holds your transfer perfectly still on the shirt, preventing any shifting that causes blurry "ghost" images.
- Teflon Sheet or Parchment Paper: Lay this over your transfer before pressing. It protects the design from direct heat and stops any ink from getting on your heat press.
For more insights on getting started, a crafter's guide to iron-on print transfer paper is another great resource. With your tools ready, it's time to move on to the fun part: preparing your design for a flawless print.
Prepping Your Design for a Perfect Transfer
A killer T-shirt design starts on your computer, long before the heat press even warms up. Honestly, getting your digital file right is the single most important thing you can do. It's where the magic begins.
Even the best printer and press on the market can't save a blurry, low-res image. Taking a few extra minutes to prep your artwork is an investment that pays off every single time. Let's walk through what you need to do to get your design completely print-ready.
Mastering Resolution and File Types
First things first, let's talk about clarity. If you want a design that looks sharp and professional—not like a fuzzy, homemade mess—you need a high-resolution file. The gold standard here is 300 DPI (dots per inch). If you pull a 72 DPI image off a website, it’s going to look pixelated and awful when you press it onto a shirt. I’ve seen it happen, and it's a real bummer.
When you're starting a new design, always set up your canvas to be 300 DPI at the exact size you plan to print. This way, you know you’re building quality in from the start.
Now, for the file type. While you might be used to JPEGs, for T-shirt transfers, the PNG file is your best friend.
- PNG (Portable Network Graphics): The number one reason to use a PNG is its ability to handle a transparent background. Got a cool logo or some text that isn't in a box? A PNG lets you isolate just the design itself, which is a must-have for dark fabric transfers where you have to trim away the blank space.
- JPEG (Joint Photographic Experts Group): JPEGs can't do transparency. Any part of your canvas that’s empty will print as a white block. This means you'll end up with a big white rectangle around your graphic. JPEGs only really work if your design is already a square or rectangle.
Pro Tip: Stick with the RGB (Red, Green, Blue) color mode for your designs. Your desktop printer is built to understand RGB, so you’ll get the most vibrant and accurate colors when you finally print on that transfer paper.
The Critical Step of Mirroring Your Image
Alright, listen up, because this is the one step that trips up almost every single beginner: you have to mirror your design. Forgetting to do this will leave you with a perfectly printed, backward image on your shirt.
So, why do you need to do this? When you're using transfer paper for light-colored fabrics, you place the paper face-down on the shirt. The heat then transfers the ink from the paper to the garment. Since you're flipping it over, the image has to be printed in reverse to look correct in the end.
It’s just like those temporary tattoos you used as a kid—the image is backward on the paper so it looks right on your skin.
When to Mirror:
- ALWAYS mirror for light fabric transfer paper.
- NEVER mirror for dark fabric transfer paper. Dark fabric paper works more like a sticker; you peel it and place it face-up, so you want the image printed exactly as it should appear.
Every design program out there, even free ones like Canva, has a simple "flip horizontal" button. It’s one click that saves you from a whole lot of frustration.
Optimizing Your Printer Settings for Success
Don't just hit the print button and hope for the best. You need to tell your printer what you're doing to get the best possible result. Open up your printer's dialogue box and look for a few key settings.
- Paper Type: Don't choose "Plain Paper." Instead, select a setting that tells the printer to lay down more ink. Options like "Matte Photo Paper," "Glossy Photo Paper," or "Premium Presentation Paper" work great. This forces the printer to slow down and use more ink, giving you much richer, more saturated colors.
- Print Quality: Crank it up. Always select the highest quality option available, usually called "High," "Best," or "Photo."
- Test Print: This is a simple habit that will save you money. Before you use a sheet of your good transfer paper, do a quick print on a regular piece of copy paper. It's the perfect way to spot a typo, a color that looks off, or a formatting mistake without wasting a valuable sheet.
All your prep work is done. You’ve got the perfect design printed and trimmed, and now it’s time for the magic to happen. This is the moment your art goes from a file on your computer to a custom shirt you can actually wear. It all comes down to the heat press, and getting a flawless, durable finish is all about mastering three simple things: heat, time, and pressure.
Think of your heat press like a chef's oven. You wouldn't bake a delicate cake and a crispy pizza using the same settings, right? The same logic applies here. Different fabrics need different treatment. Nailing these settings is what separates a professional-grade shirt from one that looks faded and starts peeling after the first wash.
Don't Skip the Pre-Press. Ever.
Before you even think about laying that transfer down, you have to pre-press the shirt. It’s a super quick step that tons of beginners skip, and they almost always regret it. Just place your blank T-shirt on the heat press and give it a quick press for about 5-10 seconds.
This one simple move does two incredibly important things:
- It gets rid of moisture. Fabric is sneaky; it holds onto moisture from the air even when it feels totally dry. If you trap that moisture under the transfer, it turns to steam and can completely ruin the adhesive bond.
- It smooths out wrinkles. This creates a perfectly flat canvas for your design. You don't want to permanently press a crease right through the middle of your artwork.
Seriously, think of the pre-press as your cheap insurance policy against the most common transfer fails. It sets you up for a strong, even application every single time.
Getting Your Design Placement Just Right
Placement is everything. A design that’s even slightly crooked or off-center can make a great shirt look amateurish. The sweet spot for a standard chest graphic is usually about 3 to 4 inches down from the collar.
Here's a pro tip I swear by: fold the shirt in half vertically and give it a quick press. This creates a faint centerline. Do the same with your transfer paper, and now you can line up the two center marks for perfect symmetry. If you're working with smaller designs, a few small pieces of heat-resistant tape on the corners of the paper will be your best friend, keeping the transfer from sliding around when you close the press.
And of course, make sure your design file is good to go—check the resolution, file format, and mirroring—before you hit print.
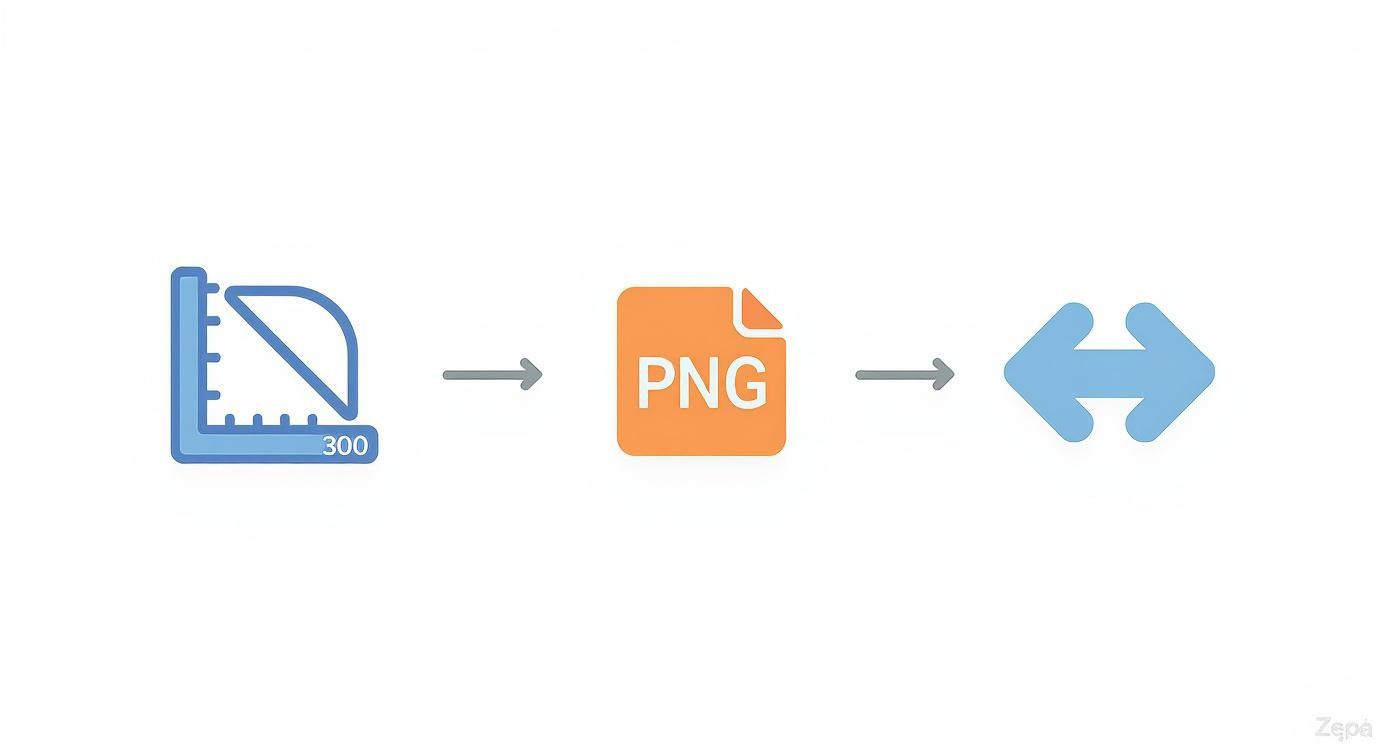
This quick visual reminds you to start with a high-quality 300 DPI image, save it as a transparent PNG, and mirror it if you're working with paper for light-colored fabrics.
Dialing in Your Heat, Time, and Pressure
The real heart of a great transfer is the perfect combination of temperature, time, and pressure. These settings aren't one-size-fits-all; they depend entirely on the fabric you're pressing. Always check the instructions that came with your transfer paper first, but knowing the "why" behind the settings will help you fine-tune your process.
If you want a deeper dive into the nuts and bolts of your machine, our complete guide on how to use a heat press for t-shirts is a great resource.
To get you started, here are some reliable starting points for the most common fabrics.
Heat Press Settings by Fabric Type
These are recommended starting points for temperature, time, and pressure for common T-shirt fabrics. Remember, it's always a good idea to test a scrap piece first!
| Fabric Type | Temperature Range (°F/°C) | Press Time (Seconds) | Pressure Level |
|---|---|---|---|
| 100% Cotton | 350-380°F / 177-193°C | 15-25 Seconds | Medium to Firm |
| Polyester | 270-300°F / 132-149°C | 10-15 Seconds | Light to Medium |
| 50/50 Blends | 320-350°F / 160-177°C | 12-18 Seconds | Medium |
Pro Tip: Polyester is really sensitive to high heat. It can scorch or even melt, which is why the temperature and time are so much lower. When in doubt, start on the lower end of the recommended range and do a test press.
Pressure matters just as much as heat. Medium pressure should feel like it takes a little effort to lock the handle down, while firm pressure requires a good, solid push. Not enough pressure and your transfer won't stick properly. Too much, and you can squish the adhesive out from the edges, leaving a weird outline around your design.
The Art of the Peel: Hot vs. Cold
Once that timer beeps, you've got one last critical choice: when to peel the backing paper off. Your transfer paper instructions will specify either hot peel or cold peel. This isn't a suggestion—it's a rule you need to follow.
- Hot Peel: Just like it sounds, you peel the backing away immediately after the press opens, while it's all still steaming hot. This usually gives the design a softer feel and a matte finish, as the ink stretches into the fabric fibers a bit.
- Cold Peel: You have to let it cool down. I mean completely cool to the touch. This method typically results in a glossier, more vibrant look because the ink and adhesive have had time to fully set.
Try to peel a cold-peel paper when it’s hot, and you might pull the whole design right off. Peel a hot-peel paper after it cools, and you could be left with a patchy mess. For the best result and durability, stick to the script. After peeling, a lot of pros (myself included) will cover the design with a Teflon sheet and press it again for another 2-3 seconds. This really helps lock the design in for the long haul.
Keeping Your Creations Looking Great (And Fixing Them When They Don't)
You did it. You pressed the perfect shirt. The colors pop, the lines are sharp, and your design looks exactly how you envisioned it. But don't celebrate just yet—the work isn't quite finished.
Now, the goal is to make sure that beautiful creation lasts. Proper aftercare is what separates a shirt that looks great on day one from a shirt that becomes a long-time favorite. And on the flip side, we need to talk about troubleshooting. Every single person making custom shirts runs into problems. Designs crack, colors fade, and weird outlines show up. Instead of getting frustrated, think of these as lessons. Figuring out what went wrong is how you get better at printing on transfer paper for t shirts.
The Essential Rules for Aftercare
The first 24 hours after pressing are absolutely critical. During this time, the transfer's adhesive is still curing and locking into the fabric fibers for good. Rushing this step is just asking for a cracked or peeling design down the road.
Here are the non-negotiable rules for making your prints last:
- Wait a Full Day: Don't even think about washing that shirt for at least 24 hours. Give the ink and adhesive plenty of time to fully set.
- Always Turn It Inside Out: This is the single most important habit to get into. It creates a shield, protecting your design from rubbing against other clothes and the inside of the washing machine.
- Cold Water is Your Friend: Hot water is the mortal enemy of custom prints. It can soften the adhesive and cause colors to bleed or fade. Stick to the cold cycle, always.
- Go Easy on the Detergent: Harsh detergents, bleach, and even fabric softeners can be surprisingly aggressive. They can break down the inks and weaken the transfer's bond. A mild detergent is all you need.
- Air Dry is Best: High heat from a dryer is just as bad as hot water. Your absolute best bet is to hang the shirt up to air dry. If you're in a pinch and must use a dryer, use the absolute lowest heat setting or a no-heat tumble-dry option.
These simple steps will dramatically extend the life of everything you make.
Solving the Most Common Transfer Paper Headaches
Even when you follow all the rules, things can go wrong. Let's walk through the most common frustrations and how to fix them.
"Why Is My Design Cracking or Peeling?"
This is, without a doubt, the number one issue for anyone starting out. You pull a shirt from its first wash, and that design you were so proud of is a cracked, peeling mess. It almost always comes down to one of three things.
- Wrong Heat Press Settings: This is the usual suspect. If your temperature was too low or your pressure wasn't firm enough, the adhesive never truly melted and fused with the fabric. Go back and double-check the recommended settings for your specific paper and the shirt you're using.
- You Skipped the Pre-Press: Remember that quick 5-second press we talked about earlier? It's not optional. Moisture trapped in the fabric turns to steam under the heat, and that steam gets in the way of a good bond. This is a silent killer of transfers.
- The Wrong Peel: If the instructions say "cold peel," you have to let it cool down completely. Peeling a cold-peel paper while it's still hot (or vice-versa for hot-peel) disrupts the bond before it has a chance to set, leading to a weak transfer that won't last.
Key Takeaway: A cracked design is almost always a sign of a weak bond. For your next project, try increasing your pressure a little or adding another 5-10 seconds to your press time. Often, that small adjustment is all it takes.
"My Colors Look Faded or Dull on the Shirt."
This is a frustrating one. The design looked incredible on the paper, but once pressed, it's disappointingly lifeless. This problem usually starts at your printer, long before the heat press is even turned on.
- Check Your Printer Settings: The most common culprit is printing on the default "Plain Paper" setting. You have to tell your printer it's working with special paper. Look for an option like "Matte Photo Paper," "Premium," or "High Quality." This tells the printer to lay down more ink, giving you much richer, more saturated colors.
- Ink Quality Matters: You can't expect vibrant results from old, cheap, or nearly empty ink cartridges. For the best prints, stick with fresh, genuine ink from your printer's manufacturer.
- Consider the Fabric: A 100% cotton shirt will almost always give you a more vibrant print than a 50/50 poly-cotton blend. Cotton fibers are just better at absorbing and holding onto the ink.
"How Do I Get Rid of That Annoying Box Outline?"
You press a really cool, custom-shaped graphic, only to be left with a faint, shiny rectangle around it. That's the polymer film from the unprinted areas of the transfer paper melting into the shirt. Thankfully, this is one of the easiest problems to solve.
The fix is simple: trim your design as close to the ink as possible before you press it. For simple shapes, a good sharp pair of scissors works great. If you're working with a more complex design with cutouts and negative space, a craft knife or a vinyl cutter with a contour-cutting feature is a game-changer. The less blank paper you press onto the shirt, the less of an outline you'll have to worry about.
Common Questions About T-Shirt Transfer Paper
Even with the best guide in hand, you’re going to run into questions when the heat press is on and you’re in the middle of a project. It just happens. Getting good answers to these common snags is what builds your confidence and helps you nail the process.
Let's walk through some of the questions I hear all the time from people just starting out.
Can I Just Use My Home Iron Instead of a Heat Press?
Look, I get it. A heat press is an investment. And while you can technically use a regular iron, I almost always advise against it if you're looking for results that last. The problem is simple: an iron can't deliver consistent heat and pressure.
A heat press has a big, flat platen that heats up evenly and clamps down with uniform force. That combo is what melts the adhesive and bonds it deep into the fabric fibers. Your household iron, on the other hand, is a mess of hot and cool spots, and the only pressure it has is what you can muster with your own strength. This almost always leads to patchy transfers, edges that peel up, and a design that looks awful after the first wash.
So, my honest advice? For a one-time craft project for yourself, sure, give the iron a shot. But if you’re making shirts to sell or something you want to wear for years, even a budget-friendly heat press will make a night-and-day difference in your quality.
Help! My Design Is Peeling After Just One Wash.
This is probably the most frustrating thing that can happen, but it’s almost always fixable. It usually boils down to one of three culprits:
- Not Enough Heat or Pressure: This is the big one. If the press wasn't hot enough or you didn't clamp it down hard enough, the adhesive never truly became one with the fabric. A weak bond is a guaranteed recipe for cracking and peeling.
- Wrong Peeling Method: Read the paper’s instructions carefully. Some are "hot peel," meaning you rip that backing off the second the press opens. Others are "cold peel," where you have to let it cool down completely. Peeling at the wrong time destroys the bond before it even has a chance to set.
- Bad Aftercare: You have to be patient! Tossing a freshly pressed shirt right into the wash is a death sentence for the design. You need to wait 24-48 hours for it to fully cure. After that, avoid hot water washes and high-heat drying cycles, which can shock the transfer and break it down.
What's the Real Difference Between Paper for Light vs. Dark Shirts?
This is fundamental. The main difference is how the paper deals with the shirt's background color.
Transfer paper for light fabrics has a transparent film. The ink sits on this clear layer, and when you press it, only the ink itself transfers over. The white or light color of the shirt shows through any blank areas in your design. This is why you always have to mirror your image before printing on this type of paper.
Transfer paper for dark fabrics works completely differently. It has a solid, opaque white background. You print your design onto this white base, and the whole thing gets applied to the shirt, almost like a very thin, high-quality sticker. You do not mirror the image for these. That white layer is essential for making your colors look bright and vibrant instead of getting lost on a black or navy shirt.
How Do I Get Rid of That Ugly Box Outline Around My Design?
Ah, the dreaded polymer box. That faint, sometimes shiny outline is from the un-printed part of the transfer paper’s coating pressing into the fabric. The absolute best way to prevent it is to meticulously trim your design.
Get as close as you can to the printed edges with a sharp pair of scissors. If you’re doing this a lot or have complex shapes, a vinyl cutter with a contour cut (often called "Print then Cut") feature is a game-changer. It follows the outline of your art perfectly.
You can also play with your heat press settings. Sometimes, just backing off the pressure a little bit can help. You want enough pressure to bond the design, but not so much that you're stamping the polymer edge deep into the fabric's weave. Finding that sweet spot is key to getting that clean, professional look.
Ready to skip the DIY process and get professional, durable, and vibrant transfers delivered right to your door? Raccoon Transfers specializes in high-quality DTF transfers that are easy to apply and built to last. Explore our products and see the difference.