
Heat Press Temperature Chart: Your Ultimate Guide
Nailing the right heat press settings is everything, and a solid heat press temperature chart gives you the exact numbers to work with. Generally, you're looking at a range from about 285°F for polyester up to 300°F for cotton, with press times usually falling between 6-15 seconds. Think of this guide's quick reference chart as your starting point for getting those perfect transfers, every single time.
Your Quick Reference Heat Press Temperature Chart
When you're in the middle of a project, you need the right settings fast. This section gives you an at-a-glance chart for the most common fabrics you'll encounter, like cotton, polyester, and blends, when using standard transfers such as DTF or HTV. It's meant to be your first stop before you get into the weeds with more unusual materials.
Use this chart for quick answers when you're working with the basics. The graphic below offers a simple visual to help you remember the temperature differences for these core fabrics.
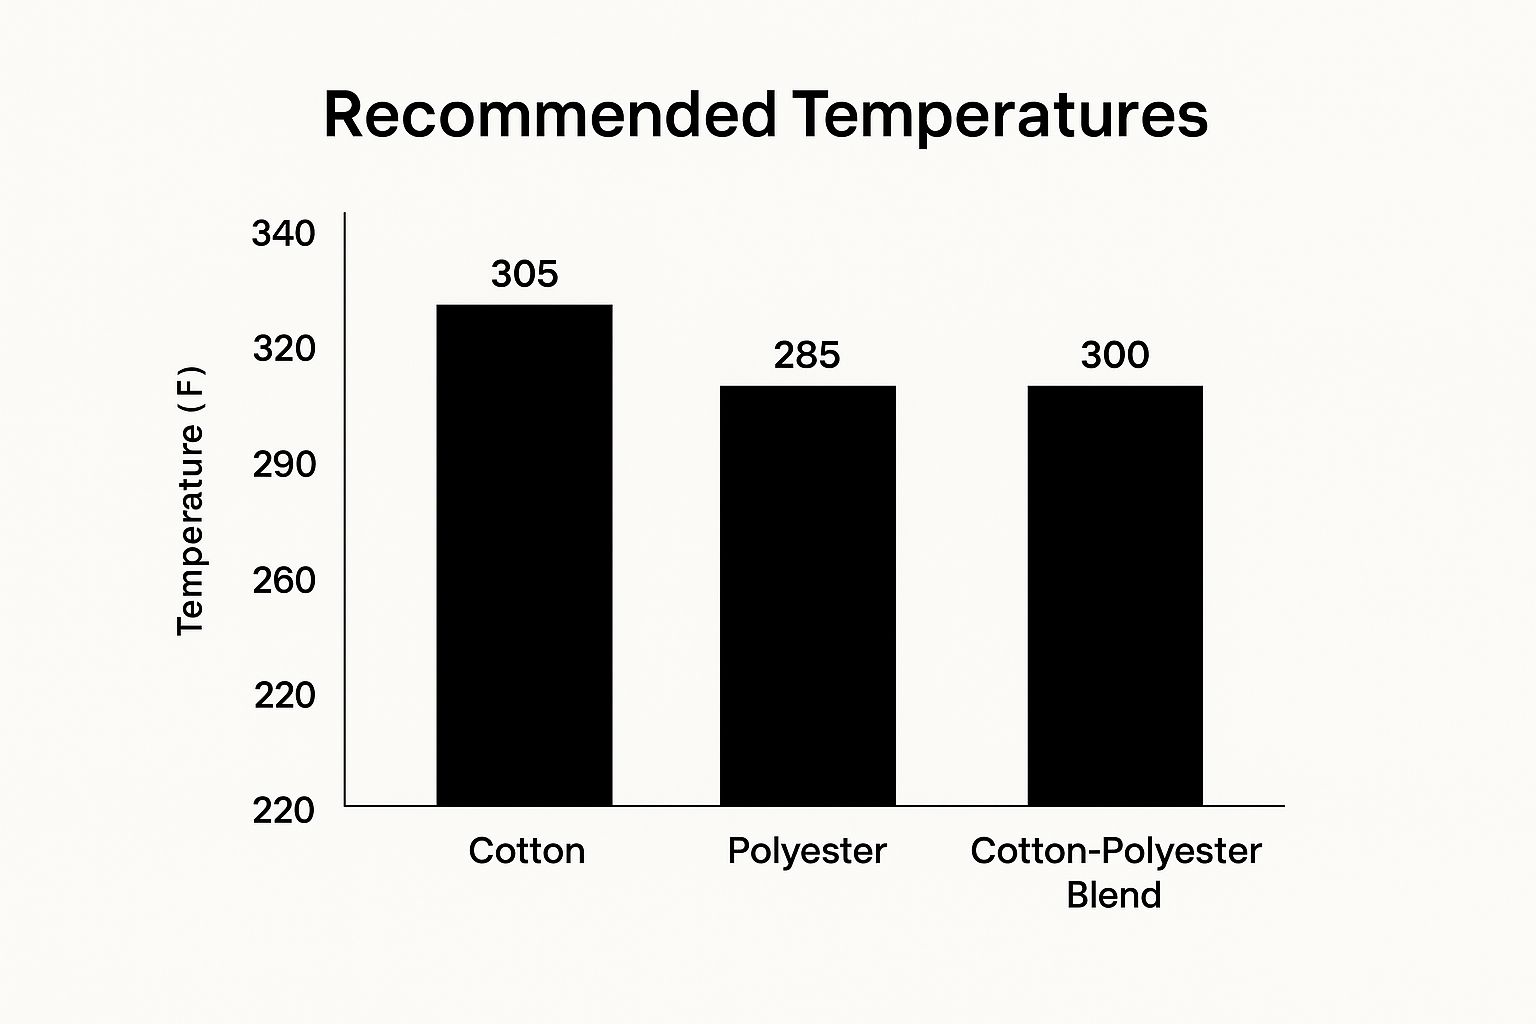
As you can see, polyester needs a lower temperature to avoid scorching or melting, while cotton is a bit more forgiving and can take the heat.
Quick Settings for Common Materials
Here’s a handy table with the settings I turn to most often. It’s a great cheat sheet for the fabrics that show up in almost every print shop.
| Material | Temperature Range (°F/°C) | Time (Seconds) | Pressure | Peel Type |
|---|---|---|---|---|
| 100% Cotton | 305-315°F / 150-157°C | 12-15 | Medium | Hot or Cold |
| 100% Polyester | 285-300°F / 140-149°C | 10-12 | Medium | Warm or Cold |
| 50/50 Blends | 300-310°F / 149-154°C | 10-12 | Medium | Warm or Cold |
These settings should get you great results right out of the gate.
Pro Tip: I can't stress this enough—always do a test press. Grab a scrap piece of the same fabric or use a hidden spot on the garment itself. This one small step can save you from ruining a perfectly good item and helps you dial in your settings with confidence.
While this table is perfect for everyday jobs, our more detailed heat press temperature guide goes much deeper into specialty materials and troubleshooting tips. Remember, these numbers are a reliable baseline, but your own machine might have its own quirks, so a quick test is always a smart move.
Getting to Grips with Heat Pressing Basics
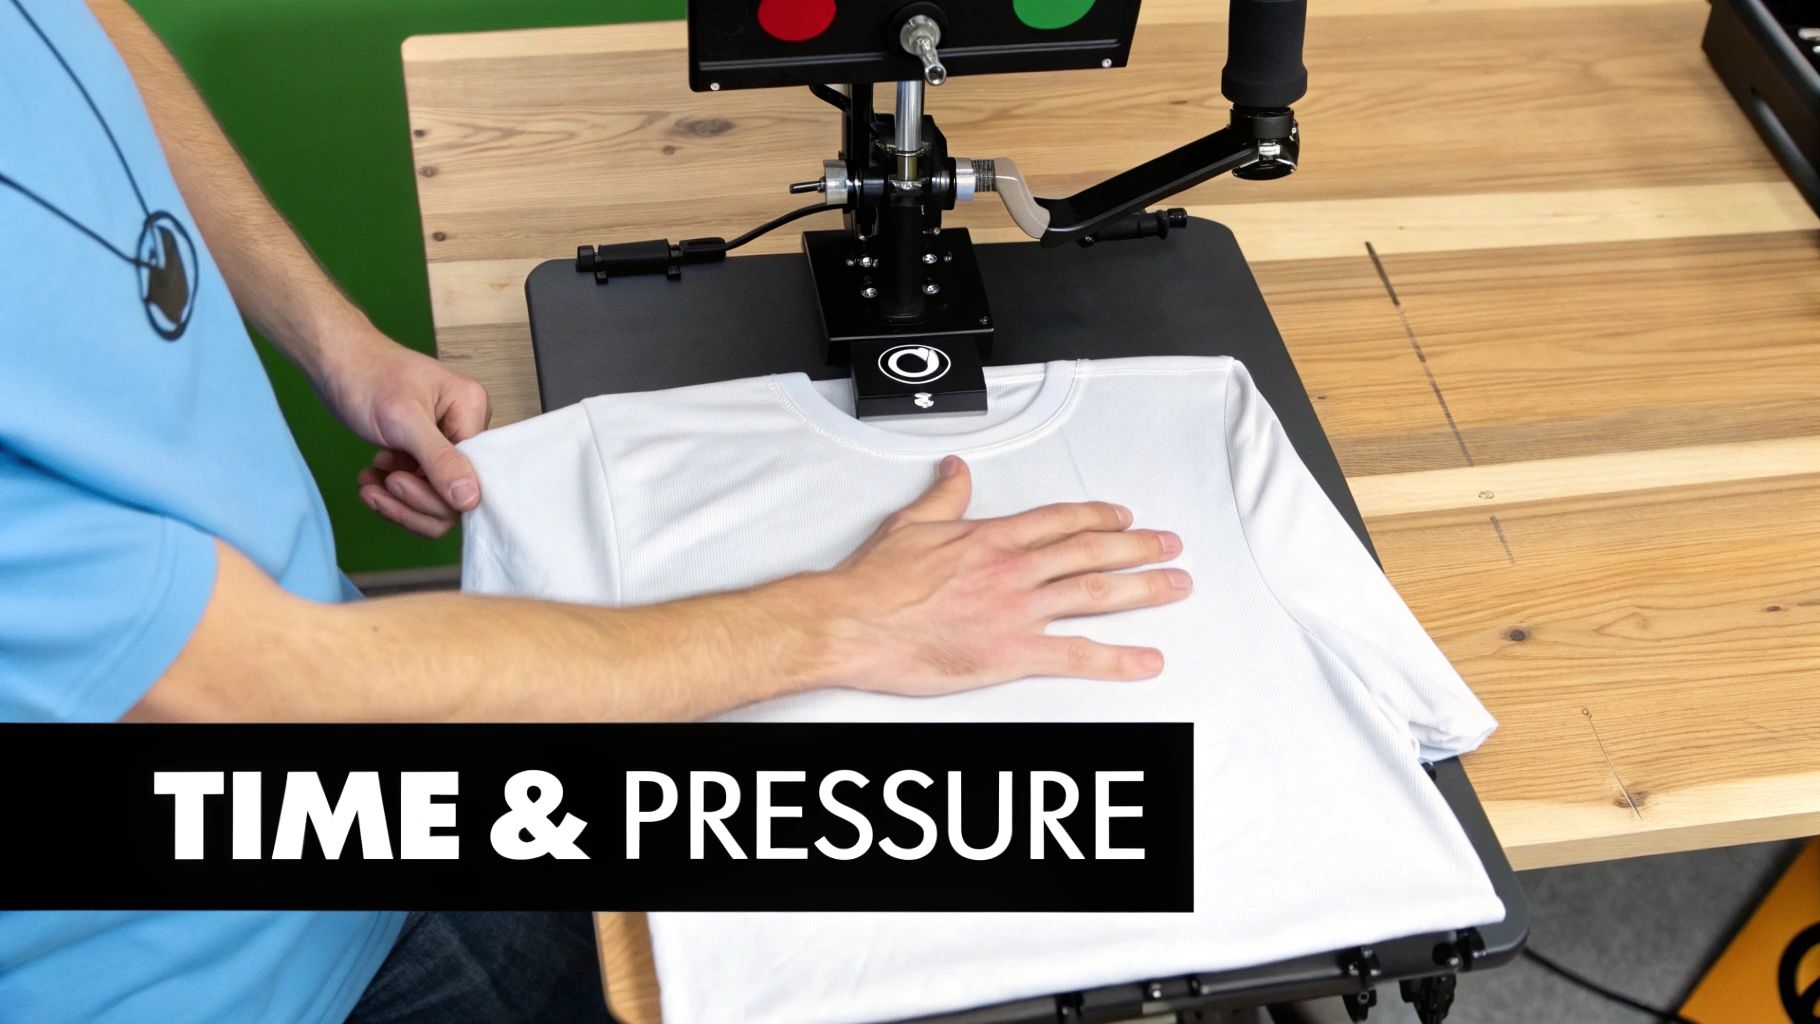
Before you even glance at a heat press temperature chart, it’s worth understanding why those numbers are so important. Nailing a perfect transfer isn't magic; it comes down to a careful balance of three key things: temperature, time, and pressure. Each one has a specific job to do, and getting them all right is what separates a professional-looking product from a failed attempt.
Temperature is what gets the whole process started. The right amount of heat, which can be anywhere from 285°F to over 400°F, is needed to activate the adhesive on the back of your transfer. If the heat is too low, the design won't stick properly. Too high, and you're in danger of scorching the fabric or even melting the transfer itself.
Next up is time, often called "dwell time." This is simply how long you apply the heat. It’s during these crucial seconds that the now-activated adhesive has a chance to sink in and form a solid bond with the fibers of the material. This is what gives your design its staying power, wash after wash.
Finally, there's pressure. You need firm, even pressure to ensure every single part of the transfer makes solid contact with the item you're pressing. Without it, you’ll end up with flaky, uneven transfers that start peeling at the edges almost immediately.
The Three Pillars of a Perfect Press
Think of these three elements as a team that has to work together perfectly. If one is off, the whole thing falls apart.
- Temperature: This is what activates the glue.
- Time: This is how long the glue gets to cure and create a permanent bond.
- Pressure: This forces the design into the fabric for an even, lasting finish.
A very common rookie mistake is to focus only on time and temperature while forgetting about pressure. In my experience, uneven or weak pressure is the number one reason why transfers fail after the first wash.
It's also worth noting that your peel type—whether it's a hot, warm, or cold peel—is directly tied to these settings. The right combination of time, temp, and pressure will determine the right moment to remove that backing paper for a clean result.
Heat Press Settings For Natural Fabrics
Natural fibers like cotton and canvas are the bread and butter of the apparel decorating world. They’re durable, breathable, and customers love them. But their porous, textured nature means you have to dial in your settings just right. Get it wrong, and you could end up with a faded transfer or, worse, a scorched shirt.
Unlike slick synthetics, these fabrics can take a bit more heat, but it’s all about finding that perfect balance of temperature and time. This is where a reliable heat press temperature chart becomes your best friend. For instance, most cotton garments do well around 356°F for 8 to 15 seconds, which is quite a bit hotter and longer than what you’d use for polyester. Nailing these parameters is what gives you a vibrant, durable print that feels great and lasts wash after wash.
Settings For 100% Cotton
Let's start with the basics: the standard 100% cotton t-shirt. This is probably what you'll press most often. Whether you're working with HTV or DTF transfers, these settings are a solid starting point.
- Temperature: 305-320°F (152-160°C)
- Time: 12-15 seconds
- Pressure: Medium to firm
Think of it this way: applying a simple, single-color HTV logo to a standard-weight cotton tee will probably be perfect at 315°F for 12 seconds. But if you’re working with a thicker, ringspun cotton shirt, those denser fibers might need the full 15 seconds for the adhesive to really sink in and bond properly.
If you're diving into more complex jobs, especially with DTF, it’s always a good idea to dig deeper into specific guidelines. You can find more detailed guidance in our complete guide to heat press settings for DTF.
A Practical Example: Imagine you're pressing a multi-layered HTV design onto a lightweight ringspun cotton shirt. Instead of pressing each layer for the full time, just tack them down for 2-3 seconds each. This "tack press" prevents the vinyl from over-curing and shrinking. Once all your layers are in place, press the entire design for the full 12-15 second duration. This final press cures everything at once, giving you a smooth, professional finish that isn't stiff or bulky.
Pressing Synthetic Fabrics and Blends
Working with synthetics like polyester and nylon can be tricky. These fabrics are incredible for apparel, but they are also incredibly sensitive to heat. If you go too hot, you risk scorching, melting, or leaving permanent press marks on the garment. This is where having a reliable heat press temperature chart becomes a non-negotiable part of your toolkit.
The golden rule for synthetics is to dial back the heat and shorten your press time. Think low and slow. While you might press cotton at a blistering 380°F, polyester demands a much gentler touch, typically around 270°F. This significant drop in temperature is what protects those delicate fibers from damage while still ensuring your transfer sticks for good.
Settings For Polyester And Blends
Before you even think about temperature, make sure you're using the right kind of heat transfer vinyl (HTV). Most standard HTVs need too much heat for polyester, so look for vinyl specifically made for low-temp applications.
Here are some solid starting points I use in my own shop:
- 100% Polyester: For things like performance wear, I usually set my press to 285-300°F (140-149°C) and press for 10-12 seconds with medium pressure.
- 50/50 Cotton/Poly Blends: These can handle a bit more heat. A range of 300-310°F (149-154°C) for 10-12 seconds works great for most hoodies and common blended tees.
- Tri-Blends (Cotton/Poly/Rayon): Be extra careful here. These fabrics are notoriously delicate. I always start low, around 280°F (138°C) for 10 seconds, and do a test press first.
Crucial Tip: Never press synthetics without a Teflon sheet or some form of protective cover paper. Seriously, don't do it. This simple barrier is what stands between you and a melted shirt. It helps distribute the heat evenly and prevents that dreaded shiny box outline that screams "amateur." It’s an easy step that makes all the difference.
Beyond the Basics: Pressing Specialty Vinyl and Hard Goods
Once you've got the hang of standard fabrics, a whole new world of customization opens up with specialty materials. We're talking everything from textured heat transfer vinyl (HTV) to hard substrates like ceramic mugs and metal plates. But be warned: you can't just use your standard heat press temperature chart for these. Each one has its own unique personality and requires a specific touch.
Take specialty vinyl, for instance. The settings that work for a simple cotton tee will spell disaster for something more complex. Glitter HTV, with its thick, sparkling texture, needs a good blast of heat—usually around 320-330°F (160-165°C)—to get that adhesive to really grab hold. On the flip side, something delicate like flock HTV, with its soft, velvety feel, needs a gentler approach. Too much heat, and you'll melt those fuzzy fibers flat. For flock, you'll want to stick closer to 305°F (152°C).
Getting the Settings Right for Advanced Materials
Nailing the application on specialty items is all about precision. Get it wrong, and you've wasted not only the transfer but the blank item itself. That’s why having a solid reference guide is so important.
The settings below are a great starting point for some of the most popular advanced materials.
Heat Press Settings for Specialty Materials
When you're working with advanced HTV types or hard substrates, the right combination of time, temperature, and pressure is everything. This table gives you the baseline settings to get started, but always remember to do a test press if you can.
| Material/Substrate | Temperature Range (°F/°C) | Time | Pressure | Special Notes |
|---|---|---|---|---|
| Glitter HTV | 320-330°F (160-165°C) | 15-20 sec | Firm | Ensures the thick adhesive bonds through the glitter texture. |
| Flock HTV | 305-315°F (152-157°C) | 10-15 sec | Medium | Too much heat or pressure can crush the velvet-like fibers. |
| Holographic HTV | 315°F (157°C) | 10-15 sec | Medium | This material can be heat-sensitive; avoid overheating. |
| Sublimation on Ceramics | 380-400°F (193-204°C) | 180-240 sec | Medium-Firm | Requires a mug press. Item MUST have a polymer sublimation coating. |
| Sublimation on Metal | 360-380°F (182-193°C) | 60-90 sec | Medium | For aluminum panels. Must be sublimation-coated. |
Getting these specialty applications right can really make your products stand out. A glitter design on a tote or a custom sublimated mug has a much higher perceived value than a standard t-shirt print.
Expert Tip: When you're sublimating on hard goods like ceramic or metal, double-check that your blanks are specifically marked as "sublimation-ready." These items have a special polymer coating that allows the ink to bond. If you try to press onto a regular mug from the dollar store, the ink will have nowhere to go, and you'll end up with a blurry, faded mess no matter what your settings are.
Diving into these advanced materials is a great way to expand your product line. If you need a refresher on the fundamentals first, be sure to check out our complete guide on how to heat press just about anything. Mastering these specialty items is what separates the hobbyists from the pros.
What to Do When Things Go Wrong: A Troubleshooting Guide
Even when you follow a heat press chart to the letter, sometimes things just don't work out. It's one of the most frustrating parts of the job—a perfect design ruined by a press that didn't go as planned. But don't worry, most issues are easily fixable once you know what to look for.
From vinyl peeling off a brand-new shirt to scorch marks that won't come out, the problem almost always comes down to three things: time, temperature, or pressure. Let's break down how to spot the issue and get your project back on track.
Pinpointing the Problem
Most heat press mishaps fall into a few common buckets. If you can recognize the signs, you're halfway to solving the problem.
- HTV Peeling After Washing: Nine times out of ten, this is a pressure problem. The adhesive on the vinyl needs to be pushed firmly into the fabric's fibers to create a permanent bond. If your pressure is too light, the vinyl is just sitting on top. Crank it up to a medium or firm setting and make sure it’s even.
- Scorch Marks or Discoloration: This one's pretty straightforward—your heat is too high. This is especially true for synthetics like polyester, which can't handle intense heat. Try dropping the temperature by 10-15°F and always use a protective cover sheet as an extra buffer.
- Uneven Adhesion: Ever have one part of a design stick perfectly while another part lifts right off? That's a classic sign of uneven pressure or cold spots in your platen. A thick, high-quality upper platen helps with heat consistency, but you should always double-check that your pressure is balanced across the entire surface.
Most heat press work across the globe happens between 300°F (149°C) and 400°F (204°C). While a standard cotton tee often presses beautifully at 350°F (177°C), delicate materials require a much gentler touch. For a deeper dive into these standards, check out this detailed heat press FAQ page.
Pro Tip: Your heat press's digital display can lie. I highly recommend grabbing an infrared temperature gun to check the real temperature of your platen. A 10-degree difference might not seem like much, but it can absolutely make or break your press.
Common Questions About Heat Press Settings
Getting your heat press settings just right can feel like a bit of an art form at first. If you've got questions, you're not alone. Here are a few of the most common ones we hear from people trying to master their craft.
How Can I Be Sure My Pressure Is Right?
There's a classic, low-tech trick for this: the dollar bill test. Just tuck a bill under each corner of the top platen and clamp it down. If you can yank them out without any trouble, your pressure is too light. You should feel a good amount of resistance when you pull.
If your press has a digital gauge, a safe bet for most heat transfer vinyl (HTV) is a medium pressure setting, which usually falls between 4-6 PSI. This is a great starting point to work from.
Is Pre-Pressing the Garment Really Necessary?
Absolutely, and it's a step you should never skip. Pre-pressing for just 3-5 seconds does two critical things. First, it smooths out any wrinkles, giving you a perfectly flat canvas for your design.
More importantly, it forces out any hidden moisture in the fabric. That trapped moisture turns into steam under heat, and steam is the enemy of a good transfer. It can block the adhesive from bonding properly, which is why some designs start peeling after a wash.
Can I Just Use a Regular Iron Instead of a Heat Press?
For a small, one-off hobby project, an iron might get you by. But if you're aiming for professional, long-lasting results, an iron just can't compete.
The problem is that irons heat unevenly and can't deliver the consistent, heavy pressure needed for the adhesive to fully cure. A heat press is the only way to get that durable, commercial-quality finish that stands up to wear and tear.