
how to print on iron on transfer paper - Pro Tips
Before you can bring those awesome custom designs to life, you need to get your supplies in order. Think of this as your pre-flight checklist for a successful project. Choosing the right gear from the get-go is the secret to getting a final product you're actually proud of.
Gathering Your Essential Toolkit
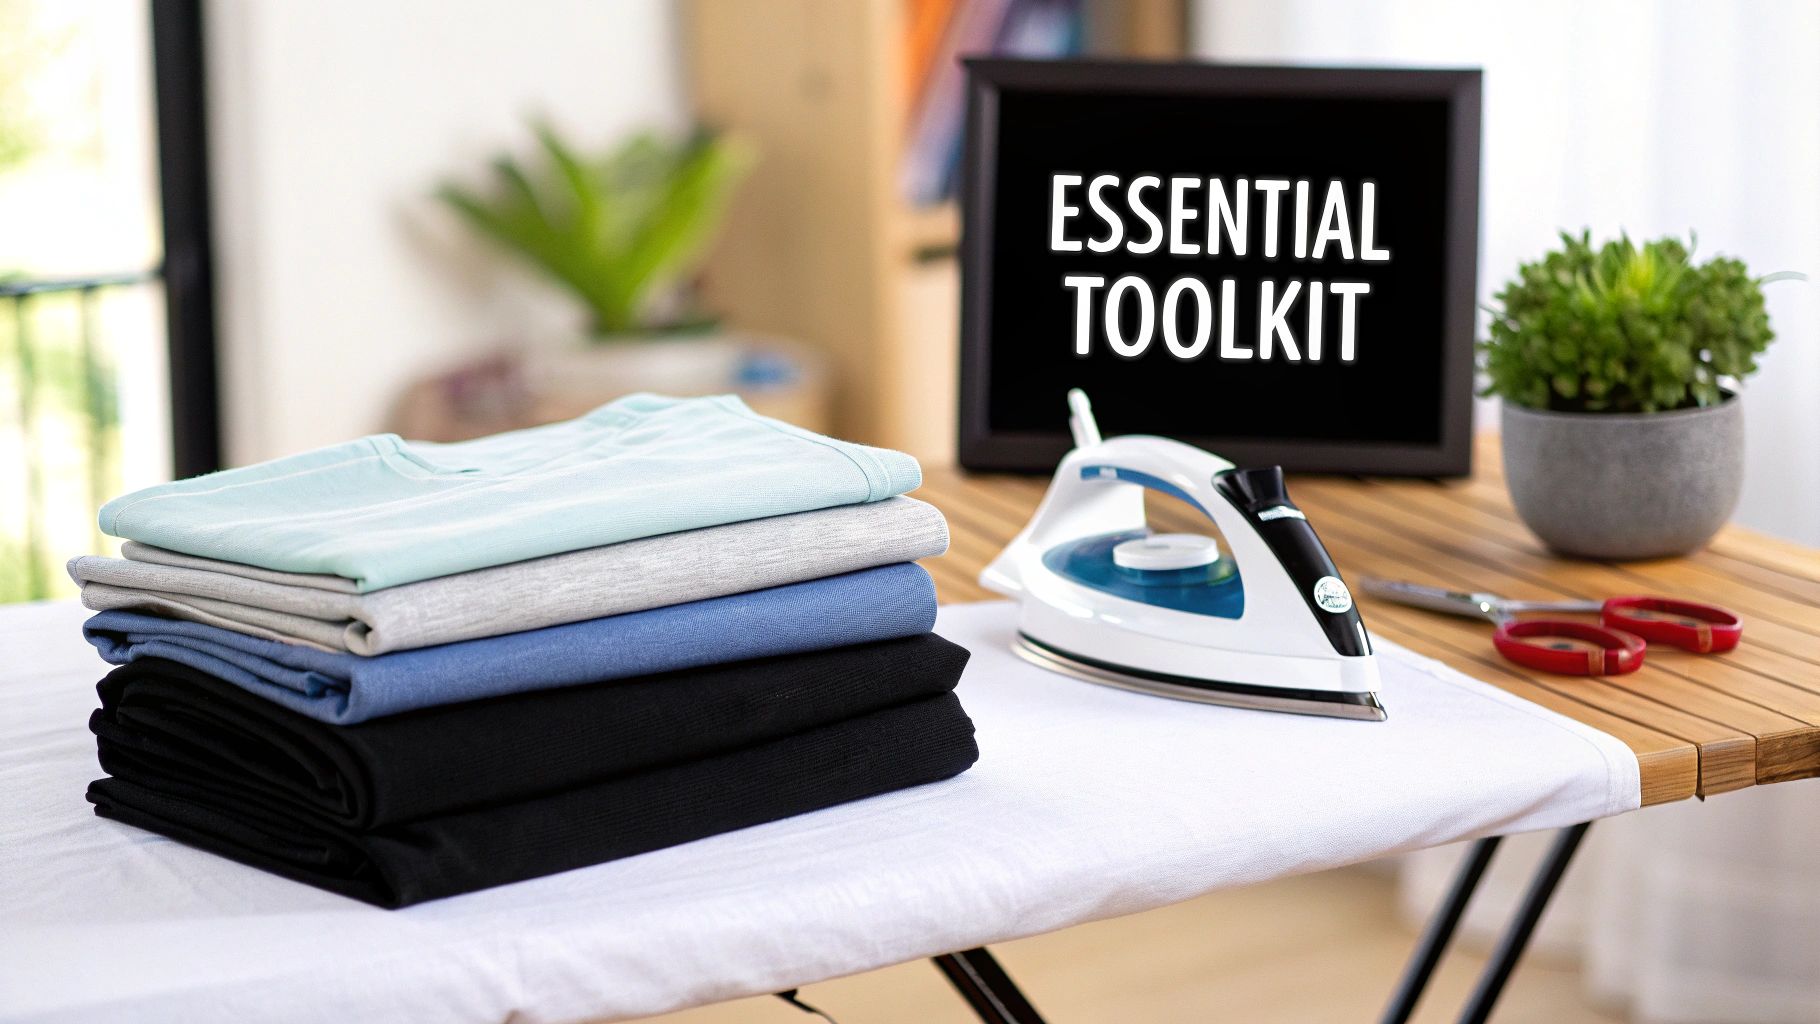
There's nothing more frustrating than getting halfway through a project only to realize you're missing something crucial. When you're learning how to print on iron-on transfer paper, having everything you need on hand makes the whole process smoother and much more fun.
The DIY apparel world is booming, and the numbers back it up. The heat transfer paper market is projected to skyrocket from around $656.6 million to an estimated $1.22 billion by 2034. That's a whole lot of custom t-shirts! It shows just how popular this creative outlet has become. You can read more about the trend in this heat transfer paper market report.
The Core Components
Your first and most important decision is picking the right transfer paper. This choice comes down to one simple thing: the color of your fabric.
Transfer Paper Options for Different Fabric Colors
Here's a quick breakdown to help you decide which paper you'll need. Getting this right is probably the most critical step.
| Feature | Paper for Light Fabrics | Paper for Dark Fabrics |
|---|---|---|
| Background | Transparent | White and Opaque |
| How it Works | The fabric color shows through any white areas in your design. | The white background makes your design pop on dark colors. |
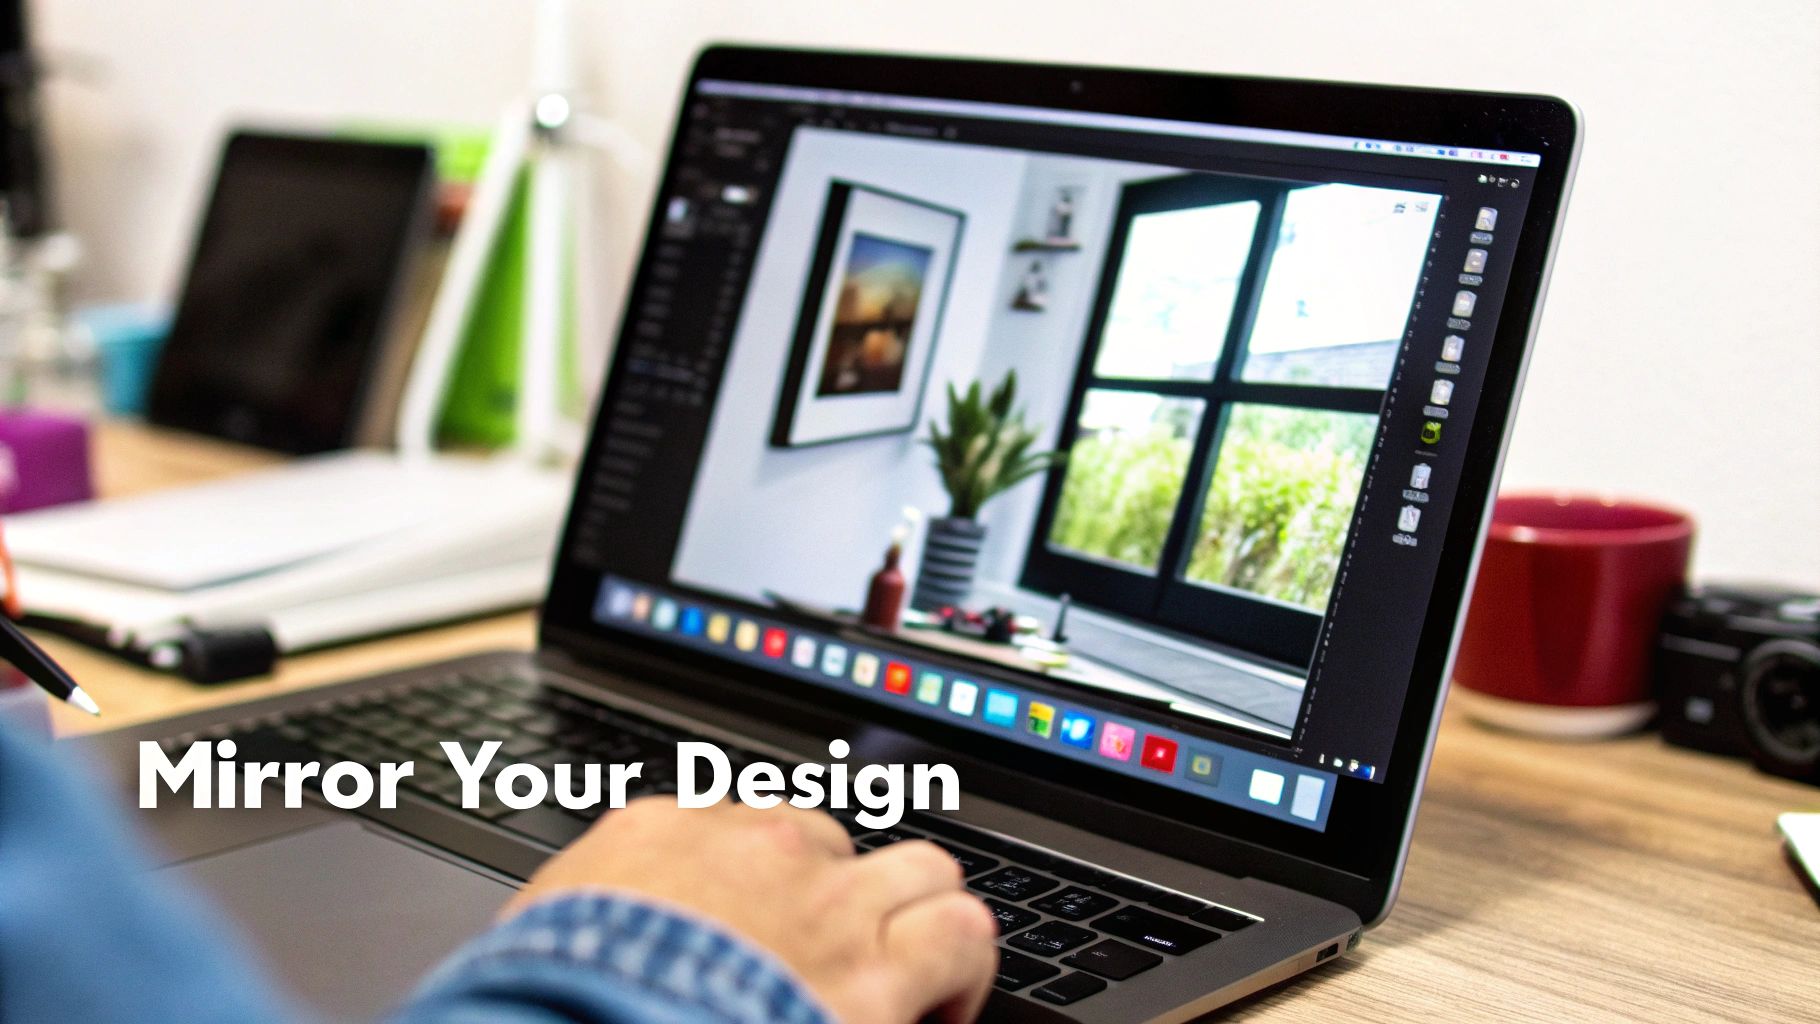
| Image Prep | Crucial: You must mirror your image before printing. | You do not mirror the image. Print it as-is. |
| Best For | White, pastel, and other light-colored garments. | Black, navy, forest green, and other dark or vibrant fabrics. |
Picking the right paper is half the battle. If you want to get really deep into the specifics, check out our guide on the best paper for heat transfer to see our top picks.
Printer and Application Tools
Good news: you probably already have a printer that works. Most standard inkjet printers are perfect for iron-on transfers. Their inks are designed to bond perfectly with the paper's coating. Just be careful—if you have a laser printer, you absolutely must use transfer paper made specifically for it. Using the wrong kind can seriously damage your machine.
Pro Tip: When you go to print, always dig into your printer settings and select the highest quality option, often called "Best" or "Photo." This forces the printer to use more ink, giving you a much richer, more vibrant transfer that will last longer.
Finally, you need heat. A dedicated heat press is the gold standard, giving you perfectly even temperature and pressure for that pro-level finish. But don't worry, a regular household iron can get the job done, too. The key is to press on a hard, heat-resistant surface like a countertop (with a towel down!)—not a wobbly ironing board.
Getting Your Design Ready for a Flawless Transfer
The secret to a great iron-on project starts long before you ever touch the printer. Getting your digital design prepped perfectly is what separates a professional-looking shirt from a costly, frustrating mistake.
The most common rookie error? Forgetting to mirror the image. Trust me, I've seen it happen countless times. When you're using transfer paper for light-colored fabrics, you iron the design face-down. If you don't flip it horizontally in your software first, any text or directional images will end up as a backward reflection on your shirt.
The Critical Flip and Image Quality
Thankfully, flipping your design is easy. Most design programs, like Canva, have a simple "flip horizontal" or "mirror" command. It’s usually just a single click after you select your graphic.
Once that's done, let's talk about image quality. A design that looks sharp on your glowing computer screen can turn into a blurry, pixelated mess when it’s printed and pressed onto fabric.
Key Takeaway: Always, always start with a high-resolution design. You're aiming for 300 DPI (dots per inch) at the actual size you plan to print. This is the gold standard for print quality and ensures every line and detail comes out crisp and clear.
Think of it this way: a 300 DPI file gives your printer all the information it needs to create a beautiful, sharp image instead of a fuzzy blob. Getting the size and placement right is just as crucial. You can find more specific advice in our guide on the perfect https://raccoontransfers.com/blogs/guides/graphic-size-for-t-shirt.
Fine-Tuning Your Visuals
Before you finalize everything, take a moment to look at the overall composition. A little bit of knowledge goes a long way, and mastering the principles of visual design can help turn a simple graphic into something truly eye-catching.
Color settings are also a big piece of the puzzle. For the truest color match, it’s best to work in a CMYK color profile if your software allows it. Printers use CMYK (Cyan, Magenta, Yellow, Black) ink, so this setting gives you a much better preview of the final printed colors. It’s a small tweak that helps prevent that vibrant red on your screen from turning into a muddy orange on the shirt.
Dialing in Your Printer for the Best Results
I've seen it happen a hundred times: a great design gets ruined by the wrong printer settings. You end up with colors that look faded or, even worse, ink that smudges right off the paper. Getting your printer settings right is just as critical as prepping your artwork, because you're telling the machine exactly how to handle that special transfer paper coating.
Before you even think about hitting that "Print" button, open up your printer's dialogue box. The most important setting you need to find is the paper type or media type. This is where the magic happens when you're learning how to print on iron-on transfer paper.
Leaving it on the default "Plain Paper" setting is a recipe for a weak, washed-out transfer. You have to tell the printer it's dealing with something special.
Choosing the Right Paper Setting
So, what are you looking for? You need an option that signals to the printer that it's using a thicker, coated paper. This one tweak changes everything—from the amount of ink it lays down to the speed at which it feeds the paper.
- T-Shirt Transfer: This is the jackpot. If your printer has this setting, use it. It's specifically calibrated for this exact job.
- Specialty Paper: A great second choice. Many printers lump all non-standard media into this category.
- Photo Paper (Matte or Glossy): If the other options aren't there, this is your go-to backup. Photo settings are designed for high ink saturation, which is exactly what you need for deep, rich colors on a transfer.
By picking one of these, you're essentially telling your printer to slow down and be more deliberate, applying more ink to really soak into the paper's coating. This is the secret to a design that pops.
My Experience: I've found that switching to a specialty paper setting can use up to 20% more ink, but it's absolutely worth it. That extra ink is what gives you those vibrant, professional-looking colors that survive the wash cycle.
While you're in there, crank up the print quality. Look for the highest setting available, which might be called "Best," "High," or "Photo Quality." Yes, it will print slower, but patience pays off with a much sharper, more detailed final product. If you're really serious about this and thinking of an upgrade, we've put together a guide on the best printer for sublimation and heat transfer with some solid recommendations.
One last pro-tip: only load one sheet of transfer paper at a time. These sheets are thicker and can easily cause a jam if you try to stack them. Trust me, it's a simple step that saves a lot of headaches.
From Screen to Paper: The Printing Process
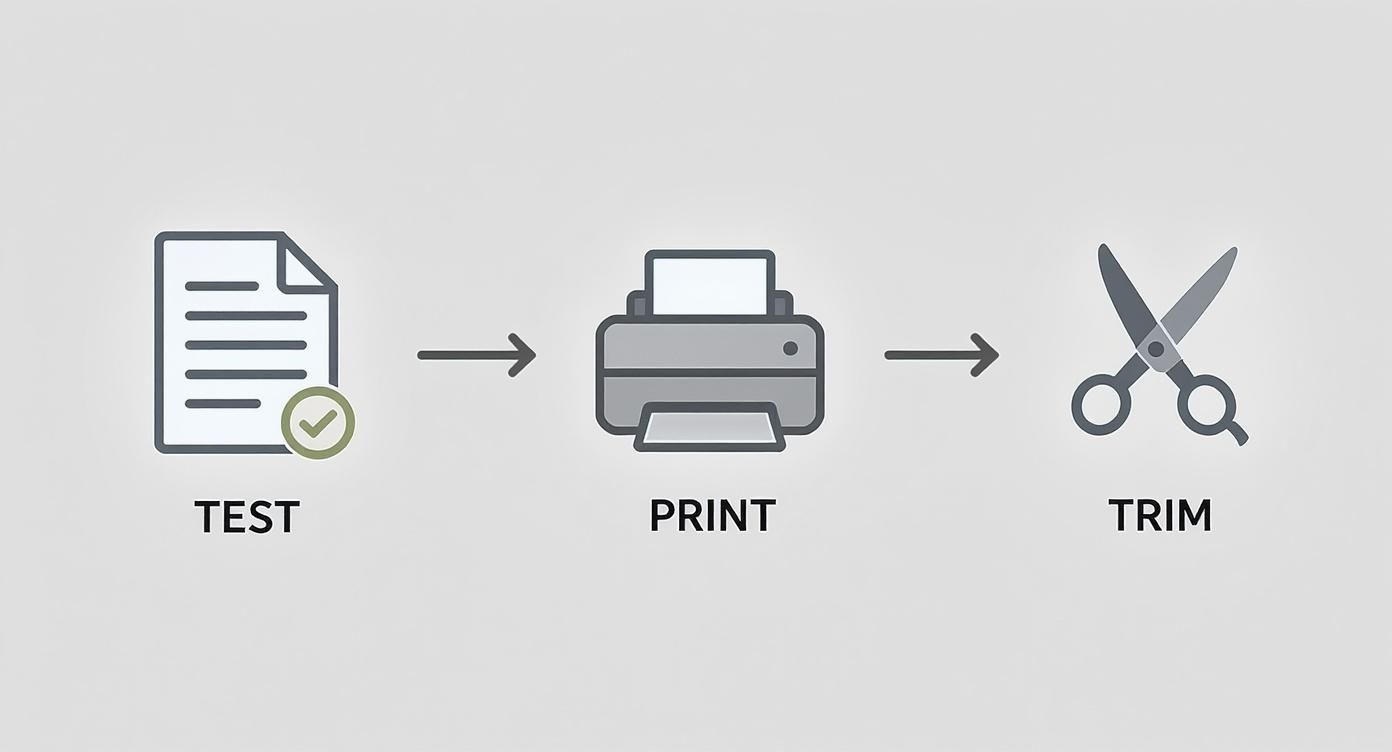
Okay, you’ve nailed the design and tweaked all your printer settings. Now for the exciting part—turning that digital file into something you can actually hold. This is where your careful prep work really starts to shine. But hold on, don't reach for that pricey transfer paper just yet. We have one last, non-negotiable quality check to run.
Always, and I mean always, do a test print on a plain sheet of copy paper first. Trust me on this. It’s a simple step that lets you double-check that your image is properly mirrored and the colors look right, all without sacrificing a good sheet of transfer paper.
The Real Deal: Printing and Handling
Once that test print gets your stamp of approval, it’s go-time. Load a single sheet of your iron-on transfer paper into the printer. Pay close attention to which side is the printable one—it's almost always the matte, non-glossy surface.
After you hit "Print," let the sheet rest for a few minutes as it comes out of the printer. The ink needs a moment to set.
Heads Up: Fresh ink on transfer paper is incredibly easy to smudge. Always handle the printed sheet by its very edges. A single fingerprint can create a blotch that will permanently transfer to your fabric.
Mastering this printing stage is a key skill. The demand for custom apparel is a big reason why the global heat transfer paper market was valued at USD 1.56 billion and is projected to climb to USD 2.1 billion by 2032. It just goes to show how many people are getting into creating their own gear. You can learn more about the heat transfer paper market and see just how fast this industry is growing.
To Trim or Not to Trim?
After the ink is completely dry to the touch, it’s time to trim the excess paper from around your design. You have a couple of ways to go about this:
- Cut Right to the Edge: This means carefully trimming as close to the outline of your graphic as you can get. It’s the best approach for detailed designs, as it prevents that tell-tale film border from showing up on your shirt.
- Leave a Small Border: A quicker and easier method is to leave a small margin of about 1/8 inch all the way around the design. This works well for simple, bold shapes.
Keep in mind, for transfer papers made for light-colored fabrics, any border you leave will show up as a faint, transparent film after you press it. For a truly professional look, taking the extra time to trim precisely is always worth it.
Bringing Your Design to Life with Heat
This is where the magic happens. All that prep work—picking the design, setting up the printer, and carefully trimming your transfer—is about to pay off. Applying heat is the final, crucial step that permanently bonds your artwork to the fabric. Whether you're working with a standard household iron or a dedicated heat press, getting this part right is what gives you that professional, long-lasting finish.
At its core, the process is pretty simple. You need to heat the transfer paper to at least 400 degrees Fahrenheit. This high heat infuses the ink from the paper right into the fibers of your garment. Once the design is printed, you just need a heat source and firm pressure to make the bond permanent. It's a surprisingly accessible technology, and you can dive deeper into the growing heat transfer paper and vinyl market to see just how popular these materials have become.
After your test prints are done and you've printed the final, mirrored design, it's time to trim away the excess and get ready to press.
As you can see, a great final result really depends on getting all the preliminary steps right.
The two most common tools for this job are a household iron and a heat press. While both can get the job done, the approach for each is quite different.
Household Iron vs Heat Press Application Settings
| Setting | Household Iron | Heat Press |
|---|---|---|
| Surface | Hard, flat, heat-safe surface (e.g., a wooden table with a pillowcase). Do not use an ironing board. | The machine's built-in lower platen. |
| Heat | Highest setting (usually "Cotton/Linen"). No steam. | Precise temperature, usually 350-375°F. |
| Pressure | Heavy, consistent body pressure. It's a workout! | Pre-set, even pressure (medium to firm). |
| Time | 1-3 minutes, with constant motion. | 15-30 seconds, stationary. |
As the table shows, a heat press offers precision, but you can absolutely achieve fantastic results with a household iron if you follow the right technique.
Nailing the Application with a Household Iron
If an iron is your tool of choice, crank it up to its highest setting (look for "Cotton" or "Linen"). The most important rule? Turn the steam function completely OFF. Any moisture will ruin the transfer.
Next, find a hard, heat-resistant surface—a sturdy table or countertop is perfect. Lay a pillowcase down to protect the surface. Do not use an ironing board! The padding is too soft and won't give you the firm, even pressure you need for a solid bond.
Give the garment a quick press to iron out wrinkles and chase away any lingering moisture. Then, place your trimmed transfer paper with the design facing down. Now, press down hard and start moving the iron continuously.
Pro Tip: I've found the best technique is to move the iron in small, overlapping circles for the entire time recommended by the paper's instructions, which is typically 1-3 minutes. Give extra love to the edges and corners—that's where peeling usually starts if they don't get enough heat and pressure.
Using a Heat Press for Perfect Results
A heat press takes all the guesswork out of the equation. It gives you complete control over temperature, time, and pressure, which is why the pros use them. Always default to the instructions that came with your specific transfer paper, but here are some solid general settings to start with:
- Temperature: Set it between 350-375°F.
- Time: Usually just 15-30 seconds.
- Pressure: A medium to firm setting works best.
Let the press heat up, place your garment on the platen, and position your transfer. Close the press, and let the machine do the work. It applies perfectly even heat and pressure, something that’s nearly impossible to replicate by hand with an iron.
Finally, pay close attention to one last critical detail: is your paper a "hot peel" or a "cold peel"? This is non-negotiable. Hot peel means you'll peel the backing paper off immediately after pressing while it's still piping hot. For cold peel, you must wait until the garment and transfer are completely cool to the touch before removing the backing. Getting this right is the secret to a flawless, crack-free design.
Got Questions? Let's Get Them Sorted
Even when you follow all the steps, a few hiccups can pop up when you're working with iron-on transfers. It happens to everyone. Let's walk through some of the most common snags I've seen over the years so you can sidestep the frustration and get back to creating.
First, let's talk gear. The biggest question I always get is about the printer itself.
Do I Need a Special Printer for This?
Great news: you almost certainly don't. Your everyday inkjet printer is likely perfect for the job. The ink in most home inkjet printers bonds beautifully with the special coating on the transfer paper, which is key to getting those bright, solid colors.
But, if you've got a laser printer, you need to pay close attention. You absolutely must buy transfer paper made specifically for laser printers. If you try to run standard inkjet transfer paper through a laser printer, the heat can melt the coating right onto your machine's internal parts. That's a messy, expensive mistake. Always double-check the packaging.
Fixing Problems During the Pressing Stage
So, your design printed perfectly, but the application went sideways. What now? Here are a couple of all-too-common issues and how to fix them.
My Two Cents: I've found that when a transfer fails, it's rarely the printer's fault. 9 times out of 10, the problem is with the heat application. Not enough heat, not enough pressure, or not enough time—that’s what causes a design to crack or peel off after its first trip through the wash.
If you're using a standard home iron, put your back into it! You need to press down with some serious, even body weight. And never do this on a padded ironing board; use a hard, heat-safe surface like a countertop (with protection). If you're using a heat press, just make sure you're dialed into the exact settings recommended for your specific paper.
Another classic mix-up is mirroring the image. Here's the deal:
- For paper made for light fabrics, you always need to mirror your image before printing. You'll be placing it face-down on the shirt, so the image needs to be flipped to look correct.
- For most papers designed for dark fabrics, you don't mirror it. These have a solid white backing, and you apply them face-up.
When in doubt, the instruction sheet that came with your paper is your single source of truth.
Tired of the DIY guesswork? If you're ready for professional, super-durable transfers that arrive ready to press, we've got you covered. At Raccoon Transfers, we make top-quality DTF transfers that work on any fabric. Just upload your art, and we’ll handle the rest.