
Your Ultimate Guide to Small Batch T Shirt Printing
If you're a creator or a small brand, you know the classic apparel dilemma: you have a killer T-shirt design, but the thought of ordering hundreds of them upfront is terrifying. What if they don't sell? That's where small-batch printing comes in. It's a method built for today's market, letting you produce anywhere from 1 to 200 high-quality shirts at a time.
Think of it as your secret weapon for testing new designs, launching limited-edition drops, or outfitting a small team without the massive financial gamble. It’s all about staying lean, minimizing risk, and maximizing your creative freedom.
Why Small Batch Printing Is a Game Changer for Creators
The old way of printing T-shirts was a huge leap of faith. Committing to a massive order of 500 shirts meant tying up a ton of cash and just hoping the design was a hit. If it flopped, you were stuck with boxes of dead stock and a serious dent in your budget. This is exactly why small batch T-shirt printing is no longer just an option—it’s essential for modern creators and small businesses.
Financial Freedom and Creative Agility
The biggest win here is simple: you slash your financial risk. Instead of a huge, scary investment, you can order exactly what you need, freeing up your cash to experiment without the constant fear of failure.
- Test Designs Risk-Free: Got a new graphic you love? Start with a run of just 20 shirts. If they sell out fast, you’ve found a winner and can confidently order more.
- Offer More Variety: Rather than betting everything on one design, you can drop five different limited-edition styles in small quantities. This approach lets you cater to more tastes and see what really connects with your audience.
- Eliminate Waste: Say goodbye to boxes of unsold shirts collecting dust in your closet. Printing on demand or in small batches is a much more sustainable model that drastically cuts down on waste.
Meeting Modern Consumer Demands
Today’s customers don't just want a T-shirt; they want a piece of a story. They crave unique, personalized items that feel special. Small-batch production fits this trend perfectly, allowing you to create exclusive, limited-run apparel that your community will value far more than mass-produced stuff.
It's a huge market, too. The custom T-shirt printing industry is expected to hit USD 11,370.8 million by 2035, largely because of this demand for personalization and the efficiency of small-run models. Some reports even suggest small-batch production can cut waste by up to 50%.
Small-batch printing isn't just a cost-saving measure; it's a strategic shift. It empowers you to be nimble, react to trends instantly, and build a brand that feels authentic and exclusive—qualities that are priceless in today's crowded market.
Of course, once you have those killer designs printed, you need to sell them. For creators ready to turn their passion into a business, learning the right channels is key. A solid guide on how to sell on TikTok Shop can give you the playbook for a platform that thrives on unique products, turning your creative hustle into a real venture.
Choosing the Right Print Method for Your Project
So, you're ready to print some shirts, but the options feel endless. It's a common hurdle. When you're just starting with small batch t-shirt printing, figuring out whether to use DTF, DTG, screen printing, or vinyl can be confusing. Let's clear things up and look at the best choices for runs between 1 and 200 units.
This isn't just a list of specs. It’s a practical breakdown based on what actually works for specific projects. We'll help you match the right process to your design, your chosen fabric, and your budget.
The Big Four for Small Batches
Every printing technique has a sweet spot, especially when dealing with smaller quantities. What works perfectly for a 25-shirt order with a five-color design might be a terrible choice for a different project.
- Direct-to-Film (DTF): This is the versatile all-rounder. DTF prints your design onto a special film first, then you heat-press it onto the fabric. Its biggest win? Fabric freedom. It looks amazing on cotton, polyester, blends, and even materials that other methods can't handle.
- Direct-to-Garment (DTG): Imagine an inkjet printer, but for t-shirts. DTG sprays eco-friendly, water-based inks right into the fabric, creating a print with a very soft feel. It’s fantastic for photos and complex art, but it really only shines on 100% cotton.
- Screen Printing: The old-school champion. This process involves pushing ink through a mesh screen (a stencil, essentially) onto the shirt, one color at a time. The results are incredibly durable and cost-effective on larger orders, but the initial setup fees can make it too expensive for just a few items.
- Heat Transfer Vinyl (HTV): Your go-to for simple, bold graphics. With HTV, you cut designs from sheets of colored vinyl and press them on. It's perfect for things like team names, jersey numbers, and clean, single-color logos.
To make this even clearer, here’s a side-by-side look at how these methods stack up for small-batch jobs.
Printing Method Comparison for Small Batches (1-200 Units)
This table breaks down the key factors to help you decide which method is the best fit for your specific project.
| Method | Best For | Vibrancy & Detail | Fabric Compatibility | Cost per Unit (Small Batch) | Durability |
|---|---|---|---|---|---|
| DTF | Full-color designs on any fabric; versatile small runs. | Excellent | Widest range (cotton, poly, blends, etc.) | Low-Medium | Very High |
| DTG | Photorealistic, complex designs on cotton. | Excellent | Primarily 100% cotton | Medium-High | High |
| Screen Printing | Simple designs (1-4 colors) in larger small batches (50+). | Good | Very broad | High (for <50), Low (for 50+) | Excellent |
| HTV | Text, numbers, and simple single-color logos. | Good (but limited) | Wide range (cotton, poly, blends) | Low-Medium | High |
Ultimately, DTF often provides the best balance of quality, versatility, and cost-effectiveness for small-batch printing, but the right choice always comes down to the specifics of your design and apparel.
Making the Right Call Based on Your Design
Your artwork is the number one thing that will guide your decision. A detailed, multi-colored illustration needs a completely different process than a simple one-color logo.
If you have a photorealistic design packed with gradients and a million colors, DTG is a fantastic option—as long as you're printing on cotton. The detail and softness are hard to beat. But what if you want that same vibrant, complex design on a polyester hoodie or a tri-blend tee? That’s where DTF becomes the clear winner. It gives you that same full-color pop without being limited by the fabric. You can learn more about how they compare in our detailed guide on DTF vs. DTG printing.
For small batches, flexibility is everything. DTF often hits the sweet spot, offering vibrant, full-color prints that work on almost any garment without the high setup costs associated with screen printing.
Screen printing comes into play when your design is simpler (maybe 1-3 solid colors) and your "small batch" is on the higher end, say 100–200 shirts. The cost per shirt drops significantly once you absorb the initial screen setup fees. For a 20-shirt order with a three-color design, those setup costs would make the price per shirt way too high.
Finally, there’s HTV. Think of it as a specialist. Need to put names and numbers on the back of 15 soccer jerseys? HTV is the fastest and most efficient tool for that job. It’s not built for intricate details or multiple colors, which is why it’s not the all-in-one solution for most creative projects.
Prepping Your Artwork for a Flawless Print
Let's be honest, the difference between a shirt that looks professional and one that screams "amateur hour" almost always comes down to the artwork file. Before you even get near a heat press, getting your digital design absolutely perfect is the most critical part of small-batch T-shirt printing. You simply can't get a great print from a garbage file.
There are a couple of ground rules you just can't break. First, your design file needs to be 300 DPI (dots per inch). If you pull a 72 DPI image off a website, it’s going to look like a pixelated, blurry mess when it's printed on a shirt. It’s a classic rookie mistake.
Second, your design must have a transparent background. Unless you actually want a big white or black box printed behind your graphic, you need to save it as a PNG or another format that supports transparency.
Master the Gang Sheet and Watch Your Costs Drop
Once your individual designs are ready to go, the real secret to making small-batch printing affordable is the gang sheet. Think of it as one big canvas. You can arrange—or "gang up"—a bunch of different designs onto a single sheet of DTF transfer film. This is a game-changer because you pay for the whole sheet, not for each individual design.
For anyone running an Etsy shop, prototyping new ideas, or just starting out, this is how you make your money go further. By consolidating designs onto a gang sheet, I've seen small businesses cut their printing costs by 20-30% per sheet. Those savings add up fast when you're working with small batches.
This little decision tree can help you visualize where different methods shine.
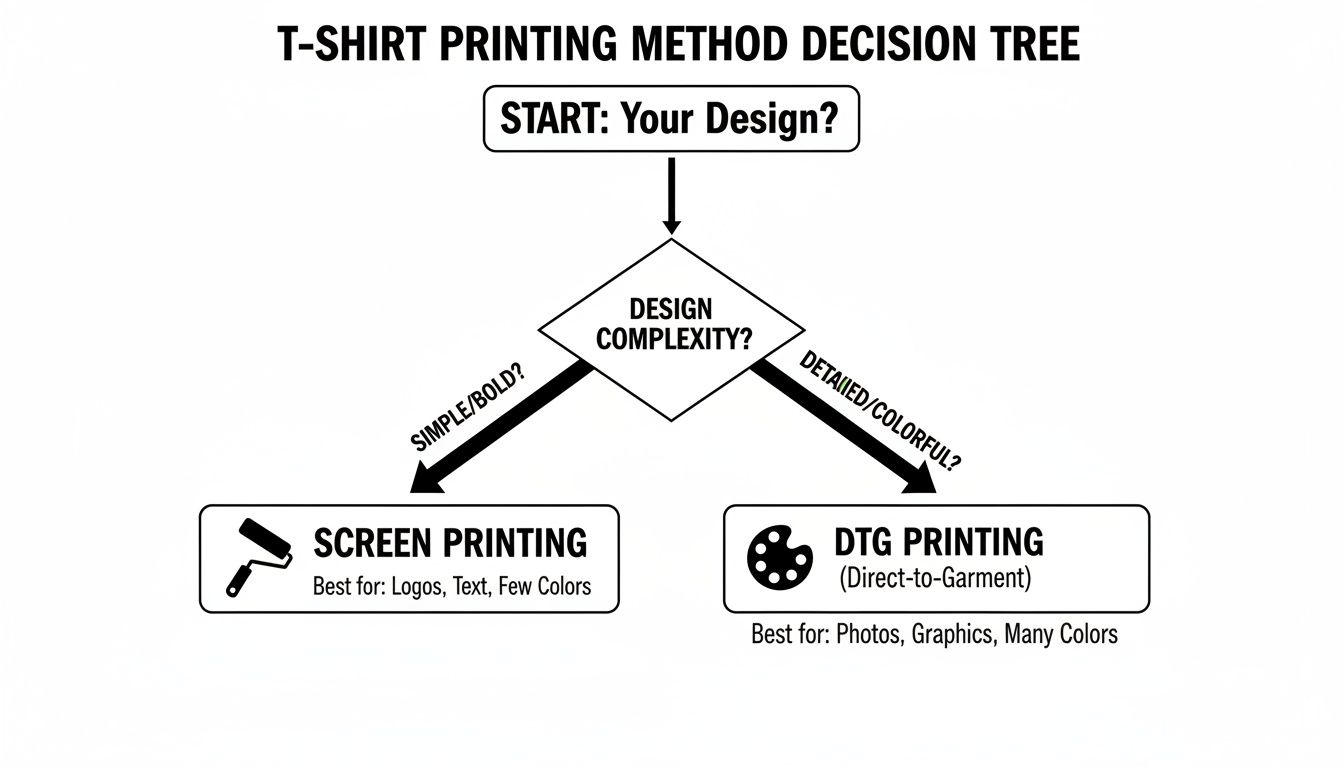
As you can see, straightforward designs with few colors are great candidates for screen printing. But for anything with intricate details or a whole spectrum of colors, you're going to want to stick with digital methods like DTF.
Using a Gang Sheet Builder
The absolute easiest way to build a perfect gang sheet is with an online tool. These builders are fantastic because they prevent you from making expensive mistakes, like having your designs overlap or cramming them too close to the edge of the film.
My Two Cents: Always leave at least a quarter-inch of space between each design on your gang sheet. Trust me, you'll thank yourself later when you're cutting them apart. It gives you just enough wiggle room so you don't accidentally nick the edge of an adjacent print.
When you start arranging, you want to use every square inch of that film. This is where you get the most bang for your buck. Think of it like a game of Tetris—rotate and nudge your graphics to fit as many as you can onto one sheet.
Of course, getting the sizing right is a huge part of this. If you’re not sure what dimensions to use for a front chest print versus a sleeve hit, our guide on choosing the right graphic size for T-shirts breaks it all down with real-world examples.
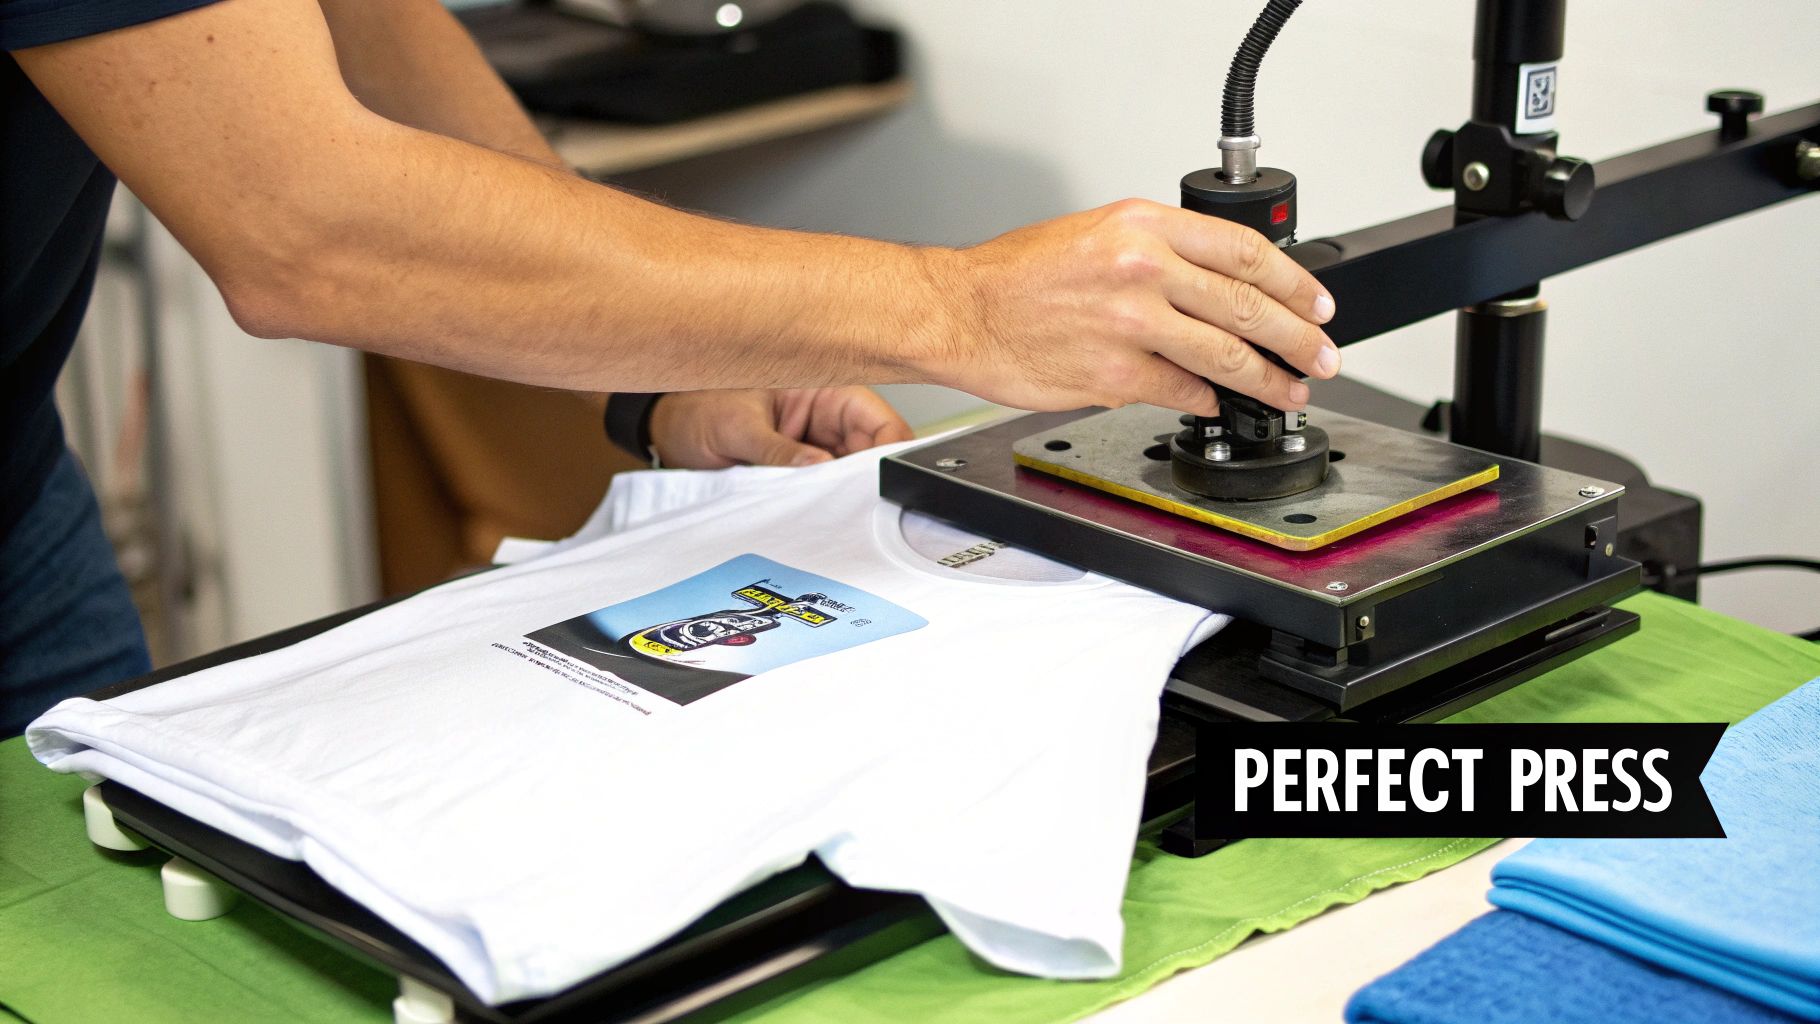
Applying Your DTF Transfers Like a Pro
Alright, this is where the magic happens. All your design work is about to pay off as you turn a digital file into a real, wearable piece of clothing. Applying a DTF transfer with a heat press is the final, most critical moment in small batch t shirt printing. It’s not about just slamming the press down; it's a careful dance of heat, time, and pressure that makes the difference between a shirt that looks homemade and one that looks store-bought.
Before you do anything else, you absolutely must pre-press your garment for 5-10 seconds. Seriously, don't skip this. Fabric straight from the box is full of moisture and wrinkles you can't even see. A quick pre-press gets rid of both, giving your transfer a clean, flat, and dry surface to bond to. Skipping this is the number one reason I see transfers fail to stick or start peeling after a wash.
Nailing Your Heat Press Settings
Every fabric is different, so a one-size-fits-all approach to your heat press settings just won't work. We've put together a detailed DTF press guide that covers everything, but the basic idea is to melt the adhesive enough to grab onto the fabric fibers without burning or discoloring the shirt.
After your pre-press, it's time to place the transfer. Take a moment to get this right. Use a T-shirt alignment tool or even just a ruler to make sure the design is perfectly centered and straight. Nothing screams "amateur" faster than a crooked print.
Pro Tip: If you're serious about this, invest in a quality heat press. Those little handheld craft presses and home irons just don't provide the consistent heat and even pressure you need. An unreliable press is a recipe for frustration, with parts of your design inevitably peeling up. A good press is the foundation of a professional finish.
Once it's aligned, lay a Teflon sheet or a piece of parchment paper over the transfer. This acts as a protective barrier, preventing the ink from melting onto your press and helping distribute the heat evenly.
Recommended Heat Press Settings by Fabric Type
Here’s a quick-reference table to get you started. Always test a small area if you're working with a new fabric, but these settings are a solid baseline for most common materials.
| Fabric Type | Temperature (°F/°C) | Press Time (Seconds) | Pressure | Peel Type |
|---|---|---|---|---|
| 100% Cotton | 300-320°F / 149-160°C | 10-15 | Medium-Firm | Cold Peel |
| Polyester Blends (50/50) | 280-300°F / 138-149°C | 10-12 | Medium | Cold Peel |
| Tri-Blends | 260-280°F / 127-138°C | 8-10 | Medium | Cold Peel |
| 100% Polyester | 250-270°F / 121-132°C | 8-10 | Light-Medium | Cold Peel |
Remember, these are starting points. The thickness of the garment and the quirks of your specific heat press might require small adjustments.
The First Press and Final Peel
Lock the press down with firm, even pressure. For a standard cotton tee, you're looking at 300-320°F (149-160°C) for about 10-15 seconds. If you're working with polyester or other synthetics, you have to lower the temperature to avoid melting or scorching the fibers.
Now for the peel—this is make-or-break. The vast majority of DTF transfers are cold peel. You have to wait until the garment and transfer are completely cool to the touch before you even think about removing the film. If you get impatient and peel it while it's warm, you'll pull the design right off with it.
Once it's cool, peel the film back in one smooth, low-angle motion. Don't just rip it off. To give it that final professional touch, cover the design with parchment paper and do a second press for 3-5 seconds. This extra step locks the design into the fabric, boosts its durability, and gives it a softer, matte finish that feels like part of the shirt.
Troubleshooting Common Printing Issues
Sooner or later, it’s going to happen. You’ll pull a shirt off the press, and something will just be… off. It’s a frustrating moment, but when you're dialing in your small batch t shirt printing process, knowing how to troubleshoot is half the battle. A peeling transfer or a faded design can feel like a disaster, but the fix is usually surprisingly simple.
Nine times out of ten, the problem comes down to one of three things: heat, pressure, or the fabric you're using. If you see a design lifting at the edges, I'd bet money your heat press pressure is uneven. And if the colors look dull and muted? Your temperature is probably too low, which means the DTF adhesive isn't getting a solid grip on the fibers.
Diagnosing the Root Cause
Before you jump in and press another shirt, pause and figure out what went wrong. A methodical check will save you a ton of wasted time and materials. Ask yourself: is the problem happening across the entire design, or just in one specific spot?
- Peeling or Lifting Edges: This almost always screams "pressure problem." Check if your press platen is perfectly level. Sometimes, things like collars, zippers, or thick seams get in the way and prevent solid, even contact. A heat press pillow is a game-changer here; it elevates the printing area above any obstructions.
- Faded or Washed-Out Colors: This is a classic sign of not enough heat or time. Go back and double-check the recommended settings for the specific fabric you’re using. Sometimes, just adding a couple of extra seconds to the clock makes all the difference.
- Scorching or a Shiny Outline: Now you've got the opposite issue—too much heat or too much time. You'll see this a lot with polyester and other synthetic blends because they're way more sensitive to high temperatures.
Here's a pro tip: the "stretch test" is your best friend for quality control. After the final press and peel, gently stretch the printed area. If you see the ink cracking or separating, that's a dead giveaway the transfer hasn't fully cured. You likely need more heat or more pressure.
Ensuring Professional Quality Every Time
Getting your technique right is about more than just a good-looking print—it's about creating something that lasts. For brands creating team uniforms or company merch, durability is everything. Top-tier prints are scratch-resistant and can stand up to 50+ washes without falling apart, ensuring the apparel keeps its professional look. You can see for yourself how quality is shaping the custom apparel market and its massive projected growth. That's the standard you should be aiming for.
The ultimate proof is in the wash test. Turn a finished shirt inside out, run it through a cold wash cycle, and tumble dry on low. If the design comes out looking just as good—no peeling, cracking, or fading—you've officially nailed your process. This simple quality check builds confidence and saves you from the headache of reprints and unhappy customers later on.
Your Small-Batch Printing Questions, Answered
Jumping into custom apparel always brings up a few questions. When you're focusing on small-batch T-shirt printing, getting straight answers can save you a ton of time, money, and headaches. We'll cut through the noise and tackle the most common things we hear from creators just starting out.
Think of this as your practical cheat sheet. From figuring out your actual costs to making sure your hard work lasts, these insights will help you get started on the right foot.
What’s the Real Cost Per Shirt for a Small Run?
This is the big one, and the honest answer is: it depends. The "true cost" goes way beyond the price of the DTF transfer itself. You have to think about the blank T-shirt, shipping, and even the value of your own time. For small batches, though, the transfer cost is where you have the most control.
The absolute best way to lower your per-print cost is by using a gang sheet. Let's say you can fit 10 chest-sized logos onto a single $15 gang sheet—your cost per transfer drops to just $1.50. If you can only squeeze five on there, that cost doubles to $3.00.
Here’s what a real-world scenario might look like:
- DTF Transfer: You manage to fit 8 designs on a sheet, making your transfer cost $1.88 each.
- Blank T-Shirt: A decent quality blank runs you about $4.00.
- Shipping & Supplies: Let's budget around $0.50 per shirt for things like mailers.
Your total cost per shirt in this example is $6.38. This is a much more realistic number to work with and is essential for pricing your products in a way that actually makes you a profit.
Do I Really Need a Fancy Heat Press to Start?
You can technically use a home iron or one of those little handheld craft presses, but if you're serious about this, the short answer is yes—a quality heat press is non-negotiable. It all comes down to three things that cheap alternatives just can't deliver: consistent temperature, even pressure, and a reliable timer.
An iron creates hot and cold spots, which means part of your design might get scorched while another part doesn't even stick. A real press distributes heat perfectly across the whole surface, giving you a flawless application every single time.
A great heat press is the foundation of professional results. It's the difference between a durable, sellable product and a peeling, amateur-looking one. You don't need a top-of-the-line industrial model, but a reliable clamshell or swing-away press is essential.
Think of it as an investment. Spending $200-$300 on a solid press protects you from wasting money on failed transfers and ruined shirts. It pays for itself fast in saved materials and customer satisfaction.
How Should I Care for Custom Printed Apparel?
Proper care is everything when it comes to making your prints last. You can use the best transfer in the world and press it perfectly, but if the shirt gets washed the wrong way, the design will crack and fade. Giving your customers simple care instructions is a small touch that adds a ton of professional value.
Here are the golden rules for keeping a custom-printed shirt looking great:
- Wait 24 Hours: Let the transfer adhesive fully cure and bond with the fabric before that first wash.
- Turn It Inside Out: This is the most important step. It protects the print from rubbing against other clothes and the inside of the washing machine.
- Wash Cold: Hot water is the enemy. It can weaken the adhesive and make colors bleed. Stick with cold or cool cycles.
- Dry on Low or Hang It Up: High heat from a dryer will destroy a print over time. If you have to use a dryer, choose the lowest setting. Hanging it to dry is always the safest bet.
- Never Iron the Print: If the shirt needs ironing, make sure it’s still inside out.
Following these simple steps ensures the apparel stays vibrant and intact for dozens of washes, which ultimately reflects the quality of your brand.
Ready to bring your designs to life with vibrant, durable, and easy-to-apply transfers? Raccoon Transfers specializes in high-quality DTF prints with a lightning-fast turnaround. Build your gang sheet today and see the difference professional quality makes.