
Uv Transfer Stickers: Your Complete Guide to uv transfer stickers
Ever seen a logo on a coffee mug or a laptop that looks like it was painted right on? No background, no halo, just the crisp, clean design itself. That’s the magic of a UV transfer sticker.
Think of it as a super-durable, professional-grade temporary tattoo, but for hard goods. These aren't your typical vinyl decals; they're essentially permanent, background-less designs that give you a premium, direct-printed look without any of the expensive equipment.
How Do UV Transfer Stickers Actually Work?
So, what's the secret behind that flawless, "painted-on" appearance? It’s a clever printing method that combines the ease of a sticker with the permanence and quality of direct printing. It's a total game-changer for businesses, crafters, and anyone wanting to customize hard surfaces.
The key difference from a standard vinyl sticker is that a UV transfer leaves only your design behind. The ink itself forms the sticker, creating a clean, slightly raised finish that looks and feels incredibly professional. It’s the perfect way to add intricate, full-color branding to just about any hard, non-porous object you can think of.
The Science, Made Simple
The process is a cool layering technique that brings together three key players: ink, adhesive, and UV light. The name comes from the ultraviolet (UV) curing process, where powerful UV lamps instantly dry—or "cure"—the ink and varnish the moment they're printed.
Here’s a quick look at the layers:
- The Adhesive: This is the foundation, creating a super-strong bond with the final surface.
- The Ink & Varnish: Special UV inks are printed onto an adhesive film, then topped with a layer of varnish for a glossy, durable finish.
- The UV Light: As the layers are printed, they pass under a UV lamp that instantly hardens them into a tough, solid design.
This instant-cure process is what makes the incredibly sharp details and vibrant colors possible. No smudging, no bleeding, just a perfectly crisp result every time.
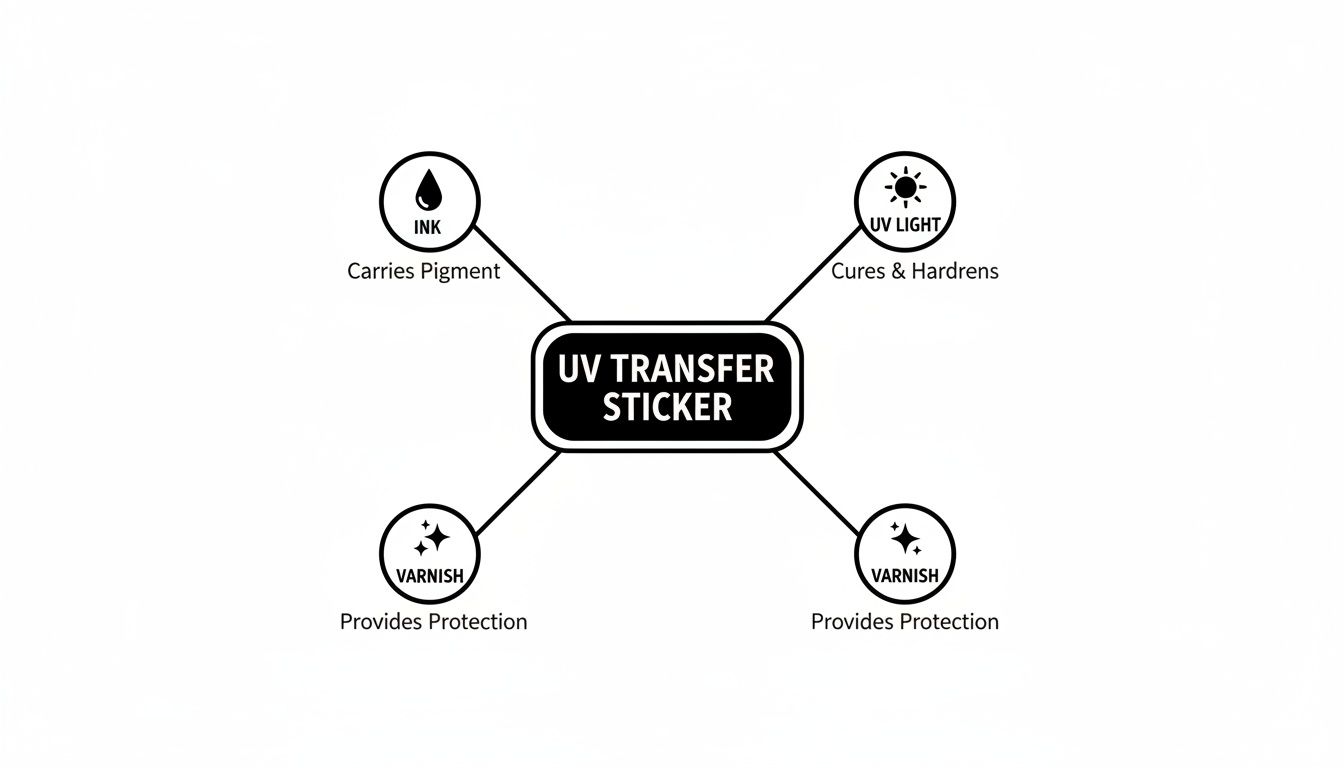
As you can see, it all comes down to the reaction between the UV light and the specially formulated ink and varnish. That’s what locks in the design and gives the final transfer its signature durability and high-end finish.
A Professional Look for Everyone
Not too long ago, getting that direct-print quality meant investing in expensive, bulky machinery and having some serious technical know-how. You’d need a dedicated UV flatbed printer, a laminator, and the right software just to get started. For a small business or a DIYer, that’s a huge (and often unrealistic) hurdle.
The real beauty of ordering pre-made UV transfer stickers is that they make industrial-grade quality accessible to everyone. You get to apply a perfect, permanent design in just a few seconds, with zero investment in equipment.
That's where services like Raccoon Transfers come in. We handle all the complex printing on our end, so you can focus on creating. You just upload your art, and we send you a sheet of transfers ready to apply for a flawless result.
It’s the ideal solution for branded merchandise, custom gifts, or personal projects that need that extra touch of class. If you want to get into the nitty-gritty of the technology, check out our in-depth guide on UV DTF stickers for more details.
Why Choose UV Transfer Stickers for Your Projects?
When you’re looking to customize gear, the options can be overwhelming. But if you’re after something that truly stands out, UV transfer stickers are in a league of their own. They offer a unique blend of toughness, visual pop, and dead-simple application that sets them far apart from old-school decals.
The biggest draw? They’re built like a tank. Forget paper stickers that fade in a week or vinyl decals that start peeling at the corners. The UV-cured ink and varnish create a rock-solid layer that shrugs off wear and tear.
This means your designs stay crisp and vibrant, even on items that get knocked around or live outdoors.
Unmatched Durability and Resilience
The magic is all in the UV curing process. This isn't just ink on a sticker; it's a hardened, chemically-bonded design that’s incredibly resistant to damage.
- Water Resistance: Slap them on water bottles, coolers, or boat gear. They won't dissolve or peel off, no matter how wet they get.
- Scratch Resistance: The tough top-coat acts like armor, protecting your logo or artwork from everyday scuffs and scratches.
- Sunlight Resistance: Those vibrant colors aren't going anywhere. The inks are formulated to fight off fading from UV exposure, keeping your design looking fresh for the long haul.
This rugged construction makes UV transfers the go-to choice for applications where other stickers would quickly fail.
A Premium Look and Feel
Beyond just being tough, UV transfer stickers look incredibly high-end. Since there’s no clear background or outline, your design looks like it was printed directly onto the item. It’s a clean, professional finish that’s hard to beat.
You’ll also notice a subtle, raised texture—almost like an embossed effect. This gives the design a tactile quality that catches the eye and feels great to the touch, instantly making any product feel more valuable. It’s that small detail that separates generic swag from premium merchandise.
This professional appearance is no accident. The technical attributes of UV-cured inks, including faster cure times and superior abrasion resistance, are precisely why they are adopted in high-stakes markets like electronics labeling and specialty packaging where print fidelity and longevity are essential. You can dig deeper into the drivers behind the UV tapes market.
Effortless Application on Almost Any Surface
Maybe the best part is how versatile and easy they are to use. UV transfer stickers stick to just about any hard, smooth surface you can think of.
The possibilities are endless:
- Glass: Perfect for customizing pint glasses, windows, or trophies.
- Metal: Ideal for branding laptops, tumblers, and tools.
- Plastic: Great for decorating phone cases, helmets, and storage boxes.
- Sealed Wood: Add a sharp logo to skateboards, coasters, or signs.
And the best part? The application is foolproof. There’s no heat press and no special tools needed. Just clean the surface, place the sticker, rub it on, and peel back the clear film. It’s a simple peel-and-stick process that gives you a perfect, professional result every single time.
Comparing UV Transfer Stickers to Vinyl and Other Decals
Figuring out the best way to brand your stuff can feel like wading through alphabet soup—DTF, UV, Vinyl… what’s the difference? It really boils down to what you're making and how you want it to look. A simple paper sticker might work for a one-off event, but it's not going to hold up on a coffee mug that gets washed every day.
This is where knowing your options truly matters. The choice between a UV transfer sticker, a classic vinyl decal, or even a Direct-to-Film (DTF) transfer comes down to three things: the surface you're putting it on, the final look you're after, and how tough it needs to be. They each have their place, but they definitely aren’t interchangeable.
Finish and Final Appearance
The biggest, most immediate difference you'll see is how the design actually looks on the product.
A UV transfer sticker gives you this incredibly clean, "no-background" look. It’s just your artwork, floating on the surface as if it were printed right there. No distracting clear halo or white border. It’s the kind of finish that just screams "premium" and is tough to get any other way.
On the other hand, traditional printed vinyl stickers always have that background layer. Even with a clear vinyl, you can usually spot that faint outline, which can cheapen the overall effect. Cut vinyl decals can pull off the no-background trick, but you're limited to simple, single-color shapes. They just can't handle the vibrant, complex designs that UV transfers nail every time.
Here's the magic of a UV transfer: it isolates your detailed, full-color art without leaving any carrier film behind. That "painted-on" vibe is exactly why it's the go-to for high-end branding on hard goods.
Durability and Surface Compatibility
Let's get practical. Imagine you're putting a logo on a metal water bottle. That thing is going to get grabbed, washed, and maybe even dropped a few times.
- UV Transfer Sticker: This is where it shines. The UV-cured ink and powerful adhesive create a bond that's both waterproof and seriously scratch-resistant. It molds right to the metal and won’t peel or fade from daily abuse.
- Printed Vinyl Sticker: While it’s often water-resistant, those edges can start to lift and peel after a few too many trips through the dishwasher. The ink is also more likely to get scuffed up compared to the tough, cured varnish on a UV transfer.
- Paper Sticker: Don't even think about it. It would be a soggy, peeling mess after one wash. Paper just isn't built for anything that gets handled or wet.
This same logic holds true for other hard, non-porous surfaces like glass, hard plastics, and sealed wood. But what about something soft, like a t-shirt or a hat? That’s a totally different ballgame. Neither UV transfers nor vinyl decals are right for fabrics. For apparel, you'll want to check out the different types of heat transfers, which are made specifically to bond with textiles.
A Head-to-Head Comparison
To lay it all out, here's a quick rundown of how these different options stack up. Think of this as your cheat sheet for matching the right transfer to your specific project.
Sticker Type Comparison Chart
| Feature | UV Transfer Sticker | Cut Vinyl Decal | Printed Vinyl Sticker | DTF Transfer |
|---|---|---|---|---|
| Ideal Surfaces | Hard, non-porous (glass, metal, plastic) | Hard, non-porous surfaces | Most smooth surfaces | Fabric (cotton, polyester, blends) |
| Final Finish | No background, slightly raised, glossy | No background, flat finish | Has a background (white or clear) | Soft, flexible, matte finish on fabric |
| Durability | Excellent; scratch & water-resistant | Good; waterproof | Moderate; can scratch or peel | Excellent; wash-resistant |
| Application | Peel-and-stick, no heat needed | Peel-and-stick, transfer tape used | Simple peel-and-stick | Requires a heat press |
| Design Complexity | Excellent for full-color, intricate art | Best for simple shapes, single colors | Good for full-color photos & graphics | Excellent for full-color, detailed art |
At the end of the day, picking the right decal is all about matching the tech to the task. If you're aiming for that high-end, direct-print look on hard goods like mugs, laptops, or equipment, the sheer durability and clean, background-free finish of UV transfer stickers are simply in a league of their own. For everything else, alternatives like vinyl and DTF are fantastic tools for the job they were designed for.
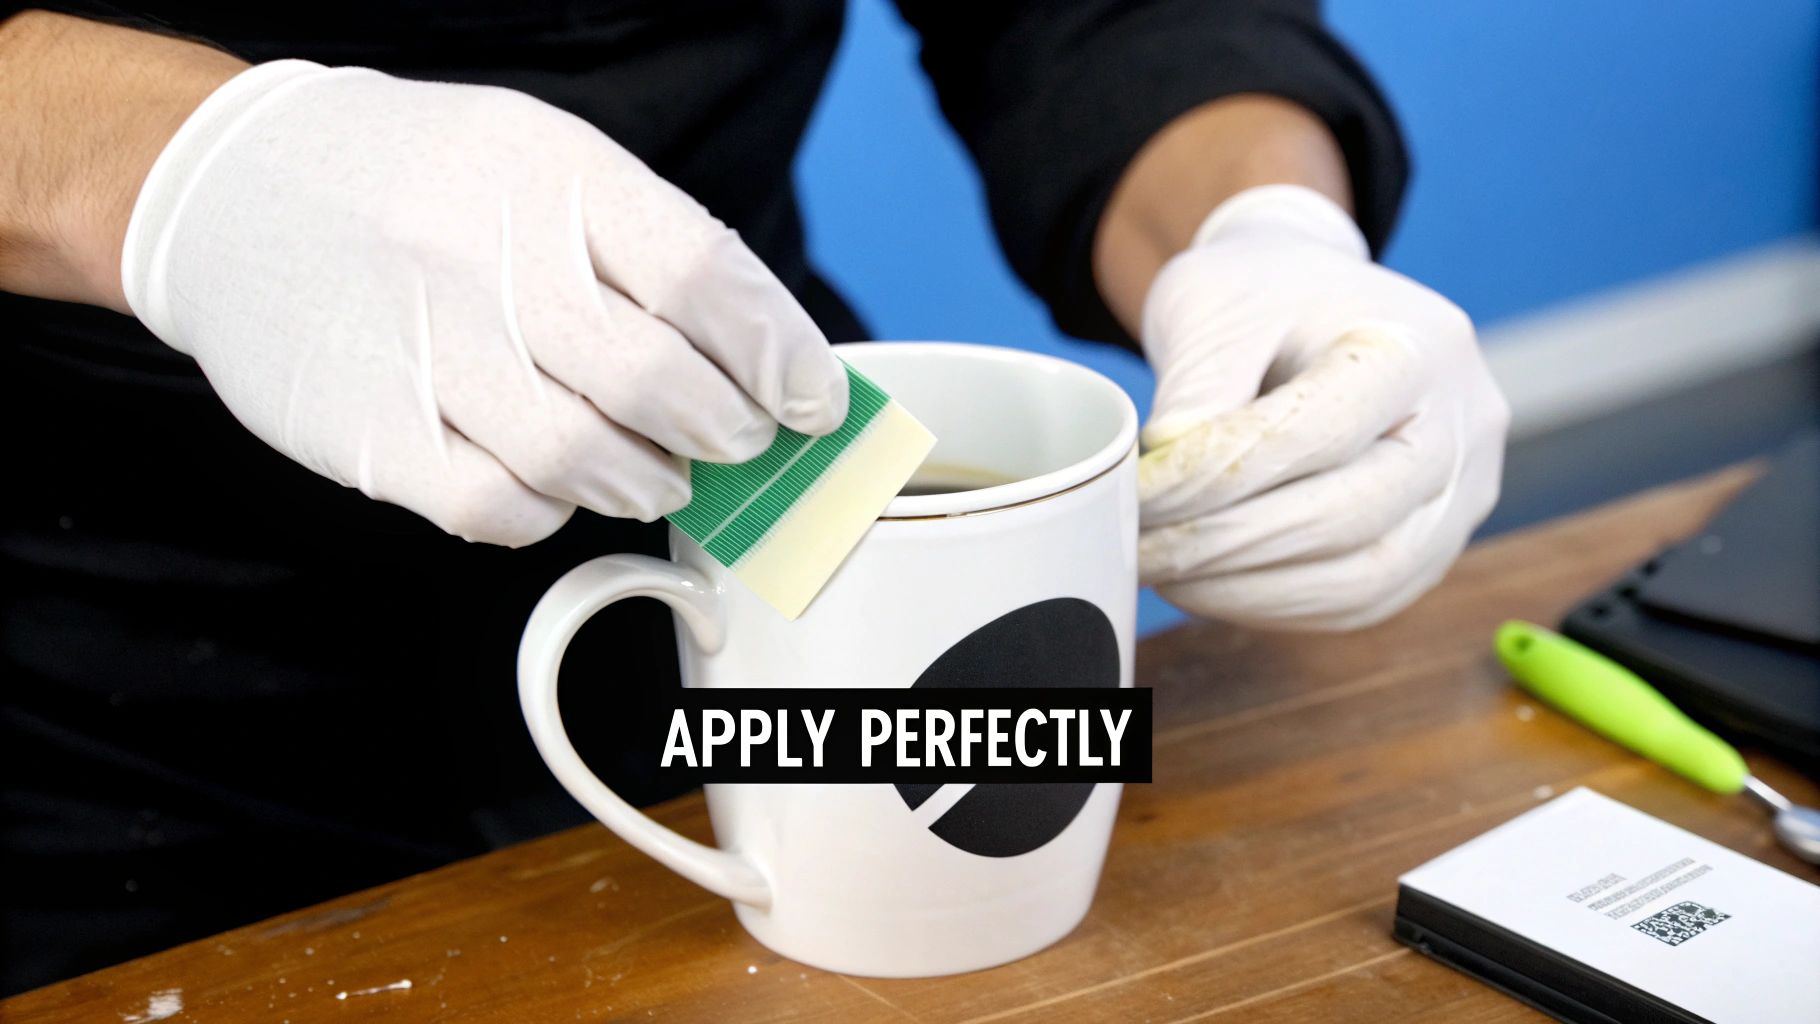
How to Apply UV Transfer Stickers for Flawless Results
You’ve got your custom UV transfers, and now for the best part—putting them on your gear. The whole process is refreshingly straightforward, but taking a moment to do it right makes all the difference between a good result and a great one. Think of it less like a peel-and-stick decal and more like a precision craft that leaves you with a professional, permanent design.
The secret to making these stickers last is all in the prep work. The entire application relies on one simple rule: the surface must be perfectly clean. Any speck of dust, oil from your fingers, or leftover residue will get in the way of a solid bond, so this first step is a must-do for that long-lasting finish.
Your Step-by-Step Application Guide
Getting that perfect, "painted-on" look is easy. We've laid out the process in four simple steps to ensure your artwork transfers cleanly, leaving nothing behind but crisp, vibrant graphics.
-
Prepare the Surface: This is the most important step, period. Grab some isopropyl alcohol and a lint-free cloth and give the surface a thorough wipe-down. This cuts through any oils or dust that might compromise the adhesive. Let it air dry completely before you do anything else.
-
Burnish the Design: Before you peel a thing, lay the sticker down on a flat table. Take a squeegee or even the edge of a credit card and rub firmly over the entire design through the clear top film. This is called burnishing, and it makes sure every bit of the design is properly stuck to the carrier film for a clean lift-off.
-
Position and Press: Now, carefully peel the white paper backing away from the clear film. This will expose the sticky side of your design. Take your time positioning it exactly where you want it. Once it’s in place, press it down firmly, starting from the middle and working your way out to the edges to push out any trapped air.
-
The Final Peel: Give the design one more good burnishing, applying solid pressure over every part of the artwork. This is the magic moment. Start peeling the clear carrier film back slowly and at a sharp angle. If you see a tiny piece of the design trying to lift up, just lay the film back down, press on that specific spot, and then continue peeling.
Pro Tip for Tricky Surfaces: Applying a sticker to something curved, like a mug or tumbler? Start by pressing down the center of the design first. Then, slowly and firmly smooth it outwards from the middle, letting the sticker naturally wrap around the curve. This is the best way to avoid bubbles or wrinkles.
Long-Term Care for Lasting Results
Your newly customized item looks fantastic, and with a little bit of care, it'll stay that way for years. The UV-cured ink is incredibly durable, but a couple of simple habits will help it live its best life.
- Hand-Wash Only: While these stickers can handle water like a champ, we always recommend hand-washing any custom drinkware. The intense heat and harsh detergents inside a dishwasher can slowly weaken the adhesive over time.
- Avoid Abrasives: Keep scrubby sponges and harsh chemical cleaners away from the design itself. A soft cloth with a bit of mild soap is all you’ll ever need to keep it looking fresh.
The demand for this kind of high-quality customization is no joke. In 2024, the global market for all types of stickers was valued at around USD 4.61 billion, and it's only expected to grow. People love making their stuff unique. You can learn more about these trends from the stickers market forecast.
What's great about this process is the lack of special equipment. You don't need a heat press, which is absolutely essential for other methods. If you were decorating a t-shirt, for example, dialing in your machine is critical—our guide to heat press settings for DTF shows just how much goes into it. But for hard goods, the beauty of UV transfers is their simplicity: just clean, press, and peel for a permanent, pro-level finish.
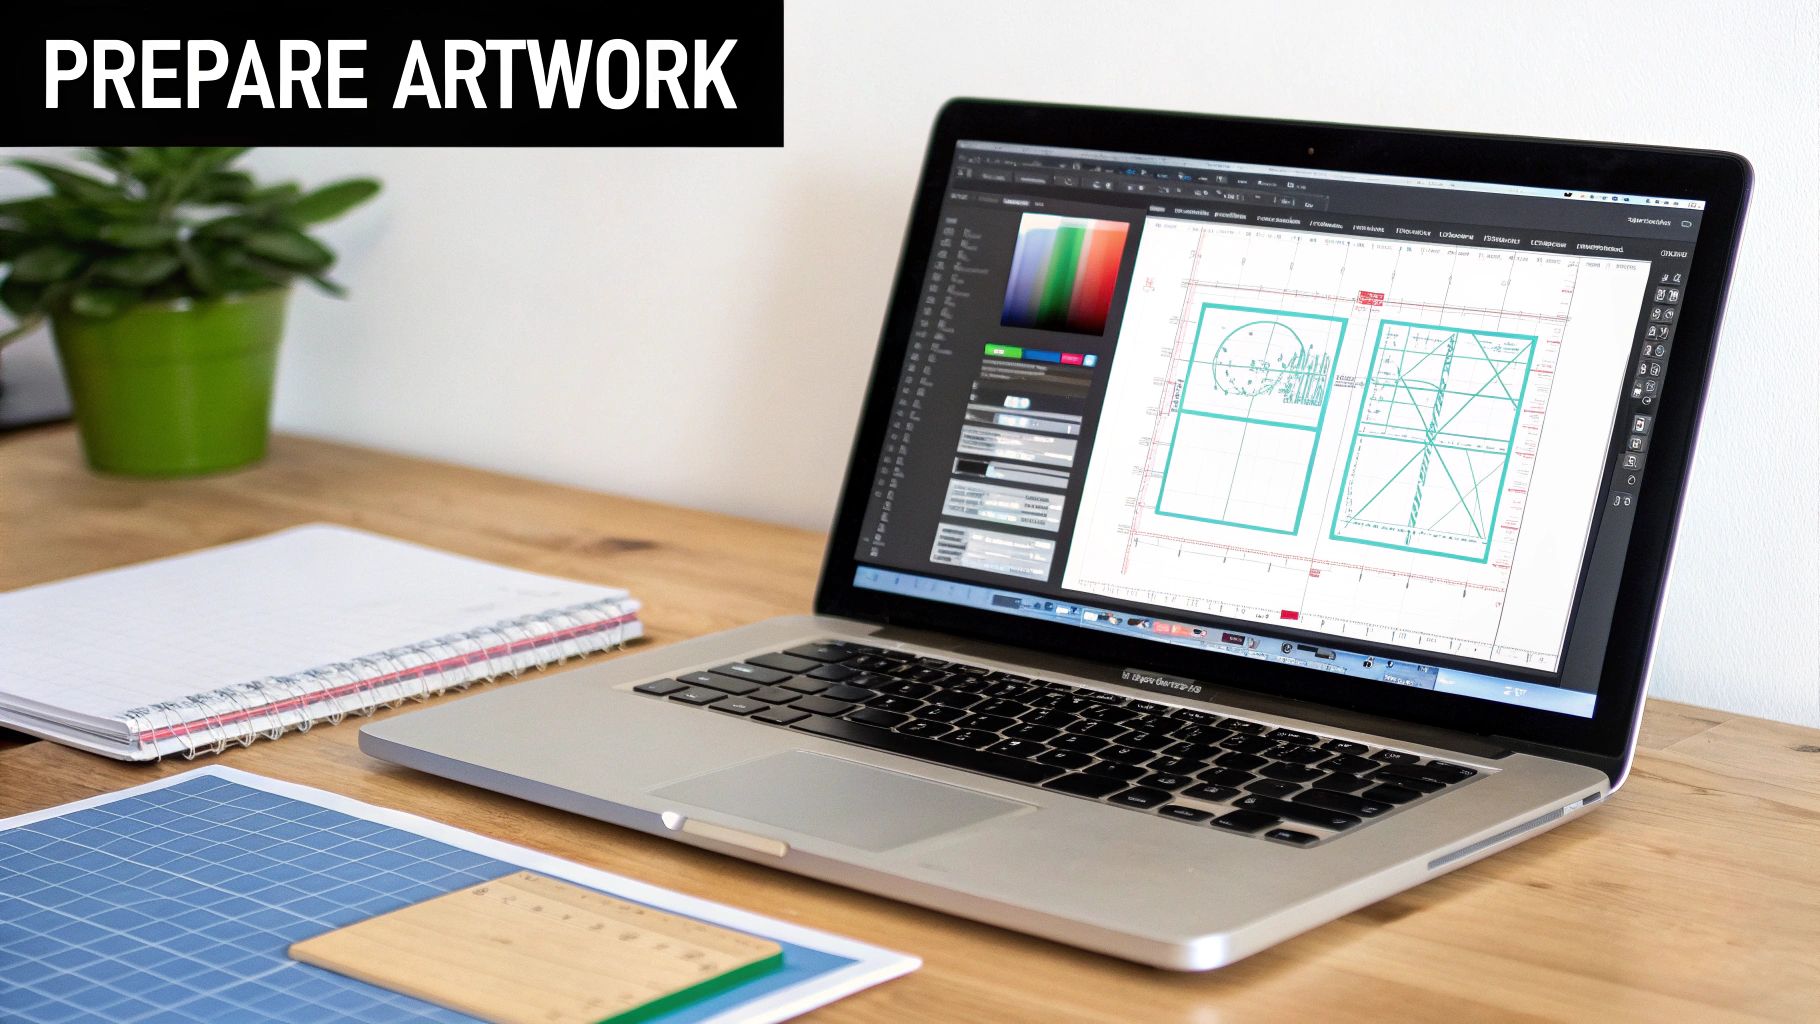
Preparing Your Artwork for the Best Sticker Quality
The secret to a stunning, professional-looking UV transfer sticker? It all starts with your artwork. Think of it this way: you can't get a crystal-clear photo from a blurry, low-resolution camera. The same logic applies here. To achieve that sharp, "painted-on" finish that makes these transfers so impressive, you need to start with a high-quality file.
Don't worry, you don't need to be a professional designer. It's really just about following a few key guidelines to make sure your vision comes to life exactly as you imagined it. Taking a few minutes to prep your file correctly can prevent common hiccups like blurry edges, weird font substitutions, or parts of your design refusing to stick.
Why Vector Files Are Your Best Friend
In the world of professional printing, not all files are created equal. When it comes to UV transfers, vector files are the gold standard, and for good reason.
Unlike pixel-based images (like JPEGs or PNGs), vector graphics are built from mathematical paths and points. This means you can stretch a vector design from the size of a postage stamp to the size of a billboard, and it will never lose its sharpness. It’s magic. The lines stay perfectly crisp. The most common vector formats we see are:
- .AI (Adobe Illustrator)
- .EPS (Encapsulated PostScript)
- .SVG (Scalable Vector Graphics)
- .PDF (as long as it was saved from a vector program like Illustrator)
If you absolutely must use a pixel-based image, make sure it’s a high-resolution file—300 DPI or higher is the minimum. But trust us, for that flawless, professional result, vector is always the way to go.
Essential Artwork Preparation Steps
Before you hit that upload button, give your file a quick once-over with this checklist. Nail these three steps, and you'll sidestep the most common issues we see, ensuring your transfers print without a hitch.
- Convert Text to Outlines: Ever opened a document on a different computer and found all the fonts looked wrong? That's what can happen if we don't have the exact font you used. By "converting text to outlines" (or creating curves), you essentially turn your letters into solid shapes. This locks in your font choice forever, so it looks perfect on our end.
- Check Your Line Thickness: The UV transfer process is amazing, but it has physical limits. Extremely thin lines or tiny, floating dots can struggle to peel off the backing because there isn't enough surface area for the adhesive to work its magic. Here at Raccoon Transfers, we recommend a minimum line thickness of 0.3mm to ensure every last detail transfers successfully.
- Embed All Images: If your design is a mix of vector shapes and a raster image (like placing a photo inside a logo), make sure that image is embedded directly into the file. This packages everything together into one neat bundle, so we don't end up with a missing piece of your design.
Honestly, taking just five minutes to outline your fonts and double-check your line weights can be the difference between a perfect print run and a costly disappointment. Think of it as the final quality-control step before production.
Maximize Value with Gang Sheets
Looking to get the most bang for your buck? Meet the gang sheet. It's a simple but brilliant concept: instead of ordering one sticker design at a time, you arrange—or "gang up"—multiple different designs onto a single large sheet to be printed all at once.
This is a game-changer for anyone making merch, running a small business, or just tackling a bunch of different DIY projects. You can fill the sheet with logos of various sizes, different text designs, or a mix of icons. You only pay for the sheet, which drastically lowers your cost per sticker and cuts down on waste. It’s the smartest, most efficient way to order uv transfer stickers in bulk.
Frequently Asked Questions About UV Transfer Stickers
So, you've got the basics down, but a few practical questions are probably popping into your head. That's completely normal. Let's dig into some of the most common things people ask to make sure you get fantastic results with every single sticker.
Are UV Transfer Stickers Waterproof and Dishwasher Safe?
Yes, they're highly water-resistant. This makes them a great pick for things that get wet, like water bottles, mugs, or outdoor signage. They can definitely stand up to rain and routine splashes without breaking a sweat.
But—and this is a big but—we always recommend hand-washing anything you've customized. While the sticker itself is tough, the high heat and harsh detergents in a dishwasher will eventually wear down the adhesive and can chip away at the finer details in your design. A gentle hand-wash is the key to making it last.
Think of it this way: hand-washing is the best way to protect your work. It keeps both the sticker and the item looking brand new for as long as possible.
What Surfaces Are Not Good for UV Transfer Stickers?
These stickers really shine on hard, smooth, non-porous surfaces. That’s where they create that ultra-strong, permanent bond we’re all after. We’re talking about glass, shiny metal, hard plastics, and wood that’s been painted or sealed.
On the flip side, they are not suitable for soft or flexible materials. Trying to apply them to fabric, silicone, or leather just won’t work. You also want to avoid porous surfaces like raw wood, concrete, or heavily textured powder-coated metal. The adhesive needs full, solid contact to stick properly, and those surfaces prevent that from happening.
How Do I Remove a UV Transfer Sticker?
Because these are designed to be permanent, taking them off takes a bit of work. Your best bet is to gently pry up a corner with a plastic scraper or even just your fingernail. Applying a little heat from a hairdryer can often soften the adhesive and make peeling it off much easier.
If there's any sticky residue left behind, a bit of rubbing alcohol or a good adhesive remover like Goo Gone will clean it right up. Just know that the sticker will be destroyed in the process, so it's a one-time application.
Is There a Minimum Size for Text and Details?
Definitely. This is one of the most important things to get right in your artwork. For a design to transfer cleanly and stay put, every piece of it needs enough surface area to bond. Super thin lines and tiny, floating dots just won't have the real estate to adhere properly.
Here at Raccoon Transfers, we've found the sweet spot. We recommend a minimum line thickness of 0.3mm. Before you upload, always convert your text to outlines and give your whole design a once-over to make sure every element meets that minimum. It’s the secret to a crisp, professional-looking transfer that lasts.
Ready to bring your ideas to life with stunning, professional-quality custom products? Head over to Raccoon Transfers, design your own gang sheet, and order your premium UV transfer stickers today. Get started at https://raccoontransfers.com.